GE DPSB620EC4WW User Manual ELECTRIC DRYER Manuals And Guides L0604465
GE PROFILE Residential Dryer Manual L0604465 GE PROFILE Residential Dryer Owner's Manual, GE PROFILE Residential Dryer installation guides
User Manual: GE DPSB620EC4WW DPSB620EC4WW GE ELECTRIC DRYER - Manuals and Guides View the owners manual for your GE ELECTRIC DRYER #DPSB620EC4WW. Home:Laundry & Garment Care Parts:GE Parts:GE ELECTRIC DRYER Manual
Open the PDF directly: View PDF ![]() .
.
Page Count: 24

ge.com
Safety instructions ........ 2-5
Operating Instructions
Control Panels ................ 6, 7
Controls Features .............. 12
Cycle Options .................. 13
Cycle Status ................... 14
Dryer Features ................. 15
Drying Cycles .................. !0
Dryness Levels ................. !!
EASYTOUCHSelections .......... 7, 9
Heat Settings .................. !!
Loading and Using
the Dryer .................... 17, 18
Quick Start Guides ............. 6, 8
Reversing the Door ............. 16
Timed Dry Cycles .............. 7, 9
Venting the Dryer .............. 19
Troubleshooting Tips .... 20-22
Consumer Support
Consumer Support ..... Back Cover
Warranty ..................... 23
DPSB620
DPSB650
Write the model and serial
numbers here:
Model #
Serial #
TheU are on the label on the
front of the druer behind
the door.
175D1807P534 49-90266 11-05 JR
IMPORTANTSAFETYINFORMATION.
READALLINSTRUCTIONSBEFOREUSING.
AWARNING!
For yoursafety,the informationin this manualmust be followed tominimize the risk of fire
or explosion,electric shock, or topreventpropertydamage,personalinjury,or death.
•Do notstoreor use gasoline or other
flammable vaporsand liquids in the
vicinityof thisor any other appliance.
•Installationand service mustbeperformed
bya qualified installer,service agency or
the gas supplier.
WHATTODOIF YOUSMELLGAS:
[] Do not try to light a match, or cigarette, or
turn on anygas or electrical appliance.
[] Do nottouch any electrical switch; do not
use anyphone in yourbuilding.
[] Clear the room,buildingor area of all
occupants.
[] Immediately call yourgas supplier
froma neighbor'sphone. Follow the
gas supplier'sinstructionscarefully.
[] If youcannot reach yourgas supplier,
call the fire department.
Caflfomia Safe Drinking Water and Toxic Enforcement Act
This act requires tile goxemor of Califimfia to publish a list of substances kno_n to tile state to catLse cance_,
birth defects or other reproductive ham_ and reqtfires businesses to warn customei_ of potential exl)osure
to Stlch stlbst_lnces.
(;as al)l)liances C_lil C_ltlSe iilinoY exl)OStli'e to J[D/li" of these s/ibst;inces, nai/lelv benzene, C_li'bon illonoxi(le,
fimnaldehyde and soot, caused primarily by the incomplete combustion of natural gas or I,P fllels.
Propedy ac!jusmd (h')/e_s will minimize incomplete COlllbtlstion. EN)osure to these stlbst;Inces can be
minimized fln'ther by propedy venting the dryer to the out(loo_s.
ge.com
%PROPERINSTALLAtiON
This dryer must be properly installed and located in accordance with the Installation Instructions
before it is used. If you did not receive an Installation Instructions sheet, you can receive one by
visiting ge.cem or by calfing 800.GE.CARE$ (800.432.2737).
[] Proper]} ground dr) er to confiwm _ith all
governing codes and ordinances. Fol]o_ details
in Installation Instructions.
[] Install or store where it will not be exposed to
temperatures below fl'eezing or exposed to
the _ eathel;
[] Connect to a properly rated, protected and sized
power supply circuit to m_id electdcal ovedoad.
[] Rein(we the colored protective film fl'om the
control panel.
[] Remo_v all shaq_ packing items and dispose of all
shipping matedals properly.
Exhaust/Ducting:
_] (;as drye_ MUSTbe exhausted to the outside.
[_Use onl'_ rigid metal 4" diameter duct_ork
inside tl'm (h'_ er cabinet. [)se onl} _igid metal
or flexible meml 4" diameter ductwork tiw
exhausting to the outside. USE OFPLASTICOR
OTHERCOMBUSTIBLEBUCTWORKCANCAUSE,4
FIRE.PUNCTUREDBUCTWORKCANCAUSEAFIRE
IFIT COU.APSESORBECOMESOTHERWISE
RESTRICTEDIN USEORDURINGINSTALlATION.
For complete details, follow the Installation
Instructions.
3

iMPORTANTSAFETYiNFORMATiON.
READALLiNSTRUCTiONSBEFOREUSING.
WARNING!
YOUflIAUNOflYAflEA
• Keep the area underneath and around your
appliances fl'ee of combustible materials
(lint, paper; rags, etc.), gasoline, chemicals,
and other flammable wq)o_ and liquids.
• Keep the floor around your appliances clean
and dry to reduce the possibility of slipping.
• Close supervision is necessm T if this appliance
is used bv or near children. Do not allow children
to play on, with or inside this or any other
appliance.
• Keep all lmmchw aids (such as detergents,
bleaches, etc.) out (ff the reach of chikh'en,
preli_rably in a locked cabinet. Observe all
warnings on container labels to avoid ii_jm'y.
• Never climb on or stand on the dryer top.
WHENUSINgYOUflOflYEfl
• Never reach into the dryer while the drum is
moving. Before loading, mdoading or adding
clothes, wait tmtil the drum has completely
stopped.
• Clean the lint filter befin'e each load to prevent
lint accumulation inside the dryer or in the
room. DONOTOPERATETHEDRYERWITHOUT
THELINTFILTERIN PLACE.
• Do not wash or d_y articles that have been
cleaned in, washed in, soaked in or spotted
with combustible or explosive substances (such as
wax, oil, paint, gasoline, degrease_, dry-cleaning
solvents, kerosene, etc.). These substances give
off wq)o_ that may ignite or explode. Do not add
these substances to the wash water. Do not use or
place these substances arotmd yore" washer or
(hTer dining operation.
• Do not place items exposed to cooking oils in
wmr (h_'e_: Items contaminated with cooking oils
may contribute to a chemical reaction that could
cause a clothes load to catch fire.
•Anv article on which wm have used a cleaning
solvent or that contai;_s flammable materials
(such as cleaning cloths, mops, towels used in
beaut}' salons, restaurants or barber shops, etc.)
must not be placed in or near the d_Ter until
solvents or flammable materials have been
removed. There are many highly flammable
items used in homes such as acetone, denatured
alcohol, gasoline, kerosene, some household
cleanei_, SOllle spot i'elllOVei_ ttli])entines_
waxes, wax removei_ and products containing
petroleum distillates.
• The lmmdry process can reduce the flame
retardanc_ of rid)tics. To axoid such a result,
careflfllx fi)llow the gmment mamffactm'er's
caI'e instlllctions.
• Do not dry articles containing rubbe_; plastic,
loam or si_nilar materials such as padded bras,
temfis shoes, galoshes, bath mats, rugs, bibs, baby
pants, plastic bags, pillo_vs, etc., that may melt or
burn. Solne rubber materials, when heated, can
trader certain drcumstances produce fire by
spont;i neo/is COil/b/istion.
• Do not store plastic, paper or clothing that may
btm_ or melt on top (ff tile dryer during
opei_ltion.
• Gam/ents labeled DtyAwa!/from Heat or Do Not
Tumble On/(such as litejackets containing kapok)
must not be put in your (h_'et:
• Do not (liT fiberglass a_licles in yore" dryer:
Skin irritation could result from the remaining
particles that may be picked up by clothing
(hllJng s/lbseqtlent dryer rises.
• To minimize the possibility ot electric shock,
m_plug this appliance fl'om the power supply
or discmmect the dryer at the building's
distribution panel b)' removing the fllse or
switching off the circuit breaker befi)re
attempting any maintenance or cleaning
(except the removal and cleaning of the lint
filter). NOTE: Pressing START,STOP or POWER
does NOTdisconnect the appliance from the
power supply.
4

ge.com
WHENUSINGYOURDRYER(cont.)
• Never attempt to operate this appliance if it is
damaged, nmlflmcdoning, partially disassembled,
or has missing or broken parts, including a
damaged cord or plug.
• The interior of the machine and the exhaust
duct connection inside the (hyer should be
cleaned at least once a year by a qualified
technidan. See the Loadingand Using the Dryer
section.
• If vom_ is a gas (hTe_, it is equipped with an
automatic electric ignition and does not have
apilot light. DONOTATTEMPT TOLIGHT WITHA
MATCH. Burns may result fr(>m having your hand
in the vicinity of the burner when the atltoi/latic
• Ybu may wish to soften your laundered lid)tics
or reduce the static electridtv in them by using
a (hTe_=ai)i)lied thl)_ic softener or an anti-static
condifione_; We recommend you use either a
tid)_ic softener in the wash cycle, according to
the manufi_cturer's instructions for those
products, or t_?' a drye>added product fin.
which the manuemmrer gives written assurance
on the package that their product can be saflqv
used in your (h_'e_: Service or perfimnance
problems caused by use of these products are
the responsibili D' of the manuthcture_ of those
products and are not covered under the warranty
to this appliance.
ignition ttlrnS {)n.
WHENNOTUSINGYOURDRYER
• (;rasp the plug firefly when disconnecting this
appliance to avoid damage to the cord while
pulling. Place the cord away from traffic areas
so it will not be stepped on, tripped over or
subjecmd to damage.
• Do not attempt to repair or replace any part of
this appliance or attempt any se_Mcing unless
specifically recommended in this Owner's Manual
or in published use>repair instructions that you
understand and have the skills to car_ T out.
• Before discarding a (hTe_; or removing it fl'om
se_Mce, remove the (hTer door to prevent
children fl'om hiding inside.
• Do not tamper with controls.
READANDFOLLOWTHISSAFETYINFORMATIONCAREFULLY.
SAVETHESEINSTRUCTIONS
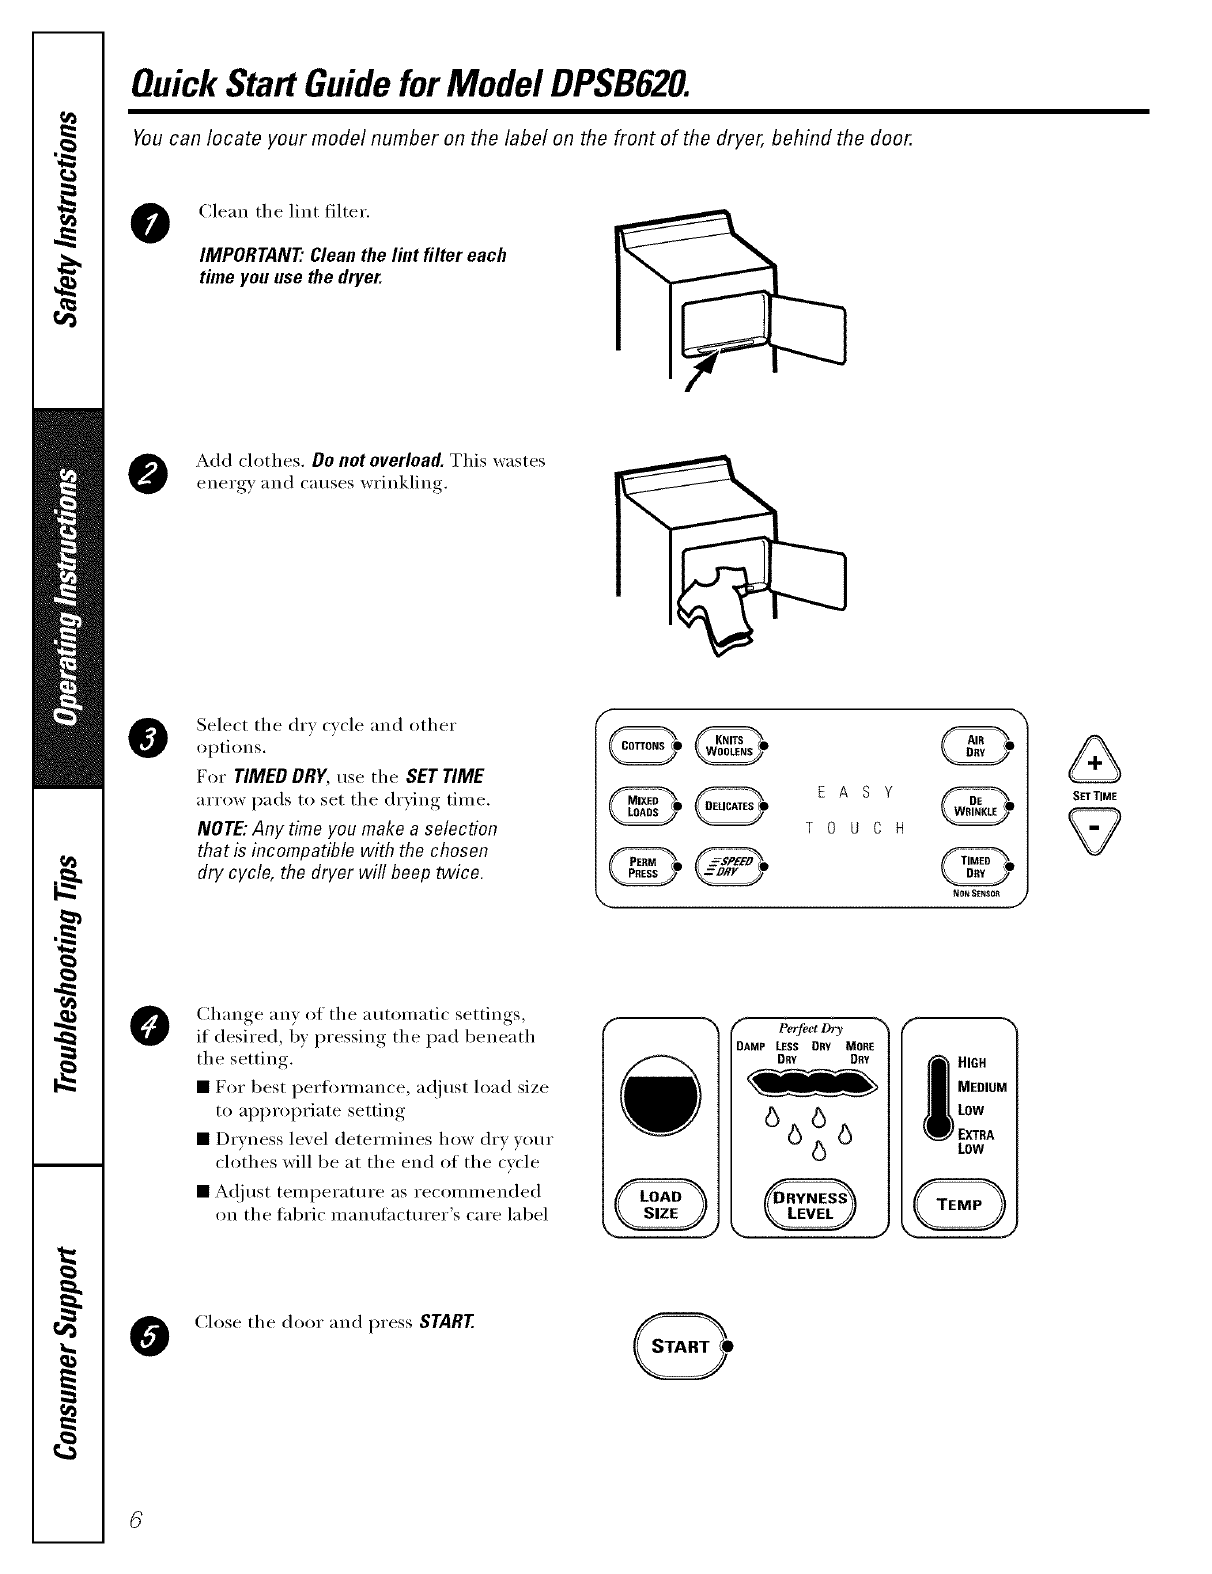
Quick Start Guidefor Model DPSB620.
Youcan locate your model number on the label on the front of the dryer, behind the door.
0Clean the lint filter.
IMPORTANT" Clean the lint filter each
time you use the dryer.
Add clothes. Do not overload. This wastes
energy and causes wrinkling.
@Select the dry cycle and other
options.
For TIMEDDRY,use the SETTIME
arrow pads to set the drying time.
NOTE:Any time you make a selection
that is incompatible with the chosen
dry cycle, the dryer will beep twice.
f
EASY
TOUCH
NO_ SENSOR
J
SET TIME
0Change any of the automatic settings,
if desired, by pressing the pad beneath
the setting.
• For best i)ertm'mance, at!lust load size
to approl)riate setting
• Dryness level determines how dry vour
clothes will be at the end of the cycle
• A(!just temperature as recommended
on the fabric manufacturer's care label
"_ ¢_ PerJi_ct Dry "_
DAMP LESS DRY MORE
DRY DRY
666 6
b
f "%
IIGH
MEDIUM
LOW
EXTRA
LOW
Close the door and press START
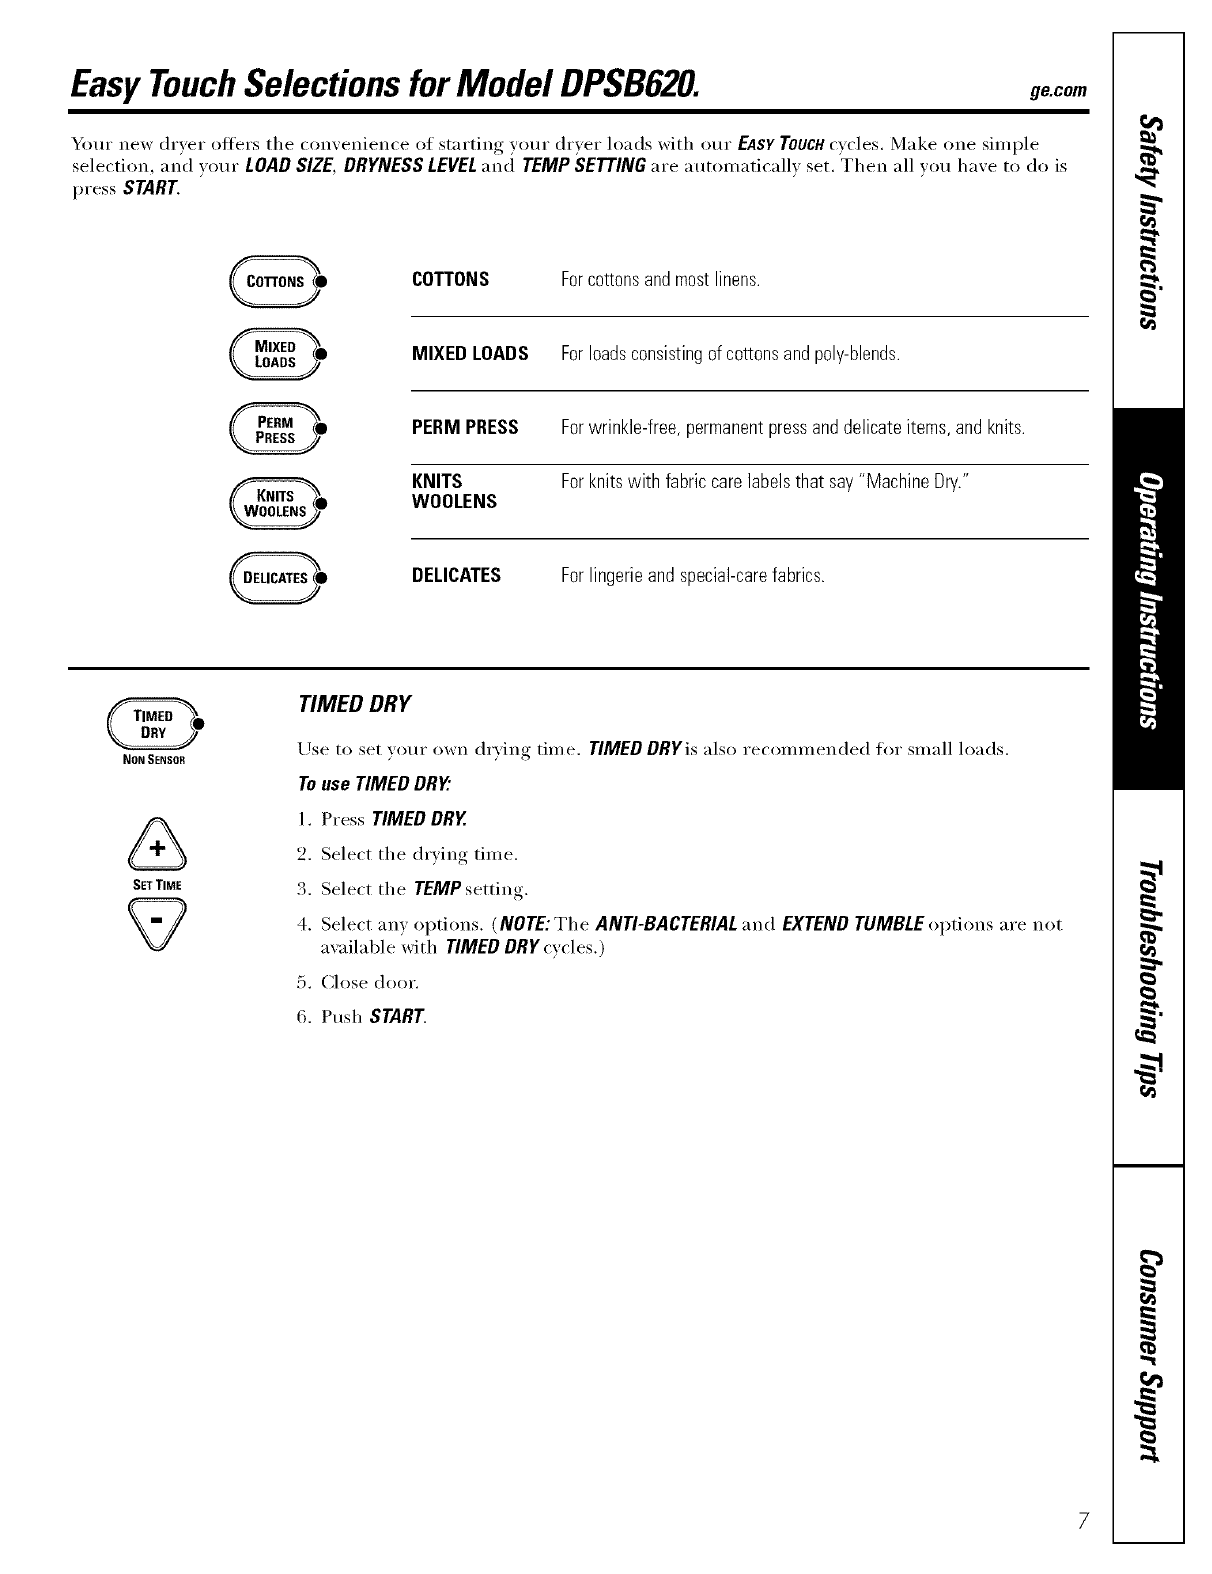
EasyTouchSelectionsfor Model DPSB620. ge.com
Your new dryer offers the comenience of starting your dr}er loads with our EASY TOUCHcycles. Make one simple
selection, and your LOADSIZE,DRYNESSLEVELand TEMP SETTING are automaticall_ set. Then all _ou ha',e to do is
press STARK
0COTTONS Forcottonsandmostlinens.
MIXED LOADS Forloadsconsistingof cottonsandpoly-blends.
PERMPRESS Forwrinkle-free,permanentpressanddelicateitems,andknits.
KNITS Forknitswith fabriccarelabelsthat say"MachineDry."
WOOLENS
DELICATES Forlingerieandspecial-carefabrics.
0
NON SENSOR
SET TIME
2?
TIMED DRY
Use to set wmr own d_Ting time. TIMED DRYis also recommended fin" small loads.
Touse TIMED DRY'.
1. Press TIMED DRY.
2. Select the drying time.
3. Select the TEMPsetting.
4. Select any options. (NOTE: The ANTI-BACTERIAL and EXTEND TUMBLE options are not
available with TIMED DRY cycles.)
5. Close door.
6. Push STARK

Quick Start Guidefor Model DPSB650.
You can locate your model number on the label on the front of the dryer, behind the door.
Clean the lint filtex:
IMPORTANT" Clean the lint filter each
time you use the dryer.
Add clothes. Do not overload. This wastes
energ) and causes wrinkling.
@
0
Select one of the three drying methods:
•Press SENSOR CYCLES to dry according
to load type
•Press GARMENT CYCLES to dry
according to clothing type
• Press TIMED DRY to specit}' dry time
Select the dry cycle by pressing the
arrow pads ( GD ) at the sides of the
display. You can scroll up and down
through the list of cycles by pressing the
UP ( _ ) and DOWN ( V_) arrow pads
beneath the display:
For TIMEDDRY,you can rise either the
display or the SET TIME arrow pads to set
the drying time.
NOTE: Any time you make a selection that
is incompatible with the chosen dry cycle,
the dryer will beep twice.
Change any of the automatic settings,
if desired, by pressing the pad beneath
the setting.
• For best perli>rmance, at!just load size
to al_l_ropriate setting
• Dryness level detemfines how dry your
clothes will be at the end of the cycle
• At!just temperatm'e as recommended
on the fabric nlanufacturer's care label
f
NON SENSOR
€- Perfect Dry _N
DAMP LESS DSY MORE
DRY DRY
6 6
666
I IGH
MEDIUM
LOW
EXTRA
LOW
Close the door and press START
EasyTouchSelectionsfor Model DPSB650. gecem
Your new dryer offers the convenience of starting your dryer loads with our EASY TOUCHcycles. Make one simple
selection, and your LOADSIZE,DRYNESSLEVEL;rod TEMPSETTINGare automaticallx set. Then all xou haxe to do is
press START,
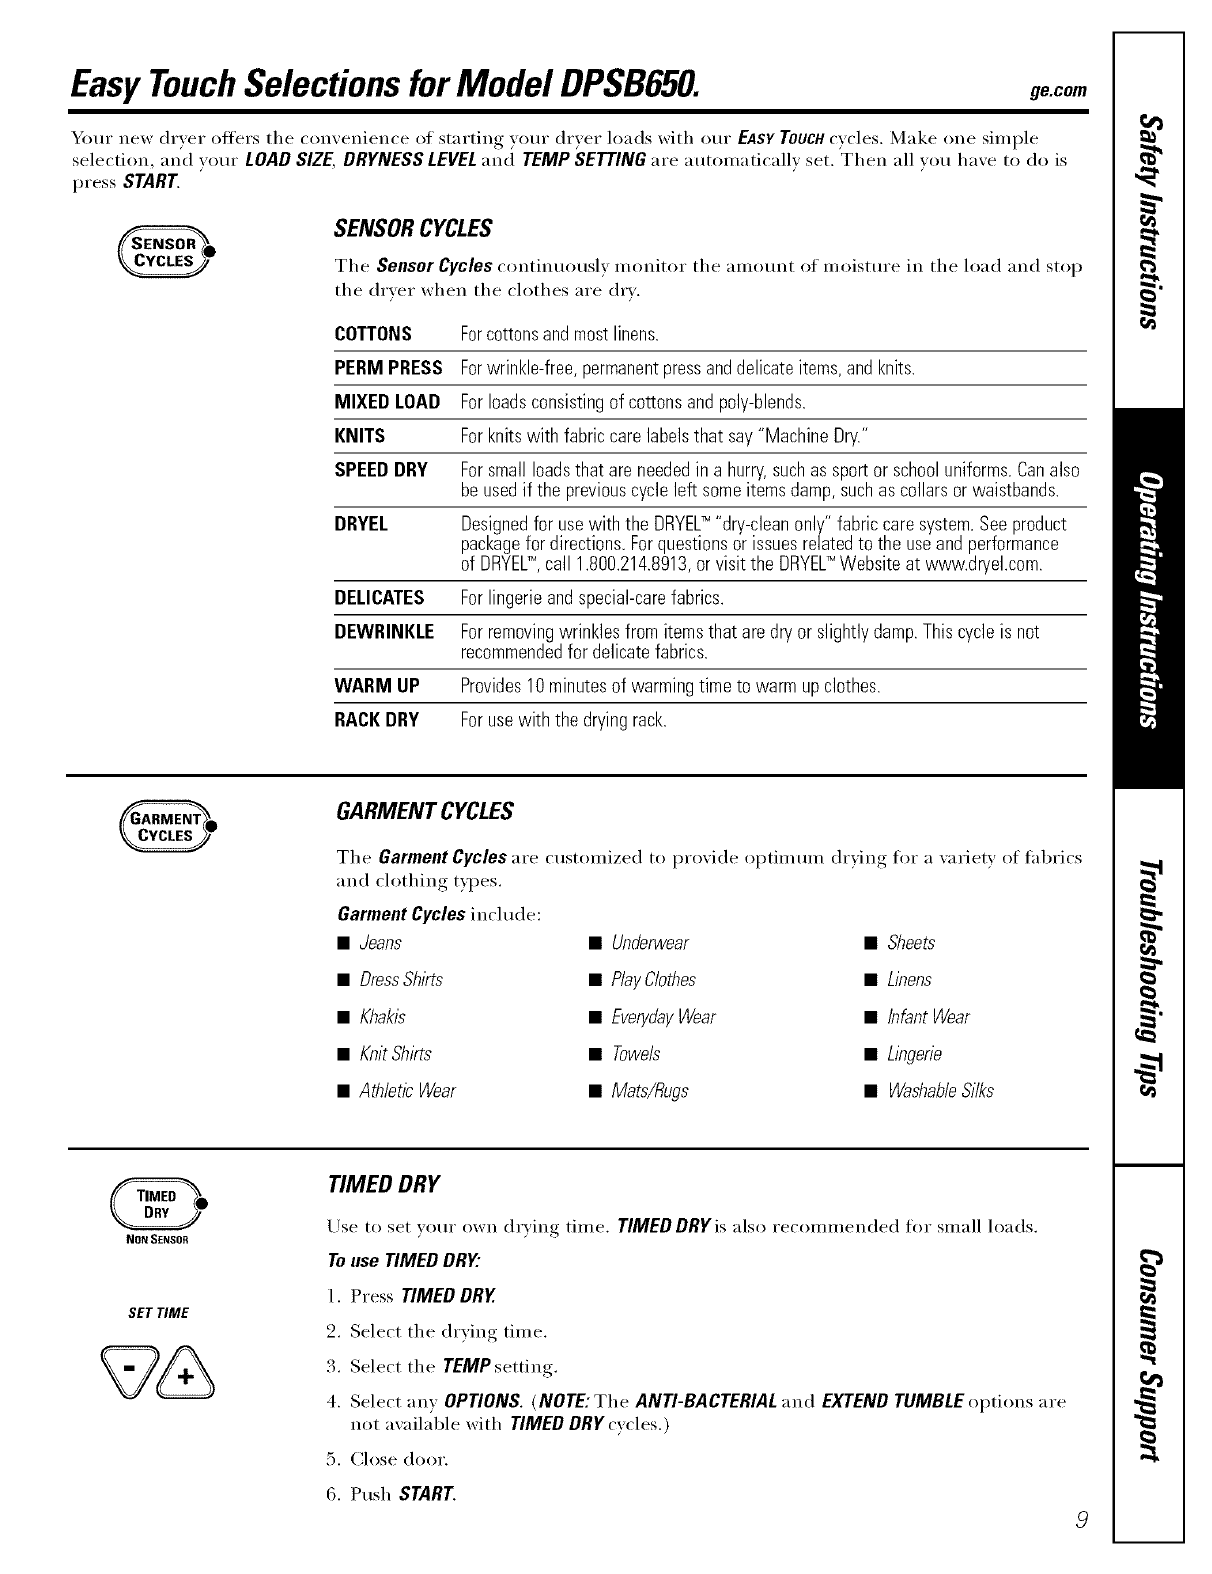
SENSORCYCLES
The Sensor Cycles continuously monitor the amount of moisture in the load and stop
the dryer when the clothes are dry.
COTTONS Forcottonsandmostlinens.
PERMPRESS Forwrinkle-free,permanentpressanddelicateitems,andknits.
MIXED LOAD Forloadsconsistingof cottonsandpoly-blends.
KNITS Forknitswith fabriccare labelsthat say"MachineDry."
SPEEDDRY Forsmallloadsthat areneededin a hurry,suchas sportor schooluniforms.Canalso
beusedif the previouscycleleft someitemsdamp,suchas collarsor waistbands.
DRYEL Designedfor usewith the DRYEL_ "dry-cleanonly"fabriccaresystem.Seeproduct
packagefor directions.Forquestionsor issuesrelatedto the useand performance
of DRYELTM, call 1.800.214.8913,orvisit the DRYEL_ Websiteat www.dryehcom.
DELICATES Forlingerieandspecial-carefabrics.
DEWRINKLE Forremovingwrinklesfrom itemsthat are dryor slightlydamp.Thiscycleis not
recommendedfor delicatefabrics.
WARM UP Provides10minutesof warmingtime to warm upclothes.
RACKDRY Forusewith the dryingrack.
GARMENTCYCLES
The GarmentCyclesare customized to provide optimum drying fin" a variety of fabrics
and clothing t,vl)es.
GarmentCyclesinclude:
•Jeans
• DressShirts
• Khakis
• KnitShirts
• AthleticWear
• Underwear
• P/avClothes
• Even/dayWear
• Towels
• Mats/Rugs
• Sheets
• Linens
• Infant Wear
• Lingerie
• WashableSilks
SET TIME
TIMED DRY
Use to set your own drying time. TIMEDDRYis also recommended for small loads.
Touse TIMEDDRY."
]. Press TIMEDDRY.
2. Select the drying time.
3. Select the TEMPsetting.
4. Select any OPTIONS.(NOTE:The ANTI-BACTERIAL"and EXTENDTUMBLEoptions are
not available with TIMEDDRY.cycles.)
5. Close door.
6. Push START.

Aboutdryingcycles.
Throughout this manual, features and appearance may vary from your model.
SPEED DRY
For small loads that are needed in a hurry; such as sport or school unifimns. Can also be
tlsed if tile previotlS cycle left some items damp, such as collars or waistbands.
DEWRINKLE
Use this teatm'e to remo_e wrinkles from items that are dr_ or slightly damp. This cycle is
not recommended for delicate fabrics.
AIR DRY
Use this ti_atm'e to tumble items without heat.
@.
PRESS & HOL9
TO STORE
CUSTOM Cycles (on some models)
Set up yore" ta\'orite coml)ination oI settings and save them here ti)r one-touch recall.
These custom settings can be set while a cycle is in progress.
Tostore a custom combination of settings:
1. Select an EASYTOUCHsetting.
2. Change LOAD SIZE, DRYNESS LEVEL and TEMPsetting to fit your needs.
3. Select any drying OPTIONSvou want.
4. Press and hold tile CUSTOMpad tor three seconds to store your selection.
A beep will sound and the pad will light up.
Torecall your stored combination:
Press tile CUSTOM pad, then press START.
Toreprogram the CUSTOM settings:
Repeat steps I-4 above.
lO
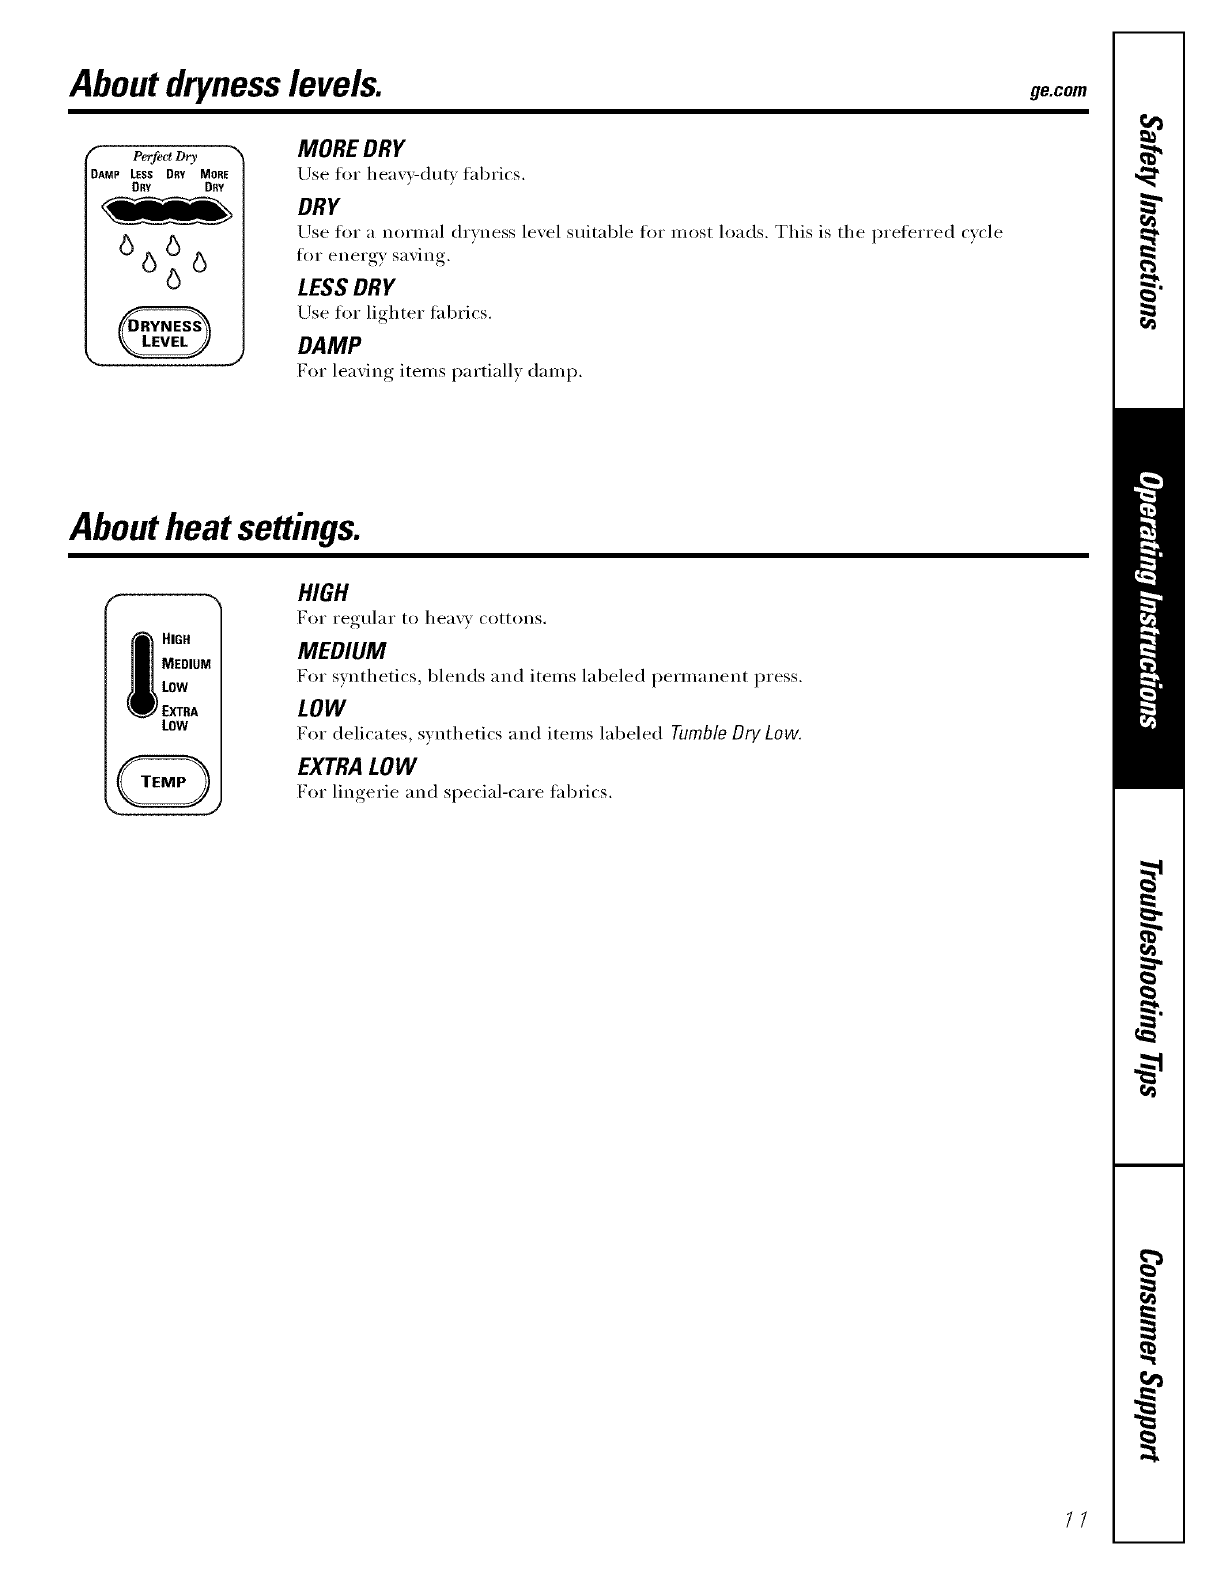
Aboutdrynesslevels, gecom
fPerfect Dry
DAMP LESS DEY MORE
DRY DRY
6 6
666
_'r J
MORE DRY
Use tin" heavv-dutv thbrics.
DRY
Use tot a normal dryness level suitable tin" most loads. This is the preferred cycle
tier energy saving.
LESS DRY
Use fin" lighter thbrics.
DAMP
For leaving items partially damp.
Aboutheat settings.
HIGH
For regtllar 1o heavv ('ottons.
MEDIUM
For synthetics, blends and items labeled permanent press.
LOW
For delicates, synthetics and items labeled TumbleOryLow.
EXTRA LOW
For lingerie and special-E'are thbrics.
//
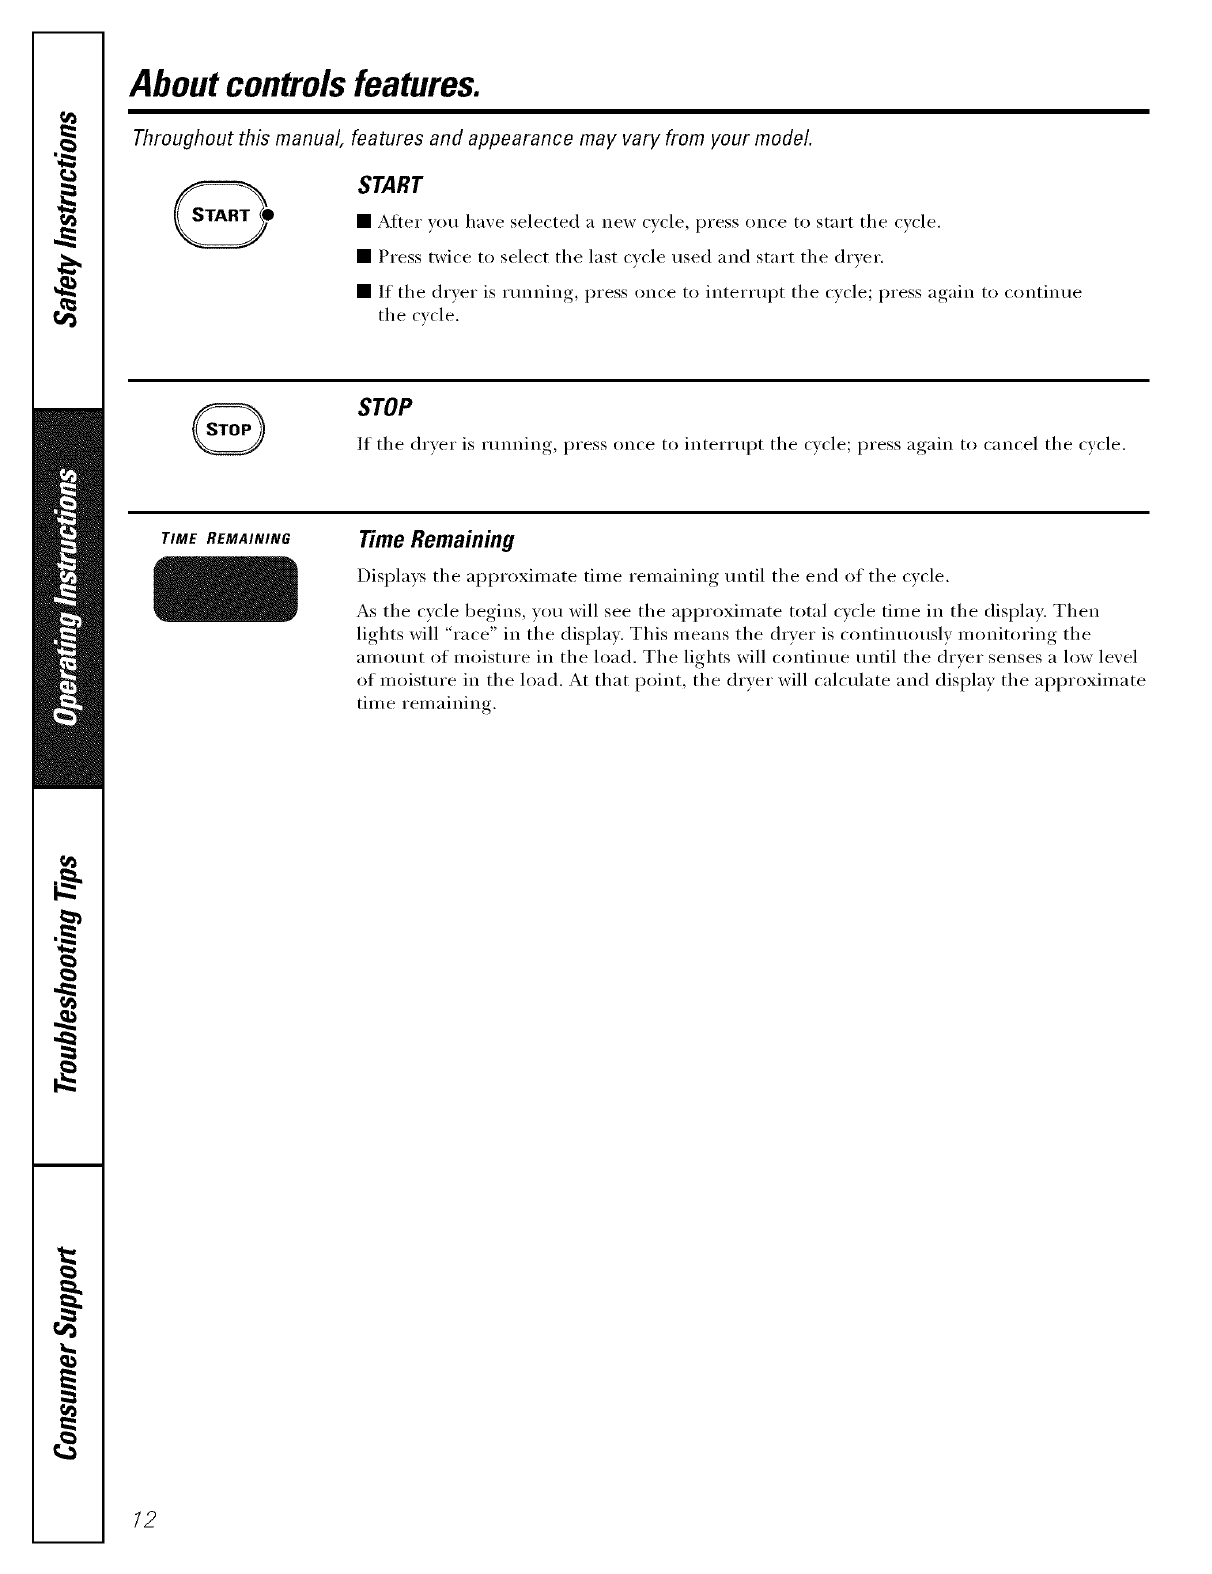
Aboutcontrolsfeatures.
Throughout this manual, features and appearance may vary from your model.
START
• After wm have selected a new cycle, press once to start the cycle.
• Press twice to select the last cvcle used and start the dryer.
• If the drver is _unning, press once to interrupt the cycle; press again to continue
the cycle.
STOP
It the dr_er is running,, press once to inteHupt the Qcle; I)ress_ aoain_ to cancel the cycle.
TIME REMAINING
ITime Remaining
Displa):_ the approximate time remaining tmtil the end of the cycle.
As the cycle begins, you will see the approximate total cvcle time in the display. Then
lights will "race" in the display. This means the (hyer is continuously monitoring the
amount of moisture in the load. The lights will continue until the drver senses a low level
of moisture in the load. At that point, the dryer will calculate and display the approximate
time remaining.
/2

Aboutcycle options.
NOTE:Not all features are available on all dryer models.
(Appearance and
features may vary)
SIGNAL
Alerts you that the cycle is c()mi)lete. The beeper will continue to sound every two
minutes for the next 6 minutes, until the clothes are removed. The clothes should
be removed when the beeper goes off so wrinkles won't set in.
Press SIGNALto select low, medium or high volume, or to turn the beeper off.
ge.com
TumblePlus EXTEND TUMBLE PLUS
Minimizes wrinkles by adding approximately 60 minutes of no-heat tmnl)ling alter clothes
are dry, The beeper will sound every 5 minutes to remind you to remove the clothes,
The TIME REMAINING display will show 00.
ANTI-BACTERIAL (on some models)
This option can only be used with the COTTONS or MIXED LOADS cycles. This option
reduces certain types of bacteria bv 99.9%, including: Staphylococcus aureus, P,seudomonas
aerug4nosa and Kh, bsiella pn_umoniae*. The anti-bacterial process occurs when high heat
is used during a portion of the d_Ting cycle.
NOTE: Do not use this cycle on delicate tabrics.
* The Anti-Bacterial Cycle is Certified by NSFInternational (formerly National Sanitation
Foundation)to NSFProtocol P154Sanitization Performance of Residential Clothes Dryers.
[ NSF Protocol P154
Sanitization Performance of
Residential Clothes Dryers
DELAYSTART (onsomemodels)
ILrse to delay the start oI your dryer.
1. Choose veto" dry cycle and any options.
2. Press DEL4YSTART. You can change the delay time in 30 minute increments using the
SET TIME arrow pads.
3. Press the STARTpad to start the countdown.
The countdown time will be shown in the T/MEREMA/N/NG display,
NOTE:If the door is opened while the dryer is in DELAY,the countdown time will not
restart unless the door is closed and START has been pressed again.
DAMP SIGNAL (on some models)
This option causes the dryer to beep when clothes have dried to a damp level. Remove
items that you wish to hang dry. The DAMP SIGNALwill only beep when the dryer SIGNAL
is tin'ned on.
Removing clothes and hanging them when they are damp can reduce the need to iron
SOllle itexns.
13

Aboutcycle status.
The cycle status indicator lights (on some models) show what part of the cycle the dryer is in and remind you to
clean the lint filter. On models without indicator lights, the cycle status will show in the display.
CYCLE STATUS
•SENSING
•TIMEDDRY
•COOLDOWN
•EXTENDEDTUMBLE
SENSING
This light c'oines on when an EASY TOUCHSensor Dry Cycle is active.
TIMED DRY
This light comes on when AIR DRY,DEWRINKLE,DRYEL"(onsome models), TIMEDDRY
or RACK DRY is selected.
EXTENDED TUMBLE
This light comes on when the dryer is in the EXTEND TUMBLEmode.
CLEANLINT FILTER
This light is areminder to clean the lint filter. It comes on at the end ot ac_cle and
goes off when the door is opened.
14
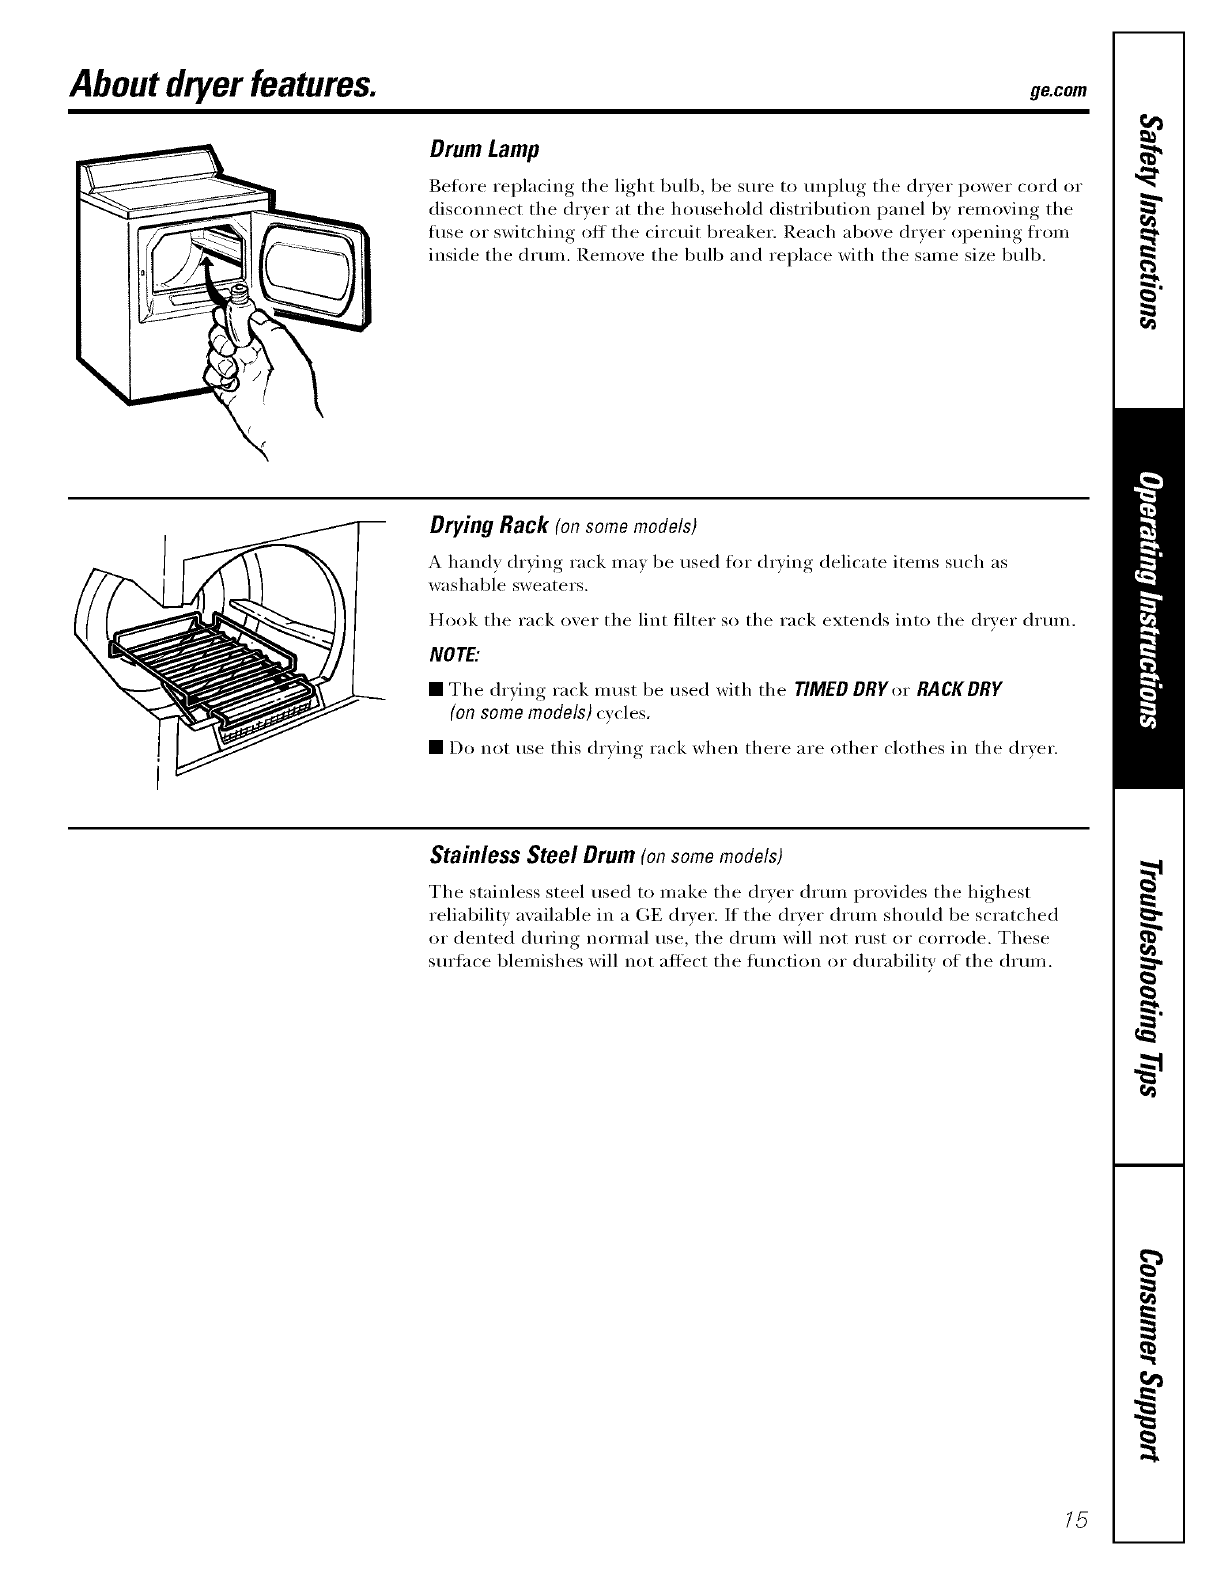
Aboutdryer features, ge.com
Drum Lamp
getore replacing the light bulb, be sure to uni)lug the dryer power cord or
disconnect the dryer at the household distribution panel by removing the
fllse or switching off the circuit breaker. Reach above drver opening fl'om
inside the drum. Remove the bulb and replace with the same size bulb.
-- Drying Rack (onsomemodels)
A handy drying rack ma_ be used for drying delicate items such as
washable sweaters.
Hook the rack oxer the lint filter so the rack extends into the dryer drum.
NOTE:
•The drying rack must be used with the TIMED DRYor RACKDRY
(on some models) cycles.
• Do not use this drvim* rack when there are other clothes in the dr",er.
Stainless Steel Drum (onsomemodels)
The stainless steel used to make the (hwer (hmn provides the highest
reliability available in a GE dryer. If the dryer d_mn should be scratched
or dented during normal use, the drmn will not _ust or corrode. These
surt_lce blemishes will not affect the flmction or durability of the dluln.
/5
Aboutreversingthe door.
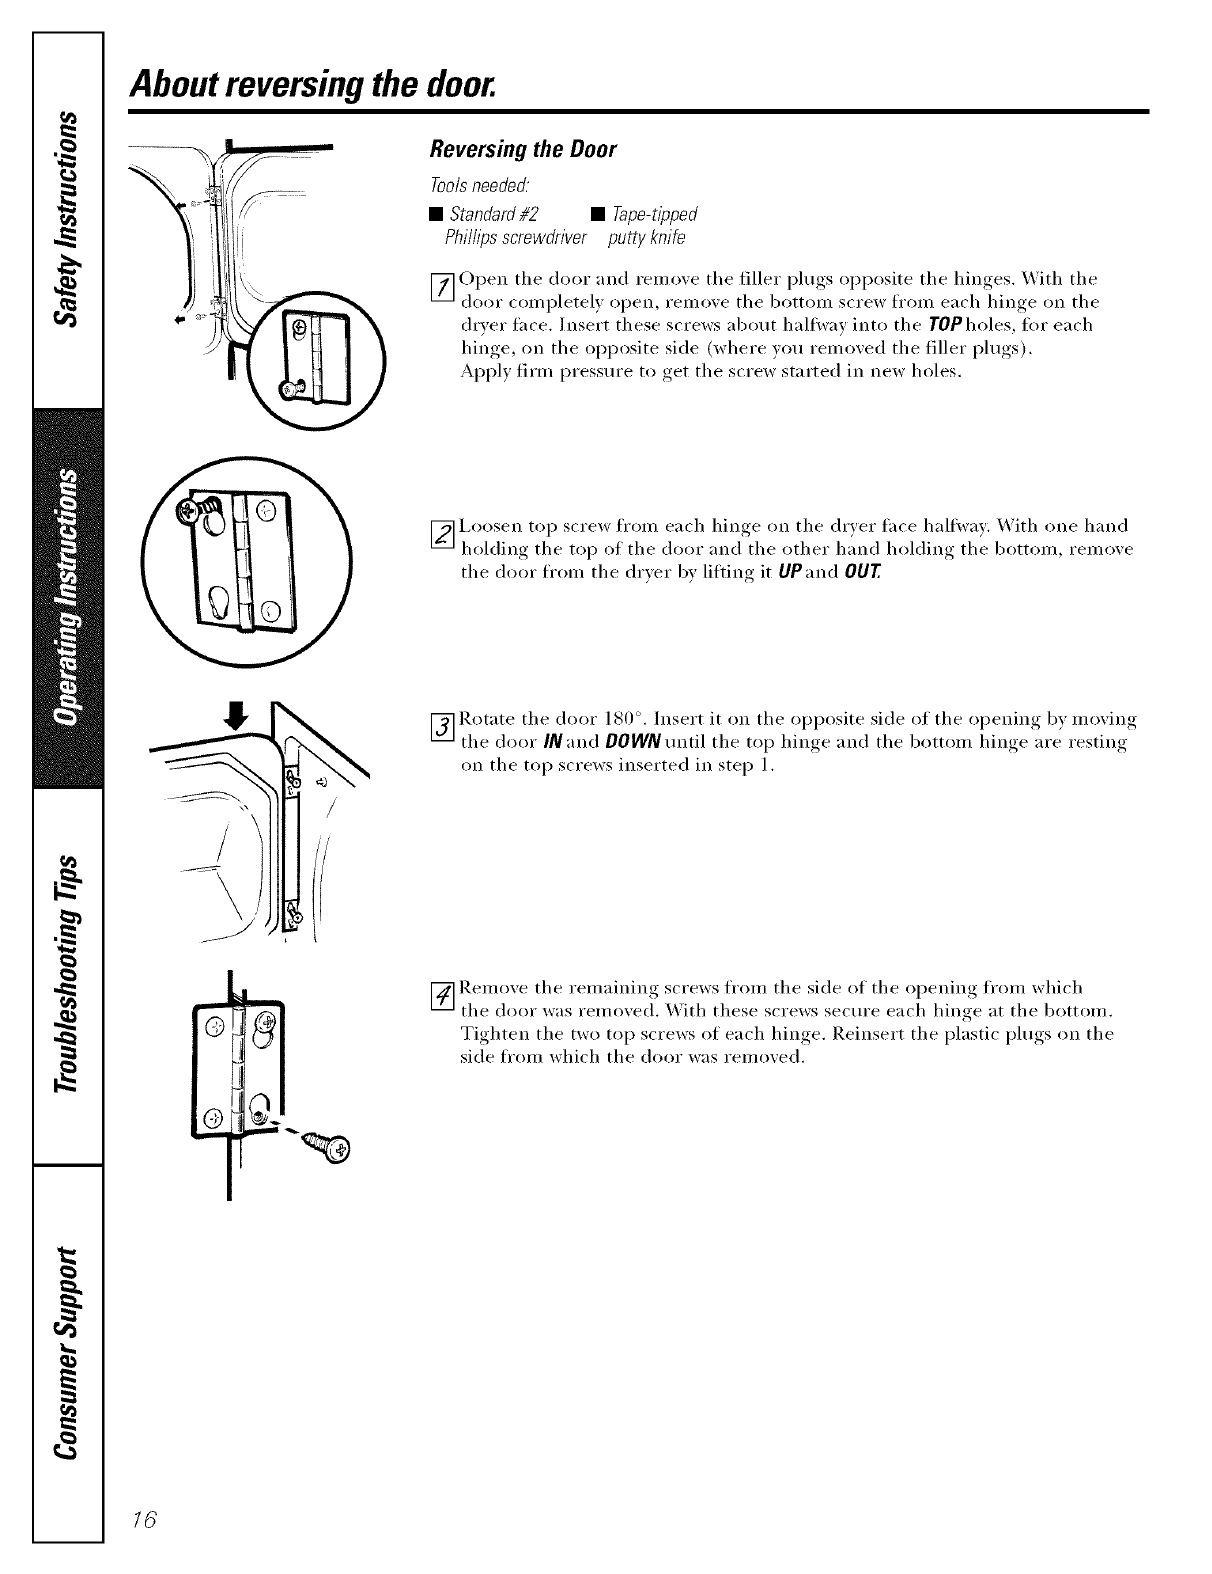
Reversing the Door
ToolsneeciecL
•Standard#2 • Tape-tipped
Phil@sscrewdriver putty knife
_] Open the door and remove the filler plugs opposite the hin_,es. _._ith the
u_ door completel) open, remo'.e the bottoin screw fl'mn each hinge on the
dryer tace. Insert these screws about halfway into the TOP holes, tot each
hin_,e on the opposite side (where)ou remo'.ed the filler I_lu_'s_
App1) firm [M'ess/IFe to <get the screw started in new holes.
_ I,oosen top screw from each hinge on the dryer thce haltway. _,_ith one hand
holding the top of the door and the other hand holding the bottom, remoxe
the door from the drxer by lifting it UP and OUT
[_ Rotate the door 180 °. Insert it on the opposite side of the oi)enino_ b'_,moving<
the door IN and DOWN tmtil the top hinge and the bottom hinge are resting
on the top screws inserted in step 1.
/
V_ Remove the remaining screws from the side of the o )enim, fl'om which
the door was removed. _ith these screws secure each hinoe at the bottom,
Tighten the two top screws of each hinge Reinsert the plastic I_lm"s_' on the
side from which the door was remoxed.
/6

Loadingand usingthe dryer, ge.com
Always follow the fabric manufacturer's care label when laundering.
FabricCareLabels
Below are fhbric care label "symbols" that aftect the clothing )ou will be laundering.
WASH LABELS
wash m m
cycle Normal p .......... t Press/ Gentle'_/ Do not wash Do not wring
wrinkle resistant delicate Hand wash
Water •• • • • •
temperature Hot w.... Co,d/coo,
(50°C/120°F) (40°C/105°F) (30°C/85°F)
DRY LABELS Foqroqroq
rt vj. Do,_otdry
Dry Normal Permanent Press/ Gentle/ Do not tumble dry (used with
wrinkle resistant delicate do not washl
setting
High Medium Low No heat/air
instructions
Line dry/ Drip dry Dryfiat In the shade
hang to dry
BLEACHLABELS
SylIIUOIS Anybleactl D,11V....... Norine bleach Donotbleach
(when needed) (when needed)
SortingandLoadingHbts
As a general rtfle, if' clothes are sorted i)roperl)
fin" the washe_, they are sorted i)roi)erl) for the
dryer, Try also to sort items according to size.
For exami)le, (lo not (h'_ a sheet with socks or
other small items.
Do not overload. Thiswastes energy and causes wrinkling.
Donotdrythe following items: fiberglassitems,woolens,
rubber-coateditem&plastic&items withplastictrimand
foam-tiffeditems.
Donot addfabricsoftenersheetsoncetheloadhas
becomewarm.Theymaycausefabricsoftenerstains.
Bounce_FabricConditionerDryerSheetshavebeen
approvedforusein aftGEDryerswhenusedinaccordance
with themanufacturer#instructions.
17
Loadingand usingthe dryer.
Always follow the fabric manufacturer's care label when laundering.
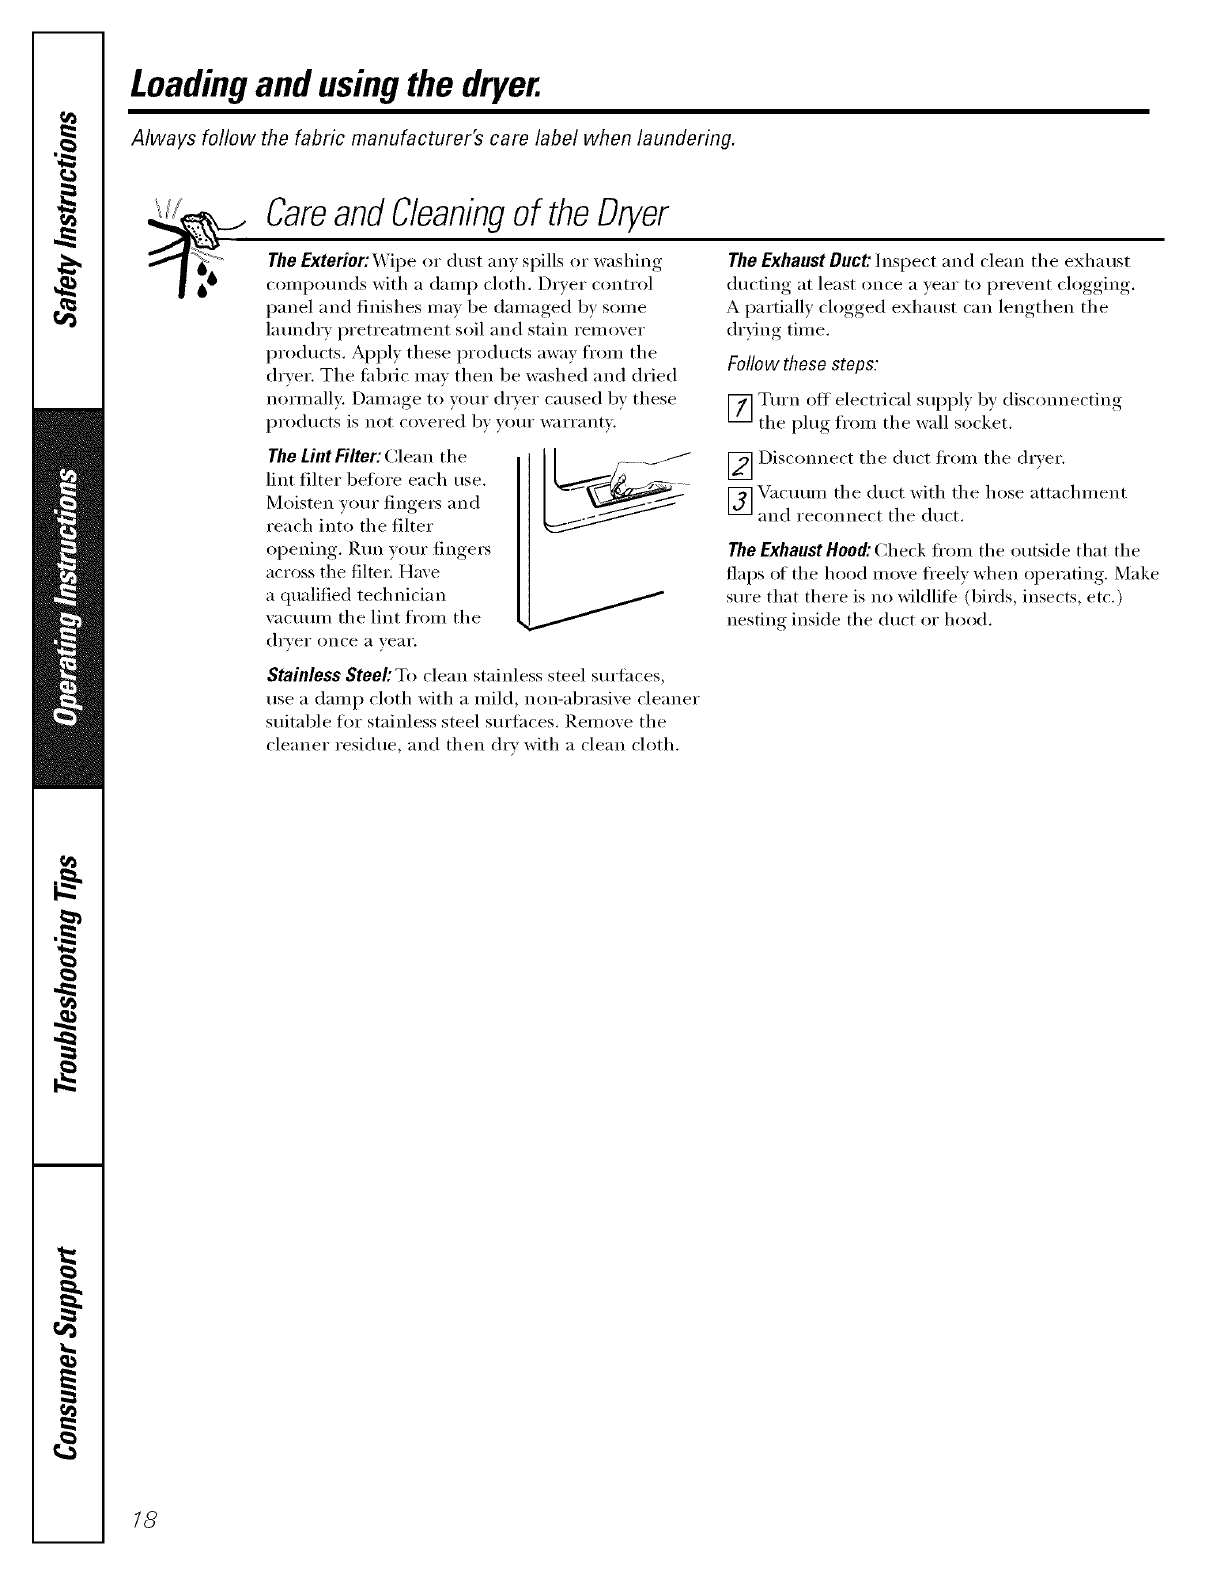
CareandCleaningof theDryer
The Exterior:_._ipe or dust any, si}ills or washing
compounds with a dmni_ cloth. Dr_er control
panel and finishes mm be damaoed_ by, some
laundI? pretreatment soil and stain relnoxer
products. App1} these products away from the
(haer. The ed_ric ma) then be washed and dried
normall): Damage to )our dr_er caused bx these
products is not co_,ered by your warrant_.
The Liut filter: Clean the
lint filter befl)re each use.
Moisten your fingeis and
reach into the filter
opening. Run wmr fingeI_
across the filter. Hme
a qualified technician
vactltli// the lint from the
dryer once _1 ve_li'.
Stainless Steel'. To clean stainless steel surtaces,
use a damp cloth with a mild, non-abrasive cleaner
suitable ti_r stainless steel surfaces. Remove the
cleaner residue, and then dry with a clean cloth.
The Exhaust Duct: Inspect and clean the exhaust
ducting at least once a year to prevent clogging.
A partially clogged exhaust can lengthen the
drying time.
Follow those steps:
_] Turn off electrical supply by disconnecting
the plug from the wall s_cl_et.
[_ Disconnect the duct ti'om the dryer.
[3] Vactltlill the duct with the hose attachment
and reconnect the duct.
TheExhaust Hood: Check from the outside that tile
flaps _fftile hood move ti'eely when operating. Make
sure that there is no wildlife (birds, insects, etc.)
nesting inside the duct or hood.
/8

Ventingthe dryer, gecem
Fox" the best drying perfl)rnmnce, the dryer needs to be properly vented. The dryer will use
more energy and run longer if it is not vented to the below specifications. Carefully follow the
details on Exhausting in the Installation Instructions.
• Use only rigid metal 4" diameter ductwork inside the dryer cabinet. Use only rigid
metal or flexible metal 4" diameter ductwork for exhausting to the outside.
• Do not use plastic or other combustible ductwork.
• Use the shortest length possible.
• Do not crash, kink or collapse the duct.
• Avoid resting the duct on sharp objects.
•Venting must conform to local building codes.
Correct
Venting "I
Incorrect
Venting
19
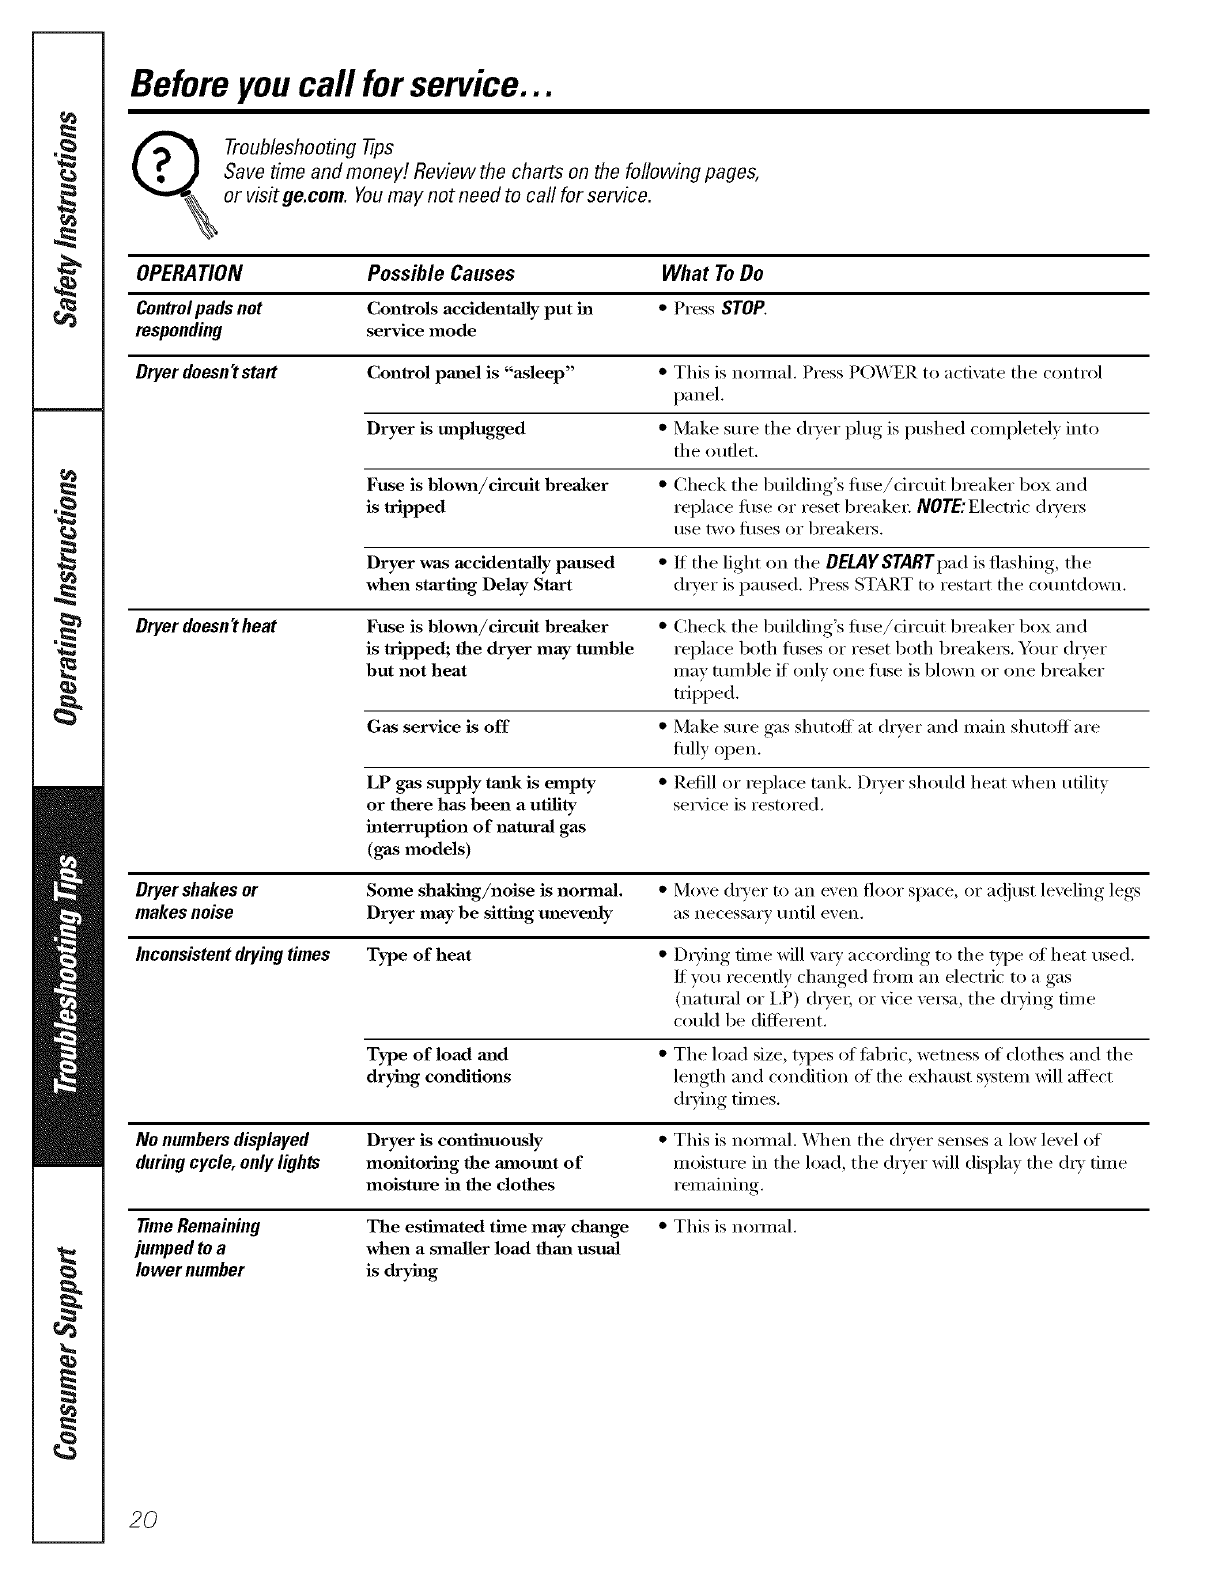
Before you call for service...
_roubleshooting -tips
Save time and money! Review the charts on the following pages,
or visit ge.eom. Youmay not need to call for service.
OPERATION Possible Causes What To Do
Controlpads not Controls accidentally put in *Press STOP.
responding service mode
Dryer doesn'tstart Control pmml is "asleep" •This is noxmal. Press POWER to actiw_te the control
panel.
Dryer is unplugged *Make sure the d_Ter plug is pushed completely into
the outlet,
Fuse is blown/circuit breaker • Check the building's filse/circuit breaker box and
is tripped replace filse or reset breaker: NOTE:Electric d_'e_
use two filses or breaket_.
Dryer was accidentally paused •If the light on the DELAYSTART pad is flashing, the
when starting Delay Start (hyer is paused. Press START to restart the countdown.
Dryerdoesn't heat Fuse is blown/circttit breaker •Check the building's fllse/drcuit b_eaker box and
is tripped; the dryer may trouble replace both fl/ses or reset both breake_. Ybtu" dryer
but not heat may ramble if only one fllse is blown or one breal_er
tripped.
Gas service is off •Make sm'e gas shutoff at d_Ter and main shutoffare
fiflly open.
LP gas supply taafl¢ is empty • Refill or _eplace tank. Dryer should heat when utility
or there has been a utility service is restored.
interruption of naturaJ gas
(gas models)
Dryer shakes or Some shaking/noise is normal. • Move dryer to an even floor space, or a(!just leveling legs
makes noise Dryer may be sitting unevenly as necessar_ until exen.
Inconsistent drying times Type of heat •D_ying time will xa_3, ,'laccording to the t_ )e of heat used.
If you recently changed ti'om an electric to a gas
(natural or I,P) (lrye_; or vice ve_a, the drying time
could be different.
Type of load mad •The load size, t)pes of lid)tic, wetness of clothes and the
drying conditions length and condition of the exhaust system will affect
drying times.
No numbers displayed Dryer is conthmottsly • This is nomml. X._qaen the dryer senses a low level of
during cycle, only lights monitoring the mnom_t of moisture in the load the dryer will display the (h 3 time
moisture in the clothes remaining.
time Remaining
jumped to a
lower number
The esthnated time may chm_ge • This is nomml.
when a smaller load thm_ usuaJ
is dxyhag
2O
ge.com
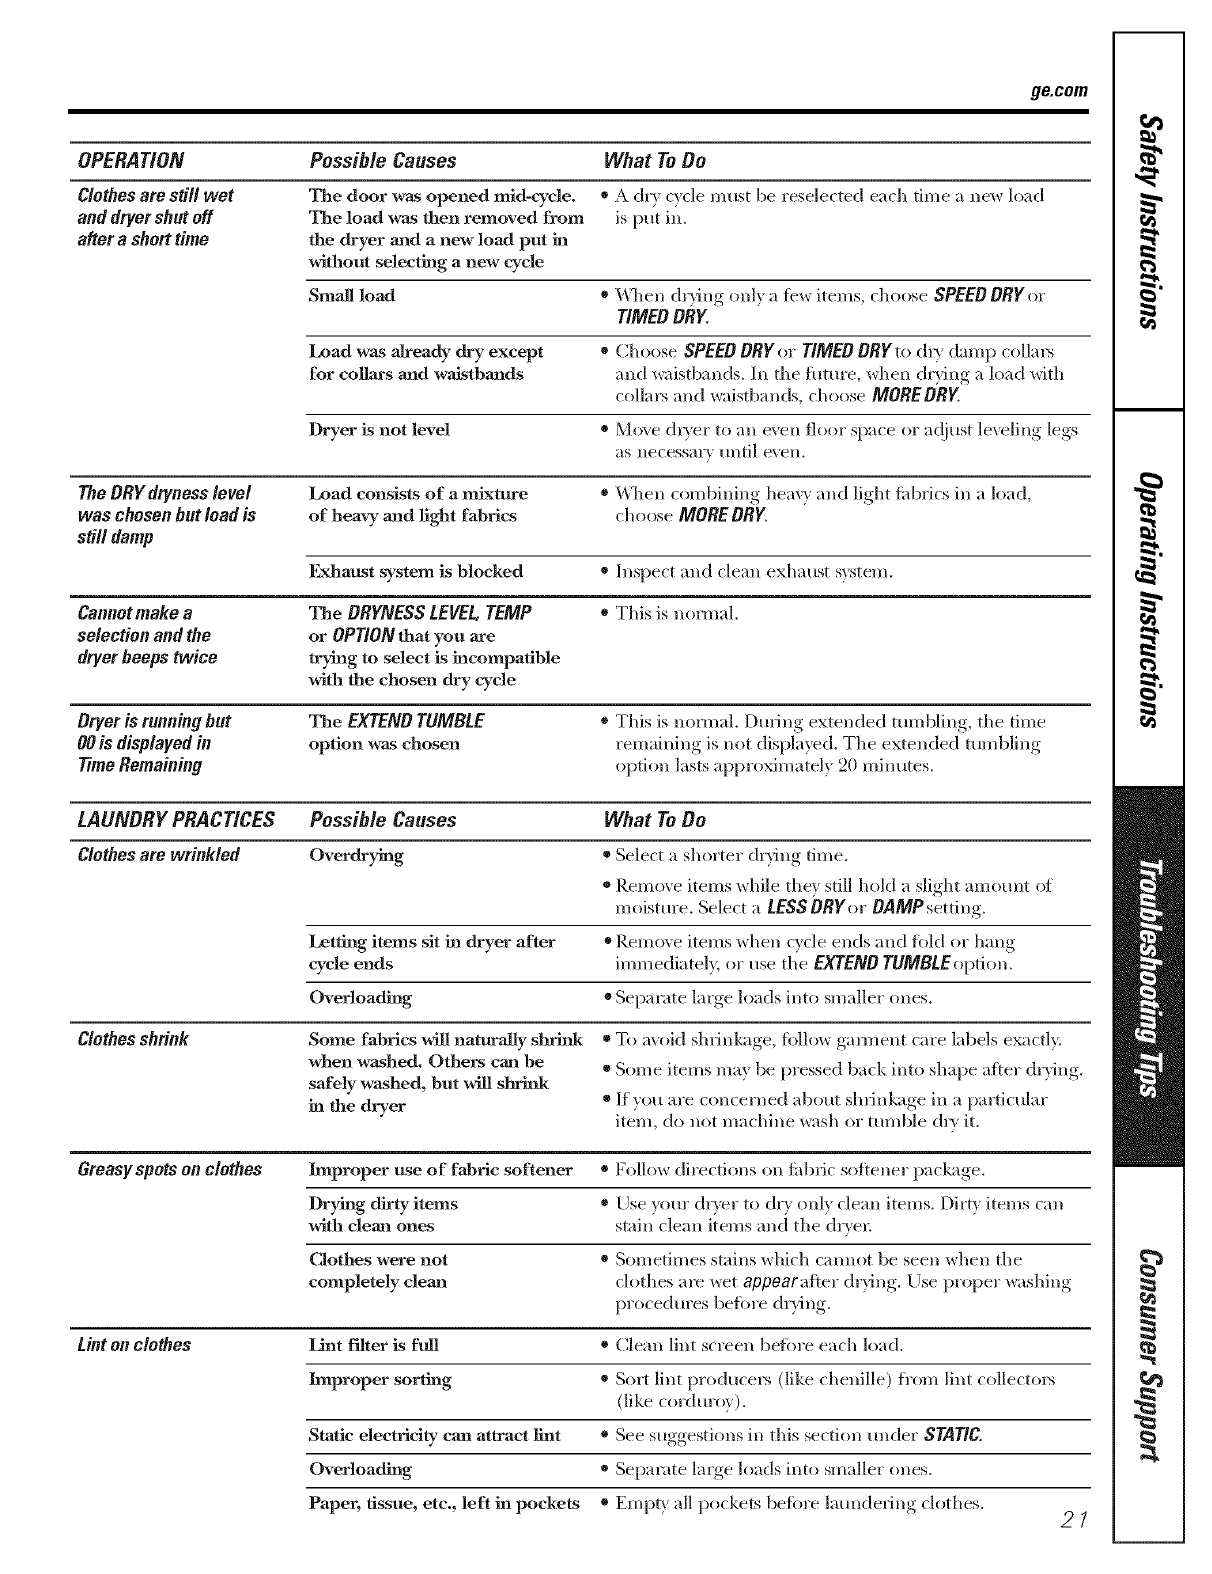
OPERATION Possible Causes What To Do
Clothes am still wet The door was opened mid-cycle. * A dry cycle must be reselected each time a new load
and dryer shut off The load was then removed from is put ill.
after a short tbne the dryer and a new load put in
without selecting a new cycle
Small load *\\qlen drying only a iew items, choose SPEED DRYor
TIMED DRY.
Load was already dry except *Choose SPEED DRY or TIMED DRY to &y damp collars
for collars arid waistbands and waistbands. In the flmlie, when drying a load with
colla_ and waistbands, choose MOREDBK
Dryer is not level *Move dryer to all even floor space or ac!iust leveling legs
as necessary until even.
The DRYdryness level Load consists of a mixture * \\q_en combining heavy and light ti_brics ill a load,
was chosen hut load is of heavy and light fabrics choose MORE DRY.
still damp
F_Jaaust system is blodmd o Inspect and clean exhaust system.
Cannotmake a The DRYNESS LEVEL, TEMP *This is no, real.
selection and the or OPTION that you are
dryer beeps twice trying to select is incompatible
with the chosen dry cycle
Dryer is running hut The EXTEND TUMBLE * This is n(mnal. During extended tumbling, tile time
O0 is displayed in option was chosen remaining is not displayed. The extended tumbling
Time Remaining option lasts approximately 20 mimltes.
LAUNDRY PRACTICES Possible Causes What To Do
Clothes are wrinkled Overdrying *Select a shorter drying time.
•Rein(we items while they still hold a slight amount ot
m oisture. Select a LESS DRY or DAMP setting.
Letting items sit in dryer after * Remove items when cycle ends and iold or hang
cycle ends immediatel> or use tile EXTEND TUMBLE option.
Overloading ®Separate hroe,_ loads into smaller ones.
Clothes shrink Some fabrics will naturally shrink *To avoid shrinkage, tbllox_ g;mnent care labels exactly.
when washed. Others can be o Some items max be pressed back into shape after dxTing.
safely washed, but will stMrd{
in the dryer *Ifxou are concerned about shrinkage in a particular
item, do not machine wash or tumble <hy it,
Greasyspots on clothes Improper use of fabric softener * Follow directions on rid)tic softener l)ack't'_"e
Drying dirty items *Use xour. dryer, to d_3 onlx clean items. Di_t) items can
with clean ones stain clean items and tile dr} er_
Clothes were not o Sometimes stains which cannot be seen when tile
completely clean clothes are _et appearatter drying. Use proper _<Mlin,,.
procedures before d,ying.
Lint on clothes Lint f'flter is fuU * (2lean lint screen before each load.
Improper sorting o So_ lint producers (like chenille) from lint collecto_
(like corduroy).
Static electricity cam attract lint ®See suggestions in this section under STATIC.
Overloading o Separate large loads into smaller ones.
Paper, tissue, etc., left in pockets *Empty all pockets belbre launde_Jng clothes. 21
Before you call for service...
LAUNDRY PRACTICES Possible Causes What To Do
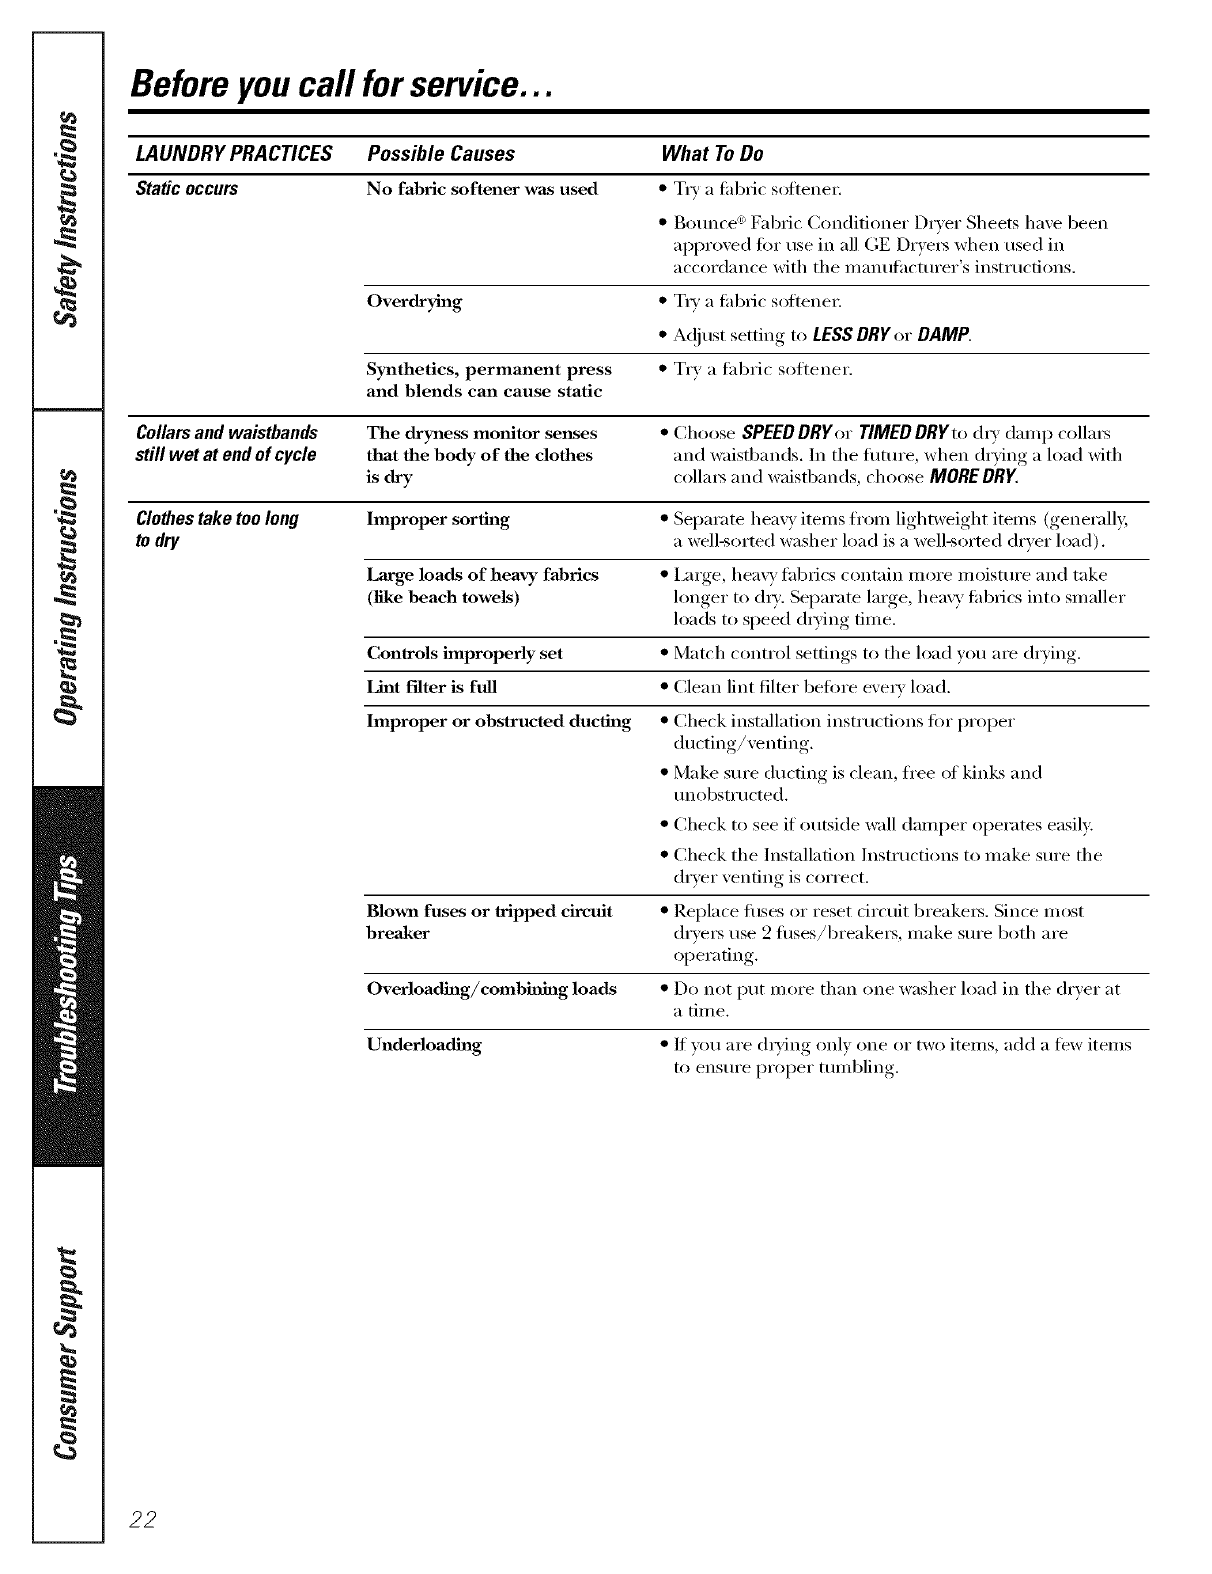
Static occurs No fabric softener was used *T_' a riO)tic soitene_:
•Bounce '_Fabric Conditioner Dryer Sheets have been
approved fi)r use in all GE DITeI_ when used ill
accordance with tile i//ainlt_lcttli'ei"s instructions.
Overdxying •T_ a e_l_Iicsolienei:
• A(!just setting to LESSDRY(>r DAMP.
Synthetics, permanent press • Try a tabric softener.
and blends can cause static
Collars and waistbands The dryness monitor senses • Choose SPEEDDRYor TIMED DRYt(, diy dmnp collai_
still wet at end of cycle that the body of the clothes _lIld waistbands. In tile J[iltllI'e, when drying a load with
is dry collai_ and waistbands, choose MORE DRY.
Clothes take too long hnproper sorting • Separate heavy iten/s ti'om lightweight iten/s (generally,
to dry a well-sorted washer load is a well-sorted dryer load).
Large loads of heavy fabrics • im'ge heavv tabrics contain more moisture and take
(like beach towels) hmger to diy. Separate lmge, heavv rift)tics into smaller
loads to speed (hying fiule.
Controls improperly set • Match control settings to tile load you are drvin ,
Lint filter is full •Clean lint filter befi)re eveP,' load.
hnproper or obstructed ducth_g • Check installation instructions fi)r proper
ducting/venfing.
•Make sure ducting is clean, fl'ee ot kinks and
unobstructed.
• Check to see if outside wall dmnper operates easily.
• Check tile Installation hlstructions to make sure tile
dryer venting is correct.
Blown fuses or tripped circuit • Replace fllses or reset circuit breakei_. Since lnost
breaker drveI_ use 2 fllses/breakei_, make sure both are
operating.
OverloadJng/combhfing loads •Do not put inore than one washer load ill tile dryer at
a [Jill e.
Underloadhag • If xou are (hying only one or two items, add a tew items
to ensure proper tulnbling.
22
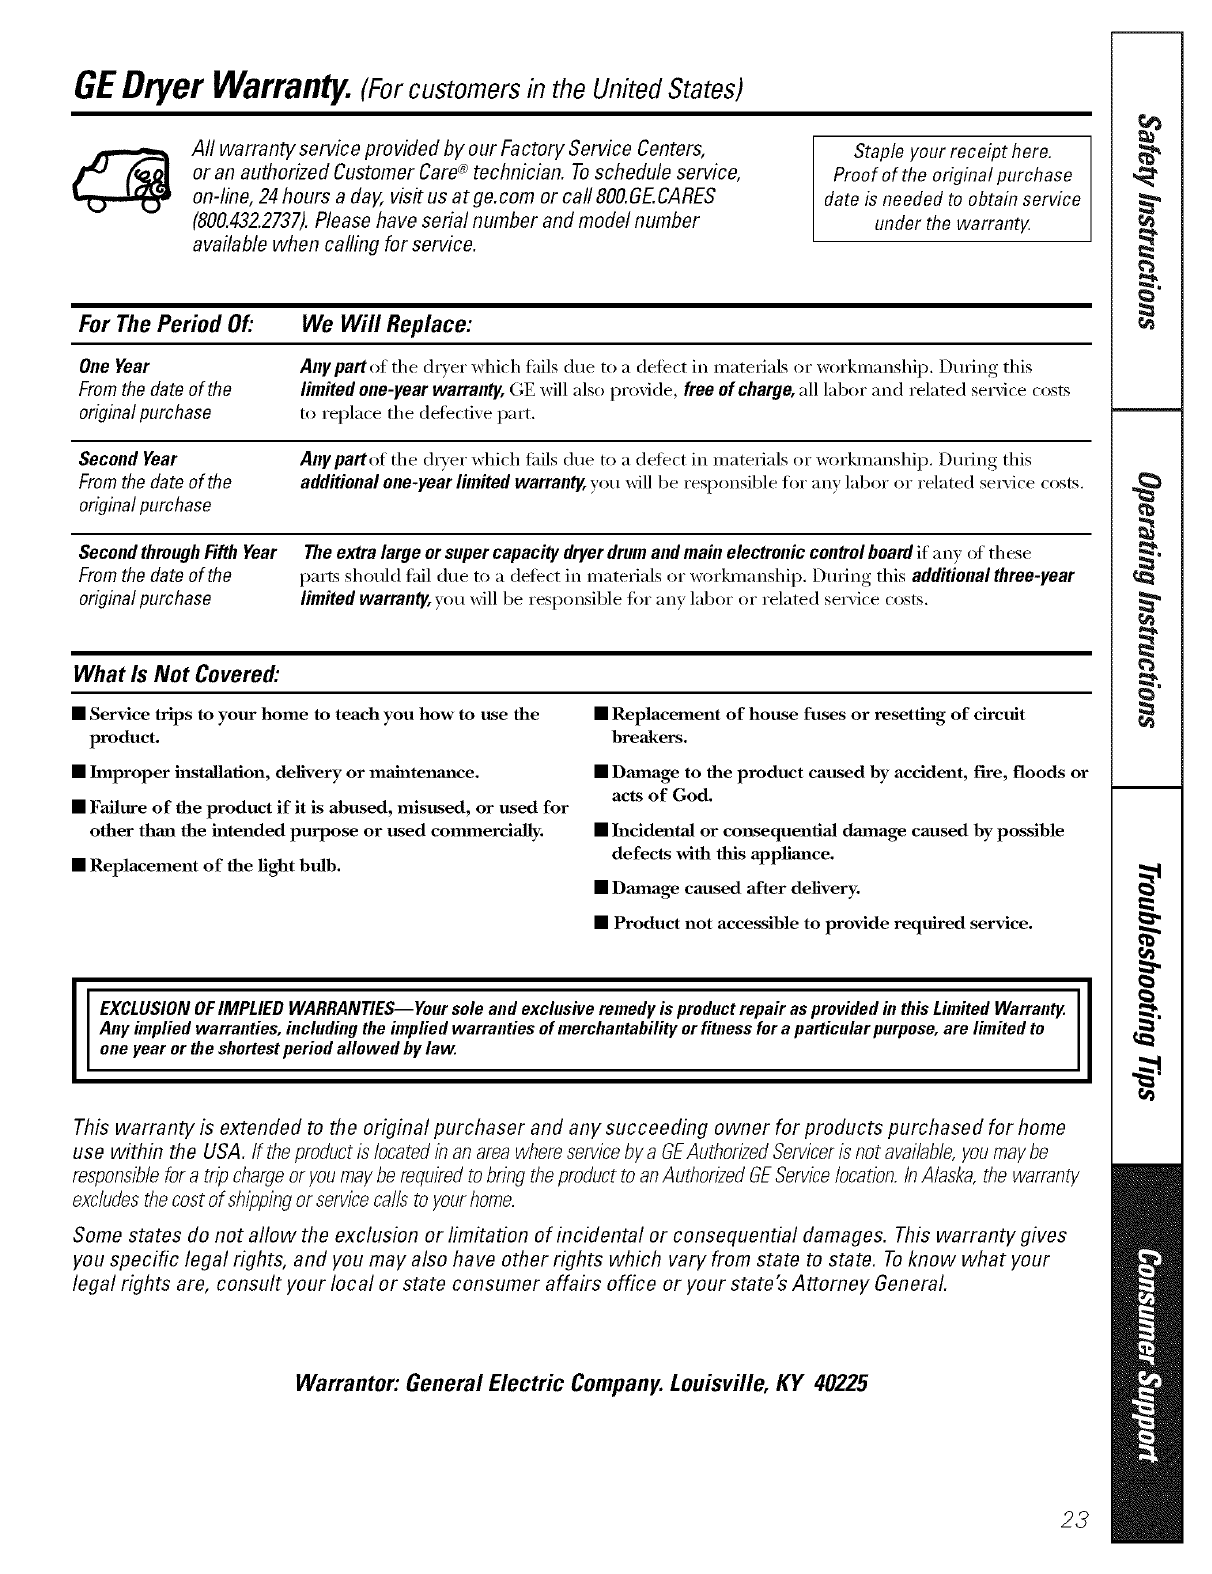
GEDryer Warranty. (For customers in the United States)
Aft warranty service provided by our Factory Service Centers,
or an authorized Customer Care®technician. To schedule service,
on-line, 24hours a day, visf us at ge.com or calI SOO.GE.CARES
(800.432.2737).Please have serial number and model number
available when calling for service.
Staple your receipt here.
Proof of the original purchase
date is needed to obtain service
under the warranty
For The Period Of."
OneYear
Fromthe date of the
originalpurchase
SecondYear
Fromthe date of the
originalpurchase
SecondthroughFifthYear
Fromthe date of the
on;ginalpurchase
We Will Replace:
Any part of the dryer which thils due to a defe(t in materials or workmanshii). During this
limitedone-yearwarranty,GE will also provide, free ofcharge,all labor and related service costs
to replace the defecti\'e part,
Any pattof the (hyer which tifils due to a defect in materials or workmanship. During this
additional one-year limited warranty, you will be responsible tot any labor or related service costs.
The extra large or super capacity dryer drum and main electronic control board if any of these
parts should thil due to a (lelect in materials or wor]_nanship. During this additional three-year
limitedwarranty,you will be responsible tot any labor or related service costs.
What Is Not Covered:
• Service trips to your home to teach you how to use the
product.
• Improper installation, delivery or maJntenm_ce.
• Failure of the product if it is abused, misttsed, or used for
other thml the intended purpose or used commercially.
• Replacement of the light bulb.
• Replacement of house fuses or resetting of circuit
breakers.
•Dmnage to the product caused by accident, fire, floods or
acts of God.
• h_ddentaJ or consequentiaJ dmnage caused by possible
defects with this applimlce.
• Dmnage caused after delivery.
•Product not accessible to provide required service.
I
IEXCLDSIONOFIMPLIEDWARRANTIES--Yoursoleandexclusiveremedyis productrepairasprovidedhithisLimitedWarranty.II
I
Anyimpliedwarranties, includingtheimpliedwarranties ofmerchantabilityorfituessforaparticularpurpose,are limitedto II
oneyearortheshortestperiodallowedbylaw.
This warranty is extended to the original purchaser and any succeeding owner for products purchased for home
use within the USA. If the productis located in an areawbere serviceby a GEAuthorizedServiceris not available,you maybe
responsiblefor a trip chargeor you maybe requiredto bringthe product to anAuthorizedGEServicelocation.In Alaska, the warranty
excludesthe cost of shippingor servicecalls to your home.
Some states do not allow the exclusion or limitation of incidental or consequential damages. This warranty gives
you specific legal rights, and you may also have other rights which vary from state to state. Toknow what your
legal rights are, consult your local or state consumer affairs office or your state's Attorney General.
Warrantor: General Electric Company.Louisville, KY 40225
23
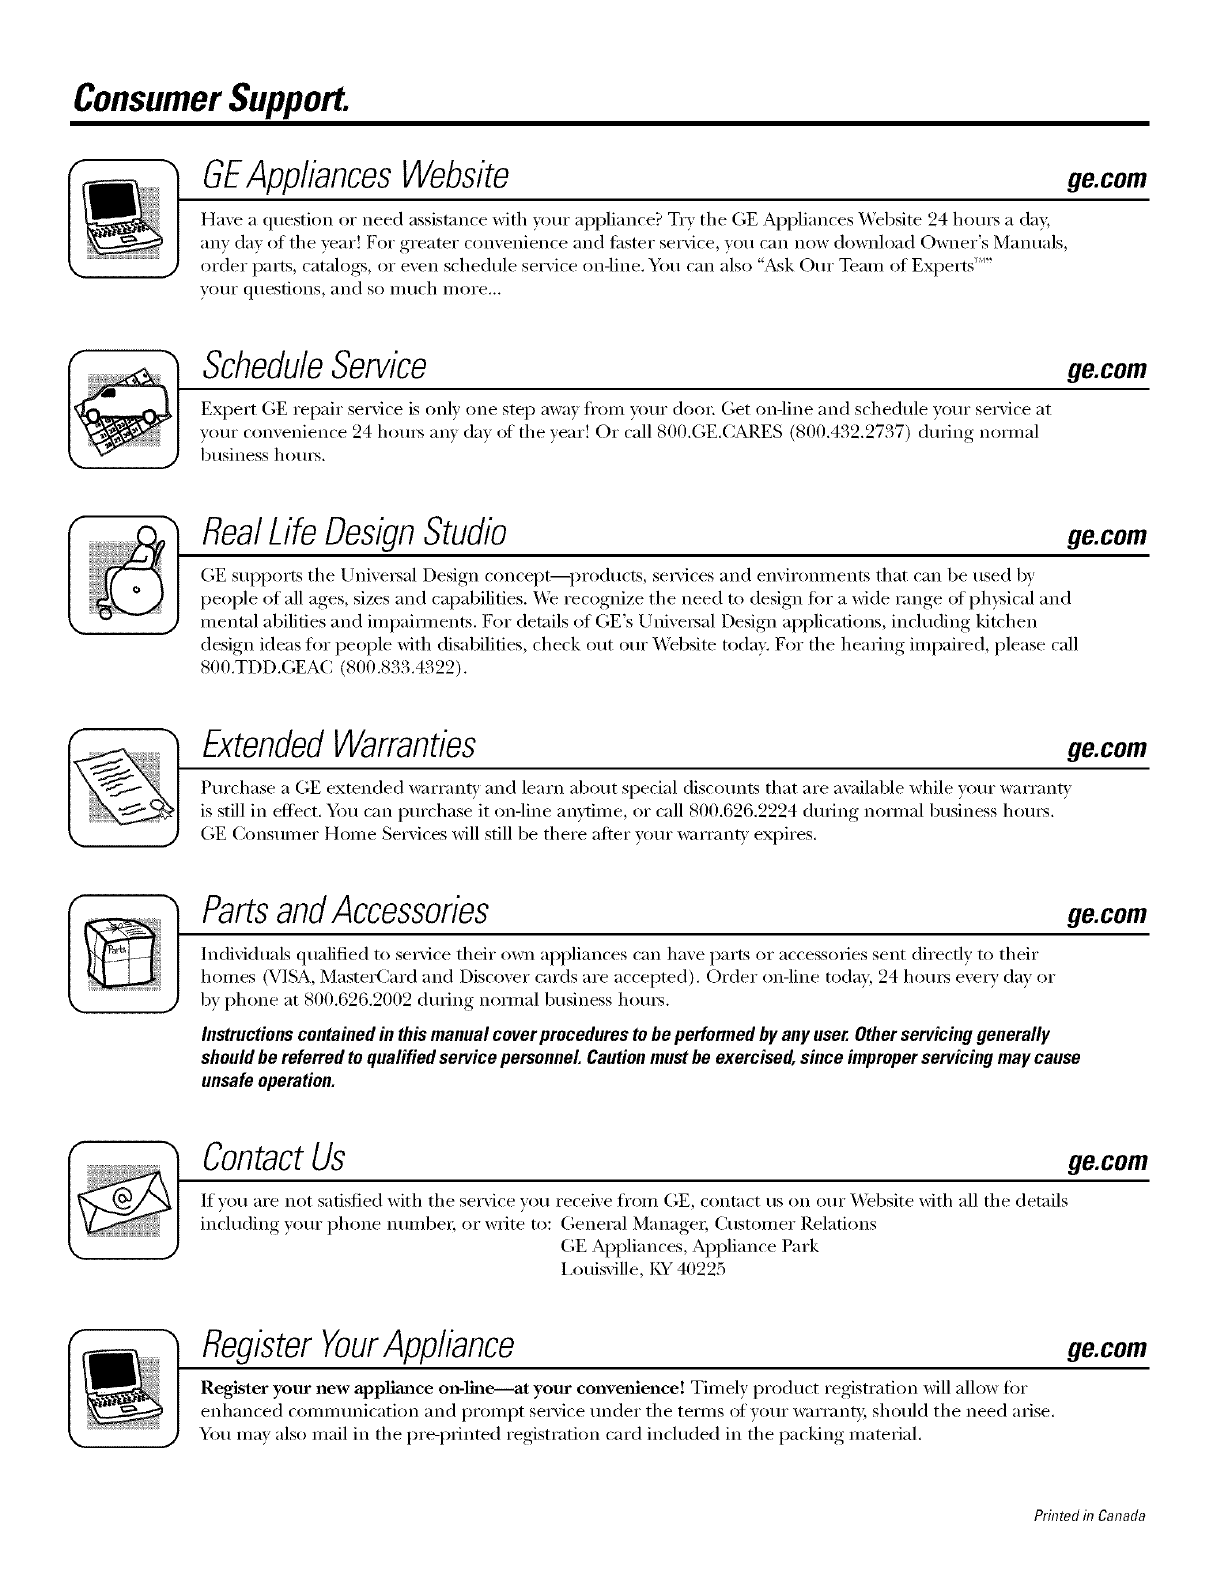
ConsumerSupport.
GEAppliancesWebsite ge.com
Have a question or need assist;race with your appliance? Try the (;E Appliances Website 24 hom_ a (la);
any day of the vear'. For greater convenience and tipster se_Mce, you can now download Owner's Manuals,
order parts, catalogs, or even schedule service onqine. You can also "_&skOur Team of Experts ......
VO/lI" (ltlesti()IIS, and s() I/l{1ch I/loI'e...
ScheduleService
Expert (;E repair ser\'ice is onl_ one step awa) fi'om yet:u" doo_: Get on-line and schedule your service at
your comenience 24 hom_ am dm of the _ear! Or call 800.GE.(_ARES 800.432.2737) during n(mnal
business horus.
ge.com
RealLifeDesignStudio ge.com
GE supports tile ILrnive_al Design concept_products, se_M('es and envn'onments that can be used b)'
people of all ages, sizes and capabilities. We recognize tile need to design fi)r a wide range of physical and
ment;fl abilities and impaim_ents. For details of GE's IL,rnivei_al Design applications, including kitchen
design ideas fl)r people with disabilities, check out our _.Vebsite today. For tile hearing impaired, please call
800.TDD.(;EAC (800.833.4322).
ExtendedWarranties ge.com
Purchase a (;E extended warranty and learn about special discounts that are available while your warranty
is still in effect. Ybu can purchase it on-line anytime, or call 800.626.2224 during n(mnal business hom_.
(;E (:onsumer Home Serxices will still be there after your warrant) expires.
PartsandAccessories ge.com
Individuals qualified to selMce their own appliances can have parts or accessories sent directly to their
homes (VISA, MasterCard and Discover cards are accepted). Order on-line today; 24 hom_ every day or
by phone at 800.626.2002 during n(mnal business hom_.
Instructions contained in this manual cover procedures to be performed by any user. Other servicing generally
should be referred to qualified service personnel Caution must be exercised, since improper servicing may cause
unsafe operation.
ContactUs ge.com
If vou are not satisfied with tile service vou receive fl'om GE, contact us on our X,Vebsite with all tile details
including your phone ntllllbeI; oi" wlJte to: General Manager; CtlStOlllei" ]),elations
GE Appliances, Appliance Park
I,ouisville, KY 40225
RegisterYourAppliance
Register your new appliance on-lhle----at your convenience! Timely, I_r°duct registration, Mll allow for
enhanced communication and pr(>mpt set\ice under tile temps of xour warrant},; should tile need arise.
You may also mail in tile pre-p_inted registration card included in tile I)ackin("_ material.
ge.com
Printed in Canada
