GE JVM1665SN1SS User Manual MICROWAVE Manuals And Guides L0902322
GE Microwave/Hood Combo Manual L0902322 GE Microwave/Hood Combo Owner's Manual, GE Microwave/Hood Combo installation guides
Whirlpool Microwave Oven UMV1152BA L0902322
User Manual: GE JVM1665SN1SS JVM1665SN1SS GE MICROWAVE - Manuals and Guides View the owners manual for your GE MICROWAVE #JVM1665SN1SS. Home:Kitchen Appliance Parts:GE Parts:GE MICROWAVE Manual
Open the PDF directly: View PDF ![]() .
.
Page Count: 72

ge.com
0
0
U
Safety Instructions .............. 2-7
Operating Instructions
Best Method of Cooking Chart ........ 21
Changing Power Level ............... 1/4
Cooking Options ...................... 10
Cookware Tips ........................ 20
Features of Your Oven .............. 8, 9
Grilling Features ................... 18-19
Microwave Terms .................... 1/4
Other Features .................... 22-2/4
Automatic Fan ...................... 2/4
Auto Nite Light ...................... 2:3
Beeper Volume ...................... 2:3
Clear/Off ............................ 22
Clock ................................ 22
Control Lock-Out .................... 22
Cooking Complete Reminder ....... 22
Display ON/OFF ..................... 2:3
Display Speed ....................... 2:3
Help ................................. 22
Light ................................ 2/4
Measures ........................... 2:3
More Time Message ................ 2:3
Resume ............................. 22
Start/Pause ......................... 22
Timer ................................ 24
Turn Table On/Off ................... 24
Vent ................................. 24
Sensor Features .................. 15117
Time and Auto Features ....... 9, 11-13
Care and Cleaning
Charcoal Filters ......................... 29
Inside ................................... 25
Outside ............................... 26
Replacing the Light Bulb .............. 27
Stainless Steel ......................... 26
Vent Filters ........................ 28, 29
Troubleshooting Tips ........ 3o,31
Things That Are Normal
With Your Microwave Oven .......... :32
Consumer Support
Consumer Support .......... Back Cover
Optional Kits ........................... 7
Product Registration .............. :33,:34
Warrantg .............................. :35
JVM1665
DVM1665
Write the model and serial numbers here:
Model #
Serial #
Youcan find them on a IGbelwhen the door
is open.
MFL51203001 49-40583-1 08-08JR
IMPORTANT SAFETY INSTRUCTIONS.
READ ALL INSTRUCTIONS BEFORE USING.
WARNING!
To reducethe risk of burns,electricshock,fire,injury to persons, or exposureto excessivemicrowave energy:
PRECAUTIONS TO AVOID POSSIBLE EXPOSURE
TO EXCESSIVEMICROWAVE ENERGY
[a) Do NotAttempt to operate this oven with the door [c)
open since open-door operation can result in harmful
exposure to microwave energy. It is important not
to defeat or tamper with the safety interlocks.
[b) Do Not Place any object between the oven front
face and the door or allow soil or cleaner residue
to accumulate on sealing surfaces.
Do Not Operate the oven if it is damaged.
It is particularly important that the oven door close
properly and that there is no damage to the:
(1)door (bent),
(2)hinges and latches (brokenor loosened),
(3)door sealsand sealing surfaces.
The Oven Should Not be adjusted or repaired by
anyone except properly qualified service personnel.
Read and follow the specific precautions
in the PRECAUTIONS TOAVOID POSSIBLE EXPOSURE
TO EXCESSIVEMICROWAVE ENERGYsection above.
This appliance must be grounded. Connect only
to a properly grounded outlet. Seethe GROUNDING
INSTRUCTIONSsection on page 6.
Install or locate this appliance only in accordance with
the provided installation instructions.
This microwave oven is UL listedfor installation over
electric and gas ranges.
This microwave oven is not approved or tested
for marine use.
This over-the-range oven is designed for use over ranges
no wider than 36:' It may be installed over both gas
and electric cooking equipment.
Do not operate this appliance if it has a damaged power
cord or plug, if it is not working properly, or if it has been
damaged or dropped. If the power cord is damaged,
it must be replaced by General ElectricServiceor an
authorized service agent using a power cord available
from General Electric.
Do not cover or block any openings on the appliance.
Usethis appliance only for its intended use as described
in this manual. Do not use corrosive chemicals or vapors
in this appliance. Thismicrowave oven is specifically
designed to heat, dry or cook food, and is not intended
for laboratory or industrial use.
To reduce the riskof fire in the oven cavity:
Do not overcook food. Carefully attend appliance when
paper, plastic or other combustible materials are placed
inside the oven while cooking.
Removewire twist-ties and metal handles from paper
or plastic containers before placing them in the oven.
Do not use the oven for storage purposes. Do not leave
paper products, cooking utensils or food in the oven when
not in use.
Do not pop popcorn in your microwave oven unless
in a special microwave popcorn accessory or unless
you use popcorn labeled for use in microwave ovens.
If materials insidethe oven ignite, keep the oven door
closed,turn the oven off and disconnect the power cord,
or shut off power at the fuse or circuit breaker panel.
If the door is opened, the fire may spread.
Do not use the SensorFeatures twice in succession
on the same food portion. Iffood is undercooked after
the first countdown, use Time Cook for additional
cooking time.
2
ge.com
IMPORTANT SAFETY INSTRUCTIONS.
When using the Auto Grill, Manual Grill or Combo Grill
functions, both the outside and inside of the oven will
become hot. Alwaus use hot pads to remove containers
of food and accessories such as the oven shelf.
Thermometer--Do not use regular cooking or oven
thermometers when cooking by microwave. The metal
and mercury in these thermometers could cause
arcing and possibledamage to the oven. Do not use
a thermometer in food you ore microwaving unless
the thermometer is designed or recommended for
use inthe microwave oven.
Do not cleon with metal scouring pods. Piecescon burn off
the pod and touch electrical ports involving risk of electric
shock.
Do not store any materials, other than our recommended
accessories,inthis oven when not in use.
Do not store this appliance outdoors. Do not use this
product near water-for example, in a wet basement,
near a swimming pool, near a sink or in similar locations.
Keeppowercordawag fromheatedsurfaces.
Some products such as whole eggs and sealed
containers-for example, closedjars-are able to explode
and should not be heated inthis microwave oven.
Such use of the microwave oven could result in injuru.
It is important to keep the area cleon where the door
sealsagainst the microwave. Useonlu mild, non-abrasive
detergents applied with a cleon sponge or soft cloth.
Rinsewell.
Thisappliance must only be serviced by qualified service
personnel.Contact nearest authorized service facility
for examination, repair or adjustment.
As with any appliance, closesupervision is necessary
when used by children.
Do not store anything directly on top of the microwave
oven surface when the microwave oven is in operation.
!!!!_!_Do not mountthis appliance over a sink.
SAVETHESEINSTRUCTIONS
Do not immerse power cord or plug in water.
WARNING!
ARCING
If _lou see arcing, press the CLEAR/OFF button and correct the problem.
Arcing is the microwave term for sparks in the oven.
Arcing is caused by:
The metal shelf not installedcorrectly so it
touches the microwave wall.
Metal or foil touching the side of the oven.
Turntable ring support not installedcorrectly.
Foil not molded to food (upturnededges oct
like antennas).
Metal, such as twist-ties, poultry pins,
or gold-rimmed dishes, inthe microwave.
Recycledpaper towels containing small metal
pieces being used inthe microwave.
IMPORTANT SAFETY INSTRUCTIONS.
READ ALL INSTRUCTIONS BEFORE USING.
.4,WARNING!
FOODS
Do not pop popcorn in your microwave oven unless
in a special microwave popcorn accessory or unless
you use popcorn labeled for use in microwave
ovens.
!!!!!!!!!_!
!!!!!!!!!_!
Do not boil eggs in a microwave oven. Pressurewill
build up inside egg yolk and will cause itto burst,
possibly resulting in injury.
Operating the microwave with no food inside for
more than a minute or two may cause damage
to the oven and could start a fire. It increases
the heat around the magnetron and can shorten
the life of the oven.
!!!!!!!!!_!
Foodswith unbroken outer "skin" such as potatoes,
hot dogs, sausages,tomatoes, apples,chicken livers
and other giblets, and egg yolks should be pierced
to allow steam to escape during cooking.
iii!!!_ SUPERHEATED WATER
Liquids,such as water, coffee,or tea,are able to
be overheated beyond the boiling point without
appearing to be boiling. Visiblebubbling or boiling
when the container is removed from the microwave
oven is not always present. THISCOULDRESULTIN
VERYHOTLIQUIDSSUDDENLYBOILINGOVERWHEN
THECONTAINERISDISTURBEDORA SPOONOR
OTHERUTENSILISINSERTEDINTOTHELIQUID.
To reduce the riskof injury to persons:
- Do not overheat the liquid.
Stir the liquid both before and halfway through
heating it.
Do not use straight-sided containers with narrow
necks.
iiiiiiiii;i
iiiiiiiii;i
iiiiiiiii;i
iiiiiiiii;i
iiiiiiiii;i
Foodscooked in liquids (such as pasta) may tend
to boil more rapidly than foods containing less
moisture. Shouldthis occur, refer to the Care
and cleaning of the microwave oven section for
instructions on how to clean the inside of the oven.
Avoid heating baby food in glassjars, even with
the lidoff. Make sure all infant food is thoroughly
cooked. Stir food to distribute the heat evenly.
Be careful to prevent scalding when warming
formula. The container may feel cooler than the
formula really is.Always test the formula before
feeding the baby.
Don't defrost frozen beverages in narrow-necked
bottles (especially carbonated beverages).Even
if the container is opened, pressurecan build up.
This can cause the container to burst, possibly
resulting in injury.
Hot foods and steam can cause burns. Becareful
when opening any containers of hot food, including
popcorn bags,cooking pouches and boxes.
To prevent possibleinjury, direct steam away
from hands and face.
Do not overcook potatoes. They could dehydrate
and catch fire, causing damage to your oven.
Cook meat and poultry thoroughly-meat to at
least an INTERNALtemperature of 160°Fand
poultry to at least an INTERNALtemperature
of 180°K Cookingto these temperatures usually
protects against foodborne illness.
- After heating,allow the container to stand inthe
microwave oven for a short time before removing
the container.
- Useextreme care when inserting a spoon or other
utensil into the container.
/4
ge.com
MICROWAVE-SAFE COOKWARE
Do not operate the oven in the microwave mode without the turntable and the turntable support seated
and in place. The turntable must be unrestricted so it can rotate.
Make sure all cookware used in your microwave oven is suitable for microwaving. Most glass casseroles,
cooking dishes, measuring cups, custard cups, pottery or china dinnerware which does not have
metallic trim or glaze with a metallic sheen can be used. Some cookware is labeled "suitable for
microwaving:'
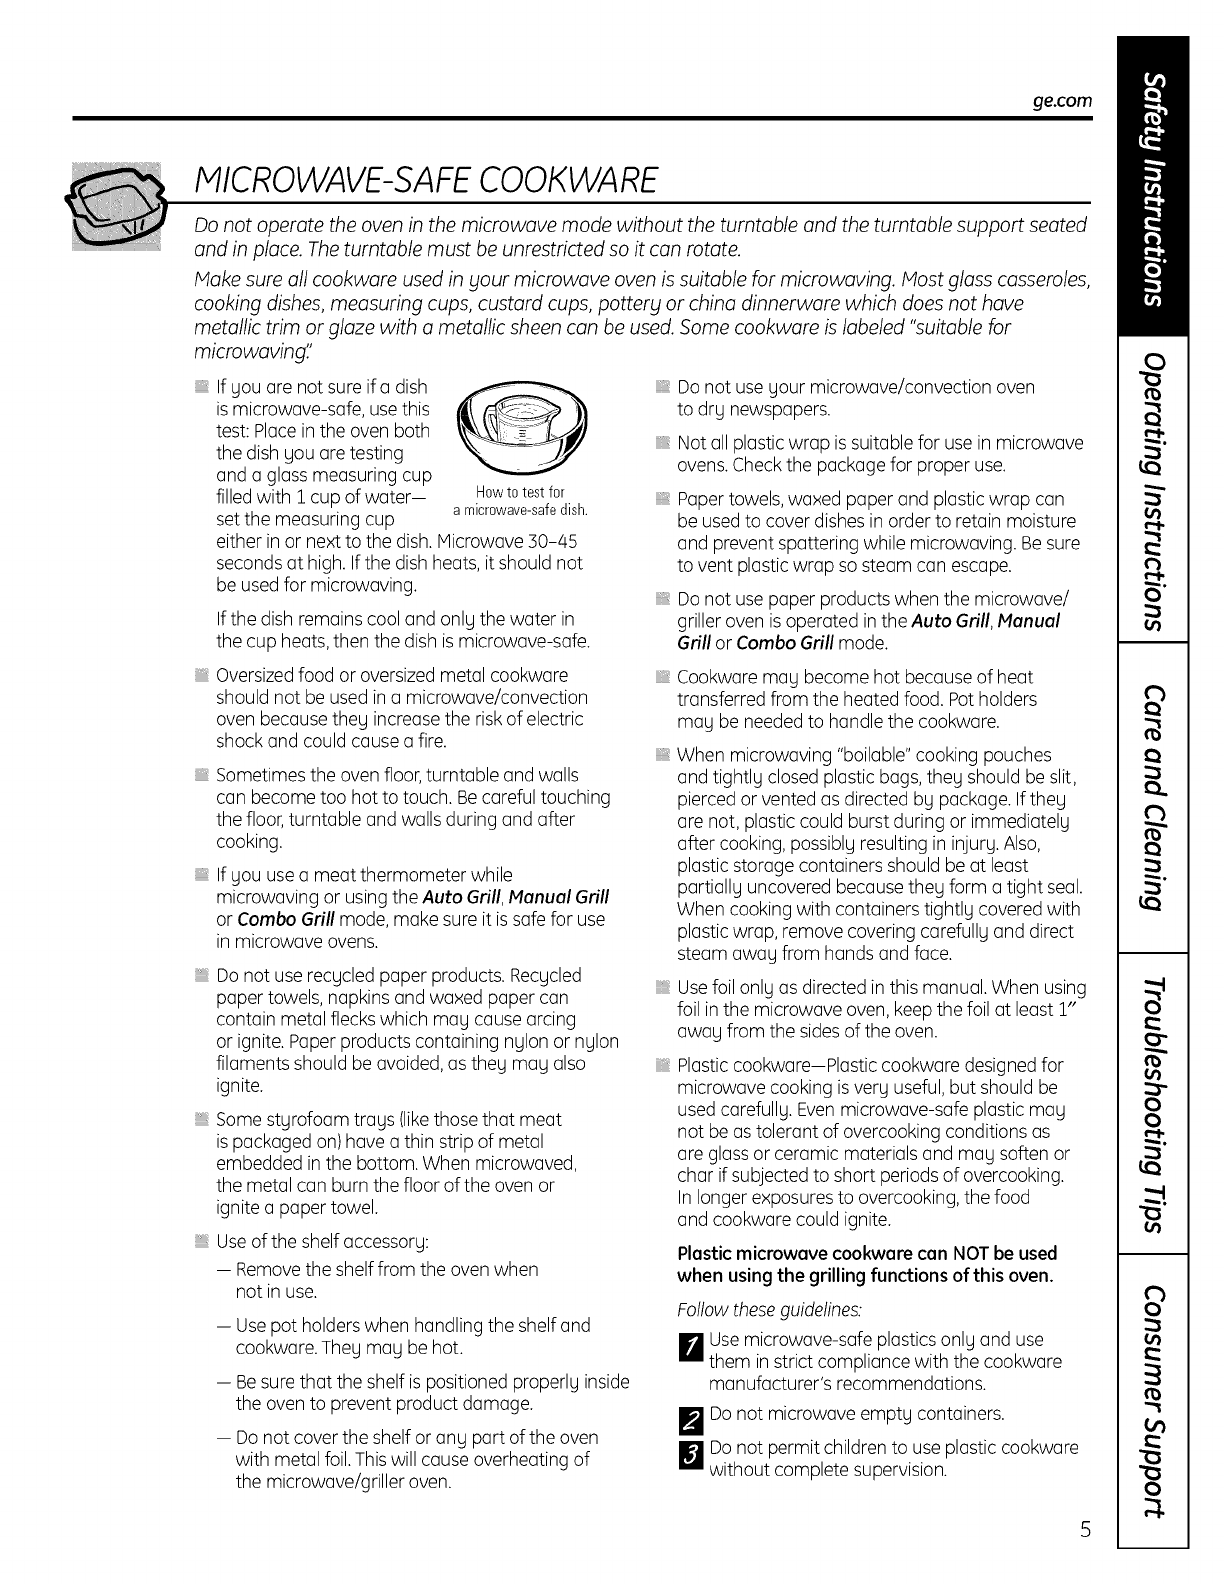
If you are not sure ifa dish
is microwave-safe, usethis
test: Placein the oven both
the dish you are testing
and a glass measuring cup
filled with I cup of water- How totestfor
a microwave-safedish.
set the measuring cup
either in or next to the dish.Hicrowave 50-45
seconds at high. If the dish heats, it should not
be used for microwaving.
If the dish remains cool and only the water in
the cup heats, then the dish is microwave-safe.
Do not use your microwave/convection oven
to dry newspapers.
Not oil plastic wrap is suitable for use in microwave
ovens. Checkthe package for proper use.
Papertowels,waxed paper and plastic wrap con
be used to cover dishesin order to retain moisture
and prevent spattering while microwoving. Besure
to vent plastic wrap so steam con escape.
Do not use paper products when the microwave/
griller oven is operated in the Auto Grill, Manual
Grill or Combo Grill mode.
Oversizedfood or oversized metal cookwore
should not be used in o microwave/convection
oven because they increase the risk of electric
shock and could cause o fire.
Sometimes the oven floor,turntable and walls
con become too hot to touch. Becareful touching
the floor,turntable and walls during and offer
cooking.
If you use a meat thermometer while
microwoving or using the Auto Grill, Manual Grill
or Combo Grill mode, make sure it is safe for use
in microwave ovens.
Do not use recycled paper products. Recycled
paper towels, napkins and waxed paper can
contain metal flecks which may cause arcing
or ignite.Paper products containing nylon or nylon
filaments should be avoided,as they may also
ignite.
Some styrofoam trays (likethose that meat
is packaged on) have a thin strip of metal
embedded in the bottom. When microwaved,
the metal can burn the floor of the oven or
ignite a paper towel.
Useof the shelf accessory:
- Removethe shelffrom the oven when
not in use.
-- Usepot holders when handling the shelf and
cookwore.They may be hot.
-- Besure that the shelf is positioned properly inside
the oven to prevent product damage.
-- Do not cover the shelf or any part of the oven
with metal foil.Thiswill cause overheating of
the microwave/griller oven.
Cookware may become hot because of heat
transferred from the heated food. Pot holders
may be neededto handle the cookware.
When microwoving "bailable" cooking pouches
and tightly closed plastic bags,they should be slit,
pierced or vented as directed by package. Ifthey
are not, plastic could burst during or immediately
offer cooking, possibly resulting in injury. Also,
plastic storage containers should be at least
partially uncovered becausethey form o tight seal.
When cooking with containers tightly covered with
plastic wrap, remove covering carefully and direct
steam away from hands and face.
Usefoil only as directed in this manual. When using
foil in the microwave oven, keep the foil at least 1"
away from the sides of the oven.
Plasticcookwore-Plostic cookwore designed for
microwave cooking is very useful, but should be
used carefully. Even microwave-safe plastic may
not be as tolerant of overcooking conditions as
ore glossor ceramic materials and may soften or
char if subjected to short periods of overcooking.
In longer exposures to overcooking,the food
and cookware could ignite.
Plastic microwave cookware can NOTbe used
when using the grilling functions of this oven.
Follow theseguidelines:
H Use microwave-safe plastics only and use
,m them instrict compliance with the cookware
manufacturer's recommendations.
F_Do not microwave empty containers.
]Do not permit children to use plastic cookware
without complete supervision.
IMPORTANTSAFETYINFORNIAT/ON.
READALL INSTRUCTIONSBEFOREUSING.
WARNING!
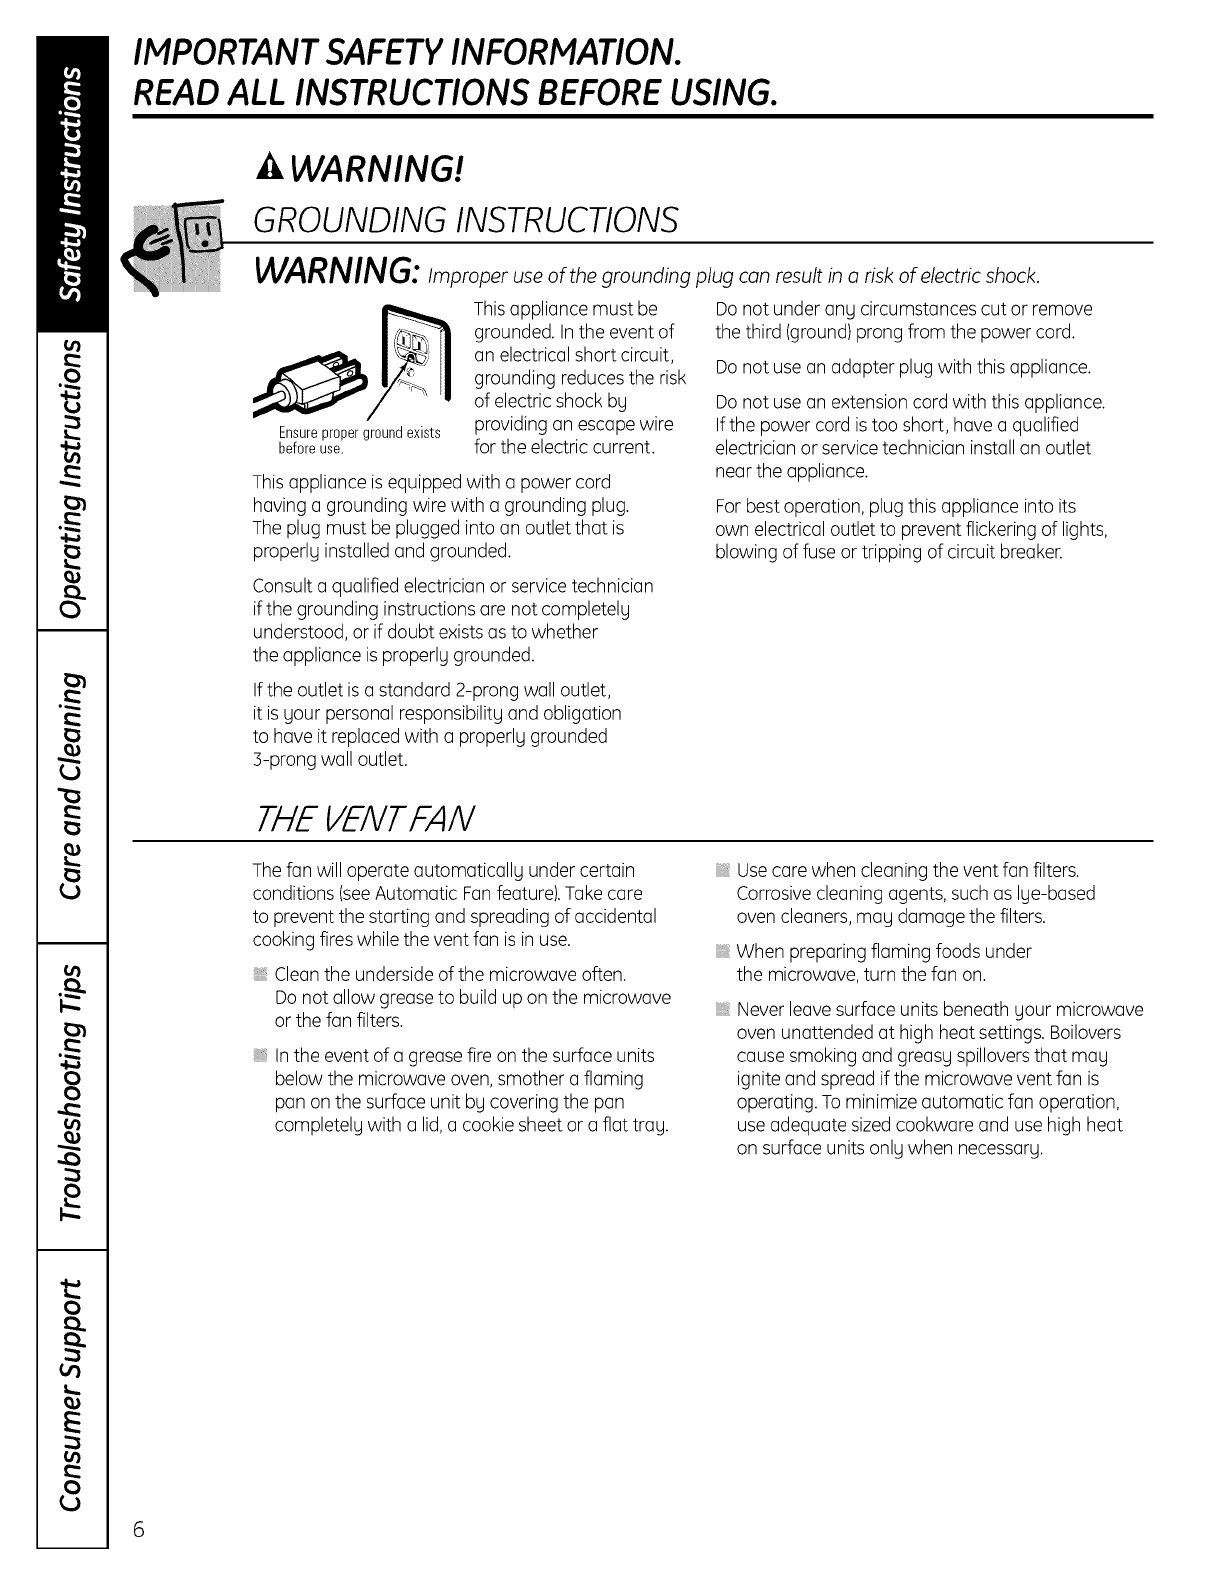
GROUNDING INSTRUCTIONS
Ensurepropergroundexists
before use.
Thisappliance must be
grounded. In the event of
an electrical short circuit,
grounding reduces the risk
of electric shock bg
providing an escape wire
for the electric current.
Do not under ang circumstances cut or remove
the third (ground)prong from the power cord.
Thisappliance is equipped with a power cord
having a grounding wire with a grounding plug.
The plug must be plugged into an outlet that is
properlg installed and grounded.
Consult a qualified electrician or service technician
if the grounding instructions are not completely
understood, or if doubt existsas to whether
the appliance is properlg grounded.
If the outlet is a standard 2-prong wall outlet,
it is your personal responsibility and obligation
to have it replaced with a properlg grounded
3-prong wall outlet.
Do not use an adapter plug with this appliance.
Do not use an extension cord with this appliance.
Ifthe power cord is too short, have a qualified
electrician or service technician installan outlet
near the appliance.
Forbest operation, plug this appliance into its
own electrical outlet to prevent flickering of lights,
blowing of fuse or tripping of circuit breaker.
THE VEIVTFAIV
The fan will operate automaticallg under certain
conditions (seeAutomatic Fan feature).Takecare
to prevent the starting and spreading of accidental
cooking fires while the vent fan is in use.
Clean the underside of the microwave often.
Do not allow grease to build up on the microwave
or the fan filters.
Inthe event of a grease fire on the surface units
below the microwave oven,smother a flaming
pan on the surface unit bg covering the pan
completelg with a lid,a cookie sheet or a flat trag.
Usecare when cleaning the vent fan filters.
Corrosive cleaning agents, such as Ige-based
oven cleaners, mag damage the filters.
When preparing flaming foods under
the microwave, turn the fan on.
Never leave surface units beneath gour microwave
oven unattended at high heat settings. Boilovers
cause smoking and greasg spilloversthat mog
ignite and spread if the microwave vent fan is
operating. To minimize automatic fan operation,
use adequate sizedcookware and use high heat
on surface units onlg when necessarg.
6
ge.com
NOTICE: PACEMAKERS
Most pacemakers are shielded from interference from
electronic products, including microwaves. However,
patients with pacemakers mag wish to consult their
phgsicians if theg have concerns.
READAND FOLLOWTHISSAFETYINFORMATIONCAREFULLY.
SAVETHESEINSTRUCTIONS
Optional kits
Avoiloble ot extro cost from blour GE supplier.
Filler Panel Kit Filter Kit
JX52
When replacing a 36" range hood, the filler panel kit
fills in the additional width to provide a custom
built-in appearance.
For installation between cabinets onlg; not for
end-of-cabinet installation. Each kit contains
two 3" wide filler panels.
JX81A--Recirculating Charcoal Filter Kit
A filter kit is used when JXalA
the oven cannot be
vented to the outside.
Available at extra cost
from gour GEsupplier.
Seethe back cover for
ordering bg phone or
at ge.com.
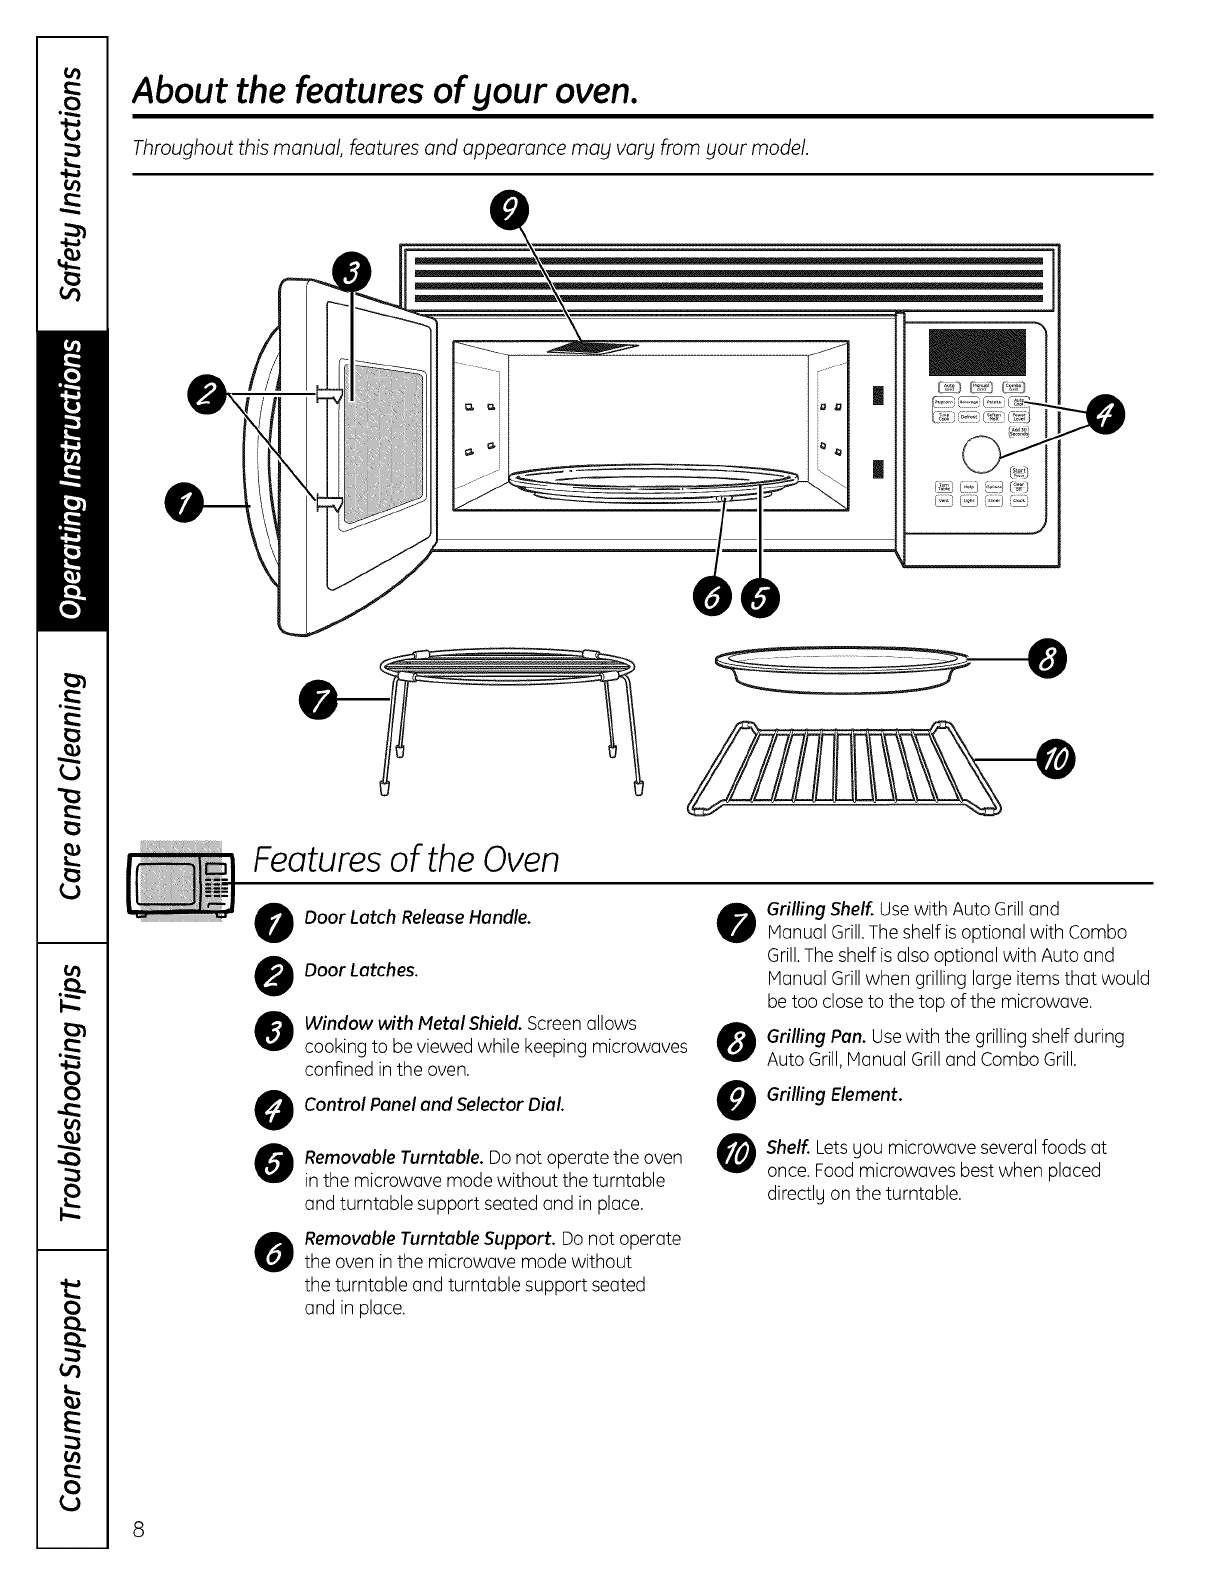
About the features of your oven.
Throughout this manual, features and appearance may vary from your model.
Featuresof the Oven
0
0
@
0
Door Latch Release Handle.
Door Latches.
Window with Metal Shield. Screen allows
cooking to be viewed while keeping microwaves
confined in the oven.
Control Panel and Selector Dial.
Removable Turntable. Do not operate the oven
in the microwave mode without the turntable
and turntable support seated and in place.
Removable Turntable Support. Do not operate
the oven in the microwave mode without
the turntable and turntable support seated
and in place.
0
0
0
0
Grilling Shelf. Usewith Auto Grilland
Manual Grill.The shelf is optional with Combo
Grill.The shelf is also optional with Auto and
Manual Grillwhen grilling large items that would
be too closeto the top of the microwave.
Grilling Pan. Usewith the grilling shelf during
Auto Grill,Manual Grilland Combo Grill.
Grilling Element.
Shelf. Letsgou microwave severalfoods at
once. Food microwaves bestwhen placed
directly on the turntable.
8
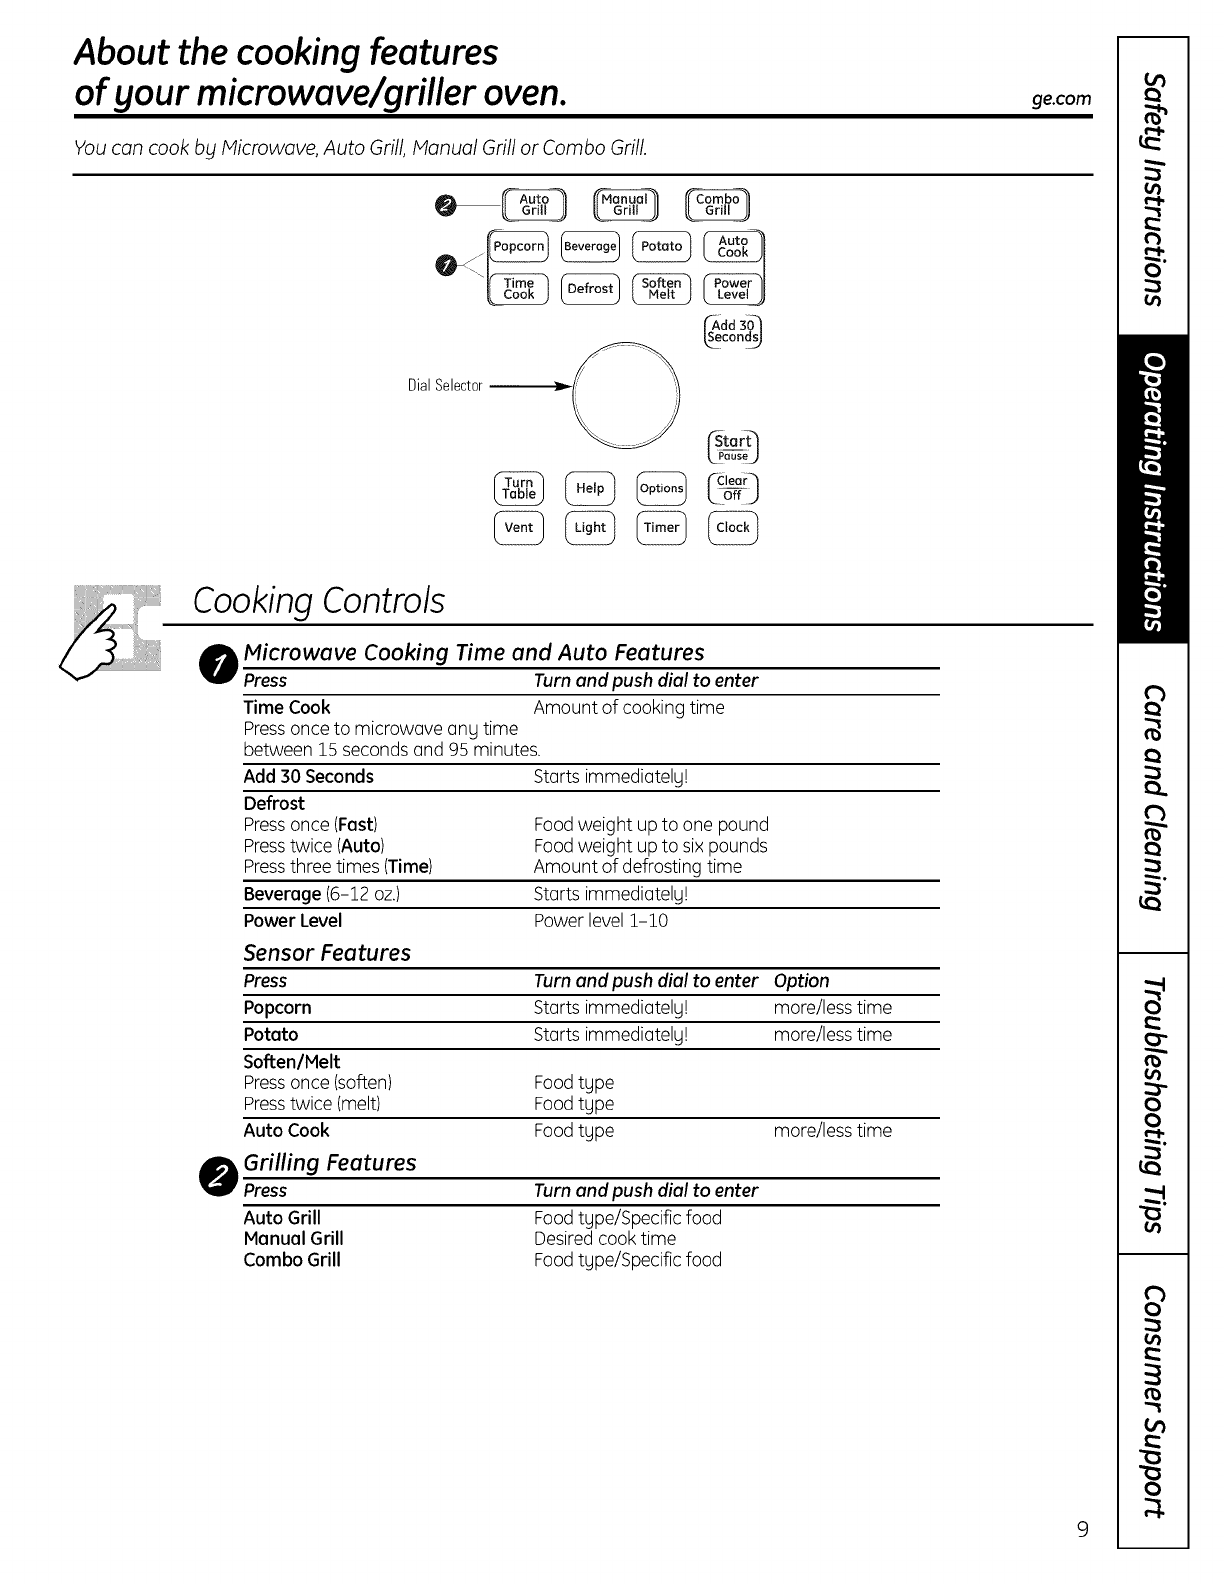
About the cookingfeatures
ofgour microwave/griller oven. ge.com
You can cook bg Hicrowave, Auto Grill, Hanual Grill or Combo Grill.
DialSelector
s_d_30]
cond_
L_aus_
Cooking Controls
0
0
Microwave Cooking Time and Auto Features
Press Turn and push dial to enter
Time Cook Amount of cooking time
Pressonce to microwave any time
between 15 seconds and 95 minutes.
Add 30 Seconds Starts immediatelg!
Defrost
Pressonce (Fast) Foodweight up to one pound
Presstwice (Auto) Foodweight up to six pounds
Pressthree times (Time) Amount of defrosting time
Beveroge (6-12 oz.) Starts immediatelg!
Power Level Power level 1-10
Sensor Features
Press Turn and push dial to enter Option
Popcorn Starts immediatelg! more/less time
Potato Starts immediatelg! more/less time
Soften/Melt
Pressonce (soften) Foodtgpe
Presstwice (melt) Foodtgpe
Auto Cook Foodtgpe more/less time
Grilling Features
Press
Auto Grill
Menuel Grill
Combo Grill
Turn and push dial to enter
Foodtgpe/Specific food
Desiredcook time
Foodtgpe/Specific food

Available cooking options.
1
Microwave Cooking
Your oven uses microwave energy to cook by oset time or weight, or automatically
by sensor.
Sensor microwave works by detecting the increasing humidity released during cooking.
The oven automatically adjusts the cooking time to various types and amounts of food.
Cooking Method
Microwave energy
is distributed evenly
throughout the
oven for thorough,
fast cooking
of food.
Heat Source
Microwave energy.
Heat Conduction
Heat produced
within food by
instant energy
penetration.
Benefits
Fast, high efficiency
cooking. Oven
and surroundings
do not get hot.
Easy cleon-up.
|
|
Alwaysusethe grilling shelf when
usingAuto Grill or Manual Grill unless
the itemyou arecookingis too large.
Auto Grill/Manual Grill
During grilling, oheating element is used to generate radiant heat to brown the exterior
of the food. Youroven offers the option of using automatic or manual grilling.Automatic grilling
allows you to select the correct food type from o pre-progrommed menu. Honuol grillingallows
you to specifythe amount of time you wish to grill.
Cooking Method Heat Source Heat Conduction Benefits
Hot air radiates Radiating Heat conducted Aids in browning
around food to heated air. from outside and enhances
produce o browned of food to inside, flavor.
exterior.
|
|
Forbestresults,usethe grilling shelf
when using ComboGrill unlessthe item
youarecookingis too large.
Combination Grill
Youroven also offers the option of using Combination Grill.Thisfeature allows for foster grilling
by combining grilling and microwave energy.
Cooking Method
Microwave energy
and radiating
heated air combine
to grill foods foster.
Heat Source
Microwave energy
and radiating
heated air.
Heat Conduction
Food heats from
instant microwave
energy penetration
and from heat
conducted from
outside.
Benefits
Shortened
grilling time from
microwave energy
plus browning
and flavor
enhancement.
10
About the time and auto microwave features, ge.com
Using the Dial
Youcon make selections on the oven by
turning the dial and pressing it to enter
the selection.
Pressingthe dial con also be used in place
of the Start/Pause button for quicker
programming of the oven.
TimeCook (Donot use the shelves when
microwave cooking.)
Time Cook /
Allows you to microwave for any time
between 15seconds and 95 minutes.
Power level 10(High) is outomoticollg set,
but gou may change it for more flexibility.
I_ Pressthe Time Cook button.
I_ Turn the dial to set the cook time and
pressthe dial to enter.
lU Change power level if Uou don't wont full
power.(PressPower Level.Turn the dial
to select. Pressthe dial to enter.)
I_ Pressthe dial or the Start/Pause button
to start cooking.
Youmog open the door during TimeCook
to check the food. Closethe door and press
the dial or Start/Pause to resume cooking.
NOTE: Youmag change the cook time at
ang time during cooking bg turning the dial.
You mag also change the power level bg
pressing the Power Level button.
Time Cook II
Letsyou change power levelsoutomoticollg
during cooking. Here'show to do it:
I_ Pressthe Time Cook button.
I_ Turn the dial to set the first cook time
and pressthe dial to enter.
[ Change the power levelif you don't wont
full power.(PressPower Level.Turn the
dial to select. Pressthe dialto enter.)
I_ Pressthe Time Cook button again.
[]Turn the dial to set the second cook time
and pressthe dialto enter.
Change the power levelif you don't
wont full power.(PressPower Level.Turn
the dial to select. Pressthe dial to enter.)
li Pressthe dial or the Start/Pause button
to start cooking.
At the end of TimeCook I, Time Cook II
counts down.
NOTE: Youmag change the cook time
at ang time during cooking bg turning
the dial. Youmag also change the power
level bg pressing the Power Level button.
Add 30 Seconds (Do not use the shelves
when microwave cooking.)
Thisis a quick wag to set and start cooking
in 30 second blocks each time the Add 30
Secondsbutton is pressed.Thecook time
mag be changed bg turning the dial at any
time during cooking.
The power levelwill automatically be set
at 10 and the oven will start immediately.
The power levelcon be changed as time is
counting down. Pressthe Power Level button,
turn the dial and pressto enter.
11
About the time and auto microwave features.
_dd30_
¢ond_
_o_
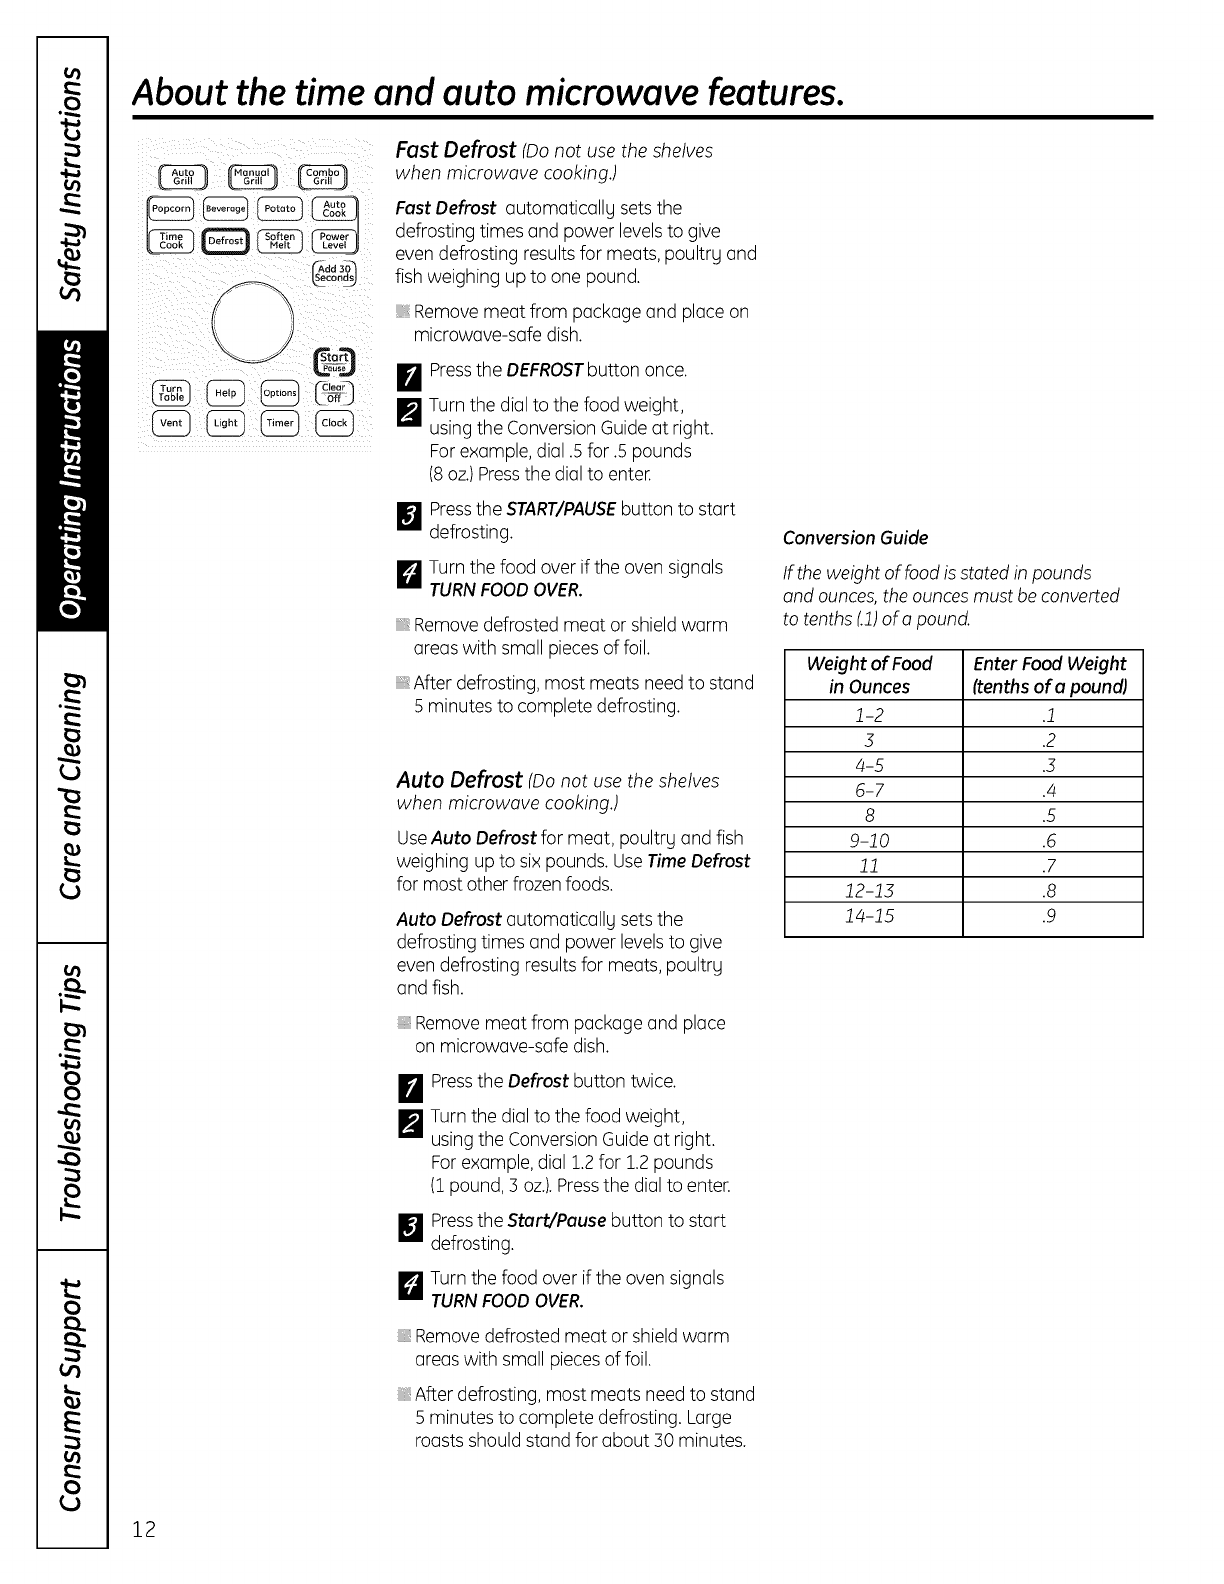
Fast Defrost (Donot use the shelves
when microwave cooking.)
Fast Defrost automaticallg sets the
defrosting times and power levelsto give
even defrosting results for meats, poultrg and
fish weighing up to one pound.
Removemeat from package and place on
microwave-safe dish.
BPressthe DEFROSTbutton once.
F_Turn the dial to the food weight,
using the Conversion Guideat right.
Forexample, dial .5 for .5 pounds
(8oz.)Pressthe dial to enter.
[]Press the START/PAUSEbutton to start
defrosting.
_J Turn the food over if the oven signals
TURNFOODOVER.
Removedefrosted meat or shield warm
areas with small piecesof foil.
After defrosting, most meats needto stand
5 minutes to complete defrosting.
Auto Defrost (Do not use the shelves
when microwave cooking.)
UseAuto Defrost for meat, poultry and fish
weighing up to six pounds. UseTime Defrost
for most other frozenfoods.
Auto Defrost automatically sets the
defrosting times and power levelsto give
even defrosting results for meats, poultrg
and fish.
Removemeat from package and place
on microwave-safe dish.
[
m
Pressthe Defrost button twice.
Turn the dial to the food weight,
using the Conversion Guideat right.
Forexample, dial 1.2 for 1.2pounds
(1pound, 3 oz.).Pressthe dial to enter.
Pressthe Start/Pause button to start
defrosting.
Turn the food over if the oven signals
TURNFOODOVER.
Removedefrosted meat or shield warm
areas with small piecesof foil.
After defrosting, most meats need to stand
5 minutes to complete defrosting. Large
roasts should stand for about 30 minutes.
Conversion Guide
If the weight of food is stated in pounds
and ounces, the ouncesmust be converted
to tenths (.1)of a pound.
Weight of Food Enter Food Weight
in Ounces (tenthsof a pound)
1-2 .1
5 .2
4-5 .3
6-7 .¢-
8 .5
9-10 .6
11 .7
12-15 .8
1¢-15 .9
12
ge.com
Time Defrost tOonot use the shelves
when microwave cooking.)
Use Time Defrost to defrost for a selected
length of time.
BPressthe Defrost button three times.
[]Turn the dial to select the time you want.
Pressthe dial to enter.
I_1 Pressthe Start/Pause button to start
defrosting.
I_ Turn the food over if the oven signals
TURNFOODOVER.
Youmay change the defrost time at any time
during defrosting by turning the dial.
Power level is automatically set at 3, but can
be changed. You can defrost small items
quickly by raising the power level after
entering the time. Power level 7cuts the total
defrosting time in about half;power level 10
cuts the total time to approximately 1/3.
However,food will need more frequent
attention than usual.
A dull thumping noise may be heard during
defrosting.This is normal when oven is not
operating at High power.
Defrosting Tips
Foodsfrozenin paper or plastic can be
defrosted inthe package.Closedpackages
should beslit, piercedor vented AFTERfood
has partially defrosted. Plasticstorage
containers should be partially uncovered.
Family-size,prepackaged frozen
dinners can be defrosted and microwaved.
If the food is in a foil container, transfer
it to a microwave-safe dish.
Foodsthat spoil easily should not be
allowed to sit out for more than one hour
after defrosting. Roomtemperature
promotes the growth of harmful bacteria.
For more even defrosting of larger foods,
such as roasts,use Auto Defrost. Besure
large meats are completely defrosted
before cooking.
When defrosted, food should be cool
but softened in all areas. If stillslightly icy,
return to the microwave very briefly, or let
it stand a few minutes.
Some models include a defrost rack, If you
have a defrost rack, place it on top of the
turntable and the food item on the rack for
best results.
Beverage (Do not use the shelves when
microwave cooking.)
The Beverage feature heats beveragesfrom
6 to 12ounces. Drinks heated with the Beverage feature mog
be verg hot. Removethe container with care.
PotcIto (Do not use the shelves when
microwave cooking.)
The Potato feature allows you to cook
I to 3 potatoes at a time at 8-10 oz.each.
13
About changing the power level.
The power level may be entered or
changed immediatelg after entering the time
for Time Cook,TimeDefrost or Add 30
Seconds.The power level mag also be
changed during time countdown.
ID First,follow directions for Time Cook,
.m Time Defrost or Add 30 Seconds.
F_ Pressthe Power Level button.
_J Turn the dial clockwise to increaseand
counterclockwise to decreasethe power
level.Pressthe dial to enter.
_J Pressthe Start/Pause button to start
cooking.
Variable power levelsadd flexibilitg to
microwave cooking,The power levelson
the microwave oven can be compared to
the surface units on a range. Eachpower level
gives gou microwave energg a certain
percent of the time. Power level 7 is
microwave energg 70% of the time. Power
level 3 is energg 30% of the time. Host
cooking will be done on High (power level10)
which givesgou 100% power.PowerlevellO
will cook faster but food mag need more
frequent stirring, rotating or turning over.
A lower setting will cook more evenlg and
need lessstirring or rotating of the food.
Some foods mag have better flavor,texture
or appearance if one of the lower settings is
used.Usea lower power level when cooking
foods that have a tendencg to boilover,
such as scallopedpotatoes.
Restperiods (when the microwave
energg cgcles off) give time for the food
to "equalize"or transfer heat to the inside
of the food. An example of this is shown with
power level3-the defrost cgcle. If microwave
energg did not cgcle off, the outside
of the food would cook before
the inside was defrosted.
Here aresome examplesof usesfor various
power levels:
High lO: Fish,bacon,vegetables, heating
liquids.
Mad-High 7: Gentle cooking of meat and
poultrg; baking casserolesand reheating.
Medium 5: Slow cooking and tenderizing
for stews and lesstender cuts of meat.
Low2 or 3: Defrosting;simmering; delicate
sauces.
Warm 1: Keepingfood warm; softening
butter.
Microwave terms.
Definition
Arcing Arcing isthe microwave term for sparks in the oven.Arcing is caused bg:
_nemesa shelf being installed incorrectlg and touching the microwave walls.
mesa or foil touching the side of the oven.
foi that is not molded to food (upturned edges act like antennas).
mesa sucn as twist-ties, poultrg pins,gold-rimmed dishes.
recgoea paper towels containing small metal pieces.
_neturntable ring support being installed incorrectlg.
Covering Covers no_a'_ moisture, allow for more even heating and reduce cooking time. Venting plastic wrap or
covering with wax paper allows excesssteam to escape.
Shielding _ a regular oven.you shield chicken breasts or baked foods to prevent over-browning. When microwaving,
gou use sma strips of foil to shield thin parts, such as the tips of wings and legs on poultrg, which would
COOKbefore larger parts.
Standing Time When you cook with regular ovens,foods such as roasts or cakes are allowed to stand to finish cooking
or to set. Standing time is especiallg important in microwave cooking. Note that a microwaved cake is not
olacea on a cooling rack,
Venting After covenng a dish with plastic wrap, gou vent the plastic wrap bg turning back one corner so excess
steam can escape.
14
About the sensor microwave features, ge.com
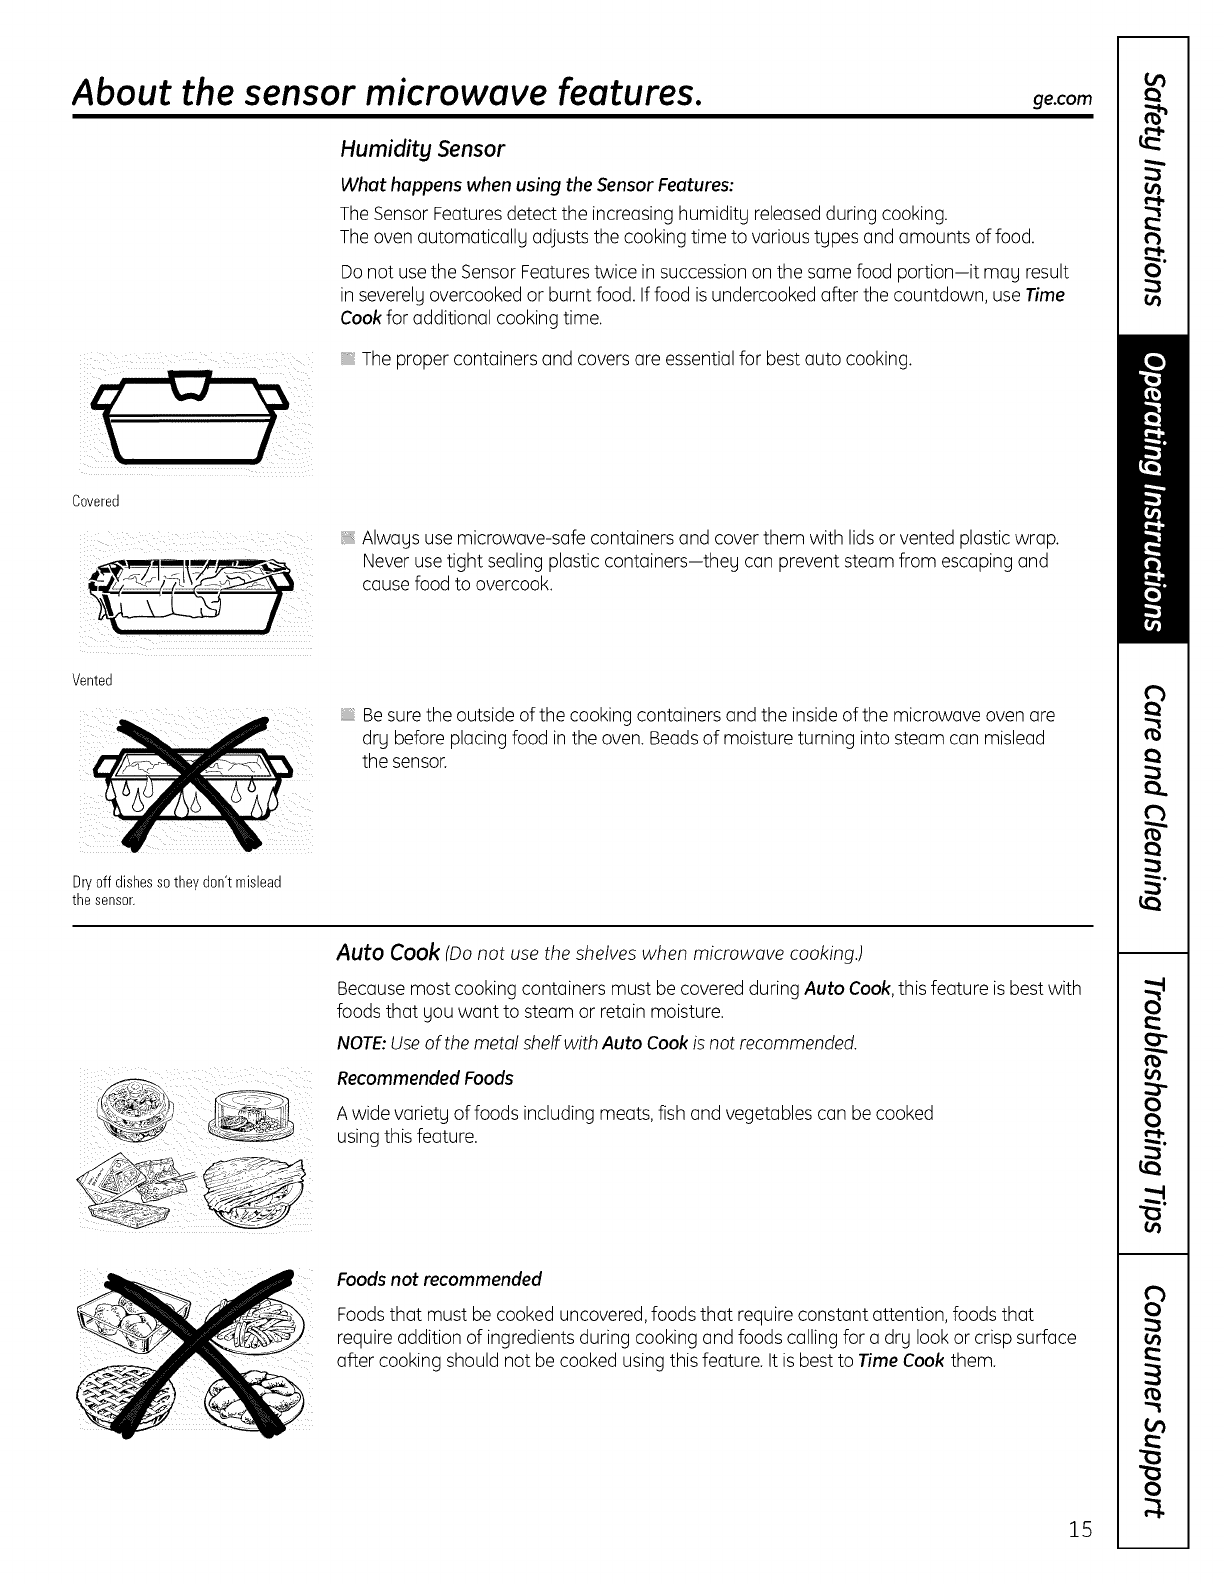
iii iii
Covered
Humidity Sensor
What happens when using the Sensor Features:
The Sensor Features detect the increasing humidity releasedduring cooking.
The oven automaticallg adjusts the cooking time to various tgpes and amounts of food.
Do not use the SensorFeaturestwice in successionon the same food portion-it may result
in severely overcooked or burnt food. Iffood is undercooked after the countdown, use Time
Cookfor additional cooking time.
The proper containers and covers are essential for best auto cooking.
Vented
Always use microwave-safe containers and cover them with lids or vented plastic wrap,
Never use tight sealing plastic containers-theg can prevent steam from escaping and
cause food to overcook.
Besure the outside of the cooking containers and the insideof the microwave oven are
drg before placing food in the oven. Beads of moisture turning into steam can mislead
the sensor.
Dry off dishes sothey don't mislead
the sensor.
I
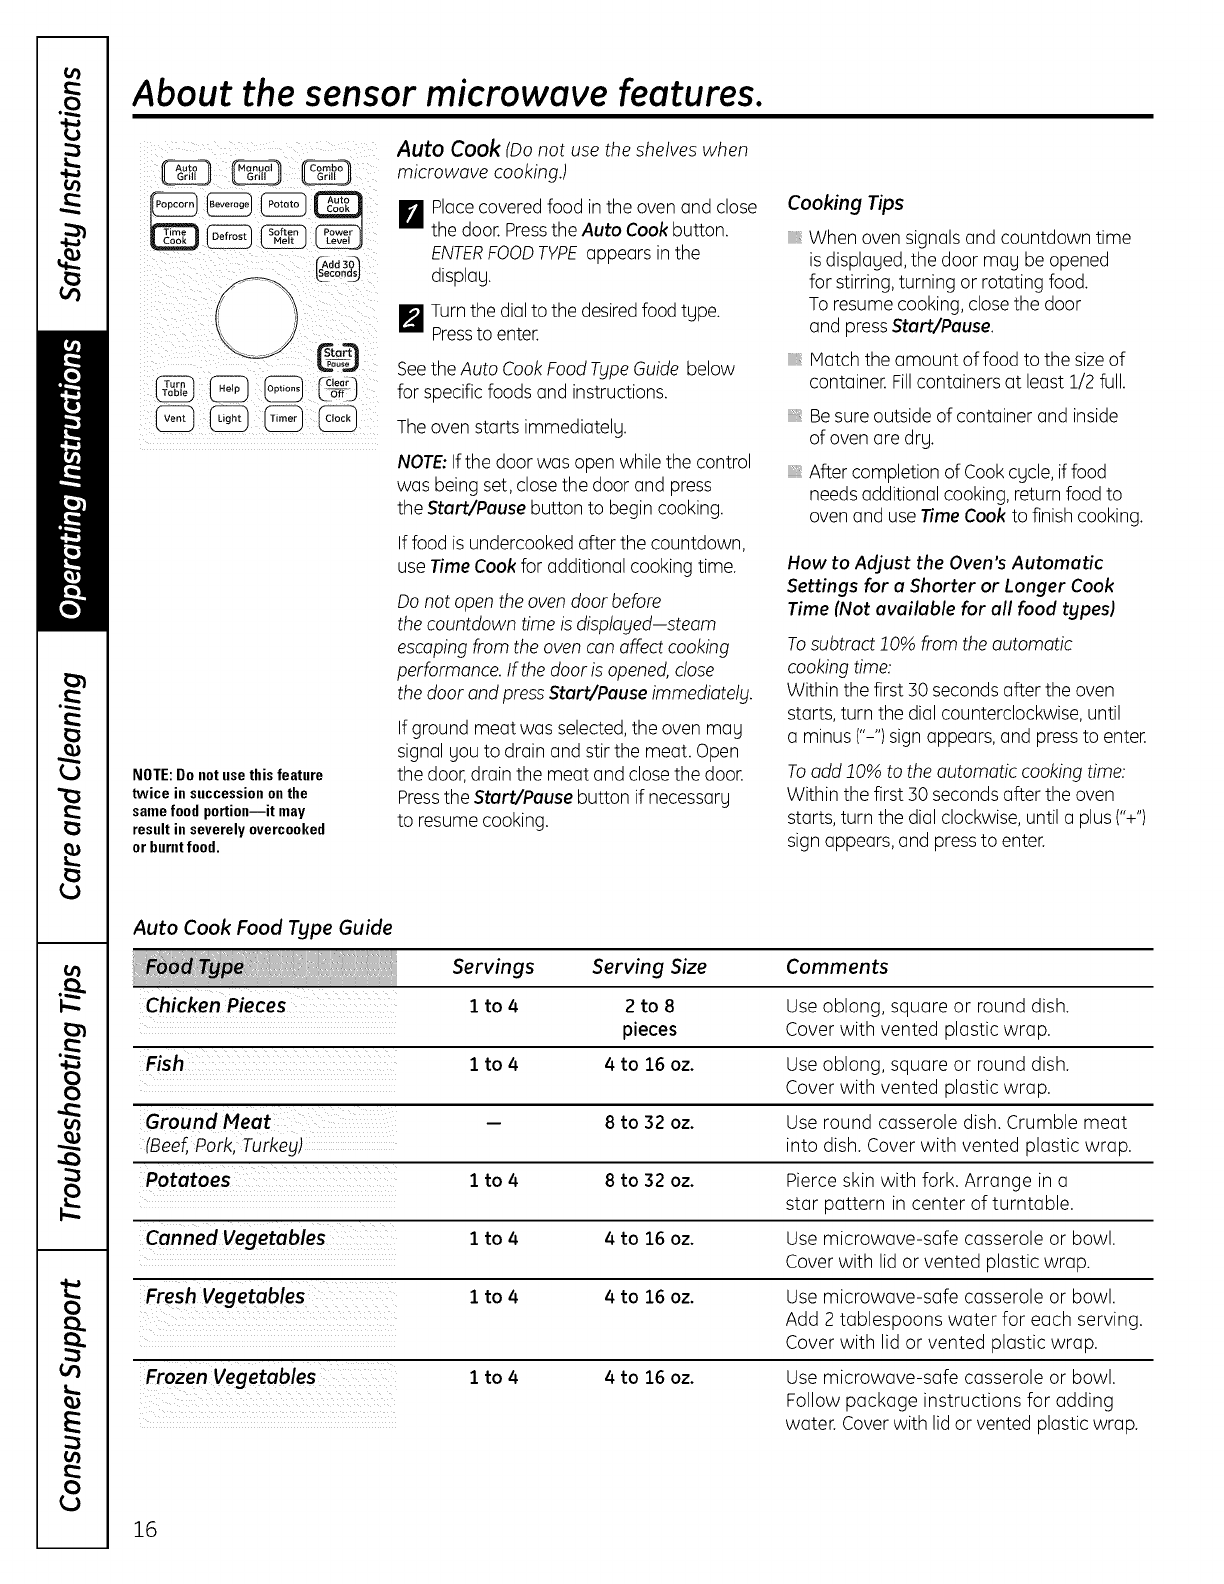
Auto Cook (Do not use the shelves when microwave cooking.)
Because most cooking containers must be covered during Auto Cook,this feature is best with
foods that you want to steam or retain moisture.
NOTE:Useof the metal shelf with Auto Cook is not recommended.
Recommended Foods
Awide variety of foods including meats,fish and vegetables can be cooked
using this feature.
Foods not recommended
Foodsthat must be cooked uncovered, foods that require constant attention, foods that
require addition of ingredients during cooking and foods calling for a drg look or crisp surface
after cooking should not be cooked using this feature. It is best to Time Cook them.
15
About the sensor microwave features.
iiiii ii! i
ii ii
NOTE: Do not use this feature
twice in succession on the
same food portion--it may
result in severely overcooked
or burnt food.
Auto Cook (Do not use the shelves when
microwave cooking.)
II1 Placecovered food inthe oven and close
,m the door. Pressthe Auto Cook button.
ENTERFOODTYPEappears in the
display.
I_ Turnthe dialto the desiredfood type.
Pressto enter.
Seethe Auto CookFood TypeGuide below
for specific foods and instructions.
The oven starts immediately.
NOTE:Ifthe door was open while the control
was being set, closethe door and press
the Start/Pause button to begin cooking.
Iffood is undercooked after the countdown,
use Time Cook for additional cooking time.
Do not open the oven door before
the countdown time is displayed-steam
escaping from the oven can affect cooking
performance. If the door is opened, dose
the door and pressStart/Pause immediately.
Ifground meat was selected,the oven may
signal you to drain and stir the meat. Open
the door, drain the meat and closethe door.
Pressthe Start/Pause button if necessary
to resume cooking.
Cooking Tips
When oven signals and countdown time
is displayed, the door may be opened
for stirring, turning or rotating food.
To resume cooking, closethe door
and pressStart/Pause.
Match the amount of food to the sizeof
container. Fillcontainers at least 1/2 full.
Besure outside of container and inside
of oven are dry.
After completion of Cook cycle,if food
needs additional cooking, return food to
oven and use TimeCook to finish cooking.
How to Adjust the Oven's Automatic
Settings for a Shorter or Longer Cook
Time (Not available for all food types)
To subtract frO%from the automatic
cooking time:
Within the first 30 seconds after the oven
starts, turn the dial counterclockwise, until
a minus ("-") sign appears,and pressto enter.
To add 10% to the automatic cooking time:
Within the first 30 seconds affer the oven
starts, turn the dial clockwise,until a plus ("+")
sign appears, and pressto enter.
Auto Cook Food Type Guide
Chicken Pieces
Fish 1to 4
Ground Meat -8 to 32 oz.
(Beef,Pork, Turkey)
Potatoes 1to 48 to 32 oz.
Canned Vegetables I to 4 4 to 16 oz.
Fresh Vegetables I to 4 4 to 16 oz.
Frozen Vegetables I to 4 4 to 16 oz.
Servings Serving Size
1 to 42 to 8
pieces
4to16 oz.
Comments
Use oblong, square or round dish.
Cover with vented plastic wrap.
Use oblong, square or round dish.
Cover with vented plastic wrap.
Use round casserole dish. Crumble meat
into dish. Cover with vented plastic wrap.
Pierce skin with fork. Arrange in a
star pattern in center of turntable.
Use microwave-safe casserole or bowl.
Cover with lid or vented plastic wrap.
Use microwave-safe casserole or bowl.
Add 2 tablespoons water for each serving.
Cover with lid or vented plastic wrap.
Use microwave-safe casserole or bowl.
Follow package instructions for adding
water. Cover with lid or vented plastic wrap.
16
ge.com
condsJ
Csto@
Clear
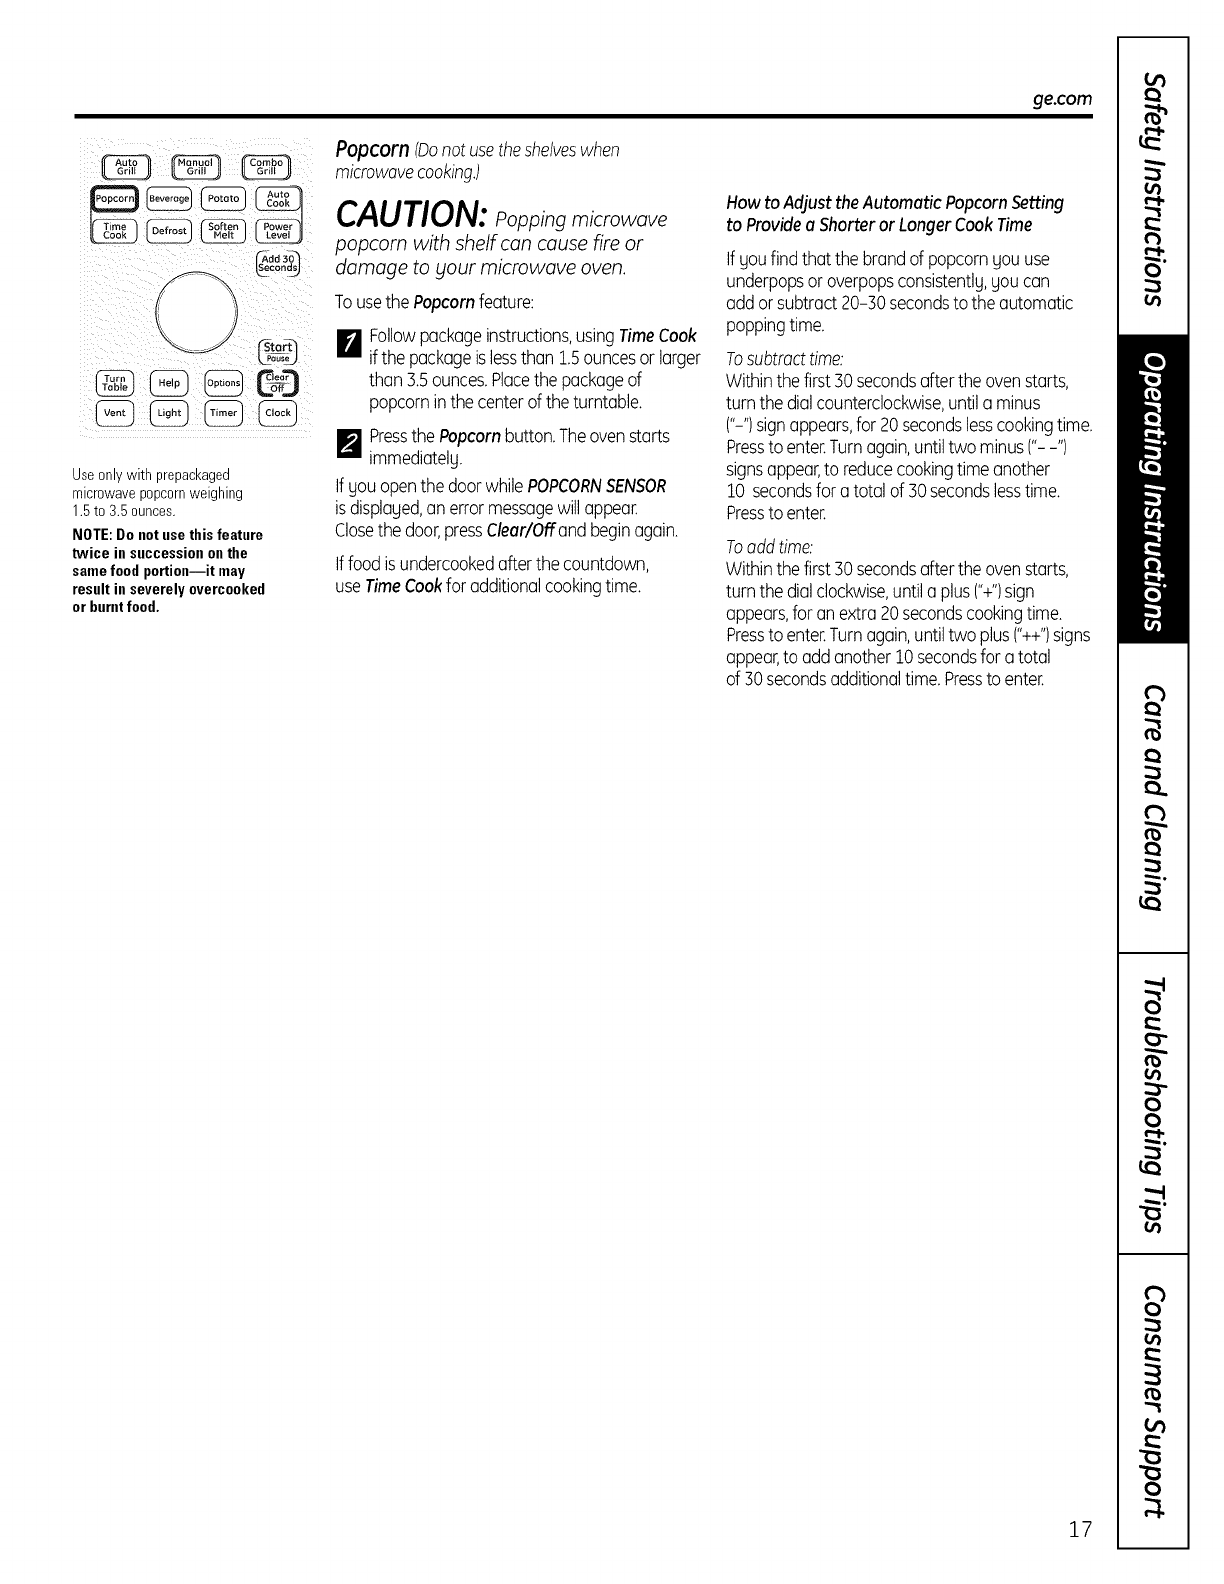
Useonly with prepackaged
microwavepopcornweighing
1.5to 3.5 ounces.
NOTE:De net use this feature
twice in successionon the
samefood portion--it may
result ill severely overcooked
or burntfood.
Popcorn (Donotusetheshelveswhen
microwavecooking.)
CAUTION: oppingmicrowave
popcorn with shelf can cause fire or
damage to your microwave oven.
To usethe Popcorn feature:
BFollowpackageinstructions,usingTimeCook
if the packageis lessthan 1.5ouncesor larger
than 3.5ounces.Placethe packageof
popcorninthe centerof the turntable.
BPressthe Popcornbutton.Theovenstarts
immediately.
Ifyou openthedoorwhilePOPCORNSENSOR
isdisplayed,anerrormessagewill appear.
Closethe door,pressClear/Offand beginagain.
Iffood isundercookedafterthe countdown,
useTimeCookfor additionalcookingtime.
HowtoAdjusttheAutomatic PopcornSetting
toProvidea Shorteror LongerCookTime
Ifyoufind that the brandof popcornyouuse
underpopsor overpopsconsistently,you can
addor subtract20-30secondsto the automatic
poppingtime.
Tosubtracttime:
Withinthe first 30secondsafterthe ovenstarts,
turn the dialcounterclockwise,untila minus
('-")signappears,for 20secondslesscookingtime.
Pressto enter.Turnagain,untiltwo minus('- -")
signsappear,to reducecookingtimeanother
10 secondsfor a totalof SOsecondslesstime.
Pressto enter.
Toaddtime:
Withinthe first 30secondsafterthe ovenstarts,
turn the dialclockwise,untila plus('+")sign
appears,for anextra20secondscookingtime.
Pressto enter.Turnagain,untiltwo plus('++")signs
appear,to addanother10secondsfor atotal
of 30secondsadditionaltime.Pressto enter.
17
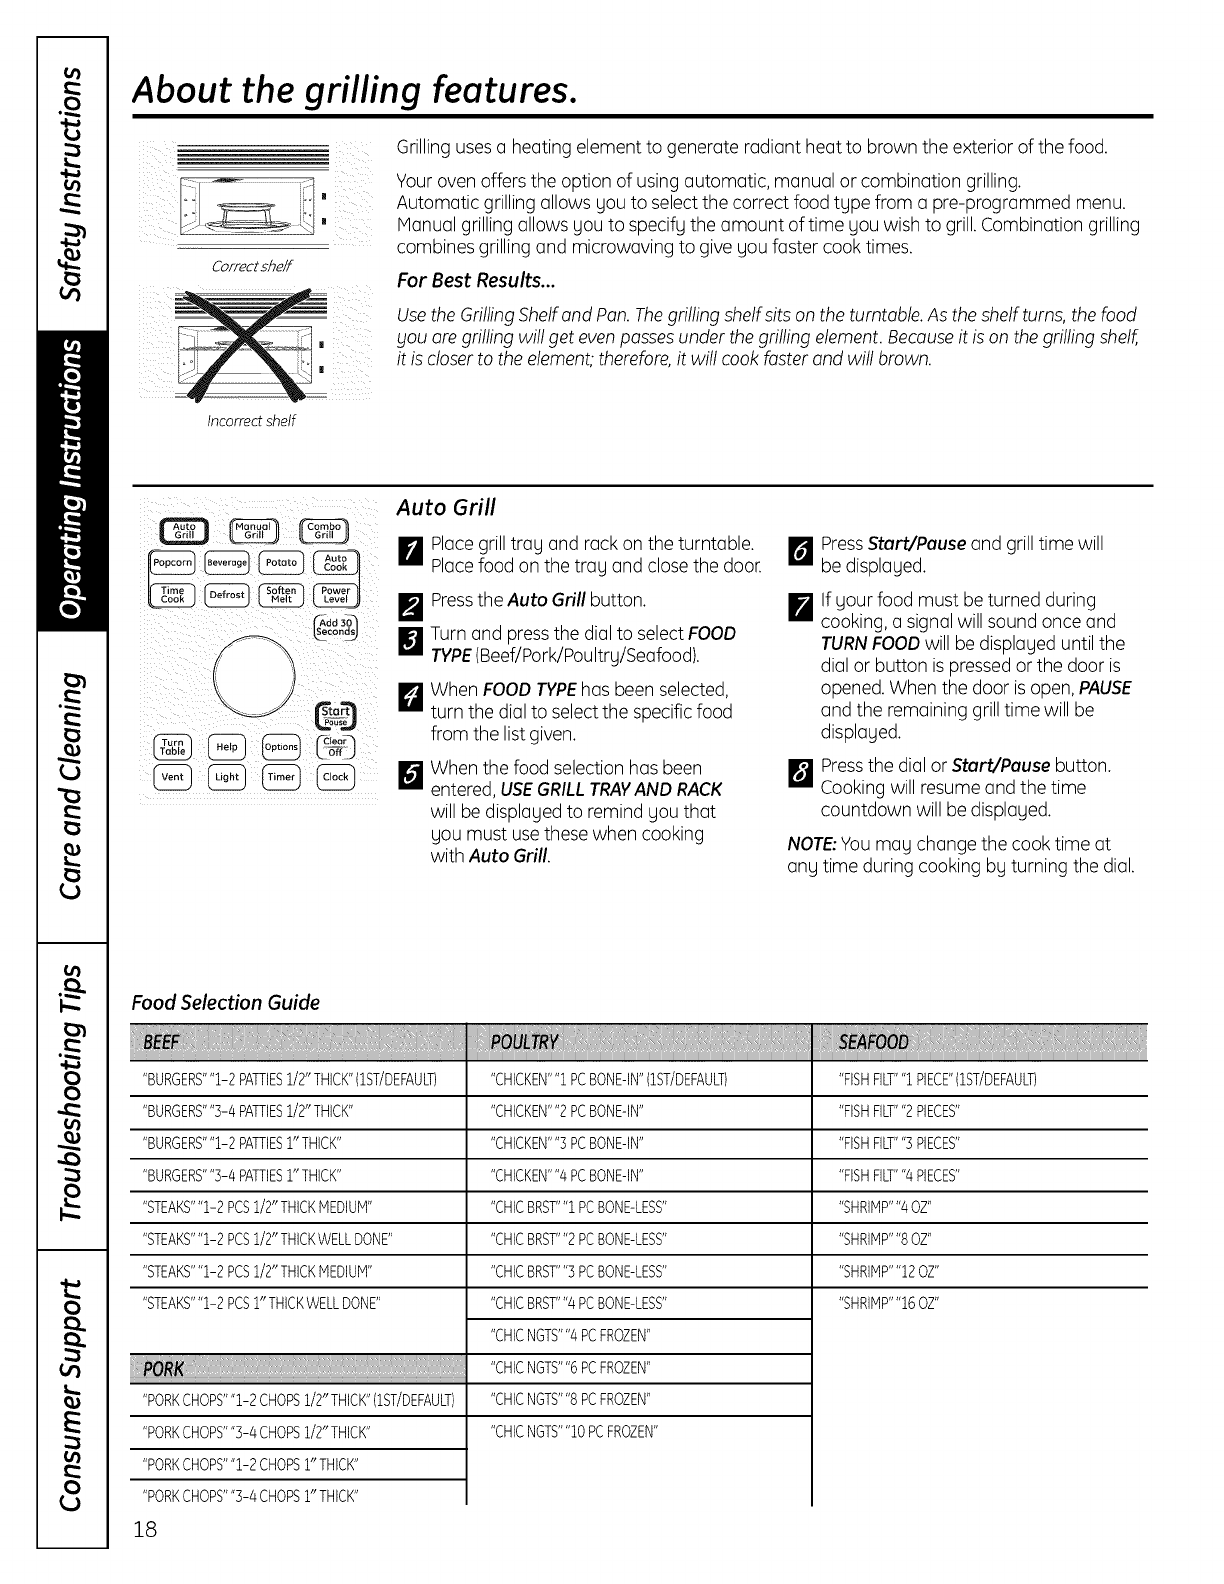
About the grilling features.
L
i i
Correctshelf
|
Grilling usesa heating element to generate radiant heat to brown the exterior of the food.
Youroven offers the option of using automatic, manual or combination grilling.
Automatic grilling allows you to select the correct food type from a pre-programmed menu.
Manual grilling allows you to specify the amount of time you wish to grill. Combination grilling
combines grilling and microwaving to give you faster cook times.
For Best Results...
Usethe GrillingShelfand Pan.Thegrilling shelf sits on the turntable. As the shelfturns, the food
you oregrilling will get evenpasses under the grilling element. Becauseit is on the grilling shelf,
it is closerto the element; therefore,it will cook faster and will brown.
Incorrect shelf
(
Auto Grill
F_ Placegrill tray and rack on the turntable.
Placefood on the tray and close the door.
_'_ Pressthe Auto Grill button. _'_
[]Turn and pressthe dial to select FOOD
TYPE(Beef/Pork/Poultry/Seafood).
_J When FOODTYPEhas been selected,
turn the dial to selectthe specific food
from the listgiven.
I_ When the food selection has been
entered, USEGRILLTRAYAND RACK
will be displayed to remind you that
you must usethese when cooking
with Auto Grill.
r_ PressStart/Pause and grilltime will
be displayed.
If your food must be turned during
cooking, a signal will sound once and
TURNFOODwill be displayed until the
dial or button is pressedor the door is
opened. When the door is open, PAUSE
and the remaining grilltime will be
displayed,
Pressthe dial or Start/Pause button.
Cookingwill resume and the time
countdown will be displayed.
NOTE:Youmay change the cook time at
any time during cooking by turning the dial.
Food Selection Guide
"BURGERS""1-2 PATTIES1/2"THICK"(1ST/DEFAULT) "FISHFILT""1 PIECE"(1ST/DEFAULT)
"BURGERS""3-4 PATTIESi/2" THICK.... FISHFILT""2 PIECES"
"BURGERS""i-2 PATTIESi" THICK.... FISHFILT""3 PIECES"
"BURGERS""3-4 PATTIESi" THICK.... FISHFILT""4 PIECES"
"STEAKS""1-2 PCSi/2" THICKMEDIUM.... SHRIMP""40Z"
"STEAKS""1-2 PCSi/2" THICKWELLDONE.... SHRIMP""80Z"
"STEAKS""1-2 PCSi/2" THICKMEDIUM.... SHRIMP""12 OZ"
"STEAKS""1-2 PCSi" THICKWELLDONE.... SHRIMP""16 OZ"
ii!iiUiiiiii!!!!!!!!!!!!!!!!!!!!!!!!!!!!!!!!!!!!!!!!!!!!!!!!!!!!!!!!!!!!!!!!!!!!!!!!!!!!!!!!!!!!!!!!!!!!!!!!!!!!!!!!!!!!!!!!!!!....
"PORKCHOPS""1-2 CHOPS1/2"THICK"(1ST/DEFAULT)
"PORKCHOPS""3-4 CHOPS1/2"THICK"
"PORKCHOPS""1-2 CHOPS1"THICK"
"PORKCHOPS""3-4 CHOPS1"THICK"
18
"CHICKEN""1 PCBONE-IN"(1ST/DEFAULT)
"CHICKEN""2 PCBONE-IN"
"CHICKEN""3 PCBONE-IN"
"CHICKEN""4 PCBONE-IN"
"CHICBRST""1 PCBONE-LESS"
"CHICBRST""2 PCBONE-LESS"
"CHICBRST""3 PCBONE-LESS"
"CHICBRST""4 PCBONE-LESS"
"CHICNGTS""4 PCFROZEN"
"CHICNGTS""6 PCFROZEN"
"CHICNGTS""8 PCFROZEN"
"CHICNGTS""10 PCFROZEN"
NOTE:Youmaychangethe cooktimeat any
timeduringcookingbyturningthe dial.
ge.com
Hunuul Grill
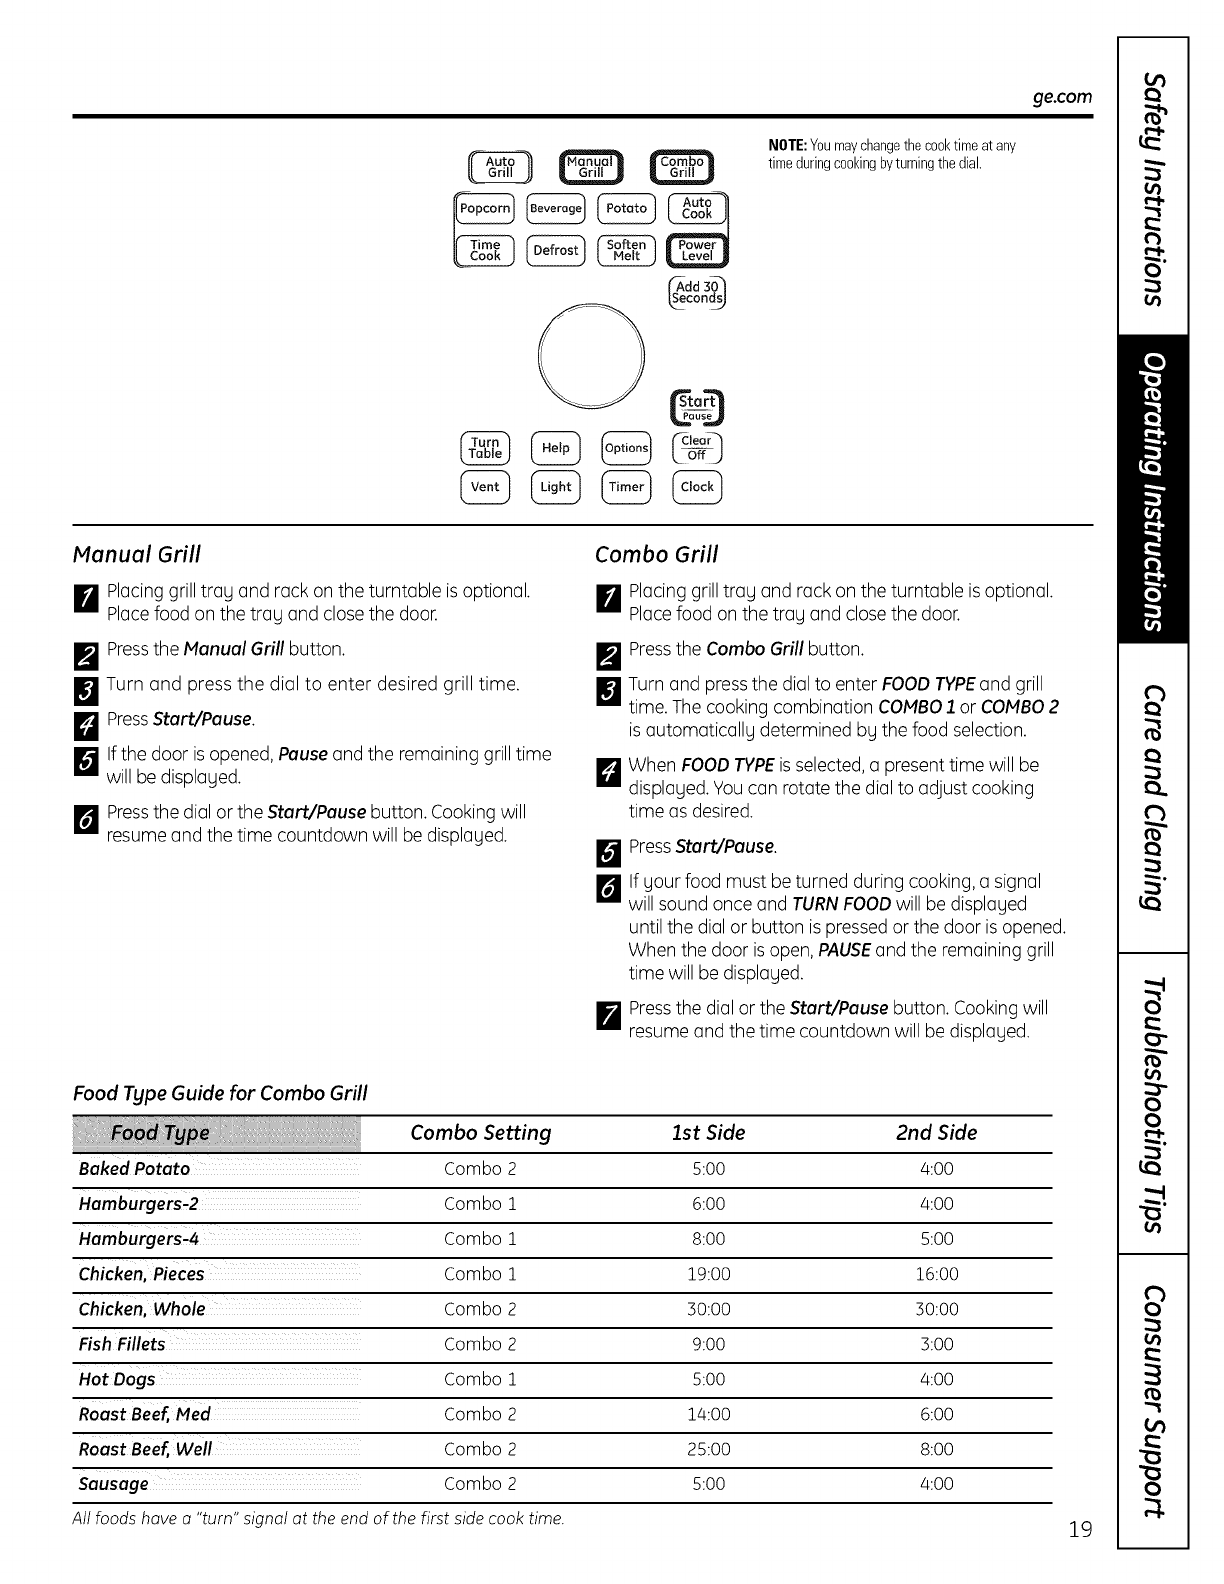
I_ Placinggrill tray and rack on the turntable is optional.
Placefood on the tray and close the door.
I_ Pressthe Manual Grill button.
I_1 Turn and press the dial to enter desired grill time.
_ PressStarfYPause.
!_ Ifthe door is opened, Pauseand the remaining grill time
will be displayed.
1_ Pressthe dial or the Start/Pause button. Cooking will
resume and the time countdown will be displayed.
Combo Grill
I_ Placing grill tray and rack on the turntable is optional.
Placefood on the tray and close the door.
I_ Pressthe Combo Grill button.
El Turn and pressthe dial to enter FOODTYPEand grill
time. The cooking combination COMBO1 or COMBO2
is automatically determined by the food selection.
I_ When FOODTYPEis selected,a present time will be
displayed. Youcan rotate the dial to adjust cooking
time as desired.
_rj PressStar,Pause.
[] Ifyour food must be turned during cooking, a signal
willsound once and TURN FOODwillbe displayed
until the dial or button is pressed or the door is opened.
When the door is open, PAUSEand the remaining grill
time will be displayed.
I_ Pressthe dial or the Start/Pause button. Cooking will
resume and the time countdown will be displayed.
Food Type Guide for Combo Grill
BakedPotato
Hamburgers-2
Hamburgers-4
Chicken, Pieces
Chicken, Whole
Fish Fillets Combo 2
Hot Dogs Combo 1
RoastBeef,tqed Combo 2
RoastBeef,Well Combo 2
Sausage Combo 2
Allfoods hove o "turn"signal at the end of the first side cook time.
Combo Setting 1st Side 2nd Side
Combo 2 5:00 4:00
Combo 1 6:00 4:00
Combo 1 8:00 5:00
Combo 1 19:00 16:00
Combo 2 30:00 30:00
9:00 3:00
5:00 4:00
14:00 6:00
25:00 8:00
5:00 4:00
19
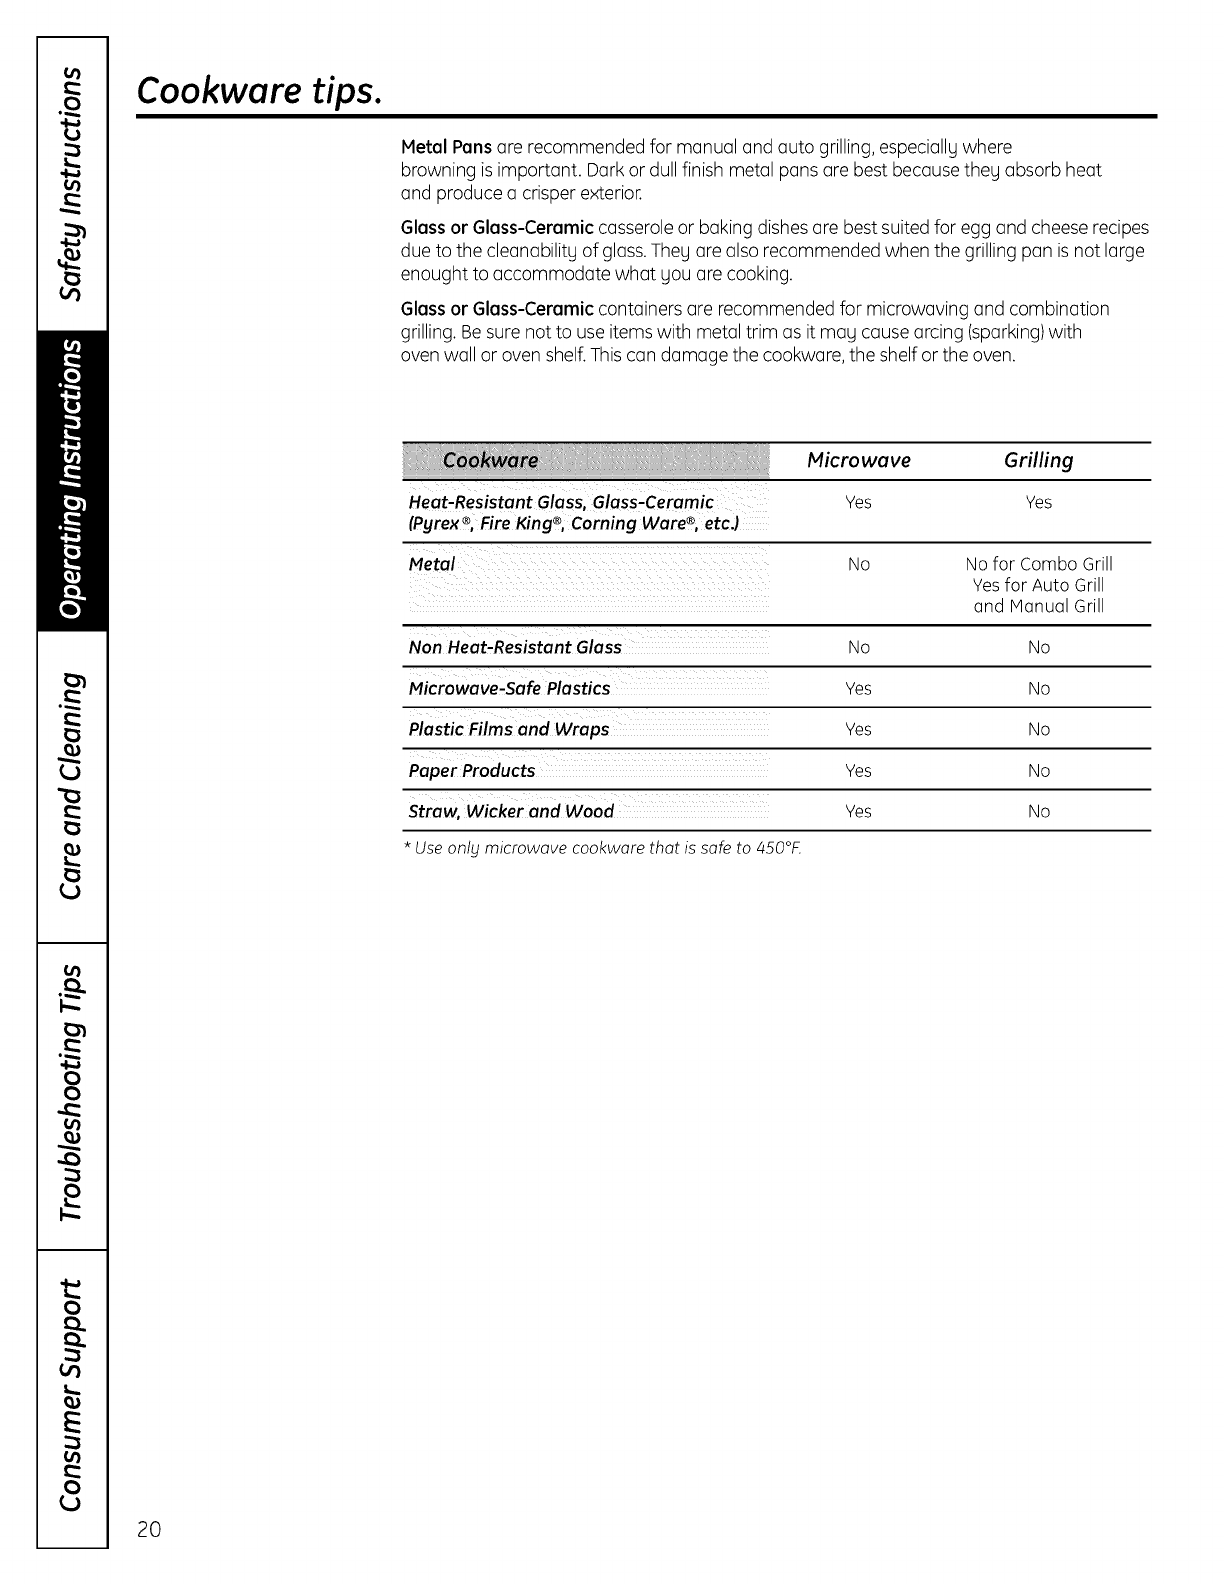
Cookwore tips.
Metal Pens are recommended for manual and auto grilling, especially where
browning is important. Dark or dull finish metal pans are best becausethey absorb heat
and produce a crisper exterior.
Glass or Glass-Ceramic casseroleor baking dishes are best suited for egg and cheese recipes
due to the cleanabilitg of glass.Theg are also recommended when the grilling pan is not large
enought to accommodate what gou are cooking.
Glass or Glass-Ceramic containers are recommended for microwaving and combination
grilling. Be sure not to use items with metal trim as it mag cause arcing (sparking)with
oven wall or oven shelf.This can damage the cookware, the shelf or the oven.
Heat-Resistant Glass, Glass-Ceramic
(Pgrex®, Fire King®,Coming Ware ®,etc.)
Micro wave Grilling
Yes Yes
Metai ..... No No for Combo Grill
Yes for Auto Grill
and Manual Grill
Non Heat-Resistant Glass No No
Microwave-Safe Plastics Yes No
Plastic Films and Wraps Yes No
Paper Products Yes No
Straw, Wicker and Wood Yes No
*Use only microwave cool<ware that is safe to z_50°E
20
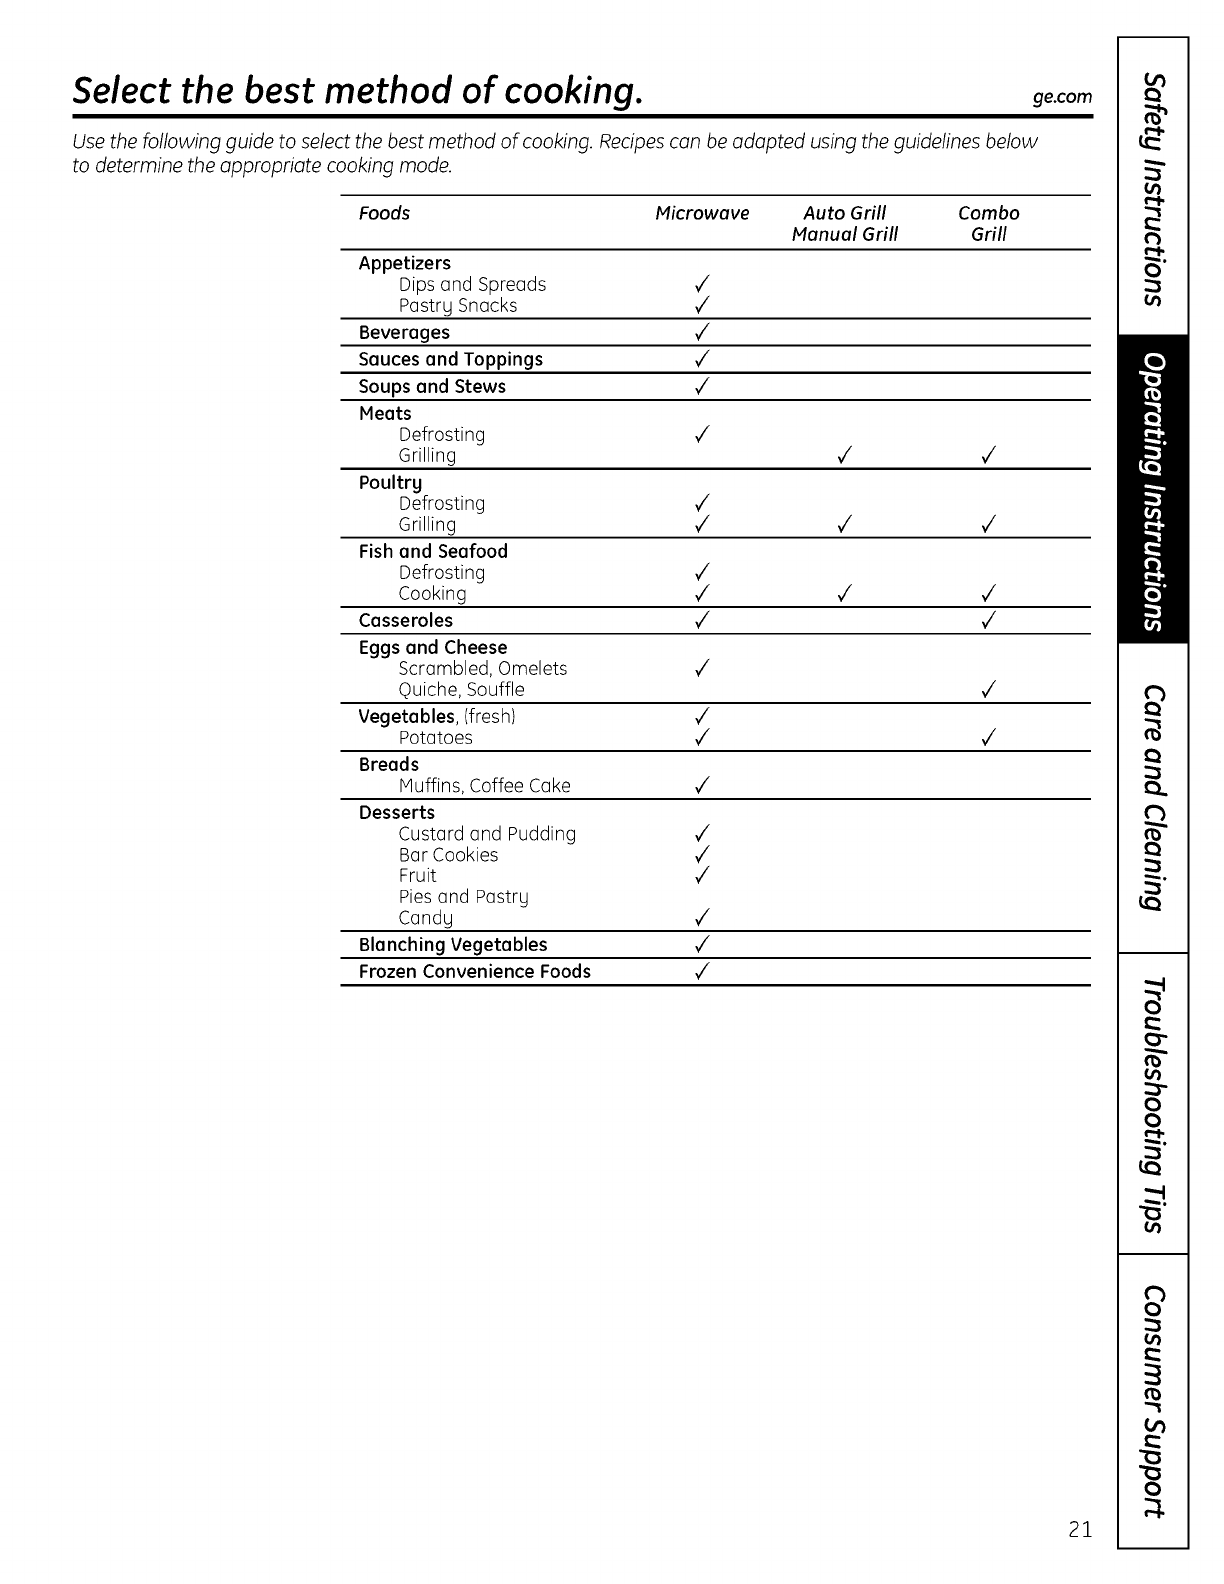
Select the best method of cooking, gecom
Use the following guide to select the best method of cooking. Recipes con be odopted using the guidelines below
to determine the appropriate cooking mode.
Foods Microwave Auto Grill Combo
Manual Grill Grill
Appetizers
Dips and Spreads d'
Pastry Snacks d'
Beverages ¢'
Sauces and Toppings ¢'
Soups and Stews 7
Meats
Defrosting ,/
Grilling ,/ ,/
Poultrg
Defrosting ,/
Grilling V_V_V_
Fish and Seafood
Defrosting ,/
Cooking V_V_V_
Casseroles ¢' ¢'
Eggs and Cheese
Scrambled, Omelets d'
Quiche, Souffle V_
Vegetables, (fresh) ¢'
Potatoes V_V_
Breads
Muffins, Coffee Cake V'
Desserts
Custard and Pudding ¢'
Bar Cookies ,/
Fruit V_
Pies and Pastry
Candy ¢'
Blanching Vegetables ¢'
Frozen Convenience Foods ¢'
21
About the other features.
Help
The Help button disploys feoture informotion
ond helpful hints. PressHelp,then turn
the diol to select o feoture ond press
the diol to enter.
Cooking Complete Reminder
The CookingComplete Reminderis o short
beep i minute offer the end of the finol beep in the 4 beep end-of-cooking sequence.
Thisbeep sounds ot the current beep volume.
Resume
After the "ottention" beeps hove completed,
PRESSFORMORETIMEwill be disployed
for 5 minutes. If your food needs to cook o bit
longer,you con restort the oven by pressing
Start/Pause or the diol.
Ifthe diol or Start/Pause is pressed,the
RESUMECOOKINGfeoture is octivoted ond
the oven will immediotely restort ot 10%
of the elopsed time.
Ifthe door is opened or the Clear button
is pressedduring the first 5 minutes,
the RESUMEfeoture will remoin octive for
onother 60 seconds. Ifthe door is closed ond
the Stert/Pouse button is pressedwithin thot
60 seconds,the oven will immediotely restort
ot 10% of the elopsed time.
Clock
Pressto enter the time of doy or to check
the time of doy while cooking.
r_ Pressthe Clock button.
F_Turn the diol to set hours. Pressthe diol
to enter.
El Turn the diol to set minutes. Pressthe diol
to enter.
I_ Turn the diol to select AM or PH.
Pressthe diol to enter.
22
Start/Pause
In oddition to storting mony functions,
Start/Pause ollows you to stop cooking
without opening the door or cleoring
the disploy.
Clear/Off
Pressthe Clear/Offbutton to stop
ond concel cooking ot ony time.
Control Lock-Out
Youmoy lock the control ponel to prevent
the oven from being occidentolly storted
or used by children.
To lock or unlock the controls, pressond
hold the Clear/Offbutton for obout three
seconds.When the control ponel is locked,
CONTROLLOCKEDwill be disployed briefly
onytime o button or diol is pressed.
Aedd 30_
conds_
ge.com
Auto Nite Light
TheAuto Nite Light con be setto come
on and go off at desired times.
I_ Pressthe Options button and turn
the dial to select AUTONITELIGHT.
Pressthe dial to enter.
F_Turn the dial to select SETTIMES.
Pressthe dial to enter.
El Enterthe time of dog for the light
to come on by turning the dial to select
the hour, minutes and AM or PM.Press
the dial to enter offer each selection.
I_ Enter the time of dog for the light
to go off by turning the dial to select
the hour,minutes and AM or PM.Press
the dial to enter offer each selection.
NOTE:TheNITEindicator will be lit whenever
the nite light isset to operate.
To review the nite light settings, turn
the dial to select REVIEWSETTINGSoffer
selecting the Auto Nite Light option.
Pressthe dial to enter.
To clear the nite light settings, turn the dial
to select CLEARSETTINGSoffer selecting
the Auto Nite Light option. Pressthe dial
to enter.
Beeper Volume
The beeper sound level con be adjusted.
I_ Pressthe Options button and turn
the dial to select BEEPERVOLUME.
Pressthe dial to enter.
F_Turn the dial to select mute to loud.
Pressthe dial to enter.The default
is NORMAL.
NOTE:TheMUTEindicator will be lit whenever
the beepervolume is set to mute.
Display ONIOFF
Useto turn your clock displog on or off.
[]Press the Options button ond turn
the diol to select DISPLAYPressthe diol
to enter.
F_Turn the diol to select ON or OFF.
Pressthe diol to enter.
Display Speed
The scrollspeed of the disploy con
be chonged.
[]Press the Options button ond turn
the diol to select DISPLAVSPEED.
Pressthe diol to enter.
F_Turn the diol to select slowest to fostest.
Pressthe diol to enter.The defoult
is NORMAL.
Measures
Heosurements con be set to disploy
in Defoult (English)or metric.
[]Press the Options button ond turn
the diol to select MEASURES.
Pressthe diol to enter.
F_Turn the diol to select DEFAULT
or METRICand pressto enter.
More Time Message
After cooking is complete, o messoge
con be disployed giving you the option
to cook the food longer ot the some settings.
Seethe Resumesection.
Press the Options button and turn
the dial to select MORE TIME MESSAGE.
Press the dial to enter.
F_Turn the dial to select MESSAGEON
or OFFand pressto enter.
23
About the other features.
Light
PressLight once for bright light, twice
for the night light or othird time to turn
the light off.
Timer
The Timer operates as a minute timer and
can be used at ang time, even when the oven
is operating.
I_ Pressthe Timer button.
I_ Turn the dial to select the minutes.
Pressthe dial to enter.
lg Turn the dial to select the seconds.
Pressthe dial to enter
D Pressthe dial or Timerto start.
To concel, press the Timer button.
When time is up, the oven will signal.
To turn offthe timer signal, pressTimer.
NOTE:The TIMERindicotor will belit while
the timer is operoting.
Turn Table On/Off
For best cooking results,leave the turntable
on. Itcan be turned offfor large dishes.
I_ Pressthe Turn Table button.
I_ Turn the dial to select ON or OFF.
Pressthe dial to enter.
Sometimes the turntable can become too hot
to touch.
Becareful touching the turntable during
and after cooking.
Vent
The vent removes steom ond other vopors
from surfoce cooking.
PressVent once for high fon speed,twice
for medium fon speed,three times for low
fon speed or four times to turn the fon off.
Automatic Fan
An outomotic fon feoture protects
the microwove from too much heot rising
from the cooktop below it. It outomoticollg
turns on if it sensestoo much heot.
Ifgou hove turned the fon on gou mog
find thot gou connot turn it off. The fon will
outomoticollg turn off when the internol
ports ore cool. It mog stog on for 30 minutes
or more offer the cooktop ond microwove
controls ore turned off.
24

Care and cleaning of the oven. ge.com
Helpful Hints
An occasional thorough wiping with a solution of baking soda and water keeps the inside
fresh.
Be sure the power is off before cleaning ang part of this oven.
How to Clean the Inside
Walls, Floor, Inside Window, Metal and Plastic Parts on the Door
Some spatters can be removed with a paper towel; others mag require a damp cloth. Remove
greasg spatters with a sudsg cloth, then rinse with a damp cloth. Do not use abrasive cleaners
or sharp utensils on oven walls.
Never use a commercial oven cleaner on anblpart Of blour microwave.
Removable Turntable and Turntable Support
To prevent breakage,do not place the turntable into water just after cooking. Wash it
carefullg in warm, sudsg water or in the dishwasher.The turntable and support can be broken
if dropped. Remember,do not operate the oven in the microwave mode without the turntable
and support seated and in place.
Shelves
Clean with mild soap and water or in the dishwasher.
Do not cleanin a self-cleaning oven.
Grilling Pan
Clean with mild soap and water or in the dishwasher.
Do not cleanin a self-cleaning oven.
25
Care and cleaning of the oven.
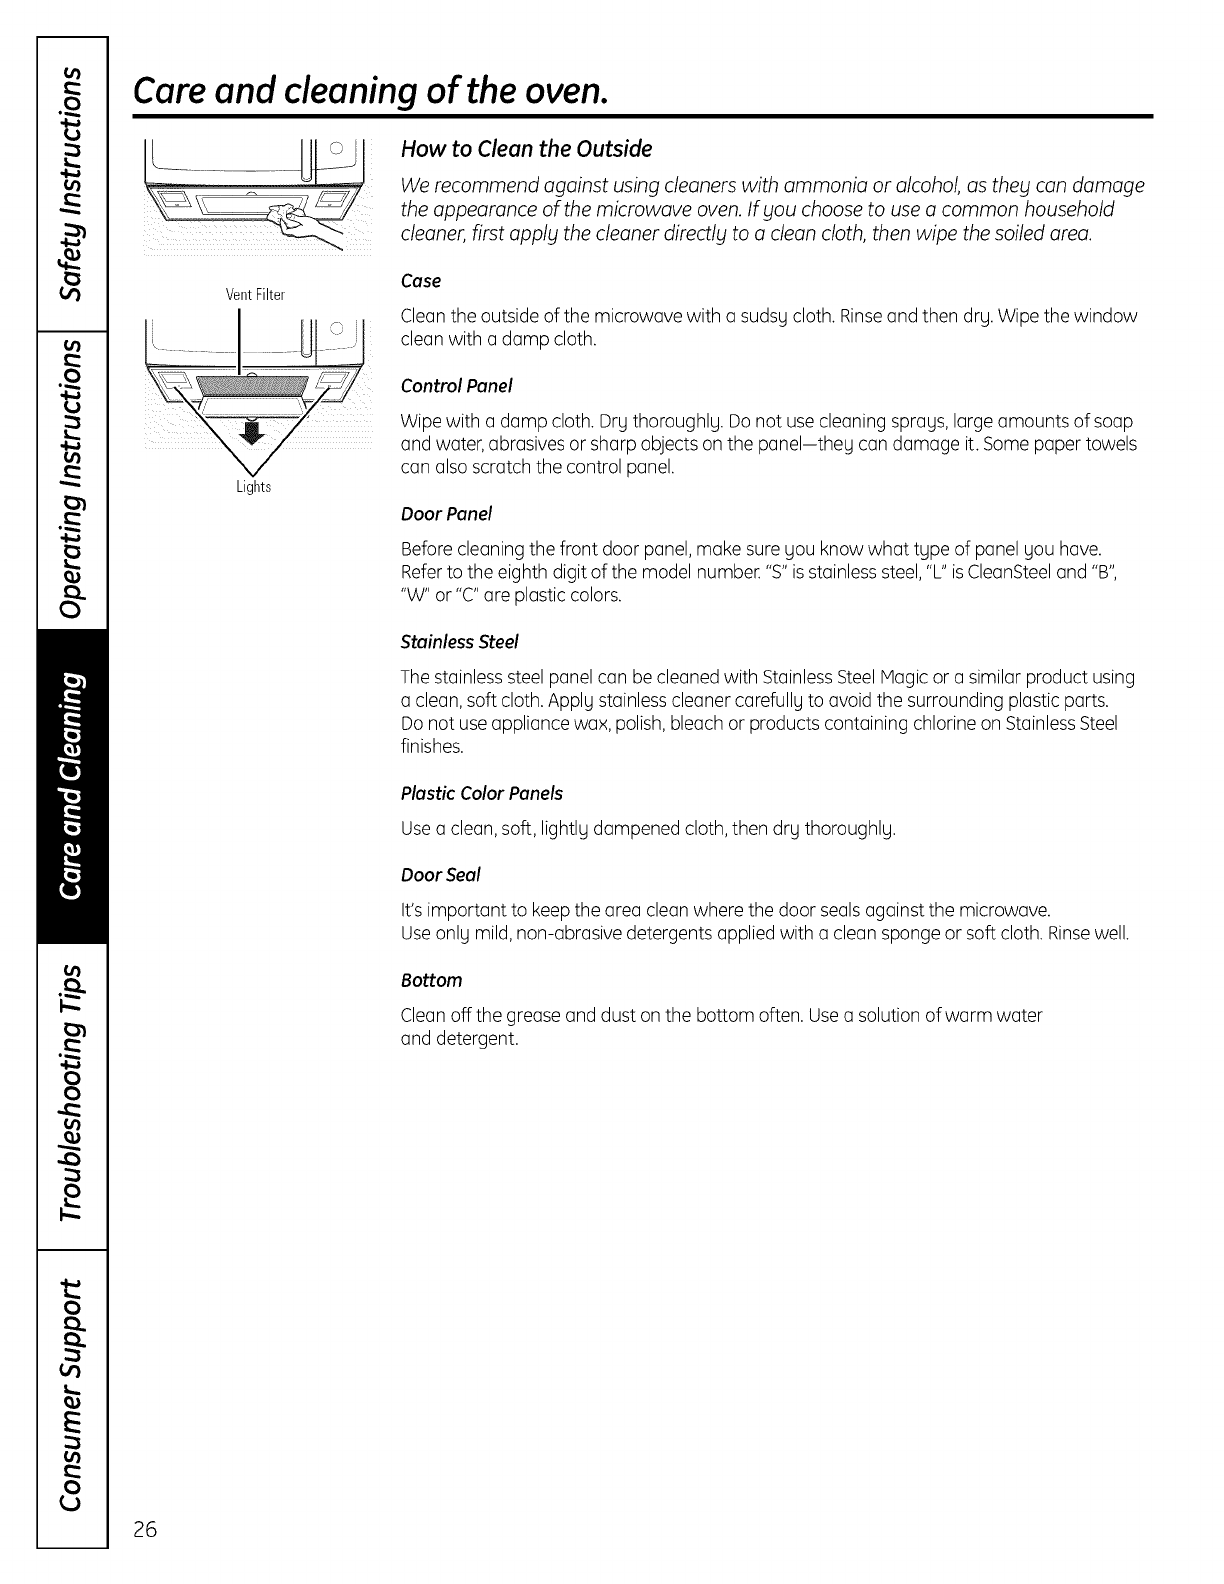
Vent Filter
How to Clean the Outside
We recommend against using cleaners with ammonia or alcohol, as they can damage
the appearance of the microwave oven. If you choose to use a common household
cleaner, first appl_l the cleaner directl_l to a clean cloth, then wipe the soiled area.
Case
Clean the outside of the microwave with a sudsy cloth. Rinseand then dry. Wipe the window
clean with a damp cloth.
Lights
Control Panel
Wipe with a damp cloth. Dry thoroughly. Do not use cleaning sprays, largeamounts of soap
and water, abrasives or sharp objects on the panel-they can damage it. Some paper towels
can also scratch the control panel.
Door Panel
Before cleaning the front door panel, make sure you know what type of panel you have.
Referto the eighth digit of the model number."S" is stainlesssteel,"L" is CleanSteeland "B",
"W" or "C"are plastic colors.
Stainless Steel
The stainlesssteel panel can be cleaned with StainlessSteel Magic or a similar product using
a clean, soft cloth. Apply stainlesscleaner carefully to avoid the surrounding plastic parts.
Do not use appliance wax, polish, bleach or products containing chlorine on StainlessSteel
finishes.
Plastic Color Panels
Usea clean,soft, lightly dampened cloth, then dry thoroughly.
Door Seal
It's important to keep the area clean where the door sealsagainst the microwave.
Useonly mild, non-abrasive detergents applied with a clean sponge or soft cloth. Rinsewell.
Bottom
Clean offthe grease and dust on the bottom often. Usea solution of warm water
and detergent.
26
Replacing the light bulb. ge.com
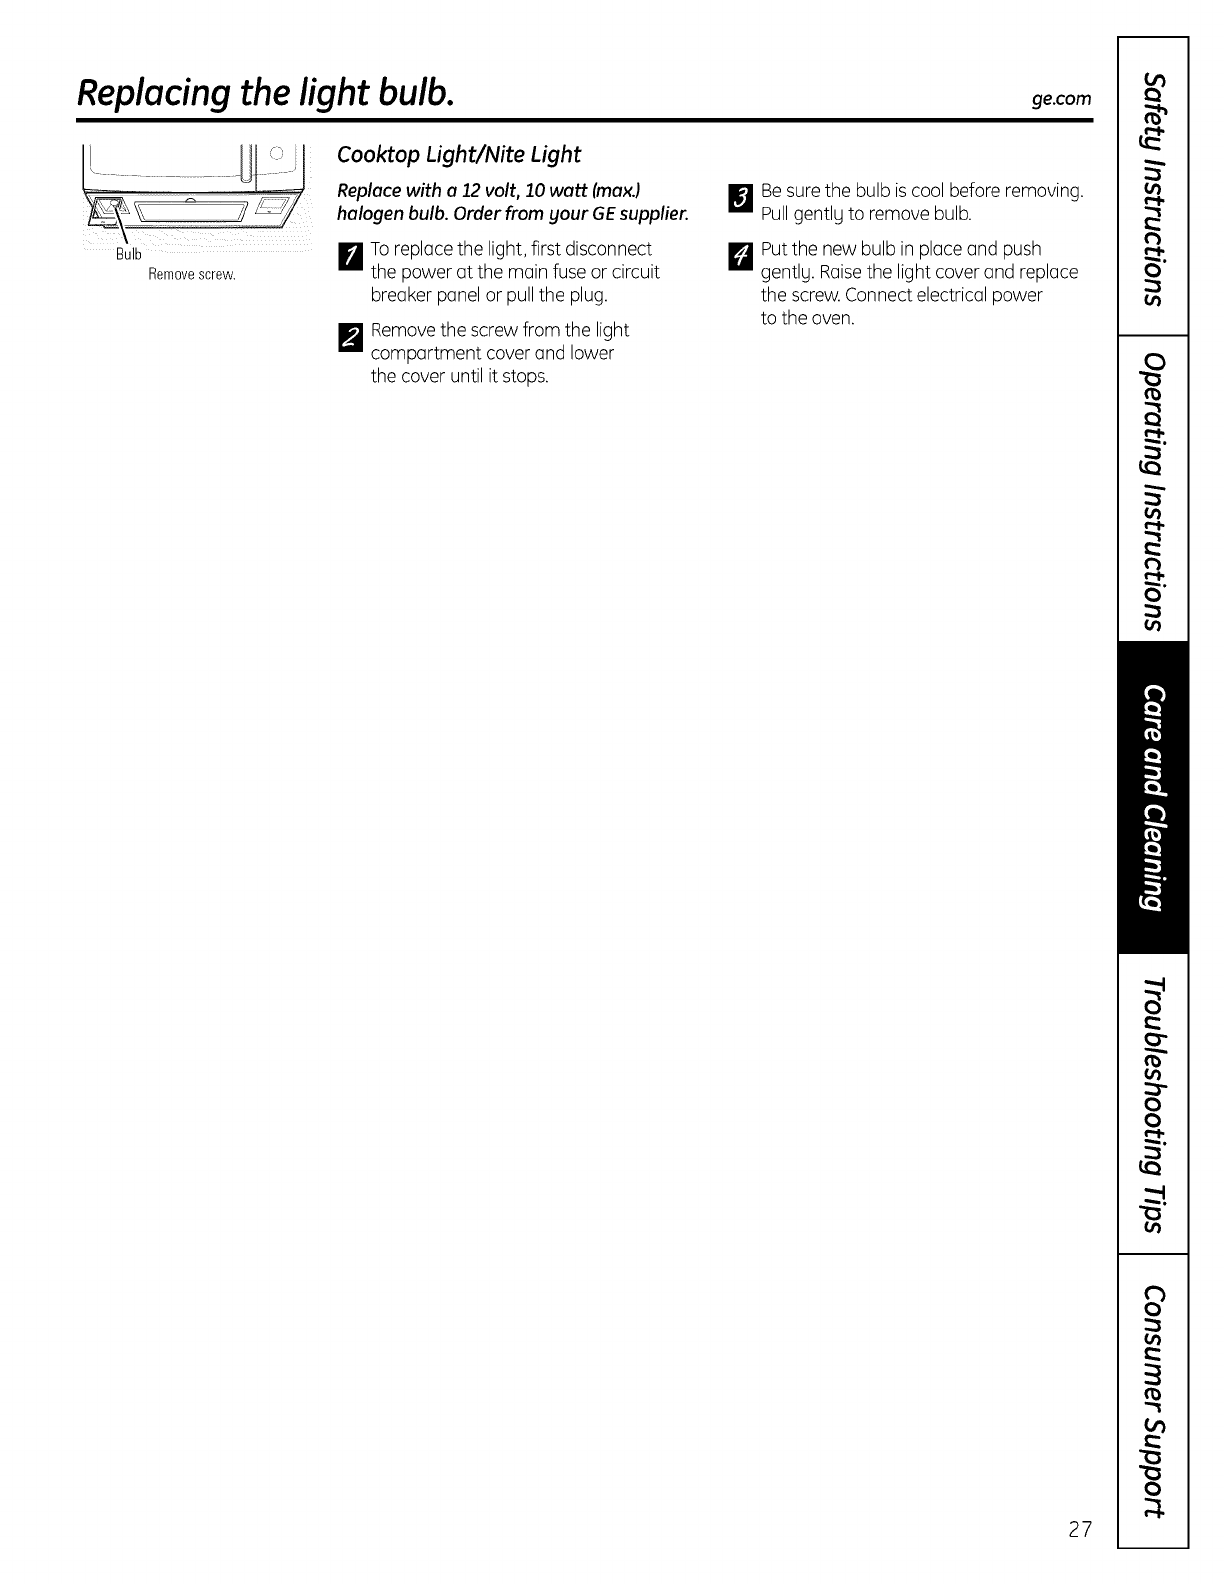
il iii
ii!!iii'!_ii'_iii:iiiii_T?T'i:i'_¸¸
Removescrew.
Cooktop Light/Nite Light
Replace with a 12 volt, 10 watt (max.)
halogen bulb. Order from your GEsupplier.
]To replace the light, first disconnect
the power at the main fuse or circuit
breaker panel or pull the plug.
F_ Removethe screw from the light
compartment cover and lower
the cover until it stops.
[] Be sure the bulb is cool before removing.
Pullgently to remove bulb.
M Put the new bulb in place and push
gently. Raisethe light cover and replace
the screw.Connect electrical power
to the oven.
27
About the exhaust feature.
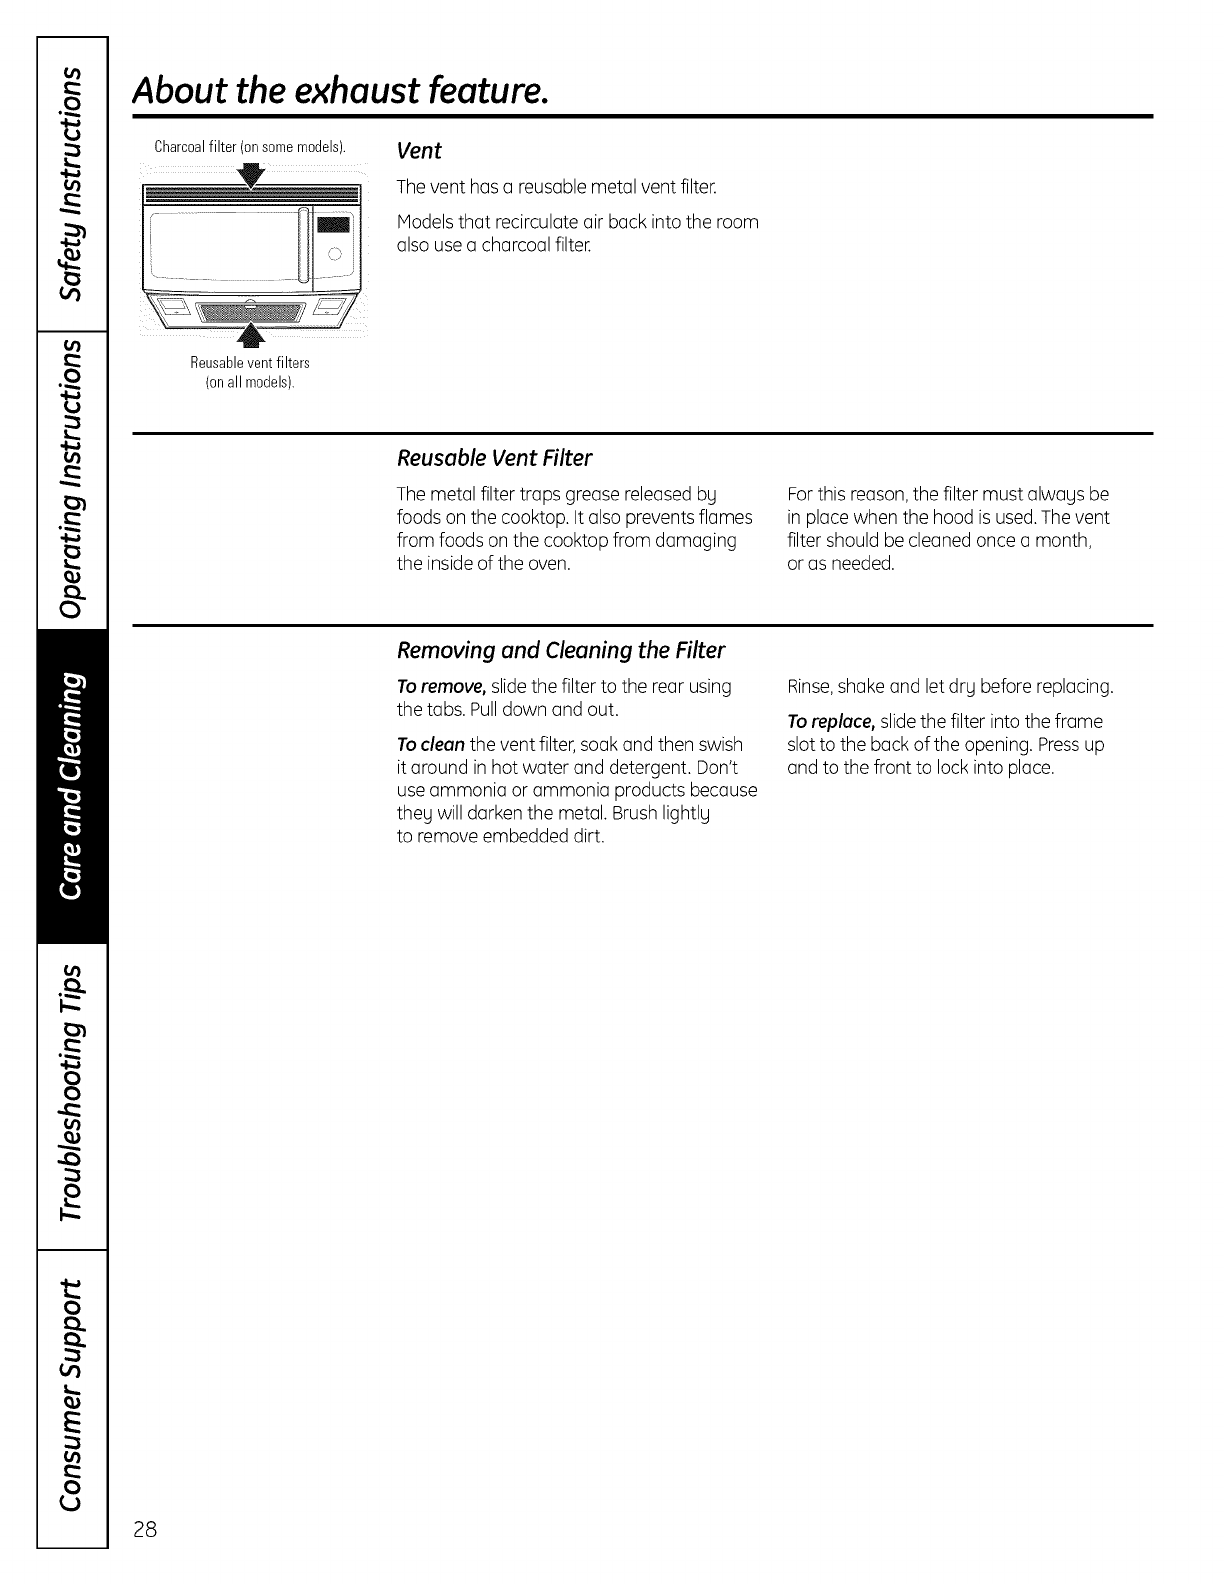
Charcoalfilter (on somemodels). Vent
The vent has a reusable metal vent filter.
Modelsthat recirculate air back into the room
also use a charcoal filter.
Reusablevent filters
(onall models).
Reusable Vent Filter
The metal filter traps grease released by
foods on the cooktop. It olso prevents flames
from foods on the cooktop from damaging
the inside of the oven.
Forthis reason,the filter must always be
in place when the hood is used.The vent
filter should be cleaned once a month,
or as needed.
Removing and Cleaning the Filter
Toremove, slide the filter to the rear using
the tabs. Pulldown and out.
To clean the vent filter, soak and then swish
it around in hot water and detergent. Don't
use ammonia or ammonia products because
they will darken the metal. Brush lightlg
to remove embedded dirt.
Rinse,shake and let dry before replacing.
To replace, slidethe filter into the frame
slot to the back of the opening. Pressup
and to the front to lock into place.
28
gR.COITI
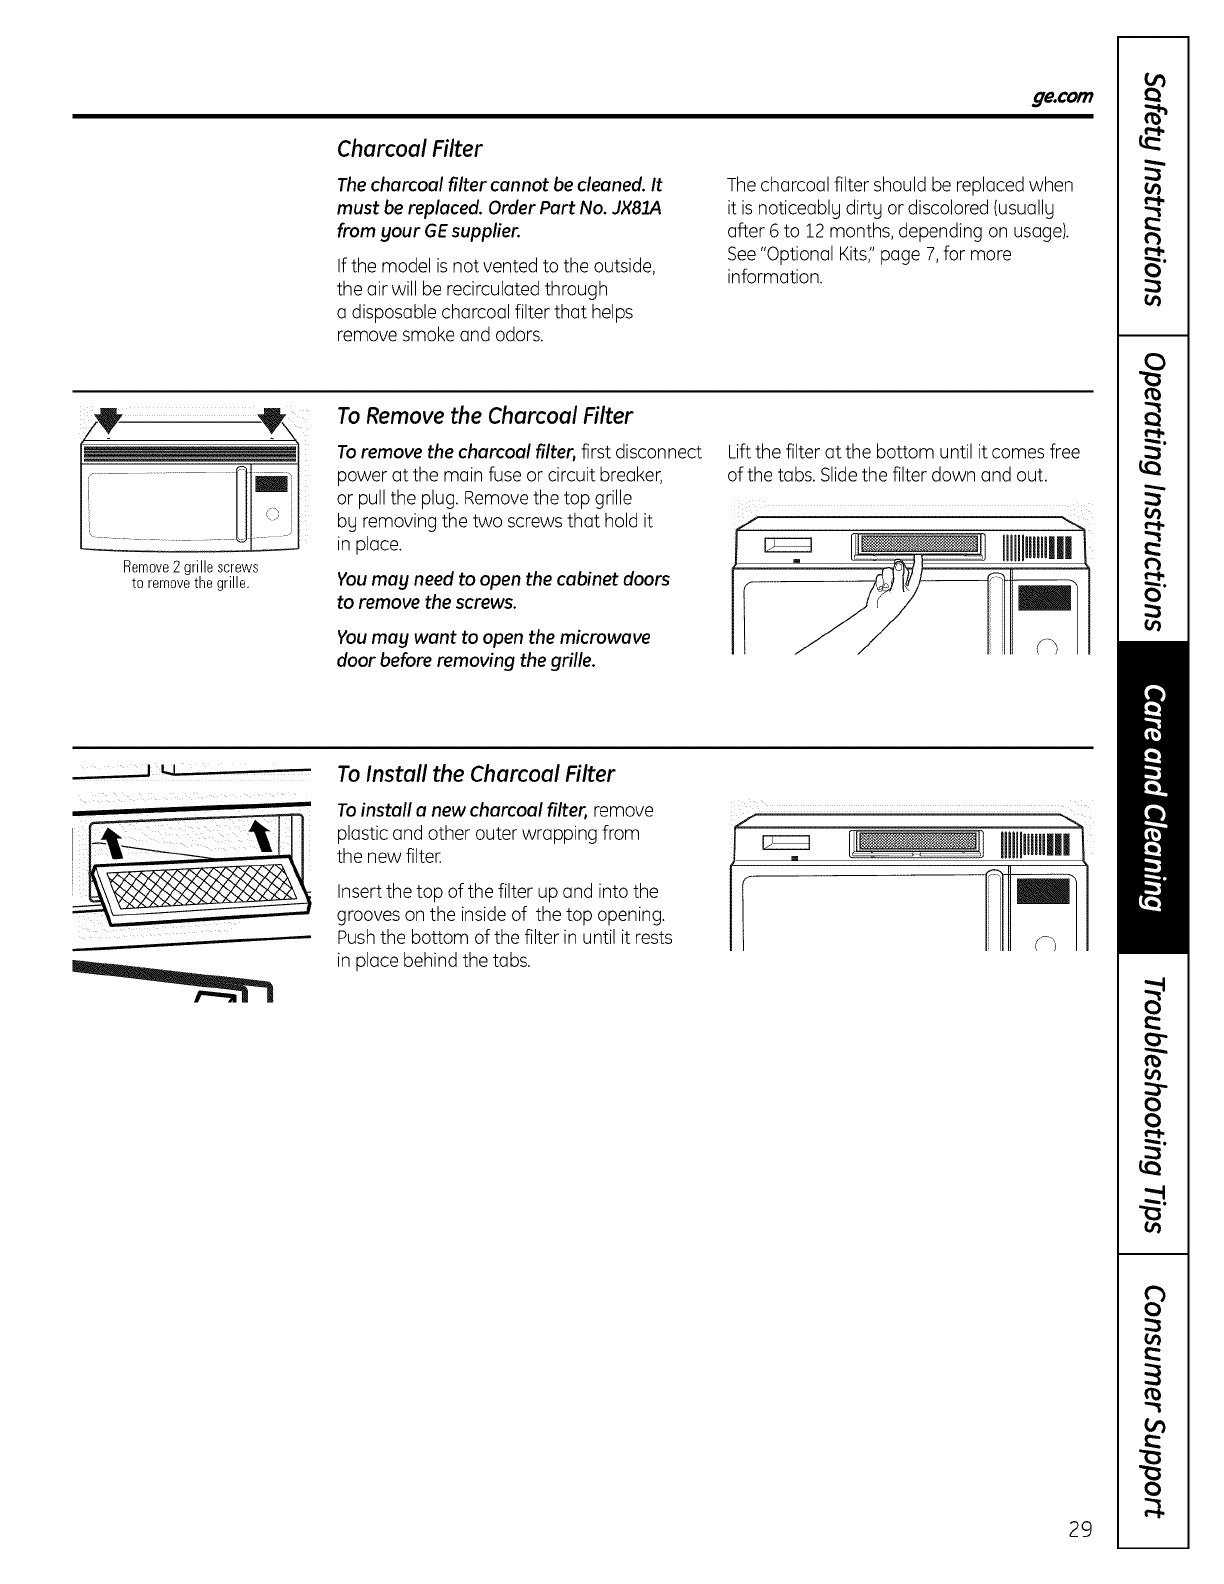
Charcoal Filter
The charcoal filter cannot be cleaned. It
must be replaced. Order Part No. JX81_
from your GEsupplier.
If the model is not vented to the outside,
the air will be recirculated through
a disposable charcoal filter that helps
remove smoke and odors.
The charcoal filter should be replaced when
it is noticeablu dirtu or discolored (usuallu
after 6 to 12 months, depending on usage).
See"Optional Kits,"page 7, for more
information.
mi I
Remove2 grille screws
to remove the grille.
To Remove the Charcoal Filter
To remove the charcoal filter, first disconnect
power at the main fuse or circuit breaker,
or pull the plug. Removethe top grille
by removing the two screws that hold it
in place.
Voumag need to open the cabinet doors
to remove the screws.
Voumay want to open the microwave
door before removing the grille.
Liftthe filter at the bottom until it comes free
of the tabs. Slidethe filter down and out.
To Install the Charcoal Filter
To install a new charcoal filter, remove
plastic and other outer wrapping from
the new filter.
Insert the top of the filter up and into the
grooves on the inside of the top opening.
Push the bottom of the filter in until it rests
in place behind the tabs.
29
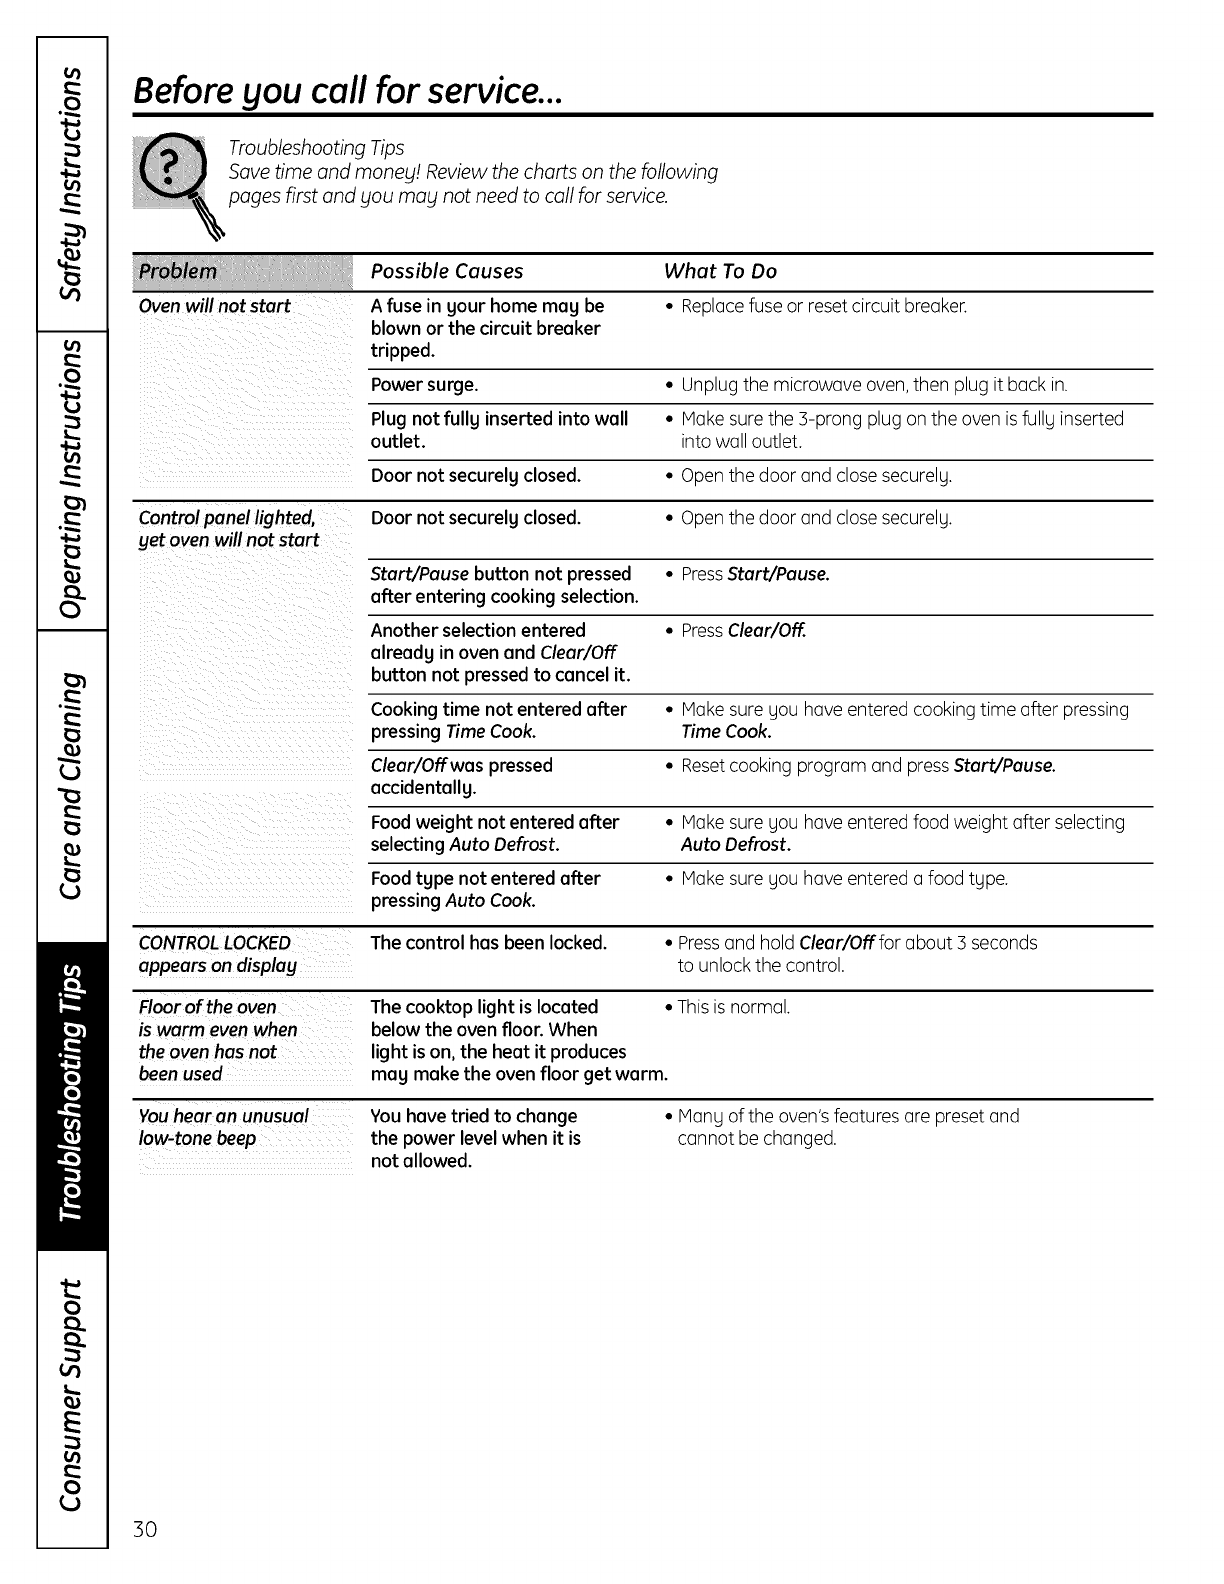
Before you call for service...
Troubleshooting Tips
Save time and money! Review the charts on the following
pages first and you may not need to call for service.
Oven will not start
Possible Causes
Afuse in your home may be
blown or the circuit breaker
tripped.
What To Do
• Replacefuse or resetcircuit breaker.
Powersurge. • Unplug the microwave oven, then plug it back in.
Plug not fully inserted into wall • Makesure the 3-prong plug on the oven is fully inserted
outlet, into wall outlet.
Door not securelyclosed. • Open the door and closesecurely.
Controlpanellighted, Door not securelUclosed. • Open the door and closesecurely.
get oven will not start
Start/Pause button not pressed • PressStart/Pause.
offer entering cookingselection.
Another selectionentered • PressClear/Off
already in oven end Clear/Off
button not pressed to cancel it.
Cooking time not entered offer • Makesure you have entered cooking time after pressing
pressing Time Cook. Time Cook.
Clear/Off was pressed • Resetcooking program and pressStart/Pause.
occidentally.
Food weight not entered offer • Makesure you have entered food weight after selecting
selectingAuto Defrost. Auto Defrost.
Foodtgpe not entered after • Makesure you have entered a food type.
pressing Auto Cook.
CONTROLLOCKED The control has beenlocked. • Pressand hold Clear/Off for about 3 seconds
appears on display to unlock the control.
The cooktop light is located • Thisis normal.
is warm even when below the ovenfloor. When
the oven has not light is on, the heat it produces
been used mag make the oven floor get warm.
low-tone beep
You have tried to change
the power level when it is
not allowed.
• Many oftheoven'sfeaturesarepresetand
cannotbe changed.
30
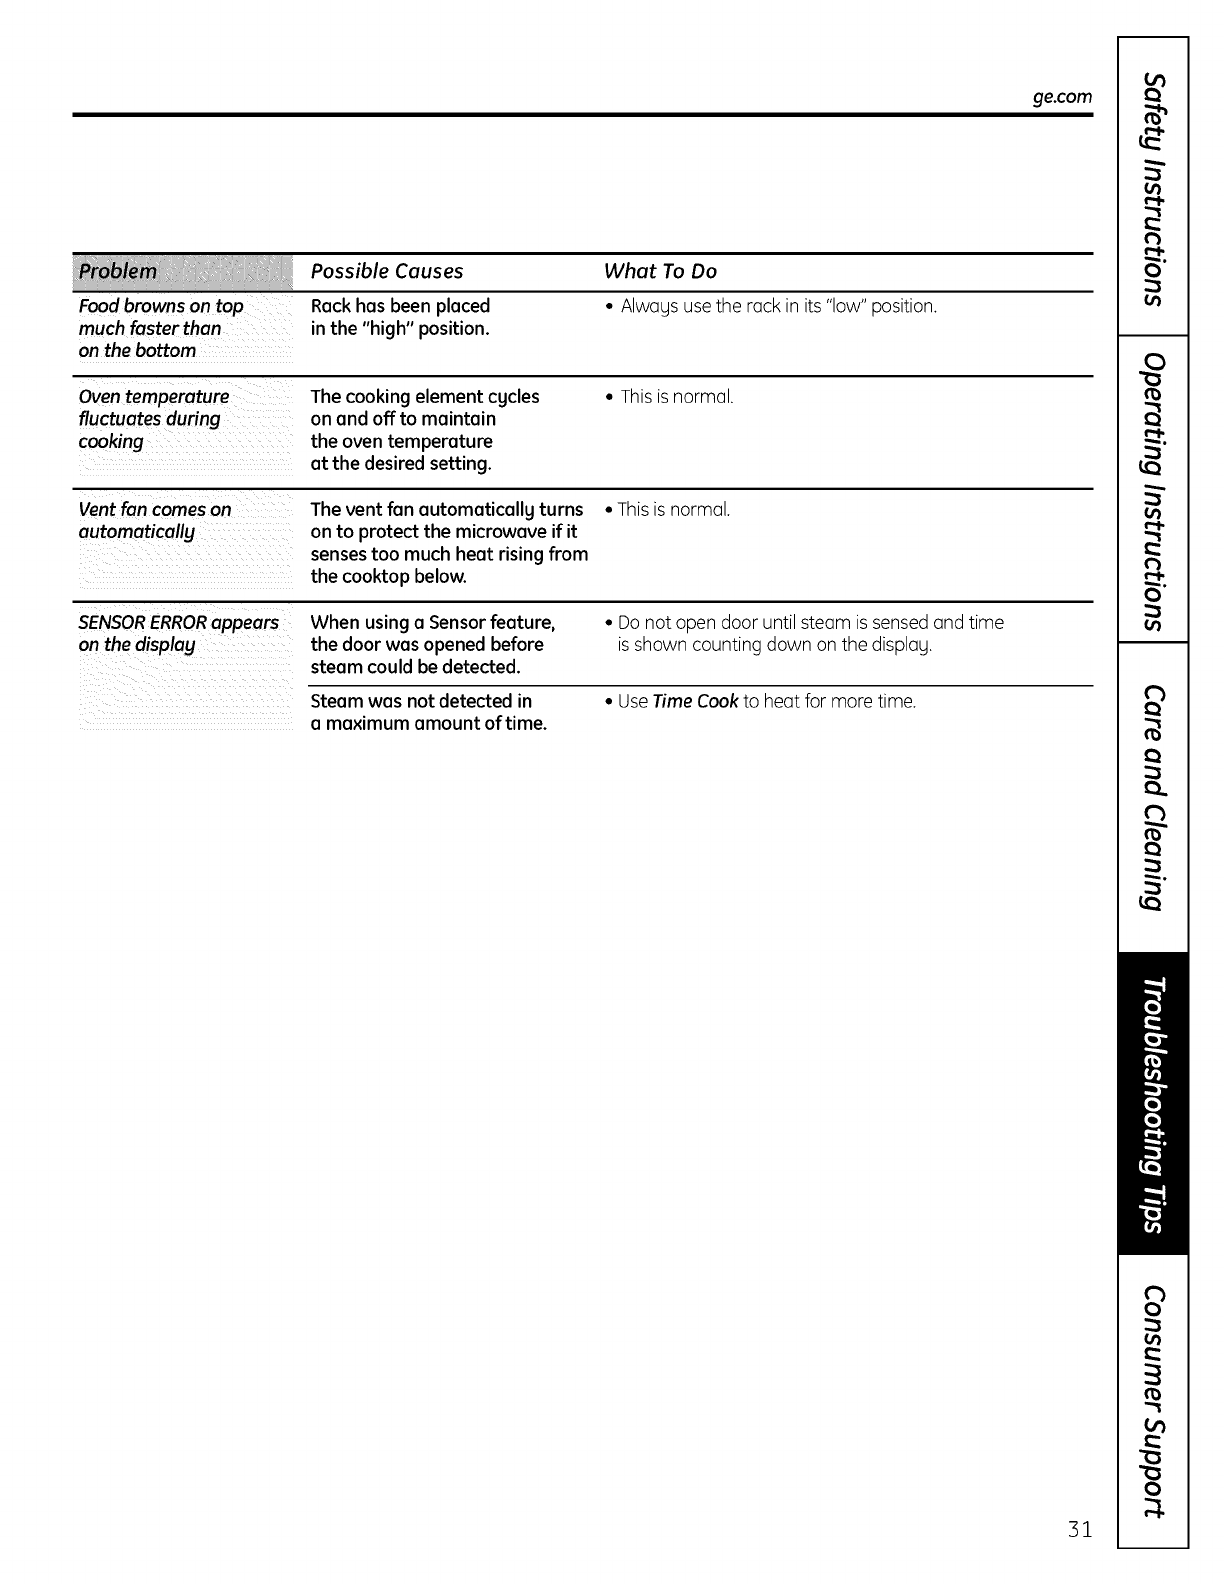
ge.com
Food browns on top
much faster than
on the bottom
Possible Causes
Rack has been placed
in the "high" position.
What To Do
• Always use the rack in its "low" position.
Oven temperature
fluctuates during
cooking
The cooking element cgcles
on and offto maintain
the oven temperature
at the desiredsetting.
•Thisis normol.
Vent fan comeson
automaticallg The vent fan automaticallg turns
on to protect the microwave if it
sensestoo much heat risingfrom
the cooktopbelow.
• Thisis normol.
SENSORERRORappears When using a Sensor feature, • Do not open door until steam is sensedand time
on the displag the door was opened before is shown counting down on the displau.
steam could be detected.
Steam was not detected in • UseTime Cook to heat for more time.
a maximum amount of time.
31
Before you call for service...
Things That Are Normal With Your Microwave Oven
Hoisture on the oven door and walls
while cooking. Wipe the moisture off
with a paper towel or soft cloth.
Hoisture between the oven door panels
when cooking certain foods. Hoisture
should dissipate shor% after cooking
is finished.
_Steam or vapor escaping from around
the door.
Light reflection around door
or outer case.
Dimming oven light and change in
the blower sound at power levels other
than high.
_The vent fan operating while
the microwave is operating.
The vent fan will not go off
nor can it be turned off until
the microwave is off.
_TV-radio interference might be noticed
while using the microwave. Similar
to the interference caused bu other
small appliances, it does not indicate
a problem with the microwave. Plug
the microwave into a different electrical
circuit, move the radio or TV as far
away from the microwave as possible
or check the position and signal of
the TV/radio antenna.
Dull thumping sound while oven
is operating.
32
GE Service Protection Plus TM
GE,a name recognized worldwide for quality and dependability together with Assurant Solutions,
offers you Service Protection PlusTM--comprehensive protection on your appliances.*
Benefits Include:
• Prompt, reliable service from GEAuthorized Servicers
• Convenient hours designed to suit your busy schedule
• Quality replacement parts
• The dependability of GE,a name recognized and trusted worldwide
• Ask about our interest-free payment plans
With Service Protection Plus you can expect:
• An extended service plan that limits unexpected repair bills
• Service coverage for most major brands
• Unlimited service calls for the length of your contract, or credit toward a replacement product
• Service coverage for covered operating parts and labor on appliances and home electronics that fail during normal
single family household use
•Yoursatisfaction is our goal. We strive to provide you with excellent service in a professional and timely manner.
Place gour confidence in GE and call us in the U.S. toll-free at 1.800.626.2224 for more information.
*Most brands covered up to 15 years old in the continental U.S.
SPPis a trademark of General Electric Company.
_.,._ Cut here
Please place in envelope and mail to:
General Electric Company
Warrantg Registration Department
P.O.Box 32150
Louisville,K¥ 40232-2150
33

Consumer Product Ownership Registration
Dear Customer:
Thank you for purchasing our product and thank you for placing your confidence in us.
We are proud to have you as a customer!
Follow these three steps to protect your new appliance investment:
Complete and mail
your Consumer Product
Ownership Registration
today. Have the peace
of mind of knowing we
can contact gou in the
unlikely event of a safetg
modification.
After mailing the
registration below,
store this document
in a safe place. It contains
information gou will need
should gou require service.
Our service number
is 800.GECARES
(800.432.2737).
Read your Owner's
Manual carefully.
It will help you
operate your new
appliance properly.
Model Number Serial Number
Important: If you did not get a registration card with your
product, detach and return the form below to
ensure that your product is registered, or register
online at ge.com. _,,,l_o Cut here
Consumer Product Ownership Registration
Model Number Serial Number
Hn [El Ms. [El Hrs. [E Hiss [E
First I I Last I
Name I I I I I I I I I Name I I I I I I I I I I I
Street I
Address I I I I I I I I I I I I I I I I I I I I I I I
Apt.#I I I I I I I I I E-mail Address*
City I
Date Placed
In Use I
Month
I I Zip/ I
, I I I I I I I I I I I I State, , J Code' i I I
oayl, I Yearl, I Phone
Numberl,, I-I,, I-I , ,
GE Consumer & Industrial
Appliances
General Electric Company
Louisville, KY/40225
ge.com
Please provide gour e-mail address to receive, via e-mail, discounts, special offers and other
important communications from GEAppliances (GEA).
::} Check here if gou do not want to receive communications from GEA's carefullg selected partners.
FAILURETO COHPLETEAND RETURNTHIS CARD DOESNOT DIMINISH YOURWARRANTYRIGHTS.
For more information about GEA's privacg and data usage policg, go to ge.com and click
on "Privacg Policg" or call 800.626.2224.
34
GE Microwave Oven Warrantg.
All warranty service provided by our Factory Service Centers,
or an authorized Customer Care®technician. To schedule service,
on-fine, visit us at ge.com, or call 800.GE.CARES(800.432.2737).
Please have serial and model numbers available when calling
for service.
Staple Four receipt here.
Proof of the original purchase
dote is needed to obtain service
under the warrant F.
GEwi,R pla "
OneYear Ang part of the microwave oven which fails due to odefect in materk_lsor workmanship.
Fromthe dote of the During this limitedone-gearwarrantg, GEwill also provide, freeof charge, all IGborand relGted
originalpurchase service to replGcethe defective part.
Service trips to gour home to teach gou how to use
the product.
Improper installation, deliverg or maintenance.
Product not accessible to provide required service.
Failure of the product or damage to the product if it is
abused,misused (for example, cavitg arcing from wire
rack or metal/foil), or used for other than the intended
purpose or used commerciallg.
Replacement of the cooktop light bulbs.
Replacement of house fuses or resetting of circuit
breakers.
Damage to the product caused bg accident, fire, floods
or acts of God.
Incidental or consequential damage caused bg possible
defectswith this appliance.
Damage caused after deliverg.
EXCLUSION OF IMPLIED WARRANTIES--Your sole and exclusive remedg is product repair as provided
in this Limited Warrantg. Ang implied warranties, including the implied warranties of merchantabilitg
or fitness for a particular purpose, are limited to one gear or the shortest period allowed bg law.
This worrontg is extended to the original purchaser and ong succeeding owner for products purchased
for home use within the USA. If the product is located in on urea where service bg o GE Authorized Servicer
is not available, gou mug be responsible for o trip charge or gou mug be required to bring the product to on
Authorized GE Service Location for service. In Alaska, the worrontg excludes the service coils to Four home.
Some states do not allow the exclusion or limitation of incidental or consequential damages. This worrontg
gives gou specific legal rights, and gou mug also hove other rights which vorg from state to state. To know
what Four legal rights ore, consult Four local or state consumer affairs office or Four state's Attomeg General.
Warrantor: General Electric Compang. Louisville, KY 40225
35
Consumer Support.
GEAppliances Website
Have a question or need assistance with your appliance? Try the GEAppliances Website 24 hours a day,
any day of the year! For greater convenience and faster service,you can now download Owner's Manuals,
order parts, or even schedule service on-line.
ge.com
Schedule Service
Expert GErepair service is only one step away from your door. Get on-line and schedule your service at
your convenience any day of the gear! Or call 800.GE.CARES(800.432.2737)during normal business hours.
ge.com
Real Life Design Studio ge.com
GEsupports the Universal Designconcept-products, services and environments that can be used by
people of all ages, sizesand capabilities.We recognizethe need to design for a wide range of physical and
mental abilities and impairments. For details of GE'sUniversal Designapplications, including kitchen design ideas
for people with disabilities,check out our Website today. Forthe hearing impaired, please call 800.TDD.GEAC
(800.833.4322).
Extended Warranties
Purchasea GEextended warranty and learn about special discounts that are available while your warranty
is still in effect. You can purchase it on-line anytime, or call 800.626.222/4during normal business hours.
GEConsumer Home Serviceswill still be there after your warranty expires.
ge.com
Ports and Accessories ge.com
Individuals qualified to service their own appliances can have parts or accessoriessent directly to their homes
(VISA,HasterCard and Discovercards are accepted).Orderon-line today, 24 hours every day or by phone
at 800.626.2002during normal businesshours.
Instructions contoined in this munuul coverprocedures to be performed by uny user. Other servicing
generully should be referred to quulified service personnel. Cuution must be exercised,since improper
servicing mug cuuseunsofe operation.
Contact Us
If you are not satisfiedwith the service you receive from GE,contact us on our Website with all the details
including your phone number,or write to: General Hanager,Customer Relations
GEAppliances,Appliance Park
Louisville,KY/40225
ge.com
Register YourAppliance
Register your new epplience on-line--et your convenience! Timely product registration will allow for
enhanced communication and prompt service under the terms of your warranty, should the needarise.
Youmay also mail inthe pre-printed registration card included in the packing material.
ge.com
Printed in China

ge.com
0
0
U
0
Instrucciones
de seguridad ................ 2-7
Instrucciones de
Funcionamiento
Cambio de nivel de potencia ..... 14
Caracteristicas
de asado al grill .............. 19, 20
Consejos de utensilios
de cocina ........................ 21
Funciones de sensor ......... 16-18
Funciones de su homo ......... 8, 9
Funciones de tiempo
g automatico ................ 11-13
Opciones de cocci6n ............. 10
Otras funciones .............. 2::3-25
Activaci6n/Desactivaci6n del
dispositivo giratorio ............ 25
BIoqueo de controle ............ 2::3
Clear/Off
(borrar/apagado) .............. 2:3
Extractor ...................... 25
Extractor automatico .......... 25
HELP (aguda) .................. 2:3
Luz ............................ 25
Luz nocturna automatica ...... 24
IVledidas ....................... 24
IVlensaje "lVlas tiempo" . ........ 24
Pantalla ON/OFF
(encendida/apagada) .......... 24
Reloj ........................... 2:3
Resume (Continuar) ............ 2:3
SeBal de final de cocci6n ....... 2::3
Start/Pause (inicio/pausa) ......... 2::3
Temporizador .................. 25
Velocidad de pantalla .......... 2/4
Volumen de seBal de aviso ..... 2/4
Tabla con el mejor m@todo
para cocinar ..................... 22
Terminologia de microondas ..... 15
Anote aqui los n6meros de modelo
g de serie:
Modelo n6mero
N6mero de serie
Los encontrar6 en una etiqueta al abrir
la puerta.
Cuidado yLimpieza
Acero inoxidable ................. 27
Exterior .......................... 27
Filtros de carb6n vegetal .......... 29
Filtros del extractor .............. 28
Interior ........................... 26
Reemplazo de bombillas ......... 28
Resoluci6n
de Problemas .............. 30,31
Cosas normales de su horno
microondas ..................... ::32
Ayuda al Cliente
Ayuda al Cliente .... cubierta trasera
Garantia ......................... 35
Kitsopcionales....................7
MFL51203001 49-40583-i
JVM1665
DVM1665
08-08JR
INSTRUCCIONESIMPORTANTESDE SEGURIDAD.
LEAPRIMEROTODA LASINSTRUCCIONES.
iPRECAUCION! Par su seguridad, la informaci6n contenida en este manual debe seguirse pare
minimizar el riesgo de incendio, explosi6n, descarga el4ctrica, exposici6n a energia
microondas o para evitar dahos a la propiedad, lesiones personales o p4rdida
de vida.
PRECAUCIONES PARA EVITAR POSIBLE EXPOSICION
A UNA EXCESIVA ENERGIA DE MICROONDAS.
(hi
No Intente operarestehornoconlapuertoabierta
goqueestopodr[aresultarenuna exposici6n
a energfamicroondasdanina.Esimportante
no cancelar ni manipular de forma indebida
los dispositivos de seguridad.
No Sit4e ningOnobjeto entre la parte frontal del horno
g la puerta ni permita que se acumule suciedad o
residuoslimpios en las gomas de cierre herm@tico.
No Use el homo si est6 danado. Esespecialmente
importante que la puerta del homo se cierre
correctamente y que no se dane:
(1)la puerta (doblada),
(2)bisagras y pasadores (rotoso sueltos),
(3)sellosde la puerto g gomas de cierre herm@tico.
d homo no deberia ajustarse ni repararse par nadie
que no sea personal de servicio adecuadamente
calificado.
, Lea g obedezca los precauciones especfficasen la secci6n
de PRECAUCIONESPARAEVITARPOSIBLEE,WPOSICION
A UNAENERG[AEXCESIVAOEMICROONOASde arriba.
, Esteelectrodom@sticodebeestarconectadoatierra.Con@ctelo
s61oa unatomadecorrientecontoma detierra.Vealasecci6n
de INSTRUCCIONESOETOI_AOETIERRAenla p6gina6.
, Instaleo coloqueesteelectrodom@sticosiguiendos61o
lasInstruccionesde Instalaci6nprovistas.
, Estehomodemicroondasest6listadoparULparaserinstalado
sabreestufaselectricasy degasenrangos.
, Estehornodemicroondasnohasidoaceptadoni probadopara
usamarina.
, Estehornopuedeinstalarseencimadelacocinag est6disenado
parasu usasabrecocinasencimerasno m6sanchasdeB6".
Puedeinstalarsesabreequiposparacocinardegas oel@ctricos.
, Nousaresteelectrodom@sticosielcabledecorriente
o elenchufehansufridoalgOndana,si nofunciona
correctamenteosi ha resultadodanadoose hacaido.Sielcable
decorrientehasidodanado,debeserreemplazadoparelServicio
ReparacionesdeGeneralElectric(GEService)ounagente
de reparacionesautorizadoempleandouncabledecorriente
queGeneralElectrictieneasu disposici6n.
, Nocubrani bloqueeningunaaperturadeesteelectrodom@stico.
Useesteaparatos61oparalosfinesquesedescribeneneste
manual.Nouseproductosquimicosnivaporescorrosivos
en esteelectrodom@stico.Estehomo microondasest6
especificamentedisenadoparacalentar,secaro cocinar
comiday no parasu usaindustrialoenlaboratorio.
, Parareducirel riesgodeincendioenlaaperturadelhomo:
- Nococinedemasiadolacomida.Presteatenci6ncuidadosa
alelectrodom@sticocuandosecolocapapel,pl6sticouotro
materialcombustibleenel homomientrassecocina.
JQuitelascintasdecierrecon metaly lasasasmet61icas
delosrecipientesde papelo pl6sticoantesdeintroducirlos
enelhorno.
JNOalmacenecosasenelhorno.Nodejeproductosdepapel,
utensiliosdecocinarnicomidaenelhornomientrasnoIo
est@usando.
JN0 haga rosetaso palomitasde maizen elmicroondasa no ser
queest@usandoun accesorioespecialparaprepararlaso que
est@empleandorosetaso palomitasde maizque indiquenser
v61idasparaelusade hornosmicroondas.
JSiseincendiaraalgOnmaterialdentro,mantengalapuerta
delhornocerrada,apagueelhornoy desconecteelcablede
corrienteel@ctrica,oapaguelacorrienteenelfusibleo panel
deldiferencial.Siseabrelapuertaelfuego podriaexpandirse.
JNoutiliceloscaracteristicasdeSensordosvecesconsecutivas
enlamismaporci6ndecomida.Silacomidanoseha cocinado
parcompletodespu@sdelaprimeracuentaregresiva,use
lafunci6nTimeCookparatiempode cocci6nadicional.
2
ge.com
INSTRUCCIONES IMPORTANTES DE SEGURIDAD.
AI utilizar las funciones Auto Grill (asado al grill automGtico),
Manual Grill (asadoal grill manual) o Combo Grill(asado al
grill combinado), tanto el exterior como el interior del homo
microondas estarGna altas temperaturas. Utilicesiempre
manoplas de cocina para sacar los recipientes de comida
g los accesorios,como por ejemplo el estante del homo.
Term6metro--no utilice term6metros de cocina o de horno
convencionales al cocinar con microondas. Elmetal g
mercurio en estos term6metros podrfa causar la formaci6n
de arcos el@ctricosg, posiblemente,danar el homo.
No use un term6metro en la comida que est@calentando
en el homo microondas a no ser que elterm6metro
est@diseflado o recomendado para su uso en un homo
microondas.
No use estropajos o fregados metGlicospara limpiar.
Podrfancaer partes del estropajo gtocar elementos
el@ctricosque pudieran causar una descarga el@ctrica.
No almacene ningOnmaterial, que no sea uno
de los accesoriosque recomendamos, en este homo
cuando no est_ us6ndose.
No almacene este electrodom@sticoal aire libre.
No use este producto cerca del agua-por ejemplo,
en un s6tano mojado, cerca de una alberca,cerca de
un fregadero o en lugares similares.
Mantenga el cable de corriente alejado de superficies
calientes.
No sumerja el cable de corriente ni el enchufe en agua.
_Algunos productos como las gemas de huevo
g recipientes sellados-por ejemplo,jarras cerradas-
podrfan explotar g no deben calentarse en el homo
microondas. Sise usa de esa forma el homo microondas
pueden causarse danos personales.
Reviselas instrucciones de limpieza de la superficie
de la puerta en la secci6n Cuidodo ylimpiezo del homo
microondos de este manual.
Las reparaciones de este electrodom@sticodeberfan
ser realizadass61opor personal cualificado. P6ngase
en contacto con el centro de servicio autorizado mGs
cercano para su revisi6n, reparaci6n o ajuste.
Eluso de cualquier electrodom@sticopor parte de ninos
deberfa ser supervisado de cerca por un adulto.
No almacene nada directamente encima de la superficie
del microondas cuando est_ en operaci6n.
No monte este electrodom@sticosobre un fregadero.
GUARDEESTASINSTRUCCIONES
J
iPRECAUCION!
FORMAClON DE ARCO ELECTRICO
Si ve que se forman amos el4ctricos, presione el botGn CLEAR/OFF (borrar/apagado) yresuelva
el problema.
Arco el@ctricoes Io que, en la terminologfa
de los microondas, describe las chispas en el horno.
Elarco el@ctricose produce cuando:
Elestante metGlico no est6 instalado correctamente
g toca la pared del microondas.
Hag un metal o papel de aluminio tocando el lateral
del horno.
Elsoporte del aro giratorio no est6 instalado
correctamente
Elpapel de aluminio no est6 envolviendo bien
la comida (hagbordes doblados hacia arriba
que act0an como antenas.)
Hag alg0n metal, como cintas de cierre con metal,
pinchos de polio, o platos con decoraci6n de oro
dentro del microondas.
Seest6 usando papel toalla recicladoque contienen
pequeBas porciones de metal en el microondas.
INSTRUCCIONESIMPORTANTESDE SEGURIDAD.
LEAPRIMEROTODASLASINSTRUCCIONES.
J
iPRECAUCION!
COMIDAS
No haga rosetas o palomitas de mafz en el
microondas a no ser que est_ usando un accesorio
especial para prepararlas o que est_ empleando
rosetas o palomitas de maiz que indiquen
ser v61idaspara el uso de hornos microondas.
No hierva huevos dentro de un horno microondas.
Segenerar6 presi6n dentro de la gema del huevo
que causar6 que expiate pudiendo, posiblemente,
danar a alguien.
Sise pone en marcha el microondas sin tener
comida en su interior par m6s de un minuto o
dos podrfan causarse daBos al horno g podrfa
empezar un fuego. Estohace aumentar
la temperatura alrededor del magnetr6n
g puede reducir el perbdo de vida 0til del horno.
Deberfacortarse la "piel" externa de aquellos
alimentos que no la tengan rata coma las papas,
salchichas, embutidos, tomates, manzanas, hfgados
de polio g dem6s menudillos de aves g gemas
de huevos,para permitir la salida de vapor mientras
se cocinan.
;AGUA SOBRECALENTADA
Liquidos,tales coma agua, col:d,o td, sepodfian
sobmcalentar m4s aii4 del punto de ebullid6n sin
parecer que estdn hirviendo.No siempre habr4
burbujas o evidenciade que el liquido est4 hirviendo
cuando se extrae elenvasecon el liquido del
microondas. ESTOPODRiARESULTAREN LIQUIDOS
MUYCALIENTESDEREPENTECOMENZANDO
A HERVIRYA REBOSARSECUANDOELENVASE
ESMOVIDO0 SI UNACUCHARAU OTROUTENSILIO
SELEINTRODUCEAL LiQUlDO.
Para reducir el riesgo de lesionespersonales:
- No sobrecaliente los Ifquidos.
- Mueva el Ifquidotanto antes coma a mediados
del tiempo de calentamiento.
- No use envases de lados rectos con cuellos
estrechos.
- Despu@sdel calentamiento, permita que el envase
permanezca en el microondas par un tiempo corto
antes de remover el envase.
- Usecuidado extremo cuando inserte una cuchara
u otro utensilio en el envase.
Las comidas cocinadas en Ifquidos(coma la pasta)
pueden tener cierta tendencia a hervir m6s
r6pidamente que losalimentos que contengan
menos humedad. Siesto ocurre, revisela secci6n
de Cuidado ylimpieza delhomo microondas donde
encontrar6 instrucciones en cuanto a la limpieza
del interior del microondas.
No caliente lacomida del beb@enjarras de cristal,
incluso si est6n destapadas. Aseg0resede que
los alimentos de los ninos est_n bien cocinados.
Remueva la comida para distribuir el calor de forma
pareja. Tenga cuidado de que el nino no se queme
al calentar la leche de f6rmula. Elcontenedor puede
parecer m6s fifo de Io que realmente est6 la
f6rmula. Pruebesiempre la f6rmula antes
de d6rsela al beb_,
No descongele bebidas congeladas en botellas
de cuello estrecho (especialmentebebidas
carbonatadas.) Incluso con el contenedor abierto,
podrfa generarse un aumento de presi6n.
Estopuede causar que el contenedor expiate,
Io cual podrfa producir daBos personales.
Los alimentos calientes g el vapor pueden causar
quemaduras. Tenga cuidado al abrir cualquier
contenedor con comida caliente, incluso bolsas
de rosetas o palomitas de maiz, bolsas o cajas de
cocinar. Para prevenir posiblesda_os personales,
mantenga el vapor alejado de sus manos g rostro.
No cocine demasiado las papas. Podrfan
deshidratarse e incendiarse, causando da_os
a su horno.
_Cocine la carne g el polio por completo-la carne
hasta que alcance una temperatura minima
INTERIORde 160°F,g el polio hasta una temperatura
INTERNA minima de Z80°F.Cuando se cocinan
a estas temperaturas se evita la contracci6n
de enfermedades por intoxicaci6n.
4
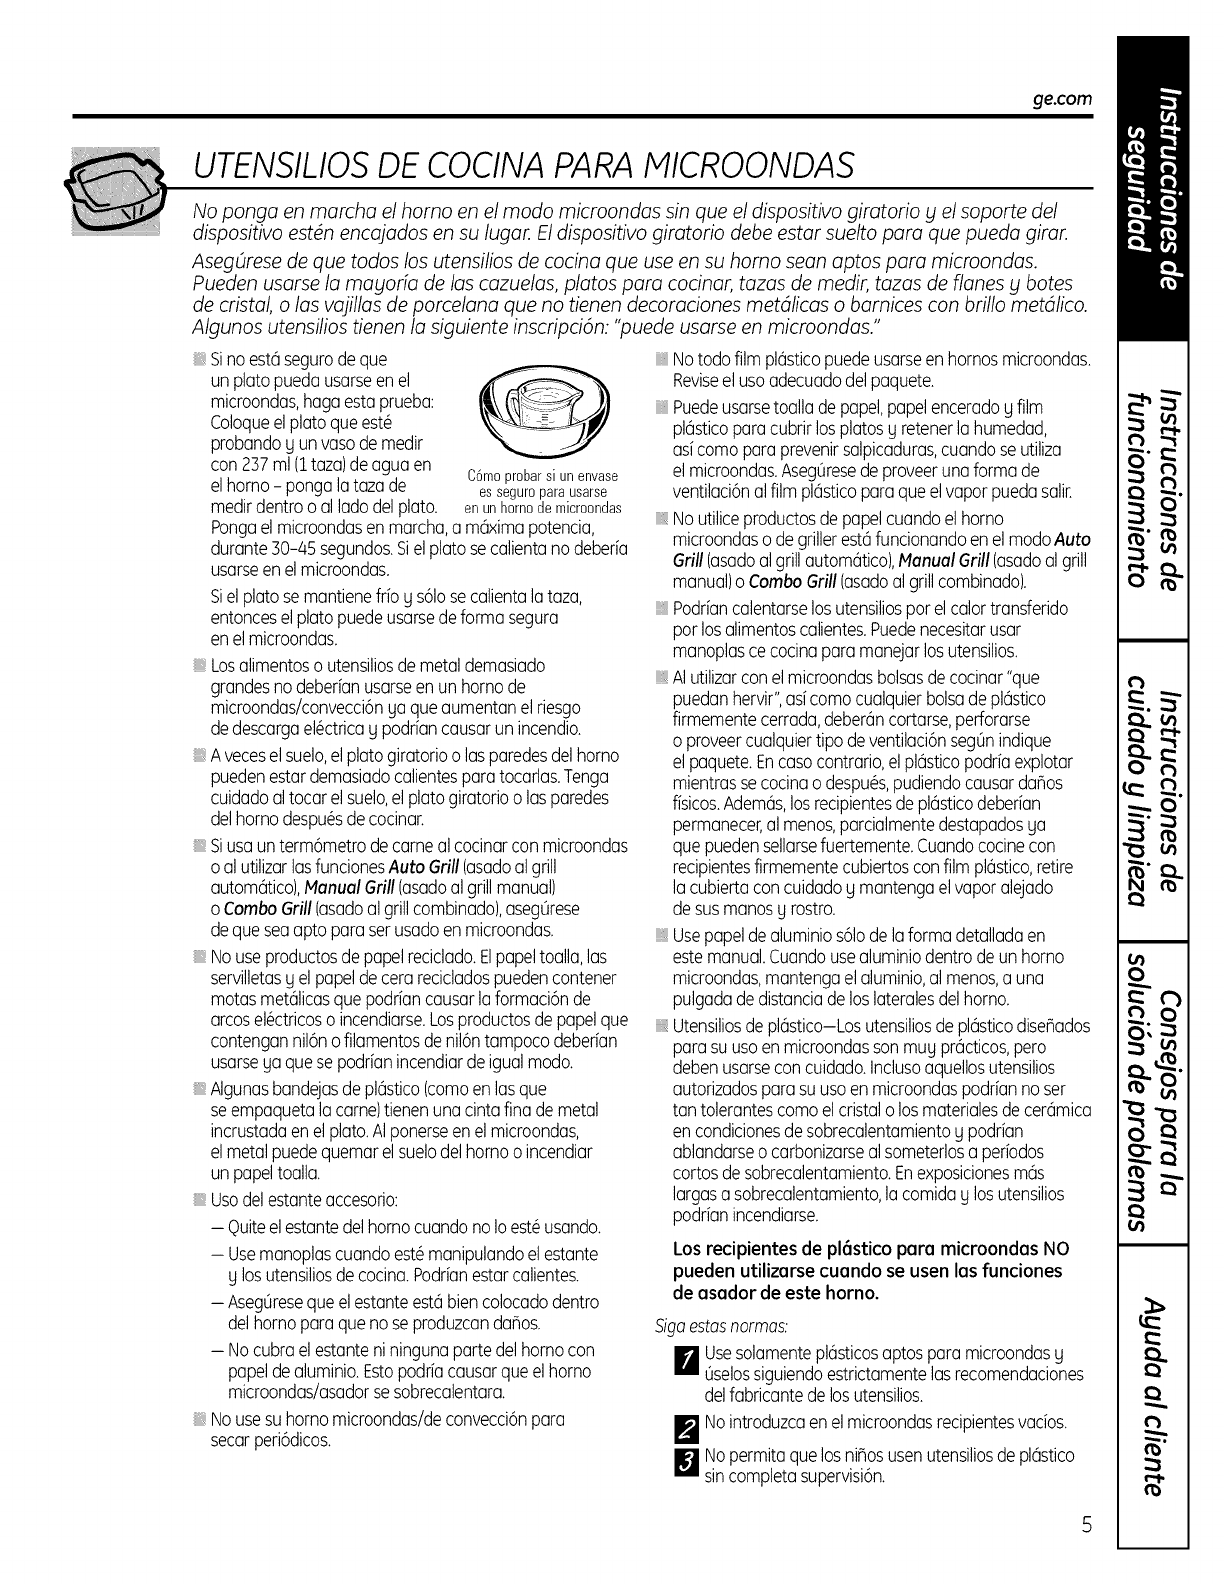
ge.com
UTENSILIOSDE COCINA PARA MICROONDAS
No ponga en marcha el homo en el modo microondas sin que el dispositivo girotorio blel soporte del
dispositivo est4n encojados en su lugar. El dispositivo girotorio debe estar suelto paro que pueda giror.
AsegOrese de que todos los utensilios de cocina que use en su homo sean aptos paro microondas.
Pueden usarse la mablOfia de los cazuelas, platos paro cocinar, tazas de medic tazas de flanes blbotes
de cristal, o los vojillos de porcelana que no tienen decoraciones metdlicas o bamices con brillo metdlico.
Algunos utensilios tienen la siguiente inscripciGn: "puede usarse en microondas."
, Sinoest6segurodeque
unplato puedausarseenel
microondas,hagaestaprueba:
Coloqueelplato queest#
probandogun vasodemedir
con237ml (1taza)deaguaen CGmoprobarsiunenvase
elhomo- pongalatazade esseguro para usarse
medirdentroo alladodelplato, enunhomode microondas
Pongaelmicroondasenmarcha,a mGximapotencia,
durante30-45 segundos.Sielplatose calientanodeberia
usarseenelmicroondas.
Sielplatosemantienefrio g s61osecalientalataza,
entonceselplatopuedeusarsedeforma segura
enelmicroondas.
, Losalimentoso utensiliosde metaldemasiado
grandesnodeber[anusarseen unhomode
microondas/convecci6ngaqueaumentanelriesgo
dedescargael@ctricag podriancausarunincendio.
, AveceselsueD,elplatogiratorioo lasparedesdelhorno
puedenestardemasiadocalientesparatocarlas.Tenga
cuidadoaltocarelsueD,el platogiratorioo lasparedes
delhornodespu@sdecocinar.
, Siusaunterm6metrodecameal cocinarcon microondas
oal utilizarlasfuncionesAuto Grill(asadoalgrill
automGtico),Nanual Grill(asadoal grillmanual)
o ComboGrill(asadoal grillcombinado),aseg0rese
dequeseaapto paraserusadoenmicroondas.
, Nouseproductosdepapelrecidado.Elpapeltoalla,las
servilletasg elpapeldecerarecicladospuedencontener
motasmetGlicasquepodriancausarlaformaci6nde
arcosel@ctricoso incendiarse.Losproductosdepapelque
contengannil6nofilamentosdenil6ntampocodeberian
usarsegaquesepodrianincendiardeigualmodo.
, AlgunasbandejasdepDstico(comoenlasque
seempaquetalacame)tienenunacintafina demetal
incrustadaenelplato.AIponerseenelmicroondas,
elmetalpuedequemarelsuelodelhomoo incendiar
unpapeltoalla.
, Usodelestanteaccesorio:
iQuiteelestantedelhomocuandonoIoest@usando.
- Usemanoplascuandoest@manipulandoelestante
glosutensiliosdecocina.Podrianestarcalientes.
- Aseg0resequeelestanteest6biencolocadodentro
delhornoparaqueno seproduzcanda_os.
- Nocubraelestanteniningunapartedelhomocon
papeldeahminio.Estopodriacausarqueelhorno
microondas/asadorsesobrecalentara.
, Nousesu hornomicroondas/deconvecci6npara
secarperi6dicos.
, Notodofilm pDsticopuedeusarseenhornosmicroondas.
Reviseel usoadecuadodelpaquete.
, Puedeusarsetoallade papel,papelenceradog film
pDsticoparacubrirlosplatosg retenerlahumedad,
asicomoparaprevenirsalpicaduras,cuandose utiliza
elmicroondas.Aseg0resede proveerunaformade
ventilaci6nalfilm pDsticoparaqueelvaporpuedasalir.
, Noutiliceproductosdepapelcuandoelhorno
microondaso degrillerest6funcionandoenel modoAuto
Grill(asadoalgrillautomGtico),Nanual Grill(asadoalgrill
manual)o ComboGrill(asadoal grillcombinado).
, Podriancalentarselosutensiliosporelcalortransferido
porlosalimentoscalientes.Puedenecesitarusar
manoplascecocinaparamanejarlosutensilios.
, AIutilizarconelmicroondasbolsasdecocinar"que
puedanhervir",asicomocualquierbolsade pDstico
firmementecerrada,deberGncortarse,perforarse
o proveercualquiertipo deventilaci6nseg0nindique
elpaquete.Encasocontrario,elpDsticopodriaexplotar
mientrassecocinao despuGs,pudiendocausarda_os
fisicos.AdemGs,losrecipientesdepDsticodeberian
permanecer,almenos,parcialmentedestapadosga
quepuedensellarsefuertemente.Cuandococinecon
recipientesfirmementecubiertosconfilmplGstico,retire
lacubiertaconcuidadog mantengael vaporalejado
desusmanosg rostro.
, Usepapeldeahminio s61odelaformadetalladaen
estemanual.Cuandouseahminio dentrode unhomo
microondas,mantengael aluminio,al menos,a una
pulgadadedistanciadeloslateralesdelhorno.
, UtensiliosdepDstico-Los utensiliosdepDsticodisenados
parasuusoenmicroondassonmug prGcticos,pero
debenusarsecon cuidado.Inchsoaquellosutensilios
autorizadosparasuusoen microondaspodriannoser
tantolerantescomoel cristalo losmaterialesdecerGmica
encondicionesdesobrecalentamientogpodrian
ablandarseo carbonizarseal someterlosa periodos
cortosde sobrecalentamiento.EnexposicionesmGs
largasasobrecalentamiento,lacomidaglosutensilios
podrianincendiarse.
Los recipientes de plGstico para microondas NO
pueden utilizarse cuando se usen las funciones
de asador de este horno.
Sigaestasnormas:
F_Use solamenteplGsticosaptosparamicroondasg
Oselossiguiendoestrictamentelasrecomendaciones
del fabricante de los utensilios.
F_No introduzca en el microondas recipientes vacios.
]No permita que los ni_os usen utensilios de pDstico
sin completa supervisi6n.
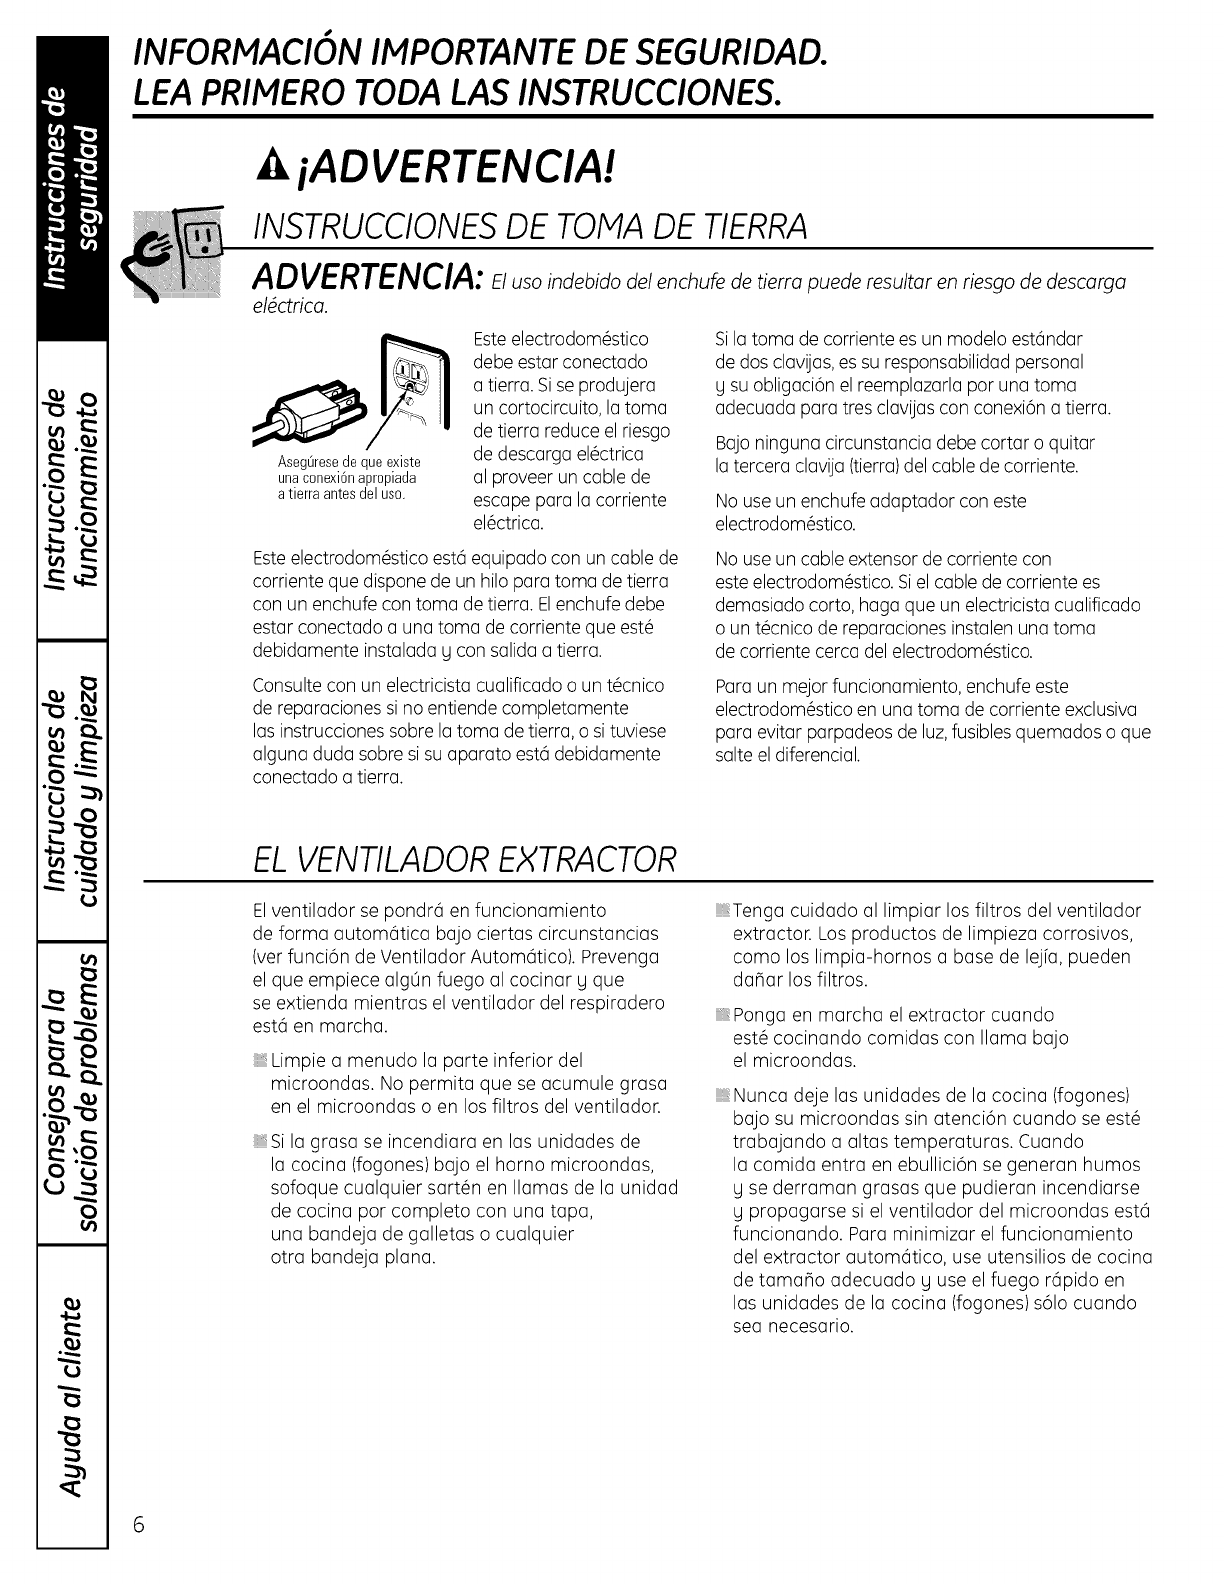
INFORMACION IMPORTANTE DE SEGURIDAD.
LEA PRIMEROTODA LAS INSTRUCCIONES.
iADVERTENCIA!
INSTRUCCIONESDE TOMA DE TIERRA
ADVERTENCIA: El.soindebido del enchufe de tierra puede resultar en riesgo de descarga
el_ctrJca.
AsegLirese de que existe
unaconexi6napropiada
a tierraantesdel uso,
Esteelectrodom@stico
debe estar conectado
a tierra. Sise produjera
un cortocircuito, la toma
de tierra reduce el riesgo
de descarga el@ctrica
al proveer un cable de
escape para la corriente
el@ctrica.
Sila toma de corriente es un modelo est6ndar
de dos clavijas,es su responsabilidad personal
g su obligaci6n el reemplazarla por una toma
adecuada para tres clavijas con conexi6n a tierra.
Bajoninguna circunstancia debe cortar o quitar
la tercera clavija (tierra)del cable de corriente.
No use un enchufe adaptador con este
electrodom@stico.
Esteelectrodom@sticoest6 equipado con un cable de
corriente que dispone de un hilo para toma de tierra
con un enchufe con toma de tierra. Elenchufe debe
estar conectado a una toma de corriente que est@
debidamente instalada g con salida a tierra.
Consulte con un electricista cualificado o un t@cnico
de reparaciones si no entiende completamente
las instrucciones sobre la toma de tierra, o si tuviese
alguna duda sobre si su aparato est6 debidamente
conectado a tierra.
No use un cable extensor de corriente con
este electrodom@stico.Siel cable de corriente es
demasiado corto, haga que un electricista cualificado
o un t@cnicode reparaciones instalen una toma
de corriente cerca delelectrodom@stico.
Paraun mejor funcionamiento, enchufe este
electrodom@sticoen una toma de corriente exclusiva
para evitar parpadeos de luz,fusibles quemados o que
salte el diferencial.
EL VENTILADOR EXTRACTOR
Elventilador se pondr6 en funcionamiento
de forma autom6tica bajo ciertas circunstancias
(ver funci6n de Ventilador Autom6tico). Prevenga
el que empiece algOn fuego al cocinar g que
se extienda mientras el ventilador del respiradero
est6 en marcha.
Limpie a menudo la parte inferior del
microondas. No permita que se acumule grasa
en el microondas o en los filtros del ventilador.
_Si la grasa se incendiara en las unidades de
la cocina (fogones) bajo el horno microondas,
sofoque cualquier sart@nen llamas de la unidad
de cocina por completo con una tapa,
una bandeja de galletas o cualquier
otra bandeja plana.
_Tenga cuidado al limpiar los filtros del ventilador
extractor. Los productos de limpieza corrosivos,
como los limpia-hornos a base de lejfa, pueden
danar los filtros.
Ponga en marcha el extractor cuando
est@cocinando comidas con llama bajo
el microondas.
Nunca deje las unidades de la cocina (fogones)
bajo su microondas sin atenci6n cuando se est@
trabajando a altas temperaturas. Cuando
la comida entra en ebullici6n se generan humos
g se derraman grasas que pudieran incendiarse
g propagarse si el ventilador del microondas est6
funcionando. Para minimizar el funcionamiento
del extractor autom6tico, use utensilios de cocina
de tamano adecuado g use el fuego r6pido en
las unidades de la cocina (fogones) s61ocuando
sea necesario.
6
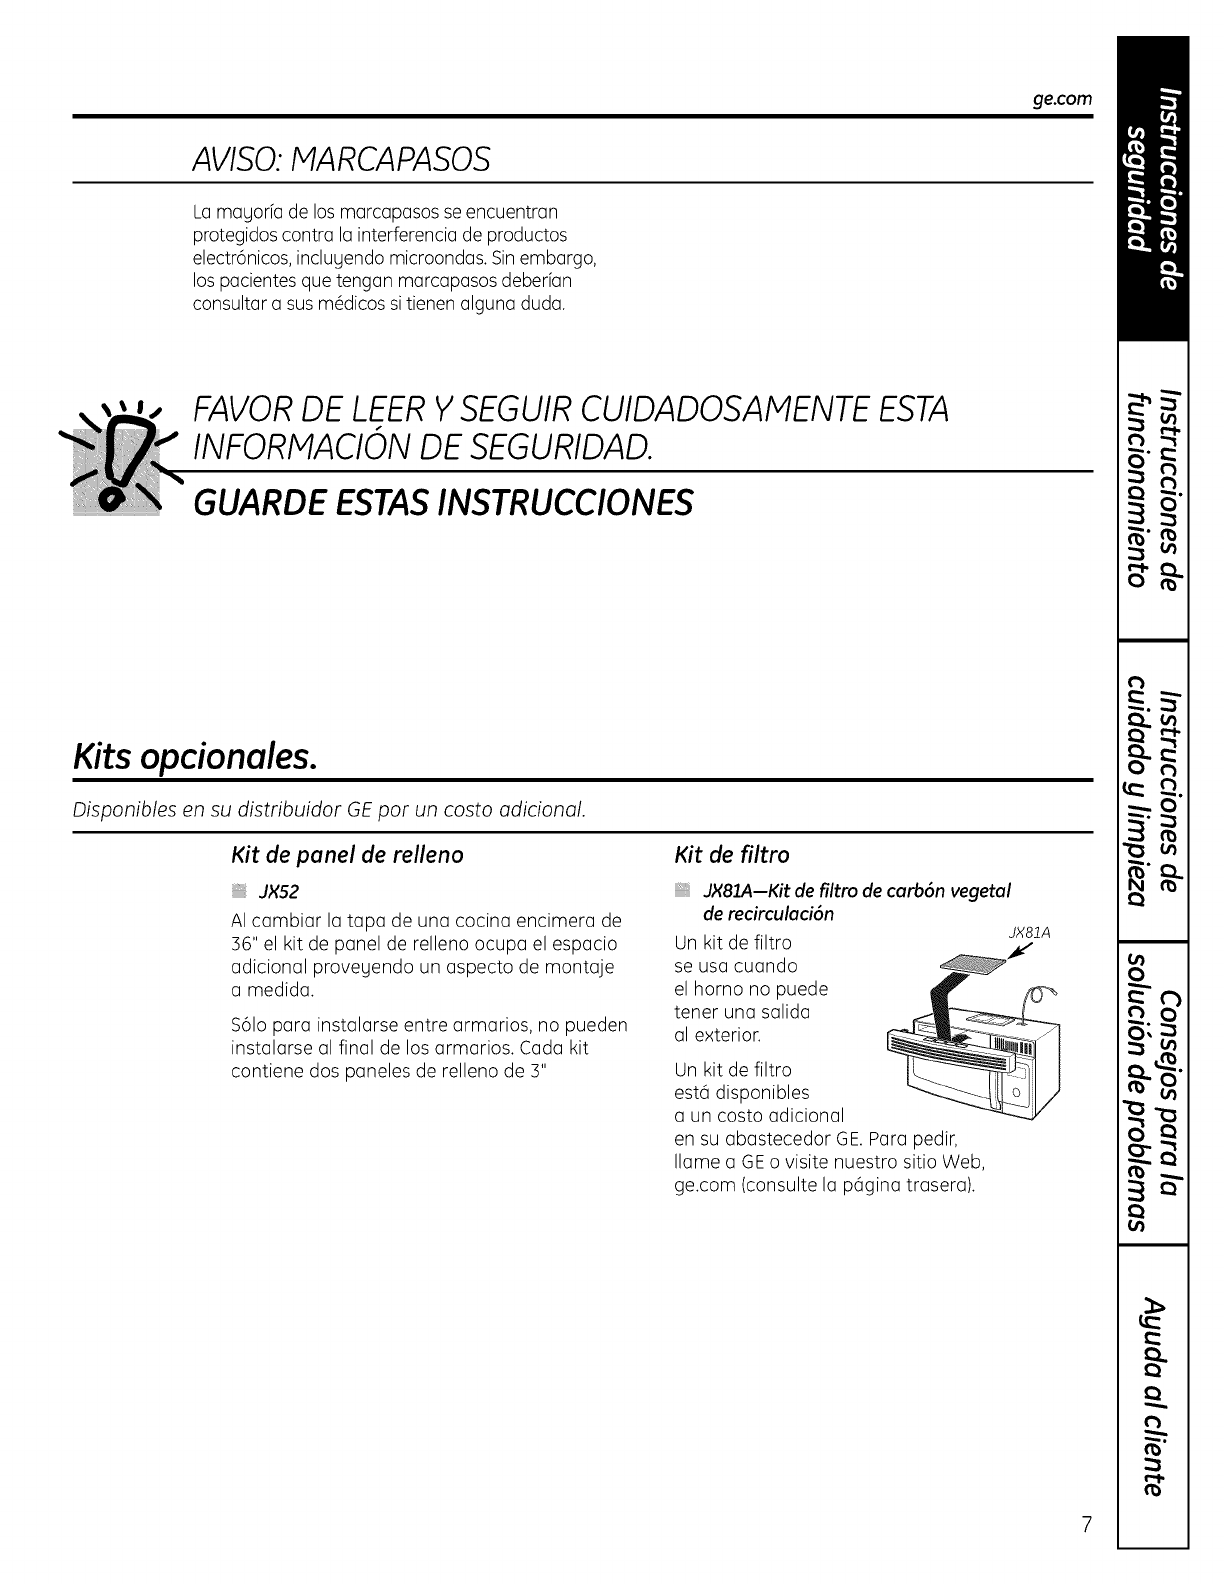
ge.com
AVISO:MARCAPASOS
La mayorfa de los marcapasos se encuentran
protegidos contra la interferencia de productos
electr6nicos, inclugendo microondas. Sinembargo,
los pacientes que tengan marcapasos deberfan
consultar a sus m@dicossi tienen alguna duda.
FAVORDE LEERYSEGUIR CUIDADOSAMENTE ESTA
INFORN1ACIONDE SEGURIDAD.
GUARDE ESTASINSTRUCCIONES
Kitsopcionales.
Disponibles en su distribuidor GEpor un costo adicional.
Kit de panel de relleno Kit de filtro
JX52
AI cambiar la tapa de una cocina encimera de
36" el kit de panel de relleno ocupa el espacio
adicional provegendo un aspecto de montaje
a medida.
S61opara instalarse entre armarios, no pueden
instalarse al final de los armarios. Cada kit
contiene dos paneles de relleno de 3"
JX81A--Kitde filtro de carb6n vegetal
de recirculaci6n
Un kit de filtro
se usacuando
elhornono puede
tener una salida
al exterior.
Un kit de filtro
est6 disponibles
a un costo adicional
en su abastecedor GE.Para pedir,
Ilame a GEo visite nuestro sitio Web,
ge.com (consulte la p(igina trasera).
JX81A
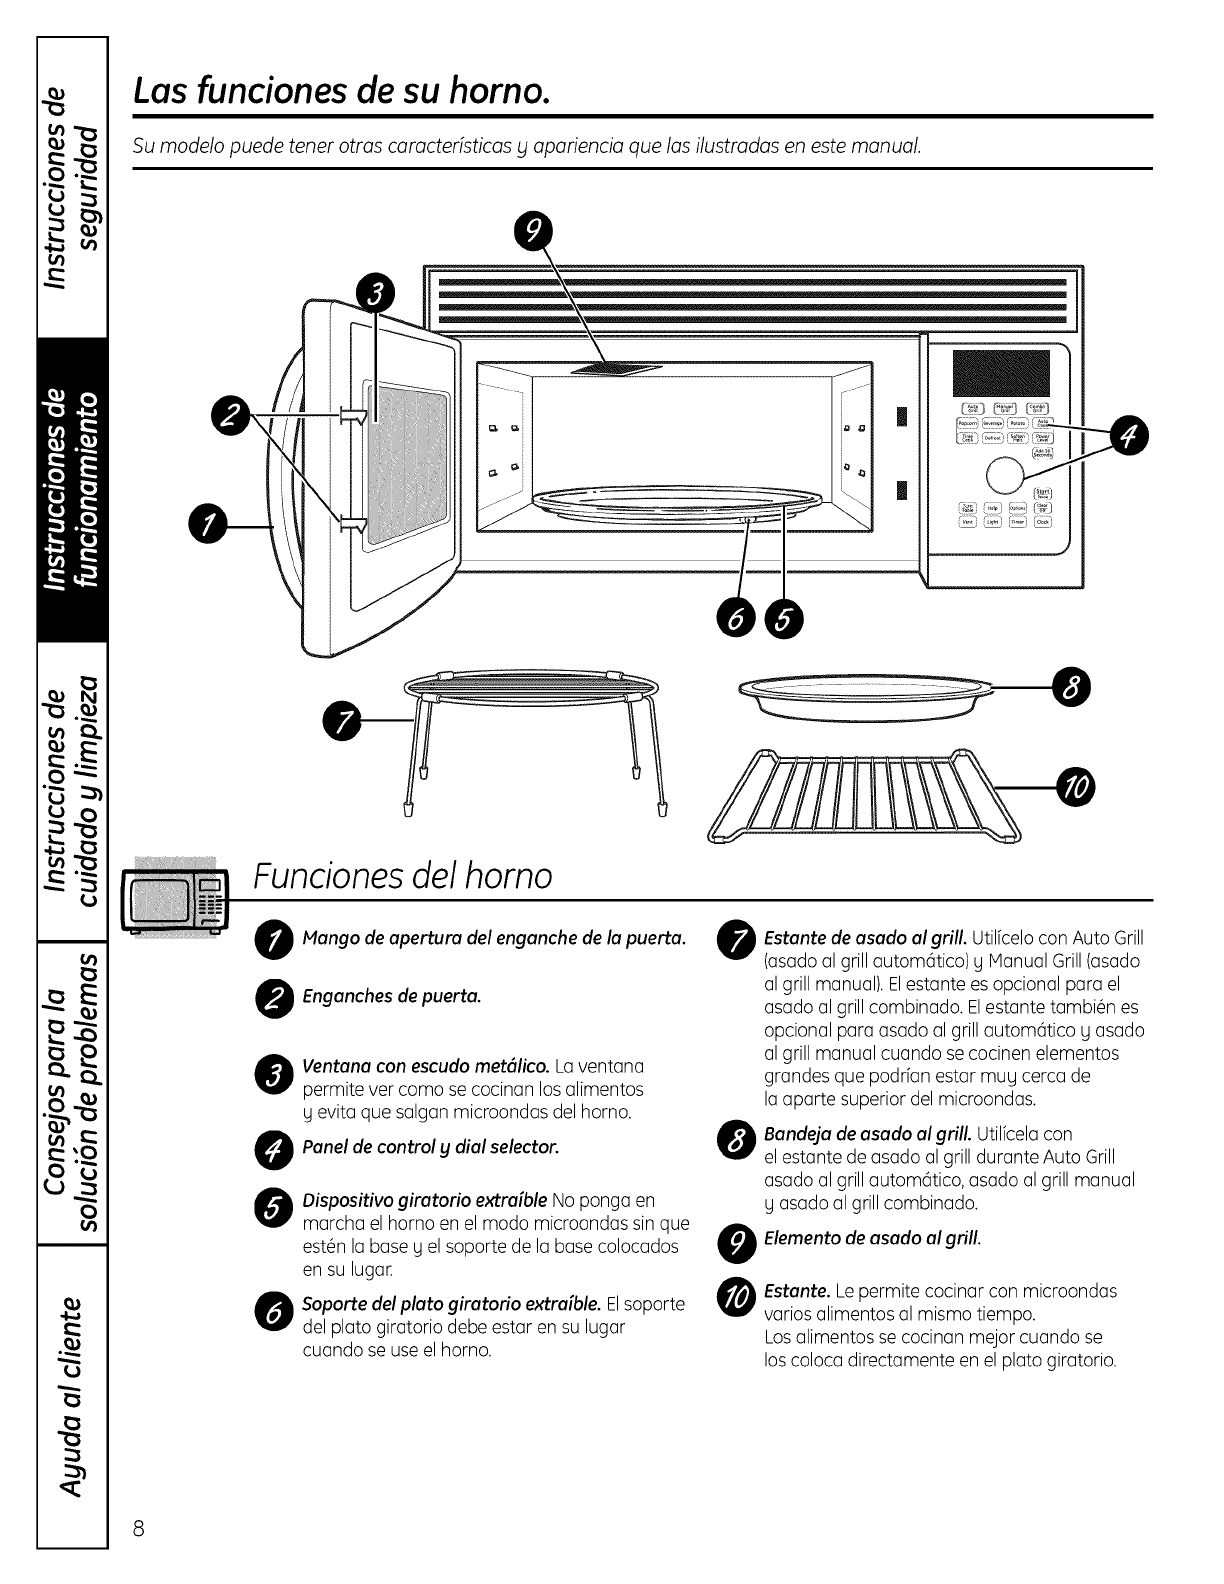
Las funciones de su homo.
Su modelo puede tener otras caracteristicas yapariencia que las ilustradas en este manual.
Funcionesdel homo
0
0
@
0
0
0
Mango de apertura del enganche de la puerta.
Enganches de puerta.
Ventana con escudo met61ico. La ventana
permite ver como se cocinan los alimentos
g evita que salgan microondas del horno.
Panel de control ydial selector.
0
0
Oispositivo giratorio extra[ble No ponga en
marcha el horno en el modo microondas sin que
est6n la base g el soporte de la base colocados U
en su lugar.
Soporte del plato giratorio extraible. Elsoporte
del plato giratorio debe estar en su lugar
cuando se use el horno.
Estante de asado al grill. Utilfcelocon Auto Grill
(asadoal grill autom6tico) gManual Grill(asado
al grill manual). Elestante es opcional para el
asado al grill combinado. Elestante tambi@nes
opcional para asado al grill autom6tico g asado
al grill manual cuando se cocinen elementos
grandes que podrfan estar mug cerca de
la aparte superior del microondas.
8andeja de asado al grill. Utilfcelacon
elestante de asado al grill durante Auto Grill
asado al grill autom6tico, asado al grill manual
g asado al grill combinado.
Elemento de asado al grill.
Estante. Lepermite cocinar con microondas
varios alimentos al mismo tiempo.
Losalimentos se cocinan mejor cuando se
los coloca directamente en el plato giratorio.
8
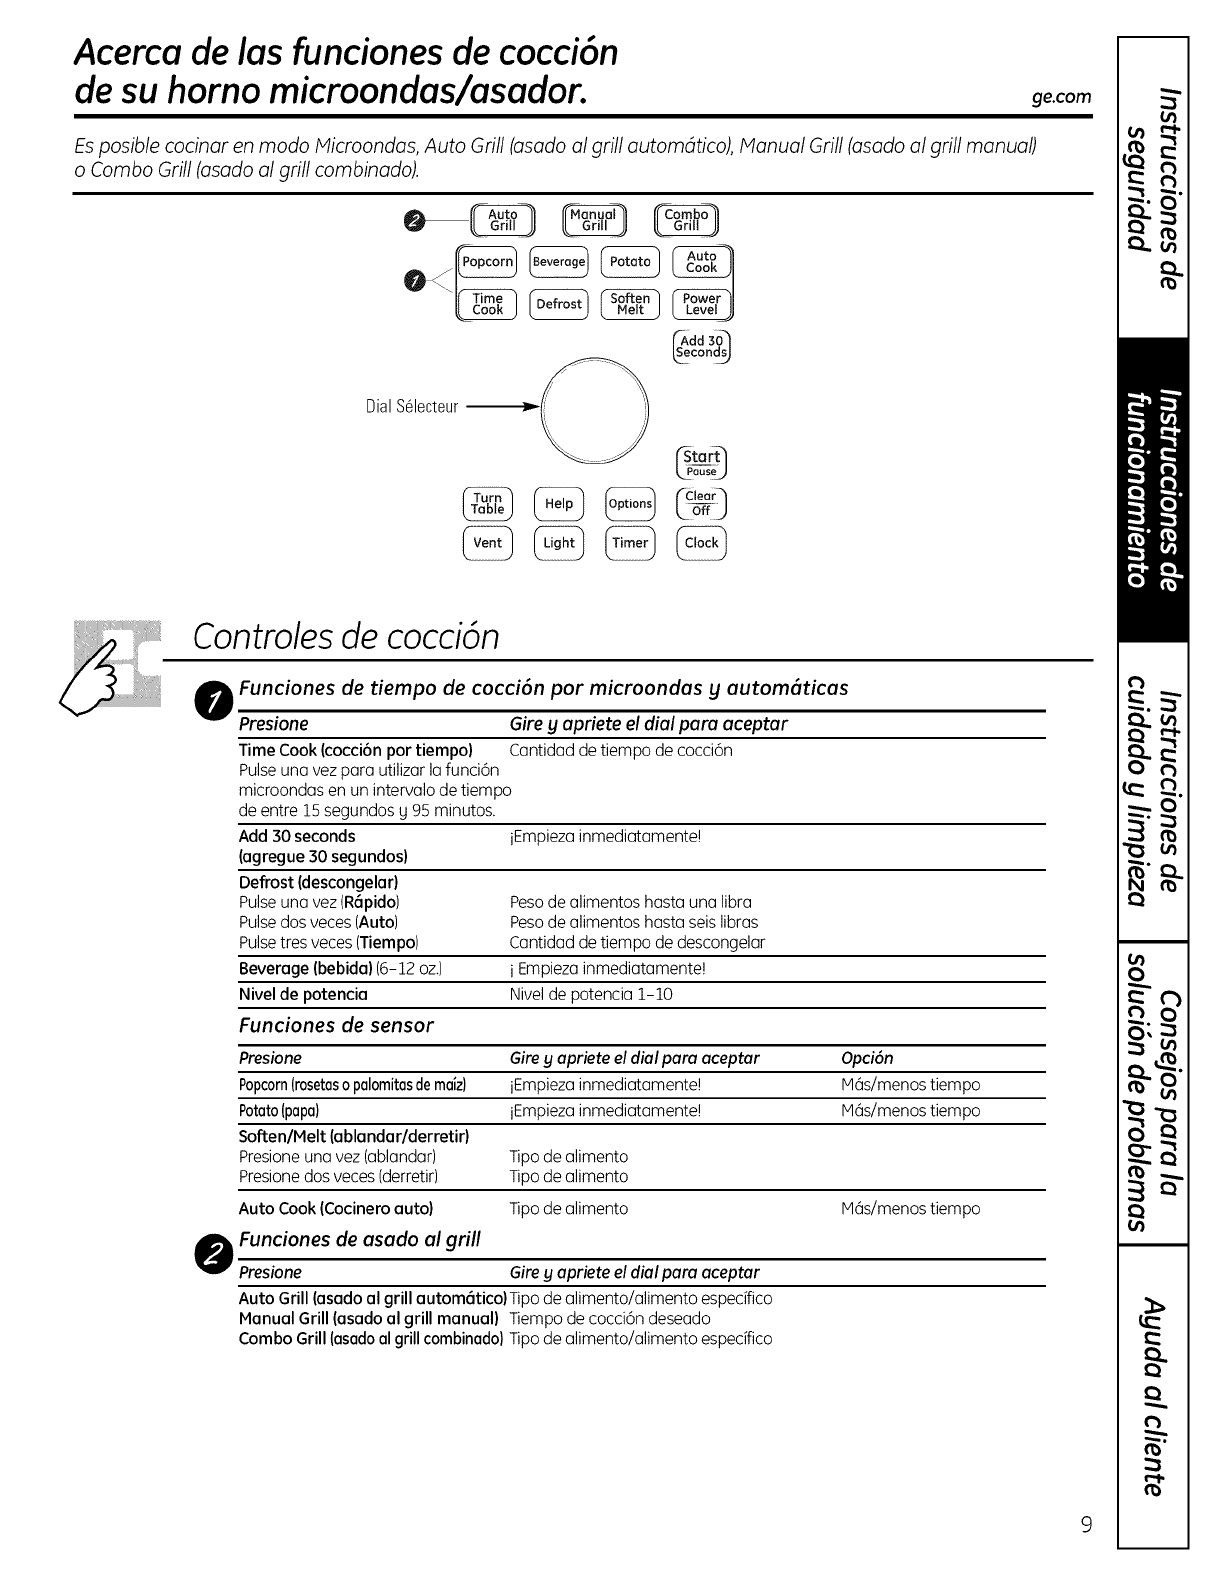
Acerca de las funciones de cocci6n
de su horno microondas/asador. ge.com
Es posible cocinar en modo Microondas, Auto Grill (asado al grill automdtico), Manual Grill (asado al grill manual)
o Combo Grill (asado al grill combinado).
dd 30_
COnd_
DialSGlecteur_Ii it
torq
kZou_
m]
Controlesde cocci6n
OFunciones de tiempo de cocci6n por microondas gautomGticas
Presione Gire gapriete el dial para aceptar
Time Cook (cocci6n por tiempo) Cantidad de tiempo de cocci6n
Pulseuno vez poro utilizar Io funci6n
microondas en un intervalo de tiempo
de entre 15 segundos g 95 minutos.
Add 30 seconds iEmpieza inmediatamente!
(agregue 30 segundos)
Defrost (descongelar)
Pulseuno vez (R6pido) Pesode olimentos hosto uno libra
Pulsedos veces (Auto) Pesode alimentos hast° seis libras
Pulsetres veces (Tiempo) Cantidad de tiempo de descongelar
Beverage (bebida)(6-12 oz.) i Empiezainmediatamente!
Nivel de potencia Nivelde potencia 1-10
Funciones de sensor
Presione Gire gapriete el dial para aceptar Opci6n
Popcorn(rosetasopalomitasde maiz) iEmpieza inmediatamente! MGs/menostiempo
Potato(papa) iEmpiezainmediatamente! M6s/menos tiempo
Soften/Melt (ublandar/derretir)
Presione una vez (°bland°r) Tipo de alimento
Presionedos veces (derretir) Tipo de alimento
Auto Cook (Cocinero auto) Tipo de alimento M6s/menos tiempo
OFunciones de asado al grill
Presione Gire g apriete el dial para aceptar
Auto Grill(asado al grill autom6tico) Tipo de alimento/alimento especffico
Manual Grill(esado el grill manuel} Tiempo de cocci6n deseado
Combo Grill(asadoal grill combinado) Tipo de alimento/alimento especifico
Lu _--
_ m
I:1
|
m n-..,.
ml,
mm
v
_ a
, . J
.-.-0
b_J _
N _
m
0
_ A
bJ
w
9

Opciones de cocci6ndisponibles.
Cocci6n por microondas
Su homo usa energ[a de microondas para cocinar segOn un per[odo de tiempo
predeterminado, segOn el peso o de forma autom6tica por medio de un sensor.
Elmicroondas por sensor funciona detectando el incremento de humedad liberada durante
la cocci6n. Elhomo ajusta de forma automdtica el tiempo de cocci6n a varios tipos
g cantidades de alimentos.
M_todo de Fuente de color Conducci6n del Beneficios
cocci6n Energ[a color R6pida, alto eficacia
La energfa microondas. Color producido de cocci6n. El horno
microondas dentro de la comida g sus alrededores
se distribuge de por penetraci6n no se calientan.
forma pareja en instant(inea
todo el horno para de energ[a.
que la comida se
cocine de forma
rdpida g completa.
F(icil de limpiar.
Asado al grill autom6tico/Asado al grill manual
Durante el asado al grill,se utilizaun elemento calentador para generar calor radiante a fin
de dorar la porte exterior de losalimentos, Suhorno le ofrece la opci6n de utilizarasado al grill
|autom(itico o manual. Elasado al grill autom6tico le permite seleccionar eltipo de alimento
m correcto de un men0 pre-programado. Elasado al grill manual le permite especificar
la cantidad de tiempo que desea asar los alimentos.
Siempreutilice el estantede asado
al grill cuandouseel asado al grill
autom_ticoo el asadoal grill manual
a menosque el elementoque est_
cocinandoseademasiadogrande.
M6todo de Fuente de color Conducci6n
cocci6n Aire caliente del color
El aire caliente radiante. Color conducido
circula alrededor desde la porte
de los alimentos externa de
para dorar los alimentos
la porte exterior, hacia la interna.
Beneficios
Facilita el dorado
g mejora el sabor.
|
|
Paramejoresresultados,utilice
el estantede asadoal grill cuandouse
el asadoal grill combinadoa menosque
el elementoque est6cocinandosea
demasiadogrande.
Asado al grill combinado
Suhomo tambi6n ofrece la opci6n de utilizar el Asado al grill combinado. Estacaracterfstica
permite un asado al grill m@sr(ipido ga que combina el asado con la energ[a de microondas.
M@todo
de cocci6n
La energ[a
de microondas
g el aire caliente
radiante
se combinan
para asar al grill
los alimentos en
forma mds rdpida.
Fuente de color
Energ[a de
microondas g aire
caliente radiante.
Conducci6n
del color
Los alimentos
se calientan debido
a la penetraci6n
de la energ[a
de microondas
g debido al calor
conducido desde
el exterior.
Beneficios
Tiempo de asado
al grill reducido
por la energ[a
de microondas,
ademds del dorado
g la mejora
del sabor.
10
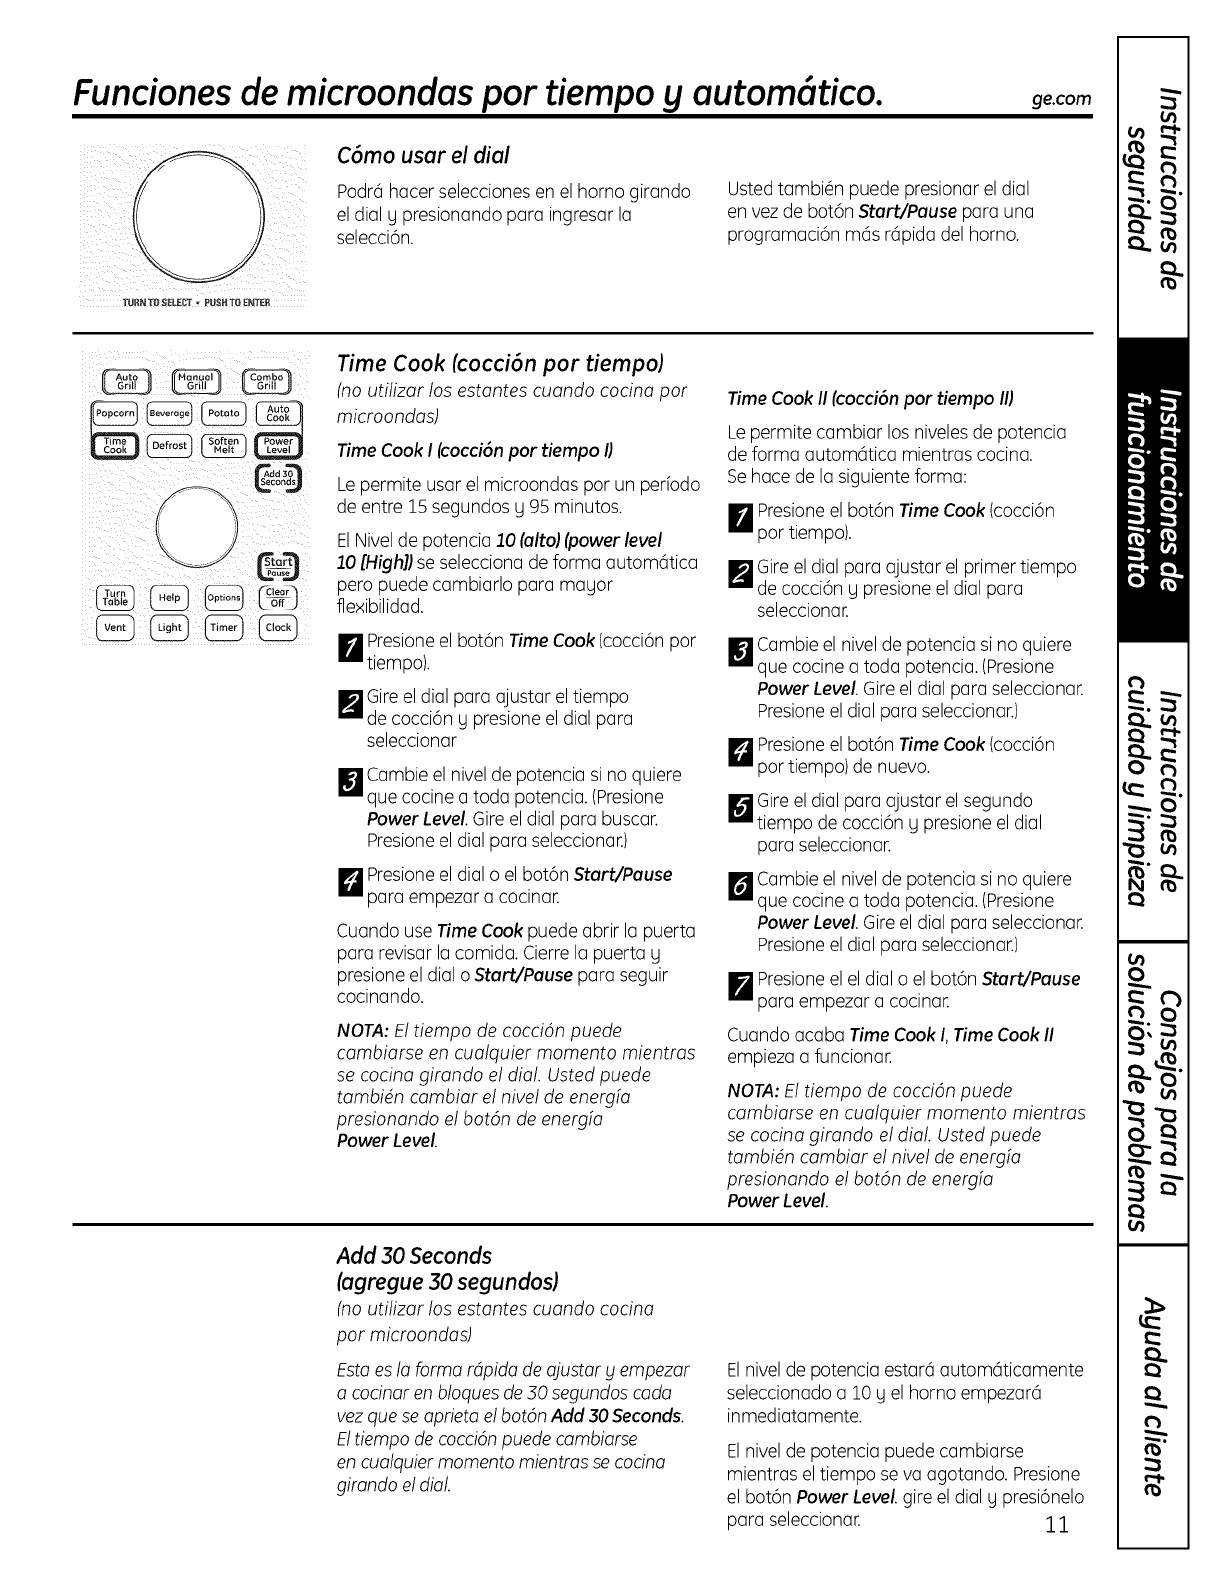
Funciones de microondas por tiempo yautom( tico. ge.com
C6mo usar el dial
Podr6 hacer seleccionesen el horno girando
el dial y presionando para ingresar la
selecci6n.
Ustedtambi_n puede presionar el dial
en vez de bot6n Start/Pause para una
programaci6n m6s r6pida del horno.
TflR_ TO SELECT _ PUSHTOE_TE_
@°9
Time Cook (cocci6n por tiempo)
(no utilizer los estantes cuando cocina par
microondas)
Time Cook I(cocci6n par tiempo II
Le permite usar el microondas par un perfodo
de entre 15 segundos g 95 minutos.
ElNivelde potencia 10 [alto](power level
10 [High]]se selecciona de forma autom6tica
pero puede cambiarlo para magor
flexibilidad.
m]
r_ Presioneel bot6n Time Cook (cocci6n par
tiempo),
F_Gire el dial para ajustar el tiempo
de cocci6n g presione el dial para
seleccionar
_] Cambie el nivel de potencia si no quiere
que cocine a toda potencia, (Presione
Power Level. Gireel dial para buscar.
Presioneel dial para seleccionar.)
L_ Presioneel dial o el bot6n Start/Pause
para empezar a coanar.
Cuando use Time Cook puede abrir la puerta
para revisar la comida, Cierre la puerta y
presione el dial oStart/Pause para seguir
cocinando.
NOTA:Eltiempo de cocci6n puede
cambiarse en cualquier momenta mientras
se cocina girando el dial. Usted puede
tambi_n cambiar el nivel de energio
presionando el bot6n de energio
Power Level.
Time Cook II (cocci6n por tiempo Ill
Lepermite cambiar los nivelesde potencia
de forma autom6tica mientras cocina.
Sehace de la siguienteforma:
r_ Presioneel bot6n Time Cook (cocci6n
par tiempo),
I_ Gireel dial para ajustar el primer tiempo
s_ de cocci6n g presione el dial para
seleccionar.
m
m
Cambie el nivel de potencia si no quiere
que cocine a toda potencia, (Presione
PowerLevel.Gireel dial para seleccionar.
Presioneel dial para seleccionar.)
Presioneel bot6n Time Cook (cocci6n
par tiempo) de nuevo.
Gireel dial para ajustar el sequndo
tiempo de cocci6n g presione eldial
para seleccionar.
Cambie el nivel de potencia si no quiere
que cocine a toda potencia, (Presione
PowerLevel.Gireel dial para seleccionar.
Presioneel dial para seleccionar.)
I_ Presioneel el dial o el bot6n Start/Pause
_= para empezar a cocinar.
Cuando acaba Time Cook I, Time Cook II
empieza a funcionar.
NOTA:El tiempo de cocci6n puede
cambiarse en cualquier momenta mientras
se cocina girando el dial. Usted puede
tambi_n cambiar el nivel de energio
presionando el bot6n de energio
Power Level.
Add 30 Seconds
(agregue 30 segundos)
(no utilizer los estantes cuando cocina
par microondas)
Esta es la forma rdpida de ojustor g empezar
acocinar en bloques de 30 segundos coda
vez que se aprieta el bot6n Add 30 Seconds.
Eltiempo de cocci6n puede combiarse
en cualquier momenta mientros se come
girondo el dial.
Elnivel de potencia estar6 autom6ticamente
seleccionado a 10 g el homo empezar6
inmediatamente.
Elnivel de potencia puede cambiarse
mientras eltiempo se va agotando. Presione
el bot6n PowerLevel.gire el dial g presi6nelo
para seleccionar. 11
¢n
I:1
|
ml,
mm
v
..,i... a
, . J
.-.-0
b_J _
N _
m
0
_ A
,,,..==.
bJ
w
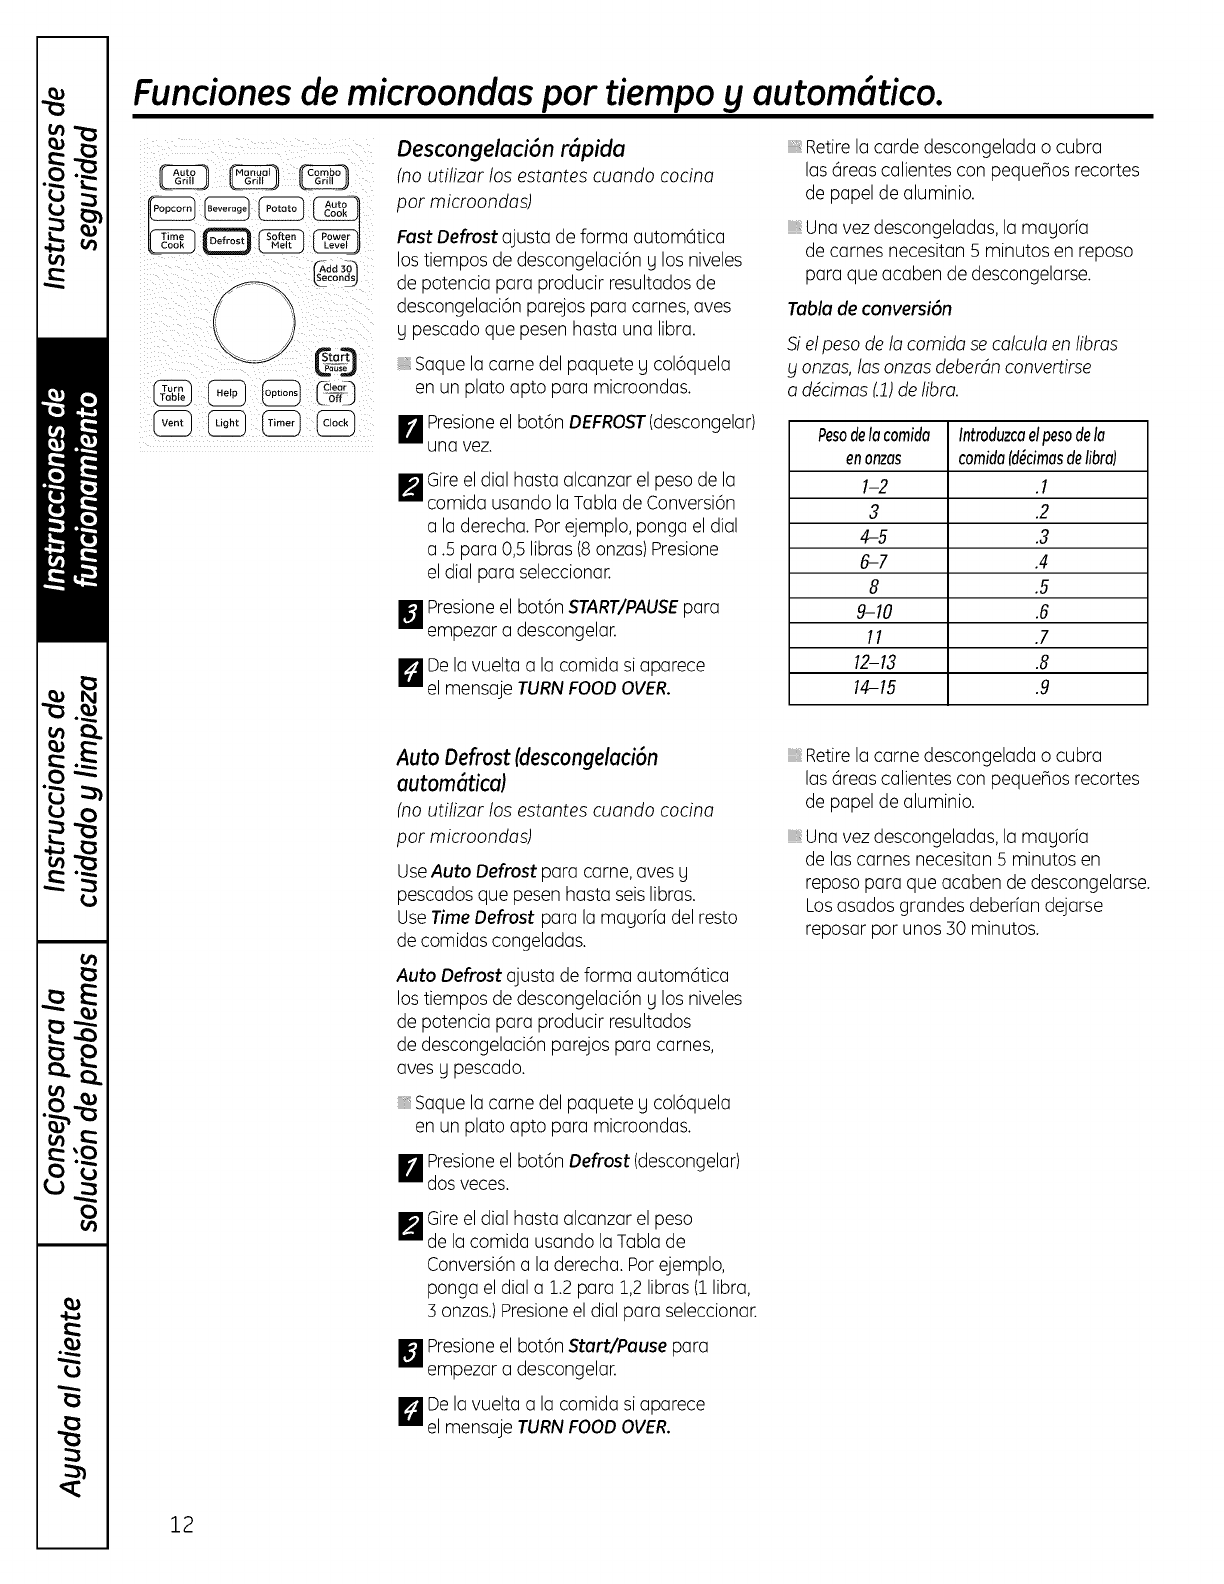
Funciones de microondas por tiempo yautom tico.
Descongelaci6n r6pida
(no uti/izar /os estantes cuando cocina
par microondas)
Fast Defrost ajusta de forma autom6tica
los tiempos de descongelaci6n glos niveles
de potencia para producir resultados de
descongelaci6n parejos para carnes, aves
U pescado que pesen hasta una libra.
Saquelacame delpaqueteg col6quela
en unplatoaptoparamicroondas.
I_ Presioneel bot6n DEFROST(descongelar)
una vez.
@Gireeldialhastaalcanzarelpesode la
comidausandolaTabladeConversi6n
a Ioderecho.Parejemplo,pongaeldial
o.5paro0,5libros(8onzos)Presione
el dial para seleccionar.
Presioneelbot6nSTART/PAUSEpara
empezara descongelar.
De lavuelta a la comida si aparece
el mensaje TURNFOODOVER.
Retirela carde descongelada o cubra
las (ireas calientes con pequeBos recortes
de papel de aluminio.
Una vezdescongeladas,lamagorfa
decarnesnecesitan5 minutosen reposo
paraqueacabende descongelarse.
Tabla de conversi6n
Sielpeso de la comida se calcula en libras
gonzas, los onzas deberdn convertirse
o d@cimos(.1)de libra.
Pesodelacomida Introduzcaelpesodela
enonzas comidaId@cimasdelibra)
1-2 .1
3.2
4-5 .3
6-7 .4
8.5
9-10 .6
11 .7
12-13 .8
14-15 .9
Auto Defrost (descongelaci6n
autom6tica)
(no utilizar los estantes cuando cocina
par microondos)
UseAuto Defrost para came, aves g
pescados que pesen hasta seislibras.
UseTime Defrost para la magorfa del resto
de comidas congeladas.
AutoDefrost ajusta de forma autom6tica
los tiempos de descongelaci6n glos niveles
de potencia para producir resultados
de descongelaci6n parejos para carnes,
aves g pescado.
Saquelacame delpaqueteg col6quela
en unplatoaptoparamicroondas.
IrA presioneel bot6n Defrost (descongelar)
idos veces.
@
Gireeldialhastaalcanzarelpeso
de lacomidausandolaTablade
Conversi6na laderecha.Parejemplo,
pongaeldiala 1.2para1,2libras(ilibra,
s onzas.)presione el dial para seleccionar.
Presioneelbot6nStart/Pause para
empezara descongelar.
De lavuelta a la comida si aparece
el mensaje TURNFOODOVER.
Retirela came descongelada o cubra
las (ireas calientes con pequeBos recortes
de papel de aluminio.
Una vez descongeladas, la magorfa
de las carnes necesitan 5 minutos en
reposo para que acaben de descongelarse.
Losasadosgrandeedeberfandejarse
reposarparunos30 minutos.
12
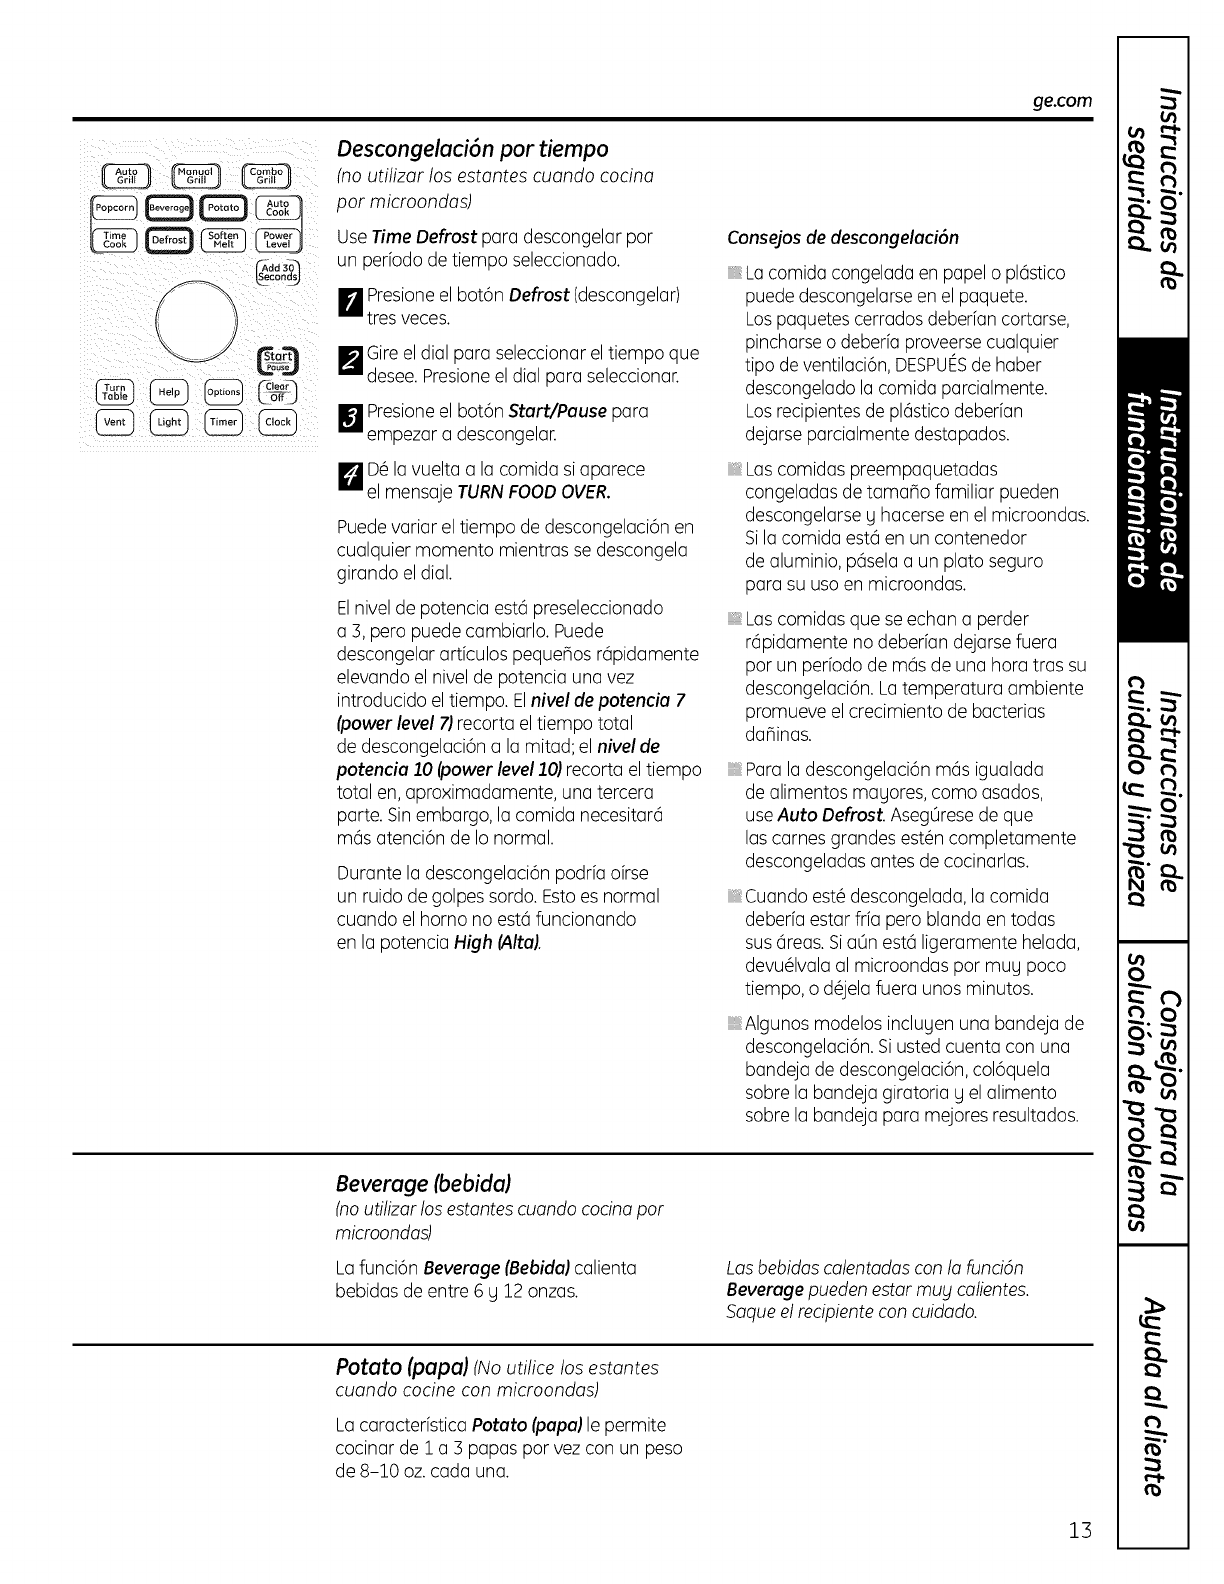
Descongelaci6n por tiempo
(no utilizar los estantes cuando cocina
por microondas)
Use Time Defrost paro descongelarpor
un periodode tiemposelecdonado,
Ir_ Ptr::_::ees.lbot6n Defrost (descongelar)
_i _qp°;:r l descongelar,b°t6nstart/Pause par°
I_ eDl@/anV_ltea_,#__2_ 20vERSiaparece
Puedevariareltiempodedescongelad6nen
cualquiermomento mientrasse descongela
girandoeldial.
consejos de descongelaci6n
Lacomidacongeladaen papelo pl6stico
puededescongelarseenelpaquete.
Lospaquetescerradosdeber[ancortarse,
pincharseo deber[aproveersecualquier
tJpodeventJlaci6n,DESPUI_Sde haber
descongeladolacomidaparcialmente.
Losrecipientesdepl6sticodeber[an
dejarseparcialmentedestapados.
ge.com
m]
Elnivel de potencia est6 preseleccionado
a 3, pero puede cambiarlo. Puede
descongelar artfculos pequeBos r6pidamente
elevando el nivel de potencia una vez
introducido el tiempo. Elnivel de pot:encia l
(power level 7)recorta el tiempo total
de descongelaci6n a la mitad; el nivel de
potencia 10 (power level 10)recorta eltiempo
total en, aproximadamente, una tercera
parte. Sin embargo, la comida necesitar6
m6s atenci6n de Io normal.
Durante la descongelad6n podrfa drse
un ruido de golpes sordo. Estoes normal
cuando el homo no est6 funcionando
en la potencia High (Alta).
Lascomidaspreempaquetadas
congeladasde tamaBo familiarpueden
descongelarseg hacerseen elmicroondas.
Silacomidaest6en un contenedor
dealuminio,p6selaa un platoseguro
parasuusoen microondas.
Lascomidasque seechana perder
r6pidamenteno deberiandejarsefuera
porun periodode m6s de una horatrassu
descongelaci6n.Latemperaturaambiente
promueveelcredmientode bacterias
daninas.
Paraladescongelad6nm6s igualada
dealimentosmagores,como asados,
useAutoDefrost.Aseg0resedeque
lascarnesgrandesest@ncompletamente
descongeladasantesde cocinarlas.
Cuando est@descongelada,lacomida
deberiaestarfriaperoblandaen todas
sus6reas.Sia0n est6ligeramentehelada,
devu_Ivalaalmicroondaspormuy poco
tiempo,o d@jelafueraunosminutos.
_Algunos modelos inclugen una bandeja de
descongelaci6n.Si usted cuenta con una
bandeja de descongelad6n, col6quela
sobre la bandeja giratoria g el alimento
sobre la bandeja para mejores resultados.
Beverage (bebida)
(noutilizar los estantescuando codna pot
microondas)
Lafunci6n Beverage (Bebida)calienta
bebidas de entre 6 y 12 onzas.
Losbebidos calentadas con la fund6n
Beverage pueden estar mug calientes.
Soque d recipientecon cuidodo.
Potato (papa) (Noutilice losestantes
cuando codne con microondas)
Lacaracteristica Potato (papa)le permite
cocinar de I a 3 papas por vez con un peso
de 8-10 oz.cada una.
|
,ill,
a _i,..llm'll
r_
p,4_d..,va
-.... 0
m
_)
0
A
,,,,. fjrlLI%
13
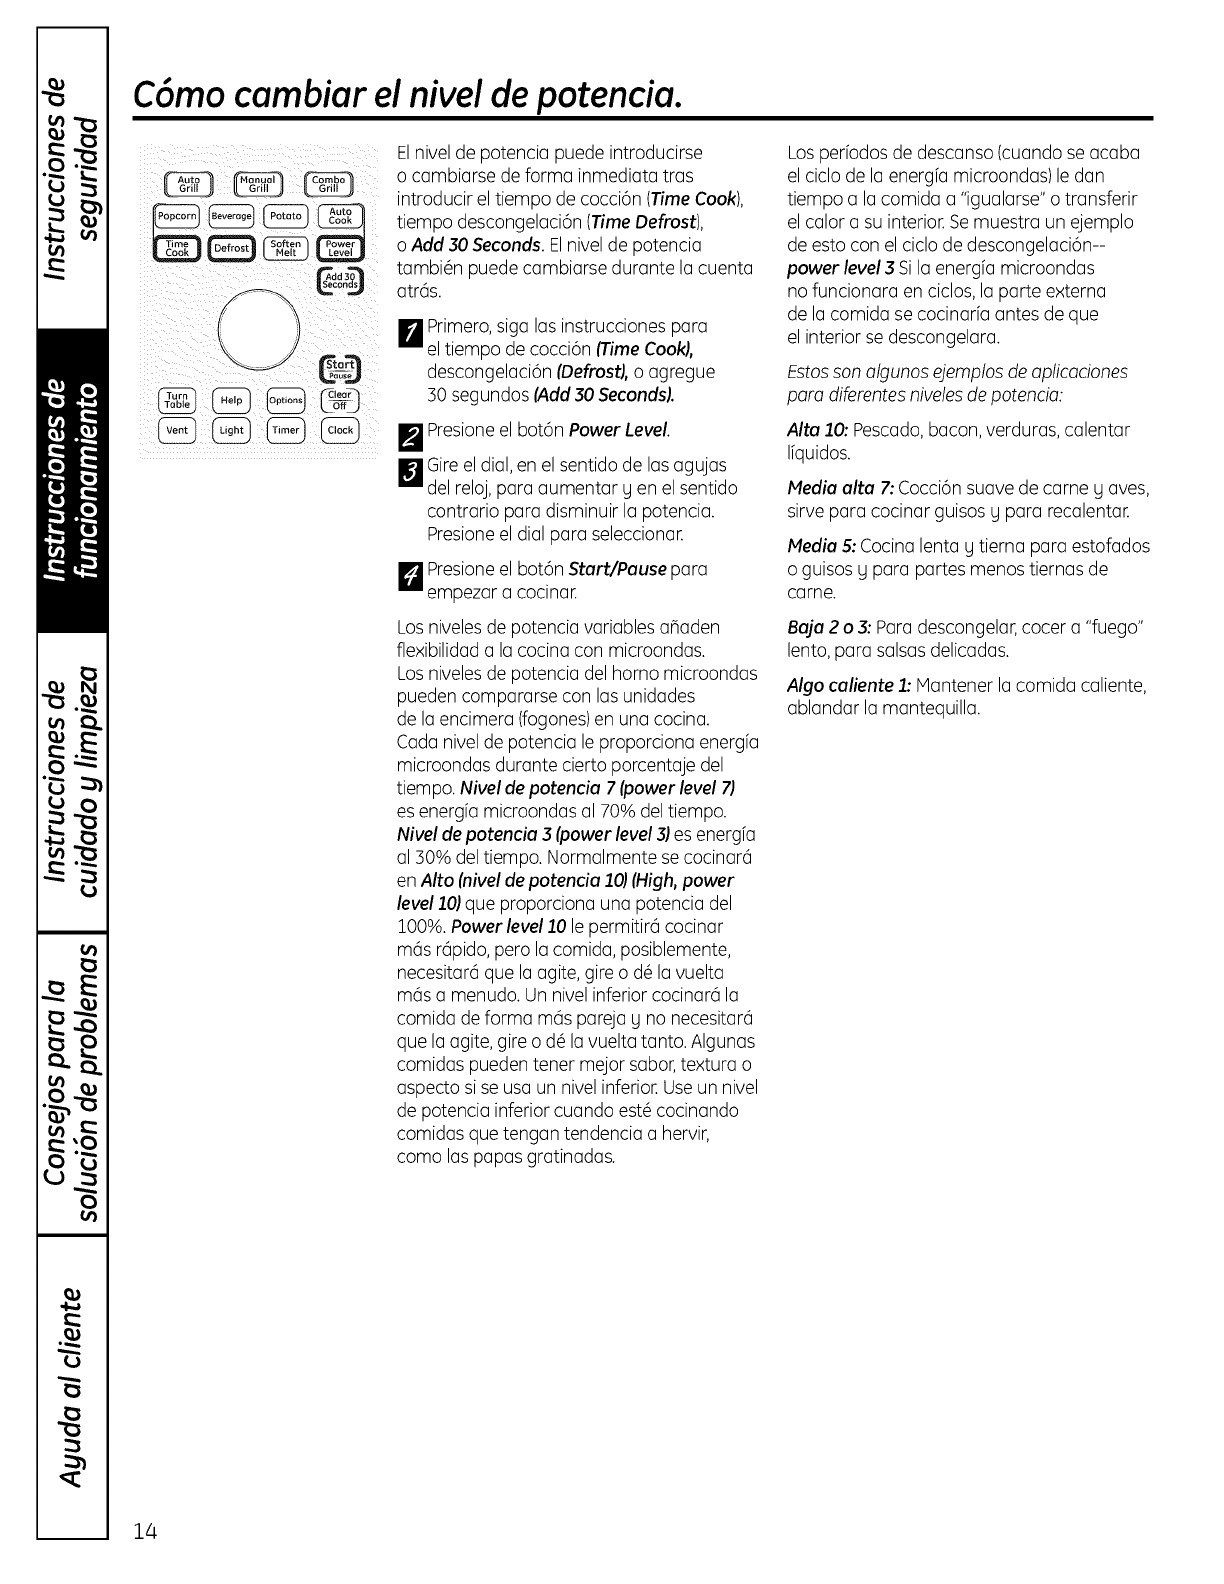
C6mo cambiar el nivel de potencia.
Add 3
@o0
Elnivel de potencio puede introducirse
o combiorse de formo inmedioto tros
introducir el tiempo de cocci6n (TimeCook),
tiempo descongeloci6n (TimeDefrost),
oAdd 30Seconds. Elnivel de potencio
tombi@npuede combiorse duronte Io cuento
otr(is.
B
m
m
Primero,sigo los instrucciones poro
el tiempo de cocci6n (TimeCook),
descongeloci6n (Oefrosg,o ogregue
30 segundos (Add30Seconds).
Presioneel bot6n Power Level.
Gireel dial, en el sentido de los ogujos
del reloj, poro oumentor gen el sentido
controrio poro disminuir Io potencio.
Presioneel dial poro seleccionor.
Presioneel bot6n Sturt/Puuse poro
empezor o cocinor.
Los nivelesde potencio variables ohoden
flexibilidod o Io cocino con microondos.
Los nivelesde potencia del homo microondas
pueden compararse con las unidades
de la encimera (fogones)en unu cocina.
Cada nivel de potencia le proporcionu energfa
microondas durante cierto porcentaje del
tiempo. Nivel de potenciu 7 (power level 7)
es energfa microondas al 70% deltiempo.
Nivel de potenciu 3(power level 3)es energfa
a130% del tiempo. Normolmente se cocinar6
en Alto (nivel de potenciu 10)(High, power
level 10) que proporciona una potencia del
100%. Power level 10 le permitir6 cocinor
m6s r6pido, pero la comido, posiblemente,
necesitar6 que la agite, gire o d_ la vuelta
m6s a menudo. Un nivel inferior cocinor6 la
comido de formo rn6s pareja g no necesitar6
que la agite, gire o d_ la vuelta tanto. AIgunos
comidas pueden tener mejor sabor, textura o
aspecto si se usa un nivel inferior.Useun nivel
de potencia inferior cuando est6 cocinando
comidas que tengon tendencia a hervir,
como las papas gratinadas.
Losperbdosde descanso(cuandoseacaba
elciclode laenergfamicroondas)ledan
tiempo a Io comida a "igualarse"o tronsferir
el color a su interior.Semuestra un ejemplo
de esto con elciclo de descongeloci6n--
power level3SiIo energfo microondos
no funcionoro en ciclos, Io porte externo
de Iocomido se cocinorfo antes de que
el interior se descongelora.
Estosson algunos ejemplosde aplicaciones
para diferentesnivelesde potencia:
Alto lO: Pescado,bacon,verduras, calentar
Ifquidos.
Media ultu 7: Cocci6n suave de came g ayes,
sirve para cocinar guisos g para recalentar.
Hedia 5: Cocinalenta Utierna para estofados
o guisos g para partes menos tiernas de
came.
Buju 2o3: Paradescongelar,cocer a "fuego"
lento, para salsas delicadas.
Algo culiente1: Hantener la comida caliente,
ablandar la mantequilla.
14
Terminologia de microondas. ge.com
iiiiii iiliiiiiiii!
Arcoe/ ctr co
_! i _i _ i_
; !:i:! iii:j i:i:i:iI
Definici6n
Elarco el_ctrico es Io que, en la terminologia de los microondas, describe las chispas en el horno.
Elarco el&ctrico se produce cuando:
el estante de metal se ha instalado de farina incorrecta Uestd tocando las paredes del microondas.
hau un metal o papel de aluminio tocando el lateral del horno.
hay papeldealuminiono est6envolviendobienlacomida(haybordesdobladoshaciaarribaque
actOancoma antenas).
hay algOnmetal,coma cintasde cierrecon metal,pinchosde pollo,o platoscondecoraci6nde oro.
hay papeltoallarecicladoquecontienepeque_aspiezasde metal.
elsoporte delarodelplatogiratorioest6instaladoincorrectamente.
Cubierto Loscubiertasmantienenlahumedad dentro,permitiendoun calentamientomas parejoy reduciendo
el tiempo de cocci6n.Cuando se agujerea el envoltorio de plastico o se cubre con papel de cera se permite
...... la salida del vapor.
Resguardar Enun homo convencional, se tapan o resguardan las pechugas de polio o las comidas horneadas para
............ que no se doren demasiado. AI usar el microondas, use peque_as cintas de papel de aluminio para cubrir
...... partes finas, coma las puntas de las alas en las aves, que podrian cocinarse antes que las partes mayores.
Cuando cocina en hornos regulares,las comidas coma los asados o pasteles se dejan reposar para
de repaso que acaben de cocinarse o se asienten. Eltiempo de reposo es especialmente importante al cocinar con
.......... microondas. Tenga en cuenta que un pastel cocido en horno microondas no se coloca en un estante
...... de enfriamiento.
Abrir Una vezque haua cubierto un plato con film pl6stico, deber6 abrir un orificio desplegando una esquina
respirederos para que pueda escapar elvapor.
¢n
Lu
I:1
/
_m
i i...,.
ml,
mm
a'iP'_
va
I%1 €I_
i
_n
€:) (,.,
A
bJ ',=-4
w
15
Caracteristicas de microondas por sensor.
Sensor de humedad
Qu_ sucede cuando usa las funciones de sensores:
Las funciones de Sensor detectan la mayor humedad liberada durante la cocci6n.
Elhomo ajusta automciticamente el tiempo de cocci6n a los diferentes tipos y cantidades
de comida.
No utilice las funciones de Sensor dos veces consecutivas en la misma porci6n de comida.
Puede resultar en que los alimentos se cocinen en exceso o se quemen. Sila comida no se ha
cocinado por completo despu@s de la cuenta regresiva, use la funci6n Time Cook para tiempo
de cocci6n adicional.
Es esencial usar los recipientes y las tapas apropiados para cocinar por sensor de forma
6ptima.
Agujereado
Usesiempre recipientes aptos para microondas y cObraloscon tapas o film de plOstico
agujereado. No use nunca recipientes cerrados por completo-pueden hacer que elvapor
no salga y causar que la comida se cocine demasiado.
Cubierto
AsegOreseque tanto elexterior de los recipientes como el interior del homo microondas
est@nsecos antes de poner la comida en el homo. Lasacumulaciones de humedad que
se convierten en vapor pueden enga_ar al sensor.
Sequelosplatos para que no enga_en
al sensor.
16

ge.com
Auto Cook (cocinero autom_tico) (noutilizar los estantes cuando cocina
par microondas)
Dado que la mayorfa de los recipientes deben estar cubiertos durante Auto Cook,
esta funci6n trabaja mejor con comidas que quiera hacer al vapor o en las que quiera
mantener la humedad.
NOTA: No se recomienda el usa del estante de metal con Auto Cook.
Comidas recomendadas
Con esta funci6n se pueden cocinar una gran variedad de comidas inclugendo carnes,
pescado g vegetales.
m]
Comidas no recomendadas
No deberfan cocinarse usando esta funci6n aquellas comidas que deban cocinarse
descubiertas, aquellas que requieran atenci6n constante, aquellas que requieran anadir
ingredientes durante su cocci6n g comidas que deban tener apariencia seca o con
una superficie crujiente. Esmejor cocinar todas estas usando TimeCook.
condsJ
NOTA:No utilice esta funcion
dosveces conseclltivas ell
la mismaporci6n de comida.
Puede resultar en que
los alimentosse cocinen
ell exceso o se quemen.
Auto Cook (cocinero autom6tico)
(no utilizar los estantes cuando cocina
par microondas)
I_ Pongala comida cubierta en el horno
g cierre la puerta. Pulseel bot6n
Auto Cook (cocinerooutom6tico).
Aparece en pantalla ENTERFOODTYPE
(introduzca el tipo de comida).
F_Gire el dial al tipo de comida deseado.
Presionepara seleccionar
Ver la Tablade Tiposde Comidas con
CocinemAutomdtico de m6s abajo para tipos
especfficosde comidas e instrucciones.
Elhomo empieza a funcionar
inmediatamente.
NOTA:Sila puerta se abre mientras se est6
seleccionando el control, ci@rela g presione
el bot6n Start/Pause para empezar a cocinar.
Sila comida no se ha cocinado par
completo despu@sde la cuenta regresiva,
use lafunci6n Time Cook para tiempo
de cocci6n adicional.
No abm la puerto del homo antes de que
el tiempo de cuenta atrds aparezca en la
pantalla-el vapor que se escapa del homo
puede afectar la cocci6n.Sise abre la puerta,
ci_rrelag presione Start/Pause
inmediatamente.
Siselecciona came picada (ground meat),
el homo puede que le indique que le extraiga
el Ifquido gla remueva. Abra la puerta, seque
la came g cierre la puerta. Presioneel bot6n
Start/Pause, si fuera necesario,para seguir
con lacocci6n.
consejos de cocci6n
Cuando el homo hace una sepal g
aparece el tiempo hacia atr6s, la puerta
puede abrirse para remover,girar o dar
lavuelta a la comida. Cierre la puerta
g presione Start/Pause para seguir
cocinando.
Ajuste la cantidad de comida al tamano
del recipiente. Llene los recipientes par
Io menos hasta la mitad.
AsegOresede que la parte exterior del
recipiente g el interior del homo est@n
secos.
Una vez completado el ciclo de Cocci6n,
si la comida necesita cocerse m6s, vu@lvala
a poner en el homo g use TimeCook para
acabar de cocinarla.
C6mo ajustar la configuraci6n
autom(_tica del horno para un tiempo
de cocci6n m(_s corto om(_s largo
(no disponible para todos los tipos
de alimentos)
Para restar el 10% del tiempo de cocci6n
autom4tico:
Enlos primeros 30 segundos tras el homo
comienza a funcionar, gire el dial en el sentido
contrario de las agujas del reloj hasta que
aparezca un signo menos ("-") g pulse para
introducir la selecci6n.
Para agregar el JO% al tiempo de cocci6n
autom4tico:
Dentro de los primeros 50 segundos tras
el horno comienza a funcionar, gire el dial
en el sentido de las agujas del reloj hasta
que aparezca un signo m6s ('+")g pulse
para introducir la selecci6n. 17
¢n
_ m
I:1
|
ml,
mm
v
_ a
, . J
.-.-0
b_J _
N _
m
0
_ A
bJ
w
Caracteristicas de microondas por sensor.
Tabla de tipos de comidas con cocinero autom6tico
_:_ i iii: ! i_ Raciones Tama_os de las raciones Comentarios
Piezas de polio 1 a 4 2 a 8 Use un plato ovalado, cuadrado o redondo.
piezas Cubra con envoltura pl6stica ventilada.
Pescado 1 a 4 4 a 16oz. Useun plato ovalado, cuadrado o redondo.
C0bralo con un film pl(istico agujereado.
Came picada - 8 a32 oz. Use plato de guisos redondo. Reparta la came
(Ternera, Puerco, Pavo] en el plato. C0bralo con un papal de cera
o un film pl(istico agujereado.
Papas 1 a 4 8a32 oz. Rompa la piel con un tenedor. Arr6glelas
en un patr6n en forma de estrella al centro
del plato giratorio.
Vegetales enlatados 1a4 4 a16 oz. Use cazuela de guisos para microondas, taz6n
o bol. CObralo con una tapa o un film pl6stico
agujereado.
Vegetales frescos 1a4 4 a16 oz. Use cazuela de guisos para microondas, taz6n
o bol. A_ada dos cucharadas de agua por cada
raci6n. CObralo con una tapa o un film pl6stico
agujereado.
Vegetales congelados 1 a 4 4 a 16 oz. Use cazuela de guisos para microondas, taz6n
o bol. Siga las instrucciones del paquete en
cuanto al agua a anadir. CObralo con una tapa
o un film pl6stico agujereado.
ear
Use s61o con palomitas
o rosetas preempaquetadas
para microondas qua pesen
de 1,B a 3,B onzas.
NOTA: No utilice esta funcion
dos veces consecutivas
ell la misma porcion
de comida. Puede resultar
ell que los alimentos
se cocinen ell exceso
o se quemen.
18
Popcorn (rosetas o palomitas
de rnaizJCNouti/izar/osestantescuando
cocina por microondas.)
PRECAUCION:Cocinor
palomitas de mdz en el microondas
puede provocar un incendio odahos
a su homo de microondas.
Parausar la funci6n Popcorn:
F_Siga las indicaciones del paquete, use
TimeCook si el paquete pesa menos
de 1,5 onzaso es mayor de S,Sonzas.
Sit0e el paquete de rosetas en el centro
del plato giratorio.
[] Presioneel bot6n Popcorrn una
o dos veces. Elhomo empieza a funcionar
inmediatamente.
Siabre la puerta mientras aparece
en pantalla POPCORNSENSOR(sensor
de palomitas),aparecer6 un mensaje
de error.Cierre la puerta, pulse Clear/Off
(barrar/desactivar) g comience de nuevo.
Sila comida no se ha cocinado por completo
despu6s de la cuenta regresiva,use lafunci6n
Time Cook para tiempo de cocci6n adicional.
C6mo ajustar la configuraci6n autom6tica
para palomitas de maiz para un mayor
o menor tiempo de cocci6n
Sise da cuenta de queen la bolsa
de la marca de palomitas que usa queda
mucho maiz sin reventar o Io cuece
demasiado, puede anadir o substraer 20-30
segundos al tiempo autom6tico de cocci6n.
Parasustraer tiempo:
Antes de qua acaben los primeros
SOsegundosdesde qua el homo se pone
en funcionamiento, gireel dial en el sentido
contrario alas agujas del relojpara
20 segundos(-) menos de tiempo de cocci6n.
Pulsepara introducir la selecci6n.Girede
nuevo,hasta qua aparezcan dos signos
menos ('--"),para reducir el tiempo de cocci6n
en otros 10 segundos hasta una cantidad
de reducci6n de tiempo de SOsegundos.
Pulsepara introducir la selecci6n.
Poraa_odir tiempo:
Antes de qua acaben los primeros
SOsegundos desde qua el homo se pone
en funcionamiento, gire el dial en el sentido
de las agujas del reloj20 segundos (+)m6s
al tiempo de cocci6n. Pulsepara introducir
la selecci6n.Girede nuevo,hasta que
aparezcan dos signos m6s ('++"),para
anadir otros 10 segundos,hasta un total
de 30 segundos de tiempo adicional.
Pulsepara introducir la selecci6n.
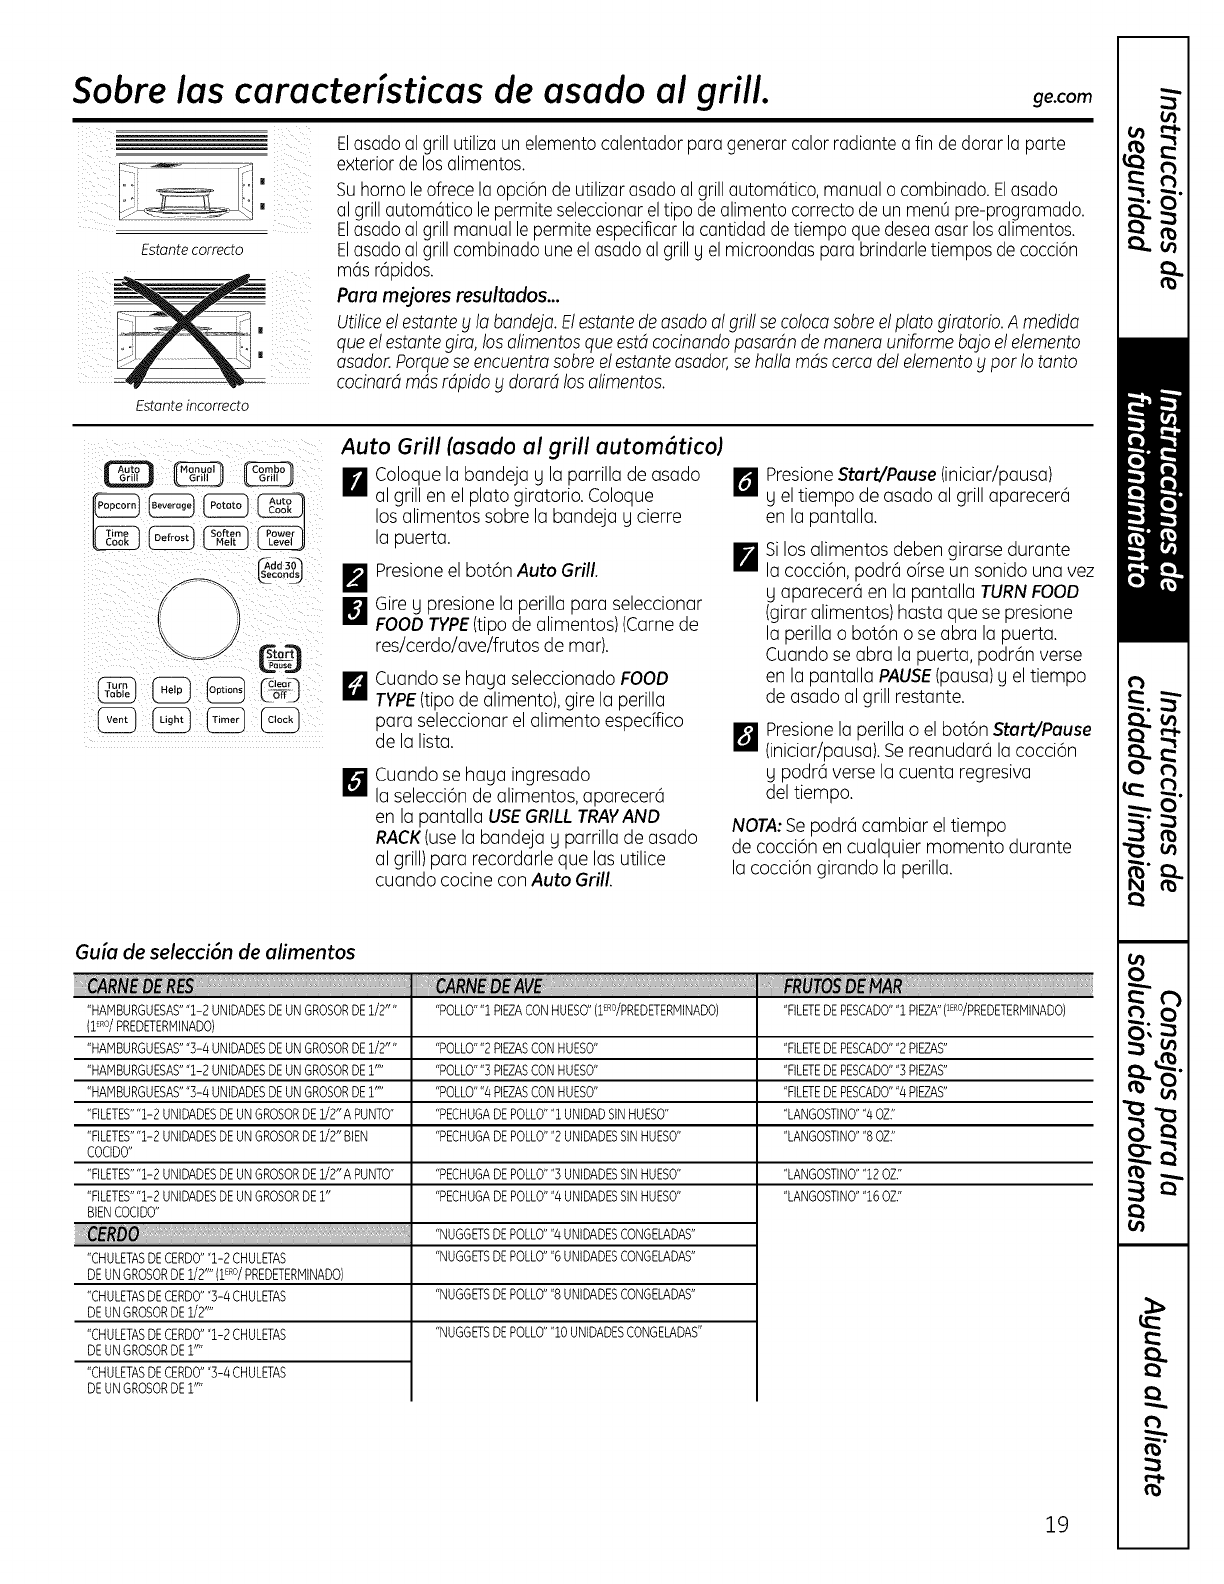
Sobre las caracteristicas de asado al grill. ge.com
ill
i
_i iii
Estante correcto
Estante incormcto
Elasado al grill utilizaun elementocalentadorpara generarcalor radiantea fin de dorar la parte
exteriorde losalimentos.
Suhomo leofrecela opci6n deutilizar asado algrill autom6tico,manual o combinado.Elasado
al grillautomatico le permiteseleccionareltipo de alimentocorrecto de un menOpre-programado.
Elasado al grill manual lepermiteespecificarlacantidad detiempo que deseaasar losalimentos.
Elasado al grillcombinado uneel asadoal grill g elmicroondaspara brindarletiempos decocci6n
mGsrGpidos.
Para mejores resultados...
Utiliceel estantey la bandeja.Elestantedeasadoal grillse colocasabreelplato giratorio.A medida
queelestantegiro, losalimentosqueestdcocinandopasardn demanero uniformebajoelelemento
asador.Porqueseencuentrosabreelestanteasador,se hallomdscercadelelementoypar Iotanto
cocinardrods rdpidoydotard los alimentos.
Auto Grill (asado al grill automGtico)
Coloque la bandeja g la parrilla de asado
I_ al grill en el plato giratorio. Coloque
m]
m
m
los alimentos sabre la bandejag cierre
la puerta.
Presioneel bot6n Auto Grill.
Gire g presione la perilla para seleccionar
FOODTYPE(tipo de alimentos)(Came de
res/cerdo/ave/frutos de mar).
DCuando se haga seleccionado FOOD
TYPE(tipo de alimento), gire la perilla
para seleccionar el alimento especffico
de la lista.
DCuando se haga ingresado
la selecci6n de alimentos, aparecer6
en la pantalla USEGRILLTRAYAND
RACK(usela bandeja g parrilla de asado
al grill)para recordarle que las utilice
cuando cocine con Auto Grill.
PresioneStart/Pause (iniciar/pausa)
r_ g eltiempo de asado al grill aparecer6
en la pantalla.
F_Si los alimentos deben girarse durante
la cocci6n, podr6 ofrseun sonido una vez
g aparecer6 en la pantalla TURNFOOD
(girar alimentos) hasta que se presione
la perilla o bot6n o se abra la puerta.
Cuando se abra la puerta, podr6n verse
en la pantalla PAUSE(pausa)g el tiempo
de asado al grill restante.
[] Presionela perilla o el bot6n Start/Pause
(iniciar/pausa).Sereanudar6 la cocci6n
g podr@verse la cuenta regresiva
del tiempo.
NOTA:Se podr6 cambiar eltiempo
de cocci6n en cualquier momenta durante
la cocci6n girando la perilla.
Guia de selecciGn de alimentos
OE
ERO 1ERO
"HAMBURGUESAS""1-2 UNIDADESDEUN GROSORDE 1/2...... POLLO""I PlEA CONHUESO"(1 /PREDETERMINADO) "FILETEDE PESCADO""1 PLEA"( /PREDETERHINADO)
(1ERO/PREDETERHINADO)
"HAMBURGUESAS"%4 UNIDADESDEUN GROSORDE1/2""
"HAMBURGUESAS""1-2 UNIDADESDEUN GROSORDE1"
"HAMBURGUESAS""3-4 UNIDADESDEUN GROSORDE1"
"FILETES""1-2 UNIDADESDEUNGROSORDEI/2"A PUNTO"
"FILETES""1-2 UNIDADESDEUNGROSORDE1/2" BIEN
COCIDO"
"FILETES""1-2UNIDADESDEUNGROSORDE1/2"A PUNTO"
"FILETES""1-2UNIDADESDEUNGROSORDE1"
BENCOCIDO"
"CHULETASDECERDO""1-2 CHULETAS
DEUNGROSORDE1/2" (1ERO/PREDETERMINADO}
"CHULETASDECERDO""3-4CHULETAS
DEUNGROSORDE1/2"
"CHULETASDECERDO""1-2CHULETAS
DEUNGROSORDE1"
"CHULETASDECERDO""3-4CHULETAS
DEUNGROSORDE1"
"POLLO""2PIEZASCONHUESO" "FILETEDEPESCADO""2 PIEZAS"
"POLLO""3PIEZASCONHUESO" "FILETEDEPESCADO""3 PIEZAS"
"POLLO""4PIEZASCONHUESO" "FILETEDEPESCADO""4 PIEZAS"
"PECHUGADEPOLLO""1 UNIDADSINHUESO" "LANGOSTINO""40Z:'
"PECHUGADEPOLLO""2 UNIDADESSINHUESO" "LANGOSTINO""80Z:'
"PECHUGADEPOLLO""3 UNIDADESSINHUESO" "LANGOSTINO""12OZ."
"PECHUGADEPOLLO""4 UNIDADESSINHUESO" "LANGOSTINO""16OZ:'
"NUGGETSDEPOLLO""4 UNIDADESCONGELADAS"
"NUGGETSDEPOLLO""6 UNIDADESCONGELADAS"
"NUGGETSDEPOLLO""8 UNIDADESCONGELADAS"
"NUGGETSDEPOLLO""10 UNIDADESCONGELADAS"
I:1
|
mm...,.
ml,
mm
v
_ a
, . J
.-.-O
b_J _
N _
m
O
_ A
bJ
w
19
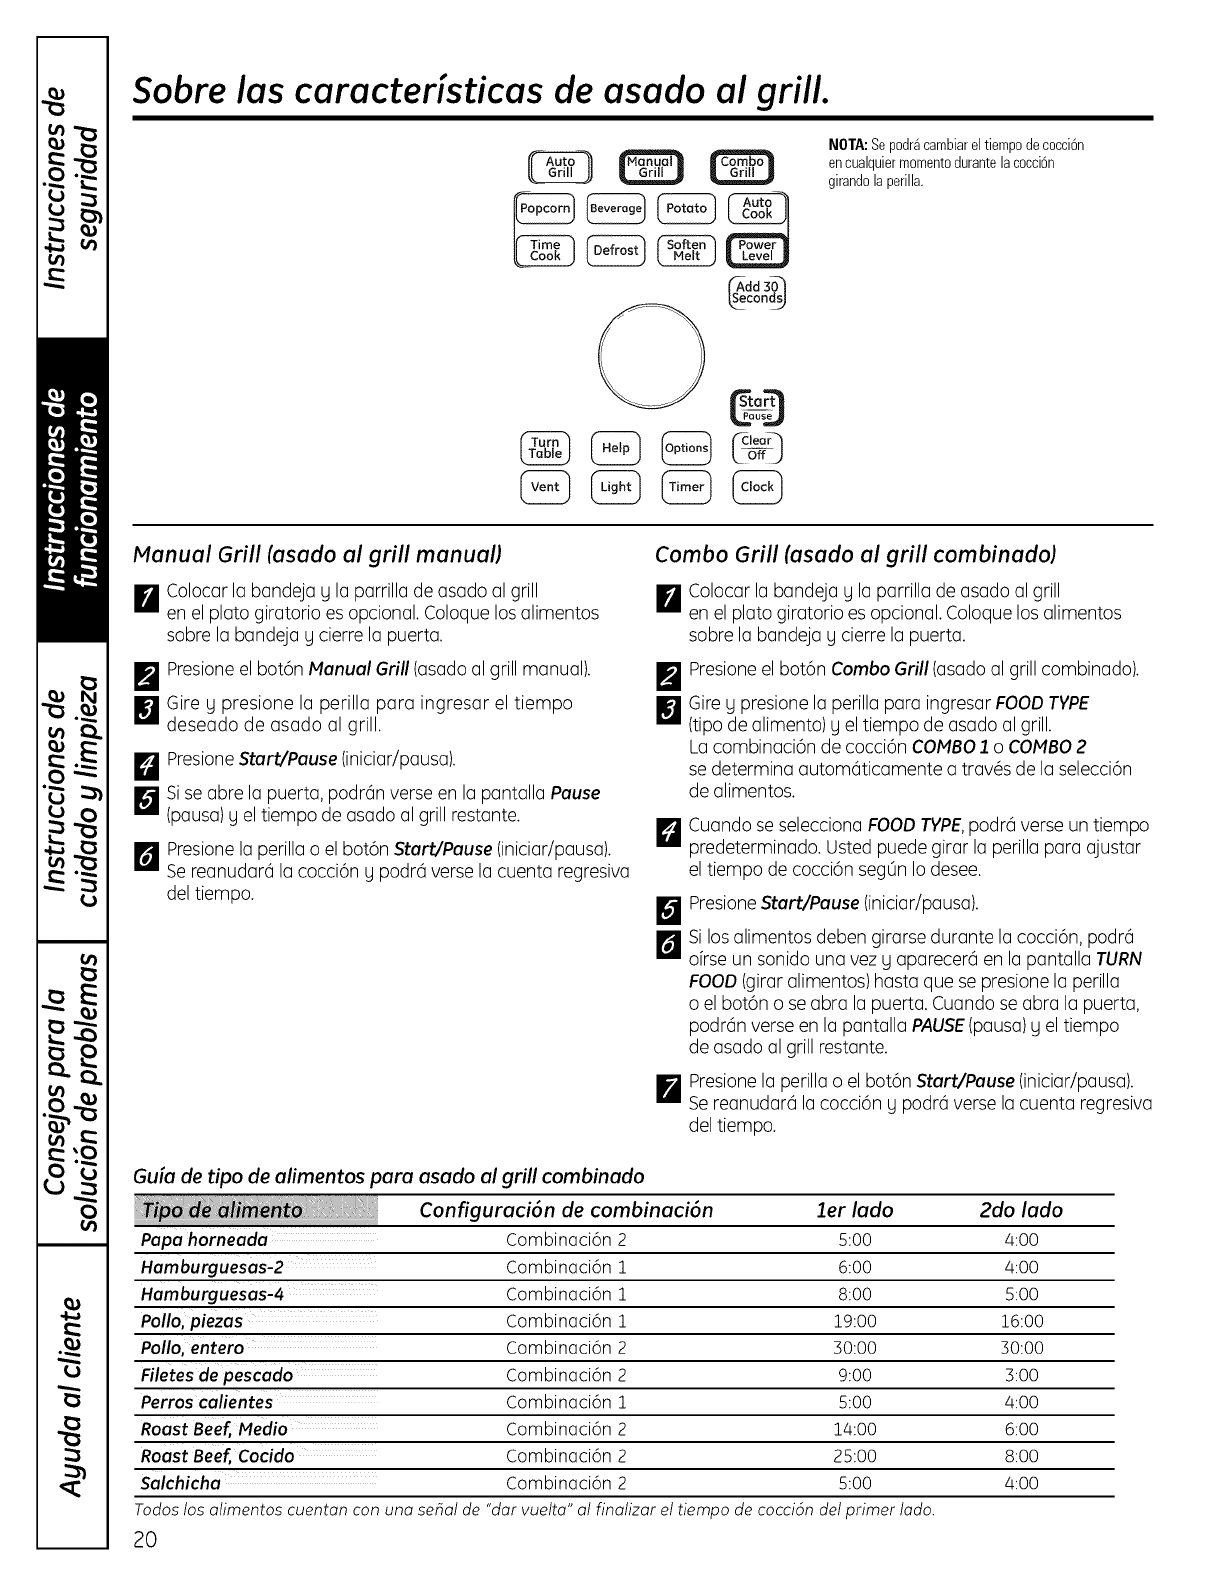
Sabre las caracteristicas de asado al grill.
s_edd3_
cond_
_o_
LoffJ
NOTA:Sepodr_cambiareltiempode cocci6n
encualquiermomentadurantelacocci6n
girandola perilla.
Manual Grill (asado al grill manual)
IrA Colocar la bandeja g la parrilla de asado al grill
en el plato giratorio es opcional. Coloque los alimentos
sabre la bandeja g cierre la puerta.
_'_ Presioneel bot6n Manual Grill (asado al grill manual).
[] Gire g presione la perilla para ingresar el tiempo
deseado de asado al grill.
FJ presionestart/Pause (iniciar/pausa).
_-_ si se abre la puerta, podrOnverse en la pantalla Pause
(pausa)g el tiempo de asado al grill restante.
r_ Presionela perilla o el bot6n Start/Pause (iniciar/pausa).
SereanudarOla cocci6n g podrOverse la cuenta regresiva
del tiempo.
Combo 6rill (asado al grill combinado)
m Colocar la bandeja g la parrilla de asado al grill
.m en el plato giratorio es opcional. Coloque los alimentos
sabre la bandeja g cierre la puerta.
_'_ Presioneel bot6n Combo Grill (asado al grill combinado).
_Gire g presione la perilla para ingresar FOOD TYPE
(tipo de alimento) g el tiempo de asado al grill.
La combinaci6n de cocci6n COMBO 1.o COMBO 2
se determina autom(iticamente a trav@sde la selecci6n
de alimentos.
D
D
N
li
Cuando se selecciona FOODTYPE,podr6 verse un tiempo
predeterminado. Usted puede girar la perilla para ajustar
el tiempo de cocci6n seg0n Io desee.
PresioneStart/Pause(iniciar/pausa).
Silos alimentos deben girarse durante la cocci6n, podr6
ofrse un sonido una vez g aparecer6 en la pantalla TURN
FOOD(giraralimentos) hasta que se presione la perilla
o el bot6n o se abra la puerta. Cuando seabra la puerta,
podr6n verse en la pantalla PAUSE(pausa)g el tiempo
de asado al grill restante.
Presionela perilla o el bot6n Start/Pause (iniciar/pausa).
SereanudarO lacocci6n UpodrOverse la cuenta regresiva
del tiempo.
Guio de tipo de alimentos para asado al grill combinado
Configuraci6n de combinaci6n
Papa horneada CombJnacJ6n2
Hamburguesas-2 Combinaci6n 1
Hamburguesas-4 ................ Combinaci6n 1
Polio, piezas
Po//o, entero
Fi/etes de pescado
Perros ca/ientes
Roast Beef, Media
Roast Beef, Cocido
Salchicha
Todos los atimentos cuentan con
Combinaci6n 1
Combinaci6n 2
Combinaci6n 2
Combinaci6n 1
Combinaci6n 2
Combinaci6n 2
Combinaci6n 2
20
]er lade 2do lade
5:00 /4:00
6:00 4:00
8:00 5:00
19:00 16:00
30:00 30:00
9:00 3:00
5:00 4:00
14:00 6:00
25:00 8:00
5:00 4:00
una sehat de "dar vuetta" at finatizar et tiempo de cocci6n det primer tado.
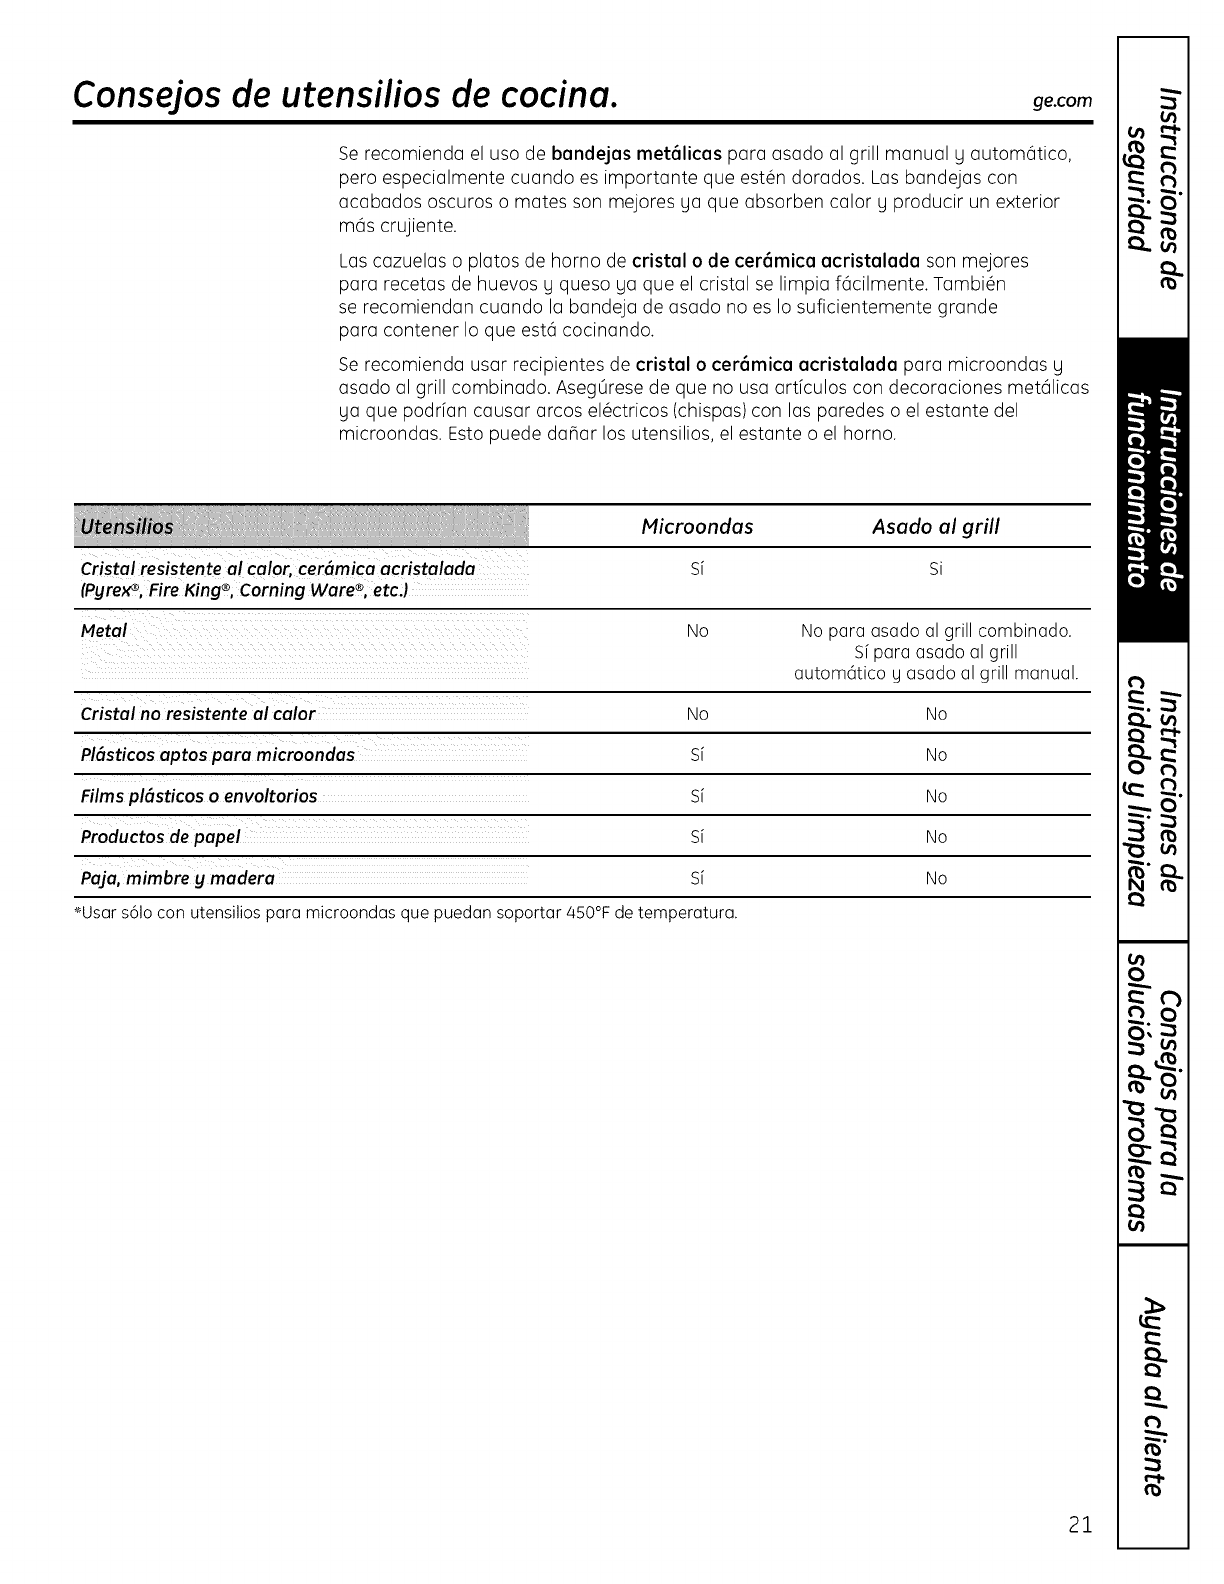
consejos de utensilios de cocina. ge.com
Se recomienda el uso de bandejas met61icas para asado al grill manual y autom6tico,
pero especialmente cuando es importante que est_n dorados. Las bandejas con
acabados oscuros o mates son mejores ya que absorben calory producir un exterior
m6s crujiente.
Las cazuelas o platos de horno de cristal o de cer6mica acristalada son mejores
para recetas de huevos y queso ya que el cristal se limpia f6cilmente. Tambi@n
se recomiendan cuando la bandeja de asado no es Io suficientemente grande
para contener Io que est6 cocinando.
Se recomienda usar recipientes de cristal o cer6mica acristalada para microondas y
asado al grill combinado. AsegOrese de que no usa artfculos con decoraciones met61icas
ya que podrfan causar arcos el@ctricos(chispas) con las paredes o el estante del
microondas. Esto puede daBar los utensilios, el estante o el horno.
m]
Cristal resistente al calor, cer6mica acristalada
(Pgrex_, Fire King®,CorningWare®,etc.)
Microondas Asado al grill
sf si
Metal ..... No No para asado al grill combinado.
Sfpara asado al grill
autom@ico g asado al grill manual.
Cristal no resistente al calor No No
PI6sticos aptos para microondas Sf No
Rims pl6sticos oenvoltorios Sf No
Productos de papel Sf No
Paja, mimbre g madera Sf No
_Usars61ocon utensiliospara microondasquepuedan soportar450°Fdetemperatura.
¢n
PA
LU
q
|
mm.,..,.
ml,
mm
v
_ a
, . J
=q
.-.-0
b_J _
N _
m
0
_ A
bJ
w
21

Seleccione el mejor m todo de cocci6n.
Use la tabla siguiente pare seleccionar el major m4todo para cocinar. Las recetas pueden ser adaptadas usando
la tabla a continuaci6n para determinar el modo de cocci6n apropiado.
Comidas Microondas 6rill autom6tico 6rill combinado
Grill manual
Aperitivos
Salsas para mojar g untar ,/
Snacks de pastelerfa ,/
Bebidas V'
Salsasy acabados ¢'
Sopas y estofados ¢'
Carnes
Descongelaci6n ,/
Asado al grill V' V'
Ayes
Descongelaci6n ,/
Asado al grill V' V' V'
Pescado ymariscos
Descongelaci6n ,/
Cocci6n ,/ ,/ ,/
6uisos V' V'
Huevos g queso
Revueltos, tortillas ,/
Ouiche, soufl_ ¢'
Vegetales, (frescos) V'
Papas ¢' ¢'
Panes
Magdalenas, pastel de t_ ,/
Postres
Flan y pudfn ,/
Galletas alargadas ,/
Fruta ,/
Pasteles rellenos g pastelerfa
Dulces d'
Vegetales blanqueados 7'
Alimentos preparados congelados 7'
22
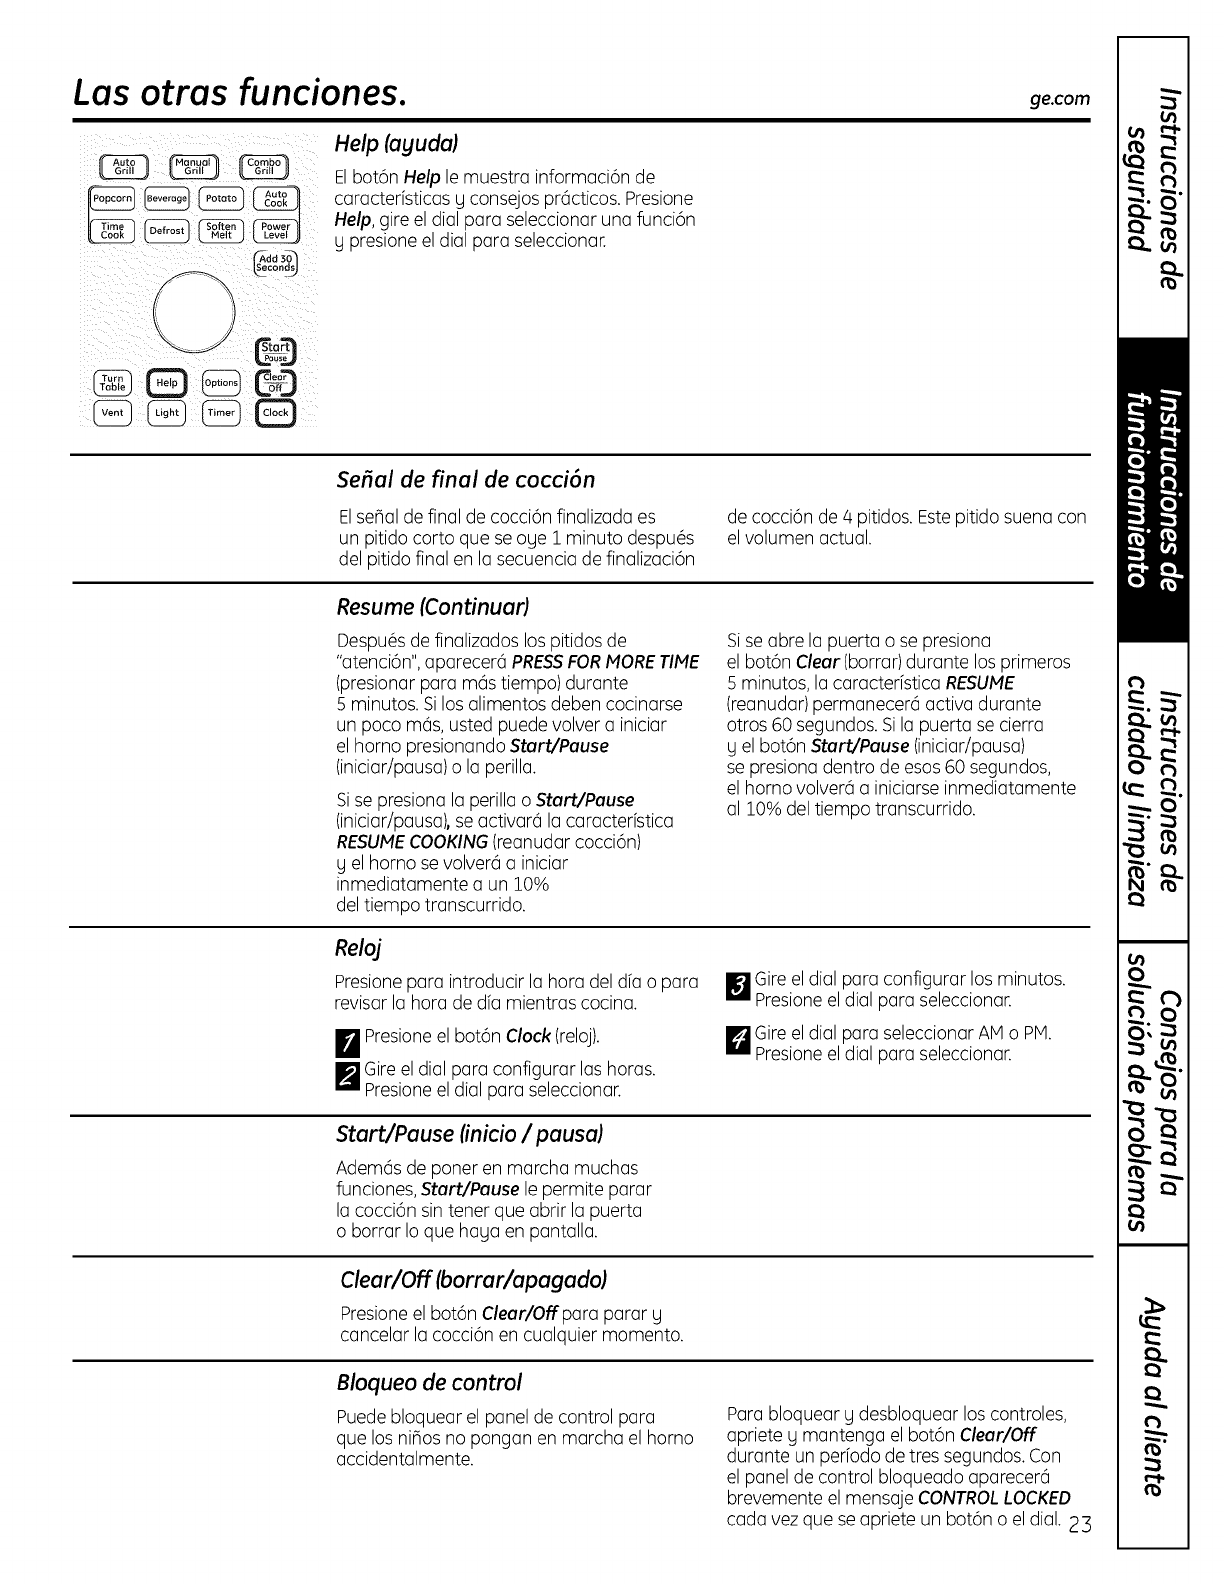
Las otras funciones.
Help (ayuda)
Elbot6n Help le muestra informaci6n de
caracterfsticas y consejospr6cticos. Presione
Help,gire el dial para seleccionar una funci6n
g presione el dial para seleccionar.
ge.com
Serial de final de cocci6n
Elsepal de final de cocci6n finalizada es
un pitido corto que se oue 1 minuto despu@s
del pitido final en la secuencia de finalizaci6n
de cocci6n de 4 pitidos. Estepitido suena con
el volumen actual.
m]
Resume (Continuafl
Despu@sde finalizados los pitidos de
"atenci6n",aparecer6 PRESSFORMORETIME
(presionar para m6s tiempo) durante
5 minutos. Si los alimentos deben cocinarse
un poco m6s, usted puede volver a iniciar
el horno presionando Start/Pause
(iniciar/pausa)o la perilla.
Sise presiona la perilla o Start/Pause
(iniciar/pausa),se activar6 la caracterfstica
RESUMECOOKING(reanudar cocci6n)
Uel homo se volver6 a iniciar
inmediatamente a un 10%
deltiempo transcurrido.
Sise abre la puerta o se presiona
el bot6n Clear (borrar)durante los primeros
5 minutos, la caracterfstica RESUME
(reanudar)permanecer6 activa durante
otros 60 segundos. Sila puerta se cierra
y el bot6n Start/Pause (iniciar/pausa)
se presiona dentro de esos 60 segundos,
el homo volver6 a iniciarse inmediatamente
a110% del tiempo transcurrido.
Reloj
Presionepara introducir la hora del dfa o para
revisar la hora de dfa mientras cocina.
F_ presione el bot6n Clock (reloj).
F_Gire el dial para configurar las horas.
Presioneel dial para seleccionar.
[]Gire el dial para configurar los minutos.
Presioneel dial para seleccionar.
FJ Gireel dial para seleccionar AM o PM.
Presioneel dial para seleccionar.
Start/Pause (inicio / pausa)
Adem6s de poner en marcha muchas
funciones,Start/Pause le permite parar
la cocci6n sin tener que abrir la puerta
o borrar Ioque haga en pantalla.
Clear/Off (borrar/apagado)
Presioneel bot6n ClearlOffpara parar g
cancelar la cocci6n en cualquier momento.
Bloqueo de control
Puedebloquear el panel de control para
que los ninos no pongan en marcha el homo
accidentalmente.
Para bloquear Udesbloquear los controles,
apriete U mantenga el bot6n Clear/Off
durante un perfodo de tres segundos. Con
el panel de control bloqueado aparecer6
brevemente el mensaje CONTROLLOCKED
cada vez que se apriete un bot6n o el dial. 23
PA
I:1
|
ml,
mm
v
_ a
, . J
.-.-0
b_J _
N _
m
0
_ A
bJ
w
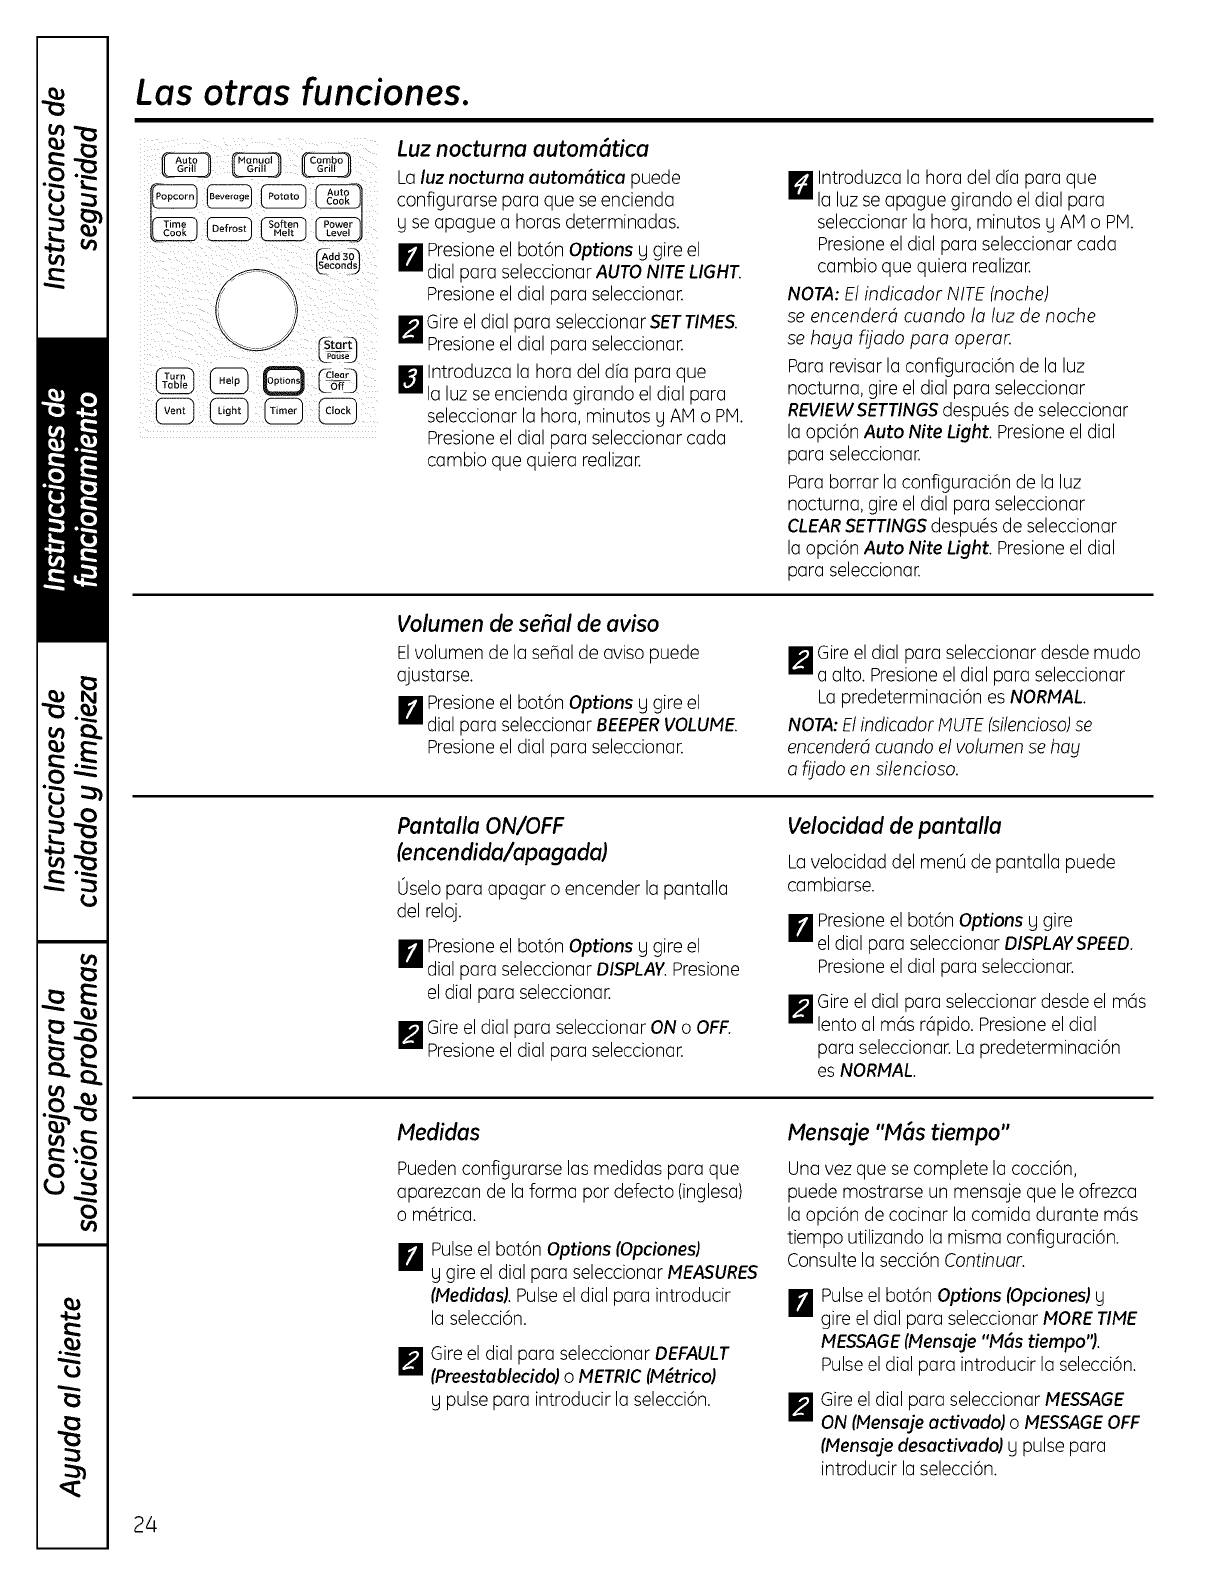
Las otras funciones.
Luz nocturna autom6tica
Laluz nocturna autom6tica puede
configurarseparaque seencienda
g seapaguea horasdeterminadas.
I_ Presioneel bot6n Options g gire el
dial para seleccionar AUTONITELIGHT.
Presioneel dial para seleccionar.
I_ Gireel dial para seleccionar SETTIMES.
Presioneel dial para seleccionar.
Introduzca la hora del dfa para que
I_1 la luz se encienda girando el dial para
seleccionar la hora, minutos y AM o PM.
Presioneel dial para seleccionar coda
cambio que quiera realizar.
I_ Introduzcalahoradelda paraque
laluzseapaguegirandoeldialpara
seleccionarlahora,minutosy AM o PM.
Presioneel dial para seleccionar coda
cambio que quiera realizar.
NOTA: El indicador NITE(noche)
se encender4 cuando la luz de noche
se haya fijado para operar.
Pararevisor la configuraci6n de la luz
nocturna, gire el dial para seleccionar
REVIEWSETTINGSdespu#sde seleccionar
la opci6n Auto Nite Light. Presioneel dial
para seleccionar.
Paraborrar la configuraci6n de la luz
nocturna, gire el dial para seleccionar
CLEARSETTINGSdespu#sde seleccionar
la opci6n Auto Nite Light. Presioneel dial
para seleccionar.
Volumen de serial de aviso
Elvolumendelasehalde avisopuede
ajustarse.
I_ Presioneel bot6n Options y gire el
dial para seleccionar BEEPERVOLUME.
Presioneel dial para seleccionar.
I_ Gireel dial para seleccionar desde mudo
a alto. Presioneel dial para seleccionar
La predeterminaci6n es NORMAL.
NOTA"El indicador MUTE(silencioso)se
encender4 cuando el volumen se hay
a fijado en silencioso.
Pantalla ON/OFF
(encendida/apagada)
Oselopara apagar o encender la pantalla
del reloj.
I_ Presioneel bot6n Options y gire el
dial para seleccionar DISPLAY.Presione
el dial para seleccionar.
I_ Gireel dial para seleccionar ON oOFF.
Presioneel dial para seleccionar.
Velocidad de pantalla
LavelocidaddelmenO de pantallapuede
cambiarse.
I_ Presioneel bot6n Options y gire
el dial para seleccionar DISPLAVSPEED.
Presioneel dial para seleccionar.
I_ Gireel dial para seleccionar desde el mGs
lento al mGsr6pido. Presioneel dial
para seleccionar.Lapredeterminaci6n
es NORMAL.
Medidas
Puedenconflgurarselasmedidasparaque
aparezcande laformapardefecto(inglesa)
o m@trica.
Pulseel bot6n Options (Opciones)
_y gire el dial para seleccionar MEASURES
(Medidas).Pulseel dial para introducir
la selecci6n.
I_ Gireel dial para seleccionar DEFAULT
(Preestablecido) o METRIC(M@trico)
y pulse para introducir la selecci6n.
Mensaje "Mhs tiempo"
Una vezque se complete la cocci6n,
puede mostrarse un mensaje que le ofrezca
la opci6n de cocinar la comida durante mGs
tiempo utilizando la misma configuraci6n.
Consulte la secci6n Continuar.
I_ Pulseel bot6n Options {Opciones]y
gire el dial para seleccionar MORETIME
MESSAGE(Menseje "M(_stiempo"].
Pulseel dial para introducir la selecci6n.
I_ Gireel dial para seleccionar MESSAGE
ON (Mensajeactivadol oMESSAGEOFF
(Mensaje desactivado) ypulse para
introducirla selecci6n.
24
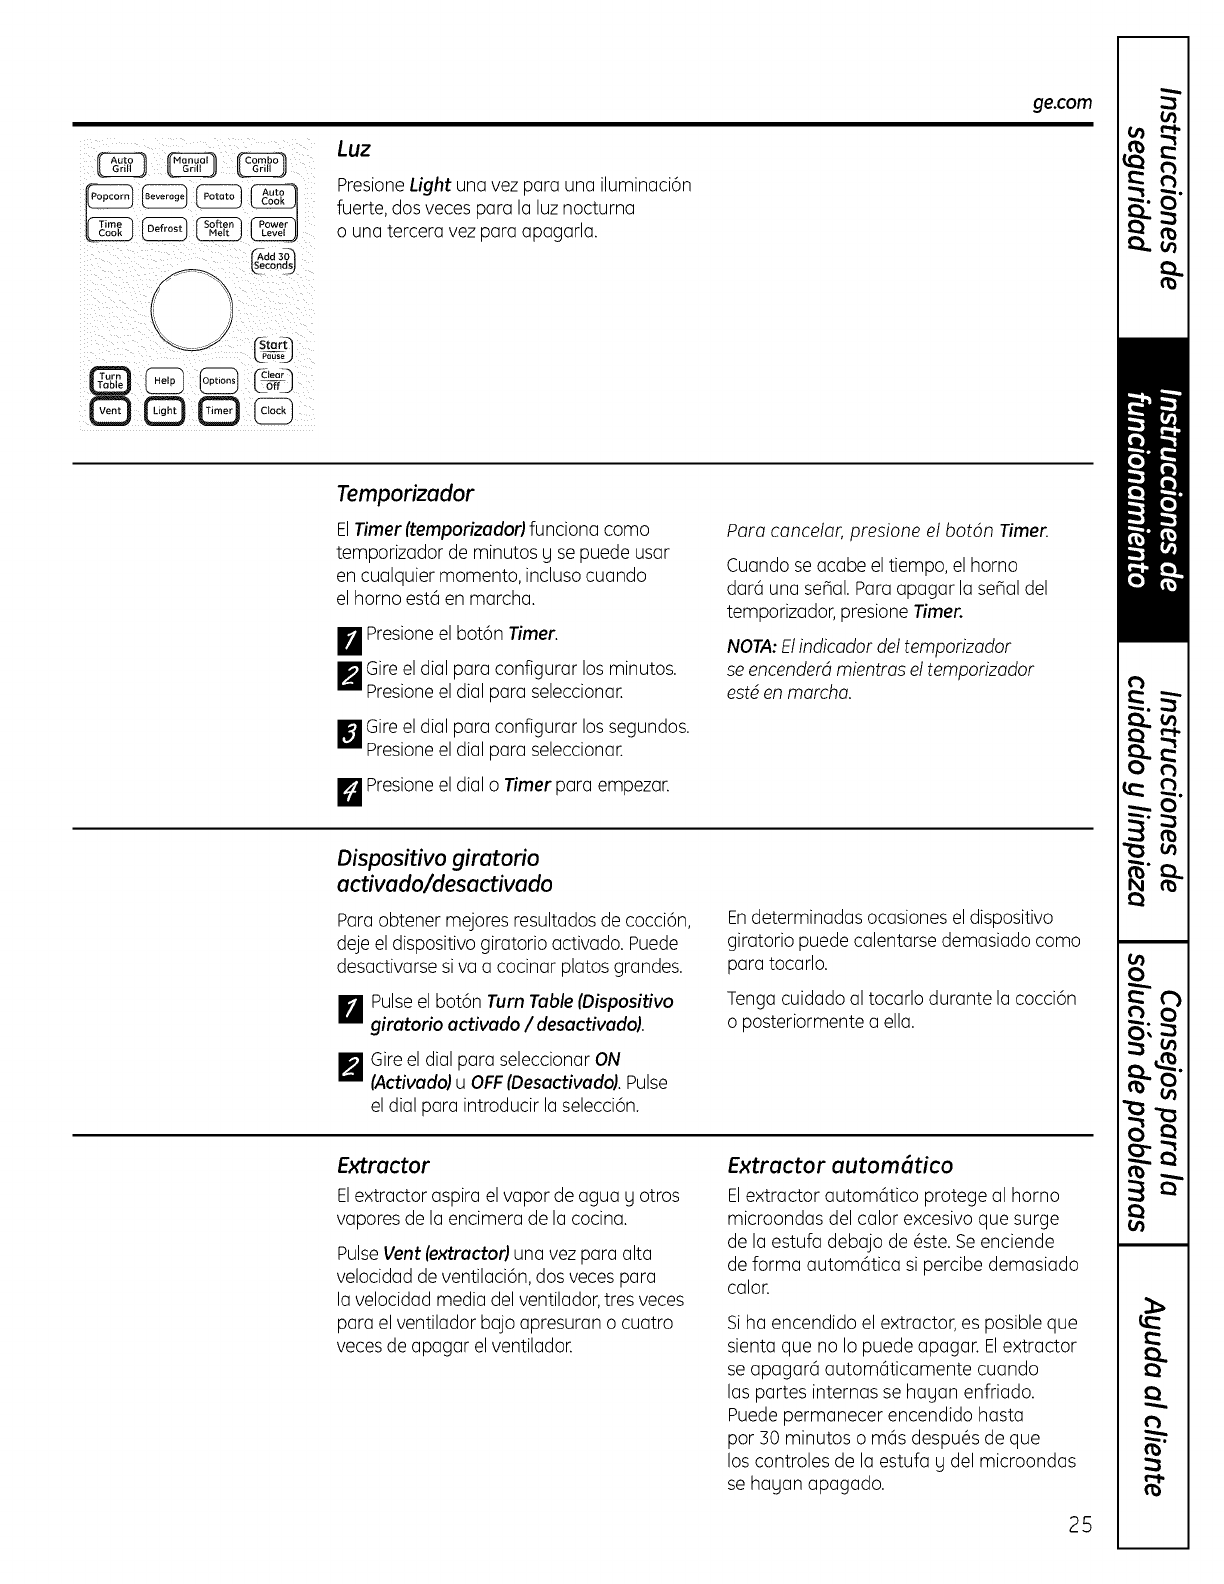
Aedd30_
condsJ
Luz
PresioneLight una vez para una iluminaci6n
fuerte, dos veces para la luz nocturna
o una tercera vez para apagarla.
ge.com
_Start]
Lpoo,ej
_leor
Temporizador
ElTimer (temporizudorl funciona como
temporizador de minutos g se puede usar
en cualquier momento, inclusocuando
el homo est6 en marcha.
m]
I_ Presioneel bot6n Timer.
I_ Gireel dial para configurar los minutos.
Presioneel dial para seleccionar.
El Gireel dial para configurar los segundos.
Presioneel dial para seleccionar.
D Presioneel dial o Timer para empezar.
Para cancelar, presione el bot6n Timer
Cuando se acabe el tiempo, el horno
dar6 una sepal.Para apagar la sepal del
temporizador, presione Timer.
NOTA:Elindicador del temporizador
se encender4 mientras el temporizador
est@en marcha.
Dispositivo giratorio
activado/desactivado
Para obtener mejores resultados de cocci6n,
deje el dispositivo giratorio activado. Puede
desactivarse siva a cocinar platos grandes.
[] Pulseel bot6n Turn Table (Oispositivo
giratorio activado /desactivado).
_'_ Gireel dial para seleccionar ON
(Activado) uOFF(Desactivado), Pulse
el dial para introducir la selecci6n.
Endeterminadas ocasiones el dispositivo
giratorio puede calentarse demasiado como
para tocarlo.
Tenga cuidado al tocarlo durante la cocci6n
o posteriormente a ella.
Extractor
Elextractor aspira el vapor de agua g otros
vapores de la encimera de la cocina.
Pulse Vent (extractor) una vez para alta
velocidad de ventilaci6n, dos veces para
la velocidad media del ventilador,tres veces
para el ventilador bajo apresuran o cuatro
veces de apagar elventilador.
Extractor autom6tico
Elextractor autom6tico protege al homo
microondas del calor excesivo qua surge
de la estufa debajo de _ste. Se enciende
de forma autom6tica si percibe demasiado
calor.
Siha encendido el extractor, es posible qua
sienta qua no Io puede apagar. Elextractor
se apagar6 autom6ticamente cuando
las partes internas se hagan enfriado.
Puedepermanecer encendido hasta
por 30 minutos o m6s despu@sde qua
los controles de la estufa g del microondas
se hagan apagado.
wa
Lu
_ m
I:1
|
ml,
mm
v
..,i... a
, . J
.-.-0
b_J _
N _
m
0
_ A
url
bJ
w
25
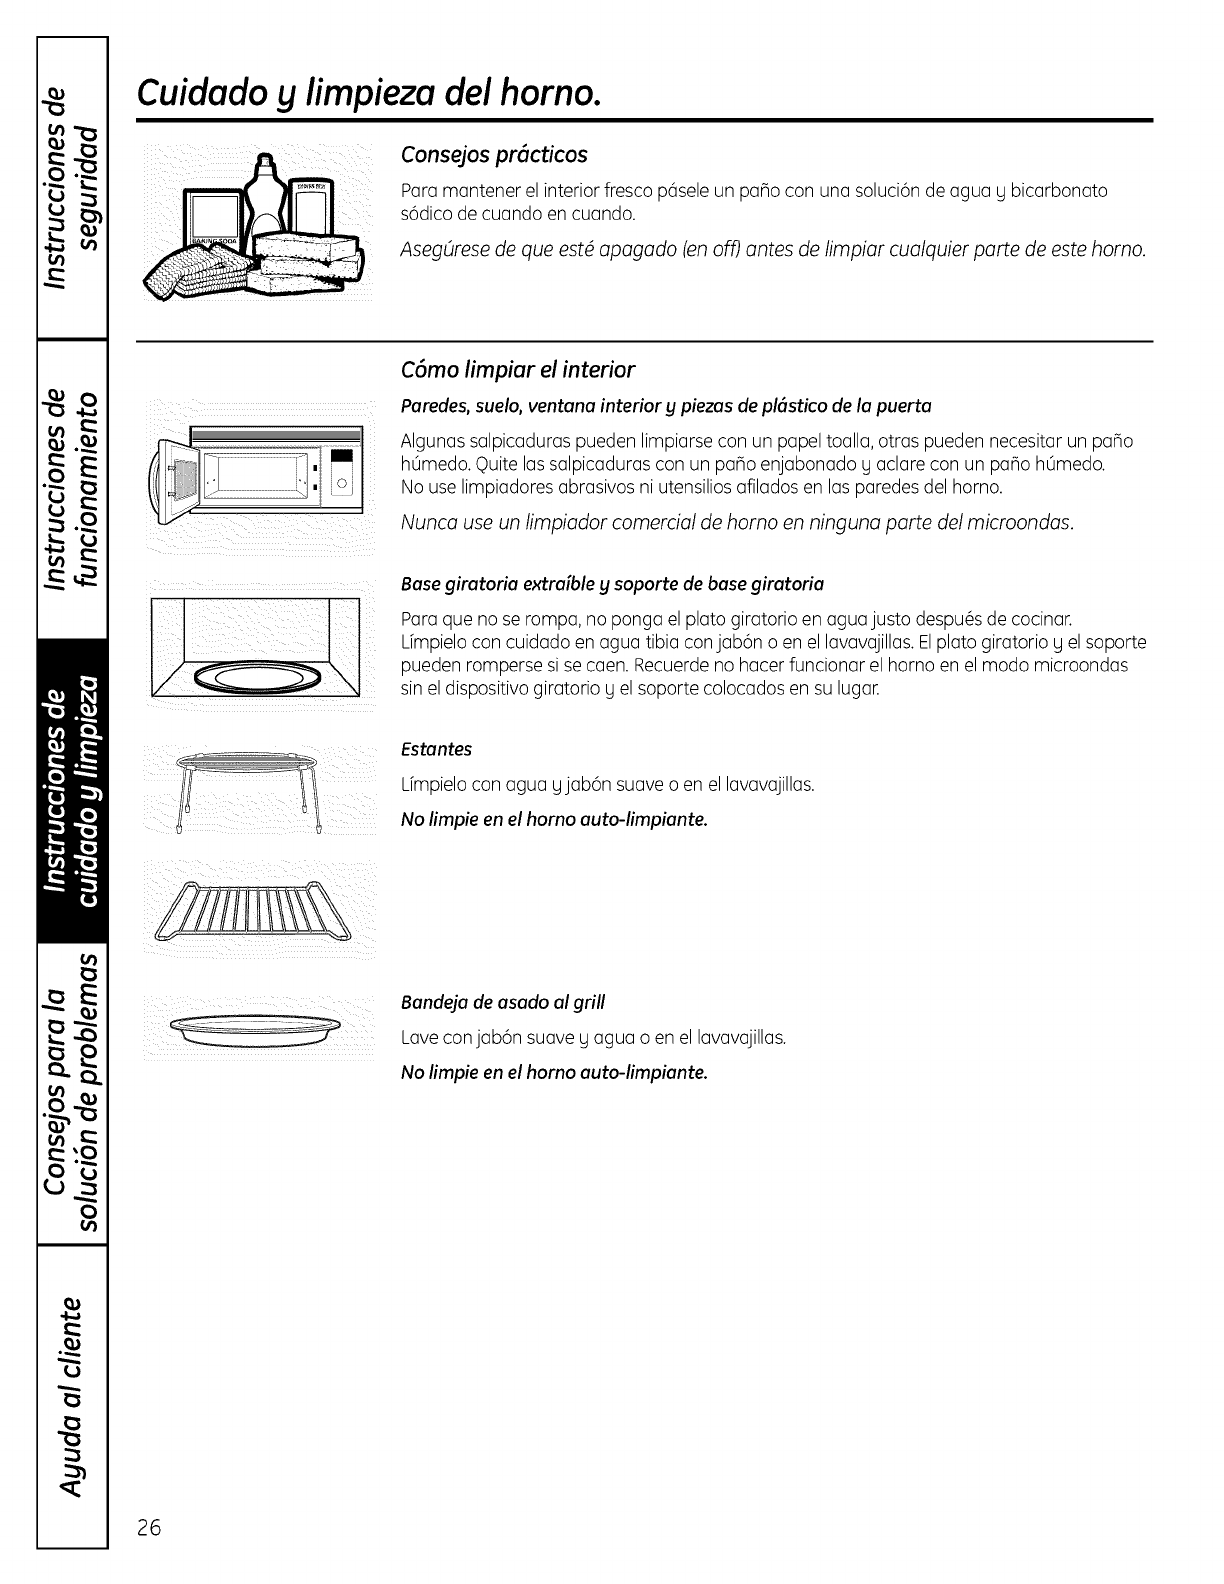
Cuidado g limpieza del horno.
.... consejos pr6cticos
Para mantener el interior fresco p6sele un pano con una soluci6n de agua g bicarbonato
s6dico de cuando en cuando.
AsegOrese de que est6 apagado (en off) antes de limpiar cualquier porte de este homo.
_ii_iil I_I_i_iiiii_ ii_i_i_i_&_k_i:_ii
C6mo limpiar el interior
Paredes, suelo, ventana interior g piezas de pl6stico de la puerta
Algunas salpicaduras pueden limpiarse con un papel toalla, otras pueden necesitar un paso
hOmedo.Quite las salpicaduras con un paso enjabonado g aclare con un pano hOmedo.
No use limpiadores abrasivos ni utensilios afilados en las paredes del homo.
Nunca use un limpiador comercial de homo en ninguna porte del microondas.
Base giratoria extraible gsoporte de base giratoria
Para que no se rompa, no ponga el plato giratorio en agua justo despu6s de cocinar.
Lfmpielocon cuidado en agua tibia conjab6n o en el lavavajillas.Elplato giratorio g el soporte
pueden romperse si se caen. Recuerdeno hacer funcionar el homo en el modo microondas
sin el dispositivo giratorio g el soporte colocados en su lugar.
Estantes
Lfmpielocon agua gjab6n suave o en el lavavajillas.
No limpie en el homo auto-limpiante.
Bandeja de asado al grill
Lave conjab6n suave g agua o en el lavavajillas.
No limpie en el homo auto-limpiante.
26
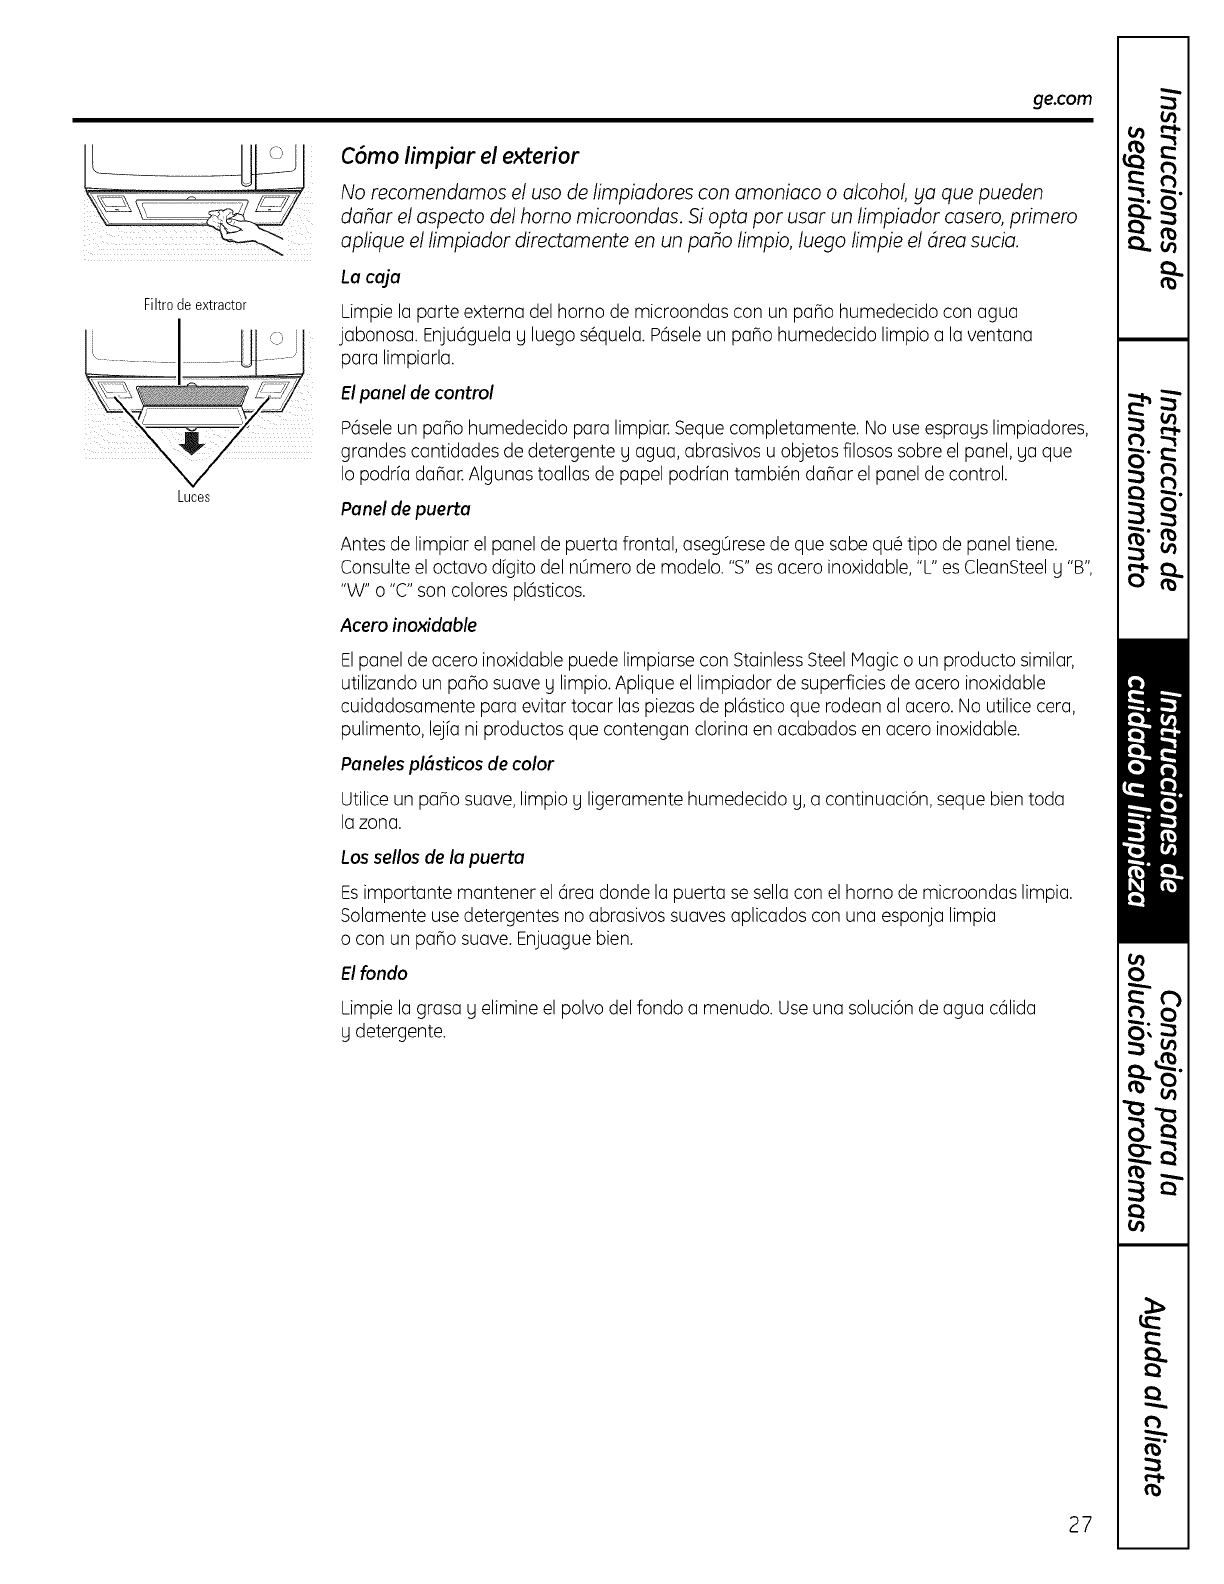
ge.com
Filtrode extractor
Luces
C6mo limpiar el exterior
No recomendamos el usa de limpiadores con amoniaco o alcohol, ya que pueden
datar el aspecto del homo microondas. Si opta par usar un limpiador casero, primero
aplique el limpiador directamente en un patio limpio, luego limpie el drea sucia.
La caja
Limpie la parte externa del horno de microondas con un pano humedecido con agua
jabonosa. Enju6guela g luego s_quela. P6seleun paBo humedecido limpio a la ventana
para limpiarla.
Elpanel de control
P6seleun pano humedecido para limpiar.Sequecompletamente. No use esprays limpiadores,
grandes cantidades de detergente g agua, abrasivos u objetos filosos sabre el panel, ga que
Io podrfa daBar.Algunas toallas de papel podrfan tambi@ndaBar el panel de control.
Panel de puerta
Antes de limpiar el panel de puerta frontal, asegOresede que sabe qu_ tipo de panel tiene.
Consulte el octavo dfgito del nOmero de modelo. "S"es acero inoxidable, "L"es CleanSteelg "B",
"W" o "C"son colores pl6sticos.
Acero inoxidable
Elpanel de acero inoxidable puede limpiarse con StainlessSteel Magic o un producto similar,
utilizando un pano suave g limpio.Aplique el limpiador de superficiesde acero inoxidable
cuidadosamente para evitar tocar las piezasde pl6stico que rodean al acero. No utilice cera,
pulimento, lejfa ni productos que contengan clorina en acabados en acero inoxidable.
Paneles pl(_sticosde color
Utilice un paBo suave, limpio g ligeramente humedecido g, a continuaci6n, seque bien toda
la zona.
_J'il
Los sellos de la puerta
Esimportante mantener el 6rea donde la puerta se sella con el homo de microondas limpia.
Solamente use detergentes no abrasivos suaves aplicados con una esponja limpia
o con un paBo suave. Enjuague bien.
El fondo
Limpie la grasa Uelimine el polvo del fondo a menudo. Useuna soluci6n de agua c61ida
Udetergente.
PA
LU
I:1
•_, v]
A
_sJi
m
mmml_mm...w
ram,,'
,,llm
il
O
A
•-_ u'l
m
n
bJ -_
w
27
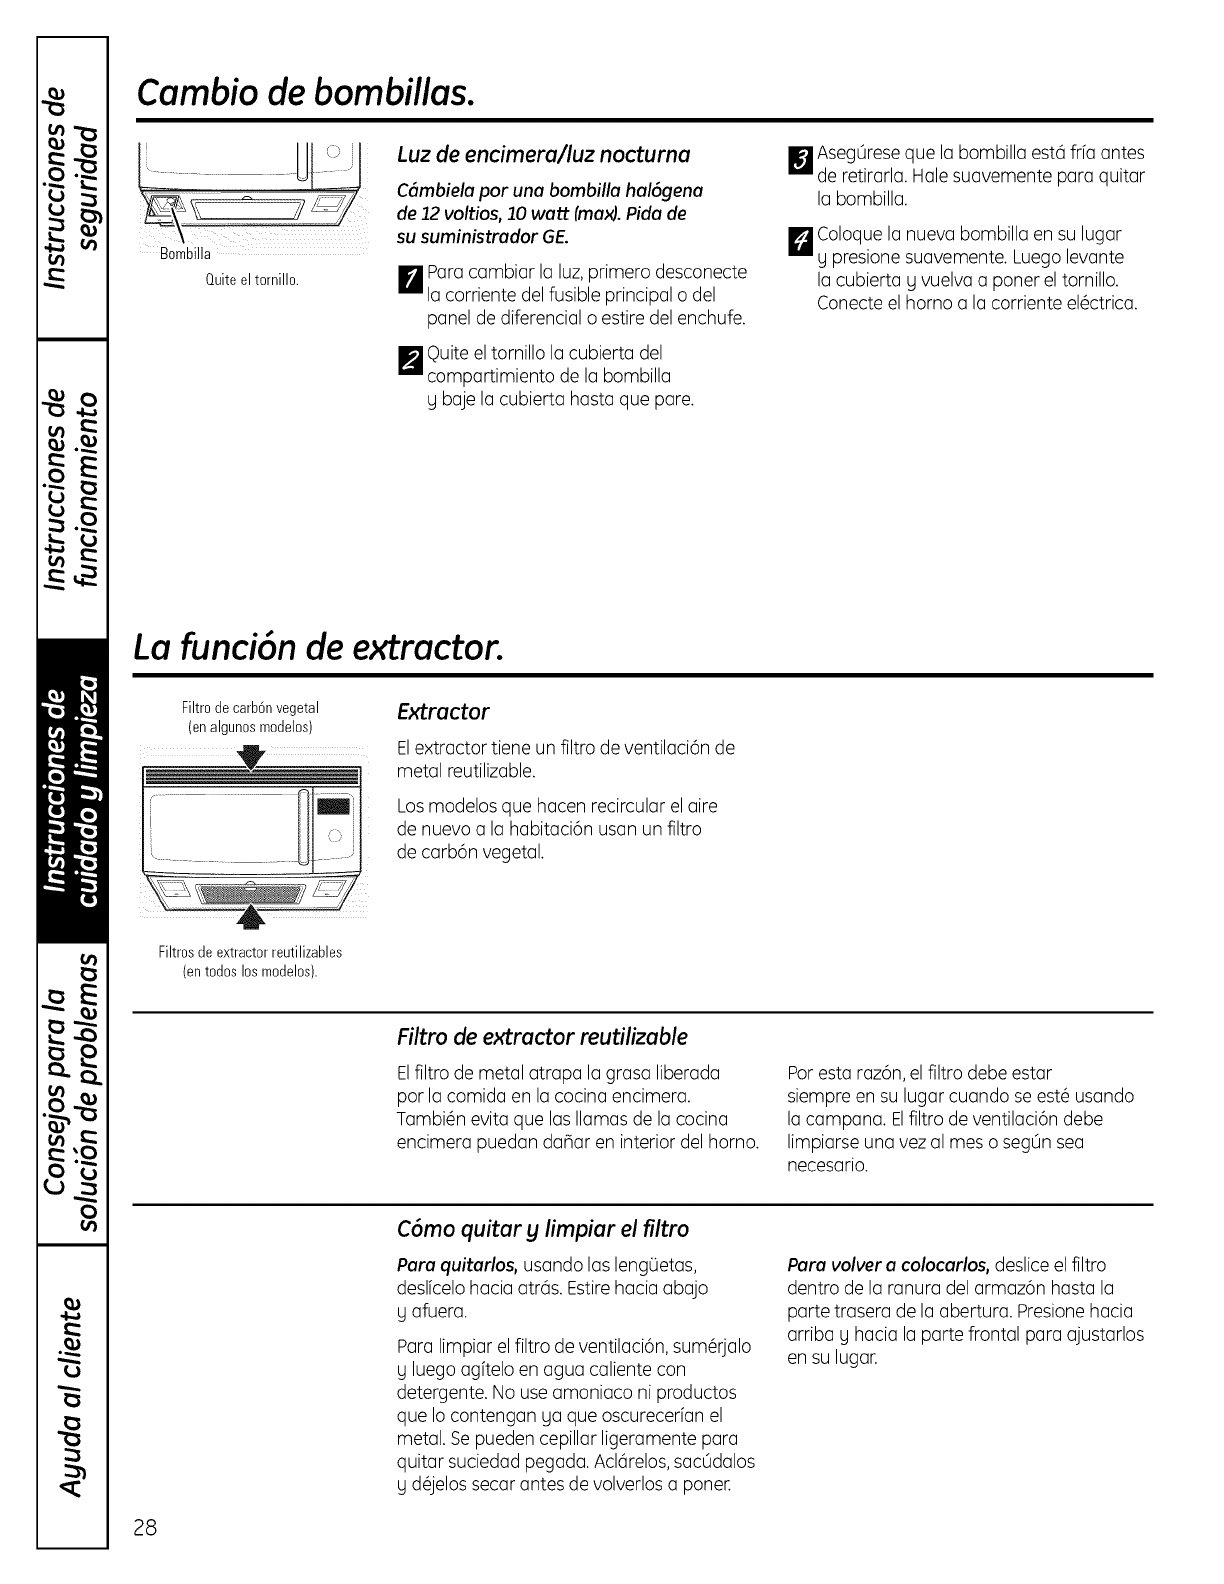
Cambio de bombillas.
Quite el tornillo.
Luz de encimera/luz nocturna
C(_mbielapor una bombilla hal6gena
de 12 voltios, lO watt (max).Pida de
su suministrador 6E.
Paracambiar la luz,primero desconecte
F_ la corriente del fusible principal odel
panel de diferencial o estire del enchufe.
_'_ Quite el tornillo la cubierta del
compartimiento de la bombilla
g baje la cubierta hasta que pare.
_J AsegOreseque la bombilla est6 frfa antes
de retirarla. Hale suavemente para quitar
la bombilla.
_J Coloque la nueva bombilla en su lugar
g presione suavemente. Luego levante
la cubierta g vuelva a poner el tornillo.
Conecte el homo a la corriente elQctrica.
La funci6n de extractor.
Filtrode carbQnvegetal
(enalgunosmodelos) Extractor
Elextractor tiene un filtro de ventilaci6n de
metal reutilizable.
Los modelos que hacen recircular elaire
de nuevo a la habitaci6n usan un filtro
de carb6n vegetal.
Filtrosde extractorreutilizables
(entodoslos modelos).
Filtro de extractor reutilizable
Elflltro de metal atrapa la grasa liberada
por la comida en la cocina encimera.
Tambi@nevita que las llamas de la cocina
encimera puedan da_ar en interior del horno.
Poresta raz6n,el filtro debe estar
siempre en su lugar cuando se est6 usando
la campana. Elfiltro de ventilaci6n debe
limpiarse una vez al mes o segOnsea
necesario.
28
C6mo quitar ylimpiar el filtro
Para quitarlos, usando las lengQetas,
deslfcelohacia atrQs.Estirehacia abajo
g afuera.
Para limpiar el filtro de ventilaci6n, sum@jalo
U luego agitelo en agua caliente con
detergente. No use amoniaco ni productos
que Io contengan ua que oscurecerian el
metal. Sepueden cepillar ligeramente para
quitar suciedad pegada. Acl@elos,sacOdalos
Ud@jelossecar antes de volverlos a poner.
Para volver a colocarlos, desliceel flltro
dentro de la ranura del armaz6n hasta la
parte trasera de la abertura. Presionehacia
arriba g hacia la parte frontal para ajustarlos
en su lugar.
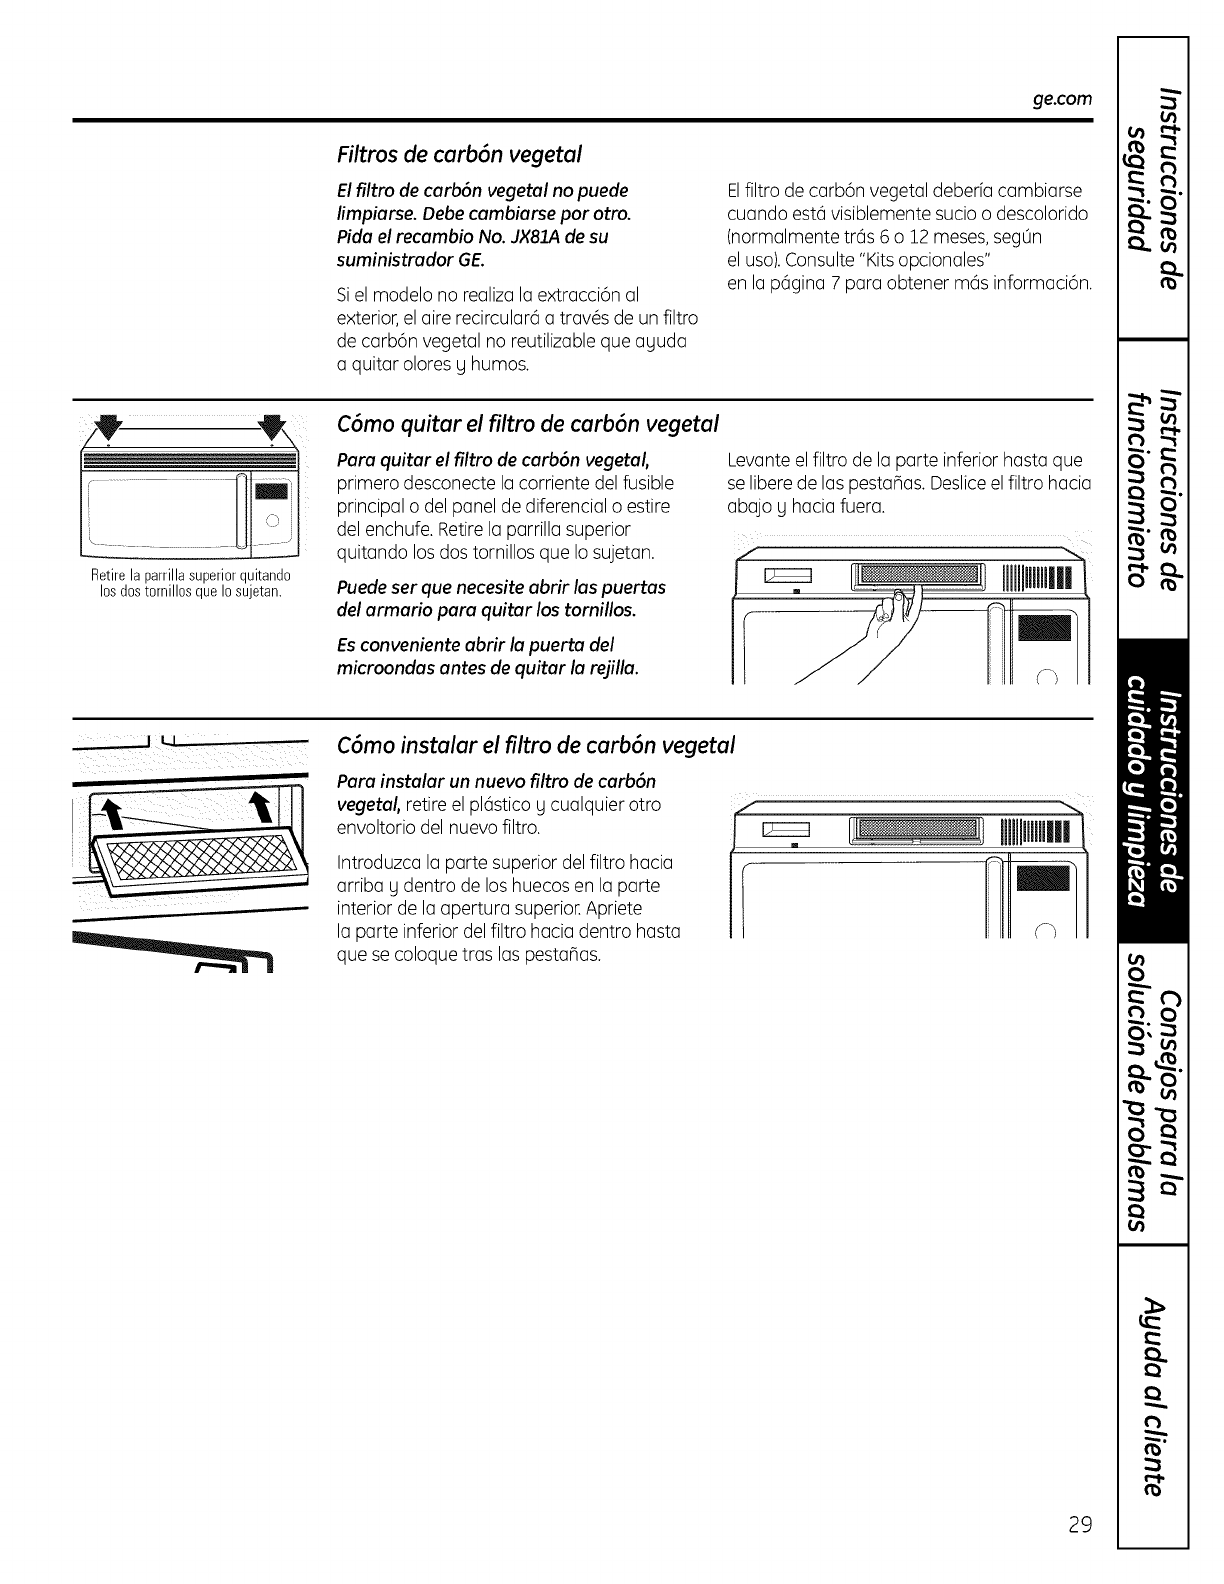
ge.com
Filtros de carb6n vegetal
El filtro de carb6n vegetal no puede
lirnpiarse. Debe cambiarse par otro.
Pida el recambio No. JX81A de su
suministrador GE.
Siel modelo no realiza la extracci6n al
exterior,el aire recircular6 a tray,s de un filtro
de carb6n vegetal no reutilizable que aguda
a quitar olores g humos.
Elfiltro de carb6n vegetal deberfa cambiarse
cuando est6 visiblemente sucio o descolorido
(normalmente tr6s 6 o 12 meses,segOn
el uso).Consulte "Kits opcionales"
en la p@gina7 para obtener m@sinformaci6n.
i ............................m
Retire la parrilla superiorquitando
losdostornillosque Iosujetan.
C6mo quitar el filtro de carb6n vegetal
Para quitar el filtro de carb6n vegetal,
primero desconecte la corriente del fusible
principal o del panel de diferencial o estire
del enchufe. Retire la parrilla superior
quitando los dos tornillos que Io sujetan.
Puede ser que necesite abrir las puertas
del arrnario para quitar los tornillos.
Es conveniente abrir la puerta del
microondas antes de quitar la rejilla.
Levanteel filtro de la parte inferior hasta que
se libere de los pestanas. Desliceelfiltro hacia
abajo g hacia fuera.
EEEE3
JLL C6mo instalar el filtro de carb6n vegetal
Para instalar un nuevo filtro de carb6n
vegetal, retire el pl6stico g cualquier otro
envoltorio del nuevo filtro.
Introduzca la parte superior delfiltro hacia
arriba y dentro de los huecos en la parte
interior de la apertura superior.Apriete
la parte inferior del filtro hacia dentro hasta
que se coloque tras las pesta_as.
¢n
PA
kU
m
_ m
I:1
•_, vJ
A
m
mmml_mm,..w
mini,'
|
0
x
m
bJ
w
29
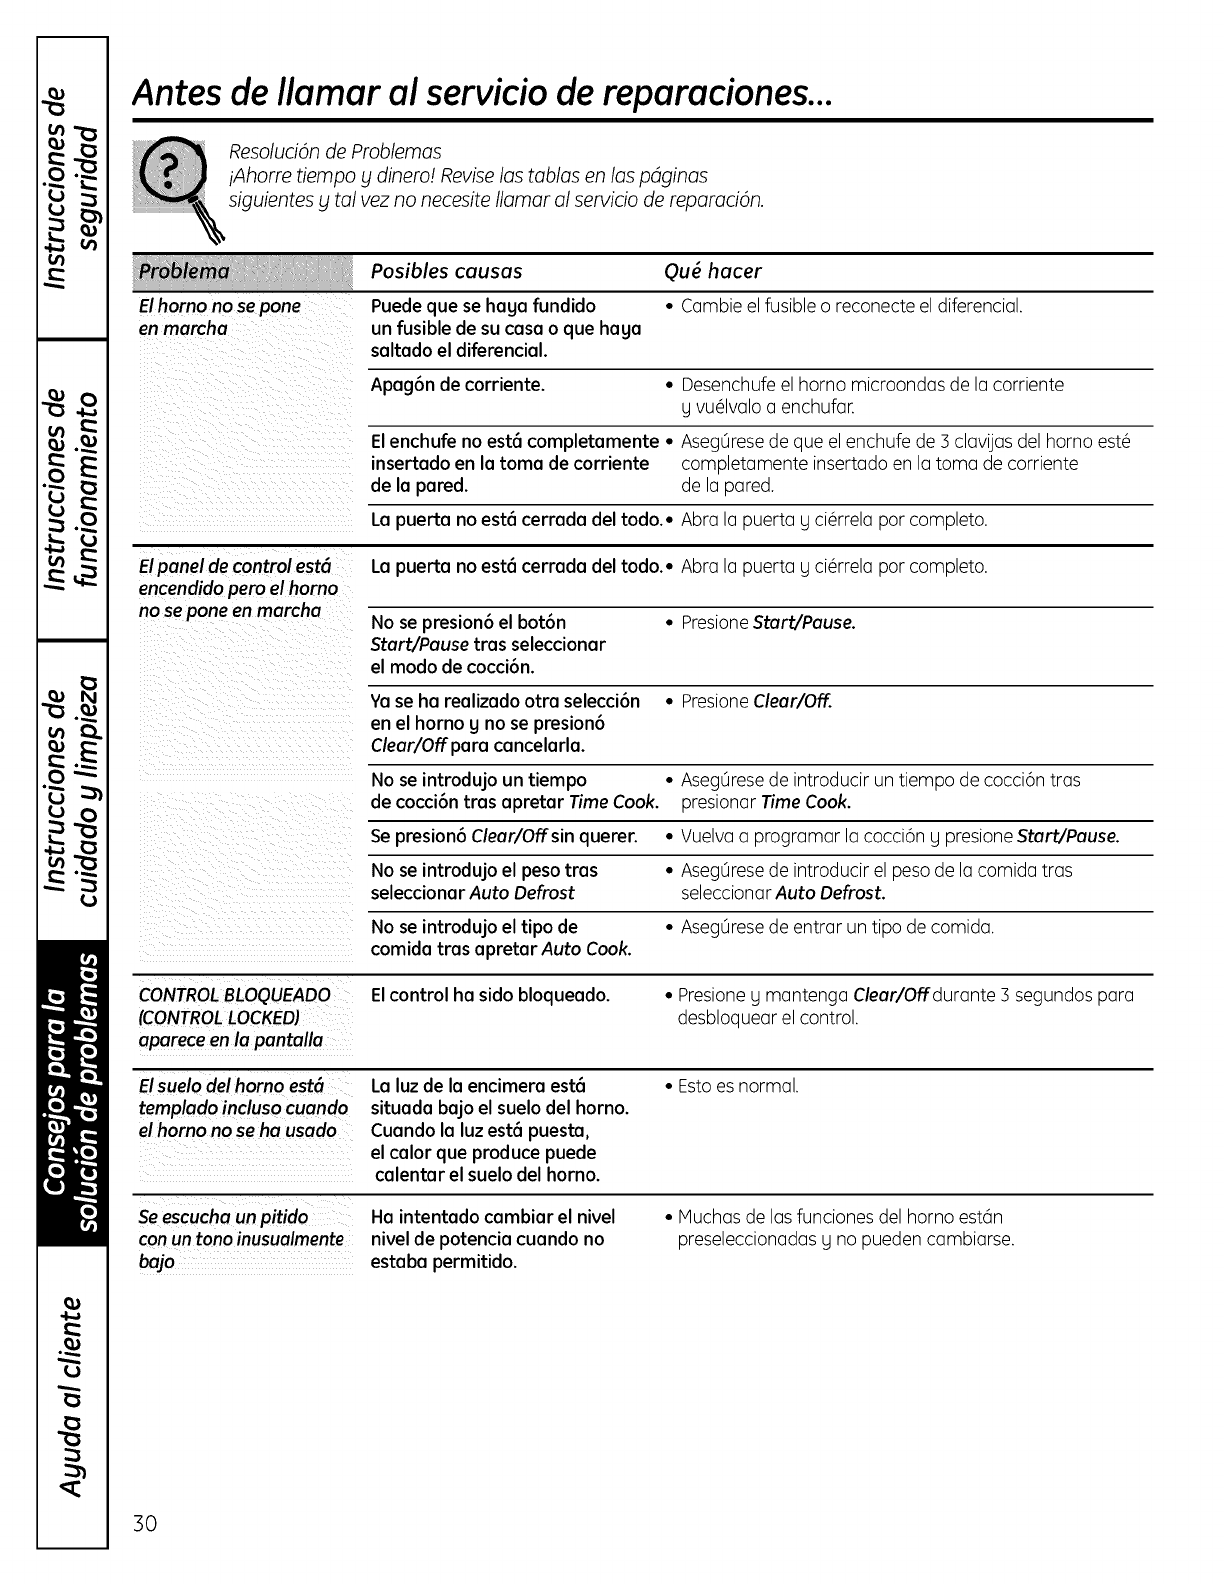
Antes de Ilamar al servicio de reparaciones...
Resoluci6n de Problemas
jAhorre tiempo ydinero! Revise los tobias en los pdginas
siguientes y tal vez no necesite Ilamar al servicio de reparaci6n.
Elhomo no se pone
en marcha
Posibles causas
Puedeque sehogo fundido
un fusible de su coso o que hogo
soltodo el diferenciol.
Qu_ hacer
•Cambie el fusible o reconecte el diferencial.
Apag6n de corriente. • Desenchufeel horno microondas de la corriente
y vu_lvalo aenchufar.
Elenchufe no est6 completamente • Aseg0resede que elenchufe de 3 clavijas del horno est#
insertado en la tome de corriente completamente insertado en la toma de corriente
de la pared, de la pared.
La puerto noest6 cerrada del todo.• Abra la puerto y ci#rrela par completo.
Elpanel de controlest6 La puerta no est6 cerrada del todo.• Abra la puerto y ci_rrela por completo.
encendidopero el homo
no se pone en marcha No se presion6 el bot6n • PresioneStart/Pause.
Start/Pause tras seleccionar
el modo de cocci6n.
Yase ha realizado otra selecci6n • PresioneClear/Off
en el homo g no se presion6
Clear/Off para cancelarla.
No se introdujo un tiempo • Aseg0resede introducir un tiempo de cocci6n tras
de cocci6n tros opretor Time Cook. presionar Time Cook.
Sepresion6 Clear/Off.sin querer. • Vuelva a programar la cocci6n y presione Start/Pause.
No se introdujo el peso tros • Aseg0resede introducir el peso de la comida tras
seleccioner Auto Defrost seleccionar Auto Defrost.
No se introdujoel tipo de • Aseg0resede entrar un tipo de comida.
comido tros opretor Auto Cook.
CONTROLBLOQUEADO Elcontrol ha sido bloqueado. • Presioney mantenga Clear/Offdurante 3 segundos para
(CONTROLLOCKED) desbloquear el control.
oporece en la pontollo
Elsuelo del homo est6 La luzde la encimera est6 • Estoes normal.
templodo inclusocuondo situada bajo el suelo del horno.
el homo no se he usado Cuando la luz est6 puesta,
el color que produce puede
calentar el suelo del horno.
Seescuchaun pitido Ha intentado cambiar el nivel
con un tono inusualmente nivel de potencia cuando no
bajo estaba permitido.
• Muchasde losfuncionesdelhornoest6n
preseleccionadasy no puedencambiarse.
30
ge.com
__ Posibles cousos
Locomidose dora mucho La parrillasefij6 en la posici6n
m6s r6pido en Ioporte alta.
de orriba queen la parte
de obojo
Ou_ hacer
• Siempre use la parrilla en la posici6n baja.
La temperatura del homo
fluct6a durante la cocci6n Elelemento de cocina pasa
de encendido a apagado paro
mantener la temperatura del
homo en los niveles deseados.
• Esto es normal.
Elextractor del homo se
enciendeautom6ticamente Elextractor seenciende • Estoes normal.
autom6ticamente pare proteger
el microondas si percibe que hag
demasiado calor en la estufa debajo
de _ste.
Aparece en la panta//a
SENSORERROR
(Errorde sensor}
Seabri6 la puerto mientros se • No abra la puerta hasta que se perciba elvapor
utilizaba la funci6n de sensorantes y aparezca en pantalla la cuenta de tiempo regresiva.
antes de que pudiera detectarse
el vapor.
El vapor no se detect6 en la
cantidad de tiempo m6xima.
• Utilice Time Cook tTiempo de cacci6n) para calentar
durante m6s tiempo.
31
Antes de Ilamar al servicio de reparaciones...
Cosas normales de su horno microondas
Humedad en lapuertay paredes
delhornoalcocinar.Frotelahumedad
conuna toallitadepapelo un patiosuave.
Humedad entrelospanelesde laspuertas
delhornoalcocinardeterminados
alimentos.Lahumedad sedisipar6
pocodespu@sde terminardecocinar.
Elvapor se escapa por la puerta.
Una luzde reflexi6nalrededorde lapuerta
o en laperiferiadelacajadelhorno.
Laluzdelhornosedebilitay elsonido
delsopladorcambiacuandoseusan
nivelesde potenciadiferentesalalto.
Un sonido sordo de golpe cuando el horno
de microondas est6 en operaci6n.
Elventilador opera mientras el horno
de microondas est6 operando. Elventilador
no se apagar6 ni se puede apagar hasta
que el horno de microondas se apague.
Sepuede notar una interferencia de
televisi6n gradio mientras se usa el horno
de microondas. Similar a la interferencia
casada por otros electrodom@sticos,Io cual
no indica un problema. Conecte el homo
de microondas en un tomacorriente
de un circuito diferente, mueva latelevisi6n
o el radio tan lejos del horno de
microondas como sea posible o
inspeccione la posici6n de la antena
de la televisi6n o el radio.
32
Notas. ge.com uo
A
I"'" ..--a
A o
_" €'b
iJJ
• • x
w. •
0
A
A
La_
rs_
n
LJ
"W
A
I:1
I:1
33
_ + __
r,l,l+
,,i,...i ve
(,n
vA
v _
_ L
m
v_
o
Notas.
34
Garantia de Homo Microondas GE.
Todos los servicios de garontia los proporcionan nuestros Centros
de Reparoci6n de Fdbrica o nuestros t4cnicos Customer Care ®
autorizados. Pare concertar una cita de reparaci6n, en linea, visite
ge.com, o llame a1800.GE.CARES(800./432.2737).Cuando llame
paro solicitor servicio, par favor tenga a mona el nOmero de serie
yel nOmero de modelo.
Grape aqui su recibo.
Se requiere facilitar prueba
de la fecha de compra original
para obtener un servicio bajo
la garanda.
:ii _ ii i
O_ GE reemplazar6:
Cualquier recambio del homo microondas que falle debido a un defecto en sus materiales o en
Oesde lo fecha de ta su fabricaci6n. Durante esta garantia limitada de un a_o, GE proporcionar6, sin costa adicional,
compraoriginal mano de obra g servicio relacionado para reemplazar las partes defectuosas.
Viajes de reparaci6n a su hogar para enseffarle c6mo
usar el producto.
Instalaci6n o entrega inapropiada, o mantenimiento
impropio.
producto no accesible para facilitar el servicio requerido.
Fallos del producto si hag abuso, mal usa (par ejemplo,
chispas dentro de horno microondas del estante
met61ico/papel de aluminio), o usa para otros prop6sitos
que los propuestos, o sl se usa con fines comerciales.
Reemplazo de bombillas de la luz de la estufa.
Reemplazo de fusibles de su hogar o reajuste
de los diferenciales.
Da_o al producto causado par accidente, fuego,
inundacioneso actos de Dios.
Da_o incidental o consecuencial a su propiedad causado
par posibles defectos con el aparato.
Causar da_os despu_s de la entrega.
EXCLUSION DE GARANT[AS IMPL[CITAS--Su 5nico y exclusivo derecho es la reparaci6n del producto,
tal y coma se indica en esta Garantia limitada. Cualquier garantia implicita, incluyendo las garantias
implicitas de comerciabilidad oadecuaci6n para un fin determinado, estSn limitadas a un a_o
oel periodo de tiempo mSs breve permitido par la ley.
Esta garantia se extiende al comprador original y cualquier comprador posterior de productos comprados
para usa residencial dentro de Estados Unidos. Si el producto estd situado en un drea que no dispone
de servicio par porte de un proveedor de servicio autorizado de GE, podria tenet que hacerse cargo
de los castes de envio o bien podria solicitdrsele que Ileve el producto a una centro de servicio de GE
autorizado para realizar la reparaci6n. En Alaska, la garantia excluye el costa de envio o los visitas
de servicio asu casa.
Algunos estados no permiten la exclusi6n o limitaci6n de dahos incidentales o consecuenciales. Esta garantia
le proporciona derechos legales espedficos, g puede tenet otros derechos que pueden variar de un estado a
otto. Para conocer los derechos legales de su estado, consulte con su oficina local de asuntos del consumidor
o al procurador general de su estado.
Garantizador: General Electric Compang. Louisville, KV 40225
35
Aguda al cliente.
Pdgina Web de GEAppliances ge.com
_Tienealguna pregunta sabre su electrodom@stico2iPruebela p(igina Web de GEAppliances 2/4horas al dfa,
cualquier dfa del ari!! Para mayor conveniencia y servicio m6s r6pido, ya puede descargar los Manuales
de los Propietarios,pedir piezaso incluso hacer una cita en Ifnea para que vengan a realizar una reparaci6n.
Soliciteuna reparaci6n ge.com
Elservicio de expertos GEest6 a tan s61oun paso de su puerta, iEntre en Ifneay solicite su reparaci6n cuando
le venga cualquier dfa del aBo! O Ilameal 800.GE.CARES(800.412.2717)durante horas normales de oficina.
RealLifeDesignStudio(Estudiodedisehoparalavidareal) ge.com
GEapoya el concepto de DiseBoUniversal--productos, servicios y ambientes que pueden usar gente de todas
las edades,tamaBos y capacidades. Reconocemosla necesidadde diseBar para una gran gama de habilidades
y dificultades fisicas y mentales. Param(is detalles cobre las aplicaciones de GEDiseBoUniversal,incluyendo
ideas de diseBopara la cocina para personas con discapacidades, mire nuestra p6gina Web hay mismo.
Para personas con dificultades auditivas,favor de Ilamar al 800.TDD.GEAC(800.8]].4122).
Garantias ampliadas ge.com
Compre una garantfa ampliada y obtenga detallessabre descuentosespecialesdisponiblesmientras su garantfa
est(i a0n activa. Puedecomprarla en Ifneaen cualquier momenta, o Ilamaral (800.626.222/4)durante horas
normales de oficina.GEConsumer Home Servicesestar(i a0n ah[ cuando su garant[a termine.
Piezas btaccesorios
Aquellos individuos con la calificaci6n necesaria para reparar sus propios electrodom@sticospueden
pedir que se les manden las piezaso accesorios directamente a sus hogares (aceptamos las tarjetas
VISA,MasterCardy Discover).Haga su pedido en Ifneahay, 2/4horas cada dfa o Ilamar par teldono
al 800.626.2002durante horas normales de oficina.
ge.com
Las instrucciones descritas en este manual cubren los procedimientos a seguir por cualquier usuario.
Cualquier otra reparaci6n deberia, pot regla general, referirse a personal calificado autorizado. Debe
ejercerse precauci6n ya que las reparaciones incorrectas pueden causar condiciones de funcionamiento
inseguras.
P6ngase en contacto con nosotros
Sino est6 satisfecho con el servicio que recibede GE,p6ngase en contacto con nosotros en nuestra p(igina
Web indicando todos los detalles as[ coma su n0mero de teldono o escr[banos a:
General Manager,Customer Relations
GEAppliances,Appliance Park
Louisville,KY/40225
ge.com
Registre su electrodom_stico ge.com
iRegistre su nuevo electrodom_stico en lineo--cuondo usted prefiero! Elregistrar su producto a tiempo
le proporcionar6, si surgiera la necesidad, una mejor comunicaci6n gun servicio m6s rcipido bajo los t@rminos
de su garantia. Tambi@npuede enviar su tarjeta de registro pre-impresa que se incluge en el material
de embalaje o recorte g use elformulario de este Manual del Propietario.
lmpreso en China
