GE JVM1842BF001 User Manual MICROWAVE Manuals And Guides L0504013
GE Microwave/Hood Combo Manual L0504013 GE Microwave/Hood Combo Owner's Manual, GE Microwave/Hood Combo installation guides
User Manual: GE JVM1842BF001 JVM1842BF001 GE MICROWAVE - Manuals and Guides View the owners manual for your GE MICROWAVE #JVM1842BF001. Home:Kitchen Appliance Parts:GE Parts:GE MICROWAVE Manual
Open the PDF directly: View PDF ![]() .
.
Page Count: 44
GEAppliances.com
D
0
• • c (
Safe O, Instruaions • •2-.)
Operating Instruaions
Auto Features ......... 20
Care and
Cleaning .......... 34, 35
Changing the
Power i,evel .......... 13
Convenience
Features ........... 2 ] -25
Cooking Guide ..... 15, 16
Deti'osting Guide ...... 18
Exhaust Feature .... 37, 38
Features of Y{)/II"
Microwave Oven .... 11, 19
Microwave Temps ...... 33
Other Features .... 2{-32
Replacing Bulbs ....... 36
Time Features ..... 14-19
7boubleshooting Tips ...39
Things That Are
Nomml _,\ith Your
Microwaxe Oxen ....... 39
Com+,mer Supp¢n't
Consumer
Support ...... Back Cover
Optional Fdts ......... 10
Product
Registration ....... 41, 42
Warranty ............. 43
Espahol
For a Spanish version ot this
manual, visit our Website at
GEAppliances.com.
PaI'a cons/lltar illl_l vei3ion
en espafiol de este manual
de instrucciones, visim
nuestro sitio de internet
GEAppliances.com.
,iq/M 1840
,/1"z 4l_ 4l
71 )
,]1'l 41842
Write the model and serial numbers here:
Model #
Serial #
Find these numt)ers on a label inside
Ill(! 0"_ (!11.
ij{iiiii
164D3370P30149-4037106-03JR
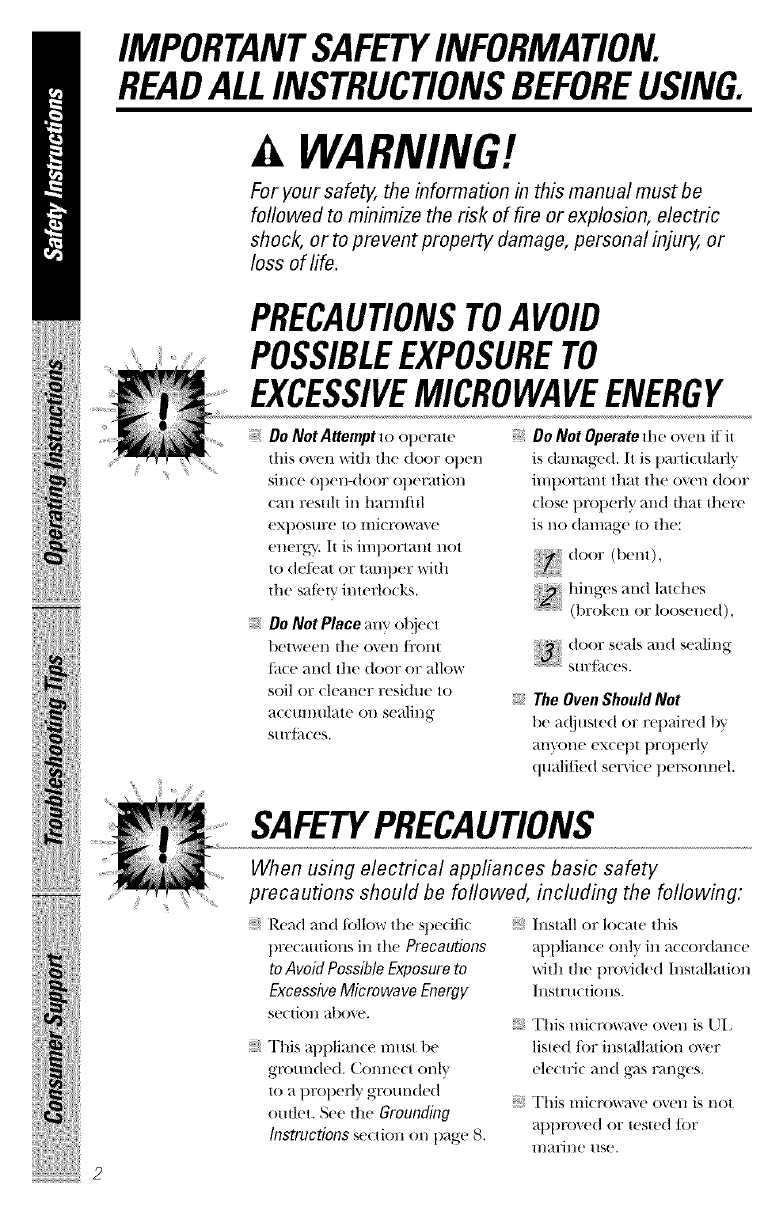
IMPORTANTSAFETYINFORMATION.
READALLINSTRUCtiONSBEFOREUSING.
AWARNING!
For your safety, the information in this manual must be
followed to minimize the risk of fire or explosion, electric
shock, or to pre vent property damage, personal injury, or
loss of life.
PRECAUtiONSTOAVOID
iiii!ili_i_!iiiqii!!ili_i,ii!_!_iiiiiii
since open-door operation
can resuh in harmful
(_xpostl£e to lilicI'ow21\ e
energ),. It is lint)art:ant ii()t
to/le/bat or t_il/ll)el: with
tile sal(,tv interlocks.
Do Not Place ally' ol!ject
between the oven/i:ont
titce and the door or allow
soil or clem/er residue to
_/cunmlate on sealing
S/ll:[ilCeS.
i]/IpOlTt}tl/t th}tt the ()_,ell (]()()F
(lose properl} mid that there
iS 1/0 (]:dl//_t_'e tO tlle:
r/,,,,,,-(,,en,_,
l/il/_-es_,l/d_t,/l/es
........................(t/roken or loosened),
S[ 117_t( es.
The Oven Should Not
be a/!iusted or rel)_dred by
an}_)ne except properly
quali/ied service personnel.
SAFETYPRECAUTIONS
When using electrical appfiances basic safety
precautions should be followed, including the following:
Re_d and tallow the specifi( :_ Install or locate this
precautions in the Precautions
to Avoid Possible Exposure to
Excessive Microwave Energy
seciion _d)ove.
This appliance must be
glX)/lllde(|. (i()nllei | onlY
to a properb/grounded
outlet. See the Grounding
Instructions se/lion on page 8.
appliance only ill accordance
with the provided Installation
I1 lStrilCtions.
This mierowm e ()\ell is klI
listed Jar installation o\er
ele/oJc and g_s rmlges.
This microwm e o\en is not
al)plxlVed or tested Jar
l//}tlJne lisp.
vvvvw.GEAppliance_com
Use this appfiance only for its intended purpose as described in this
Owner's Manual
I)o I/at n/guilt this at)plian(e o\er
a sink.
"Ib red uce tile risk of fire i]l tile
oven cavity:
This o\eFthe-mnge o\en _s_tsdesiglled
tar use o_er ranges no wider tllall 36."
It may be installed o_vr bofll Kas and
ele(tric (ooking equipn/ent.
Do not operate this alllllian(e if it liar,
a damaged power (ord or plug, if it is
not working properb;, or if it ha_, been
damaged or dropped. If the power
cord is damaged, it must be repla(ed
bv (;eneral Electric Service or an
authorized service agent using a
power cord a_dlable/i:om (;eneml
Electric.
1)o not co_er or block any openh/gs
on tile atlpliance.
Use this appliance only tar its
ime]lde(t use as described in this
mmmal. Do not use corrosive
chemi(als or vapor_, in this applian(e.
This mi(rowa_v ()_vn is specifi(ally
desiglled to heat, (tr_ or cook toad,
and is not imended/or laboratory
or industri_d use.
Do not store this apl)liance outdoors,.
I)O I]O[ list. ` this t)]?o(hlct Ile_tr w_tte] _
tar example, in a wet basement, near
a.',wimming pool, near a sink or in
similar locations.
Kee t) power cord away ti'om heated
S/lrtilces.
1)o not immerse power cord or
plug in water.
--I)o not overcook toad. Careflfllv
attend appliance when paper, plastic
or ()tile]: COl//tltlstible l//_tteri_ds are
placed inside tile o_en while cooking.
--Remove wire twist-ties and metal
handles ti'om paper or t)lastic
containers betore t)lacing them in
the oven.
--Do not use tile o_vn tar storage
t/tu])oses. I)o not leave paper
produt` is, cooking utensils or load
in the ovel;, \'dlelJ, lJ,ot in use.
--If materials in.,,ide tile ()_vn ignite,
keep tile oven door closed, turn the
oven off and disconnect the power
cord, or shut off t)ower at tile fl]se or
circuit breaker panel. If the door is
opened, the fire ma} spread.
See door SUl'/itce cleaning instructio]ls
in the Care and cleaning of the
microwave oven s( t`tion of this mmltlal.
This appliance must only be serviced
by qualified service persolmel.
Contact nearest authorized ser\'ice
tacilitv/or examination, repair or
a(!jusmlent.
As with any appliance, close
stqlervision is necessary when
used by children.
Do not store anything directly on top
ot the IIliCrOW_l_,_' ()_,_'l/ S[lrJitce whell
the 1Dicrov¢_,_, ovel/is iH ot)eratiol/,
ilii!iiiiii!/ii!iiiil i
3
IMPORTANTSAFETYINFORMATION.
READALLINSTRUCTIONSBEFOREUSING.
WARNING!
ARCING
If you see arcing, press the CLEAR/OFFpad and correct
the problem.
Arcing is the ]l/i( row_lve [el_i/] ;_ Foil not molded to/ood
/or sparks in the o_,wn+Arcing (upturned edges act Hike
is caused by: antem/as).
The metal shelf not installed ;_ Metal, such as twist-ties,
(orrectlv so it touches tl/e poultr} pins, or gold-rimmed
microwave wM1. dishes, in tile microwm e.
Metal or/oil touching the
side of the o_en.
;+ Recycled tlaper towels
containing small metal pieces
being used in the microwave.
i!iiiiii++iiiiiiii/i+!iHHiiii!iiii
+
iiiii!ili+i+!Xiiii!!i/i+i,ii!+!+iiiiiii
FOODS
Do not poll popcorn ill v(mr
lIlicrow_l_e O_el/ tulh'ss ill a
special mi(rowave pol/(orn
a(cessorv or tmless you use
pol/(orn labeled {br use in
lIlicrow_l_ e O_ ellS.
Sol/le t)ro(hlcts S/loll _lS
whole eggs and sealed
containers t_)r examl/le,
closed,jars--_m • able to
explode and should not be
he_ted ill this microwave
oven. Su(h use of tile
llliCrOW_l_+_' 0_+_'1/ (otlld
resuh in in jm+y.
I)o not boil eggs in _
lllicrol%we ovel/. Pl?eSs/lre
will build up inside egg }x)lk
and will cause it to bm'st,
possibly resulting in in jmT'.
()pemting tile mierow_v
with no/ood inside tot more
thaH _ If/illtlte or t/vo 111_1_,
(raise dmnage to tile oven
and could start a fire.
It increases the heat arom/d
tl/e magnetron and (an
shorten tile li/_' of tile o\en.
Foods with tll/l)]?okel/O/lter
"skill" such as potatoes, hot
dogs, sausages, tomatoes,
apples, chicken livers and
other giblets, and egg yolks
should be t/ierced to allow
steaiil to escape dtlrillg
cooking.
vvww.GEAppliance_com
_SUPERHEATEDWATER
Liquids, such as water,
coffee, or tea are able to be
overheated beyond the boiling
point without appearing to be
boiling. Visible bubbling or
boiling when the container is
removed from the microwave
oven is not always present
THIS COULD RESULT IN VERY
HOT LIQUIDS SUDDENLY
BOILING OVER WHEN THE
CONTAINER IS DISTURBED OR
A SPOON OR OTHER UTENSIL
IS INSERTED INTO THELIQUID.
"Ib reduce the risk of i1_iury
to persons:
--Do not o_vrheat the liquid.
--Stir the liquid both be/ore
and hal/ivay through
heating it.
--Do not use straight-sided
containers with narrow
necks.
--M'ler heating, _fllow tile
COlltailler to stand ill the
l//icFowa\ e oven {()r a short
time be/ore removing the
containel:
--Use exu:eme cat'(" when
inserting a spoon or other
utensil into tl/e container.
Avoid heating baby tbod ill
glass jars, e_vn/vith tile lid
o/E Make suw all intimt food
is thoroughly cooked. Stir
tt)od to distritmte tile heat
men]}. Be careflfl to plvvent
scalding when warming
tt)rumla or breast milk. The
container iiiwv'/_'el cooler
than the milk really is. Alwa\:'_
test the milk be/hi`(' tceding
the bah\.
;_ Don't defrost frozen
bevel_}g`('s ill n_lrl'o/*,-
ne(ked bottles (especial F
(arbonated beverages).
Even if the COlltainer is
opened, pl`('ssure can build
up. This can cause the
(ontainer to burst, t)ossibly
resulung in in jur}.
;_ ttot/oods and steam (an
(ause burns. Be caretul when
opening all,,' containers of
]lOt R)o(t, including popcorn
bags, cooking pouches and
boxes. To pl`('vent possible
illjllry, direct steam a/*,rav
tir)m hands and thce.
Do not o_._'rcook potatoes.
They could dehydrate and
(ateh/b`(', causing damage
Cook meat and poulwy
thoroughly--meat to
at least an INTERNAl,
temperatm`(' o/160°1;
and t)oulwy to at least an
INTERNAl temperat m`('
of 180'_E Cooking to
dlese temperatures
usually protects ag_,inst
tt)od-borne illness.
i_ii;;iiiiii{ii!iiiii!;iiiiii;ii
iiiiili iiiiiii!
iii il iiilli
!iiiiiiiiiii_iii'_iiii!ii
5
IMPORTANTSAFETYINFORMATION.
READALLINSTRUCTIONSBEFOREUSING.
WARNING!
+iii!ili+i+)Xiqi+!!i/i+iii!+!+iii+++i
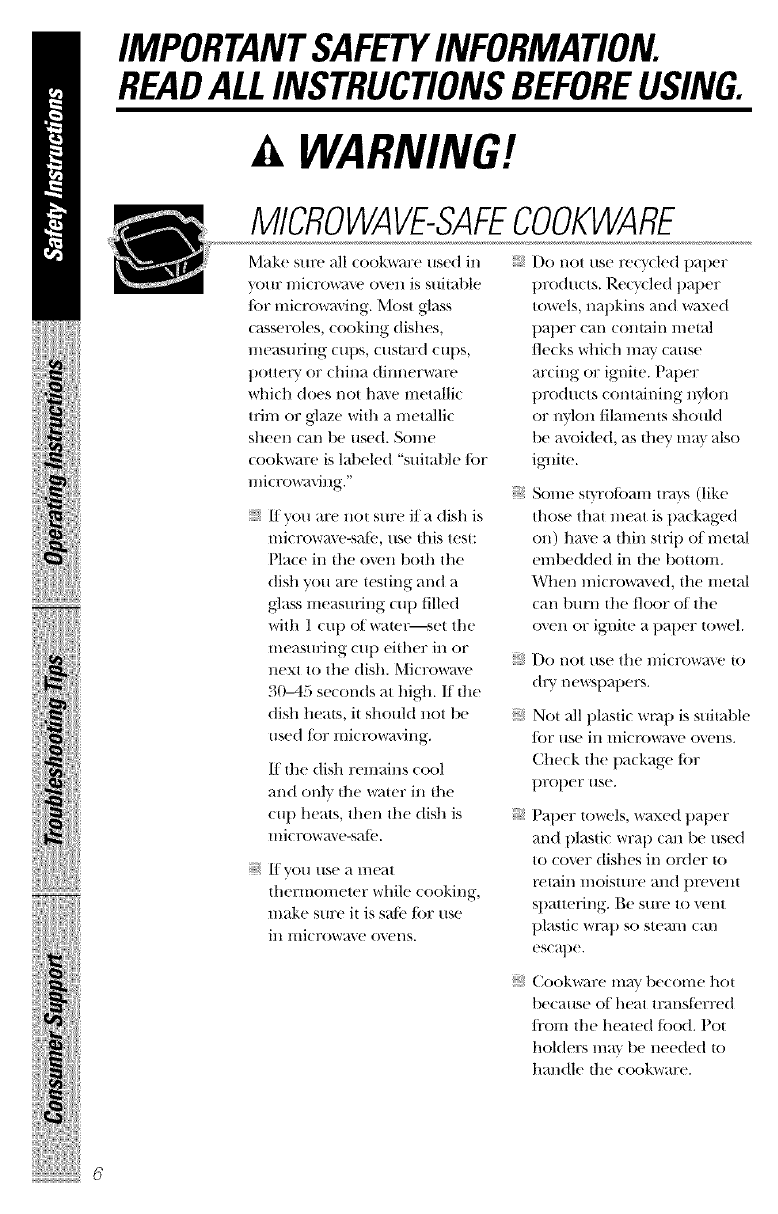
MICROWAVE-SAFECOOKWARE
Make sutv all cook_s_u:e used in
VO/I1P l//iCl?OW_iVt' ()Vt'll is suitable
/or microwaving. Most glass
casseroles, cooking dishes,
nleasm'ing cups, custard cups,
pottery or china dinnerware
which does not hme metallic
trim or glaze with a metallic
sheen can be used. Sonic
cookware is labeled "suitable/[)r
l//iCl'OW_lVil lg,"
I/you are not sure if a dish is
lllitrow_w{'-s,It( _, /l_,e tiffs test:
Place ill tile oven both tile
dish you arc testing and a
glass measuring cup tilled
with 1 cup of water--set tile
lneasmJng CUll either ill or
next to the dish. Microwave
30M5 seconds at high. If the
dish heats, it should not be
used tor lnicmwa\'ing.
l/ tile dish remains cool
and only tile _ter ill file
cup heats, then tile dish is
nlicrowa_, e-sat;v.
ffvou use a meat
d/ermometer while cooking,
make sure it is sa/{'/_)r use
in microwave (Bens.
;_ Do not use recy{led pallet
products. R{,cycled paper
towels, napkins and w,ixt'(t
]),q/cr can {'Oll[,lil/ 1//civil
/h't ks whith ln,P,; t,ltlSt'
ar( illg or ignitc. Pat/or
])l'od/ltts ( Ol/t_lil/i//g IlVIOII
Ol: 1lvl011 tilmncms should
bc a_x)i(tc(t, as dwv mm also
ig_liw.
2_ Somc stwot6mn tra+_:_,(likc
thost' th,l[ l//C,It iS p_ltk_lg('(I
oll) h,w{' a t]lill stlJl/o/mct:al
cnlbcddcd ill tilt' bottolIl.
Wilt'l/ l//i{ I'OV,_I\ t'(I, t]lC Illt't'll
t-in burll tilt' floor ot tilt'
o\cn or ignitc a t}apcr towcl.
;¢ Do I/Ot/Ise tile HliCrow_IvC to
dry newspapers.
;_ Not all plastit wrap is suitable
/_)r use ill IllitTOW,I\ e o\ ens.
Che{k the llat kagc tor
] )}x)ptT IIStL
;_ Patlcr towels, waxed t)atlcr
mid tllaStk wrap tan bc used
to {over dishes in order to
/'{'tain l//oistllrt' a11d ll/'{'Vt'llt
sp_lttt+lJ//g. Bc surc to vent
t}lasti{ wDq} so stt'_ll//1_111
t'S('_lt )(L
(;ook_*_uPe nlav become hot
because of heat trm/stcrred
/i'Olll tilt' ht',ltt'(t/_)o(I. Pot
holders lnav be needed to
handle tile cookware.
vvvvw.GEAppliance_com
"Boilal)le" cooking pouches
and tightly closed plastic
bag.,, should be slit, pierced
or _mted as directed t)_,
t)ackage. If tilt? are not,
t)lastic could burst dining or
immediately alier cooking,
t)ossibly resulting in iqjur}.
Also, plastic storage
containers should be at least
partially uncovered be(ause
they/orm a tight seal. When
(()<)king with containers
tightly cow,wed Mth plastic
WI_II) , felt/O\ e Co_,_qJl/g
careflfllv and direct steam
Use toil only as directed in
this mami:d. TV dimler.s may
be micro_l\ ed in/oil trm_s
less than 3/4" high; remo_e
the to l) loll co_'r and return
the ira +,to the t)ox. When
using/oil in the microwmv
oven, keep the {oil at least
1" awa} ti'om the sides of
the oven.
Plastic cookware--Plastic
cookware designed/or
microwa_v cooking is v,.'r}
useflll, but should be used
careflflk E\en microwa_v-
sa/_' plastic may v,ot be as
tolerant of o_ercooking
conditions as are glass or
ceramic materials and mm
soften or char ifsut!iected
to short l)etiods of
overcooking. In longer
UXI)OStI17(% tO overcooki_lg,
tl_e food and cookware
could ignite.
Follow these guidelines:
Use
++++++::+++++++++t)lastics o111_ and
tts+.' tlJ, elt_ il_ strit, t
compliance with
tile cookware
lIlan/l/ilct tll?eF'S
l?eColIllIlel l(tations.
Do not mi¢ rowme,
elIll)t _ ( OlllainelTS.
I)o v,ot 1)ermit (hildren
td S S
tO [L_e t)la,;tic cookware
without complete
supervision.
ilii!ii:iii!!++i+ii!iiiil i+
7
IMPORTANTSAFETYINFORMATION.
READALLINSTRUCTIONSBEFOREUSING.
WARNING!
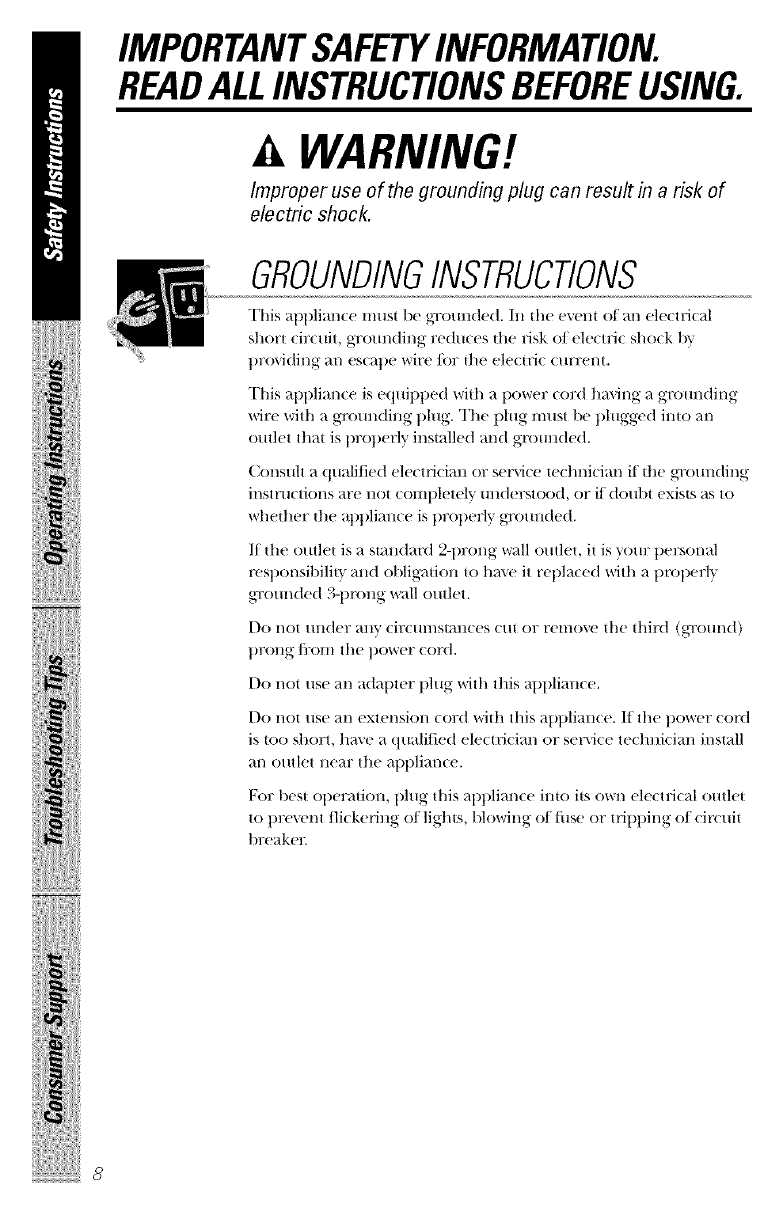
Improper use of the grounding plug can result in a risk of
electric shock.
GROUNDINGINSTRUCTIONS
This al)l)liance must be gTomlded. In the event of an electrical
short circuit, grounding reduces the lJsk of electlJC shock bv
providing an escape wire lot the elecuic cun:ent.
This al)pliance is equipped with a power cord hm'ing a gromlding
wire with a gromlding plug. The plug must be t_lugged into an
outlet that is prol)efly installed and g)'omlded.
Consult a quali/ied electrician or service technician if the gromlding
instrucdons are not completely mlderstood, or il doubt exists as to
whether the at)pliance is properly gromlded.
If the outlet is a standard 2-l)rong wall outlet, it is yore: personal
responsibili V and oblig_ltion to hm e it replaced with a properly
gTom_ded 3-prong wall outlet.
I)o not trader av,y circumstances (ut or remove the third (gTotmd)
prong/i:om the power cord.
I)o not use an adapter plug Mth this appliance.
I)o not use an extension cord with this al_pliance. If the power cord
is too short, hm e a qualified electrician or service technician install
an outlet near the appliance.
For best ol)eration, plug this al)l_liance into its own electrical outlet
to tm'_vnt flickering of lights, Nowing of fllse or tripping of circuit
breaker.
iiii!ili_i_!Xiiii!!i/i_i,ii!_!_iiiiiii/

www.GEAppliances.com
THEVENTFAN
The tiul will operate auton/atie_dly under certain conditions (see
AtltOlllati€ Fan ]('atlll?e). Take care to pFevellt tile startillg- and
spreading of accidental (ooking (ires \+dlile the Vellt ]itn is ill IlSe.
;_ Clean tile underside oI tile microwave often. Do not allow gtx'ase
to build up on tile (//icFowa\ e oF the tilll fillets.
;+ Ill tile event ()fit grease fire on tile suri_me/lllitS below tile
liliCt'owa\ e ()\ell, SlIlother a [lalllillg t)a]l Oll tile s/lrIilee/lllit
b} covering tile pan ( on/pletely with a lid, a cookie sheet or
a [lilt tl?_lV.
:_ Use care when cleaning tile vent Jim filters. Corrosive cleaning
agents, such as 1iv-based oven cleanel:s, ma} damage tile tilters.
:_ When preparing flaming ti)ods under tile microwa\ e, turn tile
tiln o11.
:¢ Nmxw lemx•sur/itce units beneath your nlicrowave (well
unattended at higll heat settings. Boilovers cause smoking and
greasy spillo\ ers that (ha} ig-uite and spread if tile mierowax e
vent Ira/is operating. "Ibminimize automatic tin/opet_tion,
use adequaw-sized cookware and use high heat on sur/itce m/its
only when necessar\.
READANDFOLLOWTHISSAFETY
INFORMATIONCAREFULLY.
SAVETHESEINSTRUCTIONS
!iii!_iiiiiiii
9
iiiiiiii_iiiiii/i/iiiiii/iiiiii_i_i_i_i_i_i'
iiili !iiil
_iiii/jiiiiW_iiiiiiiiiiiii!iiiiiiii
About optional kits.
OPTIONALKITS
Filler Panel Kits
JX52WH- White
JX52BL -Black
JX52CT- Bisque
When replacing a 36" rtmge hood, filler t)tmel kits fill in the
additional _,idth to provide a (ustom built-in at_pearan(e.
For installation between cabinets only; not ti_r end-of-cabinet
installation. Each kit contains two 3"-wide filler panels.
Filter Kits
JX81B -Recirculating Charcoal Filter Kit
Filter kits are used when the microwave oven cannot be vented
to the outside.
Available at extra cost/i'om vottr GE sut)t)lie_
10
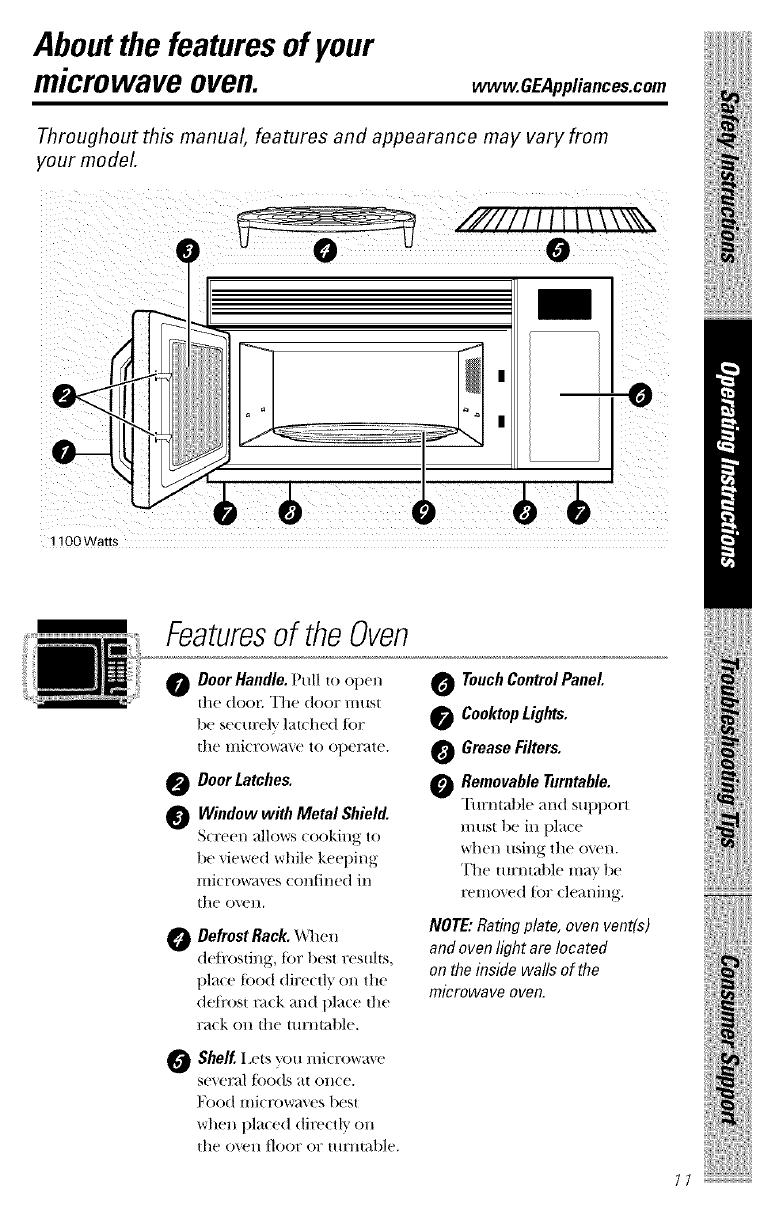
About the features of your
microwav_.e,oven: vvvvw.GEAppliances.com.
Throughout this manual, features and appearance may vary from
your modeL
/////// !\\\
mm _o
) ) 1
1100 Watts
iiii l, ii
ii!iiNii_il_i
Featuresof the Oven
ODoor Handle. Pull to open
tile door. Tile door must
be se(-/lrelv ]at(l/e(I for
tile microwave to o])e_te.
0Door Latches.
Window with Metal Shield.
S(reen a|l/)ws cooking to
be viewed while keeping
llliCrOWoves c/)n[]ned ill
the ()``'ell.
0DefrostRack. When
deli'osting, t_)r best results,
place ti)/)(t directly on the
deli'ost rock and place the
rack on the turntable.
TouchControl Panel
0Ceoktop Lights.
0Grease Filters.
Removable Turntable.
Turntable and support
must be ill place
when using the oven.
The turntable ma_ be
removed {or cleaning.
NOTE: Rating plate, oven vent(s)
and oven light are located
on the inside walls of the
microwave oven.
OShelf. I_ets you microwa``'e
st',, eral _k)o(Is at once.
D)()(t inicrowa\ es best
when placed (tirectN on
tile oven [loot or turntable.
ilii!ii_iii!!¢iii!i;l_i_
iii iHiil!iiii!ili
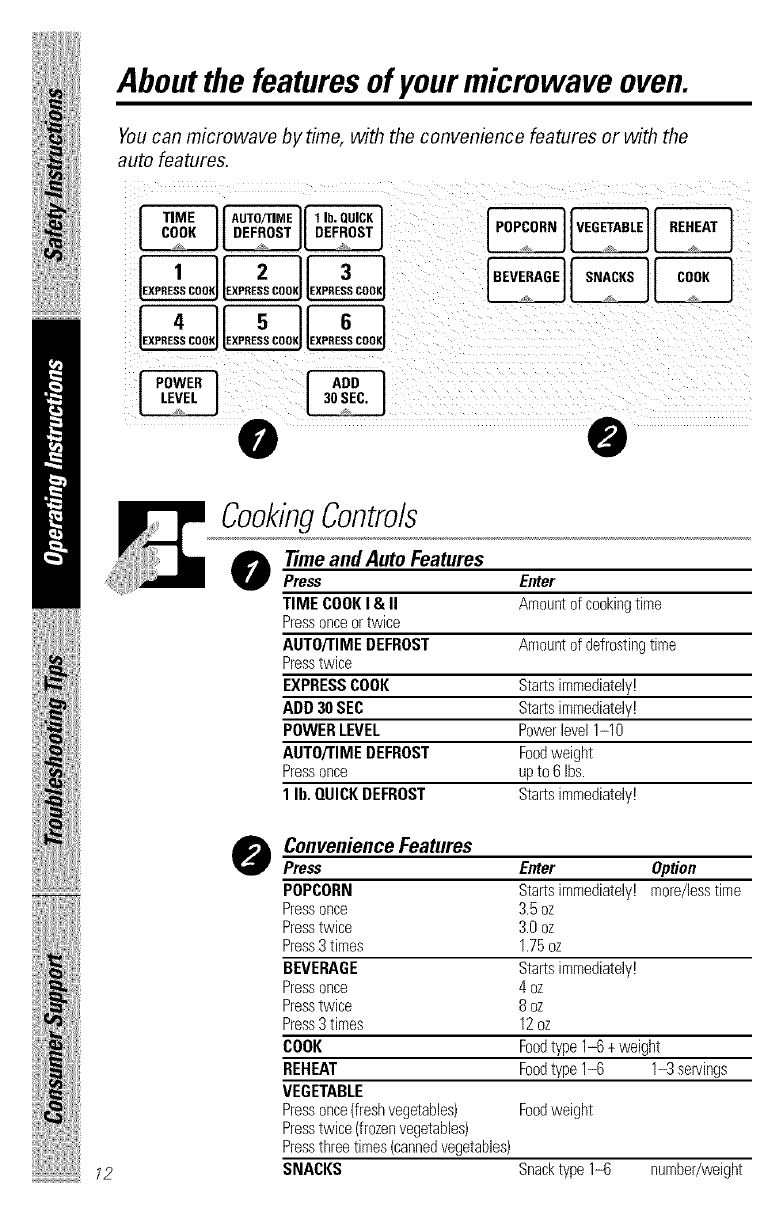
About the features of yourmicrowave oven.
Youcan microwave by time, with the convenience features or with the
auto features.
iiii!ii((iiiii!!i/i_i,iiiiiiiiiii
12
CookingContro/s
07_meand Auto Features
Press Enter
TIME COOKI & II Amount of cookingtime
Pressonceor twice
AUTO/TIME DEFROST Amount of defrostingtime
Presstwice
EXPRESSCOOK Starts immediately!
ADD 30 SEC Starts immediately!
POWER LEVEL Power level 1-10
AUTO/TIME DEFROST Foodweight
Pressonce up to 6 Ibs.
1 lb. QUICK DEFROST Starts immediately!
OConvenienceFeatures
Press Enter Option
POPCORN Starts immediately! more/iesstime
Pressonce 3.5 oz
Presstwice 3.0 oz
Press3 times 1.75oz
BEVERAGE Starts immediately!
Pressonce 4 oz
Presstwice 8 oz
Press3 times 12oz
COOK Foodtype 1-6 +weight
REHEAT Foodtype 1-6 1-3 servings
VEGETABLE
Pressonce (fresh vegetables) Foodweight
Presstwice (frozenvegetables)
Pressthree times (cannedvegetables)
SNACKS Snacktype 1-6 number/weight
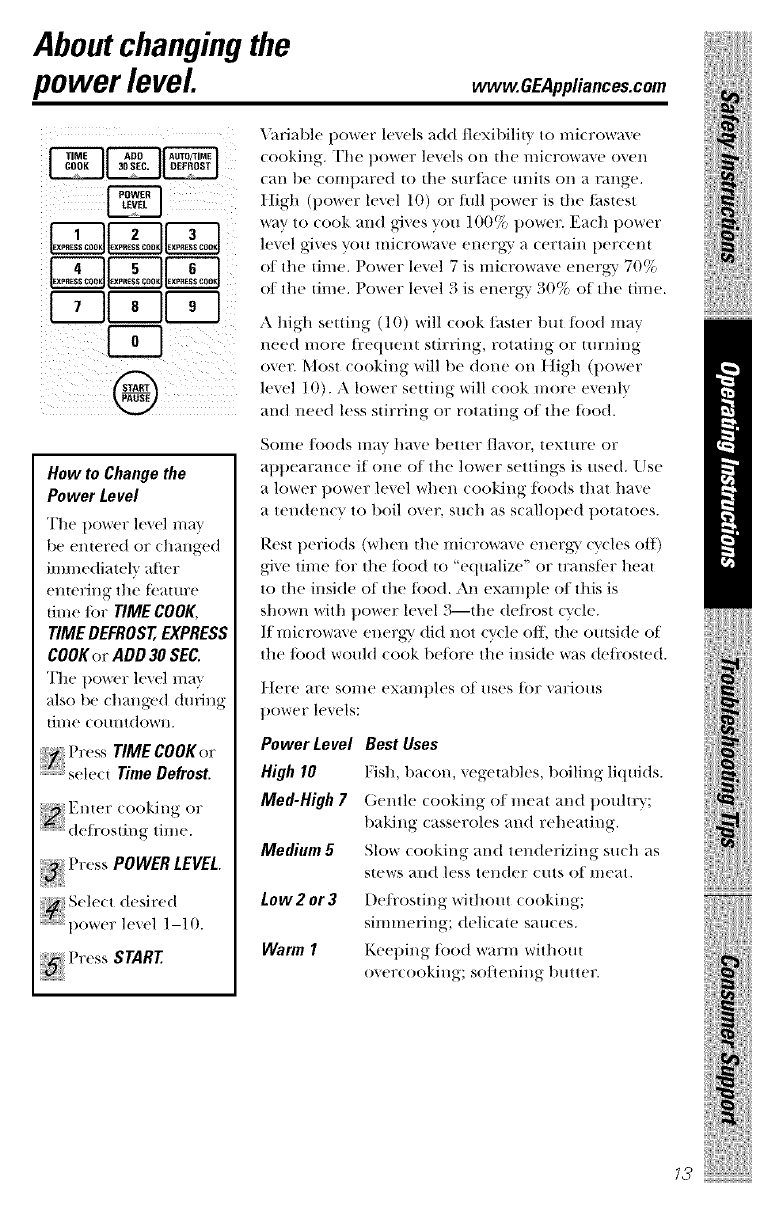
About changing the
power level. vvww.GEAppliances.com
I-;-II 8II 9I
@
How to Change the
Power Level
The power level n/av
be entered or (hanged
imlnediatelv atter
entering tile tbature
time/k)r rIMECOOK,
r/MEDEFROST,EXPRESS
COOK or ADD 30 SEC.
The t)ower h'w'l n/re'
also be changed dm'illg
time coulltdown.
Press rIME COOK or
/select Time Defrost.
Press POWERLEVEL.
\_riable power levels add flexibility to n/icrow_l_ •
cooking. The t)ower levels on tile lni(rowa_e oven
C}tl/ be €OlIlt)_tred to tile stlrl_lee tlllitS on }t l'}tl)ge+
Iligh (power level 10) or fllll power is tl/e/sstest
_v to cook and gives you 100% t)ower. Each power
level gives you microwave energy a certain percent
of the tilne. I)ower level 7 is microwave energy 70%
ot the tilne. I)ower level 3 is energy 30% of the tin/e.
A high seuing (10) will cook/i_ster but {i)od may
need n/ore t_:e(tuem stirring, rotatillg or turning
over. Most cooking will be done on t ]igh (power
lexel 10). ,k lower seUillg will (ook n)ol'e exelll'_
and ]leed less stirring or rotatillg of the tilod.
Sonle/i)o(ts ma} l/_e better/lavor, texture or
at)pearance if one of the lower settings is used. Use
a lower power level when cooking tk)o(ts that have
a ten(tenev to boil ovec such as scalloped t)otatoes.
Rest periods (wl/ell tlle microwave ellerg-} cycles Bit)
give tin/e ti)r the/k)od to "equalize" or transti'r heat
to tl/e inside of die tood. An exan/ple of this is
shown with power level 3--the deti'ost cycle.
If n/icrowa\e energy did 1lOt cycle Bit, die outside of
the/k)od would cook be/i)re the illside was de/i:osted.
Ilere are solne examt)les of uses ti)r various
t)ower levels:
Power Level Best Uses
High 10 Fish, bac on, ',egetabh's, boilillg liq ui(Is.
Med-High 7 C+entle cookillg of meat and t)oulu_y;
baking casseroles and reheating.
Medium g Slow cooking and tenderizing such as
stews mid less tender cuts of meat.
Low2or3 l)e/i'osting without cooking;
sinlnlering; delicate sauces.
Warm I Keel)ing fi)o(t warm without
over(ooking; so/tening butter.
!iiiilIii!i!l+
/S
iii iHiil!iiii!ili
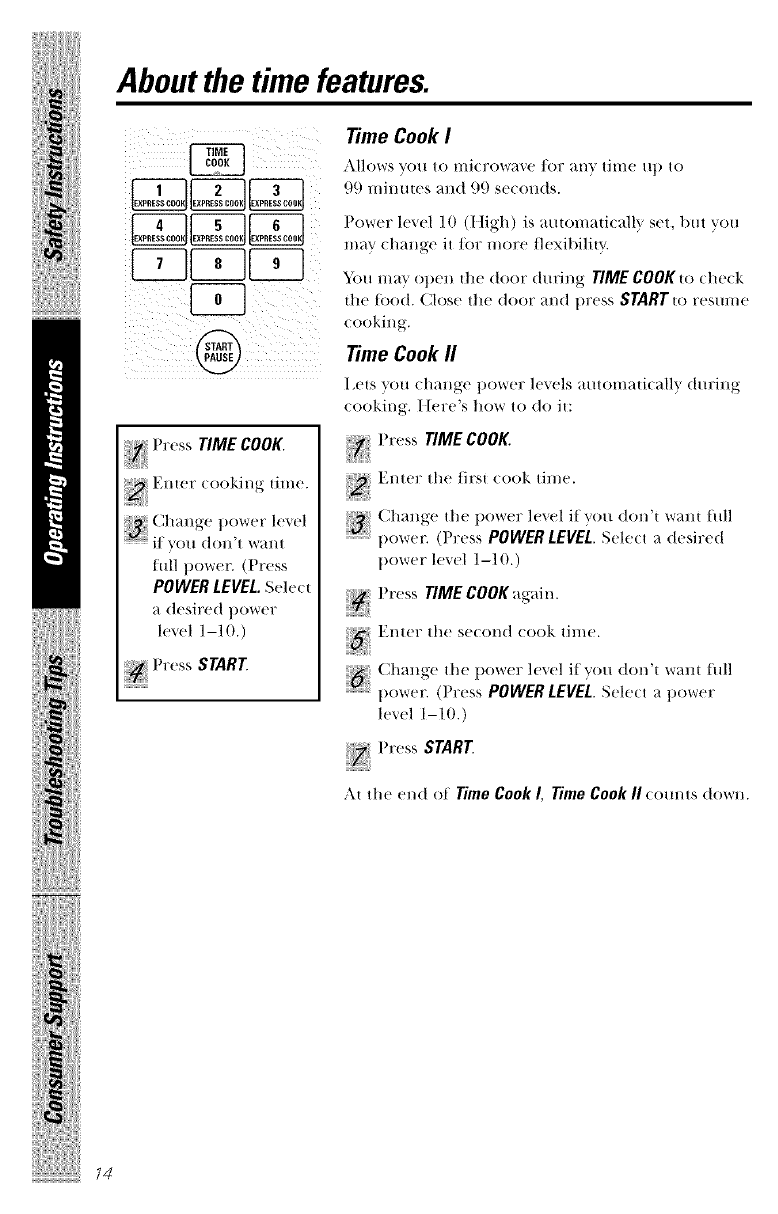
Aboutthe timefeatures.
P _ss TIME COOK.
hill t)owelL (Press
POWER LEVEL. Select
;_ desired power
h'w'l 1-11L)
Press START
Time Cook I
,\llows roll to illi(row_ixe for _tn_ tillle /I l) to
99 minuws mid 99 se(onds.
Power level 10 (tligh) is amomaticallv set, but you
lm 9' change it/or more flexibility.
You ma} open the door (tmdng TIMECOOKto (heck
the tood. Close the door and press START to resume
cooking.
Time Cook II
I xqs you change t)owe17 levels autom_ti(Mly dm:ing
cooking. I Iere's how to do it:
!,_ Press TIME COOK.
Enter the first (ook time.
.....................t)ower. (Press POWER LEVEL. Sele(t a desired
Press TIME COOK again.
l_:.,e,_,he_e,o,_d,ook.,,_e.
.....................t)ower. (Press POWER LEVEL. Select a t)ower
lexel 1--10.)
Press START
At the end of Time Cook I, Time Cook II (omits dowll.
iiii!ili_i_!Xiiii!!i/i_i,ii!_!_iiiiiii/
www.GEAppliance_com
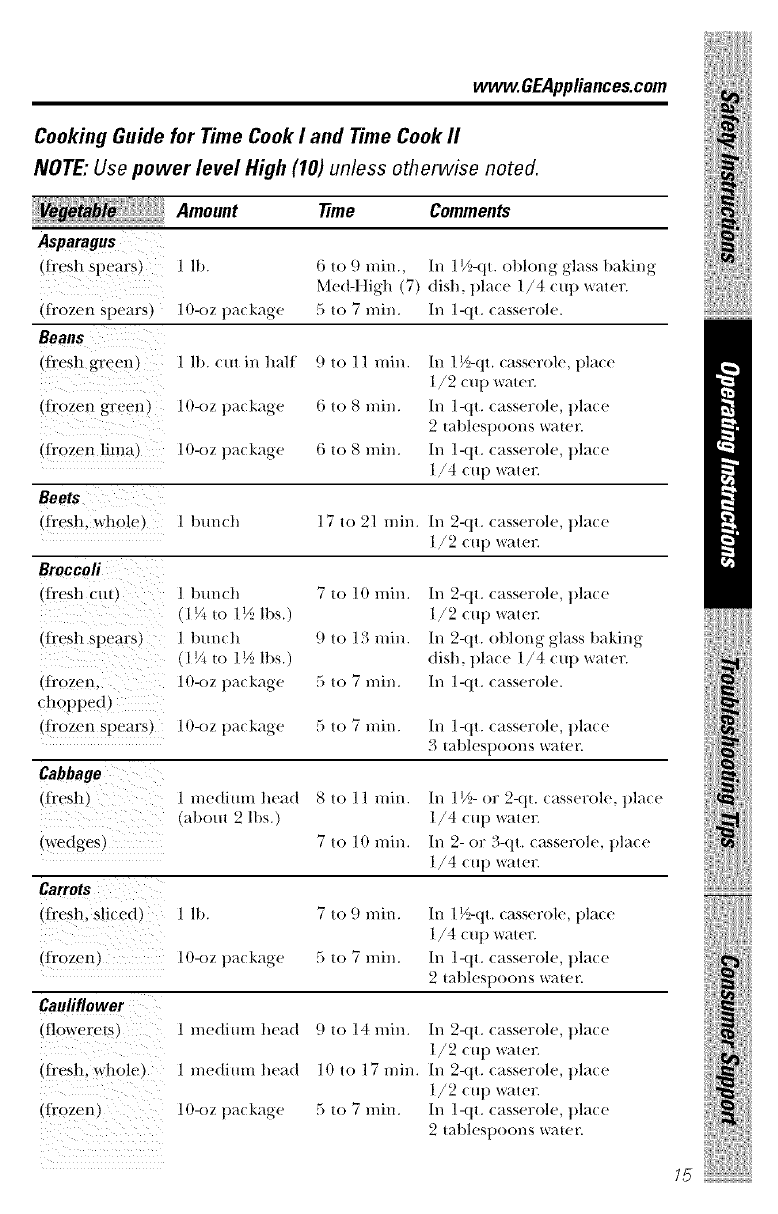
Cooking Guide for Time Cook I and Time Cook II
NOTE: Use power level High (10) unless otherwise noted.
Amount time Comments
Asparagus
(fl'esh sp_+_m'S) 1 lb. 6 to 9 rain.,
Med-I {igh (7)
(fl'ozen spears) ltt-oz pa(kage 5 to 7 rain.
Beans
(fies!l green) 1 lb. (ut in halt 9 to 11 rain.
(fl'ozen gremt) lO-oz package 6 to 8 rain.
Ill 11/-'-(It. oblong glass baking
dish, place 1/4 cup x_ater.
Ill 1-qt. (asserole.
lit 1K_-(It.casserole, place
1/2 cup vvrater.
Ill 1-(it. casserole, place
2Iablespool/s water.
(fl'ozen lima) lO-oz pa(kage 6 to 8 rain. Ill 1-(it. (asserole, pla(e
1/4 (up _ater.
(!i'esh, '_vhole) 1 bun(h 17 to 21 rain. Ill 2-qt. (asserole, pla(e
1/2 (up water.
!iiiilIii!i!ll
Broccoli
(fl'esh cut) l ttu,t(h 7 to l(t rain.
(1V_ t() 1½ lbs.)
(fi'es!l spears) l tmn(h 9 to 13 rain.
(1V_ m 1V; lbs.)
(ti'()zen, lO-oz pa(kage 5 to 7 rain.
c!!opped)
(fl'ozen spears) lO-oz package 5 to 7 rain. Ill 1-(it. casserole, place
._4tal)lesl)(/ol/s water.
Cabbage
(ti'es!l) 1 medimn head 8 to 11 rain. Ill 11/2-or 2-(tl. (asserole, pla(e
(about 2 lbs.) 1,/4 ([lit _v_tter.
(wedges) 7 to 10 rain. Ill 2- (n 5-qt. (asserole, pla(e
1/4 (up water.
Carrots
(fl'es h, s!ic_ d) 1 lb. 7 to 9 rain. In 1 V_,-(It.(asserole, pla(e
l,/4 (II1)water.
(fl'ozen) lO-oz pa(kage 5 to 7 rain. Ill 1-(it. (asserole, pla(e
2 [al)lest)ool/s w_lier.
Caufiflower
(flowerets)
(ties!l, W!tole)
1 medimn head 9 to 14 min.
1 medimn head 10 to 17 rain.
lO-oz pa(kage 5 to 7 rain.
In 2-qt. casserole, place
1/2 cup warm:
In 2-qt. ottl(mg glass baking
dish, place 1/4 cup water.
In 1-(tt. casserole.
In 2-qt. casserole, place
1/2 cup water.
In 2-qt. casserole, place
1/2 cup water.
In 1-(it. casserole, place
2 tablespoons water.
ilii!iiiiii? i:ii!iiii
75

iii iHiil!iiii!ili
iiii!ili_i_!X{q{i!!i/i_i,ii!_!_iiiiiii
Aboutthe timefeatures.
76
Amount Time Comments
Corn
tffozen kernel lO-oz })a(kage 5 to 7 rain. /n 1-ql. (assero|e. t)la(e
Corn on the cob
(Iresh
{lrozell
Mixed
vegetables
{H'OZUII
]tO _) e3rs 3to 4 rain.
t)er ear
]ear 5 lo 6 min.
2_to 6 em_s 3 lo 4 min.
per ear
In 2-qt. oblong glass baking
dish, place corn. If corn is in
husk, use no water; if corn has
been husked, a(Id 1/4 cup
water. Rearrange a/ler half
of _ime.
Place in 2-q_. oblong glass
baking dish.
Cover witt_ vented plastic wrat).
Rearrange alter half of |ime.
Peas
(li'esh. shelled)
Ilrozell
Potatoes
(ti'esh. eubed.
_hitc •
fi'esh, whole.
bweel or whi_e,
lO-oz package 5 t/) 7 rain.
2 lbs. unshelled 9 Io 12 rain.
lO-oz package 5 lo 7 rain.
4 polaloes 9 lo 12 rain.
• 6 lo 8oz ca(h)
]((; |0 _ OZ _ 10 4 //lil/.
In 1-qt. casserole, t)lace
3 tablesl)oons water.
In 1-(it. casserole, t)lace
1/4 eu t) water.
In 1-qt. casserole, t)lace
2tablest)oons water.
Peel and cut imo 1" cubes.
Place in 2-(1_. casserole with
1/2 cup water. Stir a/ler half
of time.
Pierce _fith cooking tork.
Pla(e in (enter o/tile oven.
I,et s_and 5 minutes.
Spinach
(li'esh)
(lrozell.
chopped
and leat/
Squash
(l}'esh. SLIIIIIlRT
alld Yellow _
Wllller, ,tcoYIl
bLItlerlltl[ I
lO m 16 oz 5 lo 7 rain.
lO-oz package 5 lo 7 rain.
]1t). sliced 5 lo 7 min.
l_o 2 squash 8 lo 11 min.
abottt ] lb. ('ach)
In 2-qt. casserole, place washed
st)inach.
In 1-(it. casserole, t)lace
3 tablesl)oons water.
In 1½-qt. casserole, place
1/4 cup water.
Cut in half and remove fibrous
membranes. In 2-qt. oblong
glass baking dish, t)la(e squash
cut-side-down. "Ihrn cut-side-up
alter 4 lIlill/l|es.
L+,z0°0 l+ c°0J
I' H K7-1
@
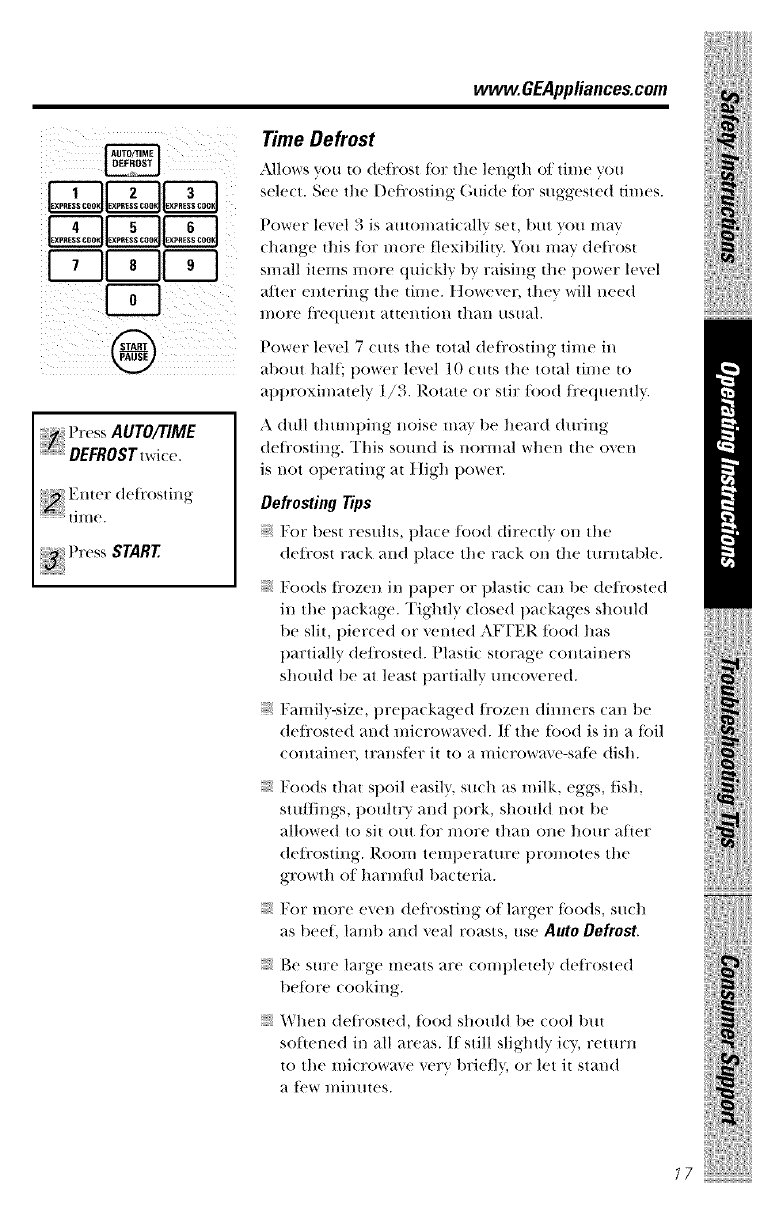
Press AUTO/TIME
DEFROST t'wi( e.
Enter defl'osting
::::::' Pr( ss START
vvvvvv.GEAppliance_com
Time Defrost
Allows VOtl to de/rost tor the length o/time _r<___
select. See the I)e/i:osting (',uide tor suggeswd times.
Power h'vel 3 is automatically set, but you ma'_
change this/or more flexibility. 5i)u may detkost
small items more quickly by raising the power level
after entering the time. t ]owever, they will need
more Dequent attention than usual.
Power le+,el 7 cuts the total defl'osting time in
about half; t)<mer level 10 cuts the total time to
at)l)roximately 1/3. Rotate or stir/ood/i'equentl}.
A dull thumt)ing noise ma} be heard d m:ing
delkosting. This somld is normal when the oven
is not operating at Itigh power.
Defrosting Tips
For best results, t)la(e/ood directly on the
delkost rack and place the rack on the turntabh'.
Foods trozen in paper or plastic can be de/rosted
in the t)a(kage. Tightly closed packages shotfld
be slit, pier(ed or vented AFTER food has
t)artially de/rosted. Plastic storage ( ontainers
should be at least partially uncovered.
FamilDsize, t)repackaged/rozen dimmers can be
defl:osted and microwaved. If tile R)od is in a foil
containel, transti'r it to a microwave-sale dish.
Foods that spoil easil}, such as milk, eggs, fish,
stu/lings, t)oult_T and l)ork, should not be
allowed to sit o/it ]i)l? lnol?e than one ho/lr alter
delkosting. Room temt)erature t)romotes tile
growth of harm/+ul bacteria.
For more even delrosting of larger toods, such
as beef, lamt) and veal roasts, use Auto Defrost.
Be sure large meats are COml)letely detrosted
betore cooking.
When detkoswd, tood should be cool bm
softened in all areas. If still slightly icy, return
to the microwave very briefl}, or let it stand
a{('w l//illtltes.
!iiiilIii+
ilii!iiiiii!!++iii!iiiil i+
77
iii i+!iiii!ili
+iii!i}i+!X{i+!!i/i+i,ii!+!+iii+++i
18
Aboutthe timefeatures.
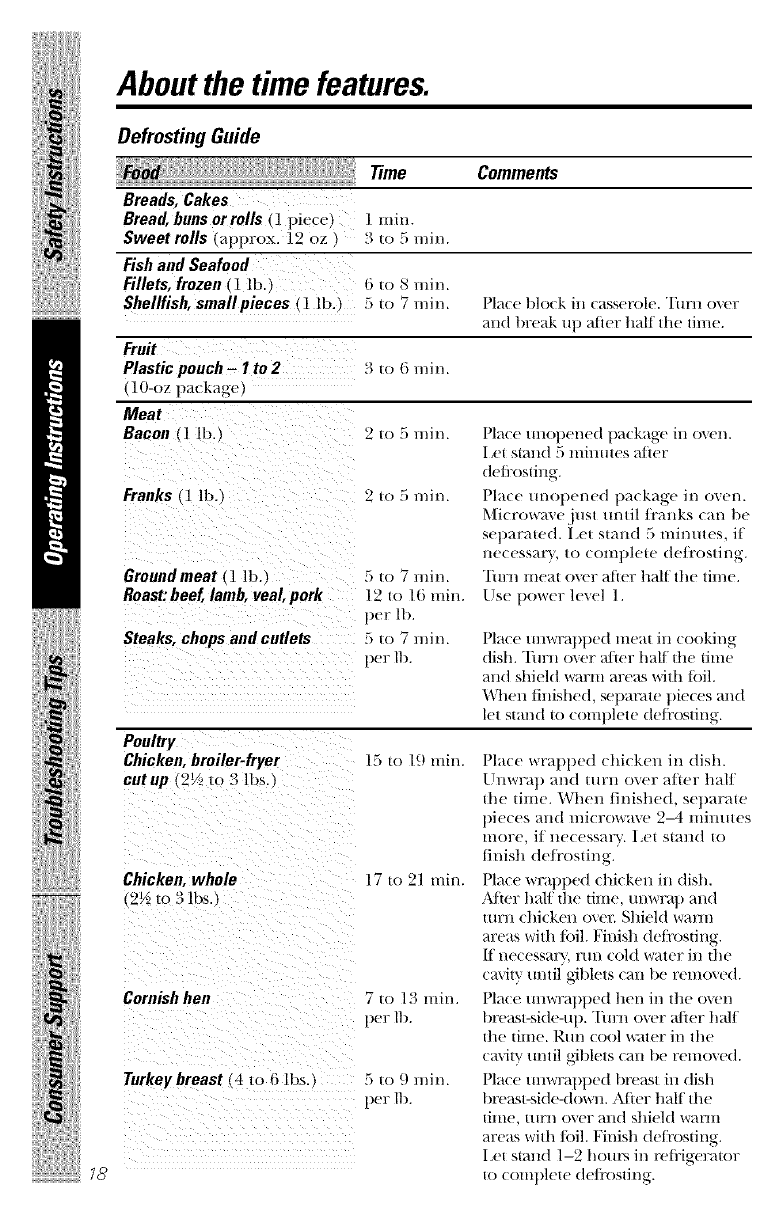
Defrosting Guide
Time Comments
Breads, Cakes
Bread, buns or rolls (1 piece) q rain.
Sweetrolls (approx. 19 oz 3 io 5 rain.
Fish and Seafood
Fillets, frozen ( 1 lb.) +; to 8 rain.
Shellfish, smallpieces (1 lbA ;, _(, 7 rain. Place block iu casserole. Turu o\er
aud break ul) after half the time.
Fruit
Plastic pouch -I to2 3u, 6rain.
]0-oz package
Meat
Bacon t l lbA :2 u) 5 rain. Place UUOl)eued t)a(kage iu oven.
l.et st:av,d 5 llliutlt+.'.s afler
(/eti+o_tiug.
P|a(e UUOl)elwd package in oven.
Microv, a_.ejusl until/_'mJ, ks (an be
Sel)araIe(t. [,el Stall(] ,',_ //lil//lles, i[
lle(essav_', to cO/ilt)|e|e (teJl'oMiH_.
Ttlrl/meat o\er alier hall the til/w.
LISt t)(_rcr ]C_C] I .
Franks (1 lb. I 2 to 5 rain.
Ground meat (1 lb.
Roast: beef, lamb, veal, pork
Steaks, chops and cutlets
5 to 7 +++in.
12 to 16 min.
per II).
5to 7 min.
per It)
Poultry
Chicken,broiler-fryer
cutup (2___m 3 lbsA
15 to 19 rain.
Chicken,whole
Cornishhen
Turkeybreast (4 to 6lbs. 1
17 to 21 min.
7 1() 1_ //lil/.
per It)
5 to 9 min.
per lt)
Place tmwrat)l)ed meat in cooking
dish. "Ihrn o_er a/ier haK d_( time
and shield warm areas with loll.
When finished, sel)amte t)ie(es and
let stand to colllt)lete (te/l'osting.
Place wrapl)ed chicken in dish.
Unwrap and tt:tr_) over after half
the time. When finished, set)araw
pieces and micrcmave 2_ minutes
lllore, if necessary. I el stand to
finish de/i'osting.
Place wrapped chicken in dish.
Alter half the time, tmwrap and
tt:u:u, chicken oxer. Shi(ld warm
area_, with/oil. Finish deti'osting.
If necessary, rtm cold water in the
(avirv tmtil giblets (an 1)e remoxed.
Pla(e tmwrat)t)ed hen in the oven
breast-side-up. Turn o_vr +Oer half
the time. Rtm cool xs;tter in the
cavity until giblets can 1)e remo\ ed.
Place tmwral)t)ed breast in dish
breast-.qde-down. Atier half the
time, turn oxer and shield warm
areas with/oil. Finish deti'osling.
Iet stand 1-2 hours in reti'igerator
to comt)lete de/i'osting.
vvvvw.GEAppliance_com
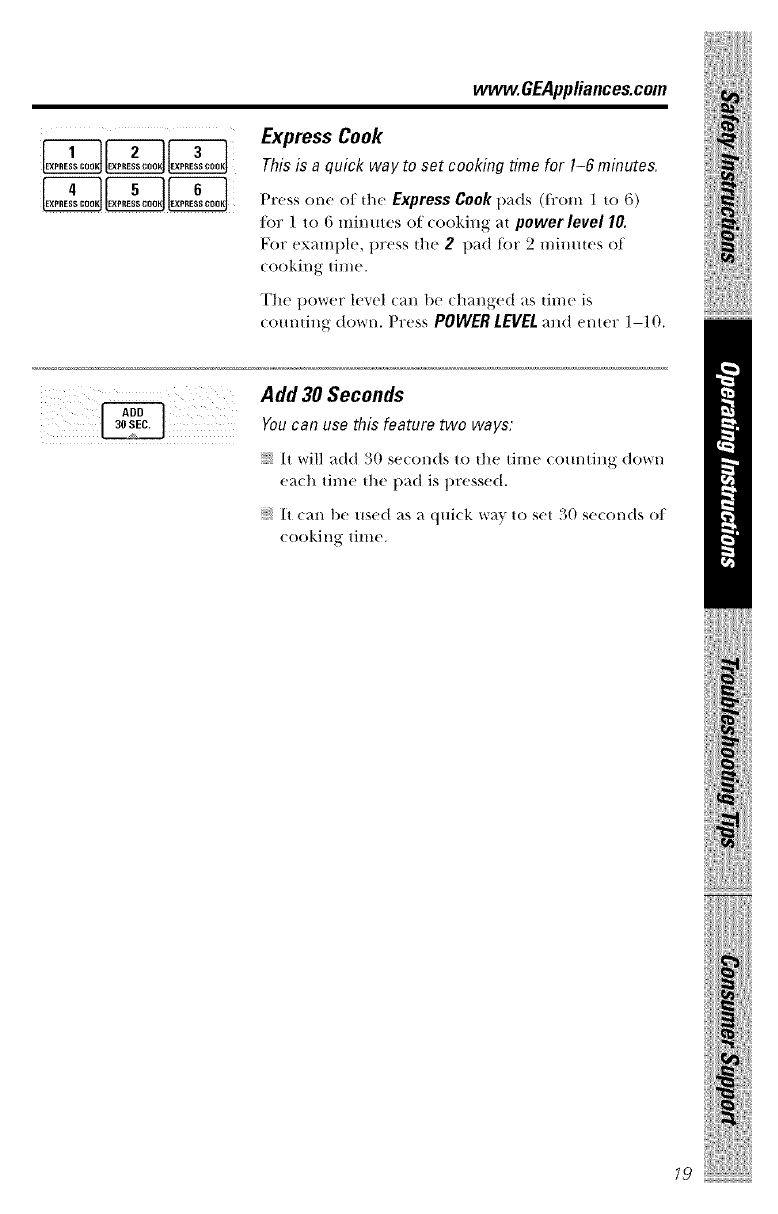
Express Cook
This is a quick way to set cooking time for I-6 minutes.
Press one o/file Express Cook pads (t_'om ] to 6)
lot ]to 6 mimn('s ot (()()king _,t power level I0.
For ex_mu)l(', press the 2t)_,(t tor 2 mhmtes ot
(()()king time.
The t)ower 1('_('1 (_m be (h_mged as din(' is
_()_]_ti_g" (t()_r_. I)]'_'SSPOWER LEVEL ;rod enter 1-10.
!iiiilIii!i!ll
Add 30 Seconds
You can use this feature two ways,"
It will add 30 secon(ts to the dine cornering down
each dine the pad is t)resse(t,
It can lie used as a quick w_} to set 30 se(on(ts of
cooking dine.
!iii! iiiiiiii
19
iii i+!iiii!ili
Abouttheautofeatures.
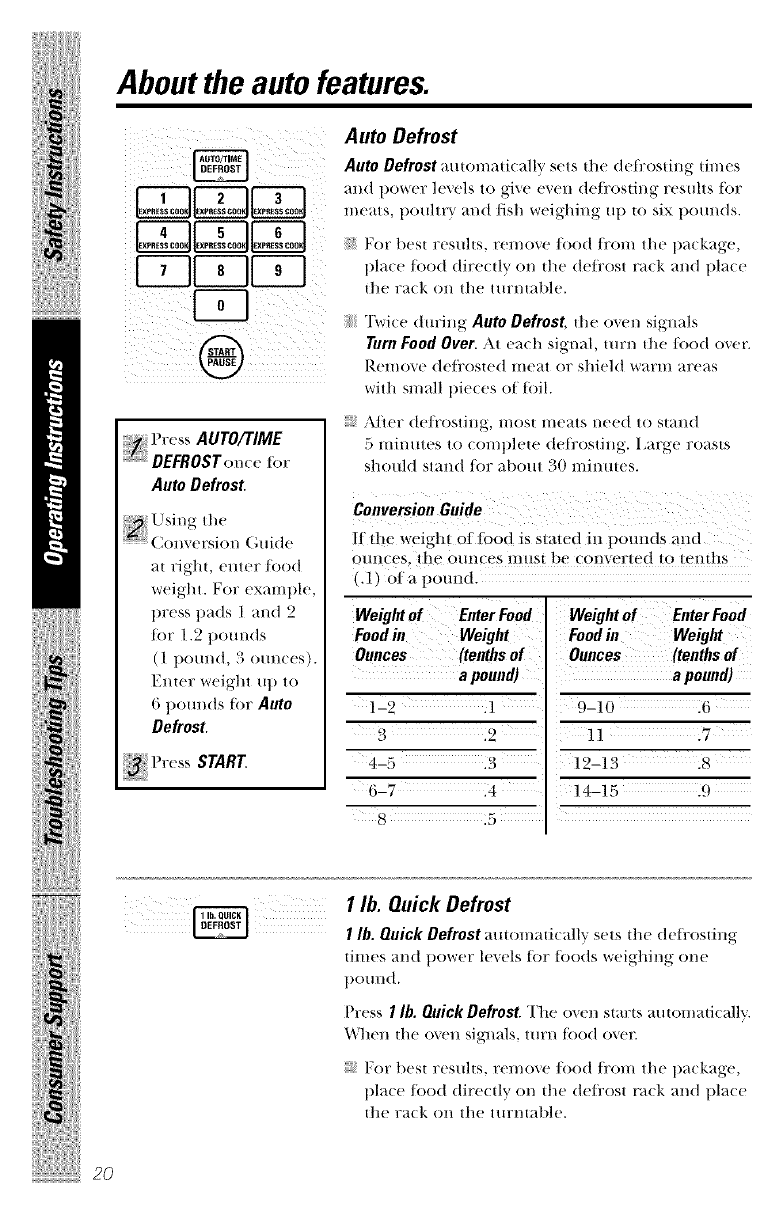
Auto Defrost
2 3
..........II..........,l
LoLoKII++Lo,I
[-7-11"II 1
@
Auto Defrost auton]ati(allv sets tile defl:ostiHg times
alld po/_el: lexels to gixe exert deil'osting results ior
meats, pouhr} and fish weighing up to six p(mnds.
/; For t)est results, remove/ood ti'om the package,
place/ood dire(tlv on tile deli'ost rack and place
tile ra(k on the turmable.
Twice during Auto Defrost the oven signals
Turn Food Over. At each signal, turn tile/ood ()ve_:
Remove defl:os|ed meat or shield warm areas
with small pie(es of tbil.
++++Press AUTO/TIME
;+++++_DEFROSTon/e tor
Auto Defrost
Using the
Corn ersion (;tilde
at right, emer/ood
weight. For example,
press pads 1 and 2
tbr 1.2 pom:ds
(1 t)otmd, 3 otmces).
Enter weight up to
6pounds tbr Auto
Defrost.
Aider deli'osting, most meats need to stand
5 minutes to (omplete (teflx)sting. large roasts
shotdd stand for about 30 minutes.
Conversion Guide
If tim weight of fbod is stated ix+-poullds and
OtllICes tile OtlllCes llltlSt be converted to tenths
(.1) of a potmd.
Weight of Enter Food
Food in Weight
Ounces (tenths of
a pom_d)
122 11
3 19
4-5 .3
6-7 14
Weightof EnterFood
Foodh_ Weight
Ounces (tenthsof
a pound)
9-10 16
11 :7
12-13 :8
14-15 £r.)
+iii!ili+i+)i{{i{+!!i/i+i,ii!+!+iii+++i
2O
I lb. Quick Defrost
I lb. Quick Defrost automati(allv sets till' deI]'osting
times and ]}ower levels {br {hods _eig+hing one
t)otmd.
Press I lb. Quick Defrost. The oven StalPtS automatically.
When the oven signals, turn {hod over.
;_ For best results, Fel//ove /ood ti'Ol// the 1)ackage,
t)lace/ood dir{xtlv on the (teI]'ost rack and t)la( e
tile ra(k Oil the ttllPl/tHble.
Aboutthe convenience
features. wvvw.GEAppliances.com
Use only with prepackagec
microwave popcorn weighing
L75 to 3.5 ounces.
IOTE:Do not usethe
metal shelf when using
the Popcornfeature.
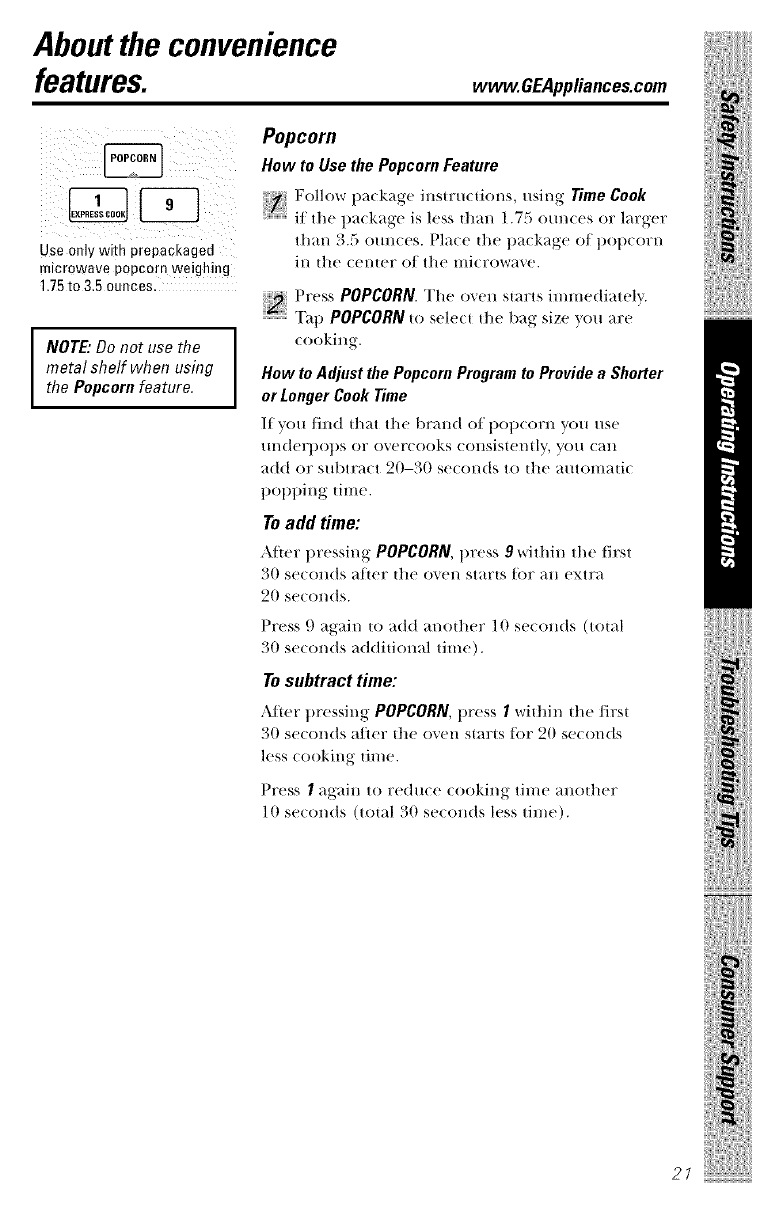
Popcorn
How to Use the Popcorn Feature
Follow pa( kage insm,(dons, using Time Cook
it the t)a(kage is less than 1.75 om_(es or larger
than 3.5 ounces. Place the t)a(kage of t)ot)eorn
ill |he (e11|er of the l/li(row_l'_e.
:_ Press POPCORN.The men starts immediately.
....................."[ht) POPCORN to select the bag size 7_ou are
(()()king.
How to Adjust the Popcorn Program to Provide a Shorter
or Longer Cook Time
It you lind that the 1)raHd of 1)ot)(orH you use
/ll/derl)Ol)S or overeooks eOllSistel/tly, }'()/l (all
add or subtract ,20-30 seconds to the automadc
t)ot)t)ing time.
To add time:
After 1)r'e._ingss+POPCORN,1)ress 9vdthin the first
30 seCOll(tS alter tlle oven starts [()r all extra
20 seconds.
Press 9 again to add another 10 seconds (total
30 seconds addidonal time).
To subtract time:
,\[ter t)ressing POPCORN,press 1witllin the /irst
30 se(onds after the oven starts t?)r 20 seconds
less cooking dine.
Press Iagain to reduce cooking time another
10 seconds (total 30 se(onds less time).
!iiiilIii!i!l+
ilii!ii+iii!!¢+ii!iiiil i
21
iii iHiil!iiii!ili
Aboutthe conveniencefeatures.
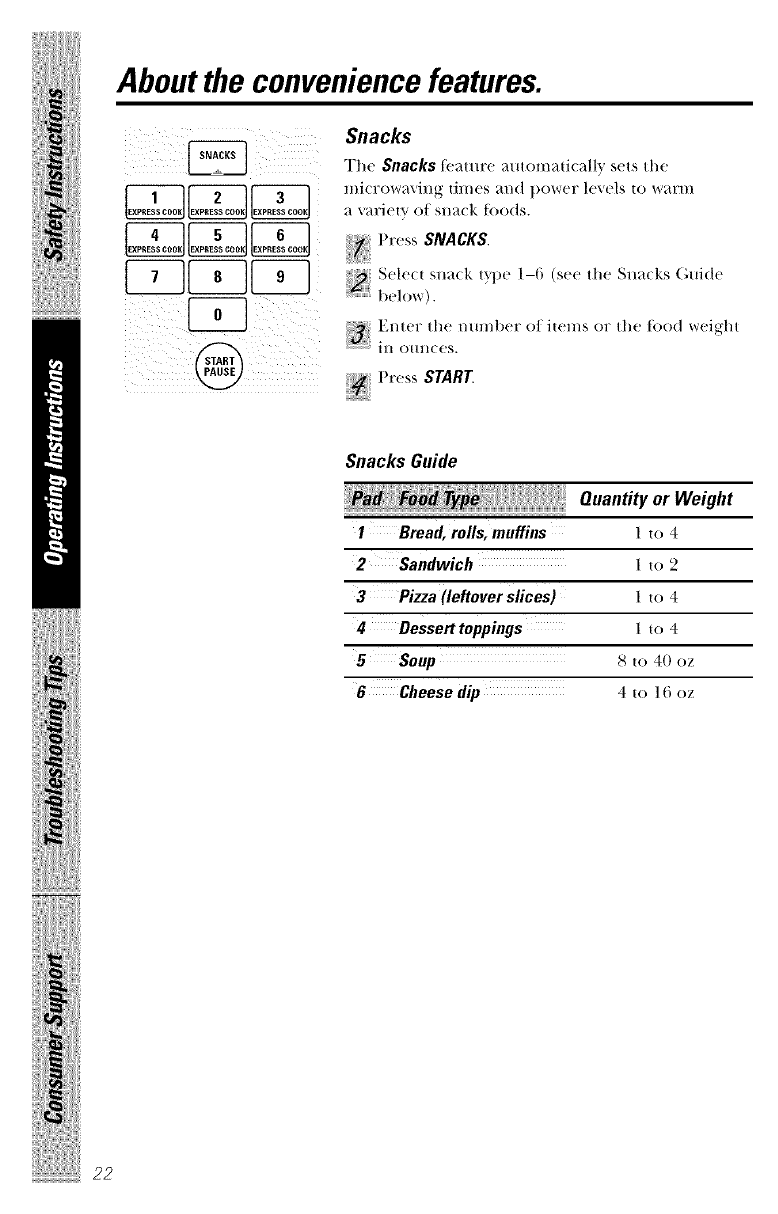
(J_il__III_ _!i_i__ii_i_i_i_ Snacks
T]'tc Snacks J(,_.ttli-(, _./ltoln_ltic_lllv s('ts the
llli(l'OW;4Villg times _tl/d _)()_r_'l" l('vcls to _'(_tFlll
a variety of snack ti)ods
Hi Press SNACKS.
Select snack type 1-6 (see the Snacks C,uide
................ 1 )(_]()_%r ) .
.....................................ill 01111( (!S.
Press START
Snacks Guide
NQuantity or Weight
1 Bread, rolls, muffins 1to 4
2 Sandwich lto 2
3 Pizza(leftover s/ices) 1to 4
4eesserttoppings lto 4
5 Soup 8to 40 oz
6 Cheese dip 4to 16 oz
iiii!iiii!Xiiii!!i/i_iii!!iiiiiii/
www.GEAppliance_com
i_i_i_ii_iii_i_i_i;_ _!ii_iiiii_i_;_ii_
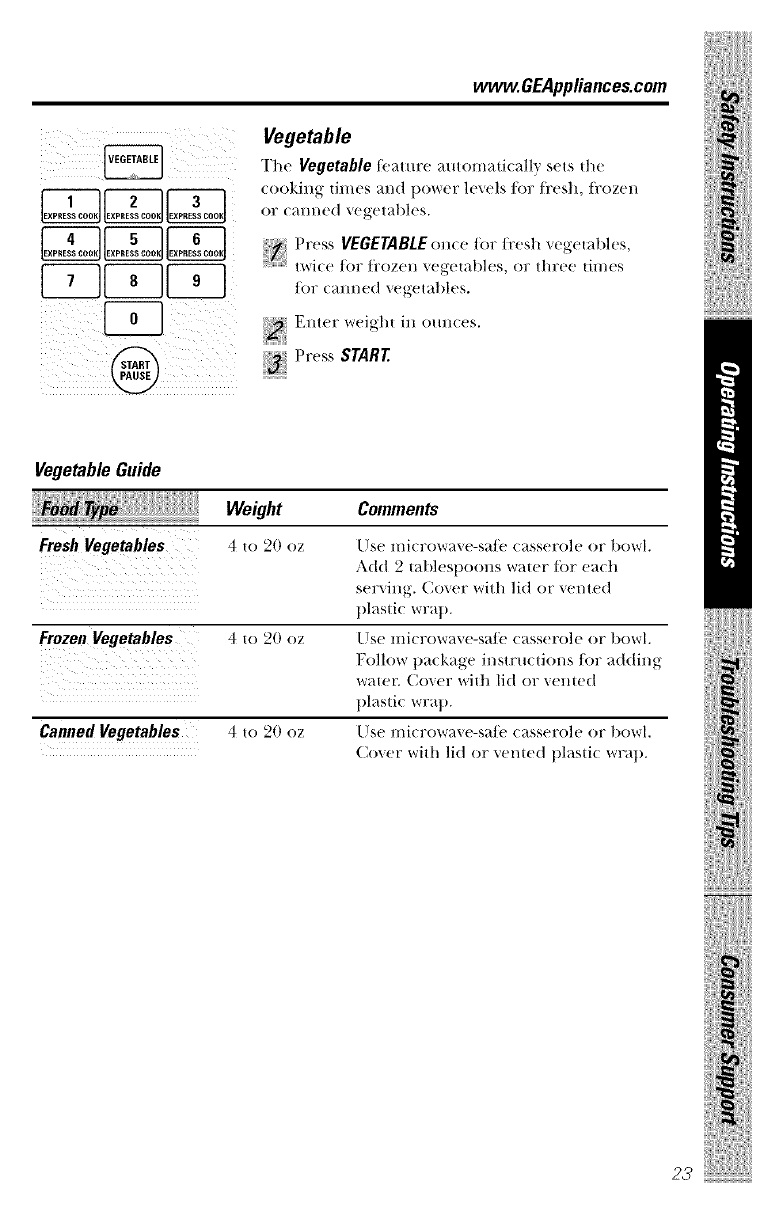
Vegetable
The Vegetabletbature automaticalh' sets the
(ooking times and power h'vels/i)r/kesh, tkozen
or canned vegetables.
Press VEGETABLE)on(eo,for fresh "_egetal)les.,
t_r](e 1"( 17 {'rozell ve_-et,'t|)les, or three til//es
/t)r calmed vegetal)h's.
!iiiilIii!i!ll
Vegetable Guide
Fresh Vegetables
Weight
4to 20 oz
FrozenVegetables 4t() 20 oz
Canned Vegetables 4t() 20 oz
Comments
Use microwave-sa/b casserole or bowl.
Add 2tablespoons water {or each
serving. Cover with lid or vented
plastic wrap.
Use microwave-sa/b casserole or bowl.
Follow package instructions/i)r adding
water. Cover with lid or veHted
plastic wrap.
Use microwave-sa/b casserole or 1)owl.
Cover with lid or vented plastic wrat).
ilii!iiiiii!/ii!iiiil_i_
23
iii iHiil!iiii!ili
Aboutthe conveniencefeatures.
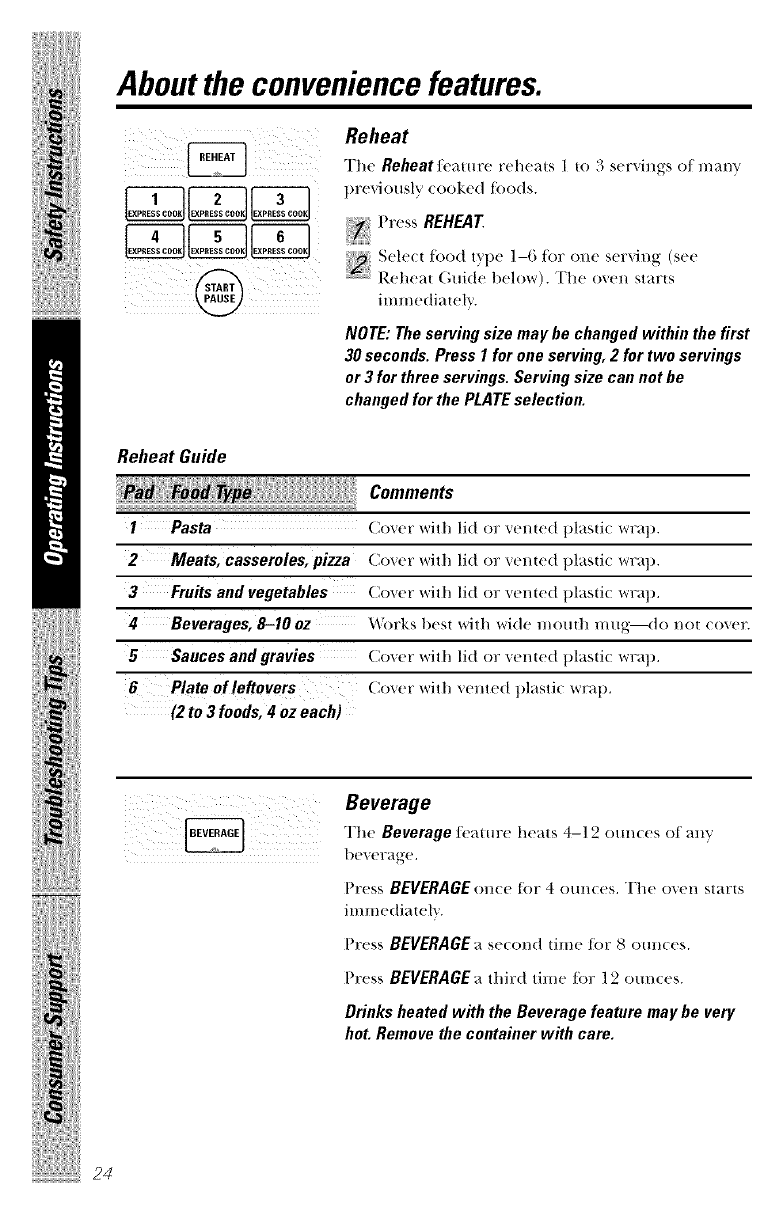
iii!ili !iiii!i_ iiiiiiiii;il_ Reheat
Tlw Reheatli'amre reheats 1to 3scrving-s o/many
previously (ookcd t_)ods.
Press REHEAT
........................................Reheat (;ui,te b(!low)+ "['t1,! O_,(!1/starts
immediately.
NOTE:Theservingsize maybe changedwithin the first
30 seconds.Press I for one serving,2 for two servings
or 3 forthree servings.Servingsize cannet be
changed for the PLATEselection.
Reheat Guide
Oo e.t
I Pasta Coxer with lid or xented plasti( wrap.
2 Meats, casseroles, pizza Cmer with lid or xented plasti( wrap.
3 Fruits and vegetables Cmer with lid or _ented plasti_ wrap.
4 Beverages, 8-I0 oz Works best with wide mouth mug--do not (oxer.
5 Sauces and gravies Coxer with lid or xented plasti( wrap.
6 Plate of leftovers Coxer with xented plasti( wrap.
(2 to 3 foods, 4 oz each)
iiii!i}i_)X{i{i!!i/i_i,ii!_!_iiiiiii
Beverage
The Beverage t_ature heats 4-12 om_(es of _ _r
Press BEVERAGE (m(e tot 4 (nm(es. The oxen starts
immediately.
Press BEVERAGE ase(ond time tot 8 oun(es.
Press BEVERAGE athird time tor 12 (mn(es.
Drinks heated with the Beverage feature maybe very
hot. Remove the container with care.
24
www.GEAppliance_com
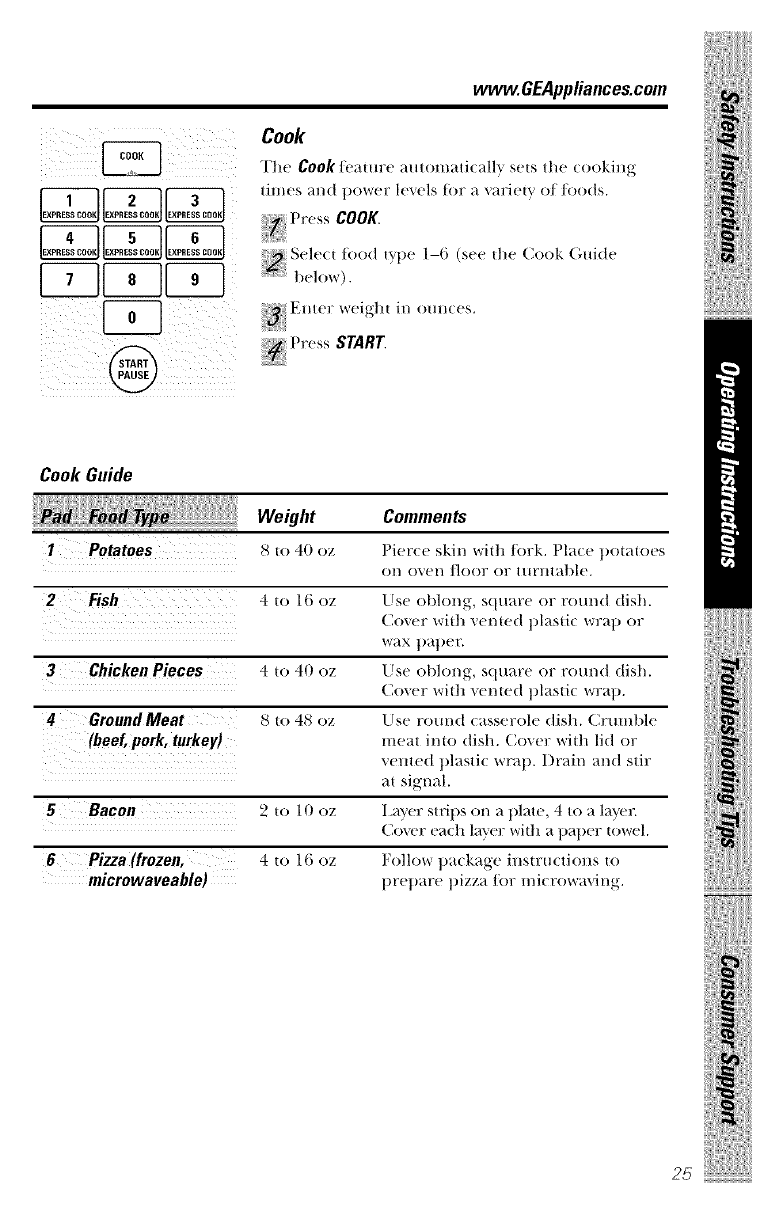
Cook
The Cook feature automati(al]'_ sets the (ookil]g
times and power lexe]s tot a ",ariet\' ot foods.
t)ress COOK.
Sele(t toed type 1-6 (see the Cook (;uide
b(!]()_r).
!iiiilIii!i!ll
CookGuide
_d _ Weight
I Potatoes 8 to 40 oz I)i('r(c skin \'vith Jerk. Pla( (' ]}ot:atocs
ol/ ov('l/ ]leer OF ltlFl]Hd)|('+
2 Fish 4 to t G oz U.',(" obhmg, square or round dish.
(',OV(T wit]| _+('nt('d]}lasti(_r]_]) ()]_
3 Chicken Pieces 4 t() 40 oz Lisp ol)]ol/_, S(III;]F(' OF FOr]lid dish.
Cover with v('l/t{'(| ])lasti(\vra]).
4 GroundMeat 8 to 48 oz Use FO/II/d (a._seFol( _ dish. {]F[]l/ll)|{'
(beef, pork, turkey) meat into di.'d]. Coxer wit]] lid or
\('lllO(| ])l;_sli(WDlt). l)Dlil/ al/d stir
at signal.
5 Bacon 2u) 10 oz I.ayer sUips (m a })law, 4 to a laver.
G()V(T P_I(]| |H_'{T \'dill a ])_I}){T tow{_l.
6 Pizza(frozen, 4 H) 1 (; oz follow ])H( k_lg(' ilIMFH( liOll._ to
microwaveab/e) pr('par(' piZZa /()r ]//i(TOW;_ViI/_,.
Comments
ilii!iiiiii?4i!iiiil i
25
iii iHiil!iiii!ili
Otherfeatures yourmodel may have.
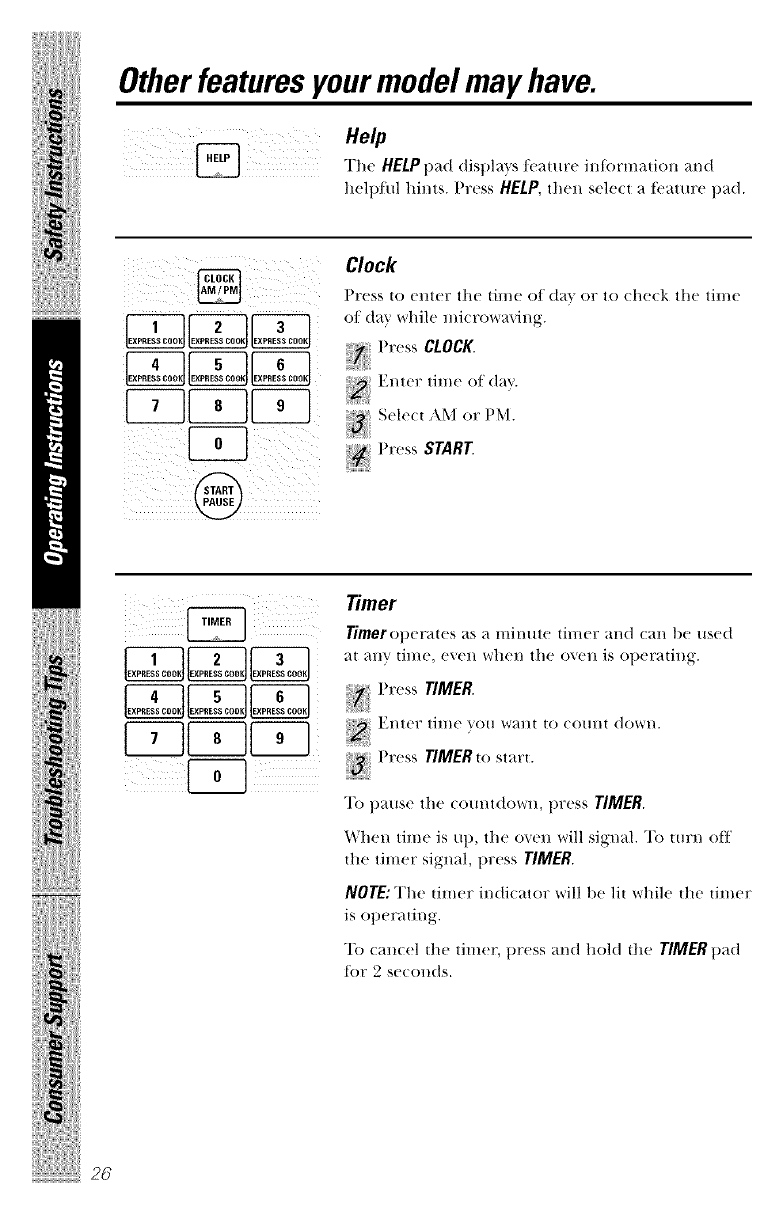
Help
helphd hints. Press HELP, then sele(t a t)_ature pad.
i;iiill_ii_iii_[_ ?i_i_i!iiiiiii_
Clock
PFeSS to elltel7 the tiH/(f ot (t_l_ ()r to (h('(k tl/(' tiH/e
ot day while mi(rowaxing.
_111p,(,,_sCLOCK
_ Enter time of day.
s,,_,_,, ,,,pM.
Press START.
iiii!ili_i_)Xiiii!!ili_i,ii!_!_iiiiiii
26
Timer
Timeroper_m,s as _ minute tim('r and can t)e used
H[ _I,IV till/(', ('V('I/ W]I('I/ th(' ov('ll is o[)('I'_ztillg'.
]),'(,ss TIMER.
Enter time you want to (omit dowI/.
PI'(,SS TIMER to St_l't.
To pause the (omit(town, press TIMER.
When time is up, the o_cn will signM. To tm:n off
the timer sight,l, press TIMER.
NOTE: The timer indicator will be lit while the timer
is opcr;_ting.
To (;re(el the timer press and hold the TIMER p;Id
t6r 2 seconds.
vvvvw.GEAppliance_com
E qr-;q !
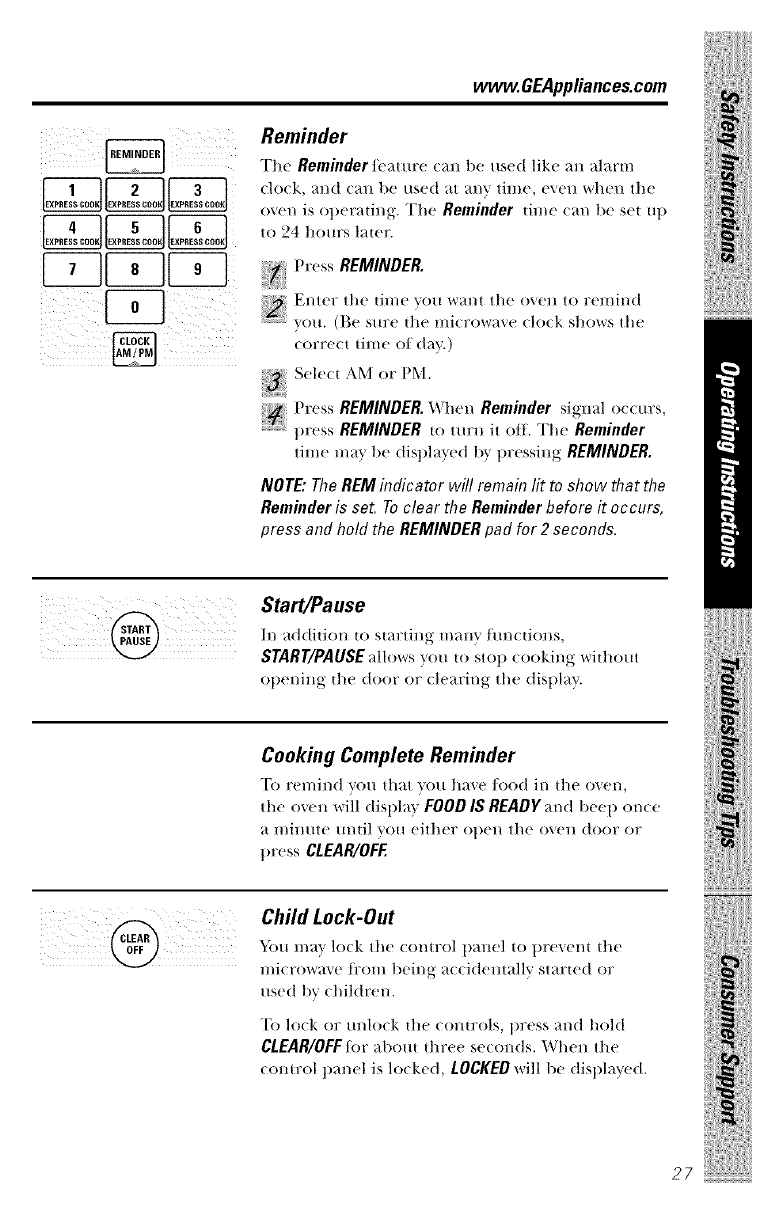
Reminder
The Reminder {_ature (_m l)e used like _m alarm
oxen is ot)er_ting. The Reminder time (an be set ut)
to 24 hours later.
Enter the time you _*_r_{I][the oxen to remind
"}'OH. (g(_ Stll?(_ |t1(? IIli(Y()W_l_,(_ (lo(k shows the
(orrect time of (b_y.)
Sele(t AM or PM.
Press REMINDER. _%;hen Reminder signal o(cm:s,
t)ress REMINDER to turn it off. The Reminder
time max be (tisl)la}cd b} t)rcssing REMINDER.
NOTE: The REM indicator will remain lit to show that the
Reminder is set, To clear the Reminder before it occurs,
press and hold the REMINDER pad for 2 seconds,
!iiiilIii!i!ll
[Start/Pause
In addition to stm:tiHg lmmy/im(tioHs,
START/PAUSE allows you to stop cooking without
opening the door or (learing the dist)l_y.
Cooking Complete Reminder
To r('mind you that you h_ve food in thu o_un,
the oven will disl)la } FOOD IS READY and bee 1) once
_t H/ilI/IH' /ll/tJl vail either open the oven door or
press CLEAR/OFE
Child Lock-Out
Sbu lnaV lo(k the (ontrol 1)_mcl to pr,.",cnt the
mi(ro_sa_c t_'om bcing a((idcntally started or
used by children.
"['o lo(k or mflock the (ontrols, press and hold
CLEAR/OFF for al)out three se(onds. When the
(ontrol t)anel is locked, LOCKED will be dist)layed. ilii!iiiiii?' i :ii!iiii
27
iii iHiil!iiii!ili
Otherfeatures yourmodel may have.
lIME AUTO/TIME 1lb. QUICK
iil-_F _-IF; 11
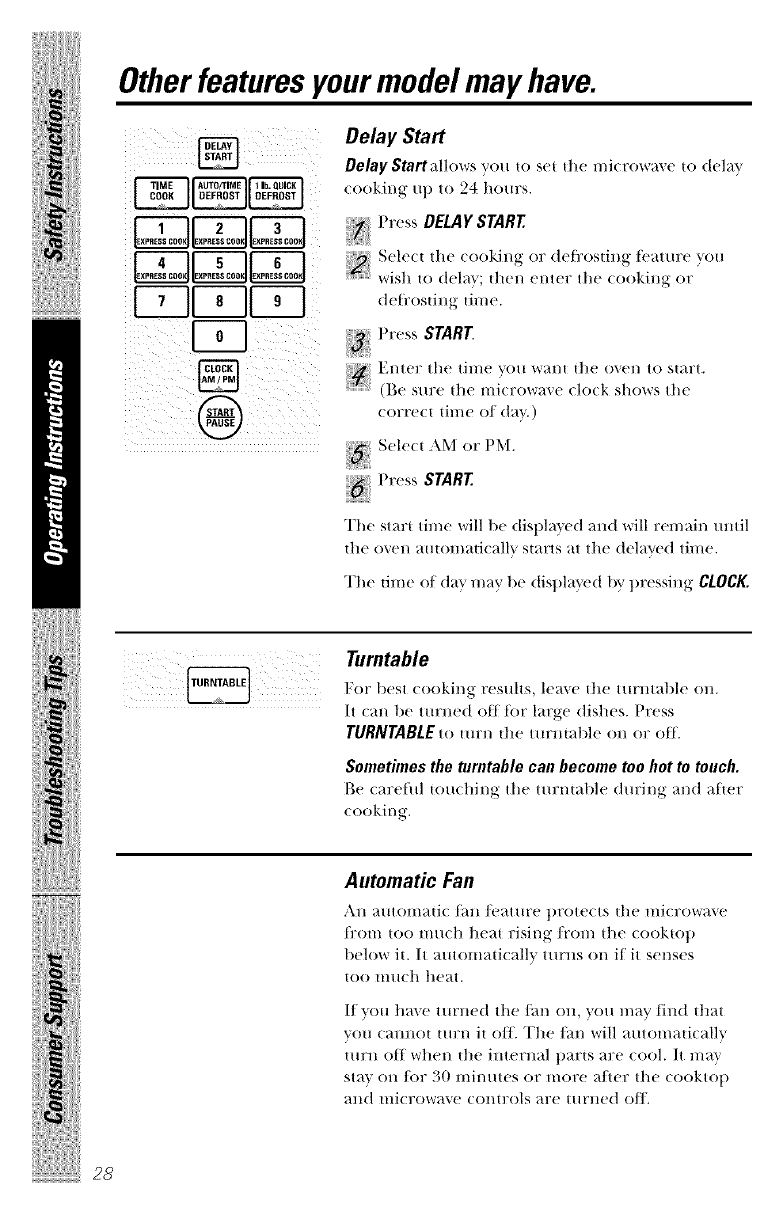
Delay Start
Delay Start allows you to set the l//i( FOW_t+_(_to delay
(ooking u l) to 24 hours.
_]'TESSDELAY START
_ Sele(t the (ookh/g or (tefi_osting t_ature 7_ou
....................wish to delaT_; then enter the (ooking or
defi_osting time.
Press START.
El/ter tl/(' ti]ne yr()/l *+,+r_lnt t]l(_ O'_('l/ tO St_ll?t.
(Be sure tlle lili(l?owaxe (lo(k sl/()*+_rsthe
(orre(t time of day+)
Select AM or PM.
,,,_,,_START
The start time will 1)e disl/laT_ed and *+'+'illr(!n/ail/tmtil
the o_(!l/ alltOlilaii(allv sial'ts at the (telav(_d til//e.
The time oI (tax_may 1)e displa'_ed by pressing CLOCK,
!iii;!!illj_i iiiilil_ill;ill!__ Turntable
For 1)('st cooking results, h'a*+c the turntal/h' on.
It can l)e turned off lot large dishes. Pr('ss
TURNTABLE to turn the turntable on or off.
Sometimes the turntable can become too hot to touch.
Be (arehfl tou(hing the turntal)le during and after
( ookin g.
iiii!i}i_)X{i{i!!i/i_i,ii!_!_iiiiiii
28
Automatic Fan
:\ll a/ltOlI/ati( t_ll /('attlF(' t)Fott'(ts th(' iili(Fo_av('
t_:om too much heat rising/i'om the (ookto l)
1)('low it. It automati(allv turHs on if it senses
too pinch tlcat.
If you ha*+e turned the/hn on, you may find tll_a+t
you (annot tm:n it o/ll The fan will automatically
ttlrll ott wlle/l tile internal t)arts are cool. It Ill}IV
sta,+ on/or 30 minutes or more a/leT the cookto t1
and microwave controls are turned o/ll
www.GEAppliance_com
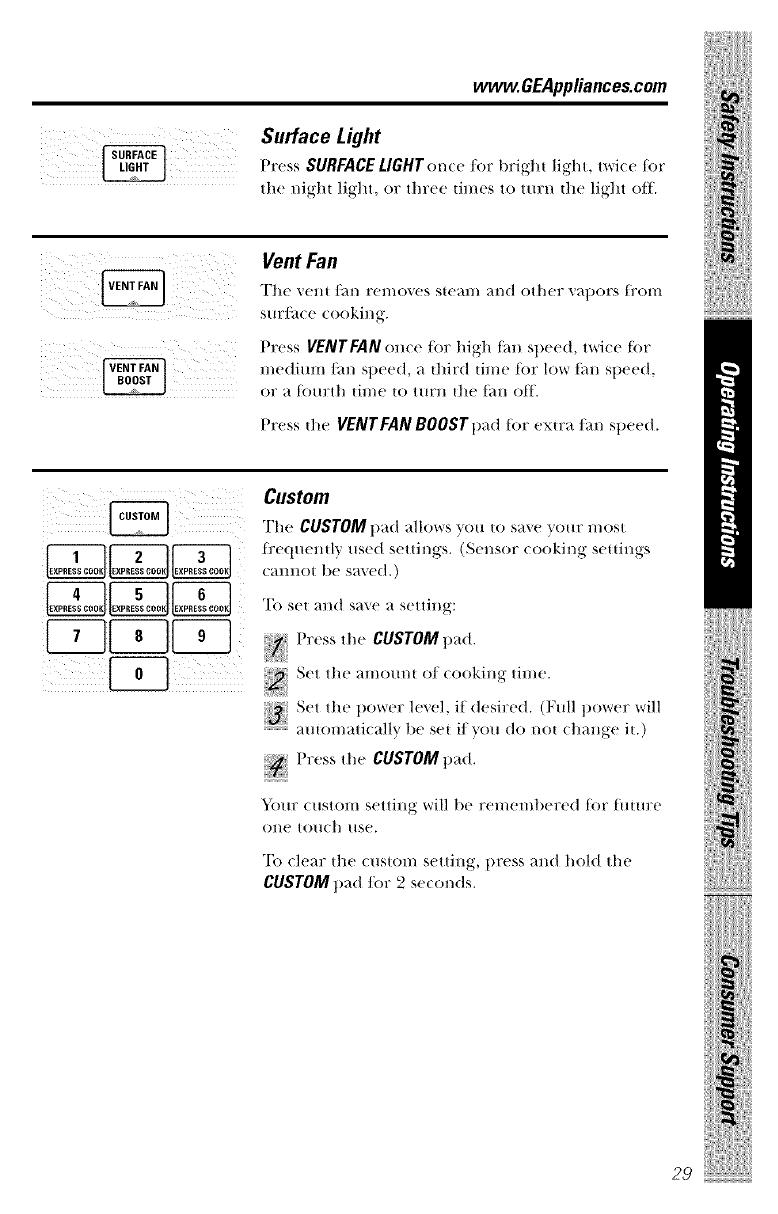
Surface Light
the night light, or three dines to turn die light off.
i , iiill ii ii ii iiil;!i
ii i zi z
Vent Fan
The _('nt/hn removes steam and other _apors fi'om
surJhce cooking.
Press VENTFANonce Ji)r high {hn speed, twice {br
me(titan t_m speed, a thir(1 time ti)r l()_Yt_l]l speed,
or _t t()/lrth Iil//e IO ttlrll I]le t_lll oIt'.
Press die VENTFAN BOOSrpad tbr extra/hn speed.
!iiiilIii!i!l+
Custom
The CUSTOM pad _t]Iows "_Otl 10 s_lxe Voilr l/lOSt
fl_equeml}' used settings. (Sensor cooking settings
(HIIIIO| be s_t'_ed,)
'Ib set alld saxe _t settillg:
_)_€_Press the CUSTOMpad.
_ Set the am(ram ot (ooking time.
.....................amomatieallv be set iixem do not change it.)
Press,,eCUSTOM,, ,,.
Yore: (ustom setting will |)e remembered ti)r tmm:e
ol/e tolleh Ilse.
To (lear die (ustom settiHg, press and hold the
CUSTOM pad for 2 se(onds.
!iii!_iiiiii+i
29
iii iHiil!iiii!ili
iiii!i?_)X{q{i!!i/i_i,ii!_!_iiiiiii
Otherfeatures yourmodel may have.
3O
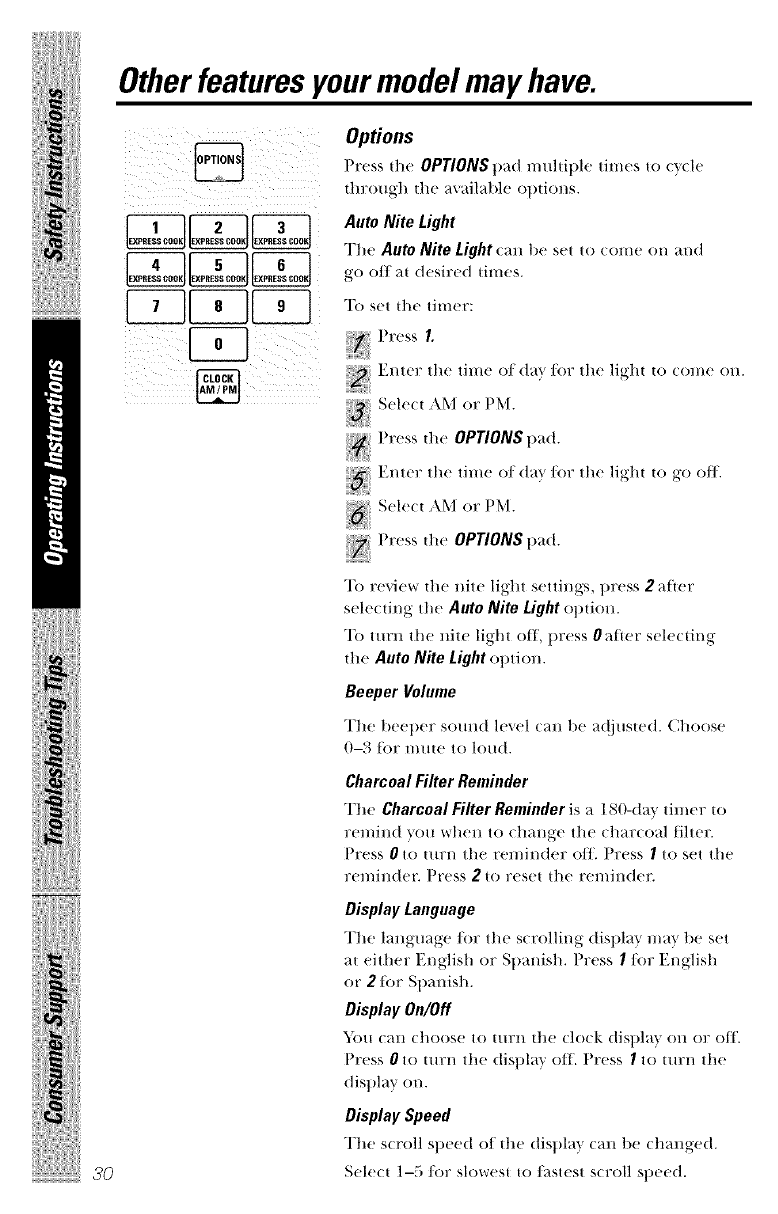
Options
Press the OPTIONSpad multiple times to (v(le
through the available options.
Auto NiLe Light
The Auto Nite Light _an be set to (omc on and
go 7)/1 at (h'sircd times.
To set the timer:
_ Press 1.
_ Enter tile time of(lax/or tile light to come on.
_ Sele(t AM or PM.
_ Press the OPTIONSpad.
N Enter tile time of (ta_ /or tile light to go o/1_
_ Selec_ AM or PM.
_ Press fl'm OPTIONS pad.
"Ib review fl_e nite light settings, press 2afmr
selecting the Auto Nite Light option.
To turn the nite light off, press 0alter selecting
the Auto Nite Lightoption.
Beeper Volume
The beeper sound lexel (an be a(!justed. Choose
0-3 tor mute to lo/_d.
Charcoal Filter Reminder
The Charcoal Filter Reminder is a 180-day timer _o
remind you wh('H tO (']l_lllg'(' tilt' (har(oal {ihcr.
Press 0to turn the remin(h'r o/]_ Press Ito set the
rcmin(h'_ Press 2to rcs('_ th(' r('mind('_
Display Language
The language for the scrolling (tispla} ma} be set
a_ either English or Spanish. Press 1/i)r English
or 2tbr Spanish.
Display On/Off
You can (boos(' to {urn th(' (lock disl)la } on or off.
Press 0to mrn the disl)lay olt. Press Ito mrn the
display on.
Display Speed
Th(' s(roll st)('('(t 7)/fl_(' (tisl)la } (an b(' (hang-('d.
S('l(f(| 1--5 ]()F SIOW('SI |7) ]_tSI('SI s(roll spt'('d,
www.GEAppliance_com
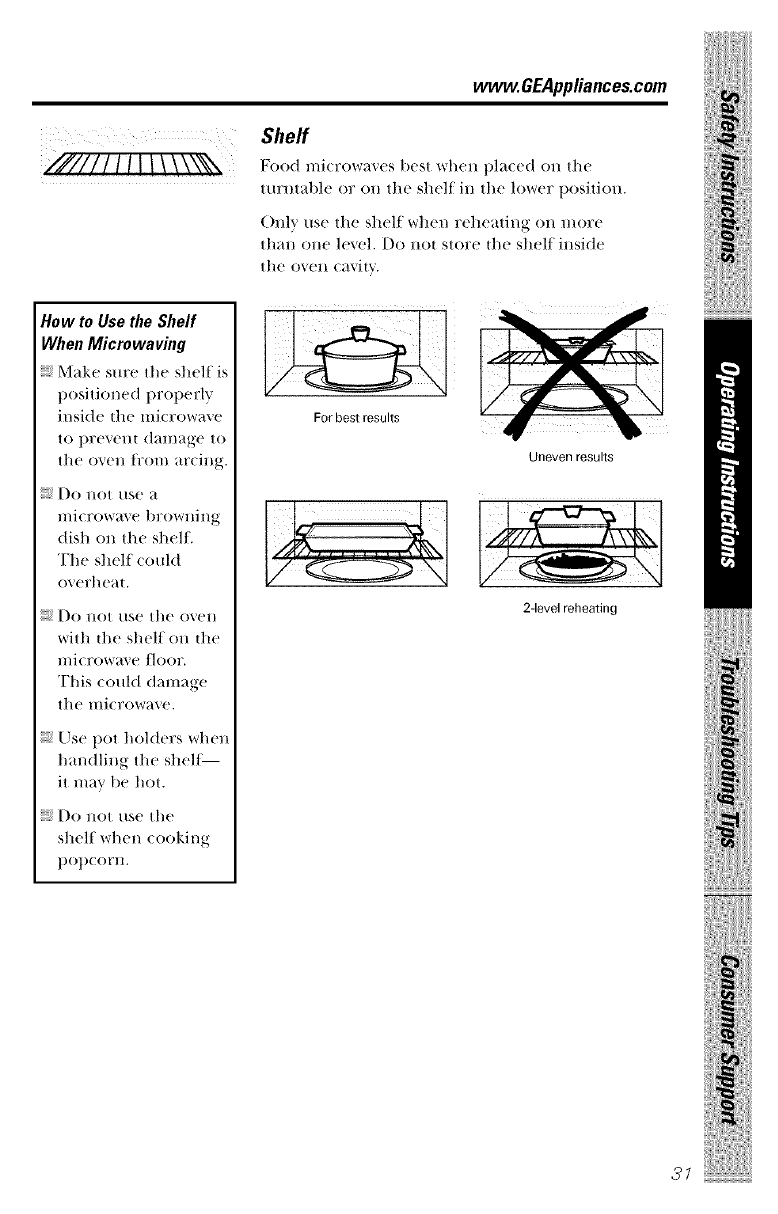
Shelf
I_()()d I//i(TOW;-IVeS [)('St when placed on the
turntal)h, or on the shelf in the lower t)osition.
()nlv use the shelf when reheating on more
than one level. Do not store the shelt inside
the oven cavits'.
Hew te Use the Sheff
When Microwaving
Make sure the shelf is
t)ositioned 1)roperly
inside the microwave
to pre_em damage to
the o_en {tom arcing.
I)o not use a
microwave browning
dish on the shel£
The shelf could
overheat.
I)o not use the oven
with the shelf on the
microwa_ e floor.
This couM damage
the lIliCYow_lve.
Use pot holders when
handling the shell
it m_lv be hot.
I)o not use the
shelf when cooking
t)Ot)COFII.
For best results ....
Uneven results
2-level reheating
ilii!iiiiii?,,,,,, i ;,ii!iiiil i
31
iii iHiil!iiii!ili
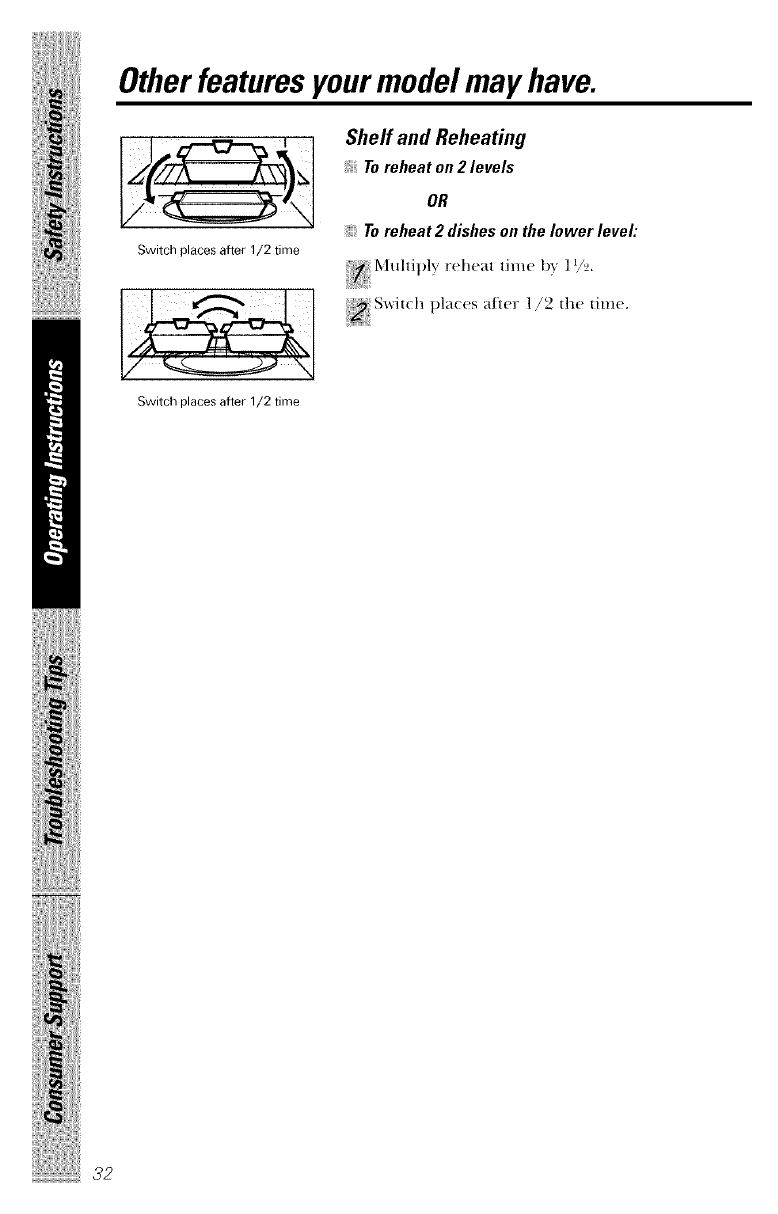
Otherfeatures yourmodel may have.
Switch places after 1/2 time
V_"4
Shelf and Reheating
To reheat on 2 levels
OR
To reheat 2 dishes on the lower level:
Multiply' reheat time b'_, 1 i/_.,
"_ SWit(h pla< es after 1/2 the time.
Switch places after 1/2 time
iiii!ili_i_!Xiqii!!i/i_i,ii!_!_iiiiiii/
Microwave terms. vvww.GEAppliances.com
iiiiil ii ,!i ii!iii iiiiii;ii!iiiiiiiiiiiiiWi!iiii
i i i i
ii i i i i
Definition
•\rcing is the l/]i(]'OW_lVe |elylll t()F Sl)ark,_ in the o\en. Arcing is
caused t)v:
the metM shell not instMled (orrectlv so that it touches
the miet'ow+_' wall.
metal or/oil touching the side of the oxen.
toil that is not molded to t_)od (ut)ttn:ned edges act like
al ltelll laS).
metal such as twist-ties, t)oultry pins, gold-rimmed dishes.
;+ reQ'cled paper towels containing small metal pieces.
Covering Coxers hold in moisture, all(m for more exert heating and re(tu(e
(ooking time. Vetoing t)lasti( WI'_I t) or (oxering with X_r_IXt)_q)er
_tllows ex(ess steklH/ to es(_tt)e.
Shielding In a regular oxen, "_'ou shield (hieken breasts or baked foods to
prexent oxet_l,rowning. When mierow_,ving, you use small st,Jt,s
(:)If(ill to shield thill l)_t_rts,Sll(h _ts the tips of x_,fil/g,rs_t_1/(tlegs on
t)oultl) wllieh wo/lld cook betore larger parts.
Standing Time When you cook xdth regular o'_ens, toods such as roasts or (akes
are _dlowed to stand to finish cooking or to set. Standing time
is est)e(ially imt)ormnt in mk rowaxe cooking. Note that a
mi(row_:txed (;_ke is 1J_ott)l:a(ed olJ_;_ (oolilJ_g iq_(k.
Venting \tier (oxelfing a dish with plasti( wrap, "_o/l xel/t the t)lasti( wl'_lt)
1)'_ tlllTllillg 1)t-I( k Olle (()l'l/eF So ex( ess ste_ll// (_tl/ es( _tt)e.
!iiiilIii!i!ll
ilii!iiiiii!/ii!iiiil i
33
iii iHiil!iiii!ili
iiii!ili_i_!iiiqii!!ili_i,ii!_!_iiiiiii
Care and cleaning of the microwave oven.
Helpful Hints
An occasiomll thorough wiping with 21solution o/
baking soda and water keeps the inside/i'esh.
NOTE: Be certain the power is off before cleaning
any part of this oven.
How to Clean the Inside
Walls, Floor, Inside Window, Metal and Plastic Parts
on the Door
Some sl)atters (an 1)e removed wit]l 21t)2q)er |OWel;
others ma} require a damp cloth. Remove greasy
spatters with a sudsy cloth; then rinse with a (tamt_
cloth. Do not use abrasive cleaners or sharp
iltellSilS Oll ovell walls.
Never use a commercial oven cleaner on any part of
your microwave.
Removable Turntable and Turntable Support
To t)re_ent break2_ge, do not t)la(e the turnt2_ble
illtO water just after cooking. \V_sh it carefully
in warm, suds} water or in the dishwasher. The
turntable and support can be broken if dropped.
Remembec do not operate the o_en without the
turntable and stq_port in t)lace.
Shelf
Cle2m with mild so2q) 2rod w21[er or in the
dishwasher.
Do not clean in a self-cleaning oven.
Defrost Rack
Cle2m _ith mild so2q) 2rod _,,2m'r or in the top ra_k
of the dishwasher.
34
vvvvw.GEAppliance_com
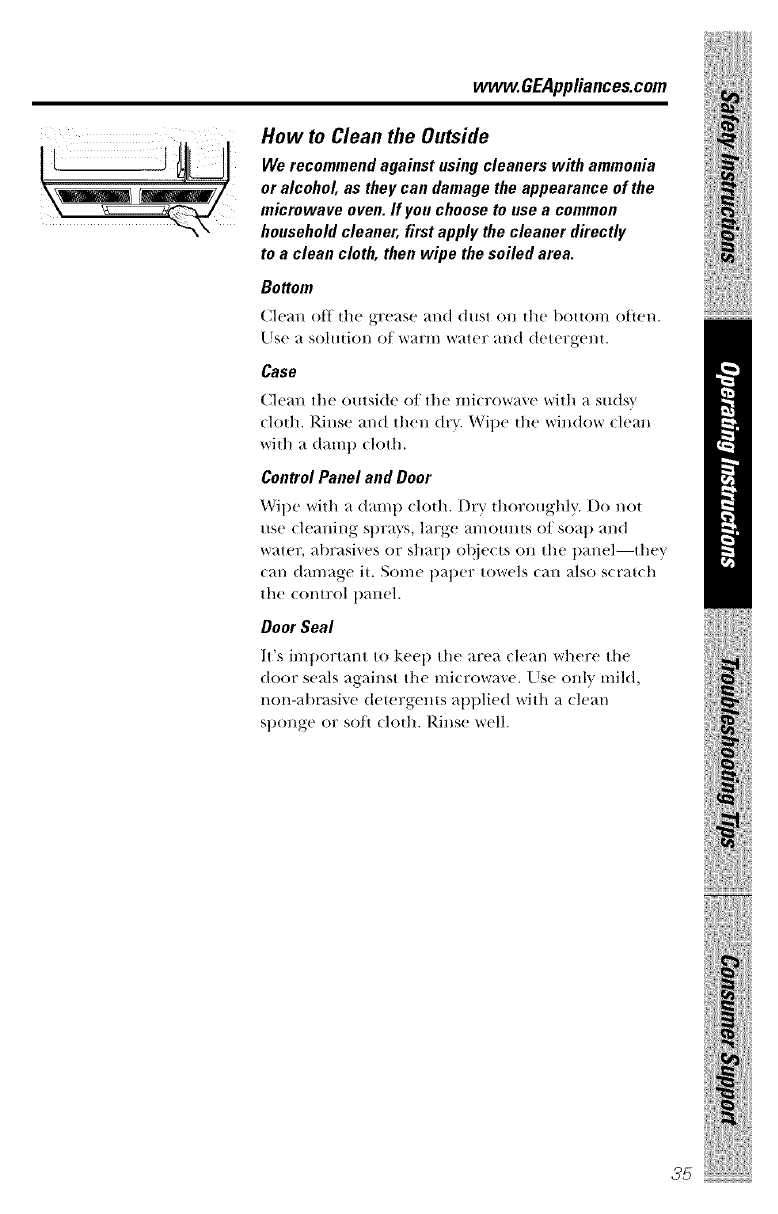
How to Clean the Outside
We recommend against using cleaners with ammonia
or alcohol, as they can damage the appearance of the
microwave oven. If you choose to use a common
household cleaner, first apply the cleaner directly
to a clean cloth, then wipe the soiled area.
Bottom
Cle;m ott the grease and dust on the bottom otten.
Llse a solution of warm water and detergent.
Case
Ch';m the outside o/the mi( r()_lve with _1su(t.',_
cloth. Rinse and then dr}. Wipe the window clean
with a damp ch)th.
Control Panel and Door
Wipe with _t (l_tnl D cloth. Dry thoroughly. Do not
use cleaning spra}% large amomHs of soap and
water, abrasives or sharp ol_iects on the panel--they
can damage it. Some paper towels can also scratch
the control panel.
Door Seal
It's imt)ortant to kee l) the area clean _r]_'_'_' the
door seals against the microwave. Use only mild,
non-abrasive detergents applied with a clean
sponge or so/t clofll. Rinse well.
!iiiilIii!i!l+
iiiiili iiiiiii!
iii+il iiilli
!iiiiiiiii+i_iii'+iiii!ii
35
iii iHiil!iiii!ili
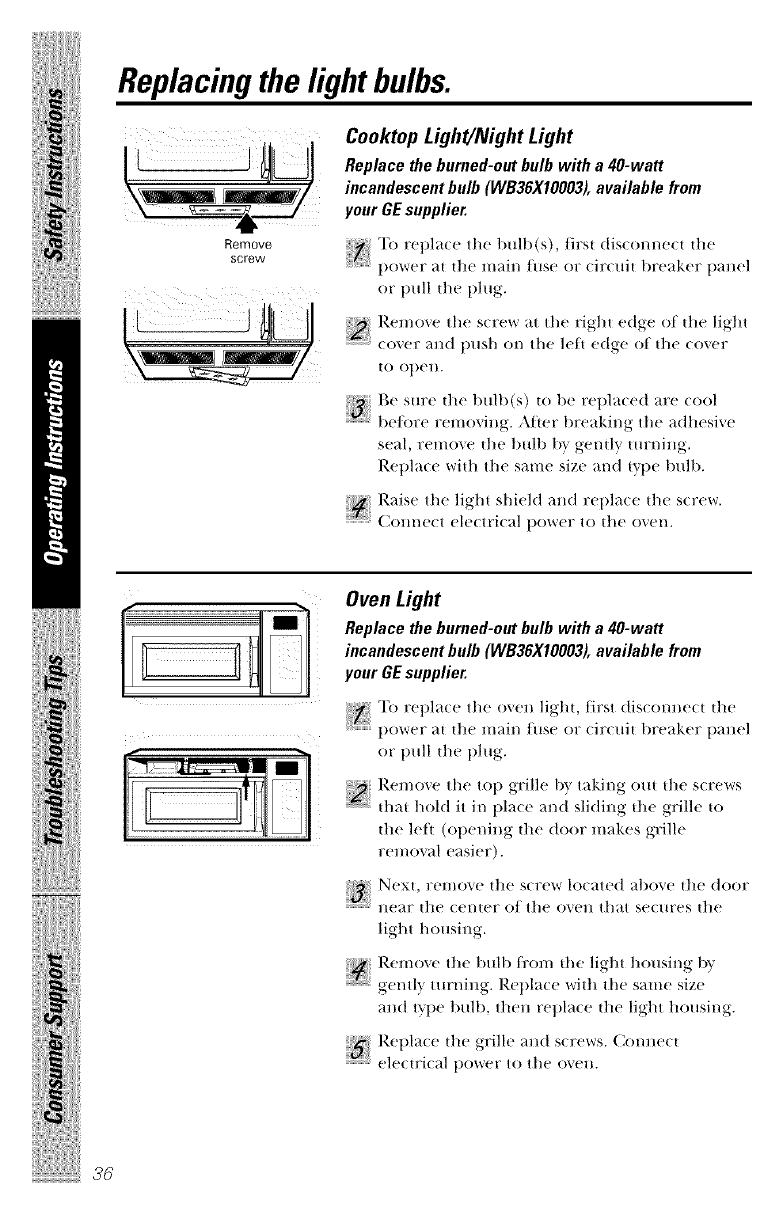
Replacing the light bulbs.
Remove
screw
Cooktop Light/Night Light
Replace the burned-out bulb with a 40-wan
incandescent bulb (WB36X10003), available frmn
your GE supplier.
i_ To ret)lace the bulb(s), first disc(mnect die
_)(_r_[_ ai die lllail/ tuse or (iF( Ilil 1)reaker t)allel
or pull die plug.
Remoxe the s(rew at the right edge of die light
........................................(oxer and t)tlsh Ol1 the lefl edg+e of the (ox, eF
tO ot)en.
Bes,l,:e,het,,,ll,<s>tol,e,'_vla(eda,'_,,ool
.....................before remmqng. Afier breaking the adhesixe
seal, remove die bulb _g genily turning.
Replace wilh tile same size and iype bulb.
(]Olllle(t ele(tri(al power to die o'_ell
iiii!i}i!X{i{i!!i/i_iii!!iiiiiii
36
Oven Light
Replace the burned-out bulb with a 40-watt
incandescent bulb (WB36X10003), available frmn
your GE supplier.
!_i! To ret,la(e the oxell lighi, tirst dis, on,le(i ,he
_)()_r_ ai die lilail/ ltlse or (if'( ilit 1)reaker t)allel
or pull lhe plug.
Remoxe the top grille bT_taking om d_e s(rews
.......................................lhai hoht it in pla(e and sliding lhe grille Io
Ill(! h!ft (opening ill(! door makes grille
rel//O'_ al easier).
Next, )Telllo'_e ill(! s(1x?w' lo(ated abme the door
lleaF |he Cel/|eF of the ovell that sectlFes the
light housing.
, e,llo,ethe1,,,ll, theli -htho,l mg1,,
.....................gently turning. Repla(e with the same size
and [_rl)e bull), [hell repla(e 1he light housing.
ele(tri(al power to the o'_ell.
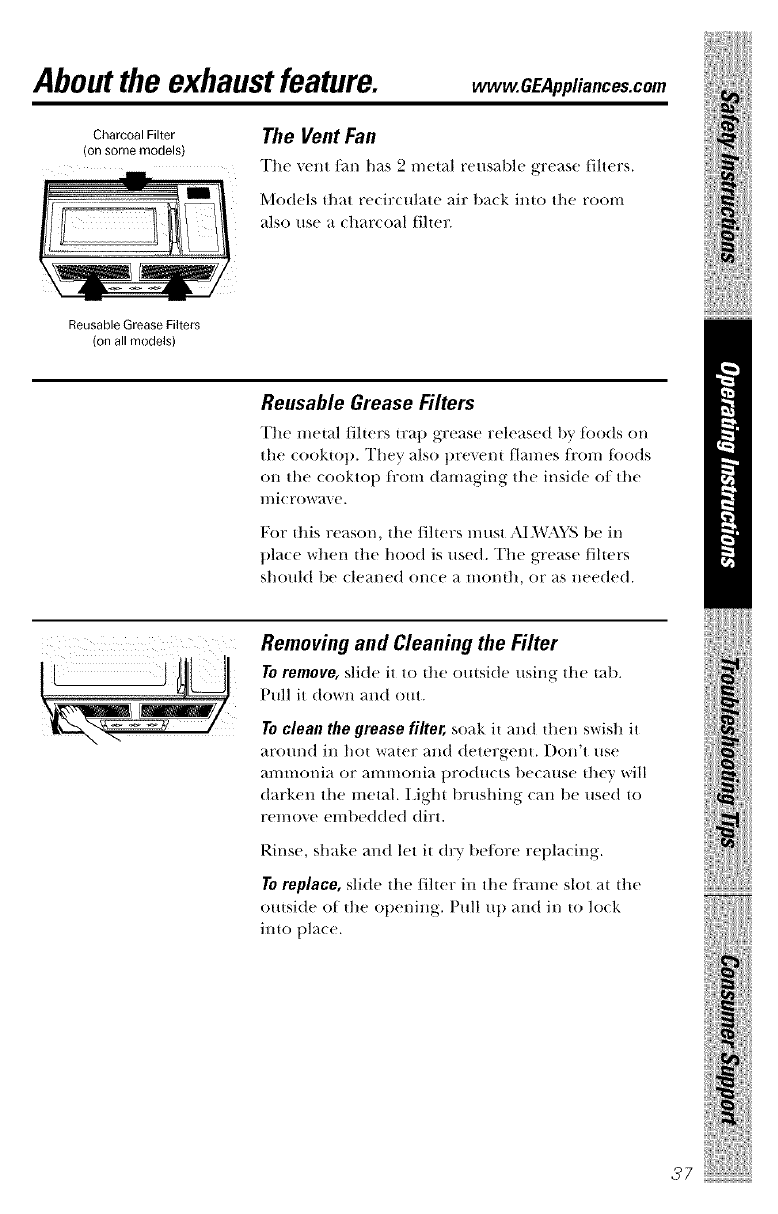
Aboutthe exhaustfeature. vvww.GEAppliances.com
Charcoal Filter
(on some models) The Vent Fan
The _('nt/an has 2 metal reusabh' grease tihers.
Models fllat recirculate air back illto the room
also use a charcoal filuq:
Reusable Grease Filters
(on all models)
!iiiilIii!i!ll
Reusable Grease Filters
The metal filters u:aI) grease reh'ased bv toods on
tile cooktot). They also prevent flames/i'om toods
Oil tile cookto I) D()lll damaging tile inside of tile
mi(rowa_e.
For this reason, the fillers must ,\l _\VA_% be in
t)la(e when the hood is used. The grease filmrs
shollld l)e eleal/ed Ol/(e a lilOl/{h, OF as lleeded.
Removing and Cleaning the Filter
To remove, slide it to the outside using the mI).
Pull it dOWl/and out.
To clean the grease filter, soak it and flien swish it
around in hot water and detergent. Don't use
al//lllOl/ia OF allllllOllia prodllcts t)ecause flley will
darken tile metal. Iight brushing can be used to
remove embedded dirt.
Rinse, shake and let it dry before replacing.
To replace, slide the filmr in tile fi'ame slot at tile
outsi(le of the opening. Pull u t) and in to lock
into place.
ilii!iiiiii? i:ii!iiiil i
37
iii iHiil!iiii!ili
Aboutthe exhaustfeature.
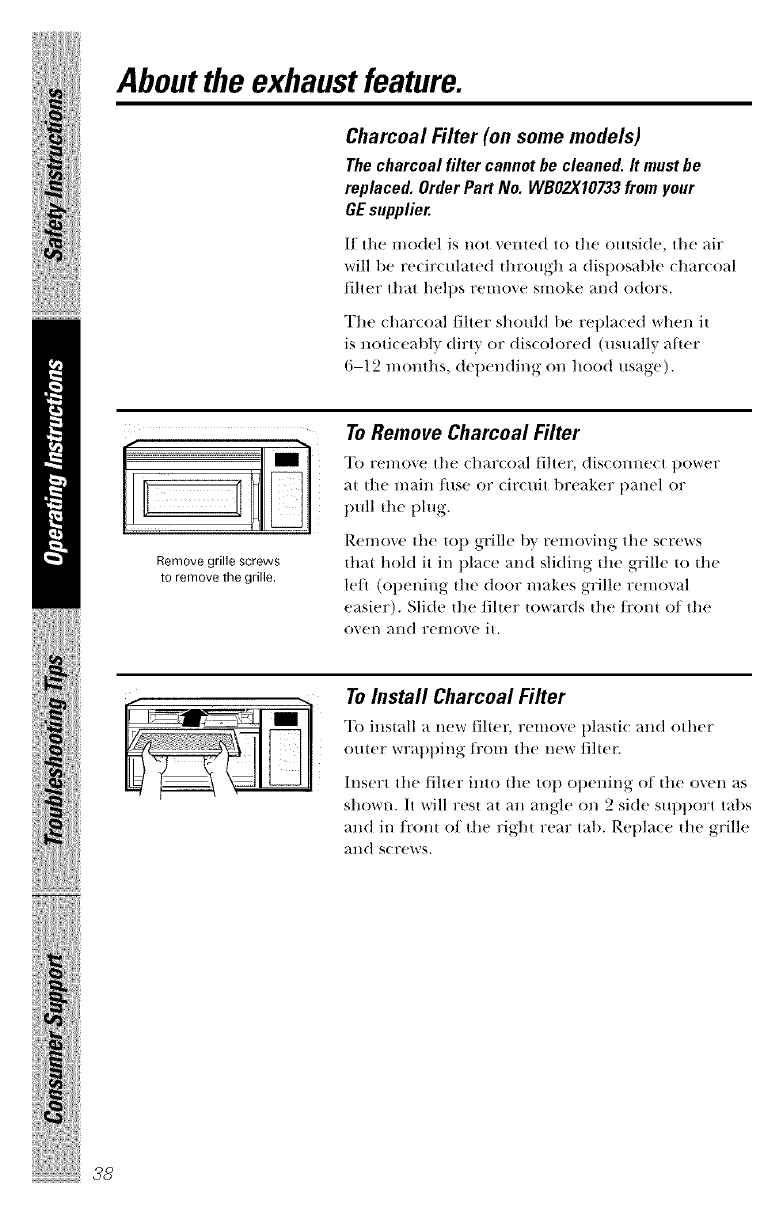
Charcoal Rlter (on some models)
The charcoal filter cannot he cleaned. It must he
replaced. Order Part No. WBO2X10733 from your
GE supplier.
If the model is not vented to the outside, the air
will be recirculated through a disl)osable charcoal
tiher that helps remove smoke and odors.
The chin:coal/iher should be replaced when it
is noticeably dirty or discolored (usually atter
6-1,2 months, depending on hood usage).
...................................... m
Remove grille screws
to remove the grille.
ToRemove Charcoal Filter
To remove the (]l_u:c oal tiher, (lisconne(t t)ower
;_t the main/i_se or cir(uit 1)re_&er t)anel or
pull the plug.
Remove the top grille b} removing the screws
that hold it in place and sliding the grille to the
le/_ (opening the door makes grille removal
easier). Slide the/ilter towards the/ront of the
o_en and remove it.
ToInstall Charcoal Filter
'Ik) install a l_'_ rtilter, remo_e 1)l_lsti( _md other
outer wrapping trom the new Jilter:
Insert the filter into the to l) opening of the oven as
shown. It will rest at an angle on 2 side support tabs
and in/font of the right rear tab. Ret)la(e the grille
and s( rews.
iiii!ili_i_!Xiiii!!i/i_i,ii!_!_iiiiiii/
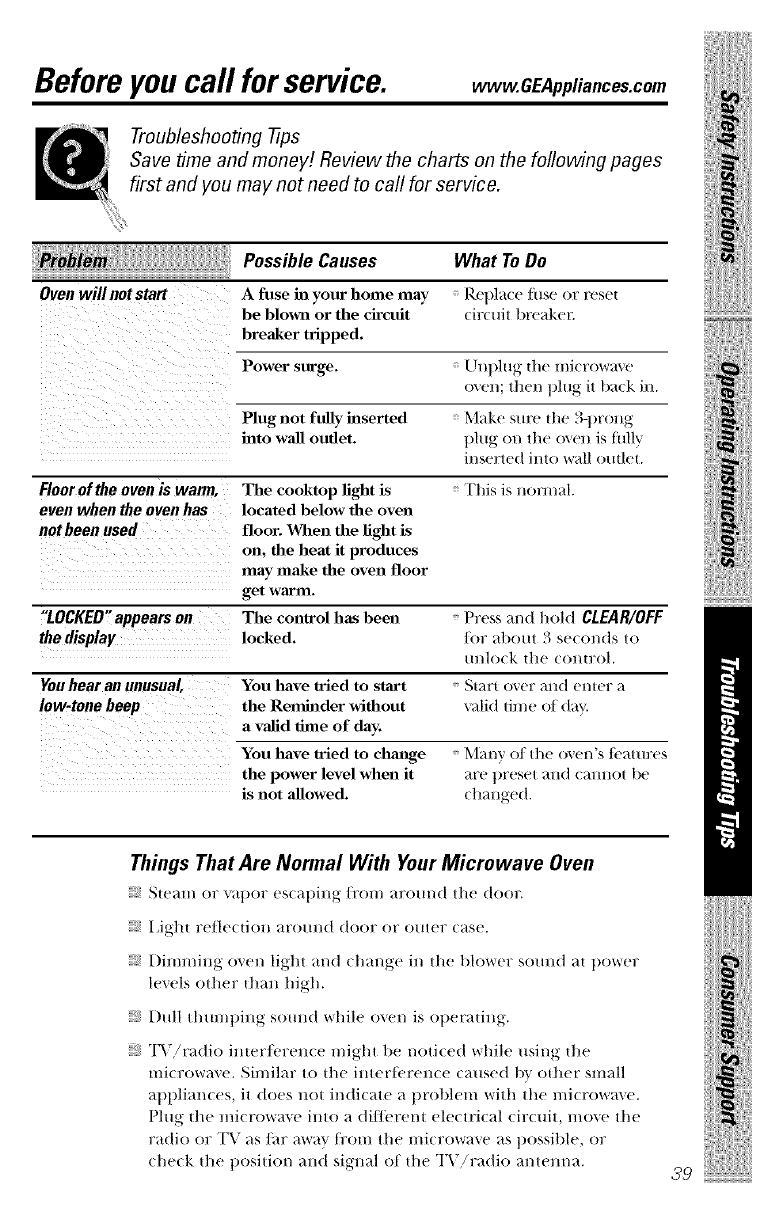
Before you call for service, www.GEAppliances.com
Troubleshooting -tips
Save time and money! Review the charts on the following pages
first and you may not need to call for service.
Oven will not start
Possible Causes
A fuse hi your benin may
be blown or the circuit
breaker tripped.
Power surge.
Plug not fully hlserted
into wall outlet.
What ToDo
Rel)la(etnse or reset
(ir( uit b)'eaken
[_Jnl)lug ll/e microwave
oxen; then t)lug it back in.
Make sure tile 3-t)r()::g
plug on tile o\en is fllllv
inserted into wall omlct.
Floor of the oven is wann,
even when the oven has
not been used
The cooktop light is
located below the oven
floor. _len the light is
on. tile heat it produces
may make die oven floor
get warln.
"LOCKED"appears on The conlrol has been t'rexs m)d ho|d CLEAR/OFF
the display locked. /or d)o/ t 3 se(ol/ds to
/ll/lo(k it|e (Ol/iro|,
You hear an unusual, You have tried to start Start oxer mM (')Her a
low-tone beep the Relnlnder witllout valid time ot day.
a valid llme of day.
You have tried to chauge
the power level when it
is not allowed.
This is normal.
Many of the (wcn's ti_,aturcs
arc preset and cannot be
changed.
iiiii:::iiiii:iiiii:i:i:iii:iii:/
Things That Are Normal With YourMicrowave Oven
:_ Steam or _at)or es(at)ing/i'om around the door.
:_ I,ight rcilc(tion around door or outer (asc.
:_ Dinnning o_en light and change in tile blower sound at t)owcr
levels other d_an high.
:_ Dull thuml)ing somld while oven is ot)cra_ing.
:_ TV!radio inter/i'ren(c might be noti(cd while using the
microwave. Similar to die intcrti'rencc caused 1)x odicr small
at)plianccs, it does not indicate a t)rol)lcm with the microwave.
Plug die microwave into a di/li'rem electrical circuit, move the
radio or TV as liar _l_r_} 1i'()1:_ tile microwave as t)ossiblc, or
(hc(k the t)osition and signal of the TV!radio antenna.

!iii_!ili!i
i-..
iili@Xiiii/ili,iiiiii/
iiiiiiiiiiiiiiiiiiii 40
GE Service Protection Plus TM
(;E, a name recognized worldwide tor quality and (lepel_dability,
offers x_O[l SClTx_Jce Protection Phlsr_--(?oH/l)rellellsive ])rote(tiOll Oll
all yore: applian( es--No Matter What Brand!
Benefits Include:
• Backed by GE
• All brmlds covered
• Unlilnited service calls
• All parts mid labor costs hlcluded
• No out-of-pocket expenses
• No lfidden deductibles
• One 800 number to call
We'll CoverAny Appliance.
Anywhere. Anytime.*
xJ_)ll will be completely satisfied x_idl our serxice prot_cdou or you ma_ request your
lilOlle x,ba_k Oll tlle relllailling vallle of vo/tr (Olltra(t. No q/testions asked. It's that silIlple.
Protect your refi:igerator, dishwasher washer and dr}e_; range, TX;VCR and much more--
rely brmld! Plus dlere's no extra charge tor emergency service and low momhly financing
is a_ailable. E_en icemaker coverage and/ood spoilage protection is o/]i'red. 51m can rest
easy, knowing that all your valuable household products are prowcwd against expensive
repairs.
Place xour confidence in (;E and call us in the U.S. tolM'ree at 800.626.2224
tor more iniormation.
*-M1ln;mds coy< led, up Io 20 years old, in II'le continental U.S.
._. (.:__.,_,_.....
Please place in envelope and mail to:
General Electric Company
Warranty Registration Department
P.O. Box 32150
Louisville, KY 40232-2150
47
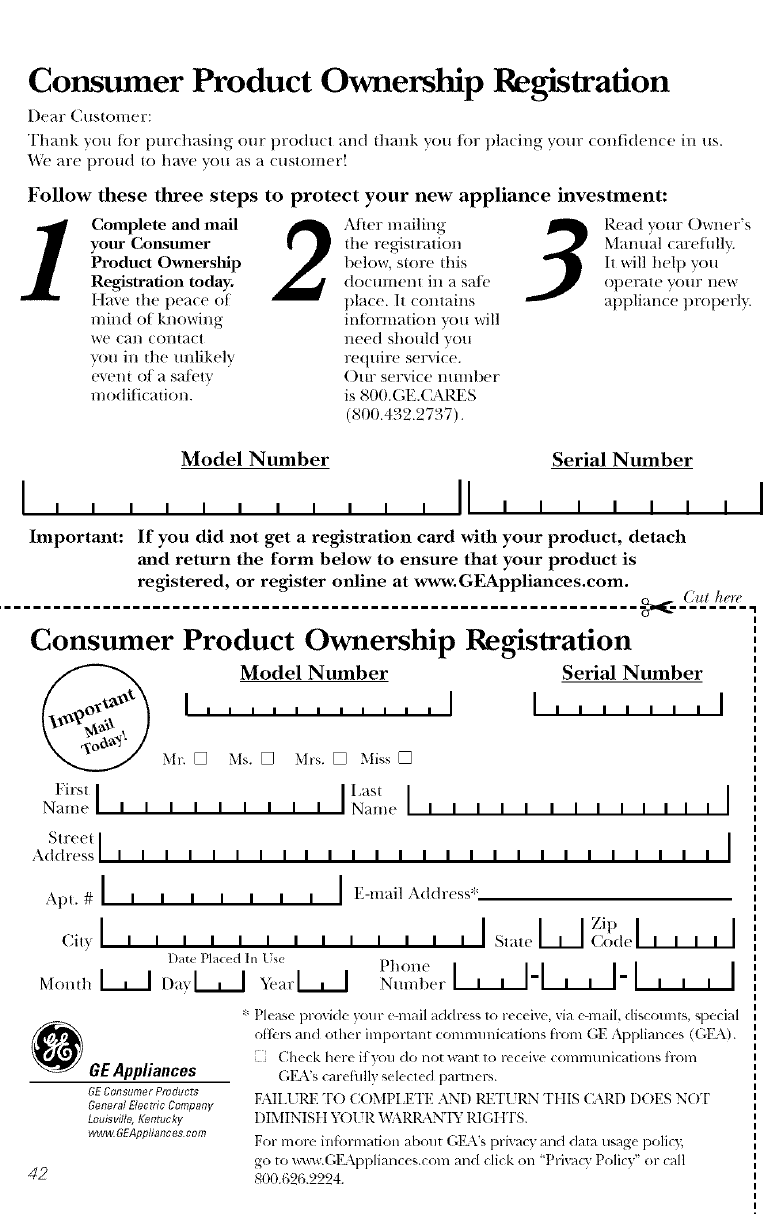
Consumer Product Ownership Registration
I)em: Customer:
Thank v(m tor t)m:chasing our t)rod uet and thank you tbr t)laeing yore: confidence in us.
_;'e are t)rolld to haxe vo/| as a (llStOl/ler!
Follow these three steps to protect your new appliance investment:
Complete mid mail
your Consumer
Product O_mership
Registration today.
l laxe the pe_l_ e of
mind of knowing
we (all COllta(t
sou in the mflJkelv
event of a sat_?tx'
moditication.
After mailing
the registration
1)clew, store this
do( HIIlel/| ill a sat_
place. It (ontains
intbrmadon mu will
need should you
require service.
()ur service munber
is 800.( ',E.(_.\ l_iS
(800.432.2737).
P.ead v(mr ()wner's
Manuid caret ullv.
It will hel t )you
ot)er_te yoIlr lleW
applian(e t)rot)erl).
Model Number Serial Number
ill li II lili iilll II II II
hnportant: If you did not get a registration card with your product, detach
mid return the form below to ensure that your product is
registered, or register online at _nnv.Gl_ppliances.com. ._,<..(2,.@.,',2:.
Consumer Product Ownership Registration
Model Number Serial Number
I ........... I I,, ,,,, ,I
Nil-. [] Ms. [] Mrs. [] Miss []
First I Last I I
Name Iii IiiI ii Name i I i i I I I I i i I I i
Street] ]
Address IIIIIIIIIIIIIIIIIIIIIIIIII
Apt. # I IIIIIIII E-mail Address*.
I I I,l it' I I
Cit_ IIIIIIIIIIIII State (_ode I I I I
l)at( Phl(ed [n [is( Phone
Mo,_,t,L_J Da,L_J _,_,rL_M_,,,_t,erl,, I-I,, I-I,, , I
OGE Appliances
GEConsumer Produc_s
General Electric Company
Louisville, Kentucky
www, GEAppliances com
42
* Please provide your e-mail addrcss to receixe, via e-mail, discounts, special
ot]bl-_ and ()tiler important communicalions from (;E Apl:)liances ((;EA).
Check here if y<m do not wm]t to rcceix e communications tvom
G1LVs carefillly selected parmer_.
FAII.[ rPd< TO C()MPI ETE AND RETI JRN Tt ]IS C_\RI) DOES N()F
DIMINISII Y()[ R W.kRR \N'IY RIGI ITS.
For more infbnnation about (;1L\'s privacy and data usage polic);
go to m_v.(;lL\ppliances.com and click on "Privacy Policy" or call
800.626.2224.

GEMicrowave Oven Warranty.
Aft warranty service provided by our
Factory Service Centers, or an authorized
Customer Carestechnician. Toschedule
service, on-line, 24hours a day, visit
us at www.GEAppliances.com, or call
800.GECARES(800.432.2737).
Staple your receipt here.
Proof of the original
purchase date is needed
to obtain service under
the warrant_
GE Will Replace:
origmal purchase one-year warrant, (;E \_ill also provide, free of charge,
all labor and _vlawd service costs to repair or repla(e
tile deJbcti_e ])art.
Second Through Tenth Year The magnetron tube, it die l/KtgllelFOI/ ltlbe tSi|s (hie lo
From the date oforiginal adet('cl ill l//aWiJ_ds or workl/lailshi]), l)udng lhis
purchase additional nine-year limited warran$ yr<_ will be
I_'S] )(>l/_il)](' _>Y _] 1_ r ];{])(_Y ()t" relined servi(e (osl_.
Service trips to your home to teach
you how to use the product.
Improper hastallallon, delivery or
lllaintenance.
Failure of the product if it is
abused, lrfisused, or used for other
flaan flae hatended purpose or used
colmnercially.
Replacement of file cooktop light
bulbs.
Replacement of house fuses or
resetlh_g of drcttit breakers.
Damage to file product caused by
accident, fire, floods or acts of God.
Incidental or cousequenfial damage
caused by possible defects with rids
appliance.
Damage caused after delivery.
Thiswarranty is extended to the original purchaser and any succeediegowner for products purchased
for ordinary home use within the USA, le Alaska, the warranty excludes the cost of shipping or service
calls to your home,
Some states do not allow the exclusionor limitation of incidental or consequential damages so the
above limitation or exclusionfray not apply to you. This warranty gives youspecific legal rights, and
you may also haveother rights which vary from state to state. Toknow what your legal rights are,
consult your local or state coesumer affairs office or your state's Attorney General
iiiiiiii!!liii:iii!iii
;iiiiiii[iii_Jiiiii!iiiiJiiii!iii
iiiiii!iiiiii !ii iili!
iiiiiiiiii: li
Warrantor: General Electric Company. Louisville, KY 40225
43
ConsumerSupport.
GEAppliancesWebsite GEAppliances.com
I lave a question or need assistance with your appliance? "Iiy the GE Appliances D,'_'bsite
24 hours a da> ally (lay of the year! For greamr con',('tlietlc e all(] faster sel_Jce, }/Oilcall
nl)w ch)wnload Owner's Manuals, order parts, camlogs, or even schedule sel_ic e on-line.
xl_)ll Call also "Ask ()llr "Ibam of Experts _'" your questions, and so much more...
ScheduleService GEAppliances.com
Expert GE repair s(rvicx is only one step away ti-om your dool= Get on-line and
SC I (1 VO1 "se-vce / volrco \el lce24hollrsallvdavofthc vear!()l-call
800.(;E.C&RI{S (800.432.2737) during normal busin( ss hours.
RealLifeDesignStudio GEAppliances.com
GE supports the I hliversal Design conc eptmproduc t.%ser'd( es and enxironmenL', that
call be used 1Vpeople of all ages, sizes and capabilities. D,\_ recognize the need to
design tilt a wide range of php, i( al and mental abilities and impairments. For details
of (?,E's Universal Design applications, including kitchen design ideas tot people
with disabilities, check (lilt ollr Website to&l> For the hearing impaired, please call
800.TDD.GEAC (800.833.4322).
ExtendedWarranties GEAppliances.com
Purchase a GE extended warranty and learn about special discounts that are available
while your warranty is still in eltb( t. "_]m call pure has( it on-line anytime, or call
800.626.2224 during normal business hours. GE Consumer Itome SelsJc es will
still be there after your warranty expires.
PartsandAccessories GEAppliances.com
Individuals qualified to ser'dce their own appliances can hme [)arts or accessories
sent direc tN to their homes (VISA, MasterCard and Discover cards are accepted).
Order on-line toda> 24 hours eve W (lay or by phone at 800.626.2002 during normal
business hours.
Instructionscontainedin this manual cover procedures to be performed byany user.
Otherservicing generally shouldbe referred to qualified service personnel.Caution
must be exercised, since improperservicing may cause unsafe operation.
ContactUs GEAppliances.com
If you are not satisfied with the service you receive fi-om GE, contact us on our Website
with all tile derails including your phone numl/en or write to:
General Managel; Customer Relations
(;E Appliances, Appliance l)ark
Louisville, KY 40225
RegisterYourAppliance GEAppliances.com
Register ),our new appliance on-line--at your convenience! Timely product registration
will allow tiw enhanced cotlltlllltli( ation and prompt service under tile terms ofvotlr
warrant); should tile need arise. You mav also mail in tile pre-printed registration card
included in the packing material.
Prtntod t}l Korea
