GE Microwave/Hood Combo Manual L0521482
User Manual: GE GE Microwave/Hood Combo Manual GE Microwave/Hood Combo Owner's Manual, GE Microwave/Hood Combo installation guides
Open the PDF directly: View PDF ![]() .
.
Page Count: 48

wwvv.GEAppliances.com
0
Advantium
Advantium Quid_ Slarl ......... lit
Cooking" controL_ .............. l 3
Cuslomer i_!]brmalion ........... 8
Oven JFat u res , ............... l 2
I,Umt is A dvanlium ? ........... 9
Sqii, ly .................... 2- 7
Speedcooking
Cooking" tips ................ l5
Custom speed(ook rec@es ..... l&19
Custom speedeook recipe log" , ..... 20
Manual @eedcook ............ l 7
Power level .................. 16
Repeat last ................. [5
I_esumeJ_ature ............... l5
Speedcook _oolrwan, ............ 17
Spedcook menu guide .......... l l
Spedcoobs@ cookwaw .......... 5
Thing:_ lhal an, normal ......... 2l
I:i_ing"a p_>s_,l speedcooh menu .... 14
Microwaving
Cooking" tips ................ 23
Custom microwave re(ipes .... 24, 25
Custom microwave recipe log" , .... 24
D@z_st (auto) ................ 26
Dejh*st (time) ................ 26
D@_sting" tips ............... 27
Micro Express ................ 23
Microwave power level,s ......... 23
Microwave-s@ cookwa_ ......... 6
Precautions to avoid passible
@OXh're to exce,',xi'oe
microwave etze_q?' .............. 2
Sensor cooking" , ........... 2& 29
ThitN:s thal are normal ......... 30
7_me eooh .................. 23
I:i_ing"pn,-sel mic_nvave seleclions , ,22
Other Features
Auto nig'ht lig'ht .............. 32
Automalicfi_n ............... _5
Beeper volt,,me ............... 32
Child lockout ................ 34
Clock ................... lO, 32
Delay start .................. _5
l)isplay ON/OFF ............. 32
Hdp ...................... 33
I¢eminder .................. _5
Review .................... 32
&:roll speed ................. 32
SutJhce l_q'ht ................ 34
Timer , .................... 34
_,m /hn ................... 34
Care and Cleaning
Cleaning" the inside ......... 36, 37
Cleaning" the oulside ........... 38
Filter,_ , ................. 39, 40
Lamp cov(_',_ , ............... 37
Optional accessories ........... 40
R_,placint;" liKhls .............. 38
Troubleshooting
Problem Solver ............ 4l, 42
Customer Service
(ht,stomer i_!/brmation ........... 8
Service phone numb_',_ , , , , Back Cover
I,l?_rmnly .................. 4 7
SCA2000
SCA200I
J,./,://,v,_.t,,_,,,ti,,,,,._:o,,, 164D3370P276 49-40346 06-03 JR

IMPORTANT SAFETY INSTRUCTIONS
Advanlit¢m Oven
PRECAUTIONS TO AVOID POSSIBLE EXPOSURE
TO EXCESSIVE MICROWAVE ENERGY
(a) Do Not Attempt to operate this ()veil with the
dooI" open since open-dooi" operation C_lil
result in haImflll exposure to nlicrowave
energy. It is iinpormnt not to deteat or
tainper with the satiety interlocks.
(hi Do Not Place any object between the ()veil
fl'ont thce and the door or allow soil or cleaner
residue to accun/ulate on sealing surfi_ces.
(c) Do Not Operate the ()veil if it is dainaged.
It is particularly important that the oven
door close properly and that there is no
dainage to the:
(1) door (bent),
(2) hinges and latches (broken
or loosened),
(3) door seals and sealing surii_ces.
The Oven Should Not be ac!iusted or
repaired b) anyone except properl)
qualified serxice personnel.
IMPORTANT SAFETY INSTRUCTIONS
Advantil¢m Oven
AWARNING.t To reduce the risk of burns, electric shock, fire, injury to persons,
or exposure to excessive microwave energy:
SAP 2 TY PRECA U770NS
Read all instructions before using this
appliance. When using electrical appliances,
basic safety precautions should be followed,
including the following:
Read and follow the specific precautions
in tile PllI'XJAU77()NN 7"0 AVOll) [ O& IBLt.
LXt )SL, BZ l( LXCLSSJIZ M1CROWAI,I_
ENEI_GY section on page 9.
Be sure vour_ appliance is properly
installed and grounded by a qualified
technician in accordance with the
provided installation instructions.
Install or locate this appliance only
in accordance with the proxided
installation instructions.
•Some products such as whole eggs and
sealed containers--tbr example, closed
jars--are able to explode and should not
he heated in this oven. Such use of the
oven could result in injm T.
• Do not mount this appliance oxer
a sink,
• This oxen is not approxed or tested for
marine use.
This oxen is UI, listed for installation oxer
electric and gas ranges.
This oxen was designed for use oxer ranges
no wider than, 6. It may be installed oxer
hoth gas and electric cooking equipment.
Do not operam this appliance if it has
a damaged power cord or ping, if it is
not working properly, or if it has been
damaged or dropped.
As with any appliance, close superxision is
necessary when used by children.
• Use this appliance only %r its intended
use as descrihed in this manual.
Do not use corrosixe chemicals or xapors
in this appliance.
This oven is specifically designed to heat,
d_T or cook food, and is not intended for
lahoratorv or industrial use.
• This appliance must only be serviced
by qualified service personnel. Contact
nearest authorized service facility tBr
examinauon, repair or adjustment.
• Do not coxer or hlock any openings on
the appliance.
• Do not store this appliance outdoors.
Do not use this product near water--
for example, in a wet basement, near a
swimming pool, near a sink or in similar
locations.
• Kee I) power cord away flom heated
surfaces.
• Do not immerse power cord or plug
in water.
• See door surface cleaning instructions in
the Caro and (,'leaning q/th_ (hmn section
of this manual.
• To reduce the risk of fire in the oxen caxiw:
--Do not overcook food. Careflflly atmnd
appliance when paper; plastic or other
comhustible materials are placed inside
the oven while cooking.
--Remoxe wire twist-ties and metal handles
from paper or plastic containers before
placing them in the oxen.
--Do not use the oxen for storage purposes.
Do not leaxe paper products, cooking
utensils or tbod in the oxen when not
in nse.
--If materials inside the oven ignite, kee I)
the oven door closed, mrn the oven off
and disconnect the power cord, or shut off
power at tile fllse or circuit hreaker panel.
If the door is opened, the fire may spread.
--Do not use tile Sensor Features txvice
in succession on the same food portion.
If tBod is undercooked after tile first
countdown, use 77ME COOK for additional
cooking time.
IMPORTANT SAFETY INSTRUCTIONS
Advantium Oven
WARNING.t
SAb 2TY Pt 2CA U7 70NS
• Do not operate tile oxen without tile
oxen rack (turntable) in place. Tile oven
rack (turntable) nmst be unrestricted so
it can turn.
• During and after use, do not touch,
or let clothing or other flammable
materials contact any interior area of
tile oven; allow sufficient time for
cooling first.
• Do not store anything directly on top
of tile oxen surface when tile oxen is
in operation.
• Cook meat and poulti T thoroughly--
meat to at least an INTERNAL
temperaune of 160°F, and poulu T to
at least an INTERNAL temperature of
180°F. Cooking to these temperatures
usnally protects against tbodborne
illness.
• Kee I) tile oxen flee from grease
buildup.
• Potentially hot surfaces include tile
oxen door, floor, walls and oxen rack
(turntable).
ARCIN(; A'_ving can occur during both speedcoohing and microwave cooking..t[you see arcing, [)_<_.sthe
CLEA H/OFF pad and cor_+ctthe problem.
Arcing is tile microwme term for sparks
in tile oxen. Arcing is caused by:
• Metal, such as twist:ties, poulti T pins,
or gold-rfinmed dishes, in tile oxen.
• Metal or foil touching tile side of
tile oxen,
• Recycled paper towels containing small
metal pieces being used in tile oxen.
• Foil not molded to food (uptnrned
edges act like antennas).
• Use foil only as recommended in
this guide.
• Metal cookware used during either
speedcook or microwave cooking
(except for tile pans provided with
tile oven).
THE
VENT"
t'XN
• Tile fan will operate automaucally
under certain conditions (see tile
Automatic Fa,_ secuon). Take care m
prevent tile starting and spreading of
accidental cooking fires while tile vent
fan is in use.
• Clean tile underside of tile oxen often.
Do not allow grease to build up on tile
oxen or tile fan filters.
• In tile event of a grease fire on tile
surface units below tile oven, smother
a flaming pan on tile surface unit by
covering the pan complemly with a lid,
a cookie sheet or a flat tray.
Use care when cleaning tile xent fan
fihers. Corrosixe cleaning agents, such
as lye-based oxen cleaners, may damage
tile fihers.
X4'hen preparing flaming %ods under
tile oxen, turn tile xent fan on.
Never leave surface units beneath your
oven unatmnded at high heat settings.
Boilovers cause smoking and greasy
spillovers that may ignite and spread
if tile oven vent fan is operating. To
minimize automatic fan operation, use
adequam sized cookware and use high
heat on surface units only when
necessary.
IMPORTANT SAFETY INSTRUCTIONS
Advat_tium Ovet_
hWARNING!
FOODS •When microwming, place all foods and
containers on tile white ceramic tray.
• Do not pop popcorn in your oven
unless in a special microwave popcorn
accessory or unless you use popcorn
labeled for use in microwave ovens.
• Do not boil eggs in this oven. Pressure
will build up inside egg yolk and will
cause it to burst, possibly resulting
in i_ju U.
• Do not operate the oxen without food
inside. This may cause damage to the
oxen. It increases tim heat around the
magnetron and can shorten the life of
tlle oxen,
• Foods with unbroken oumr "skin" such
as potatoes, hot dog:s, sausages, tomatoes,
apples, chicken livers and other giblets,
and egg yolks should be pierced to allow
steam to escape dining cooking.
•SUPERHb_Tb_ WAI_R
Liqui&, ._ud_as wato (@'e or tea, a_ able lo
lw ovoJu'ated ,5_3,o_dltw boili,_gpoi_t wilhout
aPlwari_lg lo lw boiling. Vidble bu,Sbli,g or
boili_*gwho's*ltw (vmtaino is _,m_M,f!_m_ ltw
might)way("ove_ is'not aN_@s p'_<sz'_lt.THIS
COULD IU_SULT1N Iq_RY HOT I]QUIDS
SUI)I)I{NLY BOIlJN(; Olq?l¢ 1_TqlL_VTHE
C()NTAIAq_R IS' I)LS'TL._t#_21) OR A StY)ON
OR OTHF.I? U77:.NS'IL IS INS'F.I?77,21)INTO
7"HE LIOUII).
To reduce the risk of inju Uto persons:
-- Do not oxerheat fl_e liquid.
-- Stir the liquid both before and halfis_ay
through heating it.
-- Do not use straight,sided containers with
narFow necks.
-- 'After heating, allow the container to
stand in the microwme oxen for a short
time before removing the containe_:
-- Use extreme care when inserting a spoon
or other utensil into the containen
Speedcooh
07den-S@
CO0]gZU(Ire
The oven rack (turntable)
mu,sl alwars be i¢_ place
rvhe_ u,si)_g lhe over_.
Put ]ood direclly or_ lhe
bl&'k metal fl'at tray
lo @eedcook.
• The oven and door will get very hot
when speedcooking.
•Cookware will become hot because
of heat transferred from the heated
food. O_en mitts will be needed to
handle the cookware.
• Do not use coverings, containers or
cooking/roasting bags made of foil,
plastic, wax or paper when
speedcooking.
• Do not coxer the oxen rack (turntable),
trays or any part of the oxen with metal
foil. This will cause arcing in the oxen.
• Use the black metal fiat tray in the
same way you would use a shallow
baking pan or baking tray.
• Use the black grill tray for cooking
steaks, fish and poultt T.
•Place food directly on the trays when
cooking.
• Any oven-safe dish can be used in
your oven. Recipes in the Advanfium
Cookbook were rested in Pyrex _>and
Anchor Hocking _'_glass cookware and
Corningware ° ceramic casseroles.
Cookfimes and results may va_T when
using other types of oven-safe dishes.
Place them directly on the oven rack
(turntable).
• Do not use the oxen to dry newspapers.
• Use of the white ceramic tray when
O
speedcooking MII resuh in inferior
cooking performance.
Pul ]hod di*vclly o_ lhe
bla?k metal gbill tray
to Speed_ook jbods you
would _ormally cook
or_ the grill.
IMPORTANT SAFETY INSTRUCTIONS
Advat_lium Ovet_
WARNING !
Microwave-
COOkZO(Ir_
The oven rack
(turntable) mu,sl
alwa_,s be io place wheo
i_,si_g"the oveo.
The white ceramic tray
should alwars be in
p.lm e wtwo
mlcrowauln_ _,
Make .suw to use ._uitable cookwaw during microwave cooking. Most gla.s__eav_'ml(_% cooking
dishe% mea._uring cupS, eu._tard eu[)s, potter_, or china dinn_,rwaw which does not have
metallic t_Jm or glaze with a metallic .sheen can be used. Some eoohware is labded "suitabh_
joy mierowaving."
• Place food or microwa_able container
directly on the white ceramic tray to
cook vonr tbod.
• Use of either black metal tray during
microwme cooking will resnh in
inferior cooking performance.
• If you are not sure if a dish is
microwave-safe, use this test: Place in
the oven both the dish you are resting
and a glass measuring cup filled with
l cup of wamr--set the measuring cup
either in or next m the dish. Microwave
30-45 seconds at high. If the dish heats,
it should not be used for microwaving.
If the dish remains cool and only the
water in the cup heats, then the dish
is microwax e-safe.
• Cookware may become hot because
of heat transferred from the heated
food. Oxen mitts may be needed to
handle the cookware.
• Do not use recycled paper products.
Recycled paper towels, napkins and
waxed paper can contain metal flecks
which may cause arcing or ignite. Paper
products containing nylon or nylon
filaments should be avoided,as they
may also ignite.
• Use foil only as directed in this guide.
TV dinners may be microwaved in foil
trays less than 3/4" high; remove the
top foil cover and return the tray to the
box. When using foil in the oven, kee I)
the foil at least 1" awav from the sides
of the oxen.
• Do not use the oxen to dry newspapers.
• If you use a meat thermometer while
cooking, make sure it is safe for use in
nlicrowax e ox ens.
Paper towels, waxed paper and plastic
wrap can be used to cover dishes in
order to retain moisture and prevent
spattering. Be snre to vent plastic wrap
so steam can escape.
Not all plastic wrap is suitable for use in
microwme oxens. Check the package
for proper use.
"Boilable" cooking pouches and
tightly closed plastic bag:s should be
slit, pierced or venmd as directed by
package. If they are not, plastic could
burst during or immediamly after
cooking, possibly resuhing in inju U.
Also, plastic storage containers should
be at least partially uncovered because
they form a fight seal. When cooking
with containers tightly covered with
plastic wrap, remove covering careflflly
and direct steam away flom hands
and face.
• Plastic cookware--Plastic cookware
designed for microwave cooking is very
usefifl, but should be used carefiflly.
Even microwave-safe plastic may not be
as tolerant of overcooking conditions
as are glass or ceramic materials and
may soften or char if subjected to short
periods of overcooking. In longer
exposures to overcooking, the food
and cookware could ignite.
Follow th_<seg,'uidelin _<s':
1. Use microwaxe-safe plastics only
and use them in strict compliance
with the cookware mannfactnler s
recommendations.
2. Do not microwme empty containers.
3. Do not permit children to use plastic
cookware without complete superxision.
• Some surofoam trays (like those that
meat is packaged on) have a thin strip of
metal embedded in the bottom. When
microwaved, the metal can burn the
floor of the oven or ignite a paper towel.

IMPORTANT SAFETY INSTRUCTIONS
Advat_tium Ovet_
WARNING.t
SAb 2TY PRECA U7 70NS
• Don't deflost Dozen beverages in
narrow-necked bottles (especially
carbonamd beverages). Even if the
container is open, pressure can build
up. This call cause tile container to
burst, possibly resulting ill injm_i.
• Foods cooked ill liquids (such as pasta)
may tend to boil more rapidly than
foods containing less moisture.
Should this occur, refer to the Ca'r(.
and Cl_.a,,i_,g o/the ove_l section for
instructions on how to clean the
inside of tile oxen.
• Hot foods and smam call cause
burns. Be careflfl when opening ally
containers of hot food, including
popcorn bags, cooking pouches and
boxes. To prevent possible ii_jm T,
direct smam away flom hands and face.
• Do not oxercook potatoes. They could
dehydrate and catch fire, causing
dam age to your oxen.
• Avoid heaung baby %od in glass jars,
even with the lid off. Make sure all
infant food is thoroughly cooked.
Stir food to distribute the heat evenly.
Be careflfl to prevent scalding when
warming fornmla. The container may
feel cooler than the formula really is.
Always rest the formula before feeding
the babv.
• Do not attempt to deep fry in the oxen.
SAVE THESE INSTRUCTIONS
Customer Information
Adva/_lium Ov¢_
Introduction Congratulations! You are now part of the cooking revolution!
As part of the vision to help consumers live better, easier lives, GE Appliances introduces
the revolutionary GE Advanfium oven with Speedcook technology. This new oven roasts,
grills, bakes, browns and broils, just like your conventional oven--only faster--and with
delicious results. You also save time because Advantium requires no preheating.
The information on the following pages will hel I) you operate and maintain your new
Adxantium oxen. _'e appreciate your purchase, and hope you will continue to rely on us
whenexer you need quality appliances for votli home. We thank you for buying GE.
Prvduct
registration
Fill out tile Consumer Product Registration Card.
Two Easy Ways _b Register Your Appliance!
• Through the internet at _vw.geappliances.com.
•Complete and mail the enclosed Product Registration Card.
Write
down the
model &
s#ial
7t _ _7_lDers
You can find them on a label, behind tile
open oven door, on tile fiont face.
These numbers are also on the Consumer
Product Ownership Registration Card
packed separately with your oven.
Proof of tile original purchase date is
needed to obtain service under tile
warranp<
For future reference, please write these
numbers here:
Model Number
Serial Nmnber
Inside you will find many hell)rid hints on your part can saxe you a great deal of time
how to use and maintain your oxen and money oxer tile life of your oxen.
properly. Just a little prexentixe care on
If you
need service
You'll find many answers to common
problems in the Bqfim_ You Call For &n'vi(e
section. If you rmiew our chart of
T_rmbl_<dwoti_g Tip._first, you may not
need to call for set\ice at all.
If you do need serxice, you can relax
knowing hel I) is only a phone call away.
A list of toll-fiee customer serxice numbers
is included in tile back section.
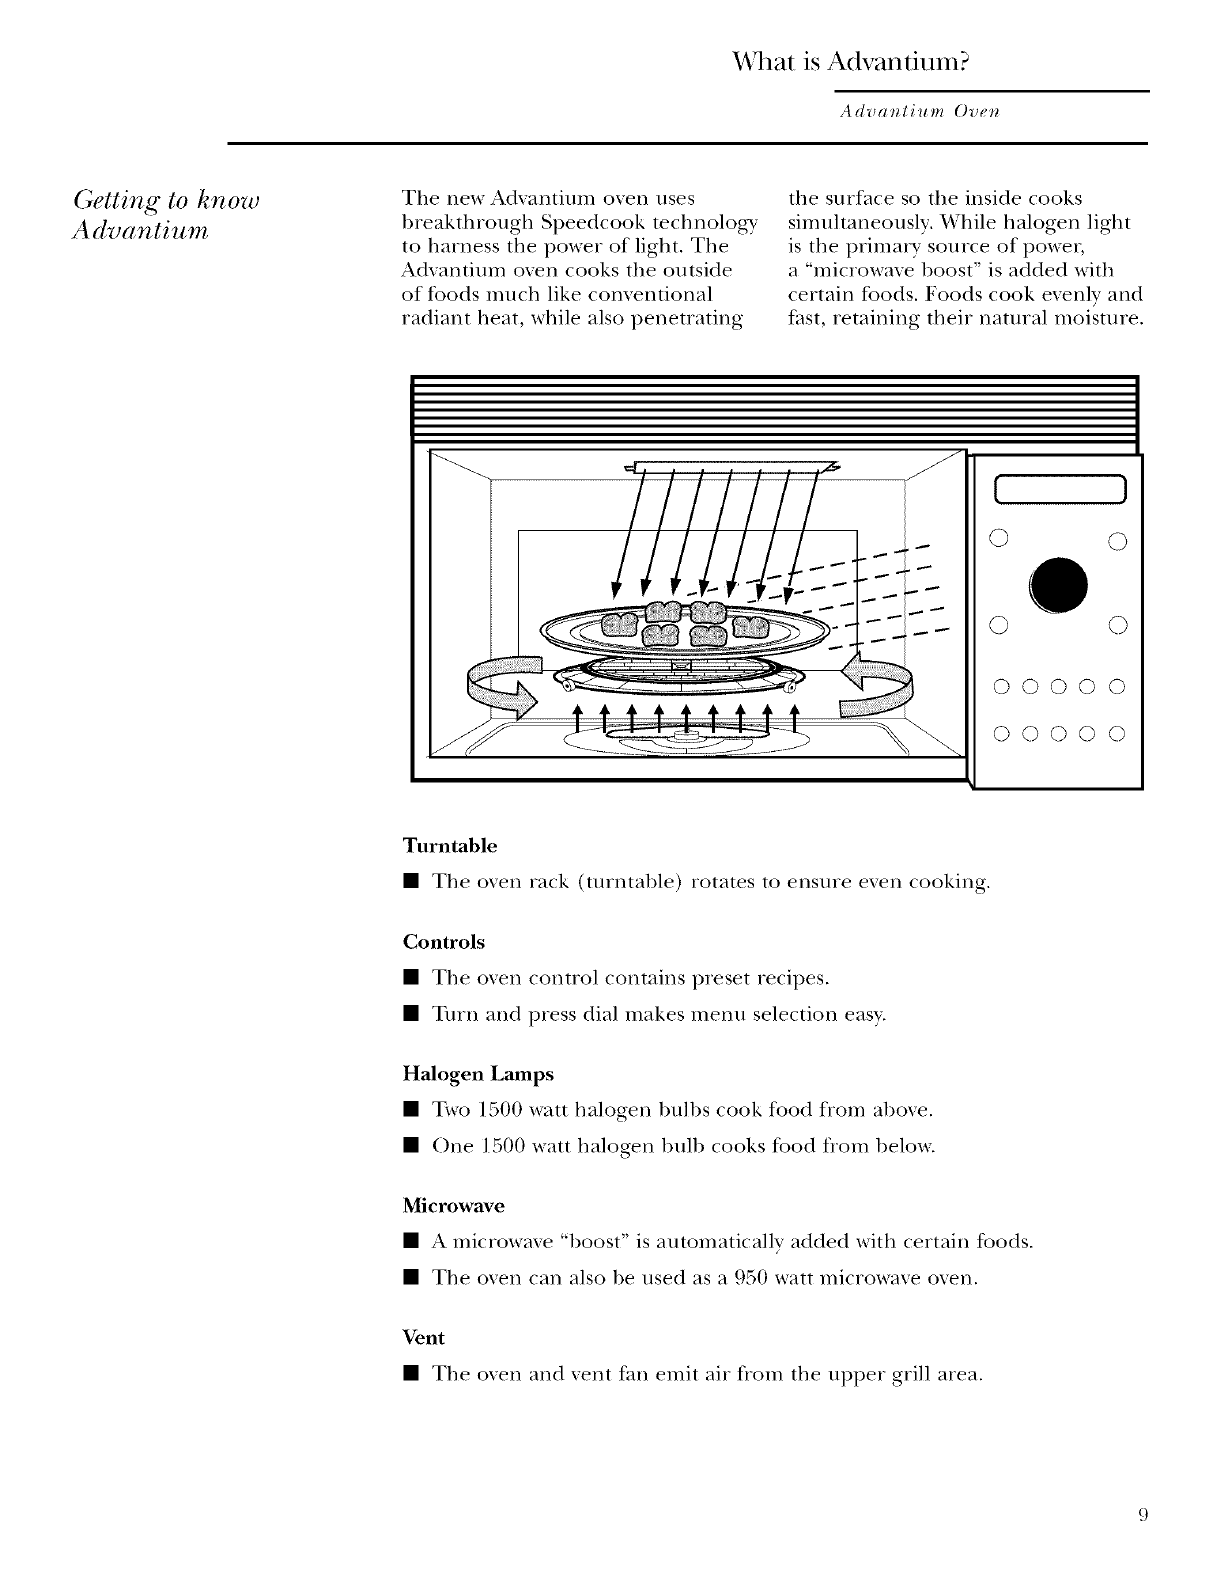
¼]lat is Advantium?
k dva _li u m Ove_
Getting to know
Advantium
Tile new Adxantium oxen uses
breakthrough Speedcook technology'
to harness tile power of light. Tile
Adxantium oxen cooks the outside
of tbods much like comentional
radiant heat, while also penetrating
tile surface so the inside cooks
simuhaneously. While halogen light
is the prima_ y source of power,
a "microwave boost" is added with
certain foods. Foods cook evenly and
fast, retaining their natural moisture.
{
\
( )
O
O
OOOOO
00000
Turntable
•The oxen rack (turntable) rotates to ensure exen cooking.
Controls
• The oxen control contains preset recipes.
• Turn and press dial makes menu selection easy.
Halogen Lamps
• Two ] 500 watt halogen bulbs cook food from aboxe.
• One ] 500 watt halogen bulb cooks fbod flom below.
Microwave
• A microwme "l)oost" is automatically added with certain f_ods.
• The oxen can also be used as a 950 watt microwaxe oxen.
Vent
• The oxen and xent fan emit air flom the upper grill area.
Advantium Quick Start
Speedcook Oven
Set the
clock
°i" _" 6
When you first plug in the oven or after
a power o/Itage:
1. Turn the selector dial to set
the hour. Press the dial to enter.
2. Turn the dial to set the minute.
Press the dial to enter.
3. Turn the dial to select AM or PM.
Press the dial to enter.
To change the time:
1. Press the OPTIONS button.
2. Turn the dial to CI,OCK.
Press the dial to enter and fi)llow the
display directions to set.
@eedcoohing
00000
°iii' i i i€
'_ " 6
00000
00000
• ooooo
OOOO0
Step 1:
Press the SPEEDCOOK button.
Step 2:
Turn the dial to select the t)])e of food
category }ou want. Press the dial to
enter it.
Step 3:
Turn the dial to select the specific food.
Press the dial to enter it.
Step 4:
Turn the dial to select the amount, size,
and/or doneness (if required, the oven
will prompt you). Press the dial atter
each selection.
Step 5:
Once the displa) shows AD/UST TL'vlE
011 $7k1_7; either press the dial or start
button to start cooking.
• Press CLEAR/OFF at any time to
stop cooking.
T/u oven rack (turntable)
musl always be in ]dace
u,ken using tlle ov(n.
Put ibod di_czl3 on the black
metal trt9, to speedcook.
As a g'_,a¢option, pu¢ fi)od
di_*,ctlyo_*the bla& metal grill
tray to speedcook /ood_ _'ou
wouht normall3 cook on the grill.
Microwaving
with Micro
Express
10
Press MICRO EXPRESS repeatedly
fi)r 30 second increments of microwave
cooking time.
The oven starts immediately. 77woven rack (turntable)
must alwm s.be in place,
77ze white ceramic tra_,
skouht alu,a3 sb_ in Ida.
ll_]t( ll mit_owaztillg.
k _ "
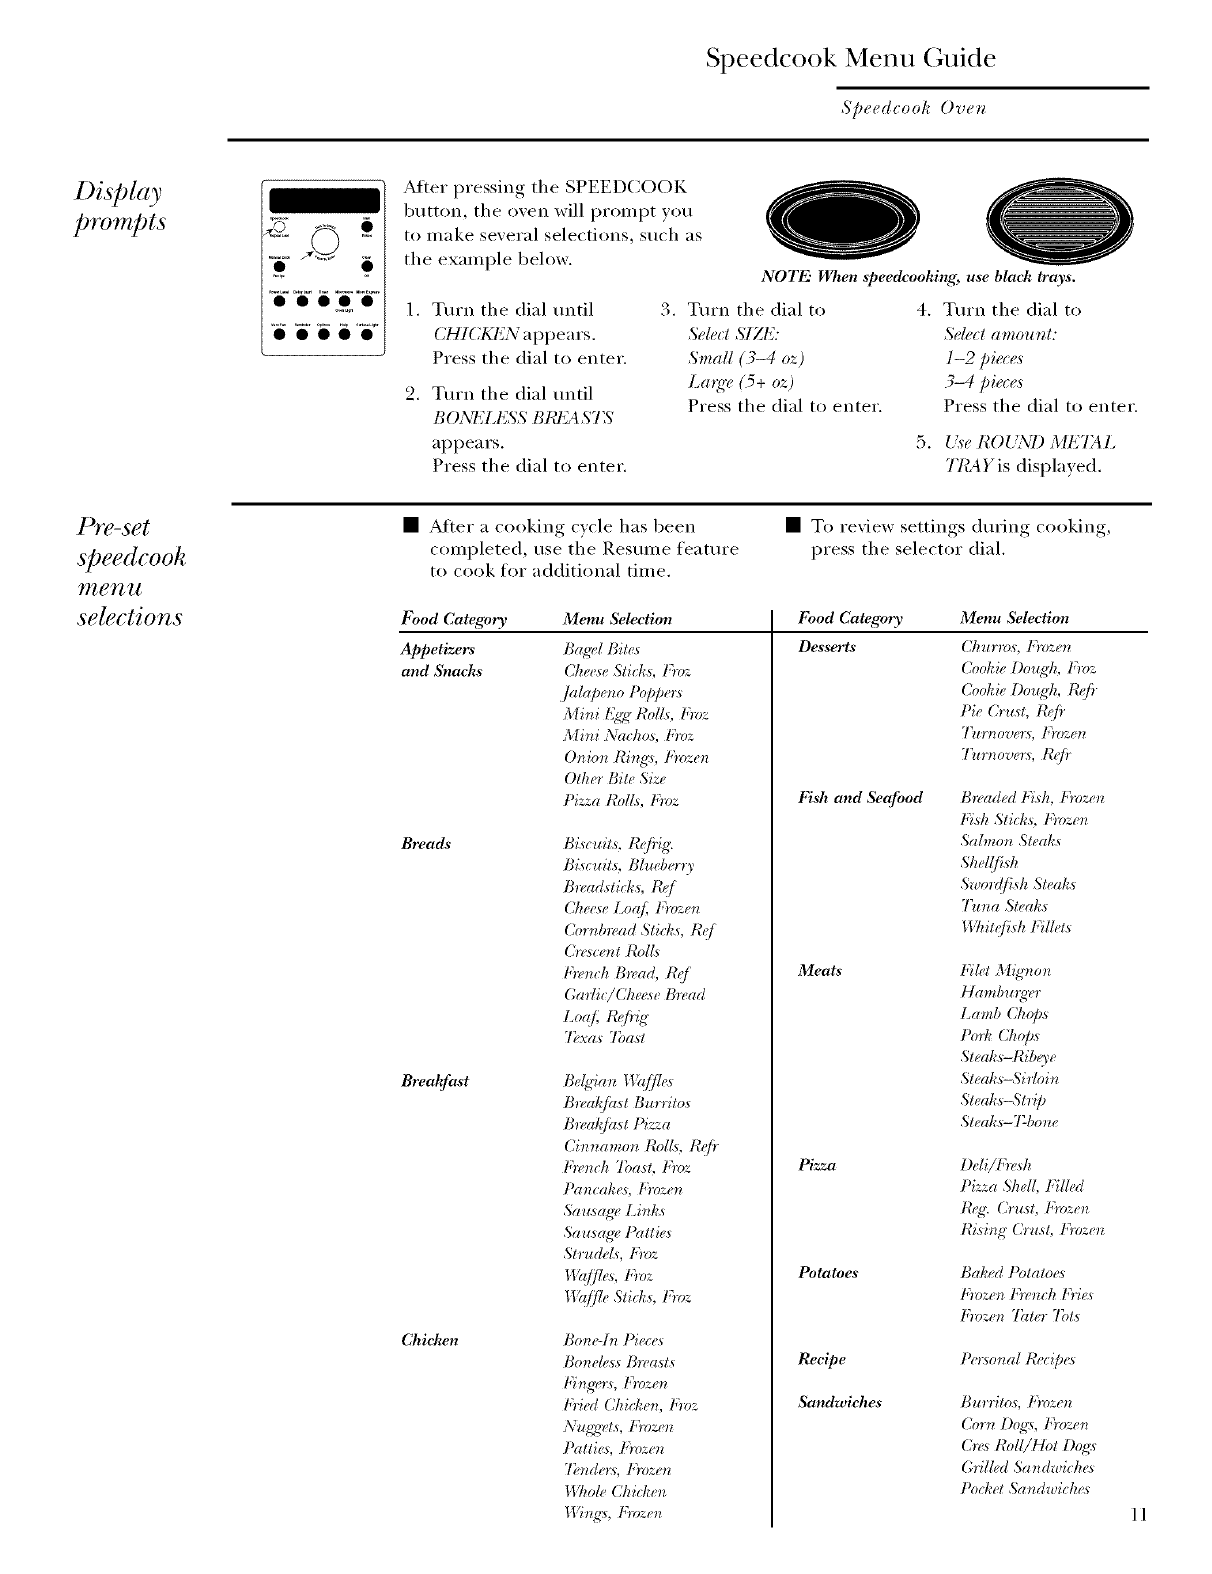
Speedcoo Menu Gmde
S/.,e& ooh Oven
Di@lay
prompts
00000
00000
After )ressin,* the SPEEDCOOK
button, the oxen will wompt )ou
to make sexeral selections, such as
the example below.
1. Turn the dial tmtil
CH1CKI_N a ppea rs.
Press the dial to enter.
2. Turn the dial tmtil
BO_\7_LESS BllI_2ASTS
appears.
Press the dial to enter.
NOTE" When speedeoohing, use blach trays.
3. Turn the dial to 4. Turn the dial to
Sdat SIZE: Select amount:
Small (3-4 oz) 1-2 pie(e,_
La*g'¢ (5+ oz) 3-4 pie( e,_
Press the dial to enter. Press the dial to enter.
5. U,se ROL%7) ME774L
THA Yis displayed.
PYs-set
@eedcooh
17Zg_12l
seh?ctions
After a cooking c)cle has been
completed, use the Resmne featm'e
to cook for additional time.
Food Category Menu Selection
Appetizers Bag_d Bit( _
and Snacks Cheese Stiek._, Fmz
.]ab@e_to I'opper_
Mi_ti t_t_" Rol£, tcn_z
Mi_ti Nacho._, Fmz
Onio)t Ring:_, IVmzen
Other Bite Size
Pizza Rol£, IVmz
Breads
Breakfast
Chicken
• To review settim*s during cooking,
press the selector dial.
Food Category Menu Selection
Desserts ChurTos, I;)vzen
Fish and Seafood
Cookie Dough, thoz
Cookie Dough, tff,fi
Pie Cra,_t, t_J}
"l_trnovers, I:roze)t
7?owovers, R@
B_z.aded f_l_, Frozen
P_sh Stiek_, P)ozen
Biscait_, R@'ig:
Biscuits, Bhzeber U
Bn, adstiek,_, t'(,J
Cheese Loq/_ I)oze)t
Cornb_,ad Slicks, R_J
Cn'sce)tt tbdl._
Fn.).:h Bn, ad, Rq
Garlie/Che<._e Bn+ad
Loq/_ t'.tjHg.
7},'¢a_ 7bast
Be(,_'ia)t I1}{ffle_
Bn, alJhst Burritos
B_valJhst Pizza
Cimmmon t'ol/._, R@
Ne)_ch 7basL Noz
Pancakea, P:roz__
,5a a._ag_, Li_tks
Sausage, Pattie_
Strude£, P)r_z
ll_{ffle Stiefl_, I+)vz
Bo_le-hl Pieee_
Boneles_ Iheasts
Fingwr_, I:roze)_
Fried Chieke)t, I;_oz
Patti_:_, I:roze_
7},riders, Frozen
117to# Chicken
Wi)_g:_,Frozen
Meats
Piy,_a
Potatoes
Recipe
Sandwiches
Sahno)_ Steaks
Shel(fid_
Swor({fish Steak_
"Fn)_a Steaks
I17titqfish Fillet,_
Fik,t Migvmn
Hamba_gvr
Lamb Chop,_
P,,,-k(:l,op,_
Steak._-Ribue
Steak.s-Sirloi_
Steak.s-Strip
Steak._- Tbo_u_
Ddi/Fn._h
Pizza 5hell, Filled
tb'g: Cra._t, Ign>zen
Rising (h'ust, I:mze_
Baked Potato_<s
Fiozen I;)wu:h I;Yie_
t;ioze)t "l}lter "lbts
Ie_:wnal Reeip_<s
Burrito._, I:roze_
Crow Dog:_, Frozen
Cn'a Roll/Hot Dog:s
Grilb.d Sa_tdwiHu'_
PoH_et Sa_dwiH_e_
ll
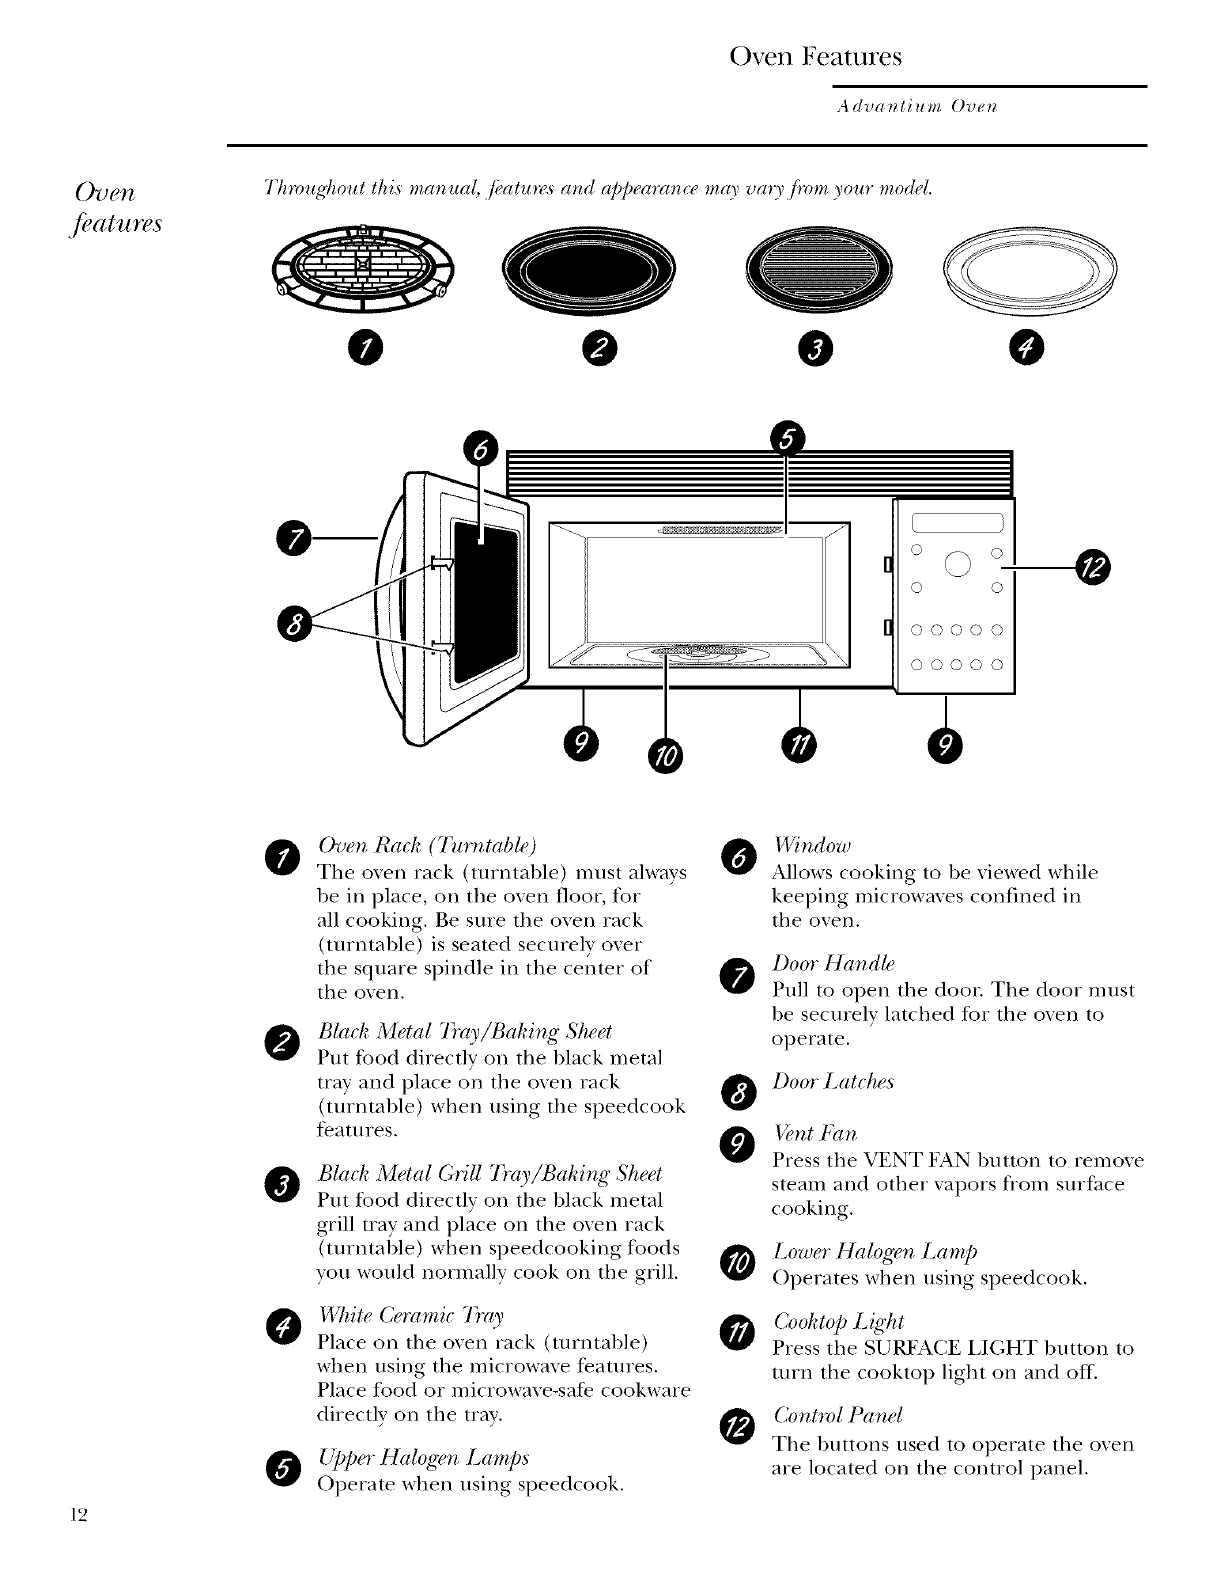
Oven Features
Advanlium Oven
Oven
./_'(itlgr(?s
00 @ 0
IP
7
0 o
o o
I] ooooo
00000
12
O
0
@
0
Oven Rack (7_o_,table) _I A
The oxen rack (turntable) must always
be in place, on the oxen floor, for
all cooking. Be sure the oxen rack
(turntable) is seated securely oxer
the square spindle in the center of
the oxen.
Black Metal 7}'ay/Bahing Sheet
Put food directly on the black metal
tray and place on the oven rack
(turntable) when using the speedcook
features.
Black Metal (;rill Tray/Baking Sheet
Put tbod directly on the black metal
grill tray and place on the oven rack
(turntable) when speedcooking foods
you would normally cook on the grill.
White Ceramic Tray
Place on the oven rack (turntable)
when using the microwave features.
Place food or microwave-safe cookware
directly on the tray.
Upper Halogen Lamps
Operate when using speedcook.
O
O
_/'ill, C[O_l}
Allows cooking to be xiewed while
keeping microwmes confined in
the oxen.
Door Hand#
Pull to open the door. The door must
be securely latched for the oven to
operate.
Door Latches
l+nt b)tn
Press the VENT FAN button to remove
steam and other vapors flom surface
cooking.
Lower Halogen Lamp
Operates when using speedcook.
Co&top Light
Press the SURFACE LIGHT button to
turn the cooktop light on and off.
Co nt)v I Pa nel
The buttons used to operate the oxen
are located on the control panel.
Overl Features
Advanliuln Oven
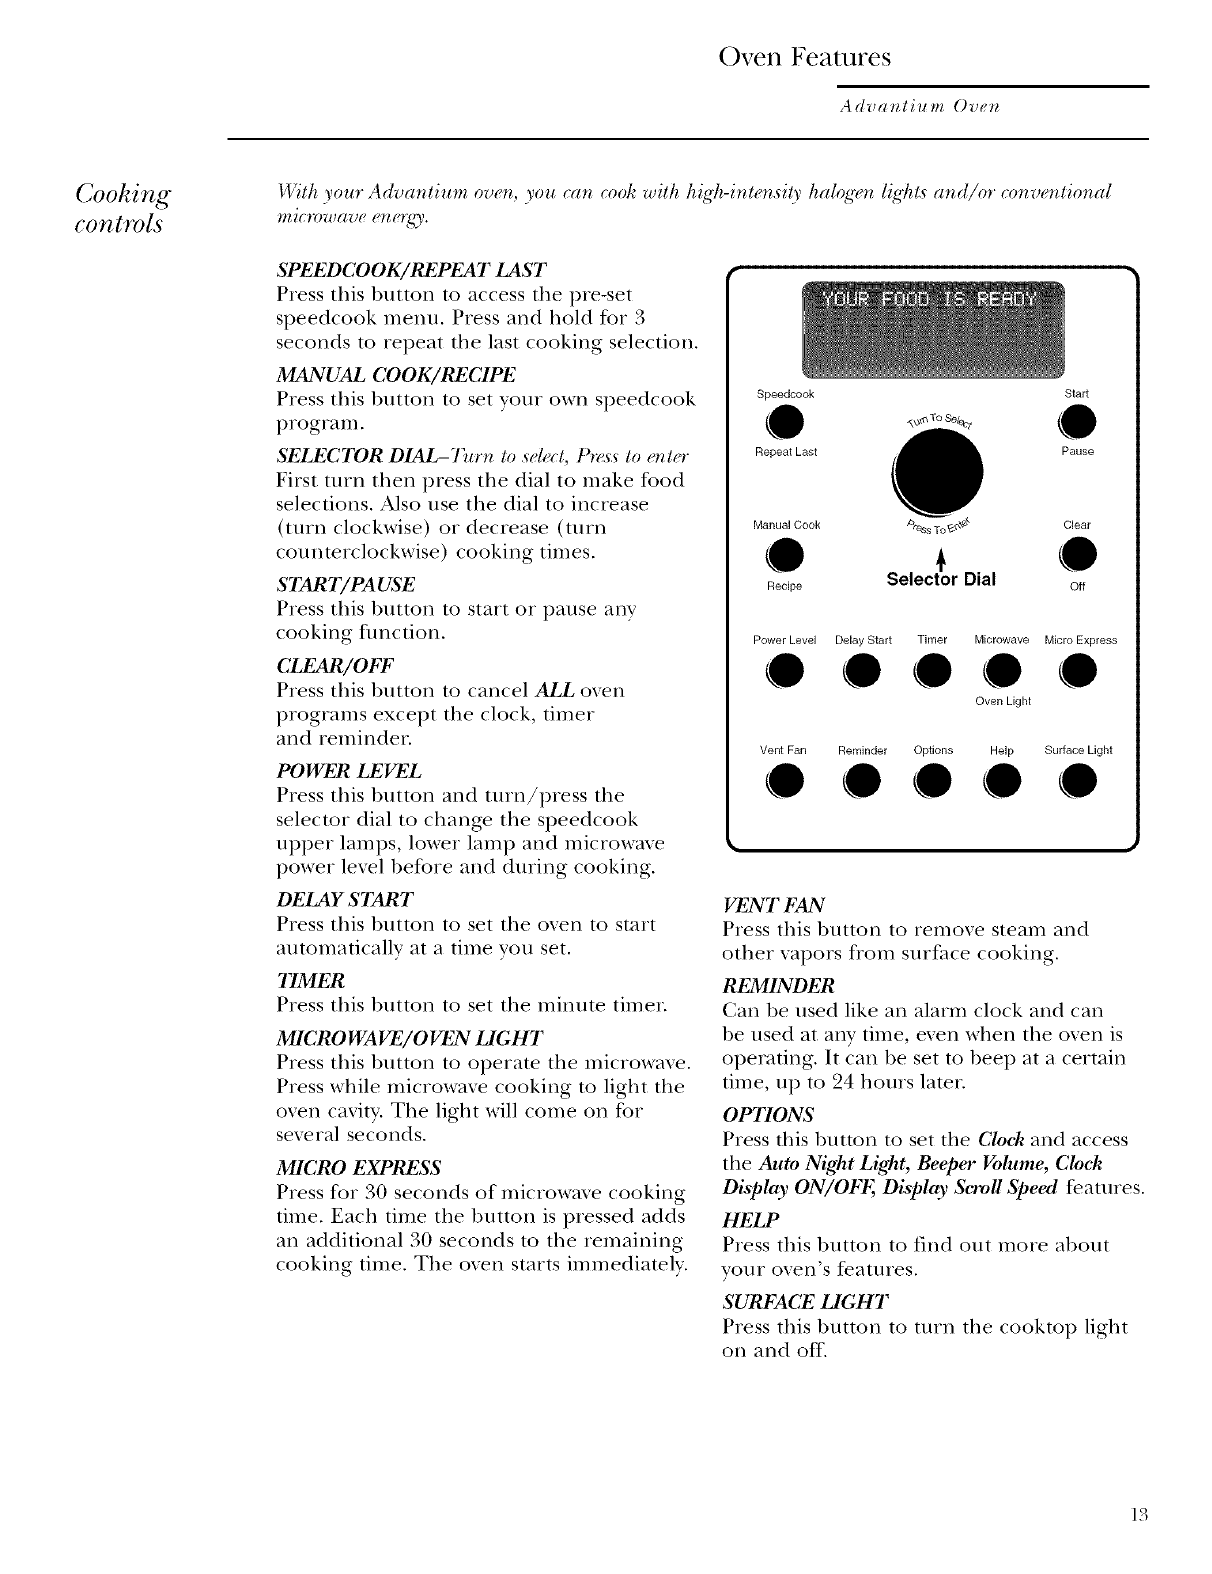
Cooking
controls
With your Advar_tium overl, you ca*_ cook with high-ir_ten,dty hal%_er_ligTlts and/or converl,tional
SPEEDCOOK/REPEAT LAST
Press this button to access the pre-set
speedcook menu. Press and hold for 3
seconds to repeat the last cooking selection.
MANUAL COOK/RECIPE
Press this button to set your own speedcook
program.
SELECTOR DIAL-7)_rn lo sd_'ct, tS_s:s to ento"
First turn then press the dial to make food
selections. Also use the dial to increase
(turn clockwise) or decrease (turn
counterclockwise) cooking times.
START/PA USE
Press this button to start or pause anv
cooking funcnon.
CLEAR/OFF
Press this button to cancel ALL oven
programs except the clock, timer
and reminder.
POWER LEVEL
Press this button and turn/press the
selector dial to change the speedcook
upper lamps, lower lamp and microwme
power lexel before and during cooking.
DELAY START
Press this button to set the oxen to start
automatically at a time you set.
11MER
Press this button to set the minute timer.
MICROWAVE/OVEN LIGHT
Press this button to operate the microwave.
Press while microwave cooking to light the
oven cavity'. The light will come on for
several seconds.
MICRO EXPRESS
Press for 30 seconds of microwave cooking
time. Each time the button is pressed adds
an additional 30 seconds to the remaining
cooking time. The oven starts immediately.
Speedcook Start
0_° T° Se/e°_ 0
Repeat Last Pause
Manual Cook Clear
00,o, 0
Recipe Off
Power Level Delay Start Timer Microwave Micro Express
• 0000 Oven Light
Vent Fan Reminder Options Help Surface Light
• 0000
VENI/"/_N
Press this button to remoxe steam and
other xapors from surface cooking.
RFJVIINDER
Can be used like an alarm clock and can
be used at any time, exen when the oxen is
operating. It can be set to beep at a certain
time, ul) to 94 hours later.
OPTIONS
Press this button to set the CIoeh and access
the Auto Night Light, Beeper Volume, CIoeh
Display ON/OI@; Display Scroll Speed t)atures.
HELP
Press this 1)utton to find out more al)out
vonr oxen's features.
SURFACE LIGHT
Press this button to turn the cooktop light
on and off.
13

Speedcooking
Advanlium Oven
Using
speedcooh
features
CAUTION: When using speedcook proqrams, remember that the oven, door and
dishes will be veo_ hot!
[¥ior to the first use of your oven ttu clock must be set. Se_ ttu Advamium Quick
Stmt .s_ction.
B@m_ yon begdm make sn'_ tke oven rack (turn table) is in place. (Ae tke black metal
tray (baking ._tuet), tke black g_rill tray (baking ._tuet) or your owr_ gla.ss or ceramic
cookwm_.
77w oven rack (turntable) must alw(9 slhtt lood din(¢l) otz ¢1. blad¢ me4al flat 15tt fi)od di_(¢ly o_z ¢1. blad_ metal
b_ ill ]dace wlu,_z u_illg llu ov_'m tr_ty to speedcook, grill tray tospeedcook /bods )ou
would twlmalI) cool; oil lke grill.
SPEEDCOOK PRE-SET FOOD SELECTIONS:
•Appetizers &Snaeks • Chieken
• Breads • Desserts
• Meats
• Pizza
• Recipe
• Sandwiches
•Breakfast • lbTsh & Seafimd •Potatoes
7b use a
pre-set
speedcooh
lTl_eTt ll
14
Advantium is ahea@ p_,-set to cook over
100 p@ular di.d,<s.
1. Press the speedcook button.
[/ no .selection is made within
l5 .se(onds_, the display will "l_q_o't
back to tke time of day.
2. Turn the selector dial to select the
type of food categ_t yyou want.
Press the dial to enter.
3. Turn the selector dial to select the
specific food (menu selection).
Press the dial to enter.
.Turn the selector dial to select
amount, size, and/or doneness
(if required, the oxen will prompt
yon.) Press the dial after each
selection.
.Once the display shows:
AI{flZS7 _TIAIE OR START
either press start or the selector
dial to start cooking.
7)or_ tlu ji)od over wk_ n tke oven ._igmaA
7"U1¢\: FOOD O'vT?l?(/br ,,train jbodO.
l:I/7,m tlu oven sigmaA CHI_CK Jbr
)( ':':"see i/yonrji,od is_
[ )A'LA'7£S, check to
done to your liking ffbr certain jbod.O.
7b r(_&'w settir_s' durir_g cooki,g [)'_._
tke .selector dial.
If yon enter arz nr_d_sh_U selectio_z at any
time .simply [)rr_sstke CLL'ALi )kt _
button and re-enter tke d_si'_d ._elections.
• Early in a .speedcook fl_)ffram, you will
.seeOtqTMIZ1N(; COOK TIME i_ the
di._'pho'. 77_eove_ automatically .sensr_s
tke electrical voltagz, hq_el in your home
and adju.st.s the cooking time up or
down jot proper cooking<
• [/the door is o/)er_ du'_Jng cooki,ff,
tke ore, will stop and t)A L<S'P2will
appear in the di._plro,. Close the door
mzd prr_s:sthe START/PAUSE buttmz
W_z_'ume cooking'.
• At too, time duri_g (ooki,g you cm_
tur_ the selector dial to change the
co&ing time. You can cka*,ge powo"
hq_eA by p'_za_:si_gPOVVER I,EVEI,.
•7})as.smz' consistent (ooki_g _z<sulls,
the oven mr9, adjust powr'r hq_eA
downward if the ore, i.s hot at the
begdnni_g of a ping'ram.
• At the end q/cooking, tke automatic
,tim will continue to run,/br a ._hort
time to cool int(,,al compom,_ts.
•7b (wok,/i)r additional time af!_,r a
cooking (Tale has bee. oomph'ted,
use the m_ume fl,atu'_z,.
Speedcooking
Advat_tium Ove*_
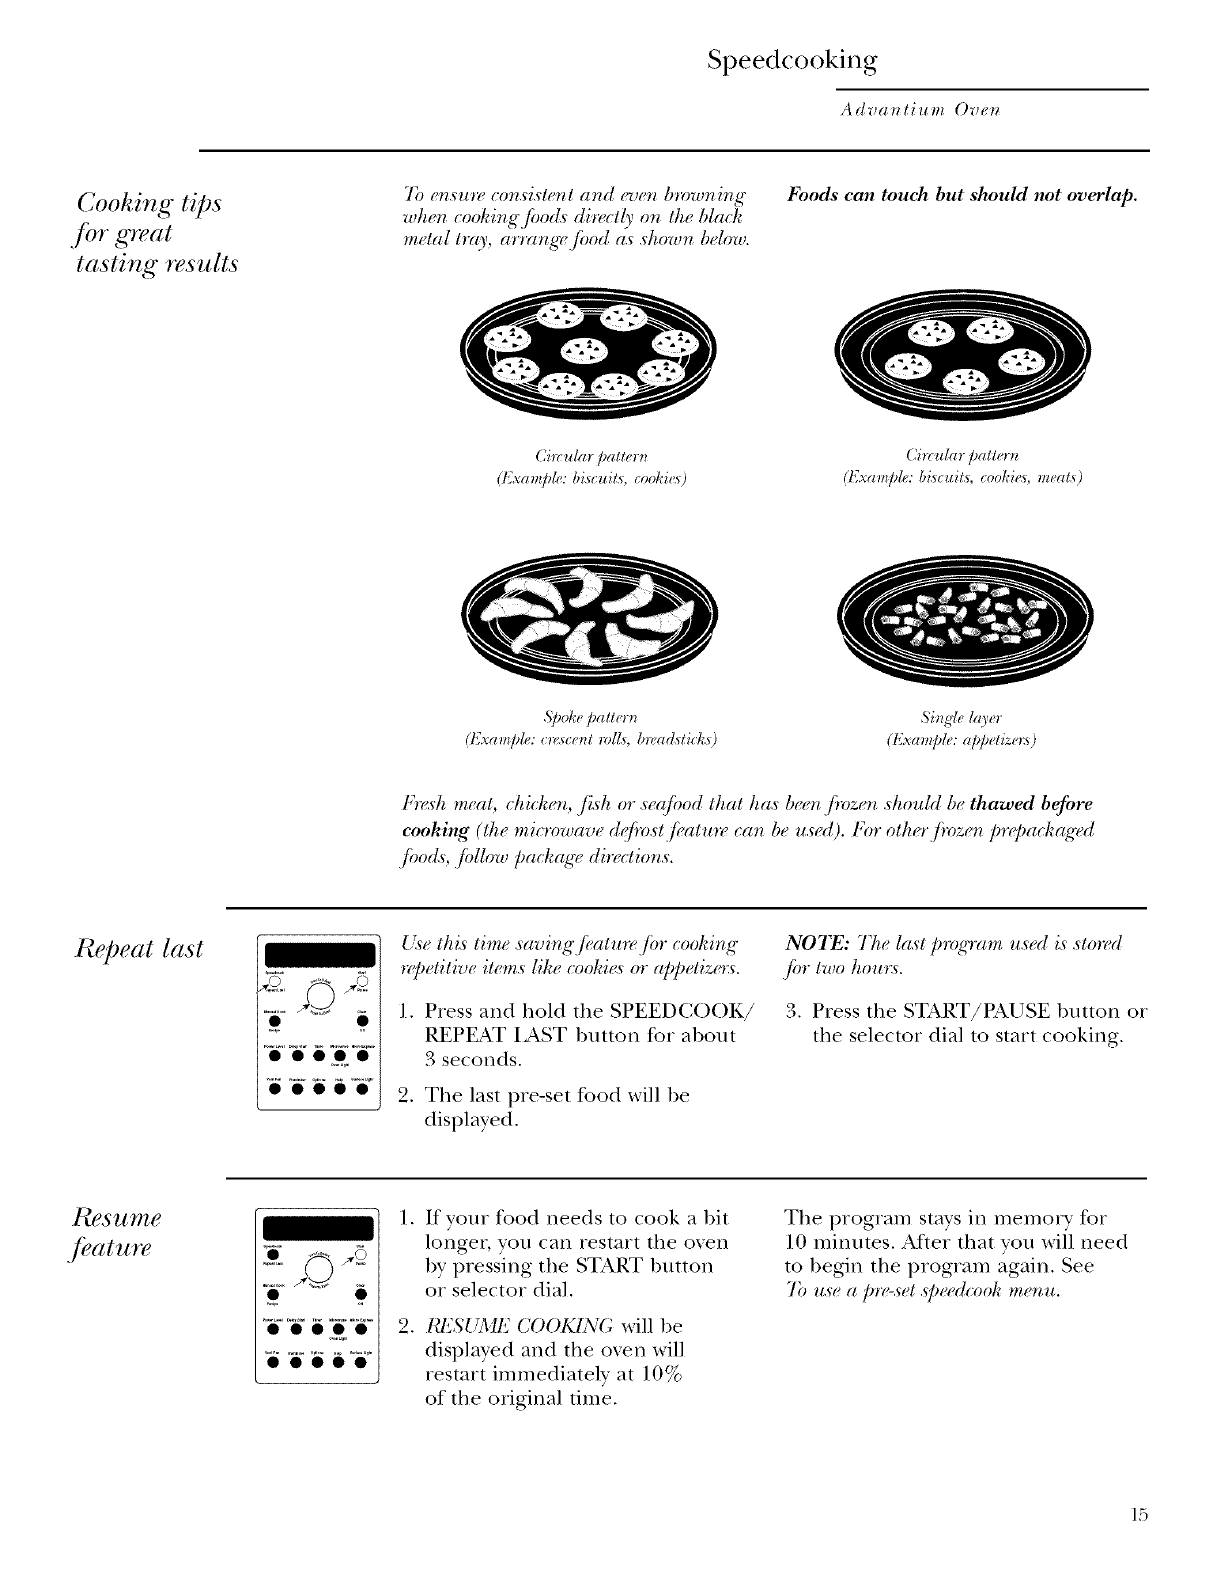
Cooking tips
jbr ,great
tasting results
7b (n.su*z_consi.sterzt and even browning
wtun (ooki,_gjbo& din_(tly on th_ bla(l_
m_tal tray a,rra,_ggjbod as shown below.
Foods can toueh but shouM not overlap.
Cimular paller_l
(Example: bi_cuils, cooki_5)
Circular pa1te_n
(t{xample." biscuils, cookie<5,meat_)
Spokepall_r_
(Example:c_,_ce_l_ol{_,b_,adslicks) Si_g'le layer
(Example: appetizer: 0
F_z<shm_at chicher_ ,fist_ or .wqf!_od that ha.s beer_,fivzer_ .should be thawed befin'e
cooking (tt. mi<,owav_ dqf!o.stjiatu,_ ca_ lw us.l). For ottu.r.f!oz_n /m.padmged
,/hods ,fidlow packag_ dir_ctior_s.
Repeat last
ooo.o
OOOOO
Use this time .saving,f!_atm_@w cooking
_,/)etitive items like cookie,sor appetize_:s.
I. Press and hold the SPEEDCOOK/
REPEAT IAST button for ahout
3 seconds.
2. The last pre-set %od will be
displayed.
NOTE: 72,_last ping'ram used is .s'to*_d
,/i,r two hou_:s'.
3. Press the START/PAUSE button or
the selector dial to start cooking.
.fi?ature
• oooeo
I.
.
If your food needs to cook a bit
longer, you can restart the oxen
by pressing the START button
or selector dial.
RESUME COOKING will be
displayed and the oxen will
restart immediately at 10%
of the original time.
The program stays in memory for
l 0 minums. After that you will need
to begin the program again. See
7b use apre-set .s]wedcook menu.
15
Speedcooking
Advanlium Oven
Speedcooh
power level
_ • OoO, •
OOOO0
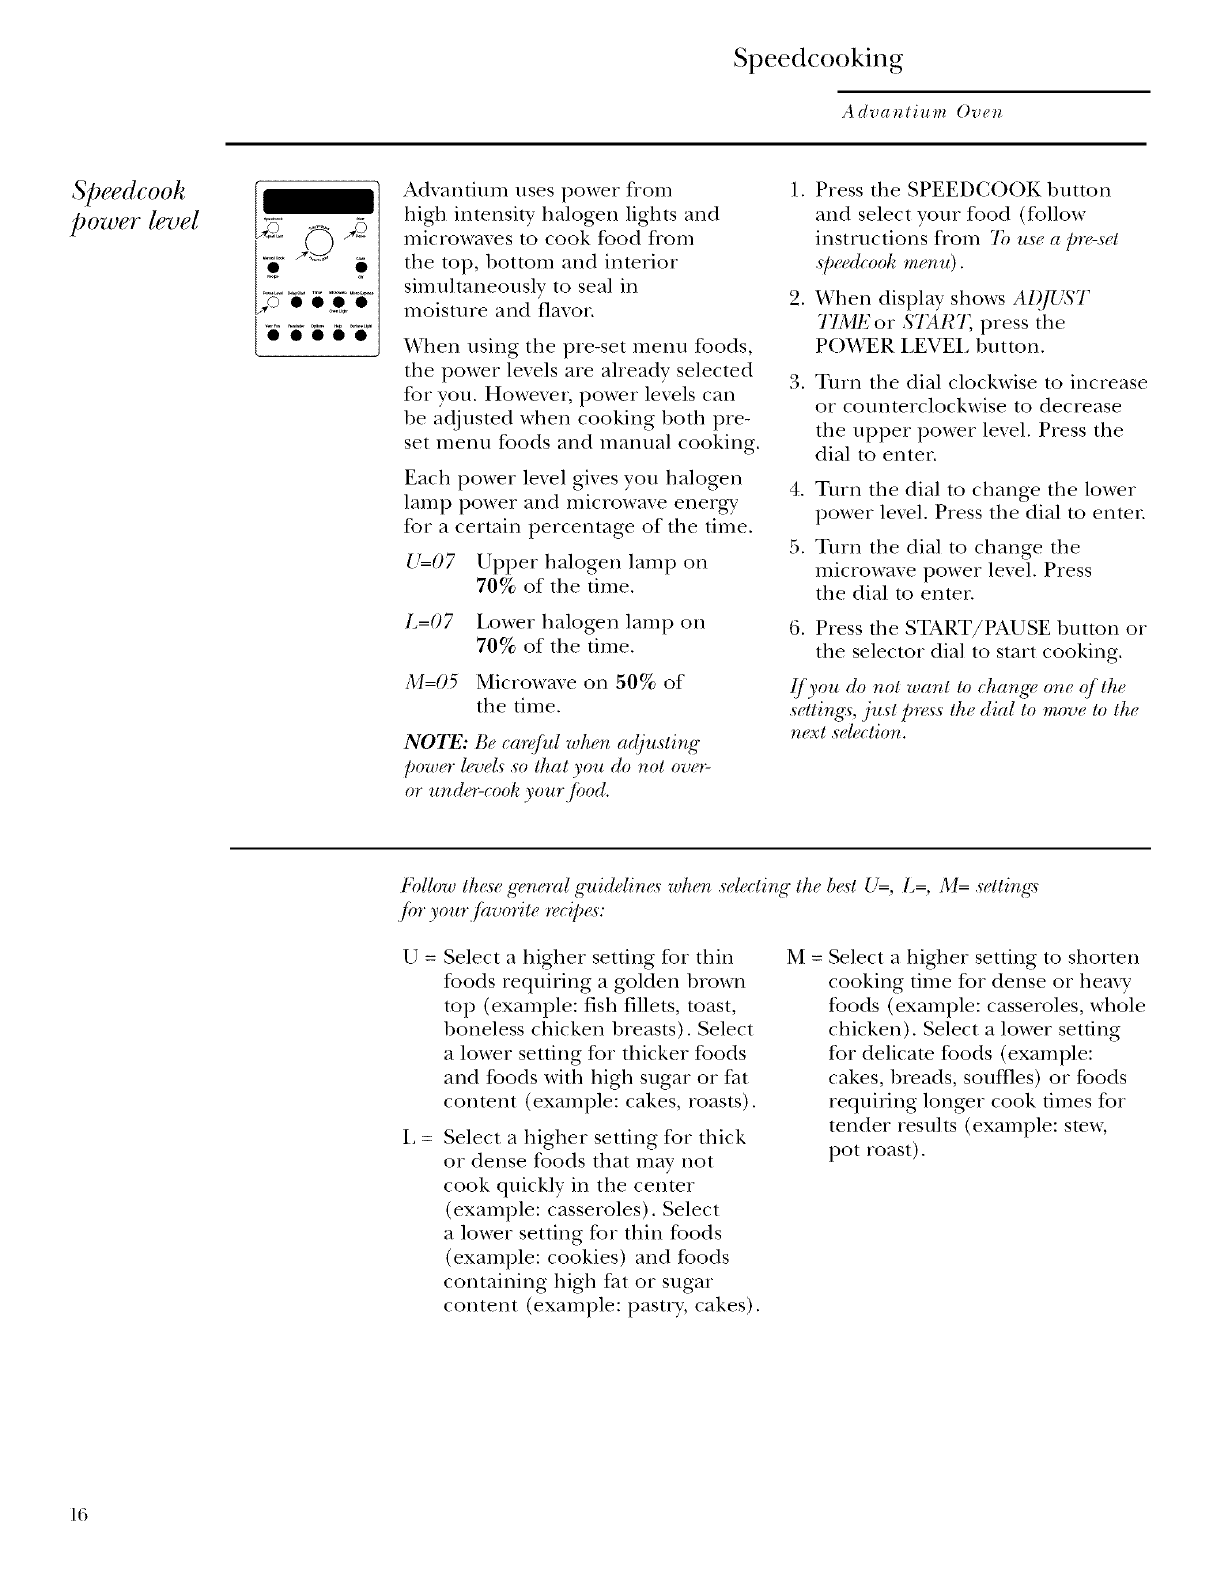
Advanfium uses power from
higix intensity halogen lights and
microwaves to cook food Dora
tile top, bottom and interior
simultaneously to seal ill
moisture and flavor.
When using the pre-set menu foods,
tile power levels are aheady selected
fox you. However, power levels can
be adjusmd when cooking both pre-
set menu foods and mannal cooking.
I.
.
Press the SPEEDCOOK button
and select your food (follow
instructions from 7b u.s_a pre-s_t
s/_eed(ool_men u ) .
When display shows AI,[bS
TIME or 5'7_1¢7, press the
POFVER LEVEL button.
3. Turn tile dial clockwise to increase
or counterclockwise to decrease
tile upper power lexel. Press the
dial to enter.
Each power lexel gixes you halogen 4.
lamp power and microwaxe enero_v._
fox a certain percentage of the time. 5.
U=07 Upper halogen lamp on
70% of tile time.
L=07 Lower halogen lamp on
70% of the time.
M=05 Microwme on 50% of
the time.
NOTE: Be ca'_)Culwhen adfl, sting
power levds' so that you do not ore*=
or unde_=cool_your ji_od.
Turn the dial to change tile lower
power lmel. Press tile dial to enter.
Turn the dial to change tile
microwaxe power lmel. Press
the dial to enter.
6. Press the START/PAUSE button or
the selector dial to start cooking.
,¢fyou do not want to changt or_t q/the
s_tling_, just p_.s th_ dial to move to ttu
next sele(tion.
Follow ltu<_eg,,neral guidelin_<s when selecting the b_<stU--, L= M= settings
jot your jhvorite _dp_s:
U= Select a higher setting fox thin
foods reqniring a golden brown
m I3 (example: fish fillets, toast,
boneless chicken breasts). Select
a lower setting fox thicker foods
and foods with high sugar or fat
content (example: cakes, roasts).
Select a higher setting for thick
or dense foods that may not
cook quickly ill tile center
(example: casseroles). Select
a lower setting fox thin foods
(example: cookies) and foods
containing high fat or sugar
content (example: pastry, cakes).
M = Select a higiler setting to shorten
cooking time fox dense or heaxy
tbods (example: casseroles, whole
chicken). Select a lower setting
for delicam foods (example:
cakes, breads, souffles) or foods
requiting longer cook times fox
tender results (example: stow,
pot roast).
16
Speedcooking
A dva, li u m Or{'7;
S[}eedcooh
€OOk_O(IFe
•Follow cookwa_ .sugg{<s'tior;.son the
oven dispho! or in the Cookbook or
C, ohi,g guid,
• Cookwaw will become hot becau._e of
heal lra,;.s)!brred,f!om the heated ji}od.
Ovum mitt._ will be needed to ha,_dle
tke cookwa';*).
Placeji}od dir{ctly on the black/rays
whet; (ookir;g.
Use the black metaljblt tray it; the
.same way you would u.s_ a shallow
bakir;g /)a_ or bakir;g h=y.
Us_ the black grill tray jot cooking
._hak._ ,fish a,_d poultry.
1, addition/o the cookware provided,
_0_1 ((l_? _IS( )?IOTI-I)_g)I(d ((l,g_gqD[g ?
dishes_, pie plates and other heat-.sqfl"
cookwaw. Place them diwctly on the
oven rack (turn/able).
Be ._,o_ to .sde(:t a size lkat will
rotat_ _asily.
Place the black metal tray, gla.s.s, or
(_,ami( (ookware dire(tly or_ the oven
rack (turr_table).
Do )_toI It,gg)(:O0]¢W(I'I_ 0"_" (:oT)t_l@t[_'
ma(h qf J)ape_;[da.stic, orjoil wt. n
cookir_g du'ri,g a spe,h:ool_ cych.
Manual
sJ)eedcooh
• • ooe, •
O0000
Adxantium gixes you the flexibility
to cook your faxorite dishes.
If you want to cook a food item that
is not among the pre-set selections,
use manual speedcook.
I. Press the MANUAL
COOK/RECIPE button.
[/ no (mtrie,sare made withir; 15 secon&
the disJday will _vvert back to tt, time
( day.
2. Turn the selector dial to select
the cooking time. Press the dial
to enter.
72._ display will prompt you to ,select
:_, (....7 )) 7
and _II(d< )1_5tl L l ( II!L/L
c_. T/IIII the dial clockwise to increase
or counterclockwise to decrease
the upper power lmel. Press the
dial to enter.
4. Turn the dial to change the
lower power lmel. Press the
dial to enter.
5. Turn the dial to change the
microwaxe power lmel. Press
the dial to enter.
6. Press the START/PAUSE
1)utton or press the selector
dial to start cooking.
For power level ar;d cookir_g tim(
suggrastior_s u._ your cooki,g guid_
or (ook book.
17
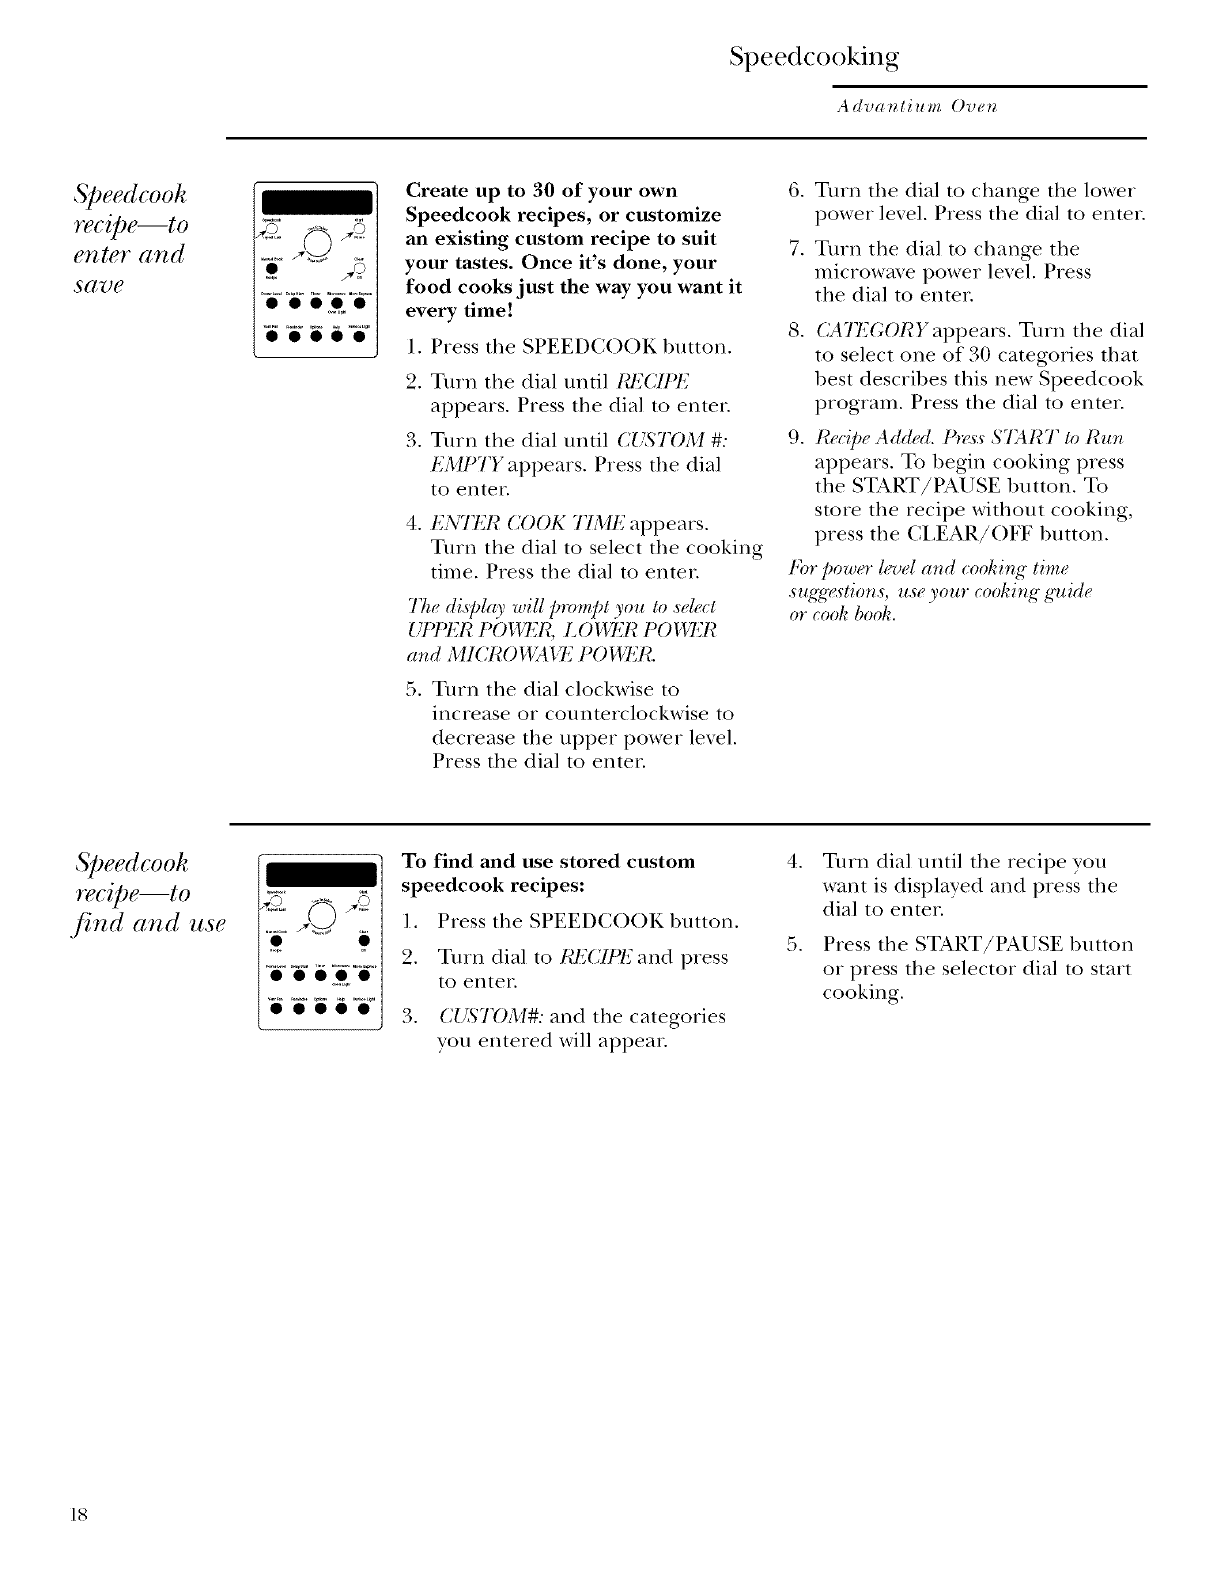
Speedcooking
Advantium Oven
Speedcooh
recipe--to
enter and
s(l_e
ii '_'_ i'ii °'
Create up to 30 of your own
Speedcook recipes, or customize
an existing custom recipe to suit
your tastes. Once it's done, your
food cooks just the way you want it
every time!
1. Press tile SPEEDCOOK button.
2. T/lin tile dial until I?ECIPF,
appears. Press the dial to enter.
3. Turn tile dial until CUSTOM #:
EMPTY appears. Press the dial
to enter.
4. F.NTI_R COOK TIME appears.
Turn tile dial to select tile cooking
time. Press the dial to enter.
77._display will prompt you to ,_dect
r))? )( ,_?
{:[ ] LR [ )DLR LOI+2_R POD]_R
and M1CROWAIq_ PODT_R.
5. Turn the dial clockwise to
increase or counterclockwise to
decrease tile upper power lmel.
Press the dial to enter.
.
7.
Turn tile dial to change the lower
power lexel. Press tile dial to enter.
Turn the dial to change tile
microwme power lexel. Press
the dial to enter.
.
.
CATF_GORY appears. Turn the dial
to select one of 30 categories that
best describes this new Speedcook
program. Press the dial to enten
Recipe Added. tSz<s.sSTART lo Run
appears. To begin cooking press
the START/PAUSE button. To
store tim recipe without cooking,
press the CLEAR/OFF button.
t:or power level and cooking lime
,suggras'lion,_ use your cookir_g g'uide
or cook book.
Speedcooh
recipe--to
.find and use
.... *r
To find and ttse stored custom
speedcook recipes:
I. Press the SPEEDCOOKbutton.
2. Turn dial to I?ECIIq;_and press
tO enter.
3. C{ZS'T()M#: and the categories
you entered will appear.
.
.
Turn dial until tim recipe you
want is displayed and press the
dial to enter.
Press the START/PAUSE button
or press the selector dial to start
cooking.
18
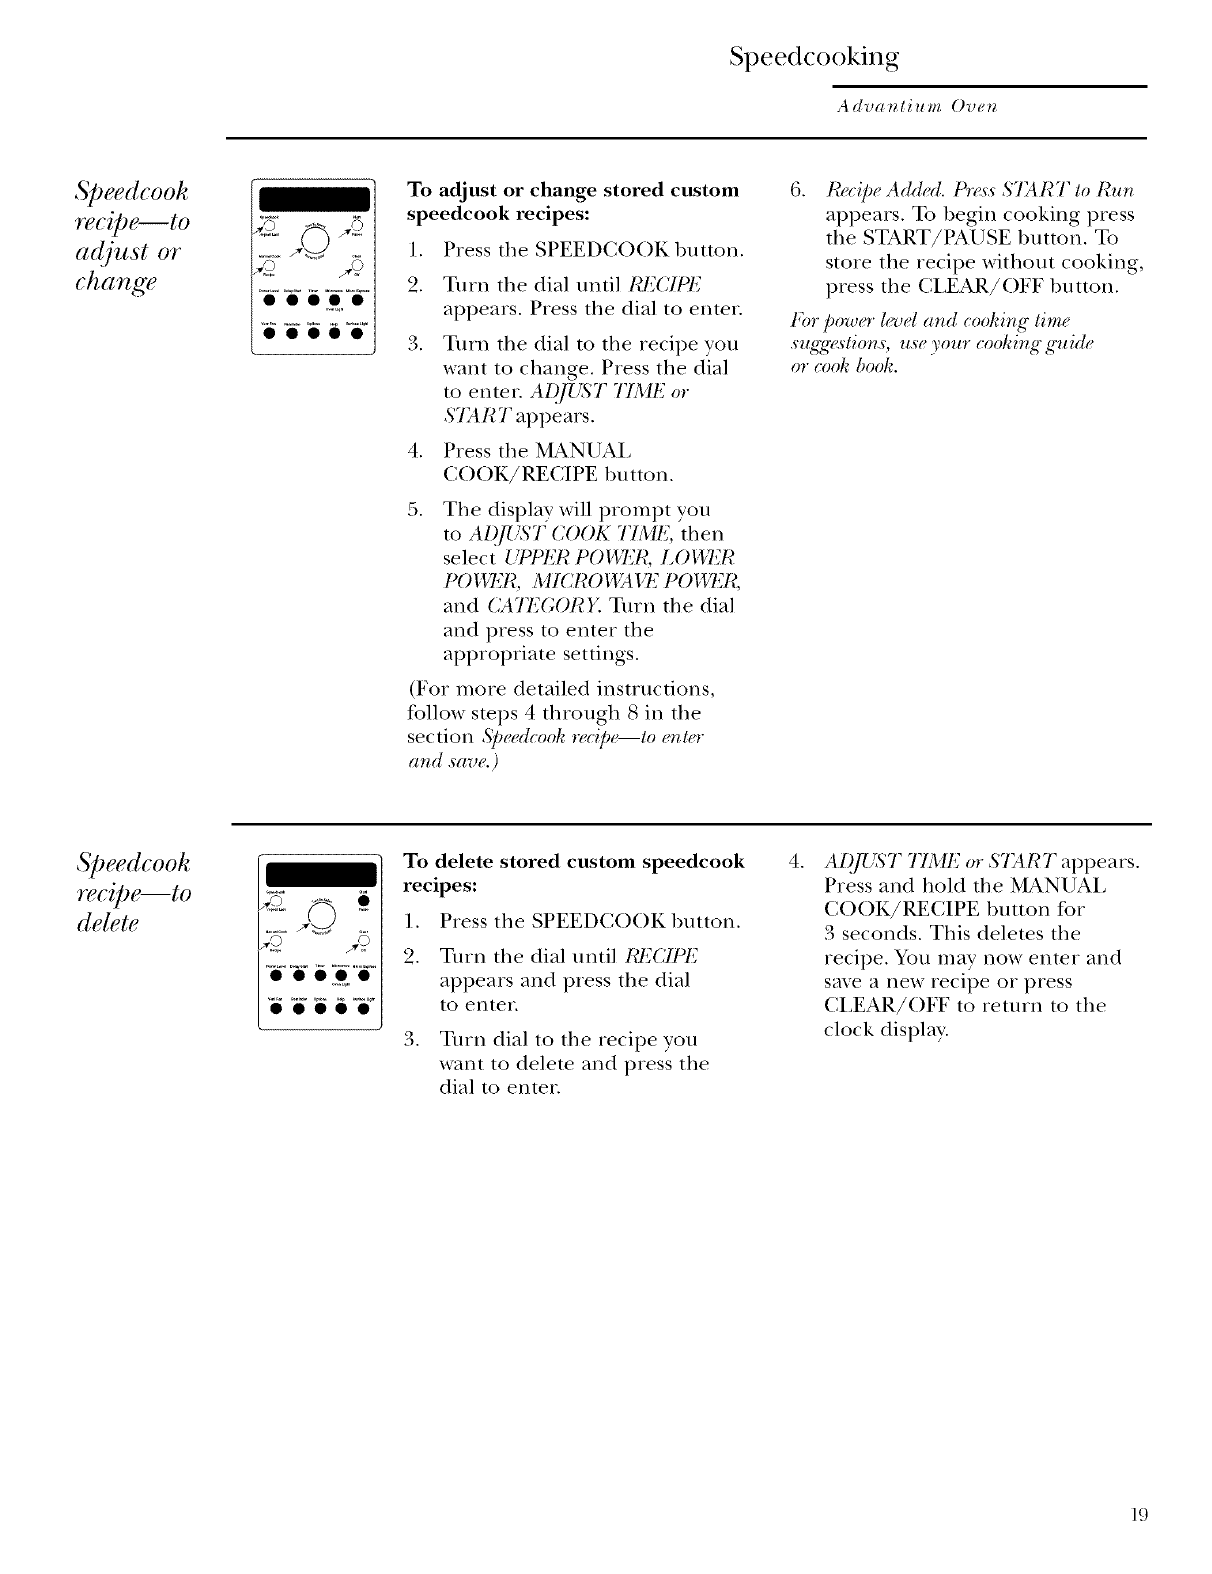
Speedcooking
Advantium Oven
Speedcooh
recipe--to
a({just or
change 00000
00000
To adjust or change stored custom
speedcook recipes:
1. Press tile SPEEDCOOK button.
.
3.
.
5.
Turn tile dial until RECIPF.
appears. Press the dial to enter.
T/lin the dial to tile recipe you
want to change. Press tile dial
m enter. AI),]LzST TIA, IF, or
START appears.
Press tile MANUAL
COOK/RECIPE button.
The display will prompt you
to AI),,fl2_S'TCOOK TIME, then
select Ut'PEI¢ PODJ'2R, LOH!7_I¢
t'0 1"_7'21¢,MICRO 1'1_51lq_ P01_7_1¢,
and CA7FGORY. Turn the dial
and press to enter tile
appropriate settings.
(For more detailed instructions,
follow stops 4 through 8 in tile
section Sper,d(ool_ recipe--to en to
and save.)
.I¢f'cipe Add_'d. tS"_<s:s'START to Run
appears. To begin cooking press
the START/PAUSE button. To
store the recipe without cooking,
press the CLEAR/OFF button.
For power l(._el arid cooking tim(
sugw_stio_s, useyour cookirlg guide
or cook book.
Speedcooh
re(iDe--to
delete
To delete stored cttstom speedcook
recipes:
I. Press tile SPEEDCOOKbutton.
2. Turn the dial until ICE(JPE
appears and press the dial
to enter.
3. Turn dial to the recipe you
want to delete and press the
dial to enter.
.AI).flJ(S'T 7YME or START appears.
Press and hold the MANUAL
COOK/RECIPE button for
3 seconds. This deletes tile
recipe. You may now enter and
save a new recipe or press
CLEAR/OFF to return to the
clock display.
19
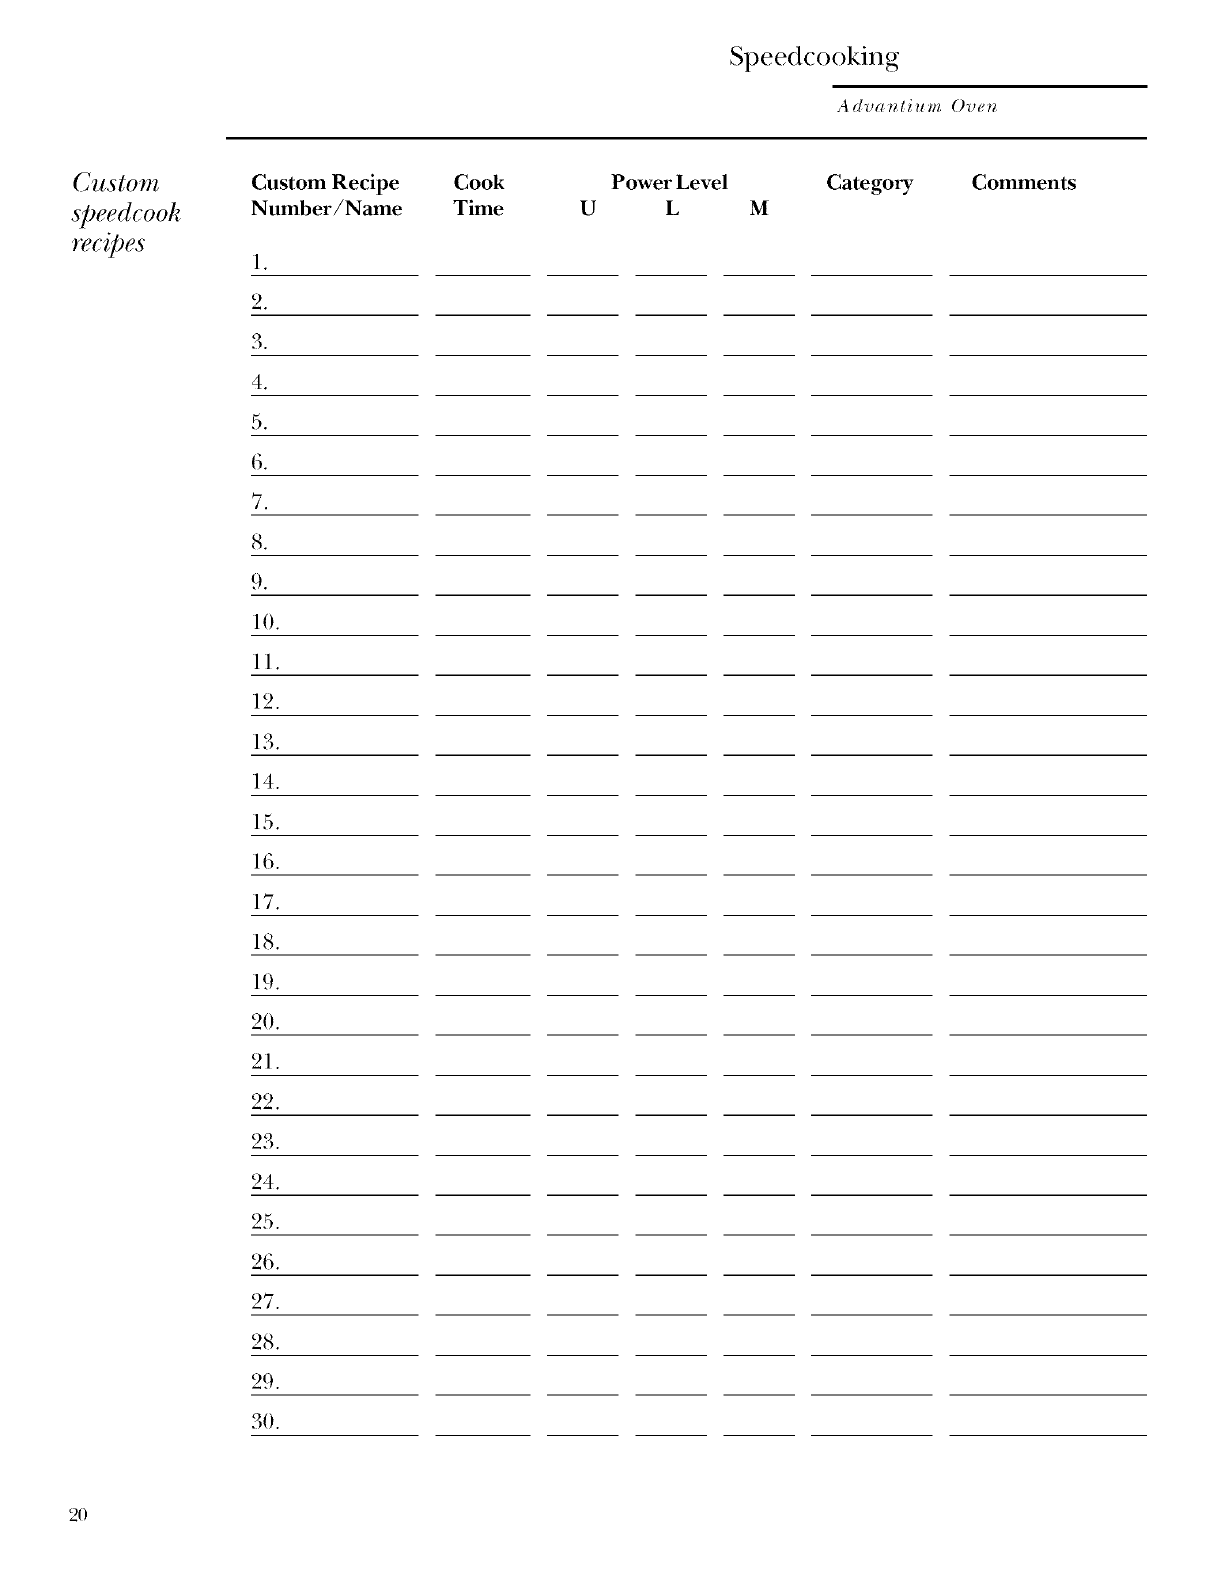
Speedcooking
Advantium Oven
Custom
speedcook
rg€i[)eS
Custom Recipe
Number/Name
1.
2.
3.
4.
5.
6.
7.
8.
9.
10.
11.
12.
13.
14.
15.
16.
17.
18.
19.
20.
21.
22.
23.
24.
25.
26.
27.
28.
29.
3O.
Cook
Time
Power Level
U L M
Category Comments
2O
Speedcooking
A dva _li u m Ove_
Things that
are ftormal
Cooking Times Oven Heat
•When speedcooking preprogranmled •
foods, you may see Ot_ITMIZIN(; COOK
7"IMF_in tile display several seconds after
you press START. Tile oven automatically
senses tile electrical voltage level in your
home and adjusts tile cooking time up or
down for proper cooking. •
Fan/Vent
No preheating time is required. Tile oxen
begins cooking immediately.
Tile door and inside of tile oxen will be
xerv hot. Use camion when opening tile
door and remoxing food.
Do not use cookware or coxerings made
of paper, plastic, or foil when cooking
dnring a speedcook cycle.
The fan will be oil during cooking. At tile •
end of cooking, tile autonmfic fan will
continue m run for a short time, and tile
display will read ()ve_, i.s Cooling. The fail
will automatically shut off when tile
internal parts of tile oven have cooled. Sounds
Tile exhaust fan may come on
auton/aticallv if tile cooktop is in use.
Tile oxen xent will emit warm air while
tile oxen is Oil.
Lights
• When the oxen is oil, light may be xisible
around tile door or outer case.
• Tile halogen lights will dim and cycle
oil and off dnring a speedcook cycle,
sometimes even at tiff] power levels.
This is nornml. Tile oven senses tile
heat level and adjusts automatically.
When cooking %r an exmnded period
of time, tile oven may automatically
reduce tile power levels to maintain
tile appropriate level of oven heat.
• (:licks and a fail blowing are normal
sounds dnring cooking. Tile relay board
is turning components oil and off.
21
Microwaving
Advanlium Oven
Using the
17ti(ro_o(l_Te
features
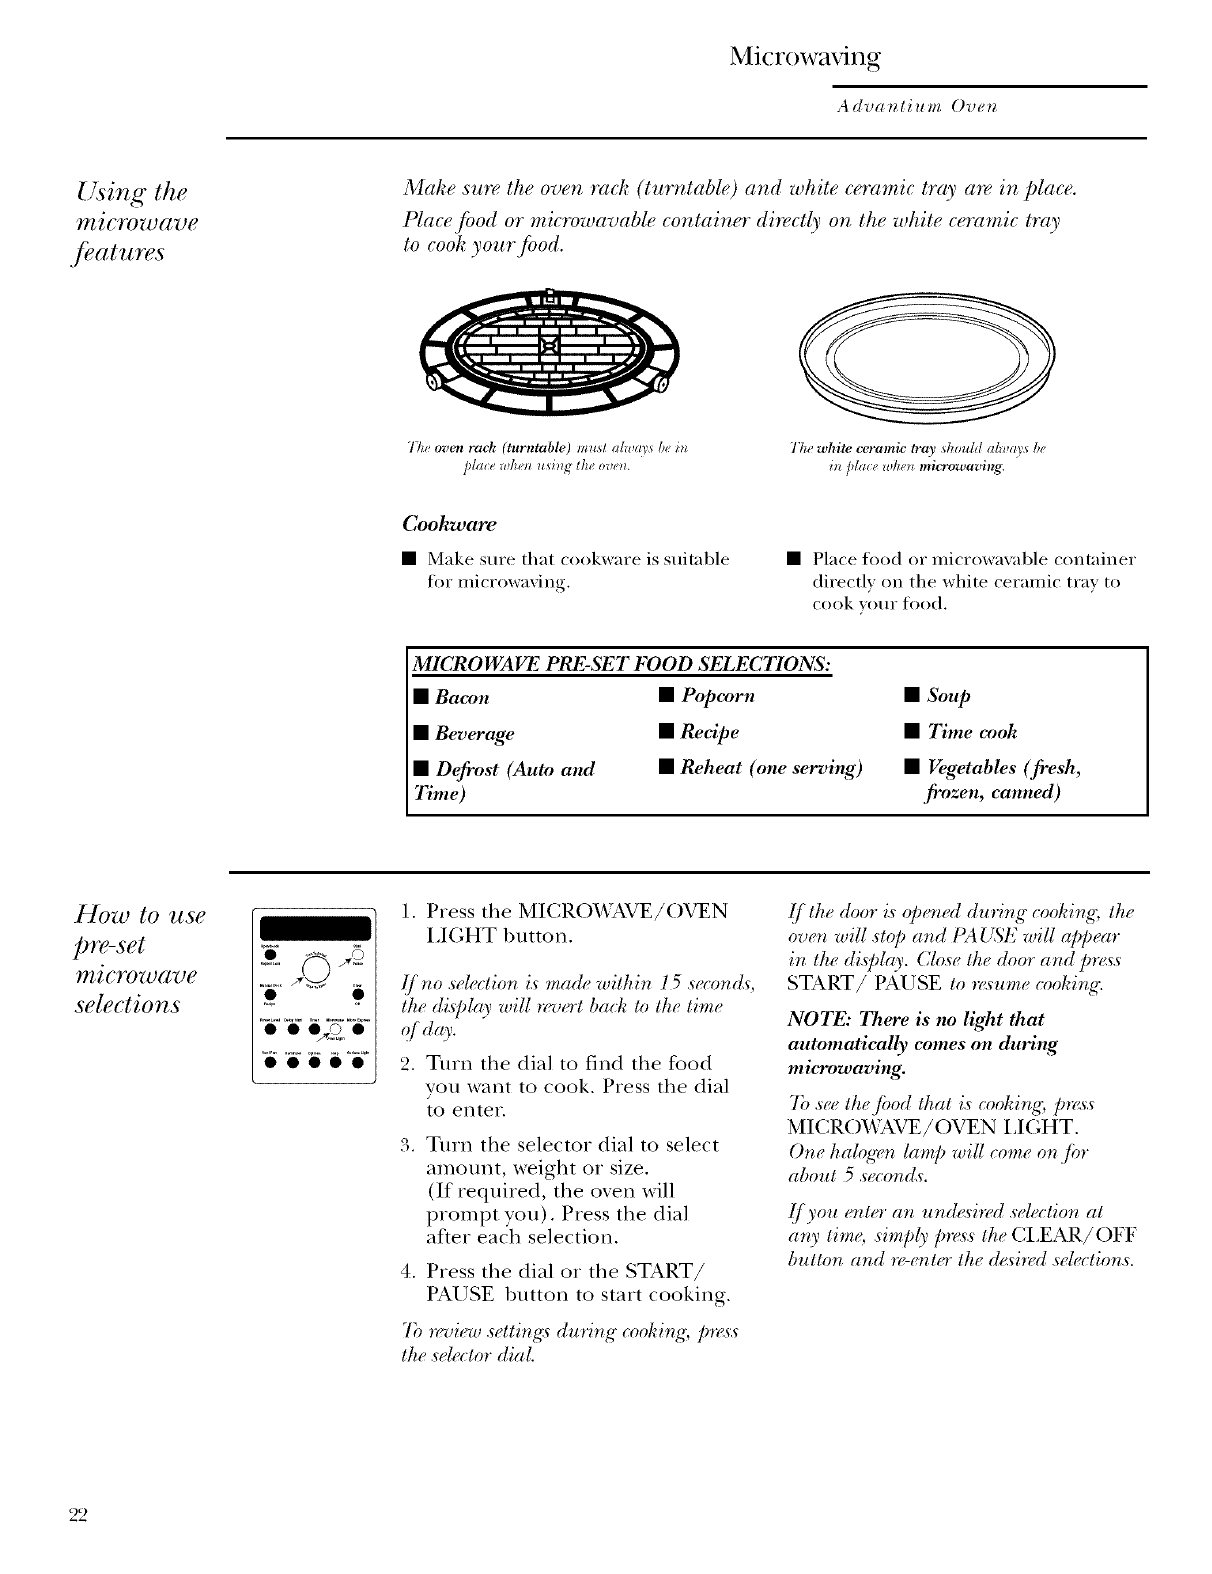
Make sure the oven, rack (turntable) and white ceramic tray are in place.
Place food or mic_vwavable container directly on the white ceramic tray
to cook your food.
77ze oven rack (turntable) must alwm sbe i_z
/dace wllell using the oven.
The white ceramic tray should always be
_[dace wh_,IImicrowaving.
Coohware
• Make sm'e that cookware is suitable
tot microwaxing.
• Place food or microwaxable container
directl_ on the white ceramic tray to
cook _o/1I" food.
MICROWAVE PRE-SET FOOD SELECTIONS:
•Bacon
•Bevel'age
• Defi'ost (Auto and
_lTme)
• Popcorn
•Recipe
• Reheat (one serving)
• Soup
•77me cook
• Vegetables (fi'esh,
fi'ozen, canned)
How to use
pre-set
?ftl(ro_o(t77e
selections
00000
I. Press the MICROXA.AVE/OVEN
LIGHT 1)utton.
_(frw ,s(lectio_ is made within 15 seeond_
the disJ)lay will _ert bach to tt. time
(d<9_.
2. Turn the dial to find the food
you want to cook. Press the dial
tO eHter,
3. Turn the selector dial to select
amount, weight or size.
(If required, the oxen will
prompt you). Press the dial
after each selection.
4. Press the dial or the START/
PAUSE 1)utton to start cooking.
7b _'vi_,w setti*_g_ durir_g cooking /n_s'.s
tt,, .s'_,l_"(tot dial.
lf the door L_opem'd during cooking, the
ove_l will ._t@ and t'A L(_,'Ewill a[)pear
izt the di.s'pl(o,. Close the door a,td /)rt<vs'
START/PAUSE to _>_ume (ooking"
NOTE: There is no light that
automatically comes on during
mio'owaving.
7b ,_eethejood that is eookir_g p_<ss
MICROWAVE/OVEN I,IGHT.
0,,_ hab_¢en lamp will come o_ ,fiw
about 5 ,w(ond,_.
,t[ you enter a,_ und_<sb_d seleetior_ at
a, U time _imp6_[.e_ the (;I,EAR/OFF
button and _>en ter the d_i'_'d .wle(tions.
22

Microwaving
Advanlium Oven
77me Cook
°i 'i i i i" 1.
J
2.
Use Time Cook to micmwavejbod that is
not in ttu _ci[)_ section.
•Tile power lmel is automatically
set at high, but you can change it
for more flexibility.
Press the MICRO_A, AVE 1)utton.
T •Turn the dial to TIME C )OK
and press the dial to enter.
Turn the dial to set the time
and press the dial to enter.
4. To change the power lexel if you
don't want flfll power, press the
PO_'ER LEVEL button. Turn
the dial to select. Press the dial
to enter.
5. Press the dial or the START/
PAUSE button to start cooking.
You may open ttu door during TIME
COOK to (tu(:l_ th_ jbod. Clo.s_ th_ door
and p'_s.s START to r_sume _ooldng.
Micro
Express
00000
Press MICRO EXPRESS repeatedly
for 30 second increments of
microwaxe cooking time. Oxen
starts immediately.
Microwave
power level
.
.
3.
.
First, follow directions for TIME
C )OK, TIME DEFROST or
MICRO EXPRESS.
Press the PO_VER LEVEL button.
Turn the dial clockwise to increase
and counterclockwise to decrease
the power lmel. Press the dial
to enter.
Press the dial or the
START/PAUSE button to start
cooking.
_)u can chang_ the powder l_'l b@n_"
or during a coohing prog'mm (except
when u,singMICRO EXPRESS).
various power levd_:
High 10: Fish, 1)acon, xegetables,
boiling liquids.
Med-High 7: Gentle cooking of meat
and poulttT; baking casseroles and
reheating.
Medium 5: Slow cooking and
tenderizing for stews and less
tender cnts of meat.
Low 2 or 3: Deflosting; simmering;
delicate sauces.
Warm 1: Keeping food warm;
softening butter.
Cooking tips •When cooking bacon, layer strips
on a plate. Coxer each layer with
apaper towel.
•When cooking xegetables,
rise a microwaxe-safe casserole
or bowl. Coxer with a lid or
xented plastic wrap.
•For frozen xegetables, tbllow the
package instructions for adding
water.
• For flesh xegetables, add
2 tablespoons of water for
each serxing.
23
Microwaving
A dva _(i u m Ove_
Microwave
r(?(il) e--to
ent_ and
S(IT)g
ii ii"i i'ii"
Create and store up to 10 of your
own microwave recipes.
I. Press the MICRO_A, AVE/OVEN
LIGHT button.
2. Turn dial until RF_CIt_Eappears.
Press the dial to enter.
3. Turn dial until CL(S'TOM#:t_MUIT
appears. Press the dial to enter.
4. F,NTI_21¢COOK 77ME appears.
Turn the dial to select the
cooking time you want. Press
the dial to enter.
5. Select POXYER LEVEL. Turn the
dial and press the dial to enter.
6. CATFGOR Y appears. Turn
the dial to select a categol T
that best describes yonr desired
microwave program.
7. Recipe Added. tS>vs START to Run
appears. To begfin cooking, press
the START/PAUSE button or
press the CI,EAR/OFF button to
store the recipe without cooking.
Microwave
rg¢ci])e--to
.find and use
• • O_, •
To find and ttse stored cttstom
microwave recipes:
I. Press the MK:ROWAVE/OVEN
LIGHT button.
2. Turn dial to RECItq_ and press the
dial to enter.
.
4.
CL.(S'TOM#: and the categories you
entered will appear.
Turn dial to your recipe and press
the dial to enter.
5. Press the START/PAUSE button
or the selector dial to start
cooking.
Custo" r_
microwave
recipes
24
Custom Recipe
Number/Name
1.
2.
3.
4.
5.
6.
7.
8.
9.
10.
Cook Power Level
Time Microwave Category Comments
Microwaving
Advantium Oven
Microwave
re(iDe--to
adjust or
change
00000
To adjust or change stored custom
microwave recipes:
I. Press tile MICROWAVE/OVEN
LIGHT button.
2. Turn dial to I_ECIPE and press tile
dial to enter.
3. Turn tile dial to tile recipe you
want to change. Press tile dial
to enter.
.
5.
AD,]{J_S'TTIME or S7_ R T appe ars.
Press tile MANUAL C )OK/
RECIPE button. Turn tile dial to
select tile cook time and press tile
dial to enter.
6. Turn the dial to select the POI47'_R
Lt_I,7?I; and press tile dial to enter.
7. I¢f,(-il)eAdd_,d. tS_<s:sSTART to Run
appears. To begin cooking, press
the START/PAUSE button or
press the CLEAR/OFF button m
store tile recipe without cooking.
Microwave
reciDe--to
delete
To delete stored cttstom microwave
recipes:
1. Press tile MICROWAVE/OVEN
LIGHT button.
2. Turn dial to I_F.CIPI_and press
tile dial to enter.
3. Turn tile dial to the recipe you
want m delete. Press tile dial
to enter.
.AI),/L,!S'T TIME OR START appears.
When prompted to press the
START button, press and hold tile
MANUAL COOK/RECIPE button
tbr 3 seconds. You may now enter
and save a new recipe or press
CLEAR/OFF m return to tile
clock display.
25
Microwaving
Advantium Oven
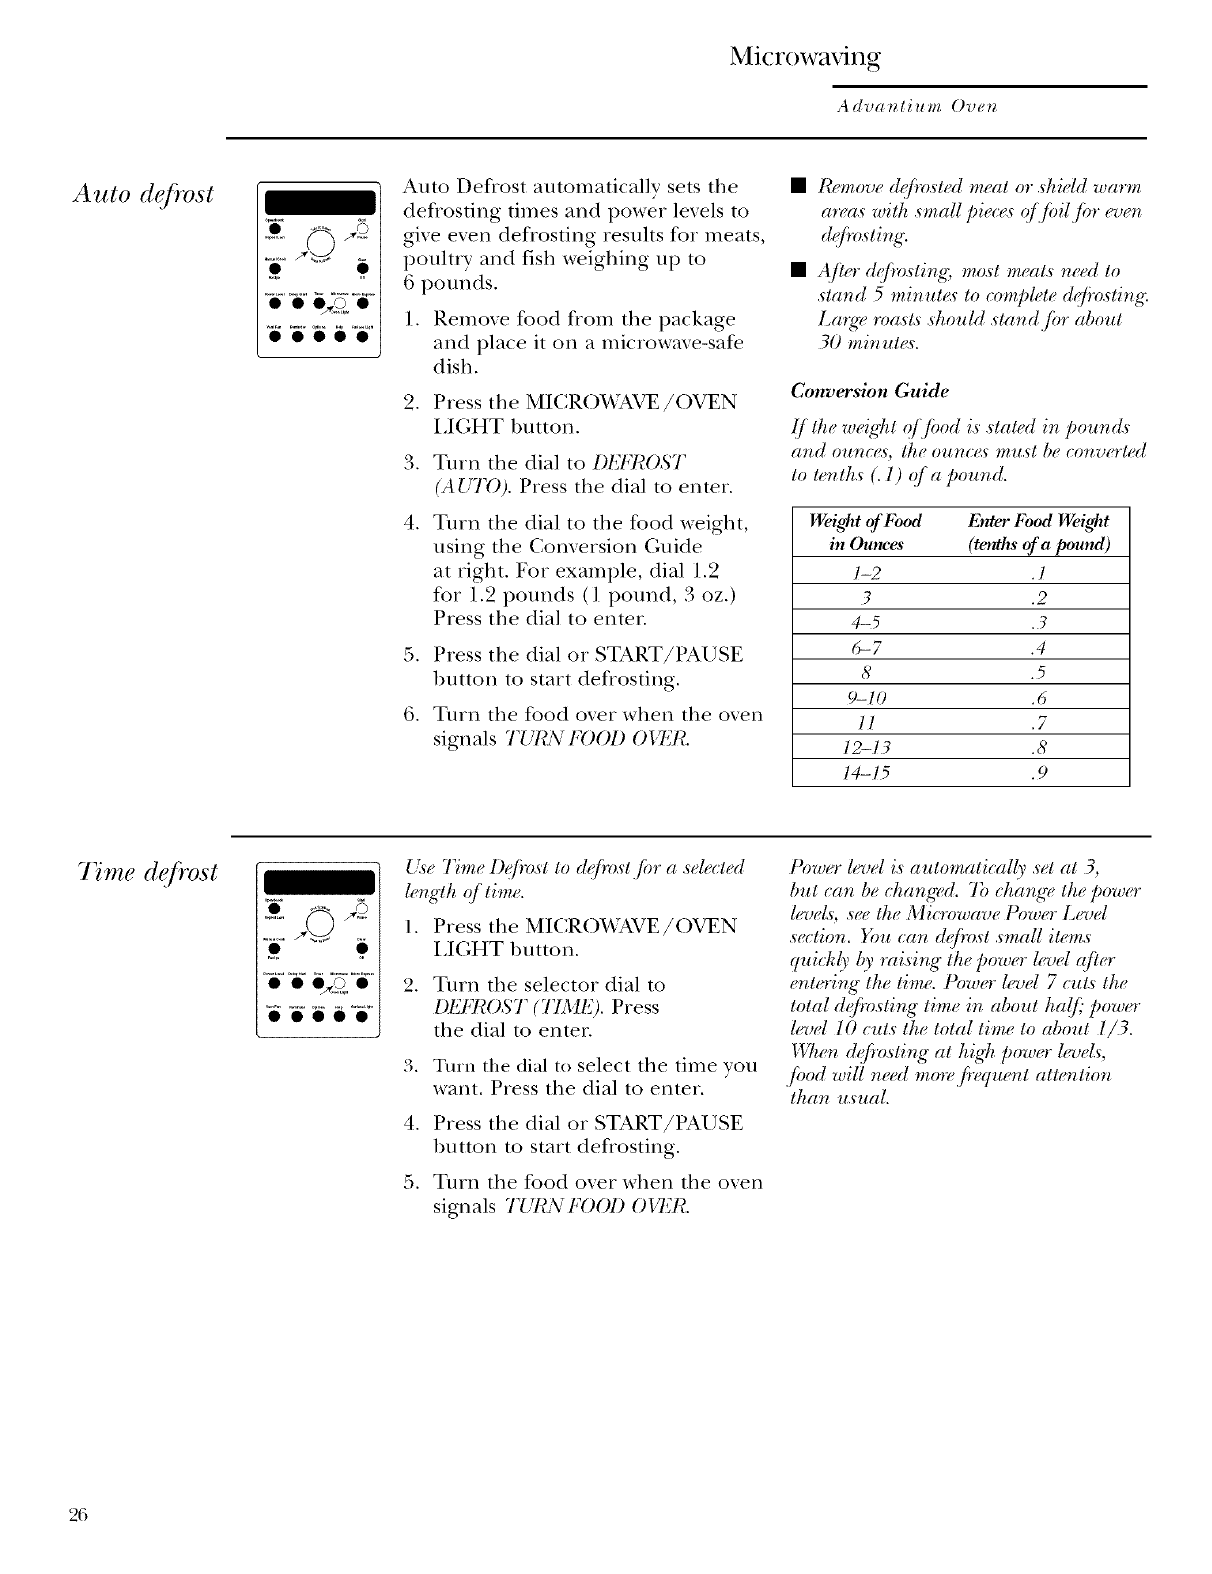
Auto deCrest
• oo_2o
OOOOO
Auto Defrost automatically sets the
defiosfing times and power levels to
give even deflosfing resuhs for meats,
poulu y and fish weighing up to
6 pounds.
I. Remoxe %od flom the package
and place it on a microwme-safe
dish.
2. Press the MICROWAVE/OVEN
LIGHT button.
4.
Turn the dial to DL] R )S ;I
(AUTO). Press the dial to enter.
Turn the dial to the food weight,
using the Conversion Guide
at right. For example, dial 1.2
for 1.2 pounds (1 pound, 3 oz.)
Press the dial to enter.
5. Press the dial or START/PAUSE
button to start deflosting.
6. Turn the food oxer when the oxen
signals TU/L_\: FOOD 0_,7'11¢.
•Rfmove dqfi'ost_d nuat or .shidd warm
a,,_s with .small [)ie((<_q/J;,il,f!,, (q,(n
d@r,,sting.
•After d@vsting, most nuat.s r, ed to
.stand 5 rain ut_s' to complete d@osting.
La'_ge roasts should stand jirr about
30 rain ut_<_.
Conversion Guide
(lthe ,eig/,tqT ,odi.s.statedinpoun s
and oun((_$ [be oun((_s nzust be (onu(_Yted
to tenth._ (. 1) qf apound.
Weight of lbbod Enter Food Weight
in Our_.es (tenths of apound)
1-2 .1
4-5 .3
6-7 .4
8.5
9-10 .6
ll .7
12-13 .8
14-15 .9
7_me dCmst
OOOO0
Use Time D@ost to d@ost,firr a selected
length of time.
1. Press the MICROWAVE/OVEN
LIGHT button.
2. Turn the selector dial to
DEFI¢OST (TIMF_). Press
the dial to enter.
3. Turn the dial to select the time yon
want, Press the dial to enter,
4. Press the dial or START/PAUSE
button to start defiosting.
5. Turn the food oxer when the oxen
signals TURN FOOD O_'T.R.
Pow_.r lrvel i,sautomatically ,setat 3,
but can be ehangz,d. 7b change the powo
lrveh; .seelbe Microwave Power Level
section. _)u can dq[i_zst,small items
qniddy by raisi,lg the power lrvel qf!_,r
e_ltoing the time. Powo l(qml 7 cuts the
total dq[h_,_ting time in about ha!£" powo"
lrvel 10 cuts the total time to about lS3.
H!7,,n dqf!o,sti_g at hig¢_ powr'r lrvets:,
,f!)od will need mo_z,,f!eqw, ntatlerl tion
than usual.
26
Microwaving
A dva _li u m Ove_
DCyvsting
tips
Us'eA UTO DFJ:ROSTJ;w meal poull U
ar_d,f!_h. Use TIME DI_FI¢OST,fi)r most
ottwr,fi'oze*_,fi)ods.
Foods frozen in paper or plastic
can be time deflosted in tile
package, but foods should be
taken out of tile package when
using I)I'_FI¢OST (AUTO). Closed
packages should be slit, pierced
or vented after food has partially
defiosted. Plastic storage
containers should be partially
/lllcovered.
Family-size, prepackaged fiozen
dinners can be deflosted and
microwaved. If tile food is in a
foil container, transfer it to a
microwave-safe dish.
Foods that spoil easily should
not be allowed to sit out for more
than one hour after defrosting.
Room temperature promotes
tile growth of harmfld bacteria.
• For more even deDosting of
larger foods, such as roasts, use
DEFROST (AUTO). Be sure large
meats are completely deflosmd
before cooking.
• When defrosted, tbod should
be cool 1)ut softened in all areas.
If still slightly icy, return to tile
microwave ve W briefly, or let
it stand a few minutes.
27
Microwaving
Advanlium Oven
Microwave
Se72SOY
cooking
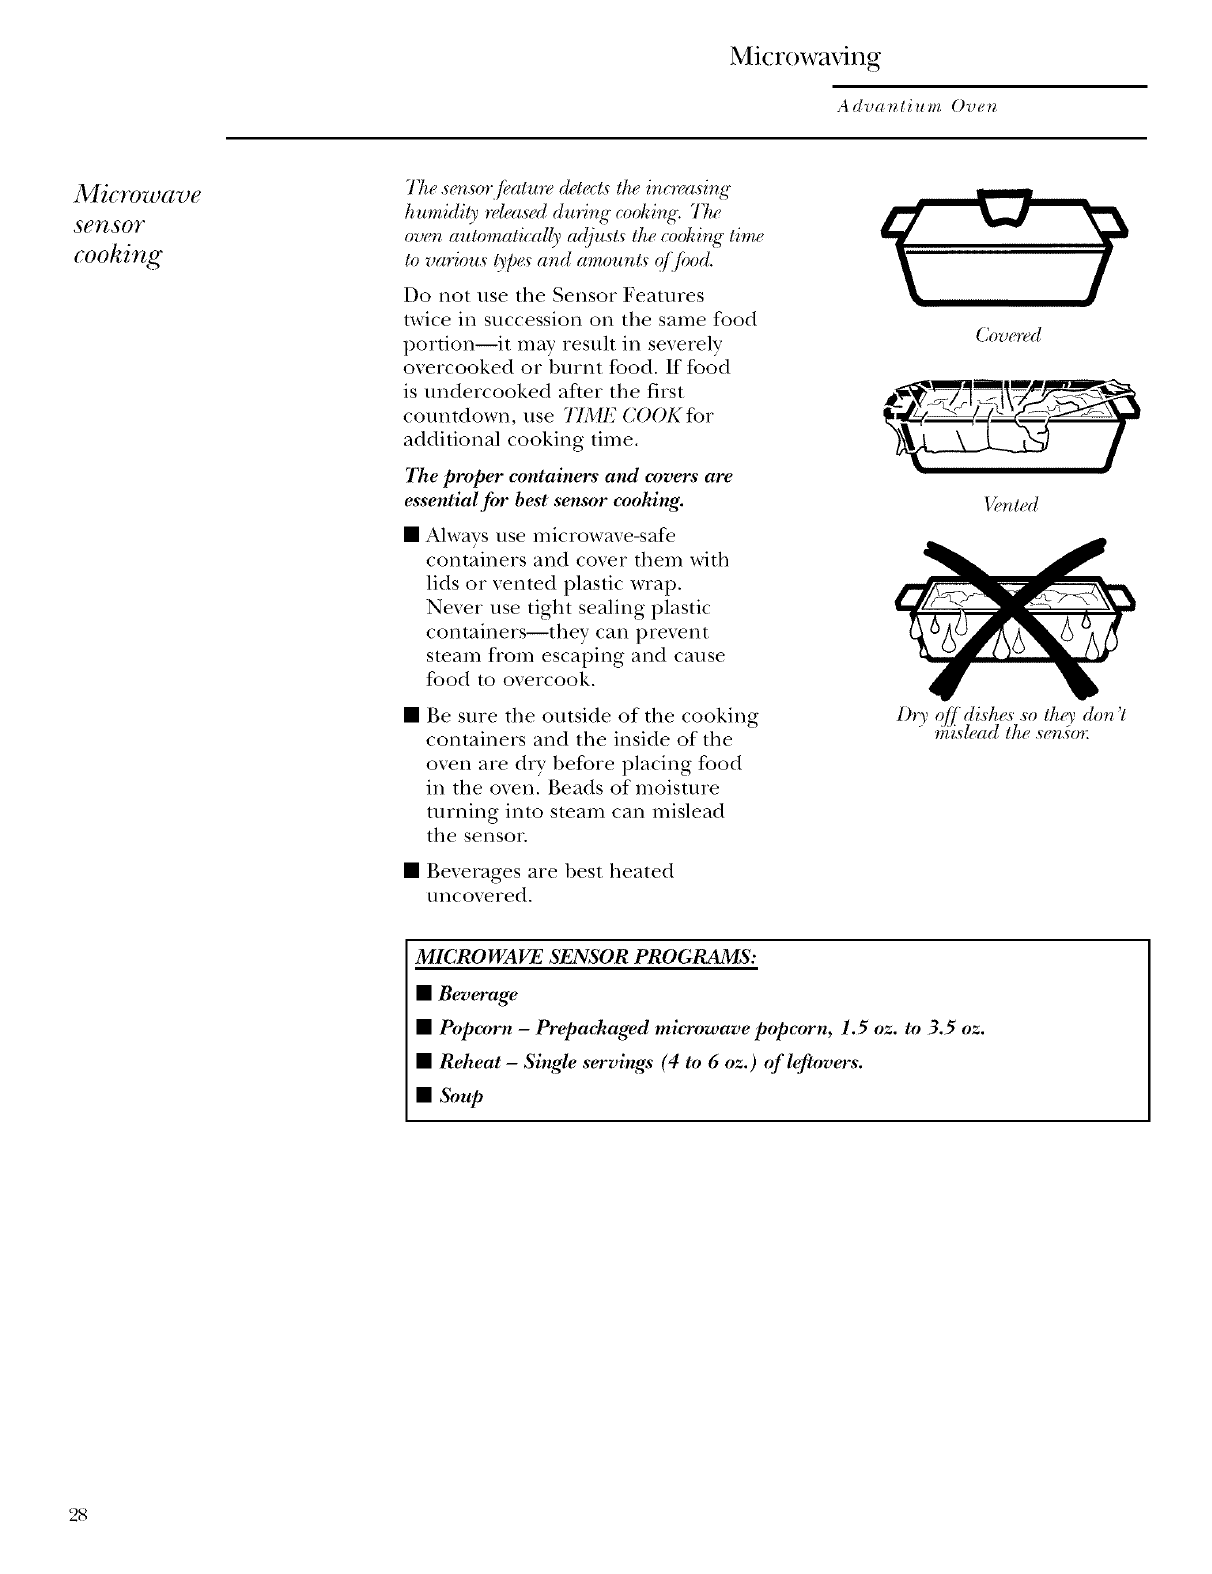
77_ese_lsorjbatu'_" ddecls lhe ino_'asing
humidil_, _z4easedduring (v)ohing. 77w
oven automatically adjusls lhe cooking time
>
Do not use the Sensor Features
twice in succession on the same food
portion--it may resuh in severely
overcooked or burnt food. If food
is undercooked after the first
countdown, use TIME COOK for
additional cooking time.
7"he proper containers and covers are
essential fi_r best sensor cooking.
•Always use microwave-safe
containers and cover them with
lids or vented plastic wrap.
Never use tight sealing plastic
containers--they can prevent
smam Dora escaping and cause
food to overcook.
Be sure the outside of the cooking
containers and the inside of the
oxen are d Ubefore placing food
in the oxen. Beads of moisture
turning into steam can mislead
the sensor.
• Bexerages are best heated
UllCOXered.
Covewd
i,{_r_ted
l)r_ o[f di,sh_<s,so they don't
"_)_Tsleadthe ,s_n,_o'_:
MICROWAVE SENSOR PROGRAMS:
•Beverage
•Popcorn -Prepackaged microwave popcorn, 1.5 oz. to 3.5 oz.
•Reheat- Single servings (4 to 6 oz.) of leftovers.
•Soup
28
Microwaving
Advat_lium Ovet_
7b use all
se_tsor
programs "i .... iJ
Advantium's microwave mode fl,aturr<s
.sr,_sor coohing. 77ze ow,n automatically
.sr'r_.se_whr'_ jood is done and .shul.s it.sd/
qffmelimi_atir_g the n(ed to [)rogram
cooktime_ and powr*r l_q_ets.
1. Press the MICROWAVE button.
2. Turn the dial to select the food
you want. Press the dial to enter.
3. Press the dial or press the START/
PAUSE button to start cooking.
Do not open the oven door until
time is counting down in the display.
If the door is opened, close it and
press START/PAUSE immediamly.
If the food is not done enough, use
TIME COOK in the microwave
selector to cook for more time.
NOTE: Do not use the Sensor
Features twice in succession on the
same food portion--it may resuh in
sexerely oxercooked or burnt food.
• If you have been speedcooking
and the oven is aheady hot, it may
indicate that it is too hot for
sensor cooking. Of course, you
can always confimm with TIMF.
COOK or SPEI_21)COOK.
To shorten or lengthen the
cook time, wait until the time
countdown shows in the display.
Then turn the dial to add or
subtract time.
• Drinks heated with the BL'_TJCA:,:(;:L
feature may be xery hot. Remoxe
the container with care.
• If you open the door while
SI(A'_,'OR Co&ing, SEA,_S'ORERROR
will appear. Close the door, press
START to begin again.
Notes about the Reheat pro_'am:
Reheated foods may haxe wide
xariations in temperature. Some
areas may be extremely hot.
It is best to use 7YME COOK and not
RIg.HEAT for these foods:
• Bread products
• Food that must be reheated
nncoxered.
• Foods that need to be stirred
or turned.
• Foods calling %r a d Ulook or
crisp surface after reheating.
29
Microwaving
A dva _li u m Ove_
Things that
are normal
Interference
•TV/radio interference migilt be
noticed while using tile microwaxe.
Similar to the interference caused by
other small appliances, it does not indicate
a problem with tile microwave. Move
the radio or TV as far away flom tile
microwave as possible, or check the
position of the TV/radio antenna.
Lights
•Tile oxen ligilt will not come on
during a microwave cooking cycle.
For about 5 seconds of light, press the
MICROWAVE/OVEN LIGHT pad.
The oxen ligilt will come on automaocally
when the door is opened.
Oven Heat
•Cookware may become hot because of
heat transferred flom the heamd food.
Oven mitts may be needed to handle
the cookware.
• Steam or vapor may escape flom around
the door.
Sounds
• You may hear a dull thumping sound
while the oxen is operating.
3O

Microwaving
Adva_lium Ove_
Notes and
(omme_lts
31
Other Advantium Features
Advanlium Oven
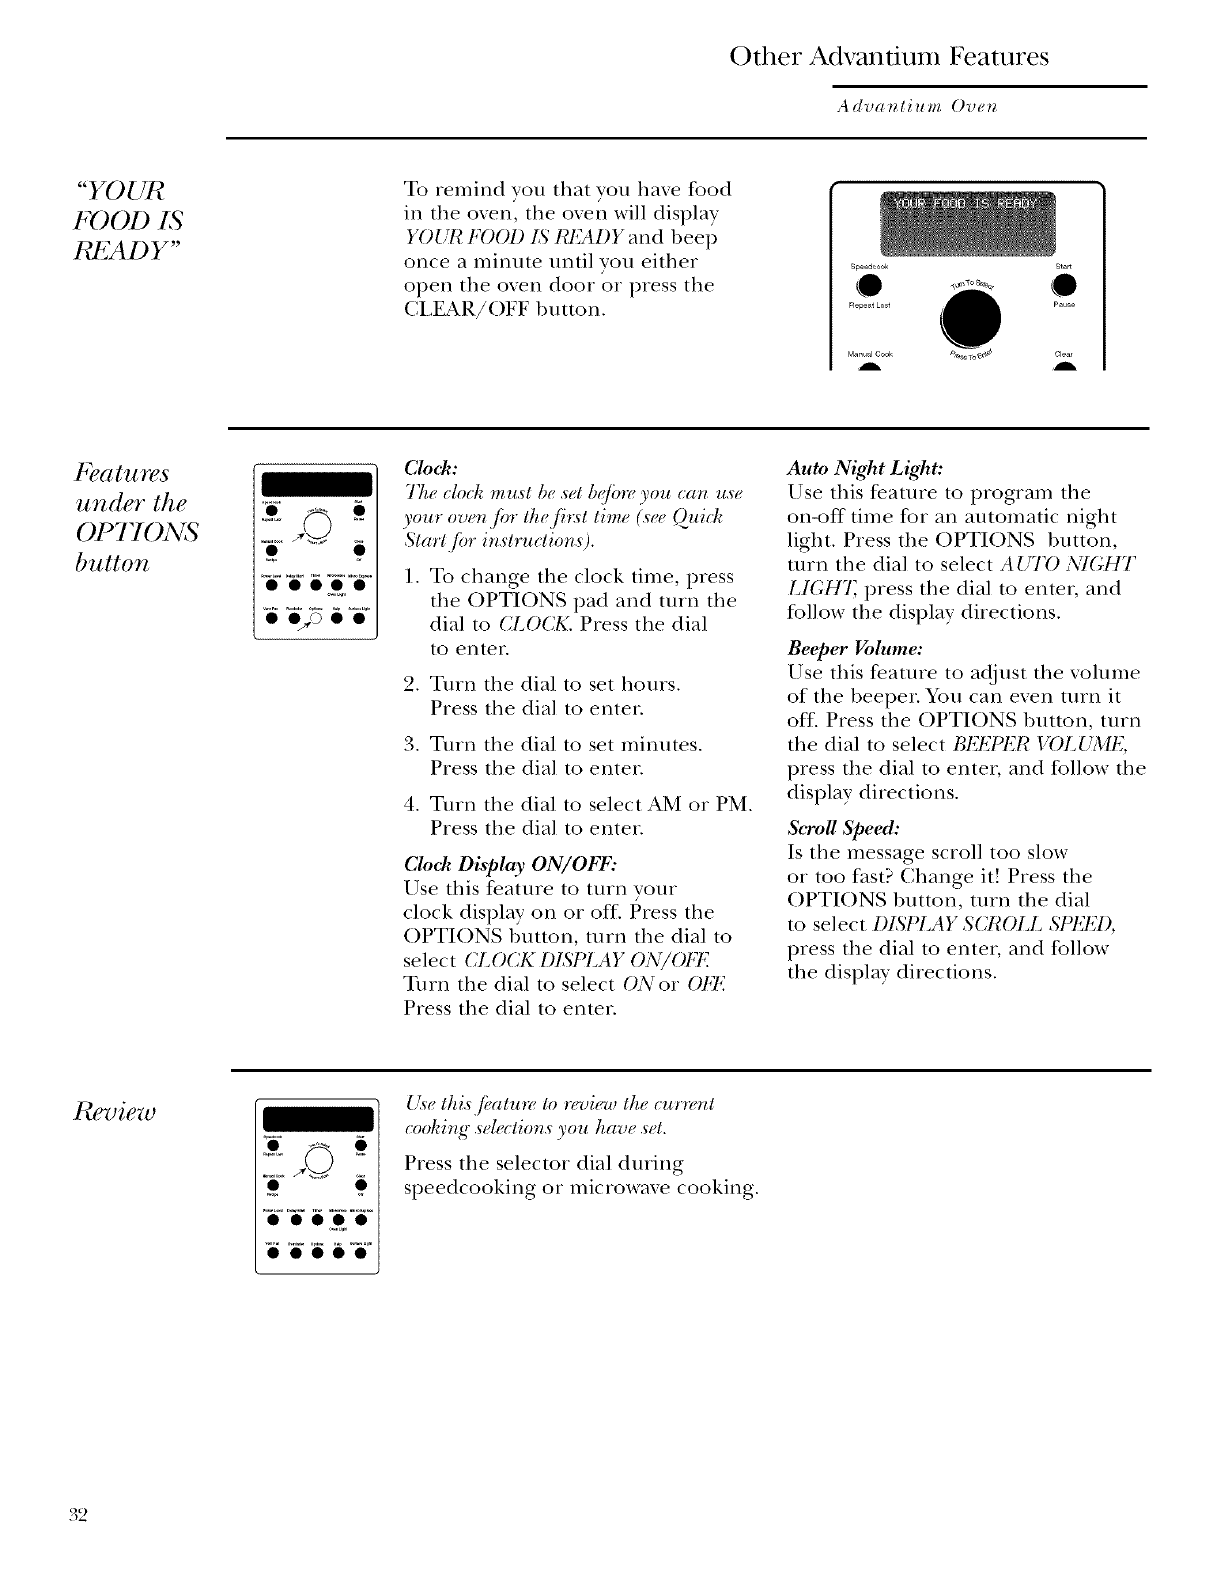
"YOUR
FOOD IS
I_2AD Y"
To remind you that you have food
ira the oven, the oven will display
YOUI¢ FOOD IS I¢EAI)Y and beep
once a minum until you either
open the oven door or press tile
CLEAR/OFF button.
P),atures
under the
Of'Tl ONS
button
Clock:
77;edod_ must be set b@m_you _an u._e
you,"over,.f!." thef!,:st time (see Quid"
Starl jiw instruction,s).
I. To change tile clock time, press
the OPTIONS pad and turn tile
dial to CLOCK. Press tile dial
tO erater.
2. Turn the dial to set hours.
Press the dial to enter.
3. T/lin the dial to set minutes.
Press tile dial to enter.
4. Turn the dial to select AM or PM.
Press tile dial to enter.
Clock Display ON/OIvT:
Use this feature to turn your
clock display on or off. Press the
OPTIONS 1)utton, turn the dial to
select CLOCK DIStqAY ON/OFI'7
Turn the dial to select ON or OFE
Press the dial to enter.
Auto Night Light:
Use this feature to program the
on-off time for an automatic night
light. Press the OPTIONS button,
turn the dial to select AUTO _\q(iHT
LI(iH7; press the dial to enteI, and
fbllow the display directions.
Beeper _dmne:
Use this feaulre to adjust the volume
of the beeper. You can even turn it
off. Press tile OPTIONS 1)utton, turn
the dial to select BI_I:7_ER VOLUMI_,
press tile dial to enter, and follow tile
display directions.
&roll Speed:
Is tile message scroll too slow
or too fast? Change it! Press the
OPTIONS button, ulrn the dial
to select DD;PIAY SCROLL SPEEI),
press tile dial to enter, and follow
tile display directions.
I_view
W "_" 6
• • ooe, •
Use this,fl_alu_v to review the cu,_nt
(ooldng .sdegtions you have .set.
Press the selector dial during
speedcooking or microwaxe cooking.
32
Other Advantium Features
Advanlium Oven
Help
ooooo
Use tkis.f!+aln_+ lo.find oul more about
you'r overt and itsji+atn'ms.
1. Press tile HELP button.
2. Turn the dial to select the feature
name. Press the dial to enter.
The display will show a description
fbr the program you haxe chosen.
Featu'_<Lfimnd in the HELPjiznction.
Adju,st
Auto Night L_¢ht
BacoTi
Ba'p#r I')dume
Beverage.
Child ko&out
(;l_,a,_#)[!"
Clo<l_
Cb)d" Di,q)lay Or_/()ff
I)ef!'o,_t (Auto)
l)@'o,_t (TimO
Delayed Start
Hd l,
Manual .S_wed(-o&
Mio'owave Cooki_lg
Mi<rowave Exp_+s
Option.s
Ow,_l L{¢kt
t'@co'r*,
Power Level
I?e(ipe
RH,.at-One Serving
Reminder
ICepeat Last
Review
&"roll Siw_'d
_%up
Start/Pau._e
@eed<ool_
Su'_f!.e kigl_t
7"imeCook
7W_o On/O[j
l+g<)tabl+_(Ca*_m)<l)
Vegetab>, (t6>s'h)
l'}'getab>* (Frozg.n)
l}'n t F<w
33
Other Advantium Features
Advanlium Oven
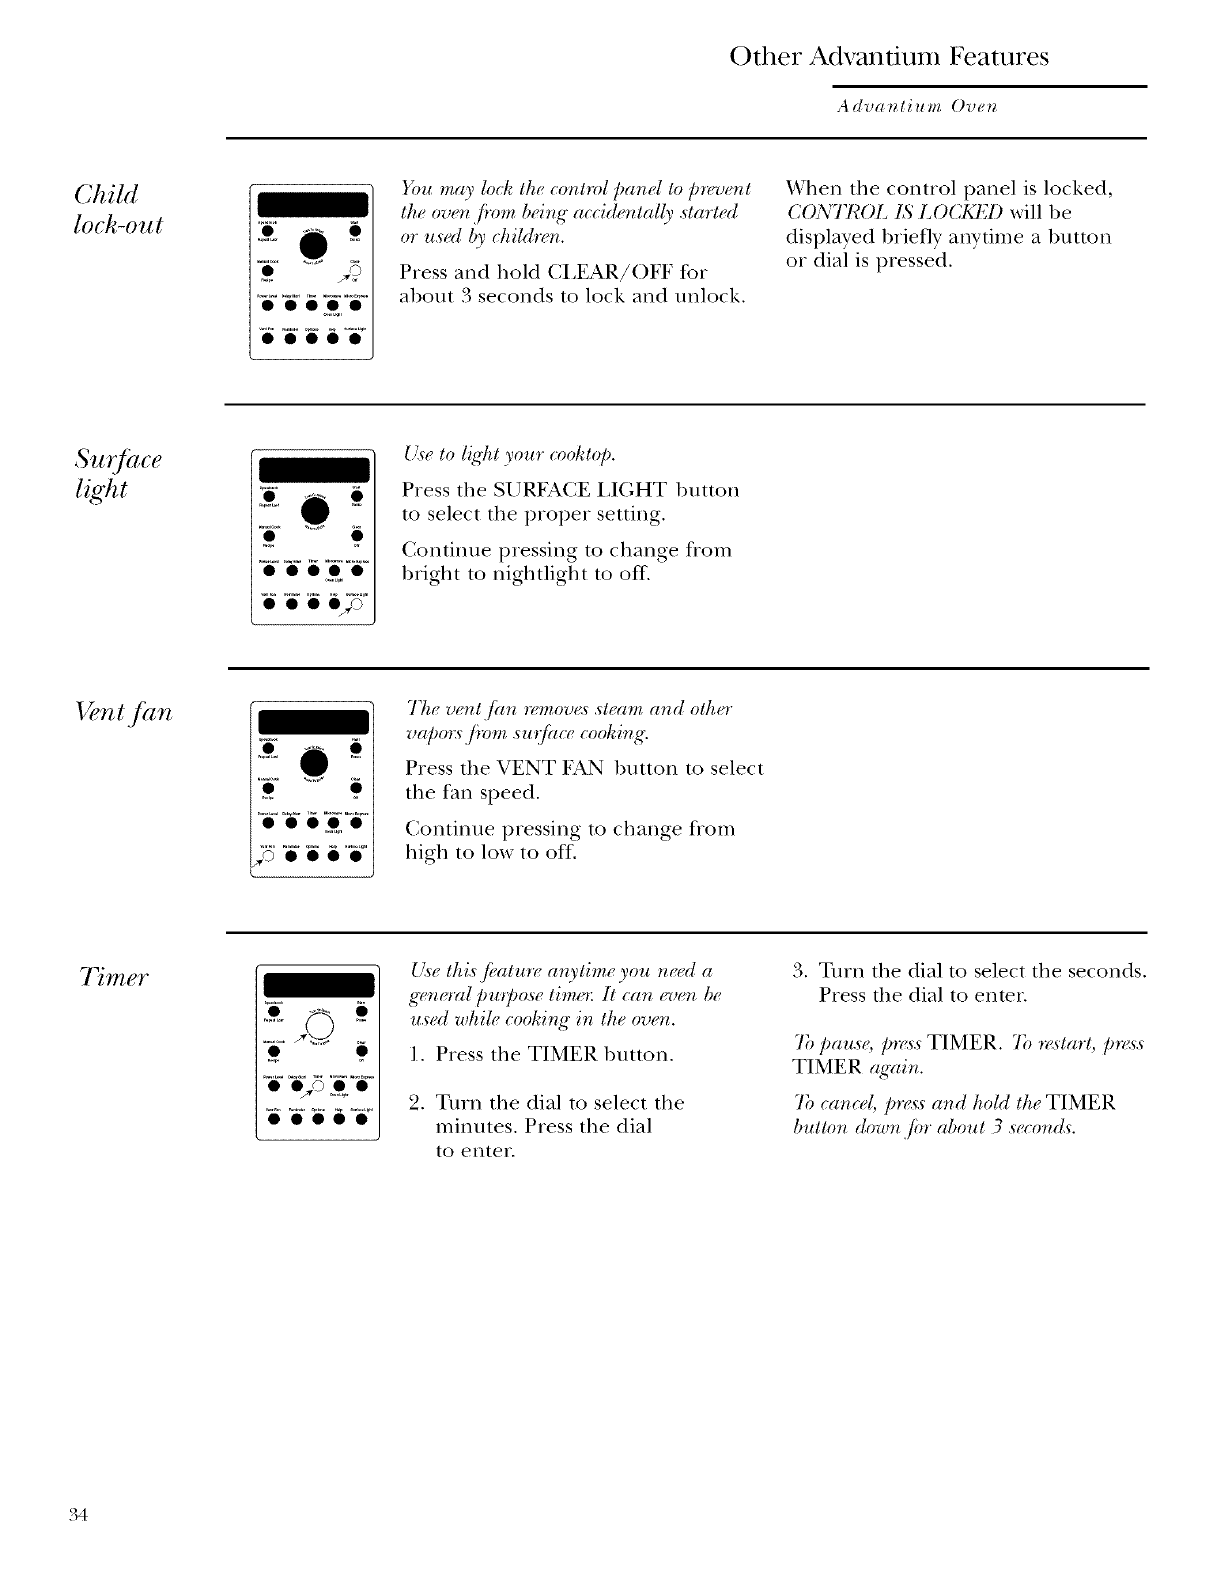
Child
lock-out
Fou may lock the conhvl panel to/)_'vent
the oven .f!'om b_ing accidentally .started
or used by d_ildr_ n.
Press and hold CLEAR/OFF tbr
about 3 seconds to lock and unlock.
When the control panel is locked,
C()NTI_OL LS L )C_J) will be
displayed briefly anytime a button
or dial is pressed.
00000
U_e to light you, (-o&t@.
Press the SURFACE LIGHT 1)utton
m select the proper setting.
Continue pressing m change fiom
bright to nightlight to off'.
Vent fan 77re w'nt jhn _'mow<s st,'am and otho"
va/_o_:L/irm_.s'u_fil_v"cool_ing.
Press the VENT FAN 1)utton to select
the fan speed.
Contimm pressing to change from
high to low to off.
7_mer {/.st tl_i.s',fial*o't a*gtim_ 3ou n_ed a
general p,opo.s_ linu**:1l can even be
used whil_ cooldng in the oven.
I. Press the TIMER button.
2. Turn the dial to select the
minutes. Press the dial
to enter.
3. Turn the dial to select the seconds.
Press the dial to enter.
7b pau._e, [)_<_.sTIMER. 7b "*_':s'Ia'*'lp_<_,._
TIMER again.
7b cancel [)r_<S:SLand hold lh( TIMER
button down Jbr about 3 'SL(_gOr_d_"
34
Other Advantium Features
Advanlium Oven
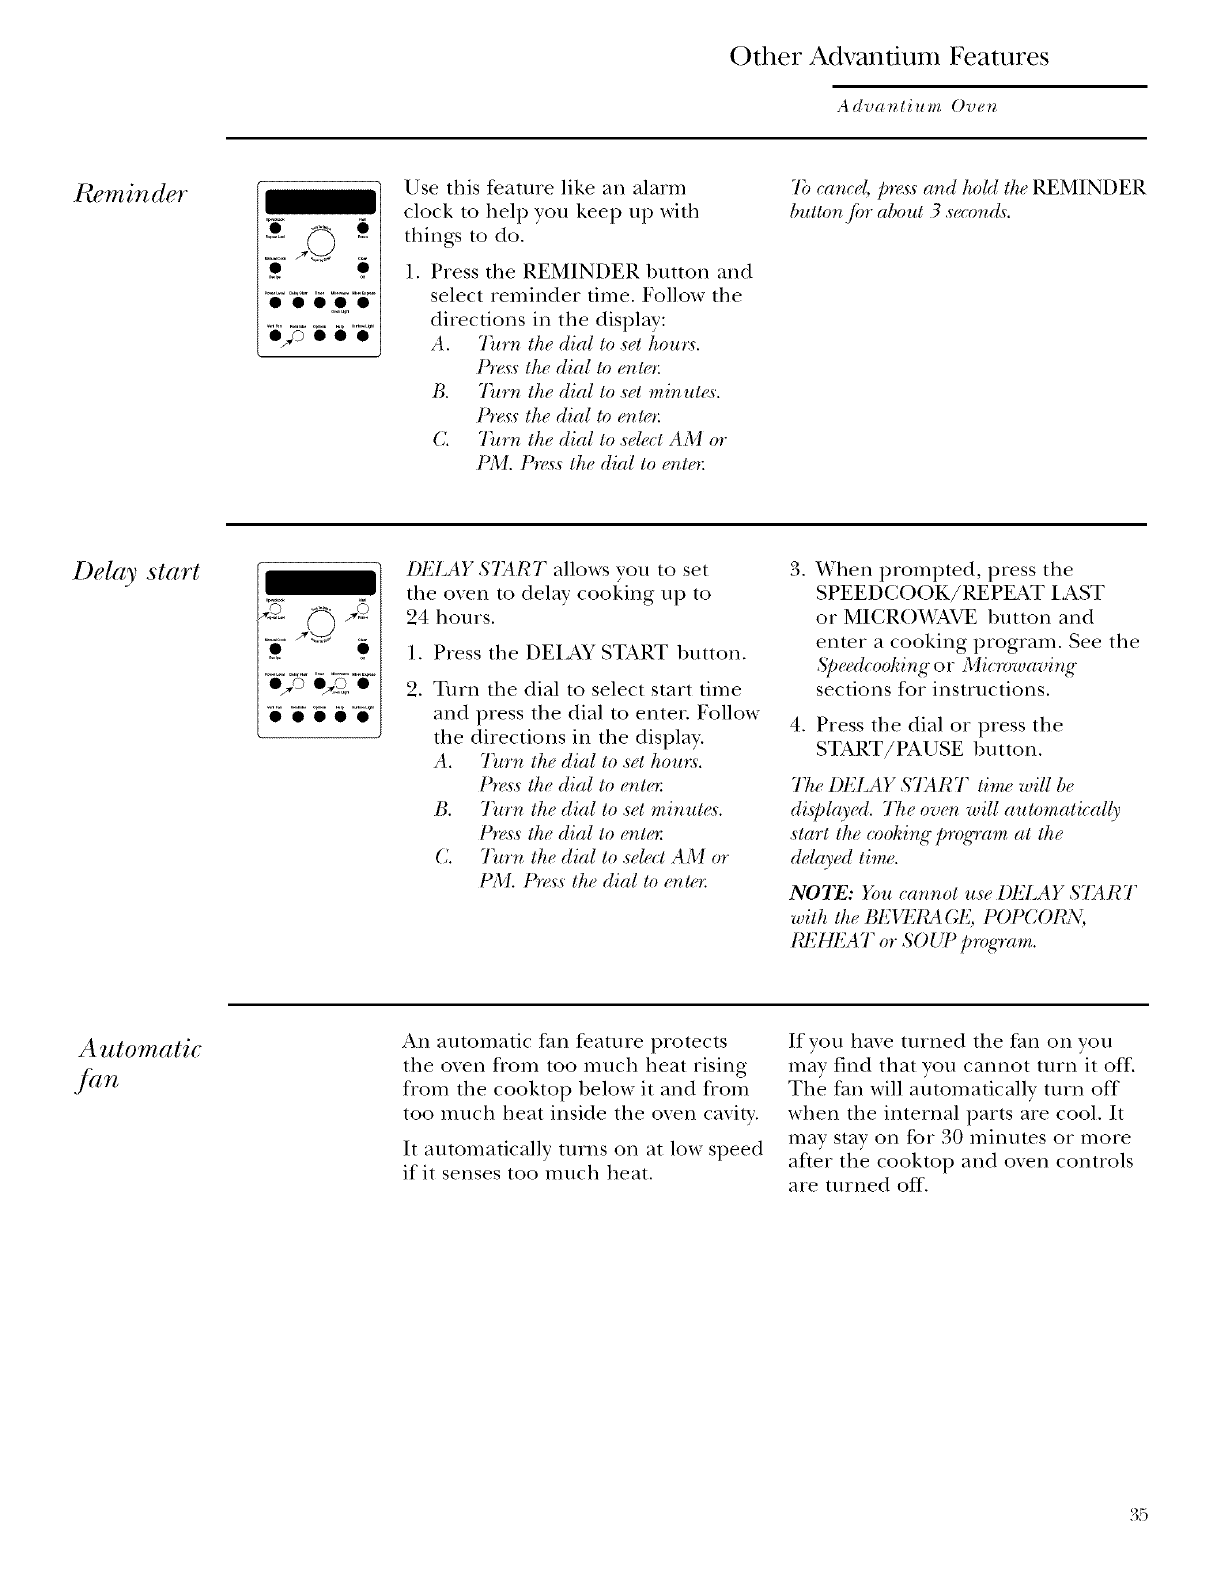
Pu_minder
ooooo
oj> • • •
Use this feature like an alarm
clock to help you kee I) up with
things to do.
I. Press tile REMINDER hutton and
select reminder time. Follow the
directions in the display:
A. 7)crn the dial to set houm.
[5>_:sflu dial to ente,:
B. 7)trn ttu dial to .sit minut_<s.
[5>s:sllu dial to er_te,:
C. 7)vrn the dial to selegt AM or
PM. t:5_<_sthe dial to erzte_:
7b caned /mas:sand hold Ihe REMINDER
button./iw about 3 second_.
Delay start I LLAYSTAR] allows you to set
tile oxen to delay cooking up to
94 hours.
1. Press tile DEIzkY START hutton.
9 Turn tile dial to select start time
and press the dial to enter. Follow
tile directions in the display.
A. •l)*rn ttu dial to s_t hom:s'.
15_<*sthe dial Io e'_Ie*:
B. 7)trn Ihe dial to .set minutes.
[5_<s'.sflu dial to _nte_:
C. 7)trn the dial to selegt AM or
PM. [5_<_sthe dial to er_te,:
3. When prompted, press the
SPEEDCOOK/REPEAT IAST
or MICRO_A.AVE button and
enmr a cooking program. See the
Speedco&ing or Micmwavi_lg
sections for instructions.
4. Press the dial or press the
START/PAUSE hutton.
77u3DELAY ST_fi'T time will be
di.qday( d. 77_( oven will automatically
start the cooking program at th_
delayed time.
NO TE: Fou can not use DELAY $7_ R T
with th_ BLI.LICA L, POPCORN,
RI{HEAT or SOUP program.
A utomatic
fan
An automatic fan t_ature protects
tile oven from too much heat rising
from tile cooktop below it and from
too nmch heat inside the oven cavity.
It automatically turns on at low speed
if it senses too much heat.
If you have turned tile iaan on you
may find that you cannot turn it off.
The fan will automatically turn off
when tile internal parts are cool. It
may stay on for 30 minums or more
after tile cooktop and oven controls
are turned off.
35
Care and Cleaning
Advantium Oven
HelH:ul
hints
An occasional thorough wiping with
a solndon of baking soda and wamr
keeps tile inside flesh.
Be certain the oven control is
turned off before cleaning any
part of this oven.
How to
clean the
inside
Clean the inside of the oven after
each use for proper heating
performance.
Some spatters can be removed with
a paper towel, others may require
a warm soapy cloth. Remove greasy
spatters with a sudsy cloth, then rinse
with a damp cloth.
Do not use abrasive cleaners or
sharp utensils on oven walls.
Never use acommerciM oven
cleaner on any part of your oven.
Do not clean tile inside of the oven
with metal scouring pads. Pieces can
1)reak off tile pad, causing electrical
shock.
Do not remove the halogen lamp
glass covers.
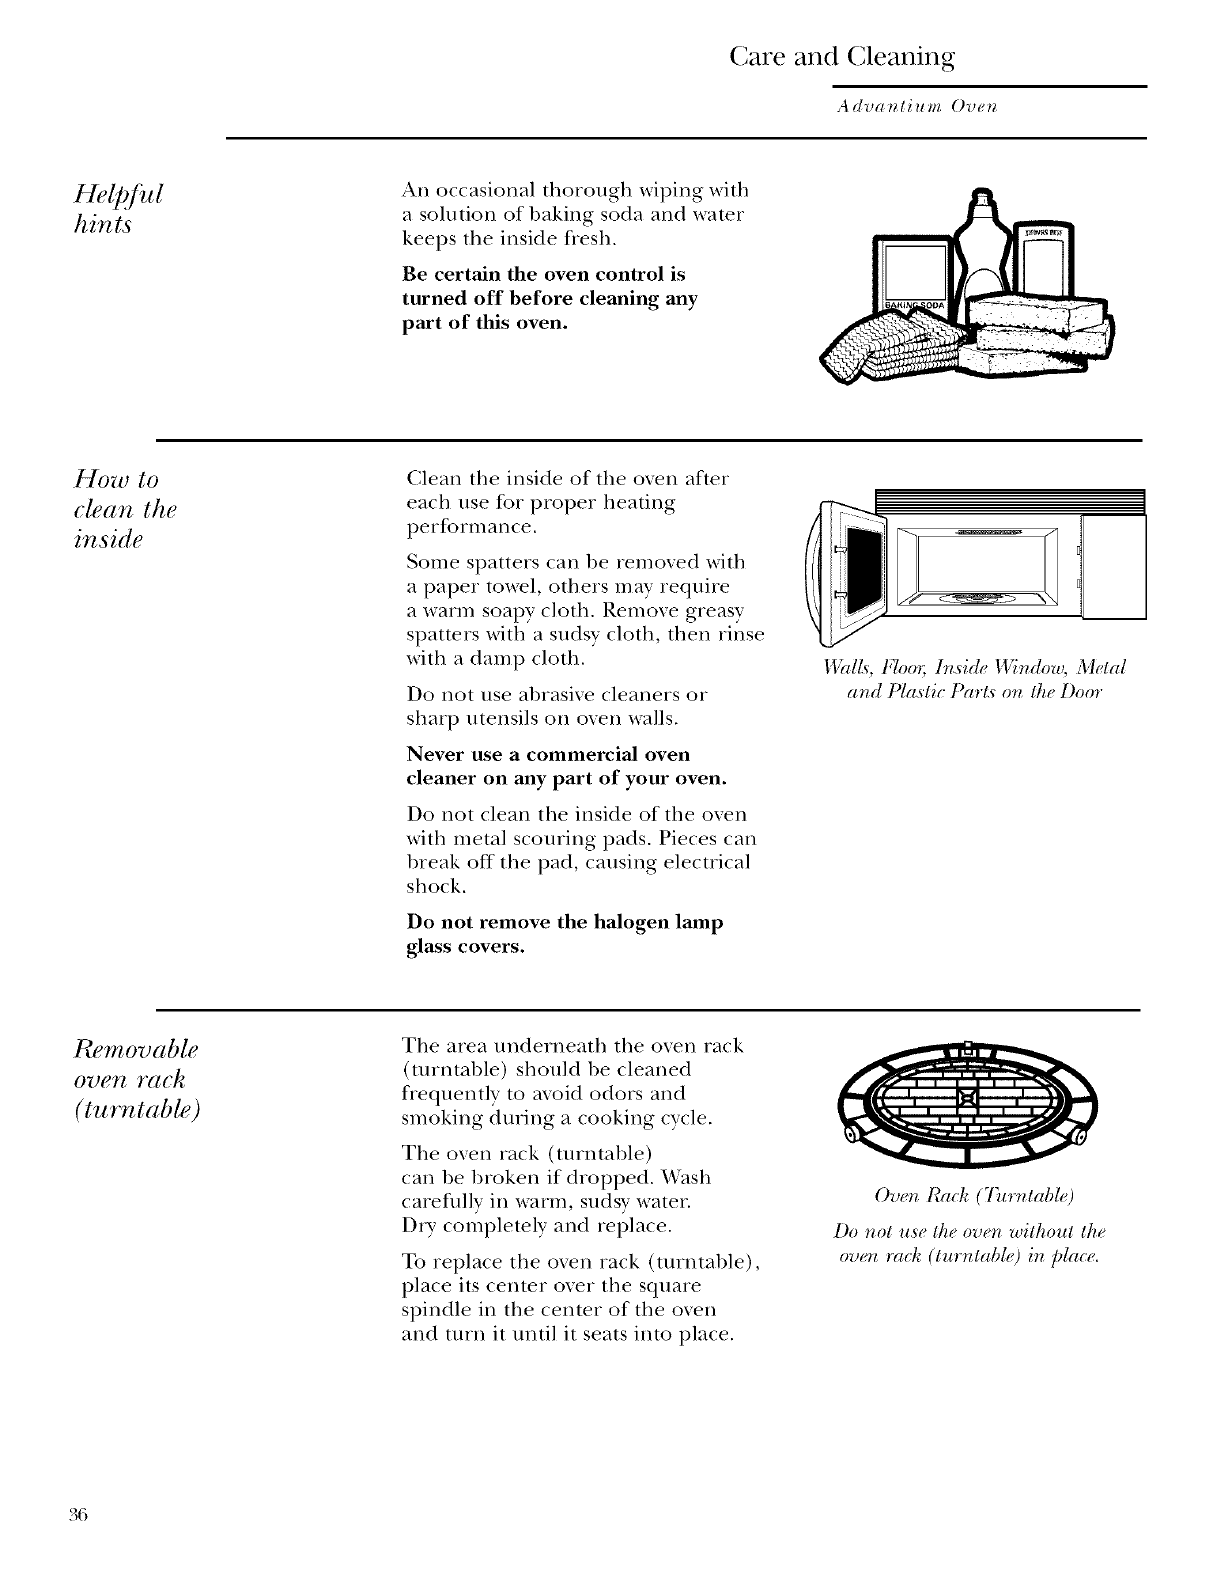
H!hl£; Floo,; l,rdde Window, Metal
and Plastic Parts on the Door
Removable
oven rack
(turntab#)
The area underneath the oven rack
(ulrntable) should be cleaned
Dequently m avoid odors and
smoking during a cooking cycle.
The oven rack Cure, table)
can be broken if dropped. _4'ash
carefully in warm, sudsy watch
DiT completely and replace.
To replace tile oven rack (turntable),
place its center over tile square
spindle in tile center of the oven
and tnrn it until it seats into place.
Oven lea& (7)¢r,ltable)
Do not use the oven without the
ow,rl rael_ (turntable) in place.
36
Care and Cleaning
Advantium Oven
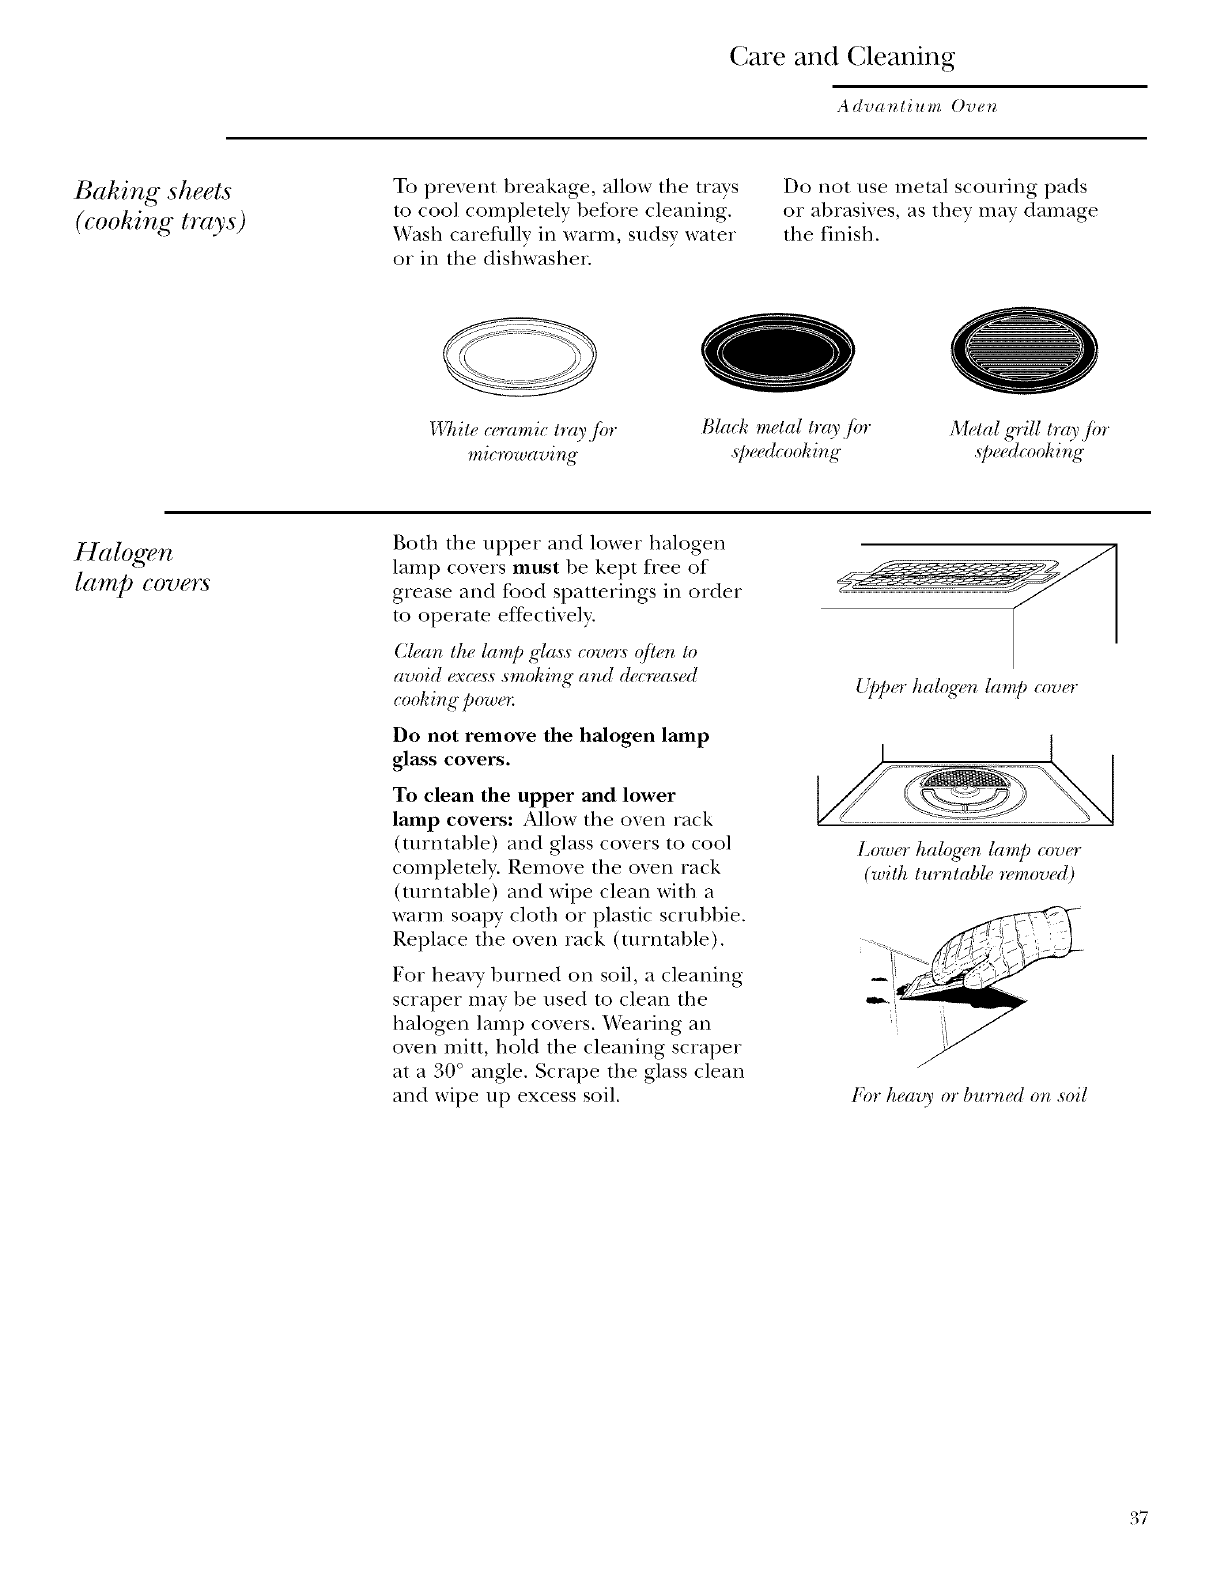
Baking sheets
(cooking trays)
To prevent breakage, allow the trays
to cool complemly betbre cleaning.
_'ash careflllly in warm, sudsy water
or in the dishwasher.
Do not use metal scouring pads
or abrasives, as they may damage
the finish.
DT_iteceramic tray jiw
microwaving
Black metal tray jot
._peedcooking
Metal grill tray,/or
s/wedcooking
Halogen
lamp covers
Both the upper and lower halogen
lamp covers mttst be kept flee of
grease and food spatterings in order
m operate eft>cfively.
Ch,an the lamp gla._:scovo:_ qfie_l to
avoid exc(<s:s.smoking and dec'_,ased
cooping powo:
Do not remove the halogen lamp
glass covers.
To clean the upper and lower
lamp covers: Allow tile oven rack
(turntable) and glass (;overs to cool
complemly. Remove the oven rack
(turntable) and wipe clean with a
warm soapy cloth or plastic scrubbie.
Replace the oven rack (turntable).
For heax T burned on soil, a cleaning
scraper may be used to clean the
halogen lamp covers. Wearing an
oven mitt, hold the cleaning scraper
at a 30 ° angle. Scrape the glass clean
and wipe up excess soil.
Lower kalog( r_lamp cover
(with turntable _z'moved)
For heavy or"burm'd on soil
37
re and (;leaning
A dva _li u m Ove_
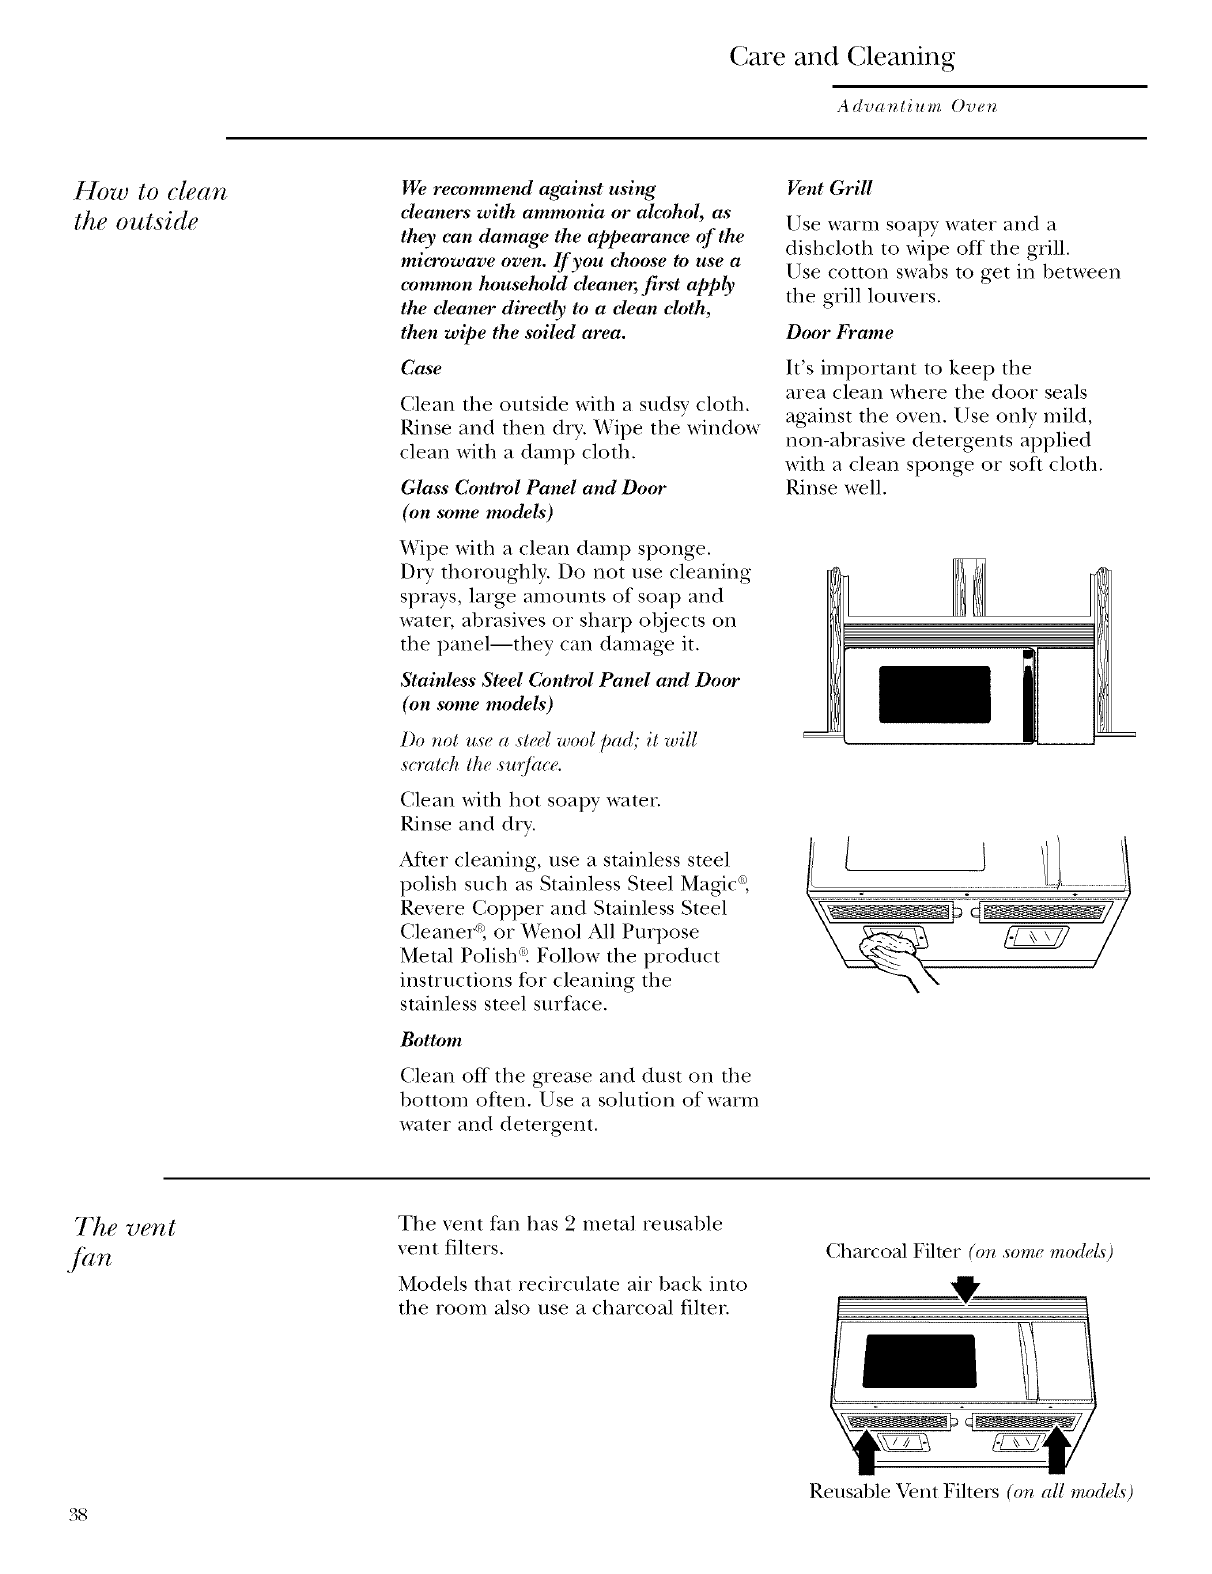
How to clean
the outside
We _wcommend against using
eleaners with ammonia or alcohol, as
they can damage the appearance of the
microwave oven. If you ehoose to use a
common household eleaner, first apply
the eleaner directly to a elean cloth,
then wipe the soiled mwa.
Case
Clean the outside with a sudsy cloth.
Rinse and then dry. Wipe the window
clean with a damp cloth.
Glass Control Panel and Door
(on some models)
Wipe with a clean damp sponge.
Dty thoroughly. Do not use cleaning
sprays, large amounts of soap and
water, abrasives or sharp objects on
the panel--they can damage it.
Stainless Steel Control Panel and Door
(on some models)
Do r_ot use a steal wool pad; it will
sgratd_ the sn'@xce.
Clean with hot soapy water.
Rinse and d U.
'After cleaning, use a stainless smel
polish such as Stainless Steel Magic ¢'_,
Revere Copper and Stainless Steel
Cleanerq or _A.enol All Purpose
Metal Polish ¢°.Follow the product
instructions for cleaning the
stainless smel surface.
Bottom
Clean off the grease and dust on the
bottom often, Use a solution of warm
water and detergent.
Vent Grill
Use warm soapy water and a
dishcloth to wipe off the grill.
Use cotton swabs to get in between
the grill louvers.
Door b]'ame
It's important to kee I) the
area clean where the door seals
against the oven. Use only mild,
non-abrasive detergents applied
with a clean sponge or soft cloth.
Rinse well.
The vent
fan
The xent fan has 2 metal reusable
xent filters.
Models that recirculate air back into
the room also use a charcoal fiher.
Charcoal Fiher (or_ ._o,m modet_)
,II,
I
Reusable Vent Fihers (on all models)
38
re and (;leaning
Advanlium Oven
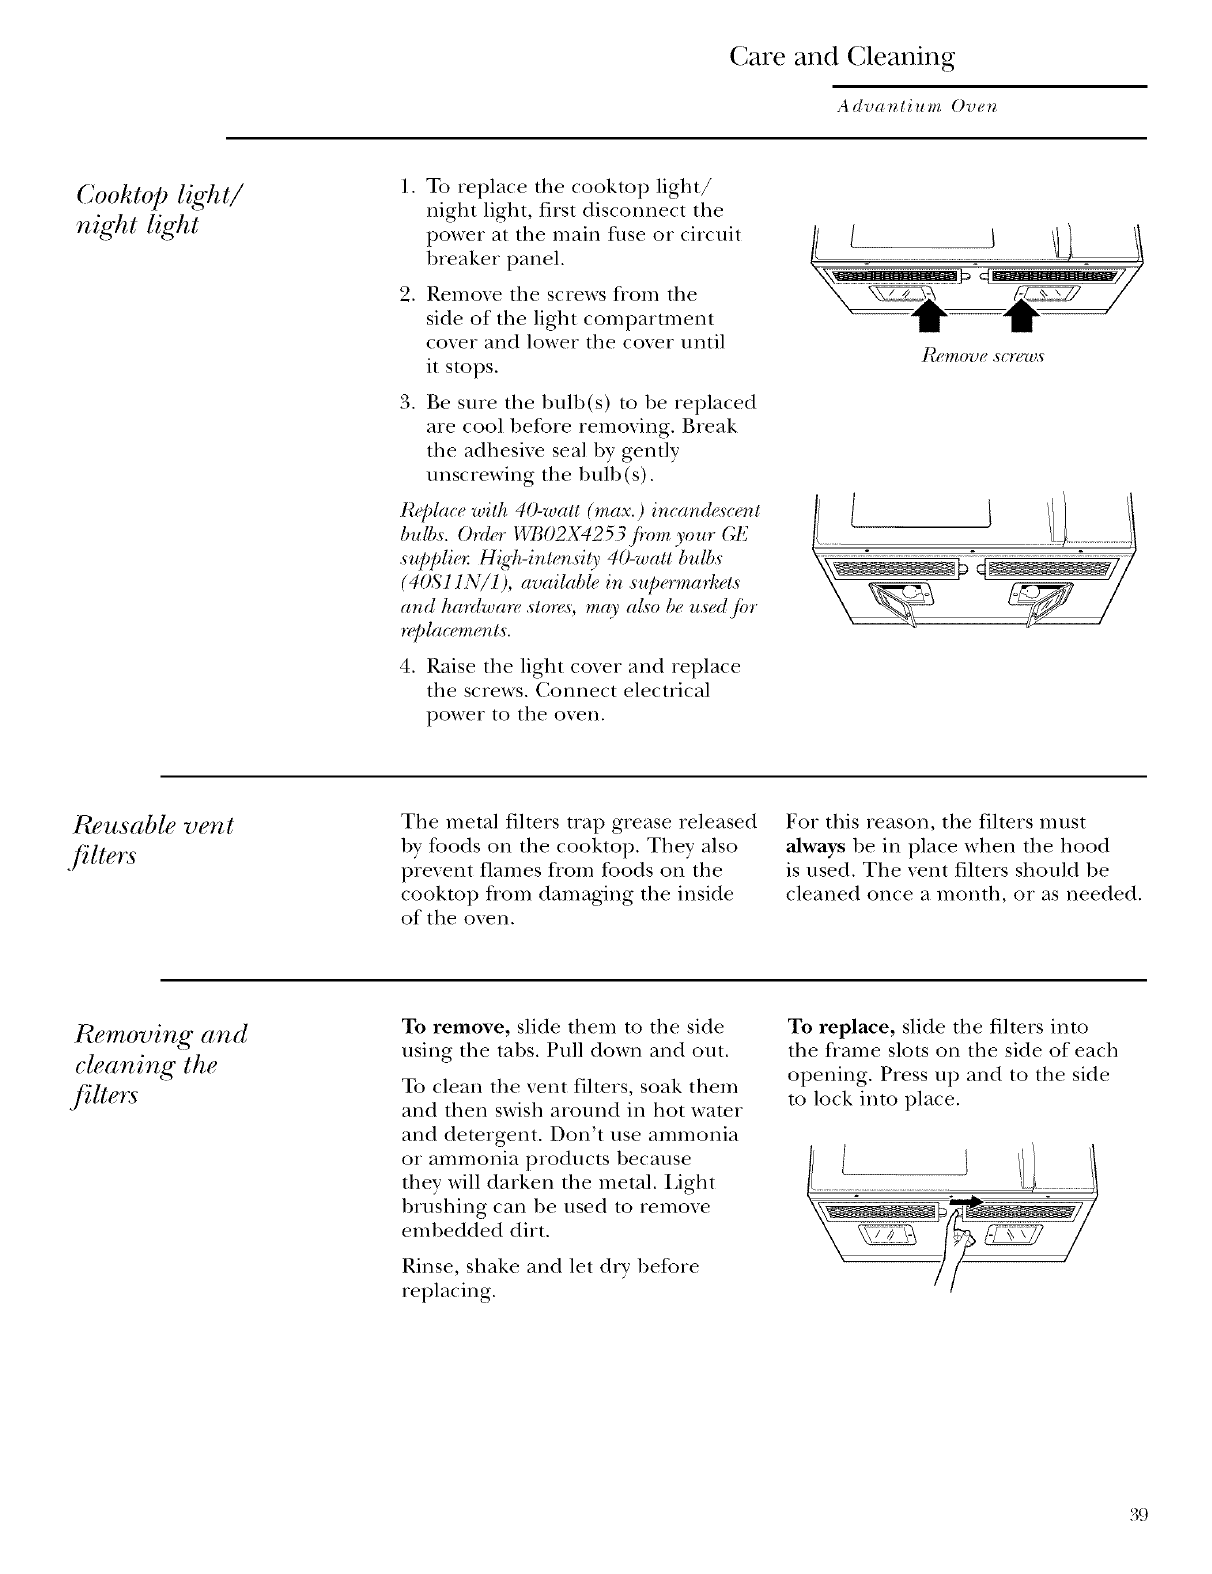
Co&top light/
night light
To replace the cooktop light/
night light, first disconnect tile
power at tile main fuse or circuit
breaker panel.
.Remoxe tile screws flom tile
side of tile light comi)artment
coxer and lower the coxer until
it stops.
.Be sure the bulb(s) to be replaced
are cool before removing. Break
tile adhesive seal by gently
unscrewing the bulb (s).
R@lace with 40-watt (max.) incangh<_cg_nt
bull).s. O, zt#r 1"_!7_02X425 3,f!om you, (;E
su[)plie_: High-irl, tensil_ 40-watt bulbs
(40S 11N/l), available in supoma,t'ets
a,ld ha'_lwa'_v .stor_<_',may a£o be u.sedjbr
roidacem_,nts.
4. Raise tile light coxer and replace
the screws. Connect electrical
power to the oxen.
Pu?usable vent
.filters
Tile metal filmrs trap grease released
by foods on tile cooktop. They also
prevent flames flom foods on tile
cooktop flom damaging the inside
of the oven.
For this reason, tile filters must
always be in place when tile hood
is used. Tile xent filters should be
cleaned once a month, or as needed.
Removing and
cleaning the
filters
To remove, slide them to tile side
using the tabs. Pull down and out.
To clean the vent filters, soak them
and then swish around in hot wamr
and detergent. Don't use ammonia
or ammonia products because
they will darken tile metal. Light
brushing carl be used to remove
embedded dirt.
Rinse, shake and let dry before
replacing.
To replace, slide tile filters into
the flame slots on tile side of each
opening. Press up and to the side
to lock into place.
39
Ca_re and (]leaning
A(lvanlium Oven
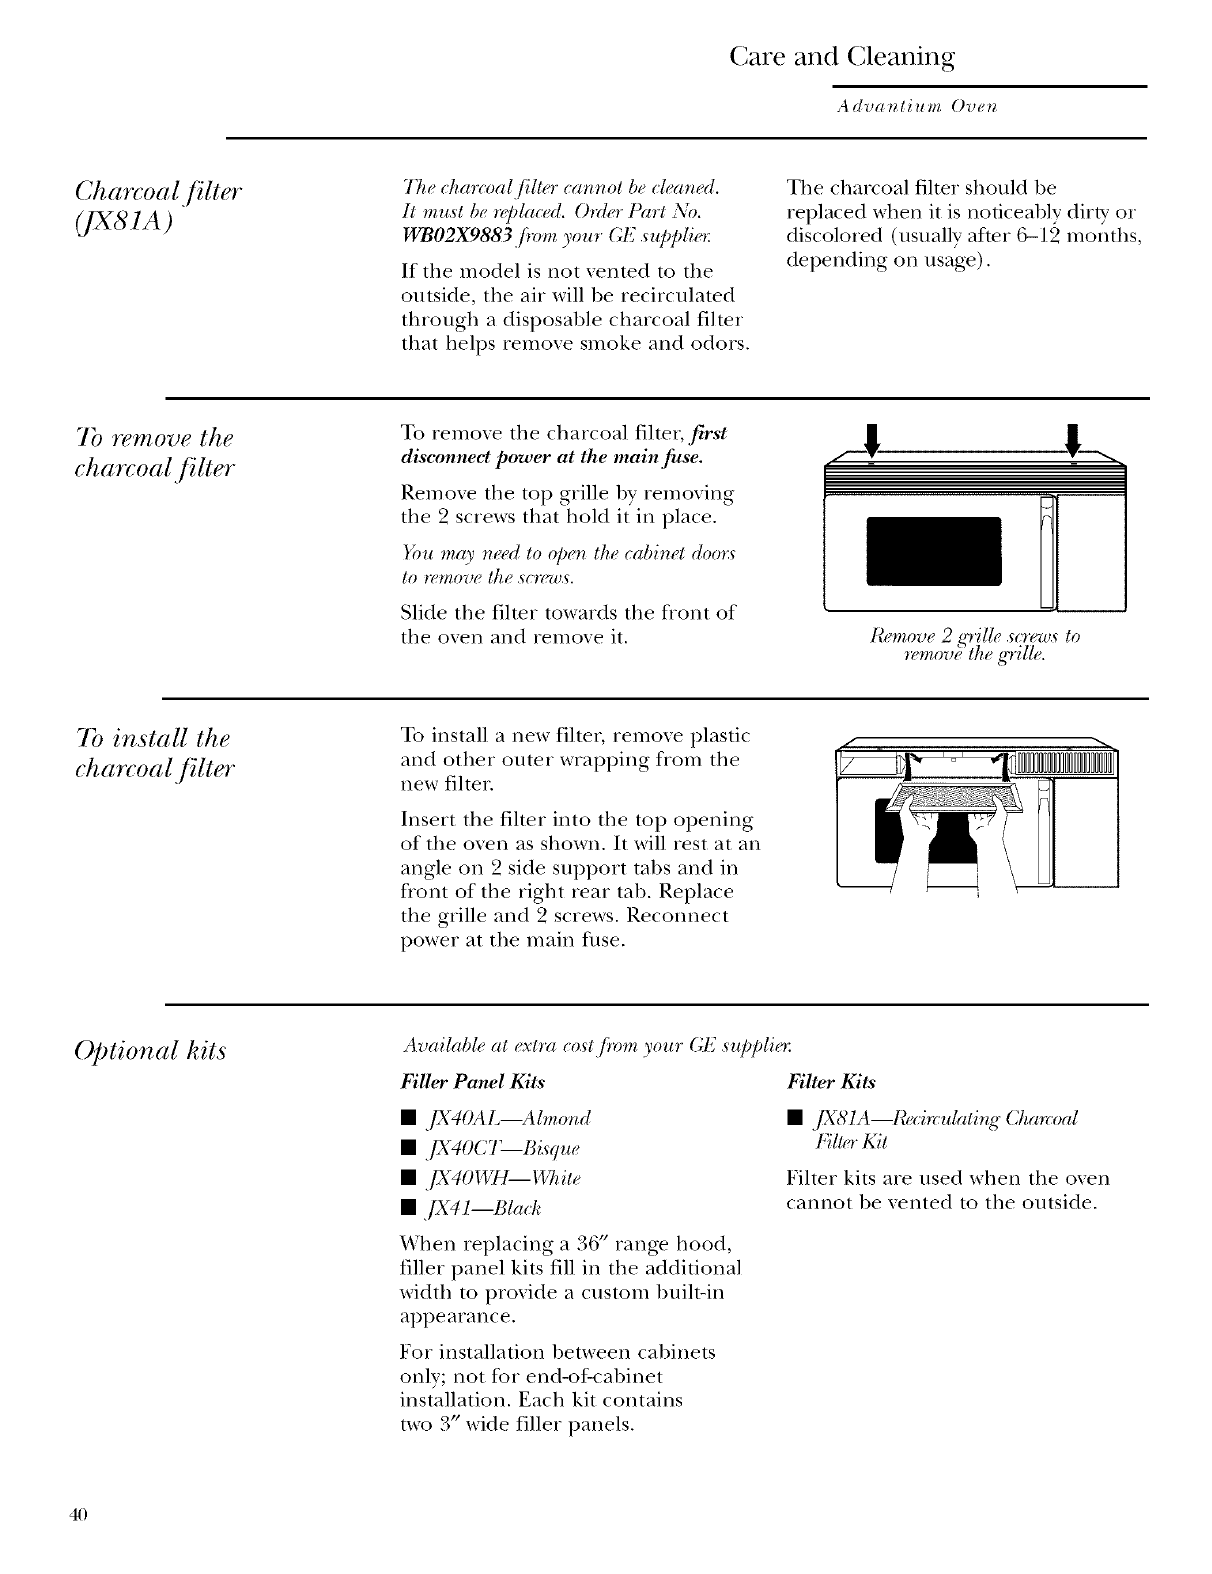
Charcoal filto
(IX81A)
77,3 etmreoal f!ller cannot be cleaned.
It must fie _J)la(ed. Order P,'rt No.
WBO2X9883,firmz your (;E s*q)plie*:
If the model is not xented to the
outside, the air will be recirculated
through a disposable charcoal fiher
that helps remoxe smoke and odors.
The charcoal fiher should be
replaced when it is noticeably dir U or
discolored (usually after 6-19 months,
depending on usage).
7b remove the
charcoal filter
To remoxe the charcoal fiher, first
disconnect power at the main fuse.
Remoxe the top grille by remoxing
the 9 screws that hold it in place.
Yon may n_ed to Open tke cabinet doo_:s
I0 lelnoz)e Ill( ._(.1g,7.2)._.
Slide the filter towards the flont of
the oxen and remoxe it. t¢,,,,:U2 ,iq,s(,U,
_mov;, tt, grilh.
7b install the
charcoal filto
To install a new filter, remoxe plastic
and other outer wrapping from the
new filter.
Insert the filter into the top opening
of the oven as shown. It will rest at an
angle on 2 side support tabs and ira
fiont of the right rear tab. Replace
the grille and 2 screws. Reconnect
power at the main fllse.
Optional kits Availabh, at extra eost,f!rmz your GIg.supplie_:
Iqller Panel Kits Filter Kits
•fXqOAL_Almond
• fX4OCT_Bisque
• fxqOWH bT_ite
•,/X4 1--131ael_
When replacing a 36" range hood,
filler panel kits fill in the additional
width to provide a custom built-in
appearance.
For installation between cabinets
only; not for end-of-cabinet
installation. Each kit contains
two 3" wide fillet panels.
•,[X8 lAmli.:i'_culatirzg C/m'_coal
Fillgo"Kit
Fiher kits are used when the oxen
cannot be xented to the outside.
40
Troubleshooting
Advanlium Oven
Questions ?
Use this
prob&m
SOb)gY
Problem Possible Causes What To Do/Explanation
LIGHTS
There is no oven This is normal. The • Press MICR()WAVE/()VEN
light on during glass is too dark for IIGHT button to light the oven
microwave cooking a microwave light, for several seconds.
Light during a This is normal. • This is normal. The oven senses the
speedcook cycle Power level has been heat level and adjnsts antomatically.
dims and cycles on automatically reduced
and off, even at full because the oven is hot.
power levels
Light visible around This is normal. • When the oven is on, light may
the door and outer be visible around the door and
case while outer case.
speedcooking
b_N
Fan continues to run The oven is cooling. • The fan will automatically shut off
after cooking stops when the internal parts of the oven
have cooled.
Oven vent emits warm This is normal.
air while oven is on
Fan comes on This is normal. • If the cooktop g>ts too hot, the vent
automatically when fan comes on.
oven not in ttse
Fan comes on This is normal. • If the microwave is used after
automatically when speedcook and the oven senses
ttsing the microwave that it is too hot, the vent fan comes
on to cool the oven.
COOKING
The oven makes (',licks and fans blowing • These sounds are normal.
unusual sounds are normal. The relay
while cooking board is turning the
components on and off.
Smoke comes out Food is high in fat • Smoke is normal when cooking high-
of the oven when content. Aerosol spray fat foods. Use vegetable oil or olive
I open the door used on the pans. oil on the meat itself instead of
coating the entire pan.
Food is not fully Programmed times • Increase or decrease time for
cooked or browned may not match the size doneness or adjust the upper or
at the end of a or amount of food you lower lamps for browning; change
cooking program are cooking, the microwave power tbr doneness.
There may be grease
1)uild-up on the glass
co_evs.
• Clean the light coxers with a scraper.
41
Troubleshooting
Advantium Oven
Questions ?
Use this
prob#m
solvJel"
Problem Possible Causes What To Do/Explanation
DISPIAY
The display is blank Tile clock display has • Check the OPTI()NS menu for clock
been turned off. display settings. Turn tile display on.
"CONTROL IS Tile control has • Press and hold CLEAR/()FF for al)ont
LOCKED'appears been locked. 3 seconds to unlock tile control.
in display
Control display is
lighted yet oven
will not start
Clock is not set. • Set tile clock.
Door not secnrelv closed. • ()pen tile door and close securely.
START/PAUSE button • Press START/PAUSE.
not pressed after enmring
cooking selection.
Another selection aheady • Press CLEAR/OFF.
enmred in oven and
CLEAR/OFF button not
pressed to cancel it.
Size, quantity, or cooking • Make snre yon, have entered cooking
time not entered after time after selecting.
selecting Iq_GETABIdgS
(FIU_SH, FITOZF.N, CA.\_\:Igl)),
t3A CON, I)I_FI¢OST (TIME)
or 77ME COOK.
CLEAR/OFF was pressed • Reset cooking program and press
accidentally. START/PAUSE.
Food weight not entered • Make sure yon have enmred food
after selecting weight after selecting DEFROST
DEFROST (AUTO). (AUTO).
OTHER PROBLEMS
The door and inside Tile heat lamps • This is normal.
of the oven feels hot produce intense heat • Use oven mitts to remove tGod when
ill a small space, when ready.
Floor of the oven is Tile cooktop light is • This is normal.
warm, even when located below tile oven
the oven has not floor. When tile light
been ttsed is on, tile heat it produces
may make tile oven floor
get warm.
Oven will not start A fllse ill your home
may be blown or tile
circuit 1)reaker tripped.
• Replace fllse or reset circuit 1)reaker.
Power surg>. • Unplug tile oven, then plug it back ill.
Plug not flflly inserted
into wall outlet. • Make snre tile plug on tile oven is
flllly inserted into wall outlet.
42

Notes
A dva*_ tiu m Ove_
Notes and
€OTfl_l_e_ltS
43

Notes
Advanliltm Oven
44
GE Service Protection Plus rM
GE, a name recognized worldwide _br quality and dependability; oflers y'ou
Service Protection Plus'"--comprehensive protection on all y'our appliances--
No Matter What Brand!
Benefits Include:
• Backed by GE
• All brands covered
• Unlimited service cars
• All parts and labor costs included
• No out-of-pocket expenses
• No hidden deductibles
• One 800 number to call
We71CoverAny Appliance.
Anywhere. Anytime.*
You will be c()mpletel,_ satisfied with our set\ice protection or you ma} request }our inonev back
on tile remaining xalue of _o/u" contract. No questions asked. It's that simple.
Protect vom" refl_igerat(m dishwasher; washer and (hTe_; range, TV, VCR and much more--any brand!
Plus there's iso extra charge tot elnergency ser;'ice and low monthly financing is available. Even icelnaker
coverage and tood spoilage protection is offered. You can rest eas> knowing that all vom" valuable
household products are protected against expensive repairs.
Place your confidence in (;E and call us in tile U.S. toll-free at _UU._lZ_.ZZZ/-]:
for inoi'e illfoI'u/atioIl,
*M1 lmmds cov(_ed, up Io 20 y(ars old, in I1-1( continental U.S.
__ _C/_ll'h__2e............
Please place in envelope and mail to:
General Electric Company
Warranty Registration Department
EO. Box 32150
Louisville, KY 40232-2150
Consumer Product Ownership Registration
Dear Customer:
Thank you for purchasing our product and thank you for placing your confidence in us.
YVeare proud to ha_e you as a customer!
Follow these three steps to protect your new appliance investment:
Complete and mail
your Consumer
Product Ownership
Registration today:
Ilave the peace ot
mind of knowing w(
Call COlltact VOI/ ill
th( unlik(lv (vent o[' a
satk'ty modification.
After mailing tile
registration below,
store this document
in a saf;.* place. It
contains intormation
you will need should
you require service.
Our service mlmber is
800 GE CARES
(8t)0.432.2737).
Read your Owner's
Manual carefidl',;
It will help you
operate yOlll" lleW
appliance properl);
Model Number Serial Number
III
Important: If you did not get a registration card with your
product, detach and return the form below to
ensure that your product is registered, or register
online at www.GEAppliances.com.
................................................................................................... _,,,- Cut here
Consumer Product Ownership Registration
Model Number Serial Number
Ms. Mrs. Miss
Name I I I I I I I I I Nam( I I I I I I I I I I I I
Address IIIIIIIIIII IIIIIIIIIIIII
Ap,._i,,,,,,,iE-lll_lilx\d(lr(!sq
Zip
Date Placed
Nulnl×_r I,I I I I I
_,_o.th I-I I-I
OGEAppliances
GE Consumer Products
Keneral Electric CompanF
Louisville, Kentucky
wwwGEAppliances.com
Occasionally, we may allow selected companies to send you inlbrmation.
[ Check here if you do not want this infkn-mation.
FAILI JRE TO C()MPLETE AN[) RETI JRN TIIIS CARD D()ES NOT DIMINISt t Y()I JR
W.kRIL\N'IY RIGt iTS.
For more intimnation about GFA's privacy and data usage policy, go to _-_a_-.Gl_Appliances.com and
click on 'Privacy Policy" or call 800.626.2224.
Advantium Oven Warranty
Advantium Oven
All warra,/), ,sowice provided by all authorized Cu,stomo" Cmv ®te<b*dcia,. 7b ,schedule ,sowic_,
onlim5 24 hou*:s ad(9,, contact u.s at www. GEApplianc_<s.com, or call 800. (;E. (;ARES.
For The Period Of:
One Year
From the dale q/the
or{ffinal plm ha,s,_
Ten Years
t')om the ,s*,eond th*v*(gt_
lhe tenth year fi*nn the
date qf or_ffinal pu_ha,_e
Ten Years
I:mm the ,s_,cond th_ougt_
the tenth yearJhwz the
date of or_g4nal pu_cha,se
GE Will Replace:
Any part of the oven which thils due to a detect in materials or
workmanship. During this full one-year warrant), GE will also provide,
free of charge, all labor and in-home service to replace the
defective part.
The halogen speedeooh lamps, if the halogen lamps fail due to a detect
in materials or workmanship. During this full ten-year warrant); GE will
also provide, free ofchar_'e, all labor and in-home se_wice to replace the
defective part.
The magnetron tube, if the magnetron tube tails due to a defect in
materials or workmanship. During this additional nine-year limited
warranty, you will be responsible tot any labor or in-home se_wice
costs.
What GE Will Not Cover:
•Service trips to your home to teach you how •Replacement of house fuses or resetting of
to use the product, circuit breakers.
• hnproper installation, delivery or
mahltenmlce.
• Failure of the product if it is abused,
misused, or used for other than the
intended purpose or used commercially.
• Replacement of the cooktop light bulbs.
• Dmnage to the product caused by accident,
fire, floods or acts of God.
• Incidental or consequential damage caused
by possible defects with this appliance.
•Damage caused after delivery.
77zis warranly i.s extended to lbe original puwha.so and a, O, ,succeeding own_,rj;)r products
pmrha.sed jbr home use within the {.IS'A.hi Alasl_< the warranly exclu&_ the cant qf shi/q)ing or
.s_.rvice calls to your home. t%q/ (f ll_e original pu_rha.se date is needed to obtain .s¢_wiceunctcr
the warranly.
Some .statg<sdo not allow the exclu.sion or limitation (f incicle_ltal or con.sr<lue, tial (/amag(<_. 77_is
warranly givr+_you .qwgific legal rig&ts, and you may also have other rigbt.s which vary .f!om .state to
.state. 7b know what your lrgal rigbt.s a'+z_,<-onsult your local or .state con._um<,rq[lhi'+:_q]Ji<e or your
.state's Attor, O, (;e+,.ral.
Warrantor: General Electric Company. Louisville, KY 40225
47
Consunmr Support
GE Appliances Web site urarw. GEAppliances.com
Have a question or need assistance with your appliance? Try the GE Appliances Web site 24 hom_ a day,
any clay _ffthe year! For greater convenience and tilster service, you can now download (-)wner's Manuals,
order parts, catalogs, or even schedule se_Mce on-line. Ybu can also "_sk Our Team oI EN)erts-," 7mr
questions, and so I/ltlch I/lore...
Schedule Service www.GEAppliances.com
Expert (;E repair serxice is onl) one step awa)fl'om )our (loo_: Get on-line and schedule _our service at
your comenience 24 hems an) day of the _ear'. Or call 800.GE.(_ARES 8(t(I.432.2737) during n(mnal
business hom_.
Real Life Design Studio www.GEAppliances.com
(;E suI)ports the Universal Design concept--products, services, and environments that can be used by
people of all ages, sizes, and capabilities. X4'e recognize the need to design for a wide range of physical and
mental abilities and impairments. For details oI GE's Universal Design applications, including kitchen
design ideas tot people with disabilities, check out our _4'eb site today: For tile hearing impaired, please
call 800.TDD.GEAC (800.833.4322).
Extended Warranties axvw. GEAppliances.com
Purchase a (;E extended x_arrantv and learn about special discounts that are axailable while your warrant},
is still in eflb'ct. "g))ll can purchase it on-line anytinle or call 800.626.2224 during normal business hou_.
(;E (_onsluner Home Services will still be there atter }our warranty expires.
Parts and Accessories _.GEAppliances.com
Individuals qualified to service their own appliances can have parts or accessories sent directly to their
homes (VISA, MasterCard, and Discover cards are accepted). Order on-line u)clay, 24 hom_ e\'e_T day,
or by phone at 800.626.2002 during normal business hom_.
Instructions contained in thN manual cover procedures to he performed by any user. Otherservicing generally
should be referred to qualified service personnel. Caution must be exercised, since improper servicing may cause
unsafe operation.
Contact Us www. GEAppliances.com
If you are not satisfied with tile se_'ice wm receive fl'om GE, contact us on our _Neb site with all tile details,
including your phone numbe_; or write to: General Manage_; Customer Relations
GE Appliances, Appliance Park
I,ouisville, KY 40225
Register Your Appliance www. GEApp liances,com
Register )our new apl)liance on-line--at your comenience! Timel) product registration will allow for
enhanced communication and proml)t service under tile temps of)our warrant_, should tile need arise.
You may also mail in tile preprinted registration card included in tile I)ackin°_ material.
FlashBahe technolqg) L5used b) GE u)_der lice)l_e fivm Quadlux, l)lc. Prickled i)l Korea
