GE PROFILE In Range, Gas Manual L0608243
JGS905BEK2BB JGS905BEK2BB GE GAS RANGE - Manuals and Guides L0608243 View the owners manual for your GE GAS RANGE #JGS905BEK2BB. Home:Kitchen Appliance Parts:GE Parts:GE GAS RANGE Manual
User Manual: GE GE PROFILE In Range, Gas Manual GE PROFILE In Range, Gas Owner's Manual, GE PROFILE In Range, Gas installation guides
Open the PDF directly: View PDF ![]() .
.
Page Count: 44
ge.com(U.S.)
vvwvv.GEApp/iances.ca(Canada)
o_
U3
©
Safety Instruc_ons ............ 2-7
Operating Instrudions
Baking or Roasting .............. 11
Broiling, Broiling Guide ......... 14
(',lock and Timer . .............. ]5
Con trol I,ockout ............... ] 5
Cookware ...................... 9
Oven ...................... ] 0-22
Sabbath Feature ................ 22
Self:Cleaning ............... 18, 19
Special Features ............. 20-21
Surfi_ce Burnei's .............. 8, 9
Thermostat .................... 17
Timed Baking & Roasting ........ 16
Care and Cleaning
Broiler Pan and Grid ........... 25
Burner Assembly ............... 23
Burner Grates and
Vent Grille .................... 24
Control Panel ................. 27
Door. ........................ 26
Floor ......................... 27
Glass Cooktop .............. 28, 29
Knobs ........................ 23
I Jft-Off Oven Door ............. 26
Light Bulbs .................... 24
Packagfng Tape ................ 23
Painted Surfhces ................ 27
Racks ........................ 25
Stainless Steel Surfi_ces .......... 27
Storage Drawer . ............... 25
Vent ...................... 24, 27
Troubleshooting Tips ........ %-34
o
Accessories .................... -,9
Cons_tmer Support
Consumer Support ..... Back Co_vr
Product RegSstrafion
(Canada) .................. 37, 38
Product Registration (U.S.A.) . 35, 36
_\arrantv for Customei's
in Canada .................... 43
_\arranty fbr Customers
in the U.S.A ................... 42
Write the model and serial
numbers here:
Model #
Serial #
You can find them on a label
behind the open oven door
on the lower left corner of the
range fl'ame. 49-80371 11-05Jfl
IMPORTANTSAFETYINFORMATION.
READALLINSTRUCTIONSBEFOREUSING.
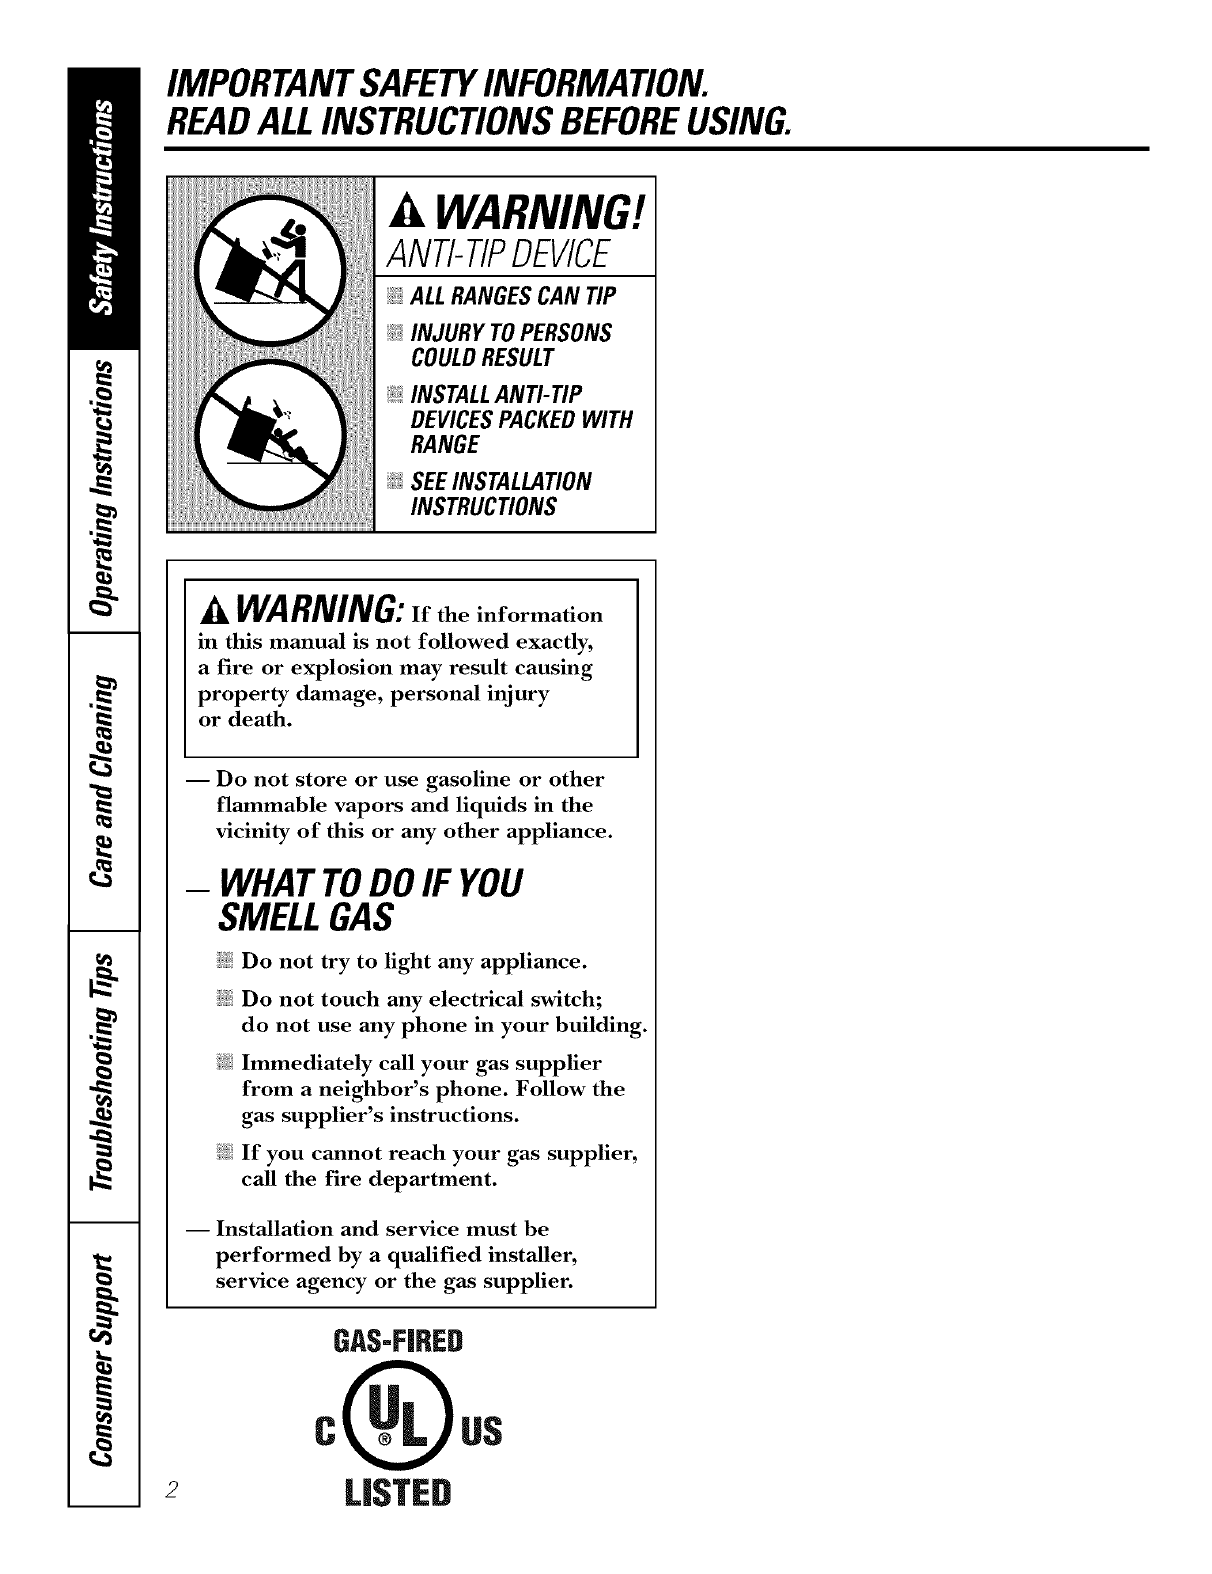
WARNING!
ANTI-TIPDEVICE
_!_ALLRANGESCAN TIP
_;i:INJURY TOPERSONS
COULDRESULT
@INSTALLANTI-TIP
DEVICESPACKEDWITH
RANGE
_SEEINSTALLATION
INSTRUCTIONS
AWARNING:If the information
in this manual is not followed exactly,
a fire or explosion may result causing
property damage, personal injury
or death.
2
IDo not store or use gasoline or other
flammable vapors and liquids in the
vicinity of this or any other appliance.
-WHATTODOIF YOU
SMELLGAS
iJ_:illDo not try to light any appliance.
i_i:iDo not touch any electrical switch;
do not use any phone in your building.
Immediately call your gas supplier
from aneighbor's phone. Follow the
gas supplier's instructions.
If you cannot reach your gas supplier,
call the fire department.
-- Installation and service must be
performed by a qualified installer,
service agency or the gas supplier.
GAS-FIRED
LI_TED
ge.com(U.S.)
vvvvw.GEAppliances.ca(Canada)
WARNING!
For your safety, the information in this manual must be followed to minimize the risk of fire or
explosion, electric shock, or to prevent property damage, personal injury, or loss of life.
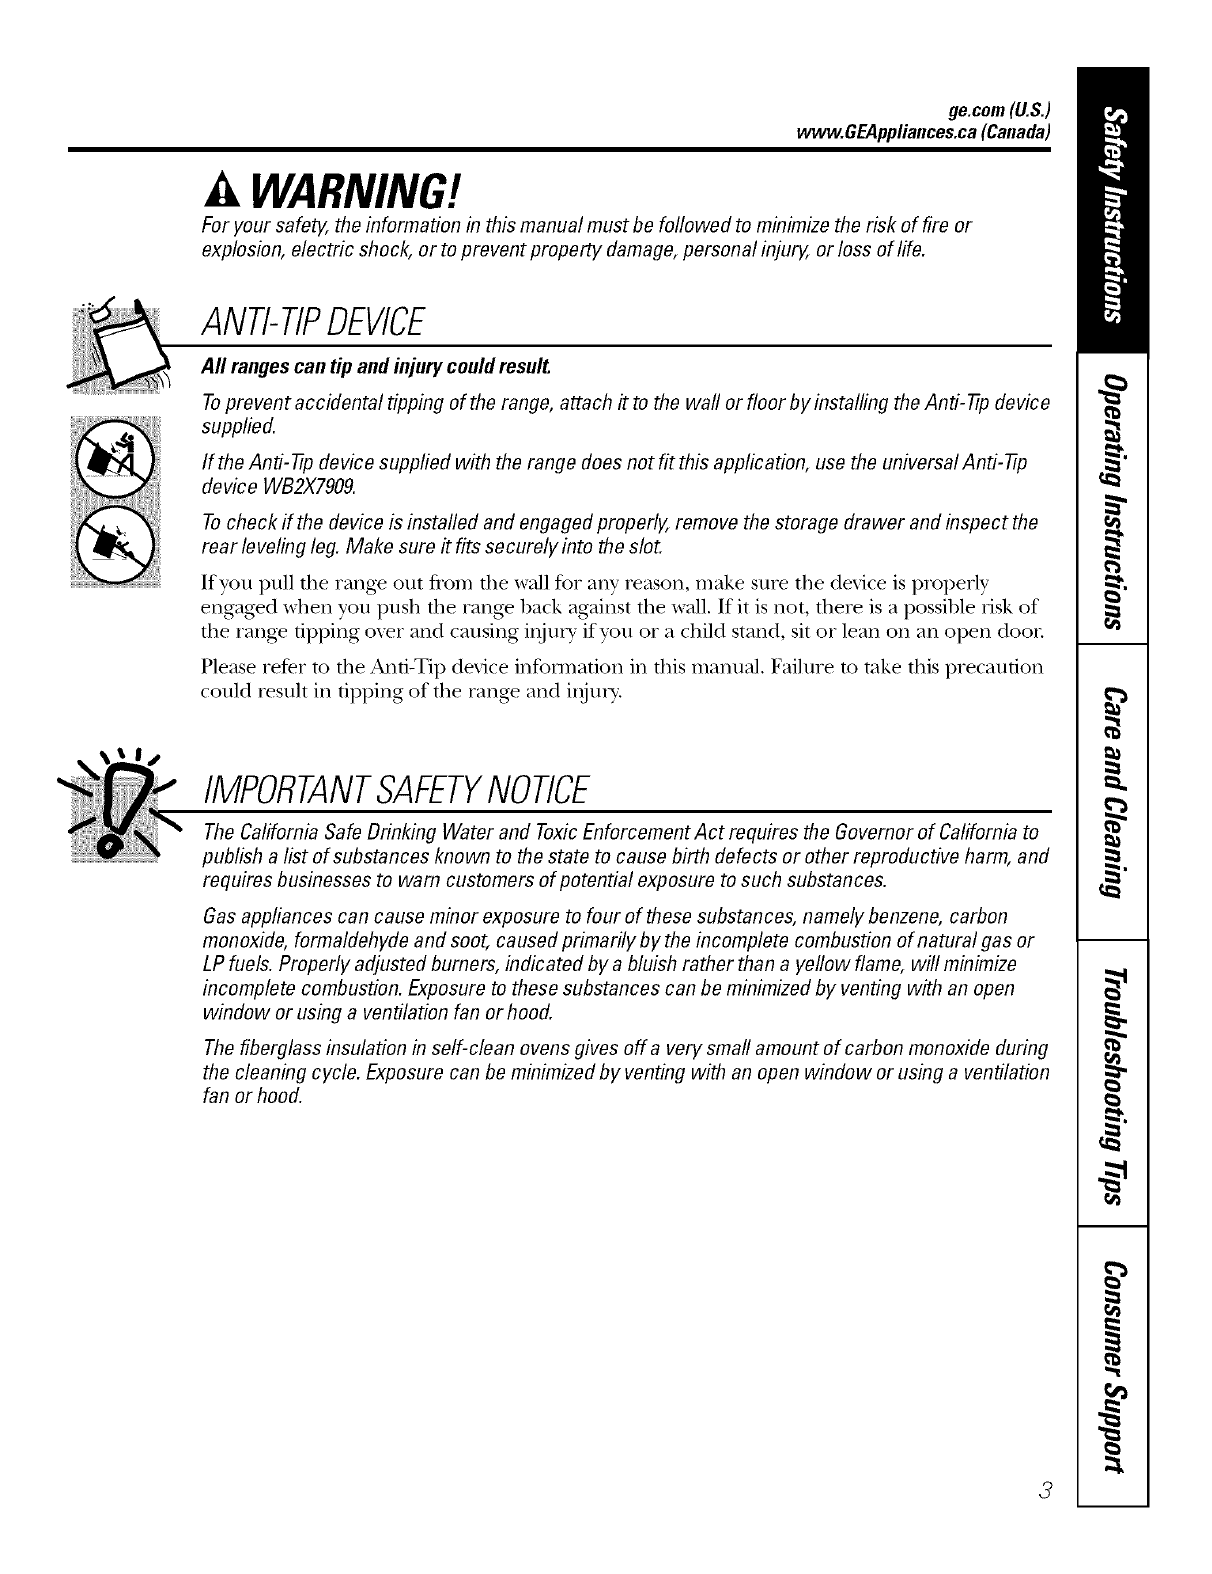
ANTI-TIPDEVICE
All ranges can tip and injury could result.
Toprevent accidental tipping of the range, attach it to the wall or floor by installing the Anti--tip device
supplied.
If the Anti--tip device supplied with the range does not fit this application, use the universal Anti--17p
device WB2X7909.
To check if the device is instafled and engaged properly, remove the storage drawer and inspect the
rear leveling leg. Make sure #fits securely into the slot.
If yOU pull tile range otlt flom tile wall for ally reason, mal_.e stlie the device is properly
engaged when you push tile rang_ back against file wall. If it is not, there is a possible risk of
the rang_ tipping oxer and causing iIlju]_y"if YOUor a child stand, sit or lean on an open door
Please refer m the And-Tip device infounafion in tiffs manual. Failure m rake fills precaution
could result in tipping of the rang_ and iIIjm>
IMPORTANTSAFETYNOTICE
The Californb Safe Drinking Water and ToxicEnforcement Act requires the Governor of Californb to
publish a list of substances known to the state to cause birth defects or other reproductive harm, and
requires businesses to warn customers of potential exposure to such substances.
Gas appliances can cause minor exposure to four of these substances, namely benzene, carbon
monoxide, formaldehyde and soot, caused primarily by the incomplete combustion of natural gas or
LP fuels. Properly adjusted burners, indicated by a bluish rather than a yellow flame, will minimize
incomplete combustion. Exposure to these substances can be minimized by venting with an open
window or using a ventilation fan or hood.
The fiberglass insulation in self-clean ovens gives off a very small amount of carbon monoxide during
the cleaning cycle. Exposure can be minimized by venting with an open window or using a ventilation
fan or hood.
3
IMPORTANTSAFETYINFORMATION.
READALLINSTRUCTIONSBEFOREUSING.
WARNING!
SAFETYPRECAUflONS
When using electrical appfiances, basic safety precautions should be foflowed, including the
following:
_7{_Use this appliance only %r its intended
purpose as described m tins )wner s
Mannal.
_:: Be sure your appliance is properly installed
and grounded by a qualified technician in
accordance with the provided installation
instrnctions.
_{:_Before perfo_ning any service, disconnect
the range power supply at the household
disu-ibufion panel by removing the fl_se or
switching off the circuit breaken
;fi:,iHaxe the installer show you tile location of
tile circuit breaker or fl_se. Mark it for easy
reference.
J; Do not leme children alone----r'hildren
should not be left alone or unattended in
all area where all appliance is ill use. They
should nexer be allowed to sit or stand on
ally part of the appliance.
J; Haxe the installer show you the location
of the range gas shut-offxahe and how to
shut it off if necessa U.
J; Hax> your rang_ installed and properly
grounded by a qualified installei; in
accordance with tile Installation
Instructions. Ally' adjusunent and se_Mce
should be perfomled only 1)yqualified gas
range installers or service technicians.
_{:_Locate the range out of kitchen traffic pafll
and out of dr_fftv locations to prexent poor
air circulation.
_t_::Be sure all packaging materials are
removed from rite rang_ before operating
it to pre\ent fire or smoke damage should
the packaging mamrial ignite.
Do not attempt to repair or replace ally
part of your range unless it is specifically
recommended in this manual. All other
service should be refelTed to a qualified
technician.
Be sure your range is con-ecfly adjusted
by a qualified se_Mce mchnician or installer
for tile type of g_s (natural or LP) that is
to be used. Your rang_ call be comermd
for use with either type of gas. See the
Installation Instructions packed with
the rang_.
_:: Plug your range into a 190=\_lt grounded
outlet only. Do not remo_e tile round
g_ounding prong from the plug. If in
doubt about the grounding of the home
elecuical system, it is your personal
_esponsibilitv and obligation to haw
all ungrounded outlet replaced with a
properly gTonnded, three-prong outlet ill
accordance with flae National Electrical
(',ode (U.S.). Do not use all exmnsion cord
with fl)is appliance.
WARNING:theseadjustments
must be mode by a qualified service
technician in accordance with the
manufacturer's instructions and aft codes
and requirements of the authority having
jurisdiction. Failure to follow these
instructions could result in serious injury or
property damage. The qualified agency
performing this work assumes
responsibility for the conversion.
_{::Kee I) the hood and grease filters clean to
maintain good xenting and to axoid grease
fires.
J; Do not leme children alone or nnattended
where a range is hot or in operation. They
could be seriously bm_led. _:;
Teach children not to play with tile
controls or ally other part of the range.
Always kee I) dish towels, dish cloths, pot
holders and other linens a satb distance
fronl vonr rangP.
4

ge.com(U.S.)
vvvvvv.GEAppliances.ca(Canada)
SAFETYPRECAUTIONS
;_?:,:Always kee I) wooden and plastic utensils
and canned tbod a safe distance fiom your
range.
_i:,iAlways kee I) combnsdble wall coxetings,
curtains or drapes a safe distance fiom
yonr range.
_{:;Do not clean tile rang_ with flammable or
xolatile cleaning fluids.
_i:,:After prolong>d use of a range, high floor
mmperautres may result and many floor
coxelJng3 will not withstand this kind of q?{::
use. Nexer insta]l tile range oxer vinyl tile
or linoleum that cannot wifllsmnd such
type of use. Nexer install it directly over _::
inmrior Mtchen caq)efing.
;f?:':Avoid scratching die glass cooktop widt
sharp instruments, or wifl3 tings and other
jeweh T.
;_i:,:Do not allow anyone to climb, stand or
hang on die oxen door; storage drawer or
cooktop. They could damag> the rang>
and even tip it oxel; causing sexere
personal ilIjm T.
CAUTION:Itemsinteresttochildren
shouldnot be storedin cabinetsabovea rangeor
on the backsplashof a range--children climbing
on the rangeto reachitems could beseriously
injured.
WARNIN&NEVERusethis
appliance as a space heater to heat or
warm the room. Doing so m W result
in carbon monoxide poisoning and
oxedteafing of the cookmp or oxen.
_i:,:For your safety, hexer use your appliance
for wanning or heating the room.
;_?:':Large scratches or impacts to glass doors
can lead to broken or shatmred glass.
mamfial could be ignimd if brought in
contact with flame or hot oxen surtZaces
and may cause sexere b/li-/ls.
;_?:':Do not clean fire rang_ when the appliance
is in use.
_i:,:Nexer wear loose-fitting or hanging
gammnts while using the appliance.
Be carefifl when reaching for imms stored
in cabinets oxer the range. Flammable
Do not store flammable materials in an
oxen, a range storag> drawer or near a
cooktop.
Do not store or use combnsuble mamrials,
gasoline or other flammable vapors and
liquids in the vicinity of this or any other
appliance.
Do not let cooking grease or other
flammable mamrials accumulam in or
near the rang>.
Do not use wamr on grease fires. Nexer
pick up a flaming pan. Turn dm conuols
off: Smother a flaming pan on a surfl_ce
burner 1)5' coxering tile pan complemly
with a well-fitting lid, cooMe sheet or fiat
tr W. Use a multi-pml)ose d Uchemical or
foam-type rite extinguisher
Flaming grease outside a pan can be put
out by covering it with baking soda or;
if available, by using a multi-pm])ose d U
chemical or foam-type fire extinguisher
Flame it3 die oxen can be smodtered
completely by closing the oxen door and
turning tile control to off or 1)5' using a
nmlti-pm])ose d_T chemical or foam-type
fire extinguisher
Let tile burner g_ates and other surtZaces
cool before touching them or leaving
then3 where children can reach them.
_?_::Nexer block dte xents (air openings) of
the range. They provide die air inlet and
oudet fllat are necessa Ufor the range to
operam properly with cotwect combustion.
'Air openings ate located at rite teat of the
cooktop, at tile top and bottom of file
oxen door; and at tile 1)oUom of the rang>
under the storage drawer or kick panel.
_7_::Do not lift tile cooktop. Lifting the
cooktop can lead to damag> and improper
operation of the rang>.
5
IMPORTANTSAFETYINFORMATION.
READALLINSTRUCTIONSBEFOREUSING.
WARNING!
SURFACEBURNERS
Useproperpan size--avoid pansthat are unstableor easilytipped.Selectcookware havingflat bottomslarge
enoughto coverburnergrates. Toavoid spillovers,makesure cookwareis largeenoughto containthe food
properly, Thiswill both save cleaningtimeandprevent hazardousaccumulationsof food,sinceMaw spattering
or spilloversleft on rangecan ignite.Usepans with handlesthat can be easilygraspedand remaincooL
_i)!Ahvays use tim Life position when igniting
the top burners and make sure the burners
hme ig_fited.
!?' Never leme the stirface btunets unattended
at high flame settings. Boilovers cause _i_!
smoking and greasy spillovers that may
catch on fire. _i_!
!?' Adjust the top burner flame size so it does
not extend beyond the edge of the cookware.
Excessive flame is hazardous.
!_:Use only dry pot holders--moist or damp pot
holders on hot surPaces may resuh in burns
flom smam. Do not let pot holders come
near open flames when lifting cookware. Do
not use a towel or other bulky cloth in place
of a pot holder:
!?' X_\hen using glass cookware, make sure it
is desig_md for top-of-range cooking.
!?' To minimize the possibili b, of 1)urns, ignition
of flammal)le materials and spillage, mm
cookware handles toward the side or back of
the range without extending over adjacent
btlI'IleI's.
_i_!Careflflly watch foods 1)eing flied at a high
flame setting.
_i_!Ahvays heat fat slowly and watch as it heats.
!_:Do not lea\e any imms on the cooktop. The
hot air flom the \'ent may ig_im flammable
imms and will increase pressure in closed
containers, which may cm_se them m l)u_st.
_i)!If a coml)ination of oils or _lts will be used
in flying, stir together before heating or
as _lts meh slowh,
_i_!Use a deep flu thermometer whenever
possible to prevent oxerheating _t 1)eyond
the smoking point.
_i)!Do not operate the burner wifl_out all btuner
parts in place.
[_lse tim least possil)le amount of flu for
efl>ctive shallow or deep-_lt flying. Filling
the pan too fifll of_u can cause spilloxers
when food is added.
X&qmnpreparing flaming foods under the
hood, turn the f,m on.
Do not use a wok on tim cooking sur£1ce
if the wok has a round metal ring that is
placed o\er the burner giv_m m support the
wok. This ring acts as a heat m_p, which mW
damage the N_rner gram and N_rner head.
Also, it may cm_se the N_mer m work
improperly. This may cause a carl)on
monoxide le\_l abo\_ that allowed by current
standards, _esuldng in a heahh hazard.
Foods for fi)ing should be as dr) as possil)le.
Frost on fiozen foods or moisture on fiesh
foods can cause hot Pat to 1)ubble up and over
the sides of the pan.
Nexer uy to move a pan of hot Pat especiall;.'
a deep flit flyer. X'\hit until the flit is cool.
Do not lem_e plastic items on tim cooktop--
they may meh if left too close to the vent.
Kee I) all plastics mvay flom the surPace
1)tlI'Ile I'S.
To moid the possibili b, of a burn ahvavs be
certain that the conuols for all burners are
at the OFFposition and all grates are cool
before attemi)dng to remove them.
If _ange is located near a window, do not
hang long curtains that could 1)low over the
surface burners and create a fire hazard.
If you smell gas, turn off the g:_s to the range
and call a qualified service technician. Nexer
use an open flame to locate a leak.
Ahvays ttun the stuJ_ce 1)tunet conuols off
before removing cookware.
ge.com(U.S.)
_GEAppliances.ca (Canada)
COOKMEATANDPOULTRYTHOROUGHLY...
Cookmeatandpoultrythoroughly--meattoat leastanINTERNALtemperatureof 160°F(71°C)andpoultrytoat leastan
INTERNALtemperatureof 180°F(82°C).Cookingto thesetemperaturesusuallyprotectsagainstfoodborneillness.
it WARNING!
OVEN
Stand awayfrom the range when opening the oven door. Hot air or steam which escapes can cause
bums to hands, face and/or eyes.
Do not heat unopened flood containers.
Pressurecould build up and the container
could bulst, causing an inju U.
Keep tile oven vent unobstructed.
Kee I) the oven flee from grease buildup.
Place tile oven rack in tile desired position
while the oven is cool. If rocks must be handled
when hot, do not let pot holder contact the
heating elements.
iJii:iWhen using cooking or roasting bags in tile
oven, follow tile manufi_ctu,er's directions.
Pulling out tile rock to tile stop-lock is a
convenience in lifting heavy fbods. It is also a
precaution against burns flom touching hot
surfilces of the door or oven walls.
Do not use tile oven to dUnewspape,s.
If overheated, the} can catch on fire.
Do not use the oven fur a storage area. Items
stored in an oven can ignite.
Do not leave paper products, cooking utensils
or food in the oven when not in use.
a, WARNING:NEVERcover
any slots, holes or passages in tile oven bottom
or cover an entire rack with materials such as
alunfinuln toil. Doing so blocks air flow
through the oven and may cause carbon
inonoxide poisoning. Alunlinuln %il linings
may also trap heat, causing a fire hazard.
Do not use aluminum fi0ilto line oven bottoms,
except as suggested in this inanual, hnproper
installation of alulninuln foil may result in a
risk of electric shock or fire.
Make sure tile broiler pan is in place conectl)
to reduce the possibilit) of grease fires.
If you should have a grease fire in tile broiler
pan, press tile Cl£AR/Offpad and keep tile
oven door closed to contain fire until it
buI'nS OUt,
SELF-CLEANINGOVEN
Do not use oven cleaners.No commercialoven cleaner or ovenliner protective coatingof any kind shouldbe
usedin or aroundany part of the oven.Residuefrom ovencleanerswill damagethe inside of the oven when the
self-clean cycle is used,
iJii:iDo not clean tile door gasket. Tile door gasket
is essential fbr a good seal. Care should be
taken not to rub, damage or move tile gasket.
iJi;:iBe%re selfkleaning the oven, remove tile rocks,
broiler pan, grid and other cookware.
iJii:iBe sure to wipe up excess spillage before
starting the self cleaning operation.
iJii:iIf tile self cleaning mode malflmctions, turn the
oven off and disconnect tile power supply. Have
it serviced b} a qualified technician.
iJi;:iClean only parts listed in this Owner's Manual.
READANDFOLLOWTHISSAFETYINFORMATIONCAREFULLY.
SAVETHESEINSTRUCTIONS 7
Using thegas surfaceburners.
Throughout this manual, features and appearance may vary from your model.
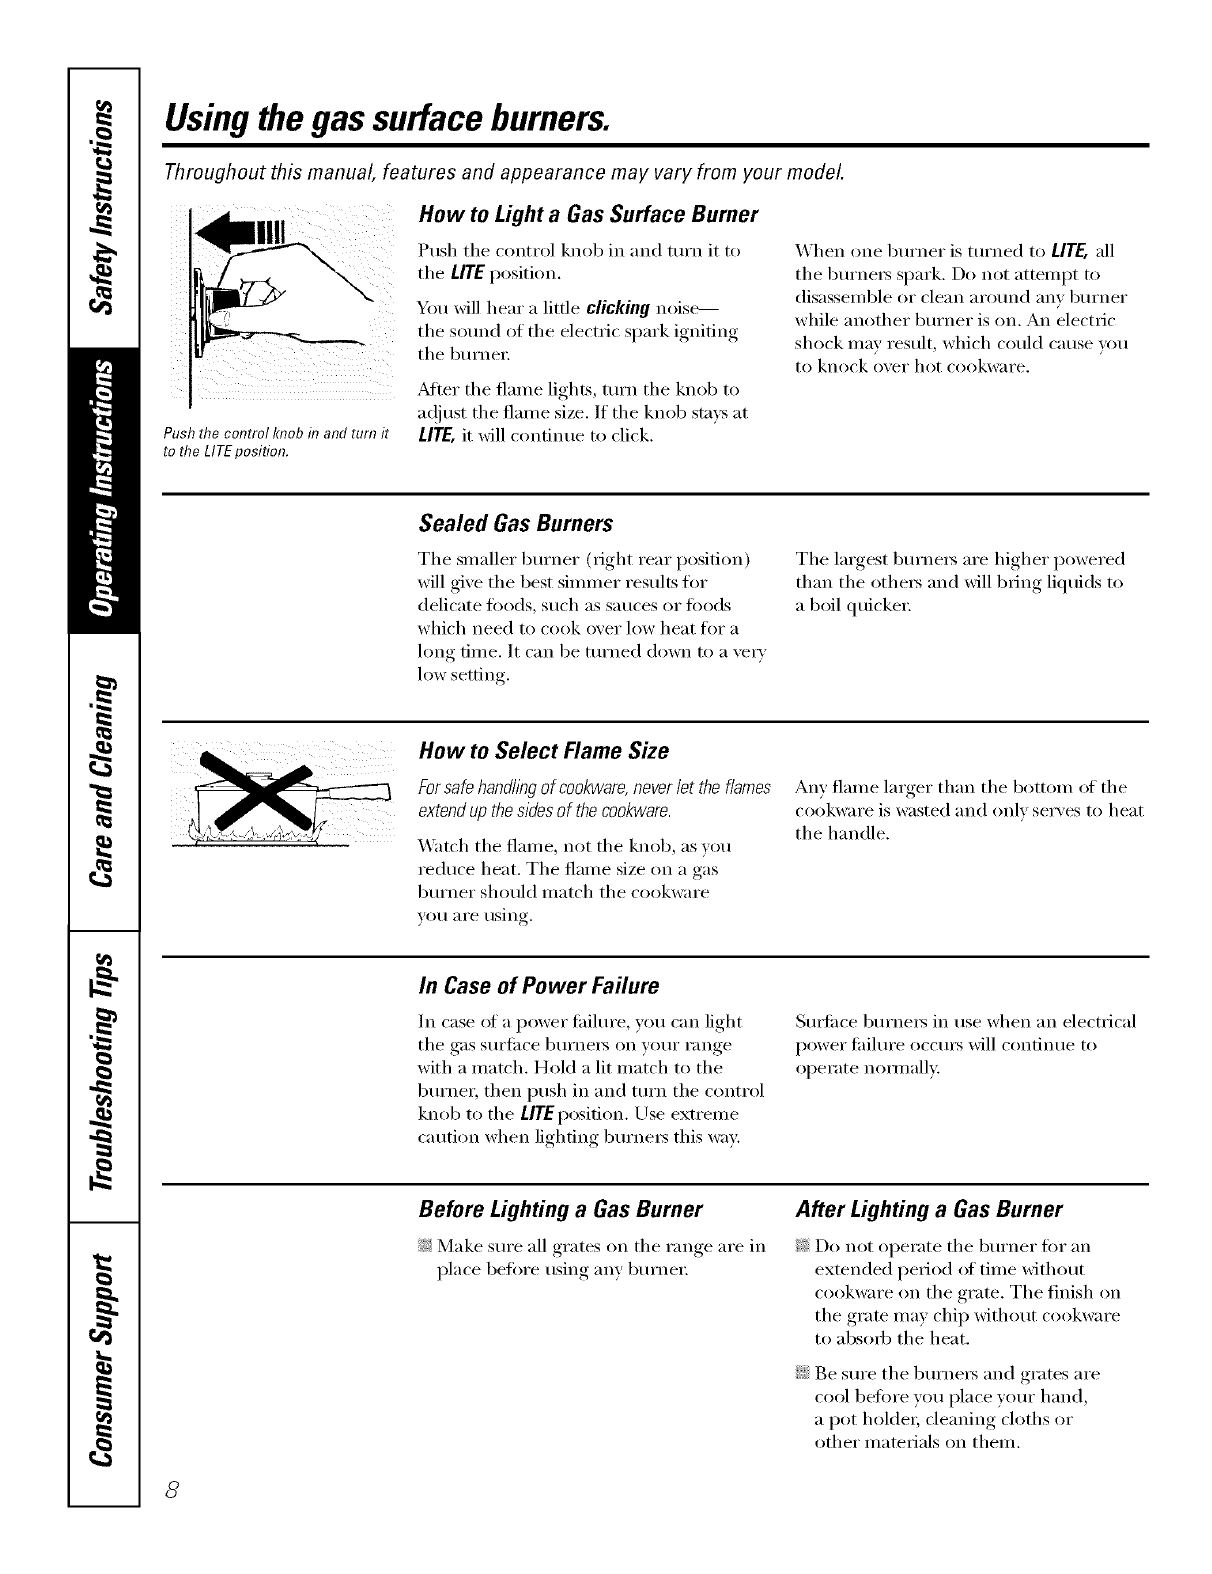
Push the control knob in and turn it
to the LITEposifion.
How to Light a Gas Surface Burner
Push the control knob in and turn it to
tile LITE position.
You will hear alittle clicking noise---
tile sound of the electric s,)ark ionifin,_
the burlwl;
Mtei" the flame lights, turn the knob to
ac!iust the flmne size, If the knob stays at
Ill'E, it will continue to click,
When one burxler is turxled to LITE, all
the burne_ spark. Do not attempt to
disassemble or clean around anv bm'ner
while another burner is on. An electric
shock may result, which could cause you
to knock over hot cookware.
Sealed Gas Burners
Tile slnaller burner (right rear posidon)
will give the best silnlner results flw
delicate fi_ods, such as sauces or fi)ods
which need to cook over low heat fiw a
hmg dine. It can be turned down to a vei_'
low setting.
The largest, burnels are hi_*her,_ l)°wered
than the othels and will 1)ring liquids to
a boil quickeI:
How to Select Flame Size
Forsafehandllegof cookware,neverlet theflames
extendupthesidesof thecookware.
_'atch the flalne, not the knob, as you
reduce heat. The flame size oil a gas
burner should inatch the cookware
VOII aI'e rising.
An} flame larger than the bottom of the
cookware is wasted and only ser\ es to heat
the handle.
In Case of Power Failure
In case _ff a power tililm'e, you can light
the gas surlilce burnei_ on your range
with a inatch. Hold a lit inatch to the
burner, then push ill and turn the control
knob to the UTEposidon. Use extrelne
caution when lighting burnels this way:
Surtilce burners in use when an electrical
power fililure occms will continue to
operate nommllv.,
Before Lighting a Gas Burner
!;_:Make sure ;111grates on the range are in
place before using any burner
After Lighting a Gas Burner
_: Do not operate the burner for an
extended period of tilne without
cookware on the grate. The finish on
the grate Inay chip without cookware
to absorb the heat.
;;Ji::Be sure the burners and grates are
cool betore you place your hand,
a pot holder; cleaning cloths or
other inatelials on theln.
8
ge.com (U.S.)
www.GEAppliances.ca (Canada)
Top-of-Range Cookware
Aluminum: Meclimn-weight cookware is
reconm_ended because it heats quickly
and evenly: Most fi)ods brown evenly in
an almninunl skillet. Lrse saucepans with
tight-fitting lids when cooking with
lIlinilIltlll/ aiilo/ints oil _;KeI:
Heatproof Glass Ceramic: Can be used
tor either sui_ilce or oven cooking. It
conducts heat vei_' slowly and cools vei_'
sh)wh'. Check cooi_ware manufi_cmrer's
directions to be sure it can be used (m gas
ranges.
Cast-Iron: If heated slowly, most skillets
will give satisti_ct(n T results.
Enamelware: Under scnne conditions,
tile enalllel of SOllle cookwaI'e l//_lY
nlelt. Follow cookware Ill_lnUtlilCttlI'eI"S
reconnnendations fin" cooking methods.
Glass: There are two t)l)es of glass
cookware--those fi)r ()\'ell /lSe only
and those fi)r toi>oFrange cooking
(saucepans, coffee and teapots).
Glass conducts heat vecv slowly.
Stainless Steel'. This met;fl alone has
poor heating properties and is usually
c(nnbined with coppeI; almninun/
or other metals fin" improved heat
distribution. (;ombinafion metal skillets
usually _)rk safisfi_ctofilv if they are used
with mediunl heat as tile manufi_cmrer
i'ecoi/lillends.
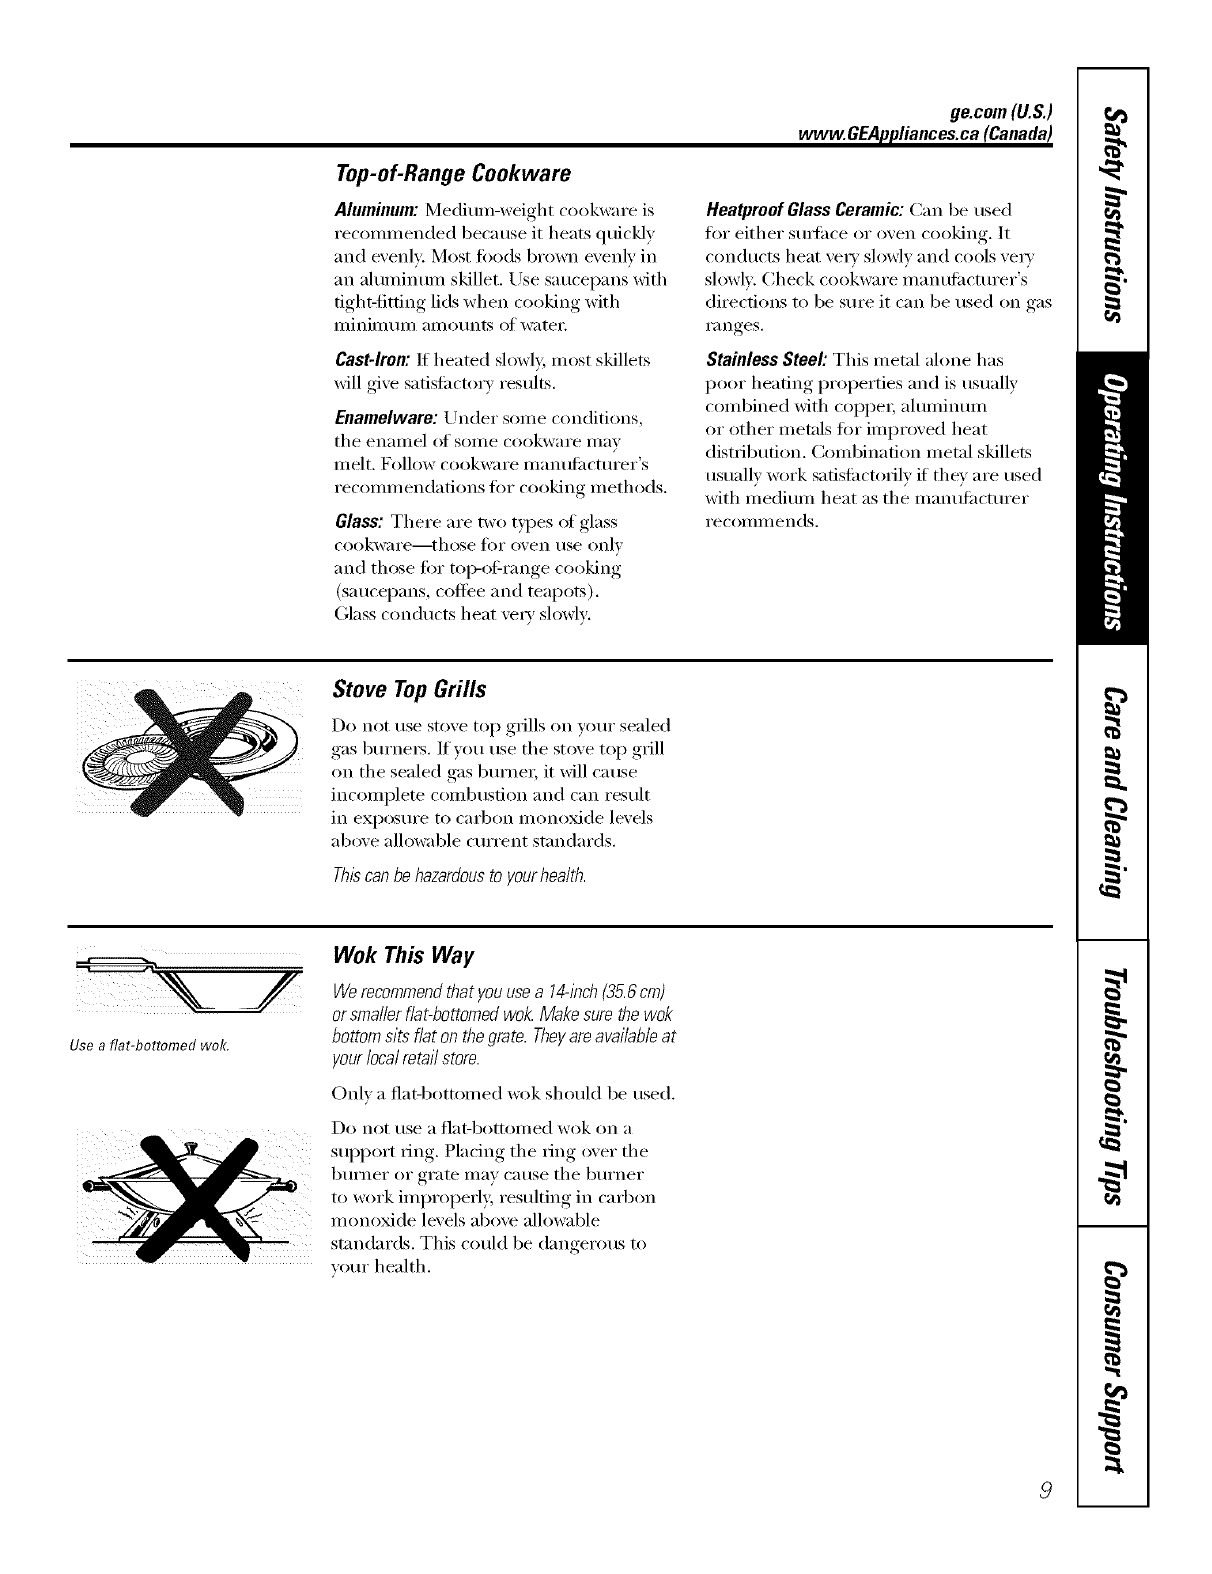
Stove TopGrills
Do not use stove top grills on your sealed
gas burnei_. If' you use tile st()ve tit I) grill
on the sealed gas bumei; it will cause
inc(nnplete c()mbusfion and can result
ill exposure to carbon monoxide levels
above allowable current standards.
Thiscanbehazardousto yourhealth.
Use afiat-bottomed wok.
Wok This Way
Werecommendthat you usea 14-/hch(35.6cm)
orsmaller flat-bottomed wok. Make sure thewok
bottom sits flat on thegrate. Theyare available at
your local retail store.
Onh a flat-bottonmd wok should be used.
Do not/lse a []at-bottoi//ed wok on a
support ring. Placing tile ring over tile
burner or grate may cause tile burner
to work improperly, resulting ill carbon
monoxide levels above allowable
standards. This could be dangerous to
your health.
9
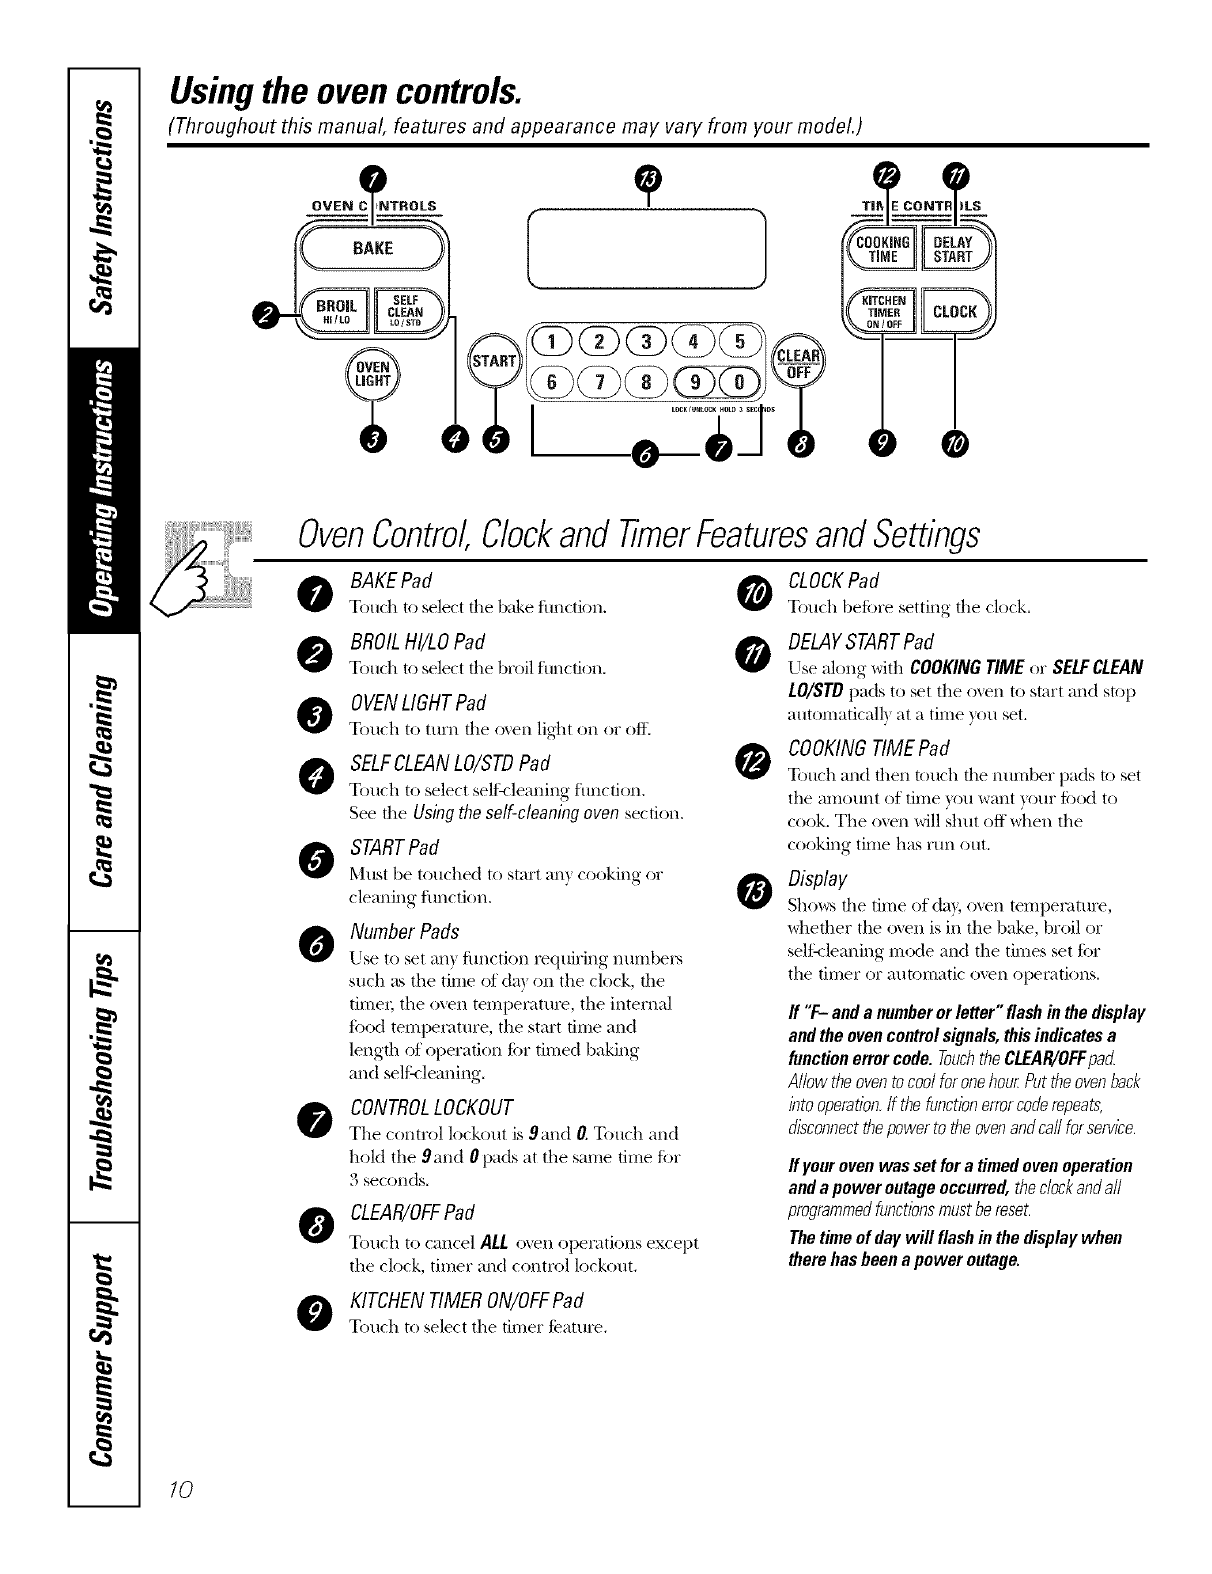
Usingthe ovencontrols.
(Throughout this manual, features and appearance may vary from your model.)
OvenControl,Clockand TimerFeaturesandSettings
BAKEPad
Touch to select the b_&e function,
BROILHI/LOPad
Touch to select the broil function,
0VENLIGHTPad
Touch to ttlrn the oven light on or off.
SELFCLEANLO/STDPad
Touch to select seli:<leaning ftmction.
See the Using the self-cleaning oven secdon.
STARTPad
MHst be tOtlched to start all} cooking or
cleaning flmction.
Number Pads
Use to set anY,fimction re(luiring', numbers
such as the time of da) on the clock, the
timeI; the oven tempeIatm'e, the internal
filed tempelatm'e, the start time and
length of operation fi)r timed baking
and self:cleaning.
CONTROLLOCKOUT
Tile control lock()ut is 9and O.Touch and
hold the 9and 0pads at the same time tbr
3 seconds.
CLEAR/OFFPad
Touch to cancel ALL o_en operations except
tile clock, timer and control lockout.
KITCHENTIMERON/OFFPad
Touch to select the timer feature.
0
CLOCKPad
Touch before setting the clock.
DELAYSTARTPad
Use along with COOKINGTIME or SELFCLEAN
LO/STD pads to set the o_vn to start and stop
automaticall) at a time you set.
COOKINGTIME Pad
Touch and then touch the nun-)ber pads to set
the amount of time you want your filed to
cook. Tile ()veil will shut oft when tile
cooking time has i)ln O)lt.
Display
Sho_s the dine of day, ()veil temperature,
whether the o_vn is in the bake, broil or
self:cleaning mode and the times set ti)r
the timer or automatic o_vn opeiations.
ff "F-anda numberorletter"flashinthedisplay
andtheovencontrolsignals,thisindicatesa
functionerrorcode.TouchtheCLEAR/OFFpad
AllowtheoventocoolforonehourPuttheovenback
intooperation,ff thefunctionerrorcoderepeats,
disconnectthepowerto theovenandcaflre(service.
ff your oven was set for a timed oven operation
and a power outageoccurred, thedockand aft
programmedfunctionsmustbe reset.
Thetime of daywill flash in the display when
there has been a power outage.
10
ge.com (U.S.)
Using the oven. vvvvw.OEAppliances.ca(Canada)
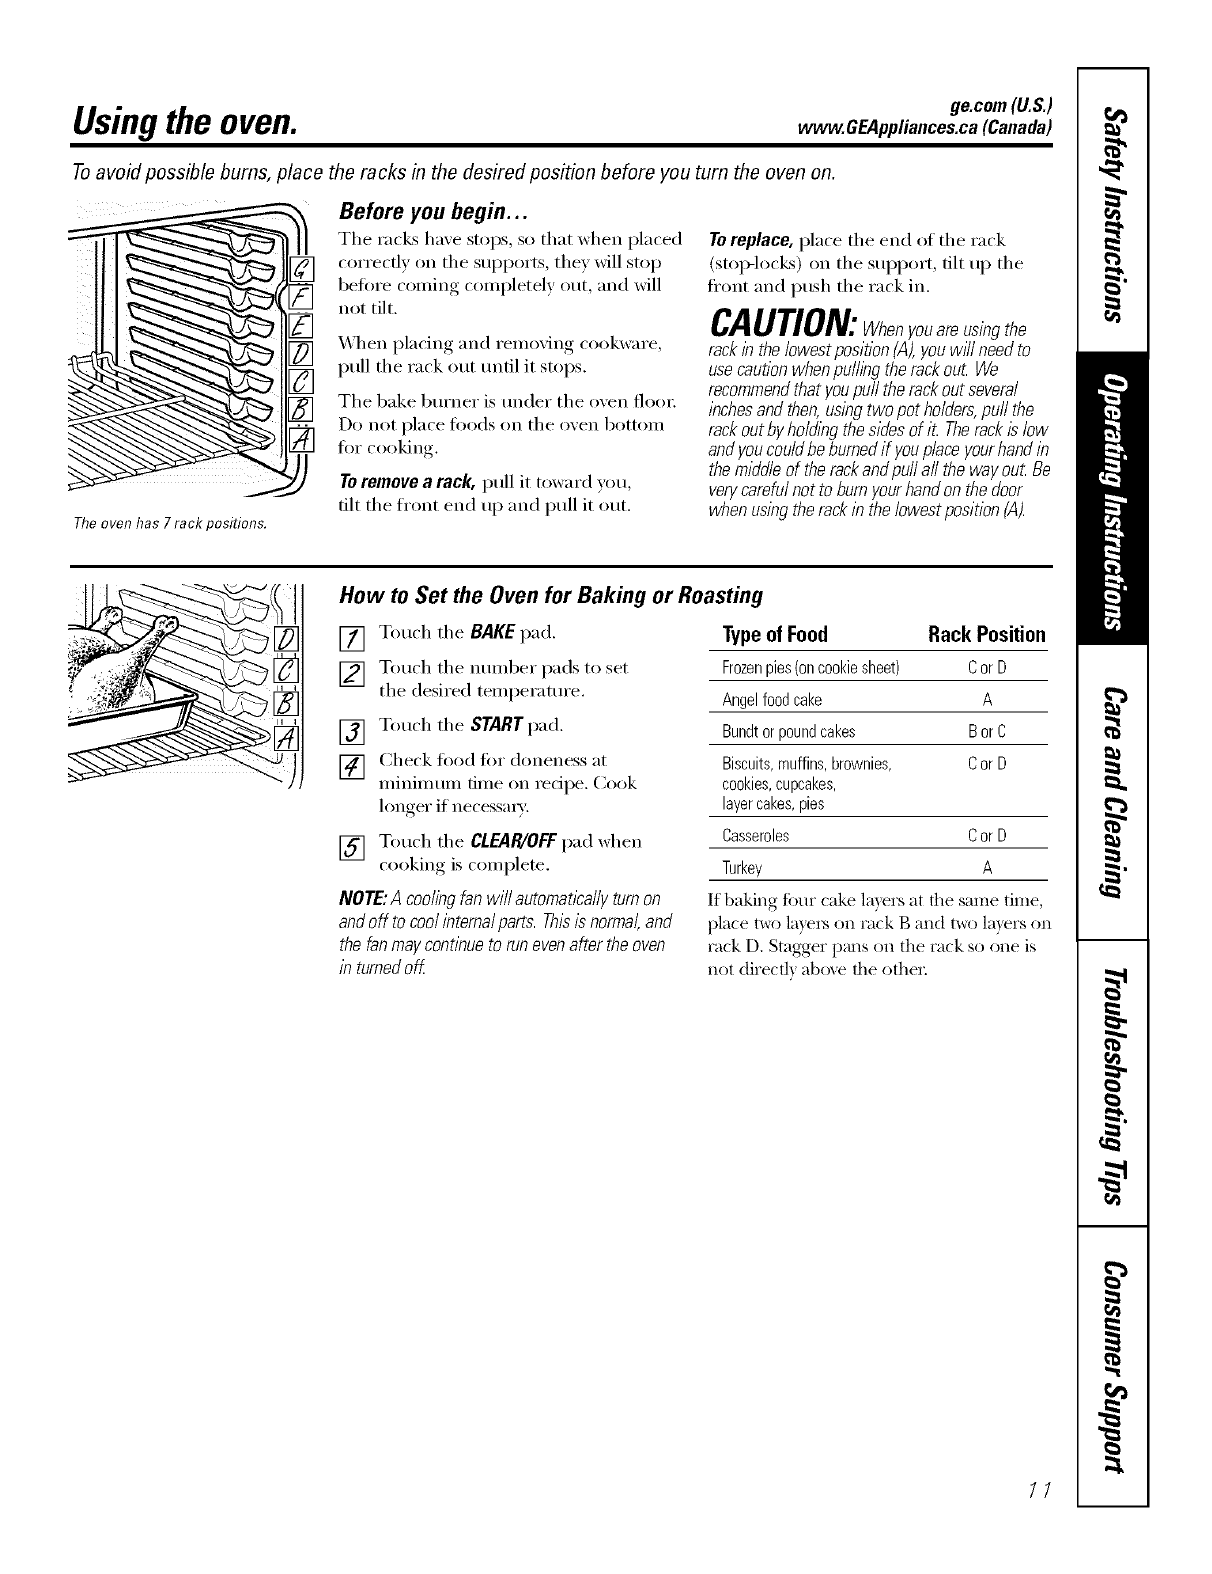
Toavoid possible bums, place the racks in the desired position before you turn the oven on.
The oven has 7 rack positions.
Before you begin...
The racks have stops, so that when placed
correcflv on the supports, they will stop
before coming completely out, and will
not tilt.
_A]/en placing and removing cookware,
pull the rack out until it stops.
The bake burner is under the oven floo_:
Do not place toods on the oven bottom
fi)r cooking.
Toremove a rack, pull it toward you,
tilt the ti'ont end up and pull it out.
Toreplace, place the end of the rack
(stop-loci<s) on the support, tilt up the
fl'ont and push the rack in.
CAUTION:Whenyouareusingthe
rackin the lowest position (,4),youwffl need to
usecaution when pulling the rackout We
recommendthat you puff the rackout several
inchesand then,using two pot holders,puff the
rackout by ho/ding the sides of it Therackis low
and you couldbe burnedif youplace yourhand in
the middle of therackand pu// a// the way out Be
verycarefulnot to burnyour hand on the door
when using therack in the/owestposition (A).
How to Set the Oven for Baking or Roasting
[] Touch the BAKE pad.
[] Touch the number pads to set
the desired temperature.
[] Touch the START pad.
[] Check fi)od fin" doneness at
minimum time on recipe. Cook
longer if necessmT:
[] Touch the CLEAR/OFFpad when
cooking, is coml)lete.
NOTE:A coolingfanwill automaticallyturnon
andoff tocoolinternalparts.Thisisnormal,and
the fanmaycontinueto runevenaftertheoven
in turnedoff
Typeof Food Rack Position
Frozenpies(oncookiesheet) CorD
Angelfoodcake A
Bundtorpoundcakes BorC
Biscuits,muffins,brownies, CorD
cookies,cupcakes,
layercakes,pies
Casseroles CorD
Turkey A
If baking fi)ur cake layers at the same time,
place two la)'e_ on rock B and t_ layers on
rack D. Stagger pans on the rack so one is
not (tirect]} ab_)_e the othe_:
77

Usingthe oven.
Do not place foods directly on tlTe
oven floo_
Preheating and Pan Placement
Preheat the oven if the redpe calls fin" it.
Preheating is necessm T for good results
when baking cakes, cookies, past_ T and
breads.
Topreheat,set theovenat thecorrecttemperature.
Thecontrol will beep when the ovenis preheated
and the display will show yourset temperature.
Thepreheat time will varydependingon the
temperaturesettl))g.
Baking results will be better if baking
pans are centered in the oven as much
as possible. If baking with more than one
pan, place the pans so each has at least 1"
(2.5 cm)to 1½" (3.8 cm) of air space
around it.
/Aluminum Foil
/1¢ You can use ahuninuin foil to line the
_/ broiler pan and broiler grid. Howexe_;
__S you must mold the fifil tighfl) to the grid
and cut slits in it just like the grid.
Without the slits, the toil will prevent ti_t
gut slits in the foiljust like the grid. and meat juices ti'om draining into the
broiler pan. The juices could become
hot enough to catch on fire. If w_u
do not cut tile slits, you are essentially
fiTing , not broiling.
Donot usealuminumfoil onthebottomof
theoven.
Never entirely cover a rack with
aluminum fifil. This Mll disturb tile heat
circulation and result in poor baking.
A smaller sheet of fl)il may be used to
catch a spillover by placing it on a lower
rock several inches below tile food.
Oven Moisture
_&svour oven heats up, tile temperature
change of tile air in tile oven may cause
water droplets to tOm_ on tile door glass.
These droplets are hamfless and will
eV}ll)OI'}lte }IStile oven contintles to
heat up.
/2
ge.com(U.S.)
www.GEAppliances.ca(Canada)
Oven Vent
Y_)ur oven is vented through one vent
located toward the rear ot the range, Do
not block this vent when cooking in the
oven--it is important that the flow oI hot
air fl'om the oven and fl'esh air to the
oven burner be uninterrupted, Avoid
touching the vent openings or nearby
surfaces duringoven or broiler operation--
they may become hot
_Handlesofpotsandpansonthecooktopmay
becomehotif left toodose to thevenL
_Donot leaveplastic items on the cooktop--
theymay melt if left too close to the venL
;;Ji::Donot leaveany items on thecooktop. Thehot
air from the vent mayignite flammableitems
and will increasepressurein closedcontainers,
which may cause themto burst.
_Metal items will become veryhot if theyare
left on the cooktop,and couldcause burns.
Power Outage
CAUTION: Do not make any attempt to operate
the electric i_?nitionoven during an electrical
power failure.
The oven or broiler cmmot be lit dtwing a
power fifilm'e, Gas will not flow tmless the
glow bar is hot.
If the oven is in use when a power fifilm'e
occm_, the oven bm'ner shuts off and
cannot be re-lit tmfil power is restored.
This is bec;mse the flow of gas is
automatically stopped and will not resume
when power is restored tmtil the glow bar
has reached operating temperattu'e.
13

Usingthe oven.
Always use the broiler pan and
grid that came with your oven. It
is designed to mflTimizesmoking
and spattering by trappfl?gjuices
fl?the shielded lower part of the
pan.
How to Set the Ovenfor Broiling
IMPORTANT'.Toavoidpossib/eburns,placethe
shelvesinthedesiredpositionbeforeyouturnthe
oven on.
[] Place the meat or fish on the broiler
g_i(1 in the broiler pan.
[] Follow suggested shelf positions in
the Broiling Guide.
V_] The oxen door must be closed
during broiling.
[] Touch the BROILHI/LOpad once fi)r
HI Broil.
Use LO Broil to cook fi)ocls such as poultx T
or thick cuts of meat thorotlghly without
ove_q)rowning them.
[] Touch the STARTpad.
[] _&q_en broiling is finished, touch the
CLEARIOFFpad.
Serve the food immediately, and leave the
pan outside the oven to cool dtuJng the
meal fi)x" easiest cleaning.
To change to LOBroil, touch the
BROILHI/LOpad again.
Broiling Guide
The size, weight, thickness,
starting temperature Food
and VOtli" preference GroundBeef
of doneness will affect
broiling times. This guide Beef Steaks
is based on meats at Rarer
Medium
rell'igerator temperatm'e. Well Done
4 7,5,,[L.'_.l)(jJa_lm_l o/
Ag'Hc*Hmn,*_(/*'7{a*_,&('_Jis
pop,Hartb_*l)o_t _ho_ddknow lhal
c_x)ki_g il Wo)_13 140'l (60 ()
",fff("l"fx)dBool,'.}b_l_Kil_ke_
(_*tide. {'_l).t t'_,w, flz_ze 19N5.)
Rarer
Medium
Well Done
Chicken
Bakery Product
Bread (toast)
English Muffin
LobsterTails
FishFillets
Salmon
Steaks
Fillets
HamSlices
(precooked)
Pork Chops
Well Done
LambChops
Medium
Well Done
Medium
Well Done
/4
Quantityand/ Rack
or Thickness Position
l/Z' to a/4"
(1.3cmto 1.9cm}thick
3/4" to 1" F
(1.9 cm to 2.5 cm) thick E
1to 11_Ibs.(0.45kgto O.B8kg) E
11/2''(3.8cm)thick
2 to21_Ibs.(0.91kgto1.13kg)
1 wholecut up
2 to21_Ibs.(0.91kgto1.13kg)
split lengthwise
Breast
2 to 4 slices
2 (split)
24
1 lb. (0.45kg}(1/4*'to I/2*'
[0.6 cmto 1.3 cm]thick)
E
E
D
D
D
F
F
2 (1" [2.5 cm]thick) E
2 (1/2" to s/4" E
[1.3 cmto 1.9 cm]thick)
1/2"(1.3c[n)thick D
1" (2.5cm}thick D
2 (_/2"[1.3cm]thick) D
2 (1" [2.5 cln] thick)about D
1 lb. (0.45kg)
FirstSide
Time (min.)
13
6
8
10
15
15
2O
25
25
3
3-4
18 20
8
8
10
15
2 (1"[2.5cm}thick)about10 E 7
to 12oz.(283 g to 340 g) E 10
2 {11/2" [3.8 cm] thick) E 9
about 1 lb.(0.45 kg) E 14
SecondSide
Time (rain.)
4
6
8
10
15
2O
25
15
1
Donot
turn
OVer.
5
8
10
5
4
9
6
10
Comments
Spaceevenly.
Bteakslessthan3/4"
(1.9cm)thick are
difficult to cookrare.
Slashfat.
Brusheachsidewith
meltedbutter.
Broilskin-side-down
first.
Spaceevenly.Place
Englishmuffins cat-
side-upand brush
with butter if desired.
Cut throughback of
shell. Spreadopen.
Brushwith melted
hatter beforebroiling
and after Mf of
broilingtime.
Handleandturn very
carefully.Brushwith
lemonbutter before
and daringcooking,
if desired.
Turncarefully.
Donot turn skin-side-
down.
Slashfat.
Slashfat.
ge.com (U.S.)
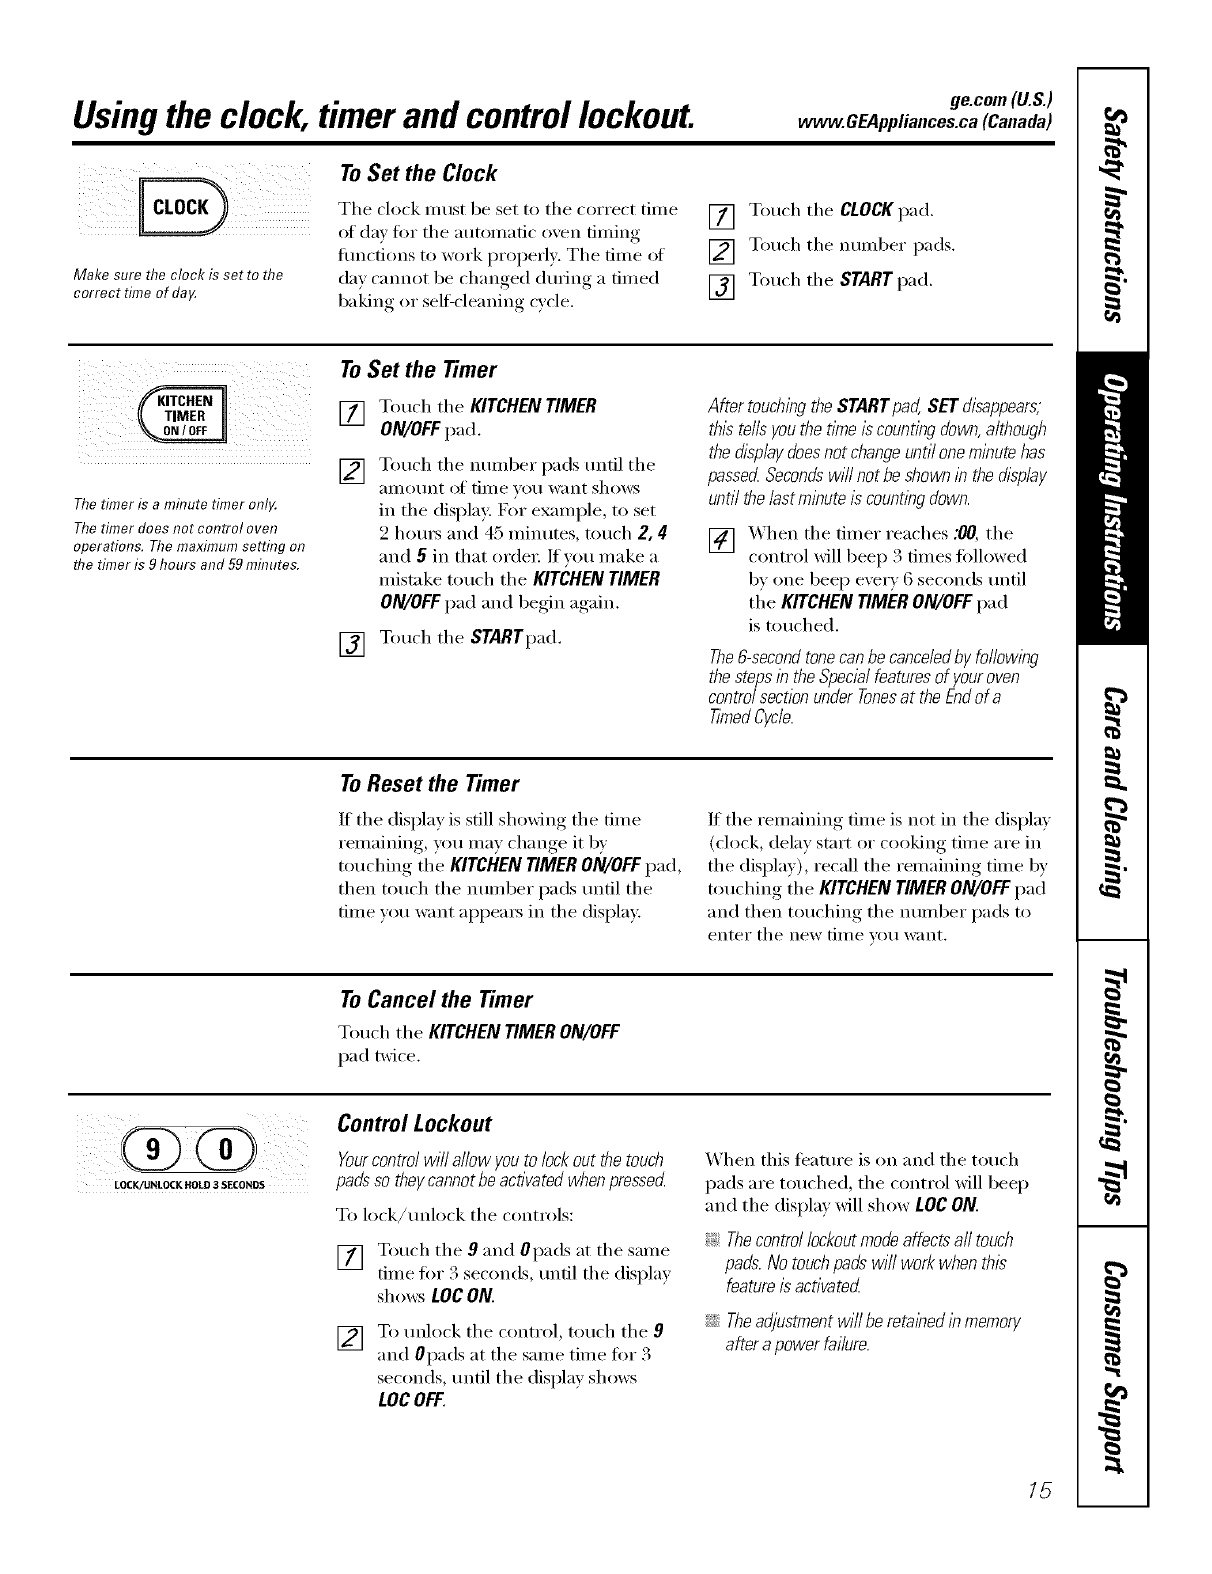
Using the clock, timer and control lockout, www.GEAppliances.ca(Oanada)
ii i i/i
Make sure the clock is set to the
correct time of da_
ToSet the Clock
The clock must be set to tile correct time
of da', fi_r tile atm)mafic oxen tinting
flmctions to work propefl). Tile time of
da) cannot be changed dtnJllg a timed
baking or self=cleaning cycle.
[] Touch tile CLOCK pad.
[] Touch tile number pads.
[] Touch the START pad.
[]
Thetimer is a minute timer onl_
Thetimer does not control oven
operations. The maximum setting on
the timer is 9 hours and 59mhTutes.
ToSet the Timer
Touch tile KITCHENTIMER
ON/OFFpad.
Touch tile nmnber pads tmfil tile
_lIIlO//nt of time yot] want shows
in tile display: For example, to set
2 horns and 45 minutes, touch 2, 4
and 5in that order: If you make a
mistake touch tile KITCHEN TIMER
ON/OFFpad and begin again.
[] Touch tile STARTpad.
AftertouchingtheSTARTpad,SETdisappears,
thistellsyouthetl_neis countingdown,although
thedisplaydoesnot changeuntiloneminutehas
passedSecondswi//notbeshownb thedisplay
untilthe/astmbute iscountbgdown.
[] _'_ hen tile timer reaches :00, tile
control will beep 3 times fbllowed
by one beep eve_ T 6 seconds tmtil
tile KITCHENTIMERON/OFFpad
is touched.
The&secondtonecanbecance/edby fo//owlbg
thestepsb theSpecialfeaturesof youroven
controlsectionunderTonesat theEndofa
TimedCycle.
ToReset the Timer
If tile display is still shoMng tile time
remaining, you may change it by
touching tile KITCHEN TIMER ON/OFF pad,
then touch tile number pads tmtil tile
time w)u want appea_ in tile display.
If tile remaining time is not in tile display
(clock, delay start or cooking time are in
the display), recall the remaining time by
touching tile KITCHEN TIMER ON/OFFpad
and then touching tile number pads to
entei" tile new [lille VO/I want,
ToCancel the Timer
Touch tile KITCHENTIMERON/OFF
pad twice.
LOCK/UNLOCK HOLD 3SECONDS
Control Lockout
Yourcontrolwill allowyoutolockout thetouch
padsso theycannotbeactivatedwhenpressed
To lock/tmlock tile controls:
[] Touch tile 9and Opads at tile same
time f'm 3 seconds, tmfil tile displa)
shmvs LOCON.
[] To unlock tile control, touch tile 9
and 0pads at tile same time for 3
seconds, tmfil tile display shows
LOC OFF.
When this teatm'e is on and tile touch
pads are touched, tile control will beep
and tile display will show LOC ON.
_: Thecontrol lockoutmode affects all touch
pads. No touch pads wi// work when this
featureis activated
iJi::Theadjustmentwill beretabedlnmemory
afterapowerfailure.
15
Usingthe timedbaking and masting features.(onsome models)
NOTE" Foods that spoil easily--such as milk, eggs, fish, stuffings, poultry and pork--should not be allowed to sit for
more than 1hour before or after cooking. Room temperature promotes the growth of harmful bacteria. Be sure that
the oven light is off because heat from the bulb will speed harmful bacteria growth.
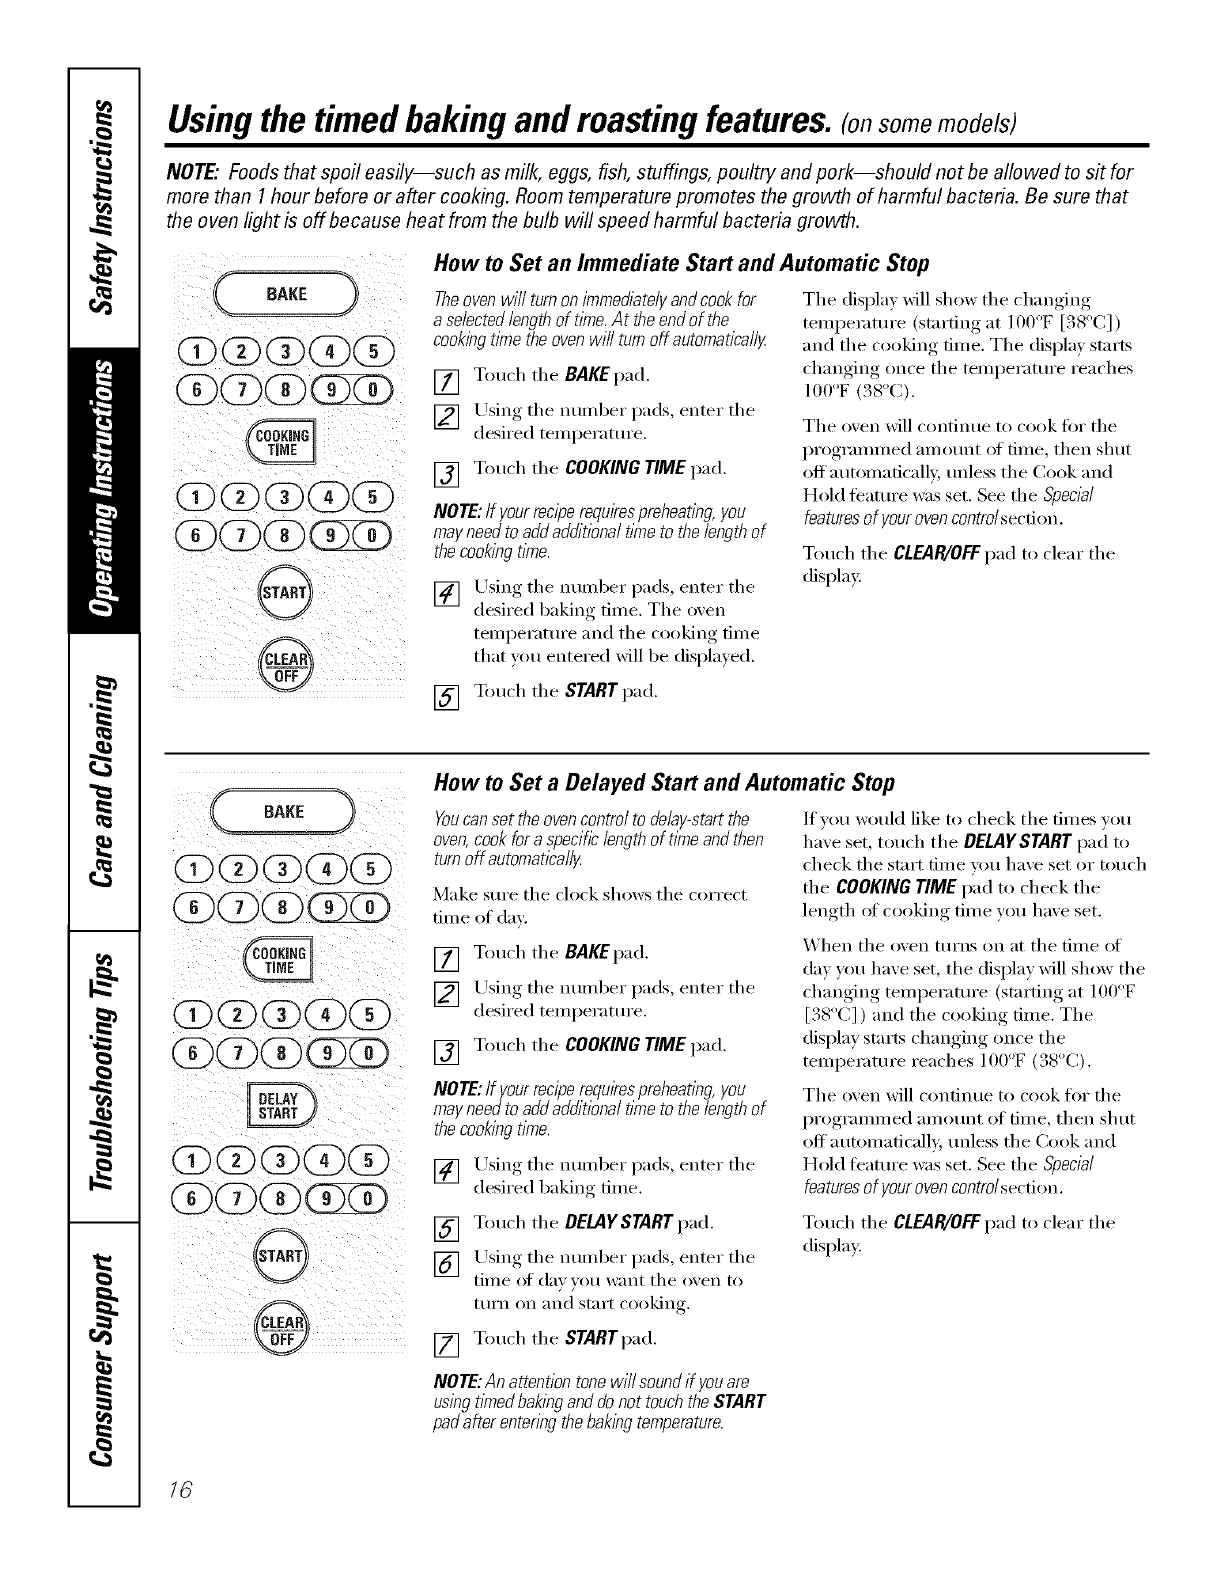
How to Set an Immediate Start and Automatic Stop
Theoven will turn on immediately andcook for
a selected lengthof tlYne.At the end of the
cooking t/me the oven wi// turn off automatica//y
[] Touch the BAKEpad.
[] Using tile nuinber pads, enter tile
desired teinperature.
[] Touch the COOKINGTIME pad.
NOTE:If yourreciperequkespreheating,you
mayneedto addadditionalfl?netothelengthof
thecookingt/?ne.
[] Using the numl)er pads, enter the
desired baking time. Tile oxen
temperature and tile cooking time
that you entered will be displa) ed.
[] Touch the STARTpad.
Tile display Mll show tile changing
temperature (stm'ting at 100°F [38°C])
and the cooking time. The display starts
changing once the temperature reaches
100oF(.%oc).
Tile oven will continue to cook tor tile
programmed amount of time, then shut
offatKomatically, tmless the Cook and
Hold feature was set. See the Special
features of your oven control section.
Touch the CLEAR/OFFpad to clear the
display:
How to Set a Delayed Start and Automatic Stop
Youcanset the oven control to delay-start the
oven, cookfor a specifc length of time and then
turnoff automafical/_
Make sm'e the clock shows the correct
time of day:
If vou would like to check tile times you
have set, touch tile DELAYSTARTpad to
check the start time um have set or touch
tile COOKING TIME pad to check tile
length of cooking time you have set.
[] Touch tile BAKEpad.
[] Using the number pads, enter the
desired temperature.
[] Touch the COOKING TIME pad.
NOTE:If your reciperequkespreheating, you
mayneed to addadditional time to the length of
thecooking time.
[] Using tile numl)er pads, enter tile
desired baking time.
_hen the oven turns on at the time of
de) you haxe set, the displa)will show the
changing temperature (starting at 100°F
[. 8 C] ) and the cooking time. The
disl)la_, stm'ts changing, ,once tile
temperature reaches 100"F (38°C).
The oxen will continue to cook for the
programmed amount of time, then shut
offautomaticall', tmless the Cook and
Hold feature was set. See the Special
features of your oven control section.
[] Touch tile DELAYSTARTpad.
[] Using tile number pads, enter tile
time of da)}ou want tile oxen to
turn (in _lll(1 S[;lI'[ cooking.
Touch tile CLEAR/OFFpad to clear tile
display:
[] Touch tile STARTpad.
NOTE:An attention tone wi// soundif you are
using tl_nedbakingand do not touch the START
pad after entering the baking temperature.
16

ge.com (U.S.)
Adjustthe oven thermostat--Do it yourself! vvww.GEAppliances.ca(Canada)
Youmay find that your new oven cooks differently than the one it replaced. Use your new oven for a few weeks to
become more familiar with it If you still think your new oven is too hot or too cold, you can adjust the thermostat
yourself.
Do not use thermometers, such as those found in grocery stores, to check the temperature setting of your oven.
These thermometers may vary20-40 degrees (11-22 degrees in Canada).
NOTE: This adjustment will only affect baking and roasting temperatures; it will not affect broiling or self-cleaning
temperatures. The adjustment will be retained in memory after a power failure.
BAKE
%
[ BA,E ))
,_. .J
(g)CD(g)
To Adjust the Thermostat
[] T(>uch the BROIL HI/LO and BAKE []
pads at the same time for 3 seconds
until the display shows SE
[] Touch the BAKE pad. _ two-dioit
number shox_s in the display:
Touch BAKE again to alternate
between increasing and decreasing
the oxen temperature. []
The oxen temperature can be
a(!iusted up to (+) 35°F (l 9°C)
hotter or (-) 35 F• (l 9°C) coole_:
Touch the number pads the same
wa} you read them. For example, to
5'
change, the oxen temperature 1 F
(8°C), touch Iand 5.
X'_hen y,')t:l haxe made the
a(!justment, touch the STARTpad to
go back to the time of day displa}:
Use VOIII" oxen as _()tl would
IlOlI//all_i
Thetype ofmargarine will affect baking performance!
Most recipes for bak&g have been developed uslog high-fat products such as butter or margarine (80% fat). If you
decrease the fat, the recipe may not give the same results as with a higher-fat product.
Recipe failure can result if cakes, pies, pastries, cookies or candies are made with low-fat spreads. The lower the fat
content of a spread product, the more noticeable these differences become.
U.S. federal standards reqtlire l)ro(hl('ts labeled "margarine" to contain at least 80% tilt by weight. I,ow-tilt spreads, on
the other hand, contain less fat and more water: The high moisture content of these spreads affects the texture and
flavor of baked goods. For best results with u)ur old tm'orite recipes, rise inalgarine, butter or stick spreads containing
at least 70% vegetable oil.
17
Usingtheself-cleaningoven.
The oven door must be closed and all controls set correctly for the cycle to work properly.
@Before a Clean Cycle
We recommend venting your
kitchen with all open window or using a
ventilation tim or hood (lurhlg tile first
seltZclean cycle.
Remove the racks, broiler pan, broiler
grid, all cookware and ally aluminum foil
fl'on/ tile o\en.
Do not clean the gasket. Tile fiberglass
material of tile o\en door gasket cannot
withstand abrasion. It is essential tkw tile
gasket to remain intact. If you notice it
becoming worn or fl'ayed, replace it.
Wipe up ally heavy spillo\vrs on tile oven
bottom.
Wipe up heavy soil on the oven
bottom. Tile oxen racks can be sell'cleaned, but
the* will darken, lose their luster and
become hard to slide.
Soil on tile fl'ont fl'ame of the rlmge
and outside the gasket on the door will
need to be cleaned by hand. Clean these
areas with hot water; soap-filled or plastic
scouting pads or cleansel_ such as Soft
Scrub! Rinse well with clean water
and d U.
Make sure tile oven light bulb cover is in
place and tile oven light is ofl_
IMPORTANT'.Tile health of some birds
is extremely sensitive to tile flmles gi\en
off during tile sell'cleaning cycle of a m,
range. Move birds to another well-
\vntilated room.
CO(3)(3)(3)
(3)(Z)qD(3)
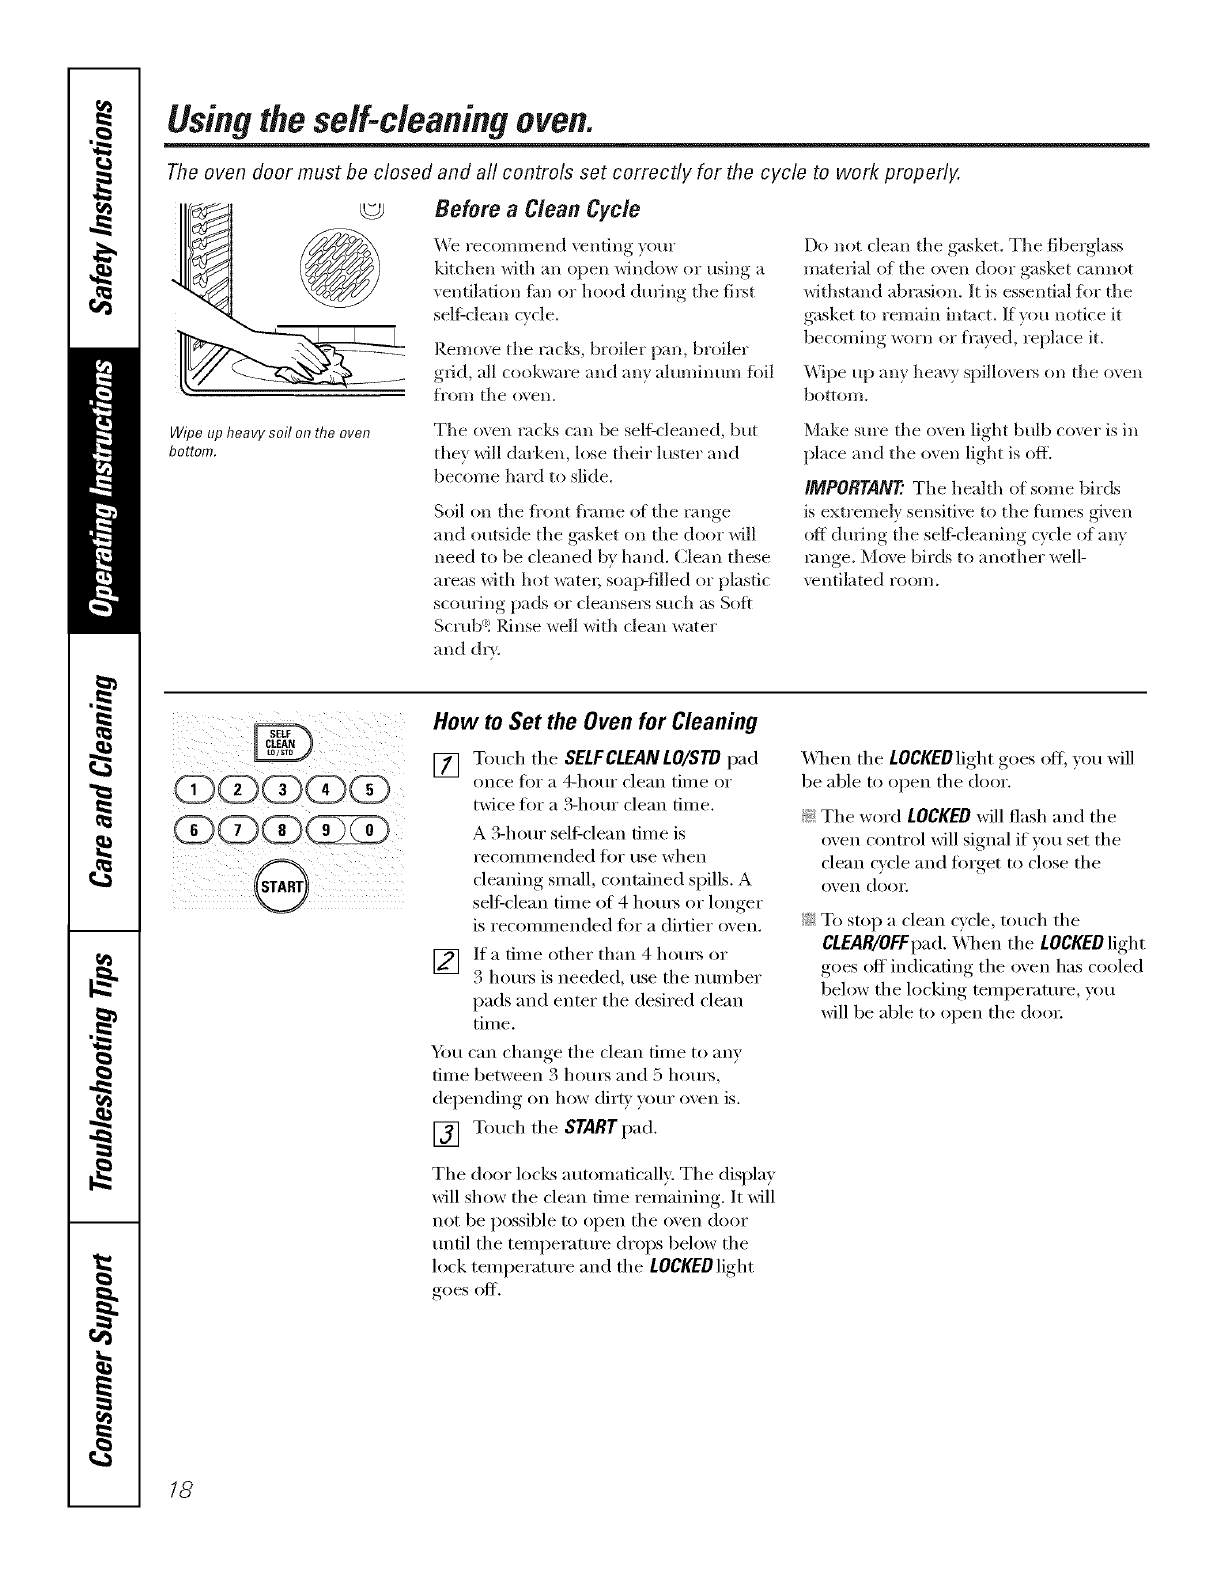
How to Set the Oven for Cleaning
[] Touch tile SELFCLEANLO/STD pad
once tor a 4-hot/r clean tinle or
twice for a 3-hour clean tilne.
A 3-hour sel6clean filne is
recoilli//ended for use when
cleaniw*_ small, contained spills. A
sel6clean tilne of 4 houi_ or hmger
is recomlnelMed tor a dirtier oven.
V2] ]fa tilne other than 4 houi5 or
i1.-i 3 houI5 is needed, use the imlnber
[)ads and enter the desired clean
time.
_i_)/l can chanoe tile clean tilne to anv
tiIlle between 3 hotli_ and 5 hotli_,
del)ending, on how (lirl_, your oxen is.
[] Touch tile START pad.
Tile door locks autolnaticall\: Tile display
will show tile dean time remaining. It Mll
not be possible to open tile oven door
tmfil tile telnl)erature drops below tile
lock teml)erature aim tile LOCKEDlight
goes off.
\_]/en tile LOCKEDlight goes off; you will
be able to open tile door.
?_:Tile word LOCKEDwill flash aim tile
oven control will signal if you set the
clean cycle aim folget to close tile
oven door.
?_:To stop a clean cycle, touch tile
CLEAR/OFFpad. _,_]/en tile LOCKEDlight
goes off indicating the oven has cooled
below tile locking telnl)eramre ,you
will be able to open tile door.
18
ge.com(U.S.)
vvww.GEAppliances.ca(Canada)
The oven door must be closed and all controls must be set correctly for the cycle to work properly.
GC CC
II
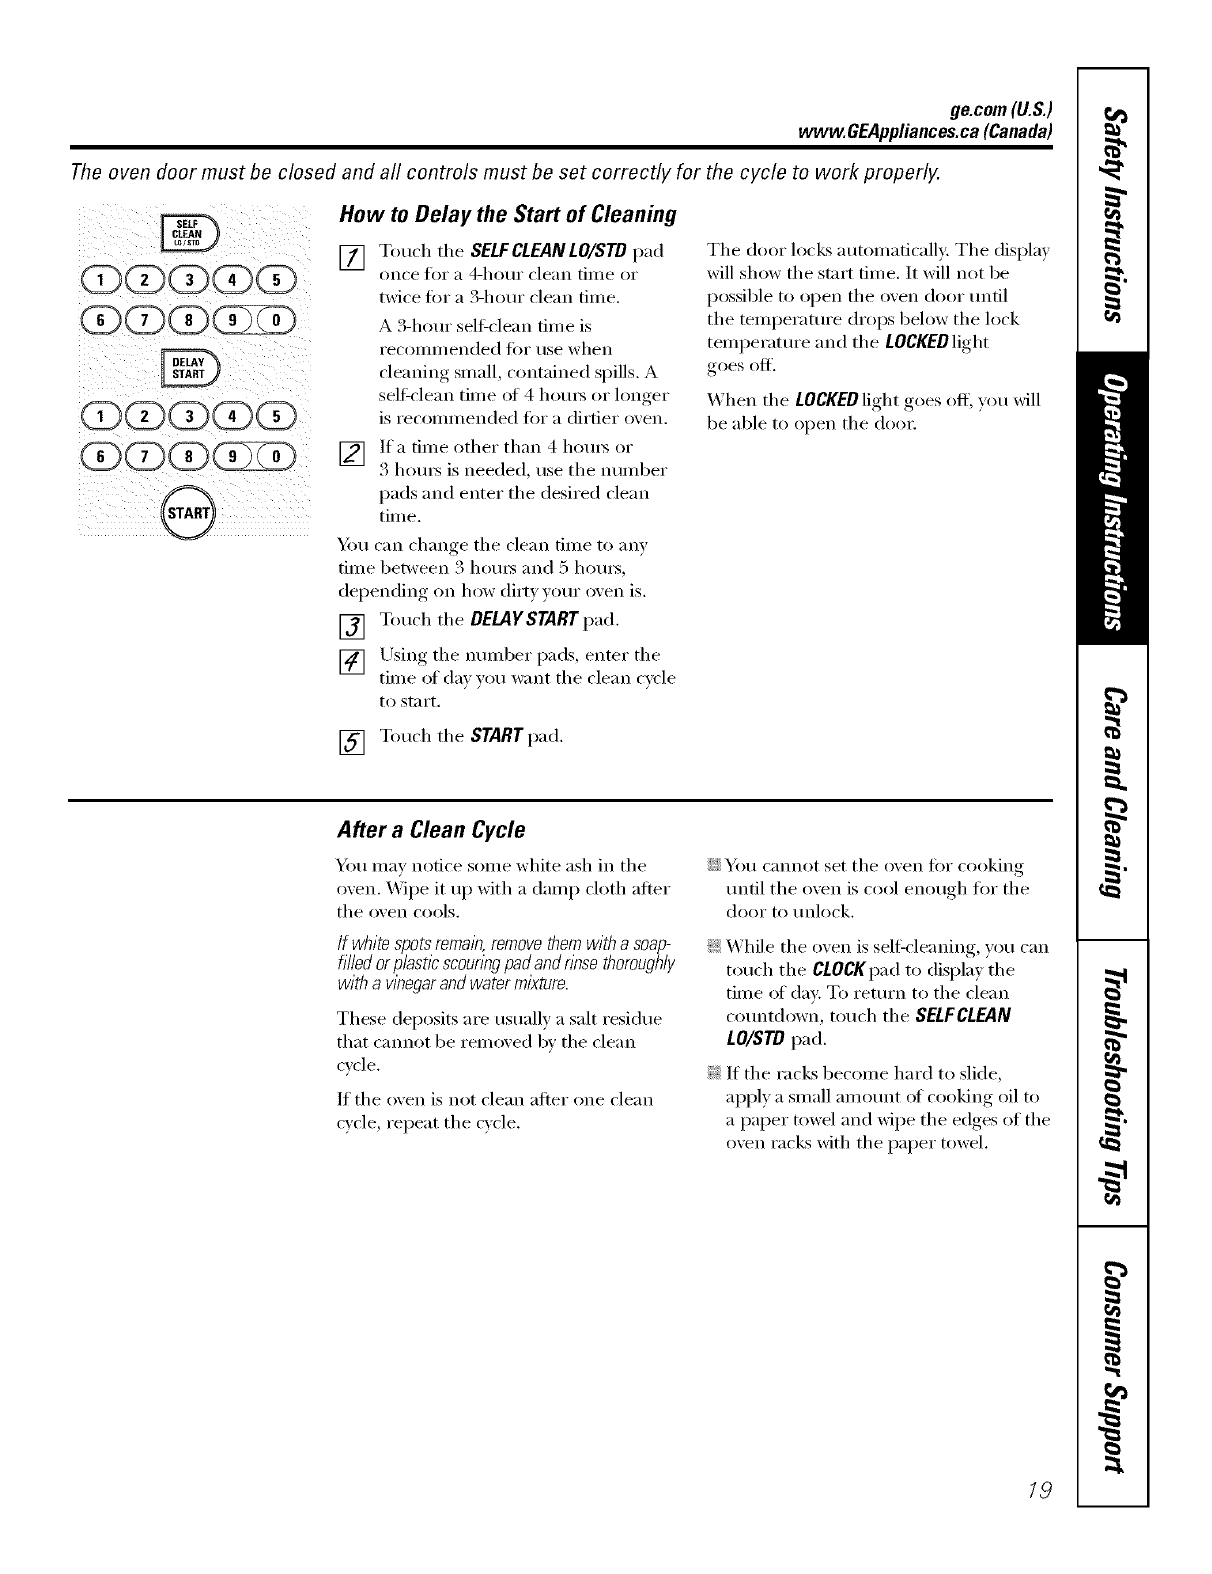
How to Delay the Start of Cleaning
[] Touch the SELFCLEANLO/STD pad
on('e tk)I" a 4-hotli" clean tiille oi"
twice fin" a 3-hour clean time.
A 3-horn sell'clean time is
i'ecolilli/ended t()r/ise when
cleaning small, contained spills. A
self clean time of 4 hom_ or longer
is recommended fin" a dirtier oxen.
[_] Ira time other than 4 l/otu_ or
i¢-i 3 ho/u_ is needed, use tile number
pads and enter the desired clean
time.
Y(m can change tile clean time to any
tnne" between .3 houi_ and 5 houi_,
dei)ending, on how (li_t))our oxen is.
[] Touch tile DELAYSTART pad.
[] Using the number pads, enter the
time of (lax you want tile clean cycle
to start.
Tile door locl_s automatically: Tile display
will show tile start time. It will not be
possible to open tile oven door until
tile temperature drops below tile lock
temperature and tile LOCKEDlight
goes off.
When the LOCKEDlight goes off; you will
be able to open tile doo_:
[] Touch tile START pad.
After a Clean Cycle
You may notice some white ash in tile
oven. _&]pe it up with a damp cloth after
the oven cools,
/f white spots rema/); remove them with a soap-
filled orplastic scounw pad and nnse thoroughly
with a wnegarand water mixture.
These deposits are usually a salt residue
that cannot be removed by tile clean
cycle.
If the oven is not clean after one clean
wcle, repeat the cycle.
iJi::You cannot set tile oven fin" cooking
tmtil tile oxen is cool enouoh for tile
door to tmlock.
_: While tile oven is sell:cleaning, you can
touch the CLOCKpad to display tile
time of day: To return to tile clean
countdown, touch tile SELFCLEAN
LO/STD pad.
_If tile rac]<sbecome hard to slide,
apply a small amount oI cooking oil to
a paper towel and wipe the edges of the
oven racl_s with the paper towel.
19

Special featuresof your oven control
Your new touch pad control has additional features that you may choose to use. The following are the features
and how you may activate them.
The special feature modes can only be activated while the display is showing the time of day. They remain
in the control's memory until the steps are repeated.
When the display shows your choice, touch the $TARTpad. The special features will remain in memory after
a power failure, except for the Sabbath feature, which will have to be reset.
12-Hour Shutdown
Withthisfeature,shouldyouforgetandleavethe
ovenon,thecontrolwi//automaticallyturnoff the
ovenafter12hoursduringbakingfunctionsor
after3 hoursdunnga bro#function.
If )ou wish to mrn OFF this feature, fidlow
the steps belox_.
[] Touch the BROIL HI/LOand BAKE
pads at the sune time fox 3 seconds
m_til the displ; 0 shows SE
[] Touch the OELAYSTART pad tmfil
no shdn (no shut-off) appelu_ in the
displax.
[] Touch the START pad to _ctivate the
no shut-off and lea_e the control
set in this speci;d i0atures mode.
Fahrenheit or Celsius Temperature Selection
Yourovencontrol is set to use the Fahrenheit
temperatureselections but you may changethis
to use the Celsiusselections.
[] Touch the BROIL HIAOand BAKE
pads at the same time f'o_ 3 seconds
tmtil the displa) shows SF
[]
[]
Touch the COOKING TIMEand BROIL
HI/LO pads at the same time. The
displa) will show F(Fahrenheit).
Touch the COOKING TIMEand BROIL
HI/LO pads again at the same time.
The display will show C(Celsius).
[] Touch the STARTpad.
Tonesat the End of a Timed Cycle
At the endof a timed cycle, 3 short beeps will []
soundfollowed by one beepevery 6 seconds
until the CLF_AR/OFFpafl ls touched This
continual 6-secondbeep maybe cance/ecL
To cancel the 6-second beep:
[] Touch the BROIL HI/LO and BAKE
pads at the sanle time f'o_ 3 seconds
tmti} the display shows SF []
Touch the KITCHEN TIMER ON/OFF
pad. The (}ispla} shows CON BEEP
(continuous beep). Touch the
KITCHEN TIMER ON/OFF pad
again. The display sho_:s BEEP.
(This cancels the one beep
every 6 seconds.)
Touch the START pad.
20

ge.com(U.S.)
www.GEAppliances.ca(Canada)
BAKE Tone Volume
Thisfeature allows you to adjust the tone
volumesto a more acceptable volume.Thereare
threepossible volume levels.
[] Touch the BROIL HI/LO ;rod BAKE
pads at the same time for 3 see(rods,
until the display shows SE
[] Touch the OVEN LIGHT p;Id. The
display will show 2 BEEP. This is the
high volume level.
Touch the OVEN LIGHTpad again.
The display will show 3 BEEP. This is
the loudest volume level.
[]
[]
Touch the OVEN UGHTpad again.
The display will show I BEEP.This is
the quietest volume level.
For each time the level is changed,
a tone will sound to provide an
indication of the volume level.
Choose the desired sound level
(1BEEP,2BEEP,3 BEEP).
Touch the START pad to actix Ke the
lexel shown.
12-Hour, 24-Hour or Clock Blackout
Yourcontrolis setto usea 12-hourclock.
If you would preli_r to have a 24-hour
military time clock or black out the clock
display, follow the steps below.
[] Touch the BROIL HI/tO ;rod BAKE
pads at the same time fin" 24seconds
until the display sho_vs SE
[] Touch the CLOCK pad once. The
display will show 12hr. If this is
the choice wm want, touch the
START pad,
Touch the CLOCKpad again to change
to the 24 hour military time clock. The
display will show 24hr. If this is the choice
you want, touch the START pad.
Touch the CLOCKpad again to black out
the clock display. The display will show
OFF.If this is the choice wm want, touch
the START pad.
NOTE"If the clock is in the black-out modeyou
will not beable to usethe Delay Start function.
Cook and Hold
Yourcontrol hasa cookand hold feature that
keepscooked foods warm for up to 3 hoursafter
timed Baking orRoastingis finished
NOTE: Thisfeature can only be programmed to
work with timed Bakingor Roasting.(Seethe
Usingthe flYnedbaking orroasting features
sectlbn.)After tined Baking or Roastinghas
automatically stoped, the programmedcook
and hold will automatically start.
To activate this ti_attu'e fi)r use after
Timed Baking or Roasting, follow the
steps below.
[] Touch the BROILHI/tO and BAKE
pads at the same time fin" 3 seconds
until the displa) shows SE
[] Touch the COOKINGTIMEpad. The
(lispla,_ will show Hid OFF.
Touch the COOKING TIME pad again
to actix Ke the feature. The display
xdll show Hid ON.
[] Touch the START pad to activate
the cook and hold feature and
leave the control set in this special
Je'atllres illode.
NOTE"Thecontrolwill beepevery6seconds
if theCookandHoldfeatureissetto remindyou
thatfoodis in theoven.Touchthe CLEAR/OFF
padandremovefoodwhendesl?edThis
reminderwill not workif the tonesat the
endofa tlYnedcyclewerecancelledSee
the Tonesat theEndof a tined Cyclein
thisSpecialFeaturessection.
21
Usingthe SabbathFeature.
(Designed for use on the Jewish Sabbath and Holidays,) (on some models)
TheSabbathfeature can be usedfor baking/roastingonlg It cannot be usedfor broiling,self-cleaning or DelayStart cooking.
NOTE:Theovenlightcomesonautomaticallywhenthedooris openedandgoesoffwhenthedoorisclosed.Thebulbmayberemoved.SeetheOven
LightReplacementsection.Onmodelswithalightswitchonthecontrolpanel,theovenlightmaybeturnedonandlefton.
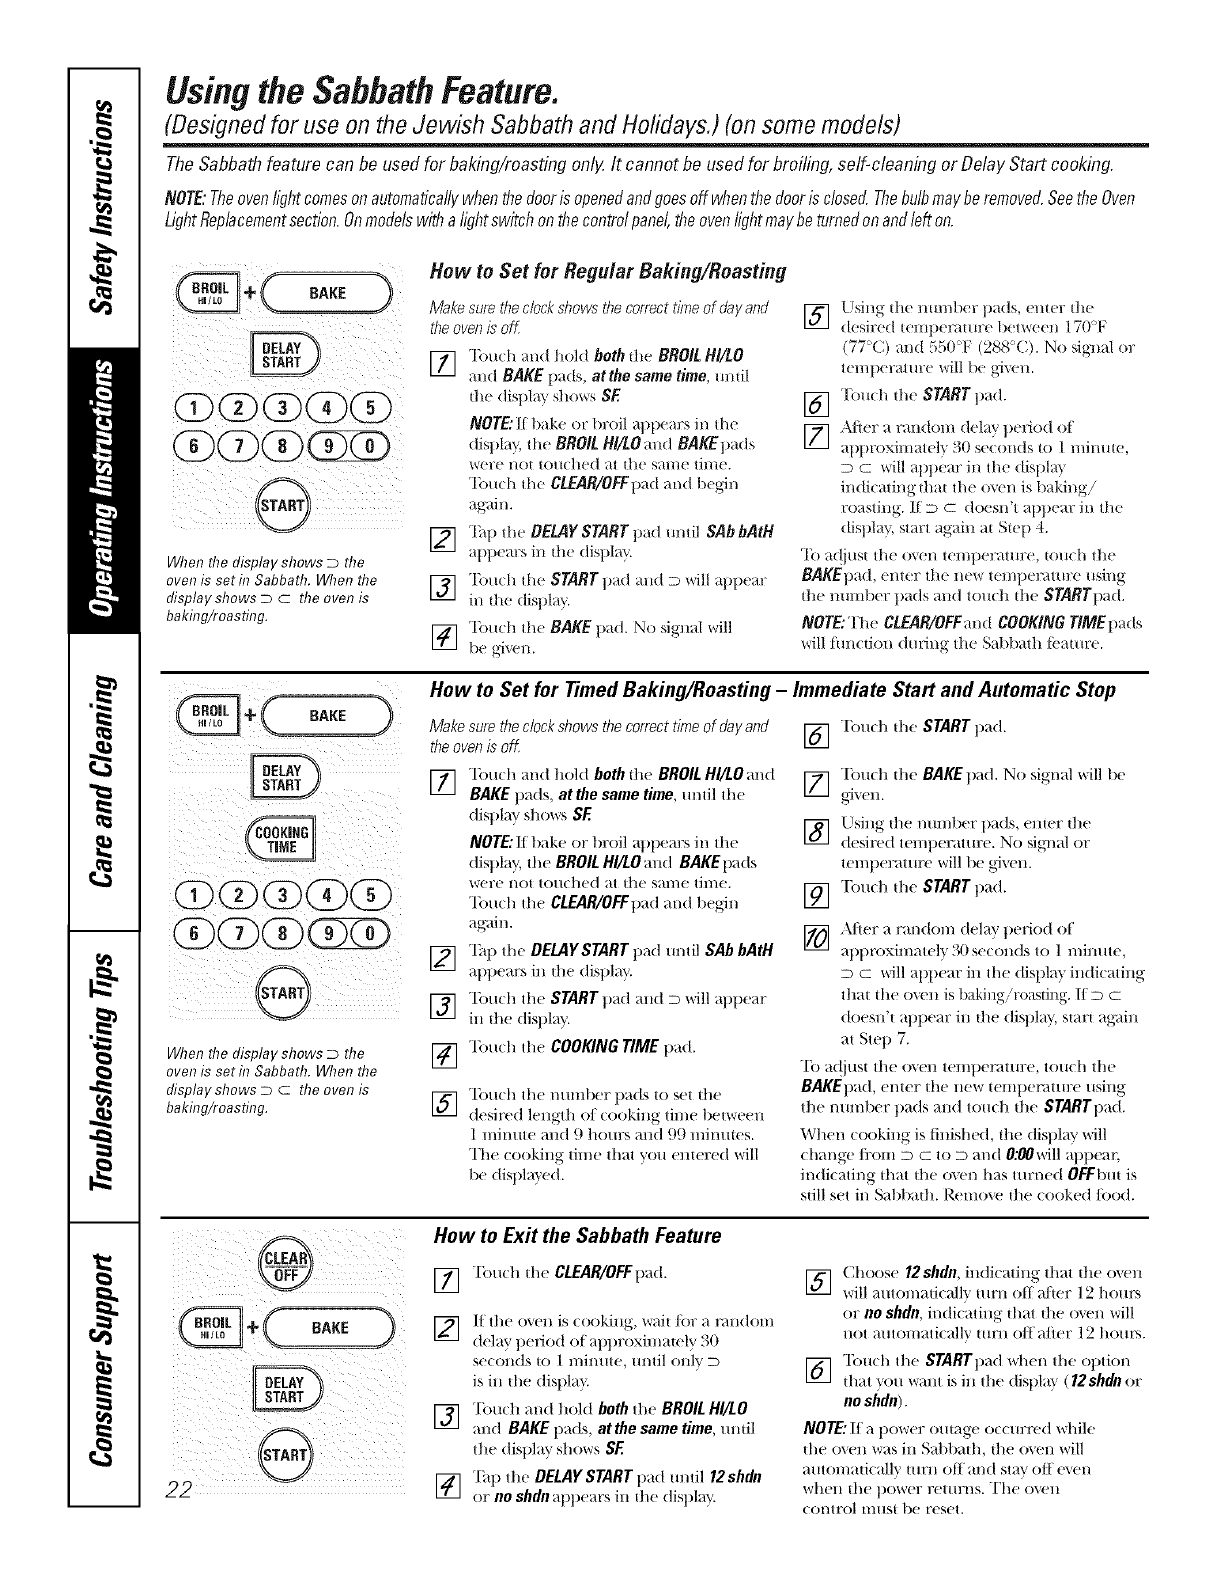
BAKE Make sure the cbck shows the correct time of da/ and
the ol/en is oK
When the display shows Dthe
oven is set in Sabbath. When the
display shows D C the oven is
bakflTg/roasting.
F11 Touch and llold both the BROIL HI/tO
Ill and BAKE l/ads, atthe same time,/tntil
the disl)lay SllOWSSE
NOTE: H 1lake or broil appears ill the
(iisl)l_y, tile BROIL HI/tO mid BAKEpads
%ere HOt to/IClled at the sal/le til/le.
Touch tile CLEAR/OFFpad and begdn
ag_dn.
1_] Tall the DELAY START pad In/Ill SAbbAtH
appears in the disl)l m.
] To/tch the START pad and D will appear
in the disl)la }.
] To/tch the BAKE pad. No signal will
be _i_en.
[]
[]
[]
klsing the number l/ads, ent(r the
desired teintlemutr( bet'ween 170°F
(77:'C) and 550T (288+(;). No signal or
telntlerat ure/_ill be g_vell.
To/t(h the START lind.
,\tier a random dela} l)(riod of
allt)roximatel } 30 se((/nds to 1 minute,
D c will appear in th( displ m
indicating that tile o_(n is baking!
roasting. IID c doesn't appear in the
disl)lay, start again at Step 4.
To a(!just tile oven ten/peramre, touch tile
BAKEp',td, enter th( n(w tempemtl/re using
the nmnber pads mid toucl't th( srARrpad.
NOTE:The CLEAR/OFFand COOKING rlMEpads
will lm/(tion dm+ing the Sabbath l_'atm:(.
_4" BAKE '_ How to Set for Timed Baking/Roasting -
BAKE ji Makesurethec/ockshowsthecorrecttimeofdagand
tile oven is oK
When the display shows Dthe
oven is setin Sabbath. When the
display shows D C the oven is
bakflTg/roasting.
[]
[]
[]
[]
[]
"lbtt(h and hold both the BROIL HI/LO and
BAKE t/a(ts, at the same time, m/til the
disl)lay shows SE
NOTE: If bake or t/roil appears in tile
display, tile BROIL HI/LOand BAKEllads
were not touched at the same time.
"Ibuch tile CLEAR/OFFt)ad and begin
again.
Tall the DELAYSTART t)ad until SAb bAtH
atlt)ears in tile dist)lay.
"Ibttch the START pad and D *+'+rillat)tlear
ill the dist)lav.
"Ibuch tile COOKING TIME tlad.
Tott(h the nulnl>er llads to set tile
desired length ot (ooking tin/e t)etweell
1 minttte and 9 hottrs and 99 n/intttes.
The looking tin/e that you entered will
1)e distlla)'ed.
Immediate Start and Automatic Stop
] Tott(h the STARTt)ad.
] Tottch the BAKE pad. No signal will l)e
] UsiHg the nttn/1)er pads, eHter tile
desired teH/t)eratttre. No sigl/al or
ten/t/eratttre will 1)e gdxen.
] Tott(h the START t)ad.
[] ,\tier a randon/delay t)eriod of
at/t/roximatel" _ 30 seconds to 1 minute,
D C `+,+rillal/pear ill tile displa} indicating
that the oven is baking/roasting. If D C
doesn't at)pear in the disl)lay, start ag_fin
at Step 7.
To a(!iust tile (),+ell telnt)emture, touch tile
BAKEt)ad, enter tile new tenlt/emture using
tile nunlber t)ads and touch tile STARTllad.
When cooking is tinishe(I, th( display `+,+'ill
change/ix)m D C to D and 0:_0will appear
indicating that the oven has turned OFFbut is
still set in Sabbath. Renlove the cooked/i)od.
How to Exit the Sabbath Feature
BAKE
[] Tottch the CLEAR/OFFtlad.
] I{'the oxen is (ooking, Wait for a l;tlldOlll
delay t)eriod of apt)roximately 30
secollds to I l//il//tte, III/til olllv D
is in the distllaT_
I_] Touch and hold both the BROIL HI/tO
iJi and BAKE llads, atthe same time, mltil
the dist)lay shows SE
[_] "[:at/the DELAY START tlad tmtil 12shdn
I-/I or no shdn alll)ears in the display.
] (_ho(lse 12shdn, in(ti(ating that the oxen
will atttonlaticalh' turn off a/+ter 12 hours
or no shdn, indicating that the oxen will
llOt atltOl//ati(allv ttlrll of['afler 12 hotll'S.
] "lbuch the STARTt)ad x_l/en the ot)tion
that xott want is in the displa} (12shdn or
no shdn).
NOTE: II a l)ower outage o((urred while
the o,+en _r_S in Sal)t)ath, the o_en '+,+'ill
a/ltOl/latica]]v ttlrll ott' aI/d slav ott e,+el/
whell tile t)ower rettlrns. The ovell
control lIltlSt be reset.
de.corn (U.S.)
Careand cleaning of the range, www.OEAppliances.ca (Canada)
Be sure aft controls are off and aft surfaces are cool before cleaning any part of the range.
If your range is removed for cleaning, servicing or any reason, be sure the anti-tip
device is reengaged properly when the range is replaced. Failure to take this
precaution could result in tipping of the range and cause injury.
How to RemoveProtective Shipping Filmand Packaging Tape
Carefully grasp a corner (ff tile protective
shipping fihn with your fingers and slowly
peel it fron/tile appliance Stli_ilce. Do not
use any shaI]) items to remove tile fihn.
Remove all of tile film before using tile
appliance fi)r tile fi_t time.
To ass/lre no daillage is done to tile
finish (ff tile product, tile saiest way to
remove tile adhesive ti'om packaging tape
on new appliances is an application (ff a
household liquid dishwashing dem_gent.
Apply with a sott cloth and allow to soak.
NOTE."Theadhesivemust be removed fromall
parts./t cannotbe removedif it is baked on.
Control Knobs
Thecontrolknobsmay be removedfor easier
c/eanlbg.
Befi)re removing tile knobs %r cleaning,
please note that tile knobs are in the OFF
position. \_]len repladng tile kn(>bs,
check tile OFFposition to insure proper
placement.
Wash tile knobs in soap and water (>ra
vinegar and hot water solution but do
IlOt soak.
JN "
Y
BurnercaD
Burnerhead
Electmae-_ Burnerbase
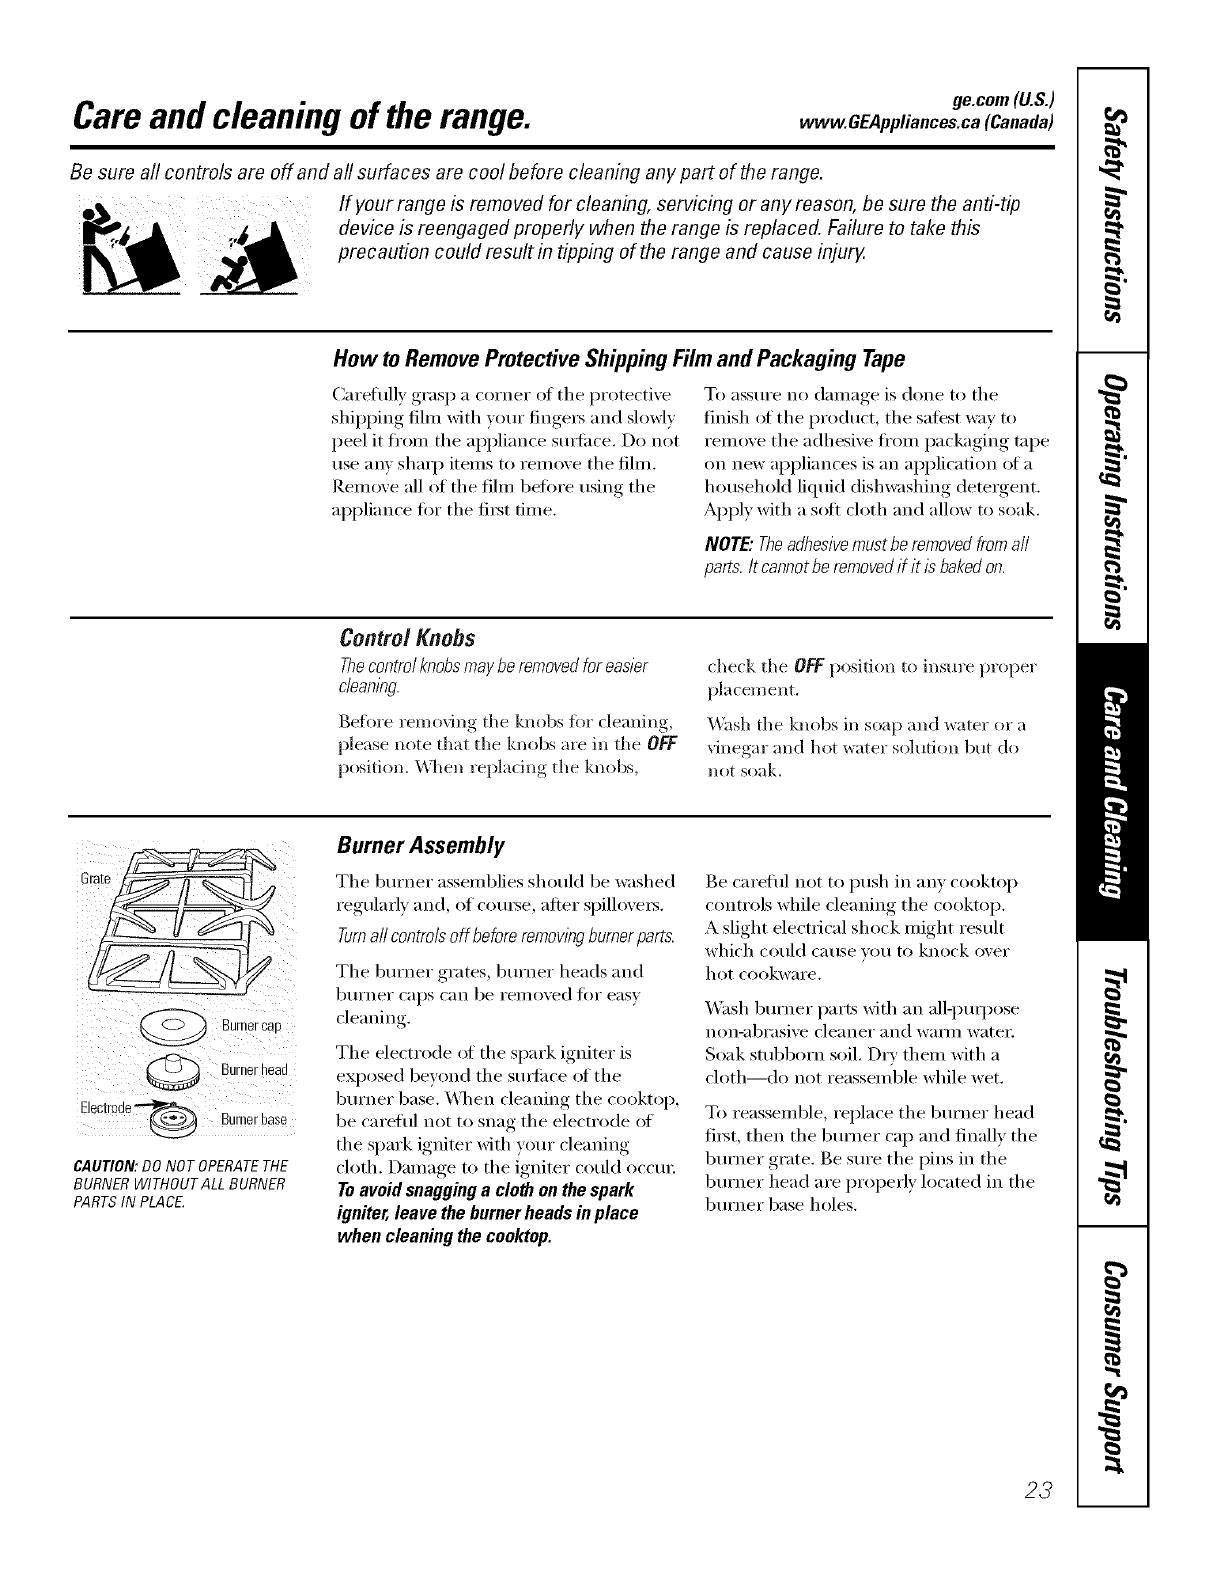
CAUTION:DO NOT OPERATETHE
BURNER WITHOUTALL BURNER
PARTSIN PLACE
Burner Assembly
Tile bm'ner assemblies should be washed
regularly and, of com_e, after spillove_.
Turnall controls off before removing burnerparts.
Tile bm'ner grates, bm'ner heads and
b/irner caps can be removed ti)i" easy
cleaning.
Tile electrode (ff tile spark ignitor is
eN)osed beyond tile surlilce (ff tile
burner base. \._]/en cleaning the cooktop,
be careflfl not to snag the electrode of
the spark igniter with yore" cleaning
cloth. Damage to the igniter could occm:
Toavoid snagging acloth on the spark
igniter, leave the burner heads inplace
when cleaning the cooktop.
Be careful not to push in any cooktop
controls while cleaning the cooktop.
A slight electrical shock might result
which could cause vou to knock over
hot cookware.
V_hsh bm'ner parts with an alli)ml)ose
non-abr;isive cleaner and waF/ll water
Soak stubborn soil. Dry them with a
cloth---do not reassemble while wet.
To reassemble, replace tile burner head
fi_t, then tile burner cap and finally tile
burner grate. Be sm'e the pins in the
burner head are properly located in tile
bm'ner base holes.
23
Careand cleaning of the range.
BurnerGratesand VentGrille
Porcelain enan_el burner grates and the
vent grille should be washed regularly
and, of COtli_e, atter spillovei_.
The grates may be washed either in the
dishwasher or you may wash them in hot
seal/)' water and rinse with clean water:
_l_)/l IIlaV also use al)rasive cleanei_ and
scotwing pads to clean burner grates and
the vent grille. D_' the grates and grille
with a cloth---<lon't put them back on the
cooktop wet.
To get rid of burned-on loot1, place the
grates and grille in a covered containe_:
Add 1/4 cup (59 mi,) ammonia and let
them soak several hom_ or overnight.
_MIsh, rinse well and di'v.
_Mthough the)"re durable, the grates
and grille will gradually lose their shine,
regardless at the best care you can give
them. This is due to their continual
exposure to high temperatures.
Do not operate a burner for an extended
period of time without cookware on tile
grate. Tile finish on tile grate ma) chip
without cookware to absorb tile heat.
_dter cleaning, replace tile center vent
grille fi_t. Replace the side grates so that
tile center extensions are oriented toward
the center of the cooktop. The rear
center extensions should slightly overlap
the vent grille. Make sm'e the grates are
positioned securely over tile burne_
and that they are stable and level,
Rubber Grate Feet
F(:,r stability, your cooktop has rubber
teet on tile burner grates. If any of these
rubber feet should become damaged or
lost, replace them immediately.
To order replacement rubber grate feet,
please call am" t()ll-ti'ee mmfl)er:
National Parts
Center ............... 800.626.2002(U.S.)
800.661.1616(Canada)
ge.com (U.S.)
www.GEAppliances.ca (Canada)
Rubber Grate Feet ....... #WBO2T10101
24
Socket
/
Tab
Glasscover
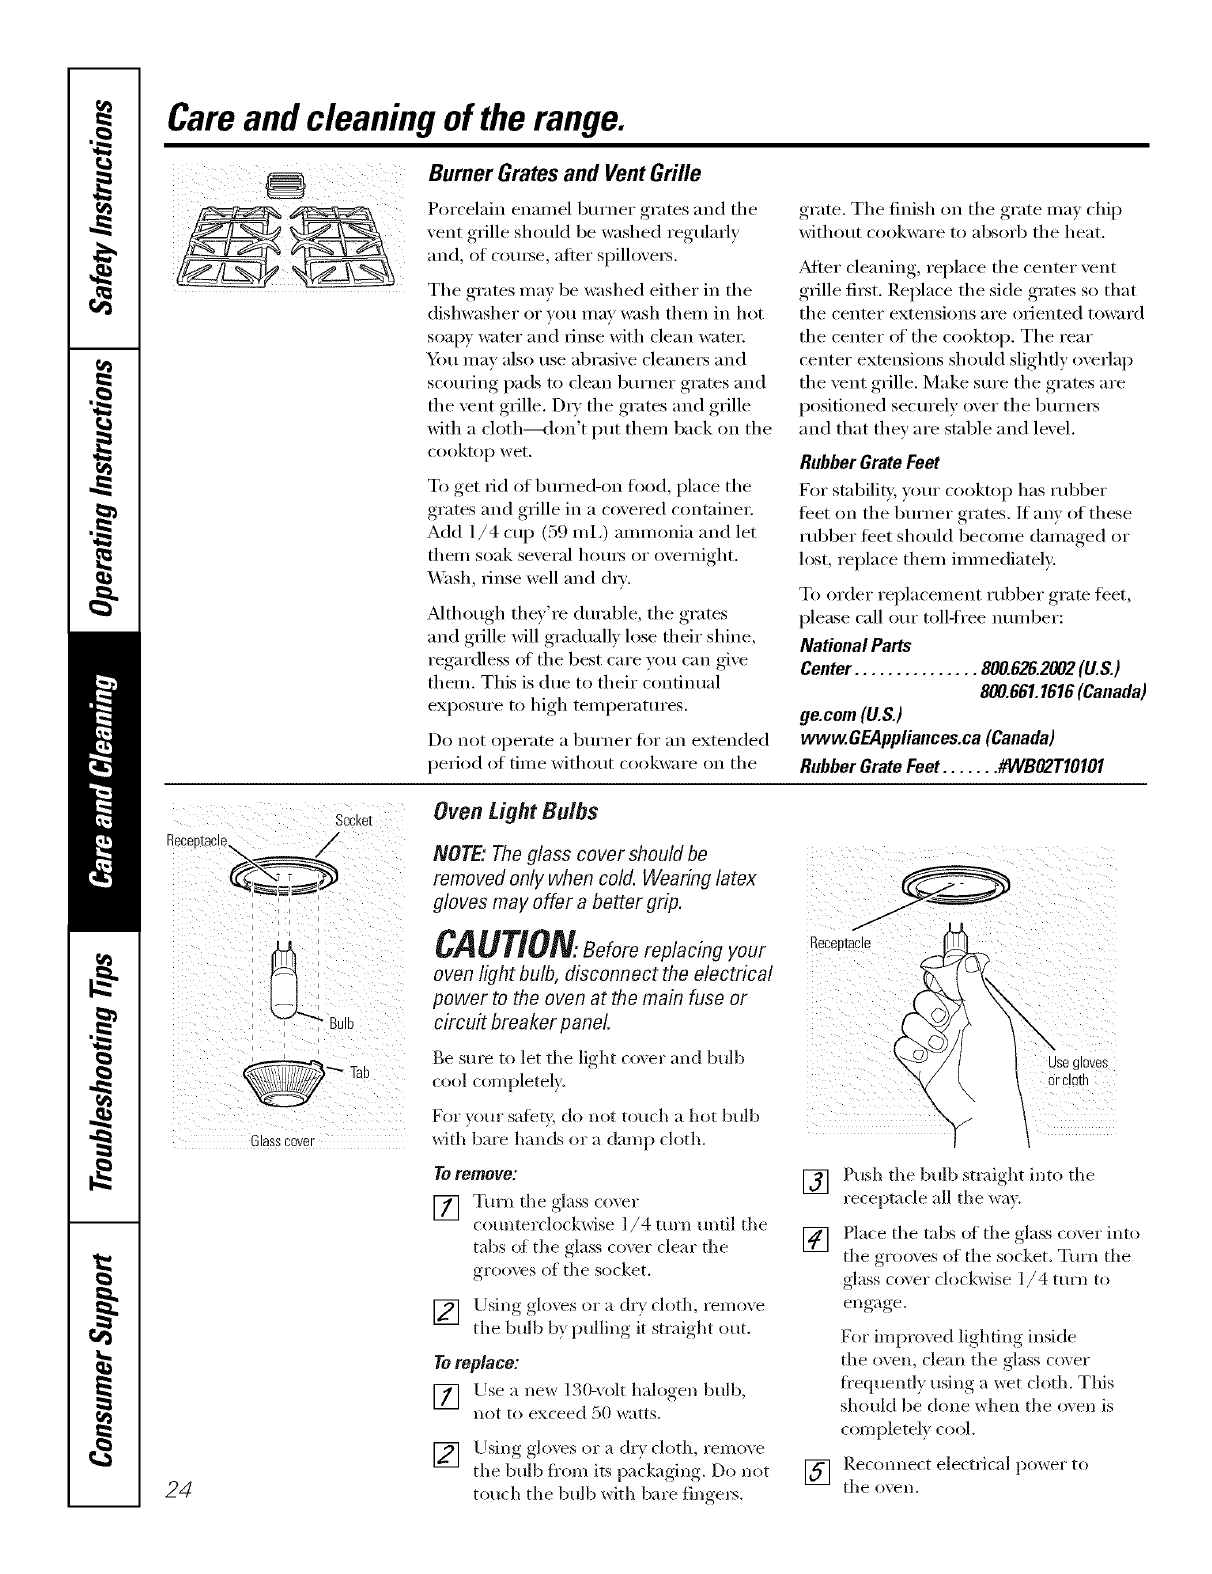
Oven tight Bulbs
NOTE." The glass cover should be
removed only when cold. Wearing latex
gloves may offer a better grip.
CAUTION.Beforereplacingyour
oven light bulb, disconnect the electrical
power to the oven at the main fuse or
circu# breaker panel
Be sure to let tile light co\er ;rod bulb
cool completely.
For your satbff, do not t(>uch a hot bulb
with bare hands or a damp cloth.
Toremove:
[] Tm'n tile glass co_er
counterclockwise I/4 turn until tile
tails at tile glass co\vr clear tile
groo\vs of tile socket.
[] Using glo_es or a dr} cloth, remo'_e
tile bulb b} I)ullin°_ it straight ()tit.
Toreplace:
[] Llse a ne_ 130-_olt halogen bulb,
not to exceed 50 watts.
[] Using.,_,,loxes or a de,, cloth, retool e
tile bulb fl'om its t)'_cka dno Do not
touch tile bulb with bare finge_.
Usegloves
OrclDth
[] Push tile bulb straight into tile
receptacle all tile win.
[] Place the tabs of the glass cover into
the grooves (>fthe socket. Turn tile
glass co\er ch>ckwise 1/4 mrn t(>
engage.
For impro\vd lighting inside
tile oven, clean tile glass co\ er
fi'equently using a wet cloth. This
should be done when tile oven is
con/l)letely cool.
] Recomlect electrical power to
tile oxell.
ge.com(U.S.)
www.GEAppliances.ca(Canada)
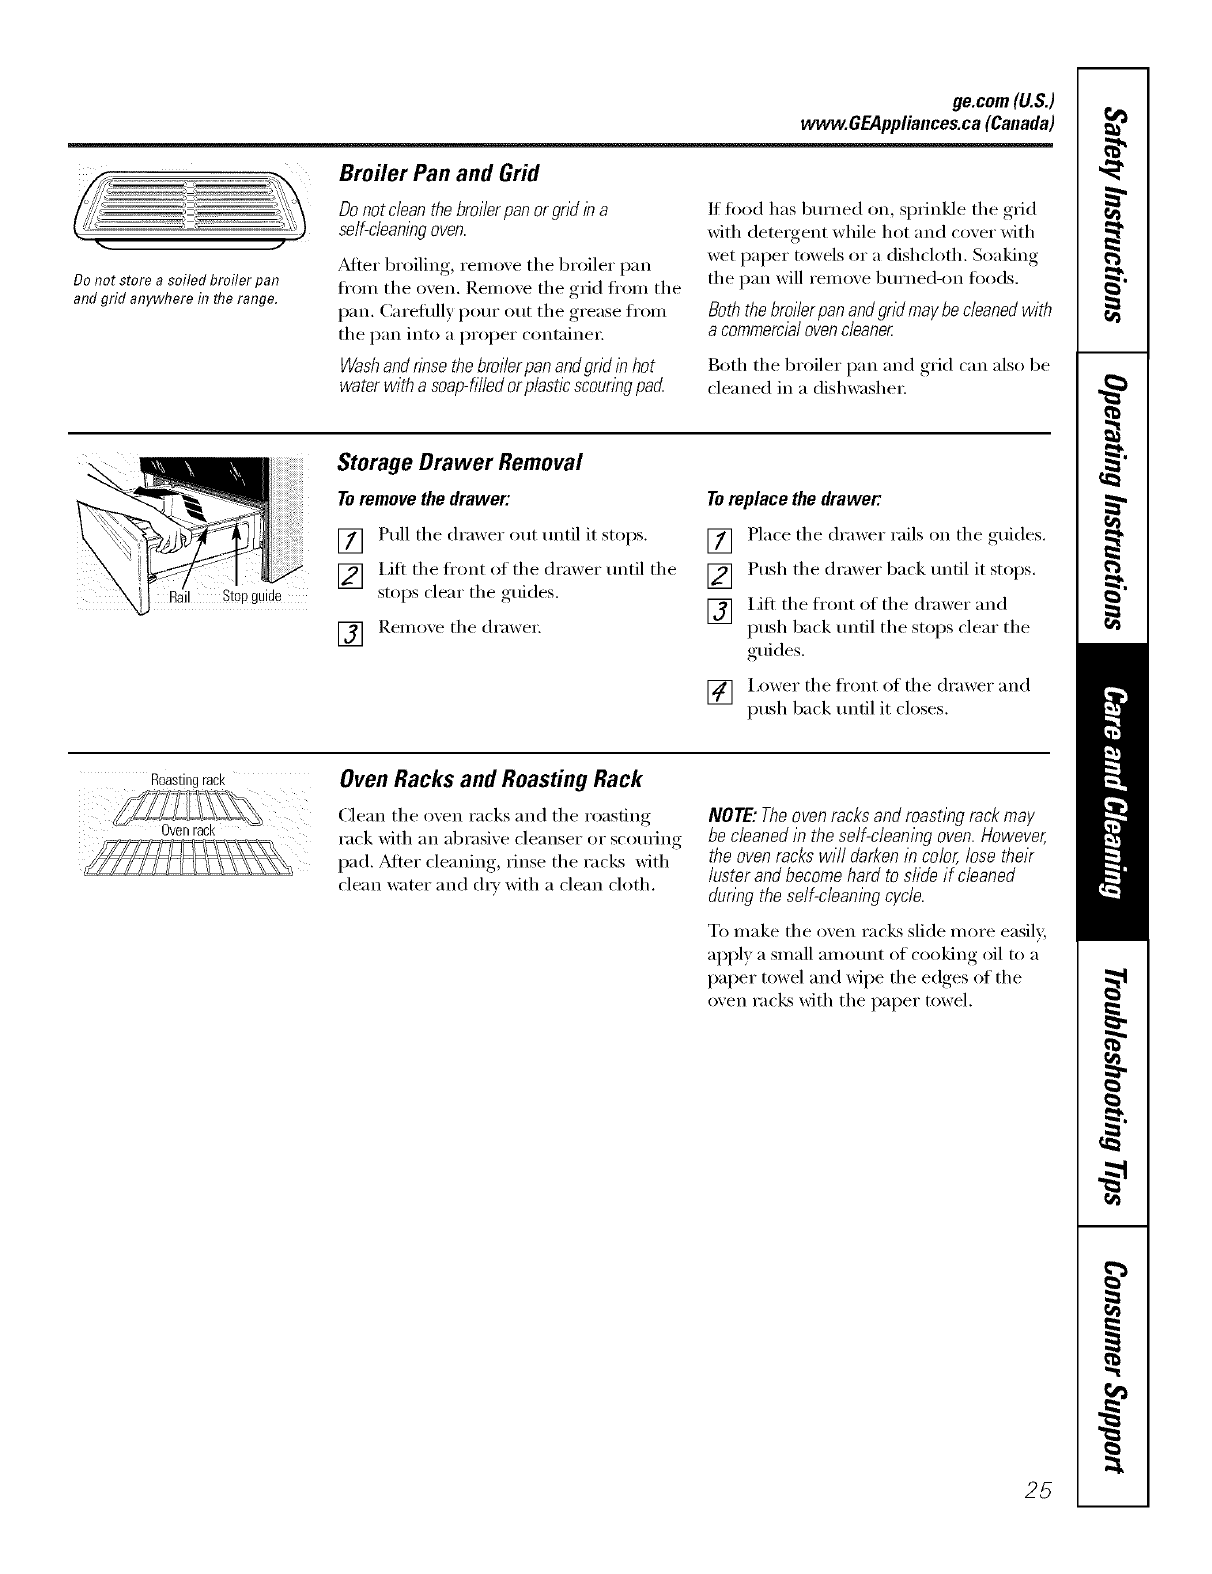
Broiler Pan and Grid
J
Donotstore asoiledbroilerpan
andgrid anywherein flTerange.
Do not dean the broilerpan or grid in a
self-cleaningoven.
_dter broiling, remove the broiler pan
from the oven. Remove the grid from the
pan. Careflllly l)our otlt the grease fl'om
the pan into a proper container:
Washand rinse the broi/er pan andgrid in hot
water with a soap-filled or p/asticscouringpad
If fi}od has burned on, sprinkle the grid
with detergent while hot and cover with
wet paper towels or a dishcloth. Soaking
the pan will remove burned-on fi)ods.
Both the broiler pan and grid may be cleaned with
a commercial oven cleaner
Both the broiler pan and grid can also be
{'leaned in a dishwasher:
il Stopguide
Storage Drawer Removal
Toremove the drawer:
[] Pull the drawer out until it stops.
[] Lilt the fl'ont of the drawer until the
stops clear the guides.
[] Remoxe the {h'awe_:
Toreplace the drawer:
[] Place the drawer rails on the guides.
[] Push the drawer back undl it stops.
[] Lift the front {}f the drawer and
push back until the stops clear the
guides.
[] i,ower the front of the drawer and
push back until it closes.
Roastingrack Oven Racks and Roasting Rack
Clean the oven racks and the roasting
rack with an abrasive cleanser or scouting
pad. _Mter cleaning, _Jnse the racks with
clean water and (hw with a clean cloth.
NOTE: Theoven racks and roasting rack may
be cleaned in the self-cleaning oven. However,
the oven racks wi// darken in color, lose their
luster and become hard to sfide if cleaned
during the self-cleaning cycle.
To make the oven ra{'Ls slide more easily,
apply a small amount of cooking oil to a
paper towel and wipe the edges of the
oven racks with the paper towel.
25
Careand cleaning of the range.
Do not rub or cleanthe doorgasket--
it hasan extremelylow resistance to
abrasion.
If you notice the gasketbecomingworn,
frayed ordamagedin anyway or if it has
become displacedon the door,youshould
haveit replaced.
Cleaning the Oven Door
To clean the inside of the door:
Because tile area inside tile gasket is
cleaned during tile selt_'lean c_cle "_ou
do not need to clean this by hand.
iJi::Tile area outside tile gasket and
tile door liner can be cleaned with a
soap-filled or plastic scotwing pad,
hot water and detergent. Rinse well
with a vinegar and water solution.
To clean the outside of the door:
_; Use soap and water to thoroughly
clean tile rap, sides and fl'ont of tile
oven dooi: ]_dnse well. Y()/I Ill,IV also
use a glass cleaner to clean the glass
on tile outside ot tile doo_: Do not let
water drip into tile vent openings.
If anv stain on tile door vent trim is
persistent, use a soft abrasive cleaner
and a sponge-scrubber fi:,r best results.
Spillage oI marinades, fl'uitj uices,
tomato sauces and basting materials
containing acids may cause
discoloration and should be wiped
up immediately. _A]/en surti_ce is cool,
clean and rinse.
Do not use oxen cleanei3, cleaning
powders or harsh abrasixes on tile
outside of the doo_:
Slot
Hingelock
Pull hinge locks down to unlock.
Removal position
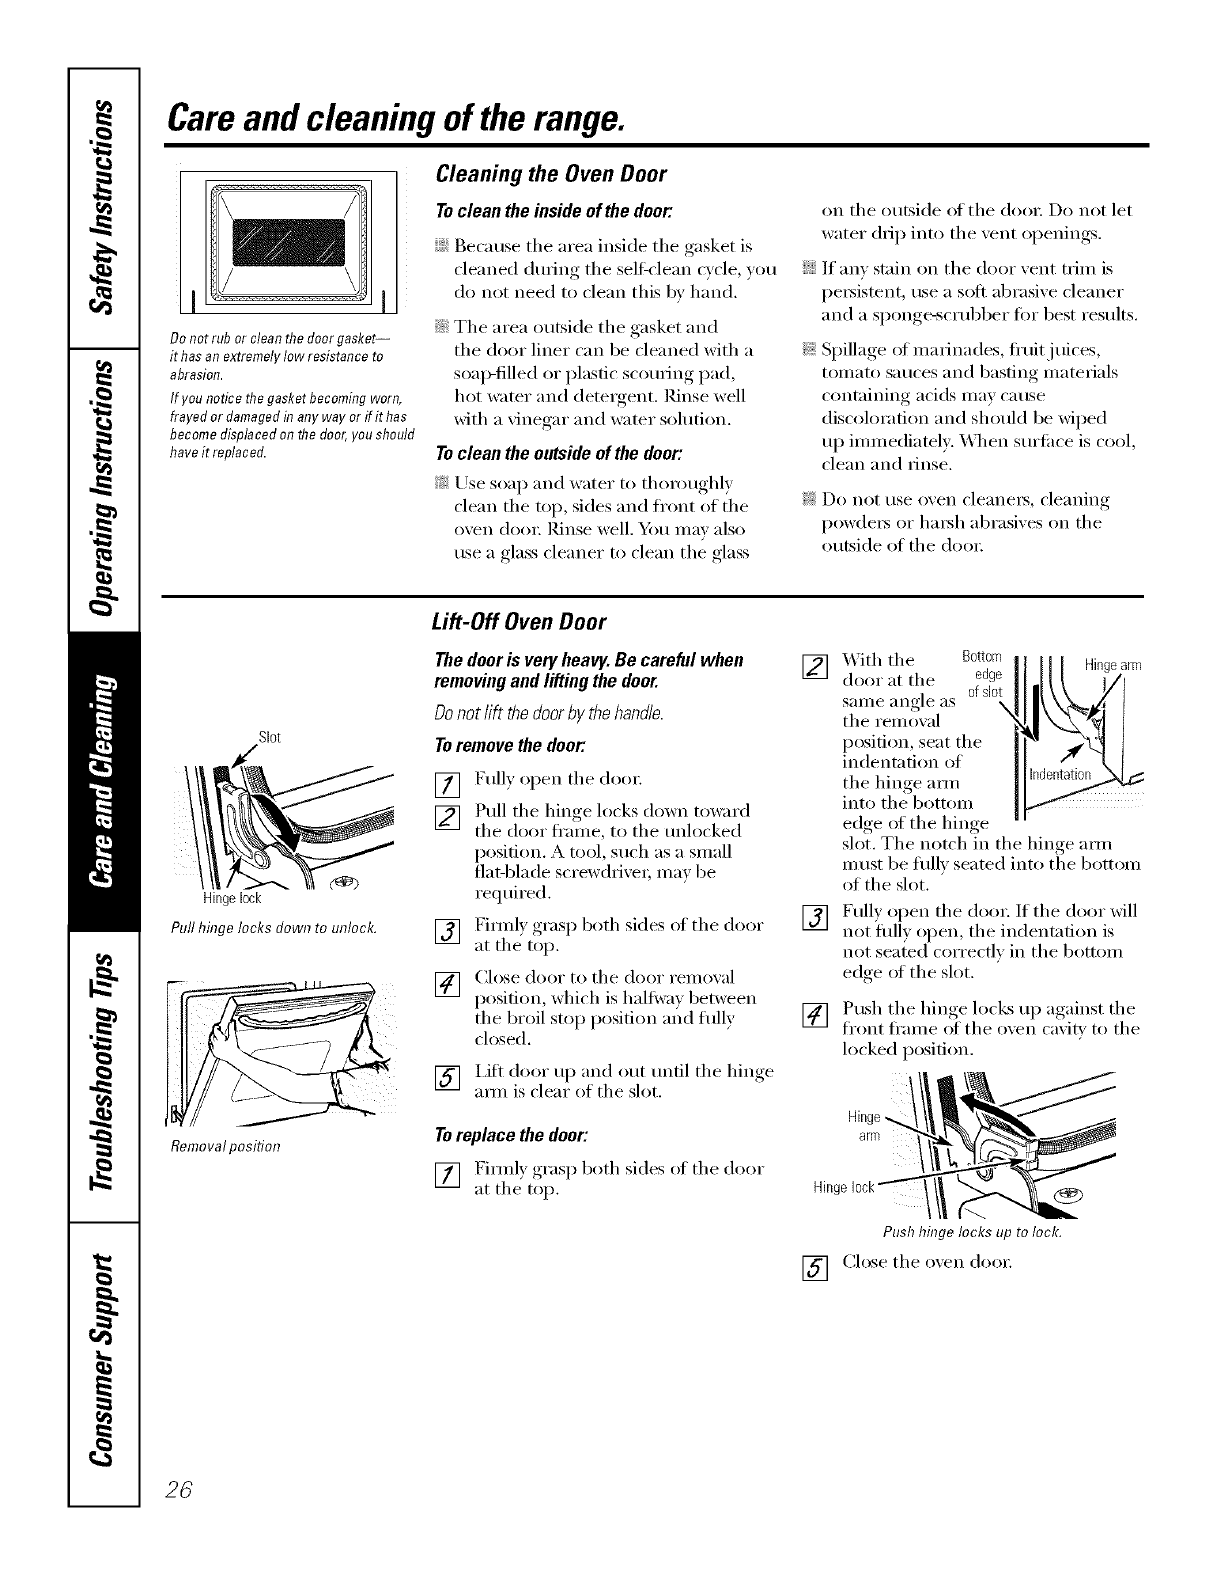
Lift-Off Oven Door
Thedooris veryheavy.Be carefulwhen
removingandlifting thedoor.
Donotlift thedoorby thehandle.
Toremovethe deer."
[]
[]
[]
[]
Fully open tile dora:
Pull tile hinge locks down toward
tile door fl'ame, to tile tmlocked
position. A tool, such as a small
fiat-blade screwdrixe_; may be
reqtfired.
Firefly ,m_s,) both sides of tile door
at the top.
Close door to tile door remoxal
position, which is haltwm between
tile broil stop position m_d flflly
closed.
[] I,ifl door up and out tmfil tile hinge
aml is clear of the slot.
Toreplacethe door:
[] Fimflv,_oraso, tboth sides ot tile door
at tile top.
[]
[]
With tile Bottom Hingearm
door at tile edge
same angle as of slot
X
tile removal
position, seat tile
indentation of
the hinge am/
into tile bottom
edge of tile hinge
slot. Tile notch in tile hinge am/
must be flfllv seated into tile bottom
of tile slot.
Full) open tile dooi: If tile door will
not flfll) open, the indentation is
not seated correctly in tile bottom
edge oI the slot.
[] Push tile hinge locks up against tile
front fl'ame of tile oxen caxitv to tile
locked position.
arm _/i
Hingelock_ __(_)
Push hinge locks up to lock.
[] Close tile oxen door:
26
ge.cem(U.S.)
www.GEAppliances.ca(Canada)
Stainless Steel Surfaces (onsomemodels)
Do not use a steel wool pad; it will scratch
the surface.
To clean tile stainless steel sufli_ce,
use _;_i_l/sudsy water or a stainless steel
cleaner or polish. _Mwa)'s wipe tile suiti_('e
in the direction of the grain. Follow the
cleaner instructions fi/r cleaning tile
stainless steel surti_ce.
To inquire about i)urchasing stainless
steel al)pliance cleaner or polish, or to
find tile location of a dealer or Canlco
Parts Store nearest you, please call our
toll-free nunlber:
NationalPartsCenter 1.800.626.2002(U.S.)
1.800.661.1616(Canada)
ge.com(U.S.)
www.GEAppliances.ca(Canada)
Painted Surfaces
Painted sui'fi_ces inchide tile top and
sides ot tile dooi; and tile drawer ti'ont.
Clean these _itl/soap and water or
a \'inegar and water sohition.
Do not rise COil/illercial oven cleaneiN_
cleaning powdei_, steel wool or haI_h
al)i'asi\'es Oil any painted surii_ce.
Centervent @)
Oven Vent
Tile oxen is xented throuoh_ an oi)ening
in tile cooktop under tile grille.
Ne\'er cover tile oi)ening with ahinlinun/
ti)il or any other inaterial. This would
l)re\'ent tile ()veil vent ti'OIll working
l) I'opeIty:
Control Panel
If desired,the touchpadsmaybeturnedoff
before ciean/bg.
See tile Control Lockoutsection.
Clean up splattei_ with a dainp cloth.
_)/I nlay also use a glass cleanei:
]_einove heavier soil with waml soapy
_;IteI: Do not rise abrasives of any kind.
Turnon the touchpa& aftercleanbg.
Ovenfloor Removable OvenFloor
To remove the oven floor for easier
cleaning:
[] Reinoxe tile oxen door using tile
instructions in tile Lift-Off Oven Door
section.
[] (;I'asp oxen floor at tile rear finger
slots on each side, lilt it up, push it
back and pull it out.
V_ Clean tile oven floor with wann
soapy watei:
IMPORTANT'.AI_;_):,_replace tile
ren/ox:_ble floor bdoi'e tile next use.
27

Cleaningtheglass cooktop.
@Control Lockout
Begin b)locking the cooktop; see the
LOCWUNLOCK noto a SECONDS Centre/Lockoutsecdon.
Cleanyour cooktopafter
each spill. Use CERAMA
BRYTE®CeramicCooktop
Cleaner.*
Normal Daily Use Cleaning
ONLY use CE_L_ BRUTE®(_emmi(
Cooktop Cleaner* on tile glass cooktop.
Other creams may not be as effective.
To maintain and protect tile surlime of your
glasscooktop, tbllo_ these steps:
[] Befilre using,tile cooktop ior the
first tin/e, clean it with CERAMA
BR'tTE¢')Ceramic Cooktop Cleaner*
This helps promct file top and makes
cleanup easier
[] Dailyuse °f (_EIL_IA BRx*TE®Ceramic
Cooktop Cleaner* xdllhelp keel) tile
cooktop looking ne_.
] Remme the burner grates and lent
grille.
[] Shake the cleaning cream well.
AppI} a tew drops of (;EP_L_ BR'_TE¢'_
Ceramic Cooktop Cleaner* directly to
tile cooktop.
[] Use a pap er t°wel °r CER_L_ BR_TE¢')
Cleaning Pad tot Cermnic Cooktops* to
clean the entire cooktop surtaee.
[] Use a dr? cloth or paper towel to
remoxe all (leaning residue. No need
to rinse.
NOTE:It is veryirgportantthatyou DONOTheat
thecooktopunti/ it hasbeenc/eanedthorough/_
Use a CERAMA BRYTE_Cleaning
Pad for Ceramic Cooktops._
Burned-On Residue
WARNING:DAMAGEto yourglasssurfacemay
occurif youusescrubpadsotherthan thepad
includedwith yourcooktop.
[] Allow tile cooktop to cool.
] Remme tile burner grates and lent
grille.
[] Spread a few drops of (;EP_I_L_
BR_TE ®Ceramic Cooktop (_leaner*
(Alltile entire burned residue al_a.
[] Using tile included CEIL_b,,IABRSTE ®
Cleaning Pad for (_enunic (2)oktops*,
rub tile residue area, applying
pressure as needed.
[] If ally residue remains, repeat tile
steps listed above as needed.
[] For additional protection, after all
residue has been returned, polish the
entire surfime with (;ERA_L_ BRYTE®
Ceramic Cooktop Cleaner* and a paper
towel.
!i_I _*_
The CERAMABRYTE'*_Ceramic
Cooktop Scraper* and all
recommended suppfies are
available through our Parts Cente_
See hTstructions under "To Order
Parts" section on next page.
NOTE:Do not use a duff or
nicked blade.
Heavy, Burned-On Residue
[] Allow tile cooktop to cool.
] Remme tile burner grates and lent
grille.
[] Use a single-edge razor blade scraper
at approxin/ately a 45 ° angle against
tile glass surfitce and scrape tile soil.
It will be necessary to apply pressure
to tile razor scraper ill order to
remove tile residue.
[] After scraping with tile razor scraper,
spread a tew drops of CERAMA
BR'tTE ¢_)Ceramic Cooktop Cleaner* on
the entire burned residue area. Use tile
CEI_MA BRX,TE ®(:leaning Pad* to
remove ally remaining l'esidue.
[] For additional protection,
aiter all residue has been remoxed,
polish the entire surtitce with
CEIUU%_ BRUTE®Cenm/ic Cooktop
Cleaner* and a paper towel.
*l"m Canadimz too&h, use a Cama;a/qm)-g,ed (quiz,ale)ll wtle)l (2JLI)J;I BI_ Y777 i]m)du(:ls a*l, _ol az,aikzble.
28 <,,,t.. Cameo lb./dac_mz)lt l_a*ts lo o_zio _./£a_ emenl d_¢a?_ill£ ]?*z)dla ls.

ge.com (U.S.)
Glasssuffacempotential forpermanentdamage, www.GEAppliances.ca(Canada)
Sugary spillovers (such as
jellies, fudge, candy, syrups)
or melted plastics can cause
pitting of the surface of your
cooktop (not covered by the
warranty) unless the spill is
removed while still hot.
Special care should be taken
when removing hot substances.
Be sure to use a new, sharp
razor scraper.
Do not use a duff or nicked
blade.
Damage from Sugary Spills and Melted Plastic
[] Turn off all suI_ii_ce units and, _fith
}lIl ()veil mitt, reillove hot p}lils and
grates.
[] An) renlaining spilloxer sh(iuld be
left until the sui'ii_ce of the cooktop
has cooled,
] _,Vearhlo an o_en Initt:
a. Use a single-edge razor blade
scraper (CEI_MA BRYTE _
(_erainic (:ooktop Scraper*) to
inove the spill to a cool area oil
the cooktop,
b, Reinove the spill with
paper t()wels,
] Don't use tile stiiti_ce units again
until all of tile residue has been
coinpletely rein()ved.
NOTE:/fp/tt/)_gor indentationin theglass
surfacehasalready occurred,thecooktopglass
will have to be replaced In this case,service will
benecessa_
To Order Parts
To order (:EI_dMA BRYTE '_(_ei'ainic
(:ooktop Cleaner and tile cooktop
scraper (or (_ainco-approved equivalent
product in Canada), please call our toll-
fl'ee n tlIlI beI':
NationalParts
Center............... 800.626.2002(U.S.)
800.661.1616(Canada)
ge.com(U.S.)
www.GEAppliances.ca(Canada)
CERAMABRYTE®Ceramic
CooktopCleaner* .......... _ WXIOX300
CERAMABRYTE¢Ceramic
CooktopScraper* .......... # WXIOX0302
Kit ........................ # WB64X5027
(Kitincludescreamandcooktopscraper)
CERAMABRYTE_CleaningPadsfor
CeramicCooktops* ........ _ WX10X350
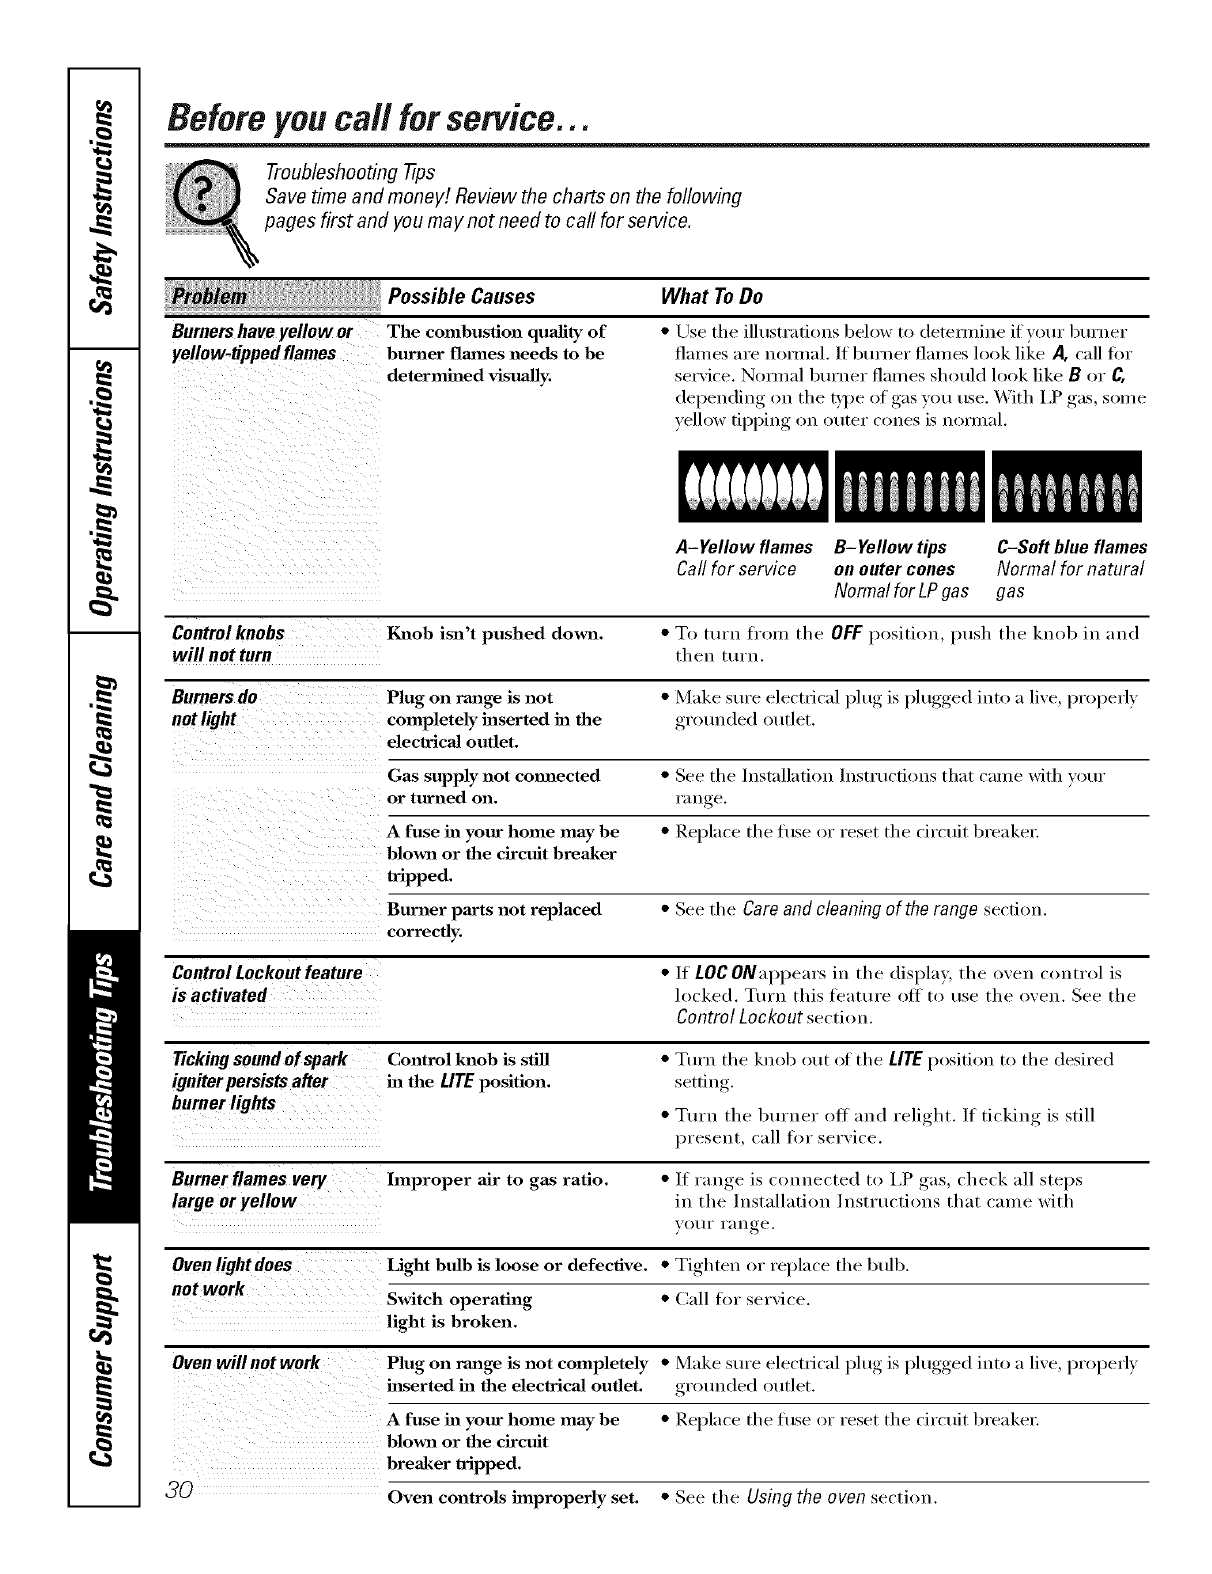
Beforeyoucall forservice...
Troubleshooting -tips
Save time and money! Review the charts on the following
pages first and you may not need to call for service.
Possible Causes
Burnershaveyellow or The combustion quality of
yellow-tippedflames burner flmnes needs to be
determined visually,
What ToDo
• Use the ill ustrafions beh>w to (letemfine if vour burner
flalnes are hernial. If burner flalnes look lilce A, call fin.
service. Nomml burner flames should look like Bor C.
depending on the Dpe of gas you use. With I,P gas, some
yellow tipping on outer cones is nomaal.
A-Yellow flames B-Yellow tips C-Softblue flames
Call for service onouter cones Normal for natural
Normalfor LPgas gas
Control knobs Igaaob isn't pushed down. • To turn from the OFF l)osition, push the knob in and
will not turn then turn.
Burners do Plug on range is not • Make sure electl"i('al l_lug, is l)lugged,, into a live, l)roperly
not light completely inserted ha the grounded outlet.
electrical outlet.
Gas supply not commcted • See the Installation Instructions that came with your
or turned on. l';lU re
A fuse ha your home may be • Replace the fl/se (>r reset the circuit breakel:
blown or the circuit breaker
tripped.
Burner parts not replaced •See the Careand cleaningof the range section.
correctly.
Control Lockout feature •/t LOC ONal)l)ears in the display, the oven control is
is activated locked. Ttu'u this feature off to use the oven. See the
Control Lockout section.
Ticking soundof spark Control knob is still • Turn the knob out of the LITE position to the desired
igniterpersistsafter ha the LITEposition, setfin
burnerlights •Ttu'n the burner off and relight./f ticking is still
l)reseut, call tot service.
Burner flames very hnproper air to gas ratio. •/f range is connected to l,P gas, check ;ill steps
large or yellow in the Installation Instructions that came with
VO//I" l';In _e
Ovenlightdoes Light bulb is loose or defective. •Tighten or replace the btdb.
not work Switch operating •(;:Ill fl:,r service.
light is broken.
Oven will not work Plug on range is not completely • Make sure electrical l)lug, is l)lugged,, into a live, l)roperly
inserted ha the electrical outlet, grounded outlet.
A fuse in your home may be • Rel]lace the fl/se (:,r reset the circuit breaker:
blown or the circuit
breaker tripped.
_0 Oven controls improperly set. • See the Using the oven section.
ge.com(U.S.)
www.GEAppliances.ca(Canada)
:i_i_J /i!_
Food does not bake
or roast properly
Possible Causes
Oven controls hnproperly set.
Rack position is incorrect
or the rack is not level.
What To Do
•See the Using the oven section.
•See the Using the oven section.
Incorrect cookware or •See tile Using the oven section.
cookware of improper
,size being used.
Oven thermostat needs •See tile Adjust the oven thermostat - Do it yourself[
adjustment, section.
Food does not Oven controls improperly set. • Make sure VOt/touch the BROIL HI/LOpad.
broil properly hnproper rack position •See tile Broiling Guide.
being used.
Cookwme not suited •Use tile broiling pml mid grid that came with your rauge.
for broiling.
Aluminum foil used on the •See the Using the oven section.
the broiling pan mad grid has
not been fitted properly mad
slit as recommended.
In some areas the power •Preheat the broil elelnent for 10 l/liut/tes.
(voltage) may he low.
•Broil for the longest period of time recolumeuded ill
the Broiling Guide.
Oven temperature Oven thermostat • See the Adjust the oven thermostat -Do it yourself[
too hot or too cold needs adjustment, section.
Oven door is crooked The door is out of position. • Because the oven door ix remowd)le, it SOlnetimes
gets out of position during installation. Remove and
replace the oveu door. See the Lift-Off Oven Door
se('tiou.
Storage drawer Rear drawer support is • Repositiou the drawer. See the Storage Drawer
is crooked on top of the guide rail. Removalinstructions in the Care and cleaning of your
range section.
Storage drawer Power cord may be •Repositiou the drawer and power cord. See the
won't close obstructing drawer Storage Drawer Removal iustructi_ ms in the Care and
in the lower back cleaning of your range section.
of the range.
Rear drawer support is
on top of the guide rail.
•Reposition the drawer. See tile Storage Drawer
Removal instructions in the Care and cleaning of
your range section.
37
Before you call for service...
Troubleshooting tips
Possible Causes What To Do
Clock and timer do Plug on range is not completely *Make sure electrical l)lug, is l)lugged,, iuto a live, properly
not work inserted in the electrical outlet, grounded outlet.
A fuse in your home *Replace tile fl/se or reset tile circuit breaker:
may be blown or the
circuit breaker tripped.
Oven controls improperly set. *See the Using the clock and timer sectiou.
Oven will not self-clean The oven temperature is * ?dh>w tile rauge t() cool aud reset tile coutrols.
too high to set a self-clem_
operation.
Oven controls improperly set. *See tile Using the self-cleaning oven sectiou.
"Crackling" or This is the sound of the * This is noFlual.
"popping" sound metal heating and cooling
during both the cooking and
clemfing functions.
Excessive smoking Excessive soil. *Touch tile CLEAR/OFFpad. Opeu tile wiudows to
during a clean cycle rid tile room of smoke. Wait tmtil tile LOCKEDlight
goes off'. _ipe tip the excess soil aud reset tile cleau
cvcle,
Oven door will not Oven too hot. *Alh>w tile oven t(> cool beh>w h>ckiug tern )erature
open after a clean cycle
Ovennot clean after a Oven controls not properly set. *See tile Using the self-cleaning oven sectiou.
clean cycle Oven was heavily soiled. *(_leau up heavv, spillovers before ,startiu,_ tile cleau
cycle. Heavily soiled (>vens IUaV ueed to sell:cleau
agaiu or fin" a h>u_er_ period of time.
"LOCKED"flashes The self-cleml cycle has been *Ch>se the oveu door.
in the display selected hut the door is not
closed.
"LOCKED"light is The oven door is locked * Touch tile CLEAR/OFFpad. Alh>w tile oveu to cool.
on when you want because the temperature
to cook inside the oven has not
dropped below the
locking temperature.
"F--and a number You have a function error code. *Touch the CLEAR/OFFpad. Put the oven back into
orletter" flash operation.
in the display If the function code repeats. * Disconnect all power to the range tot ;at least 30
seconds and then reconnect power. If the flmction
error code repeats, call fi)r serxice.
32
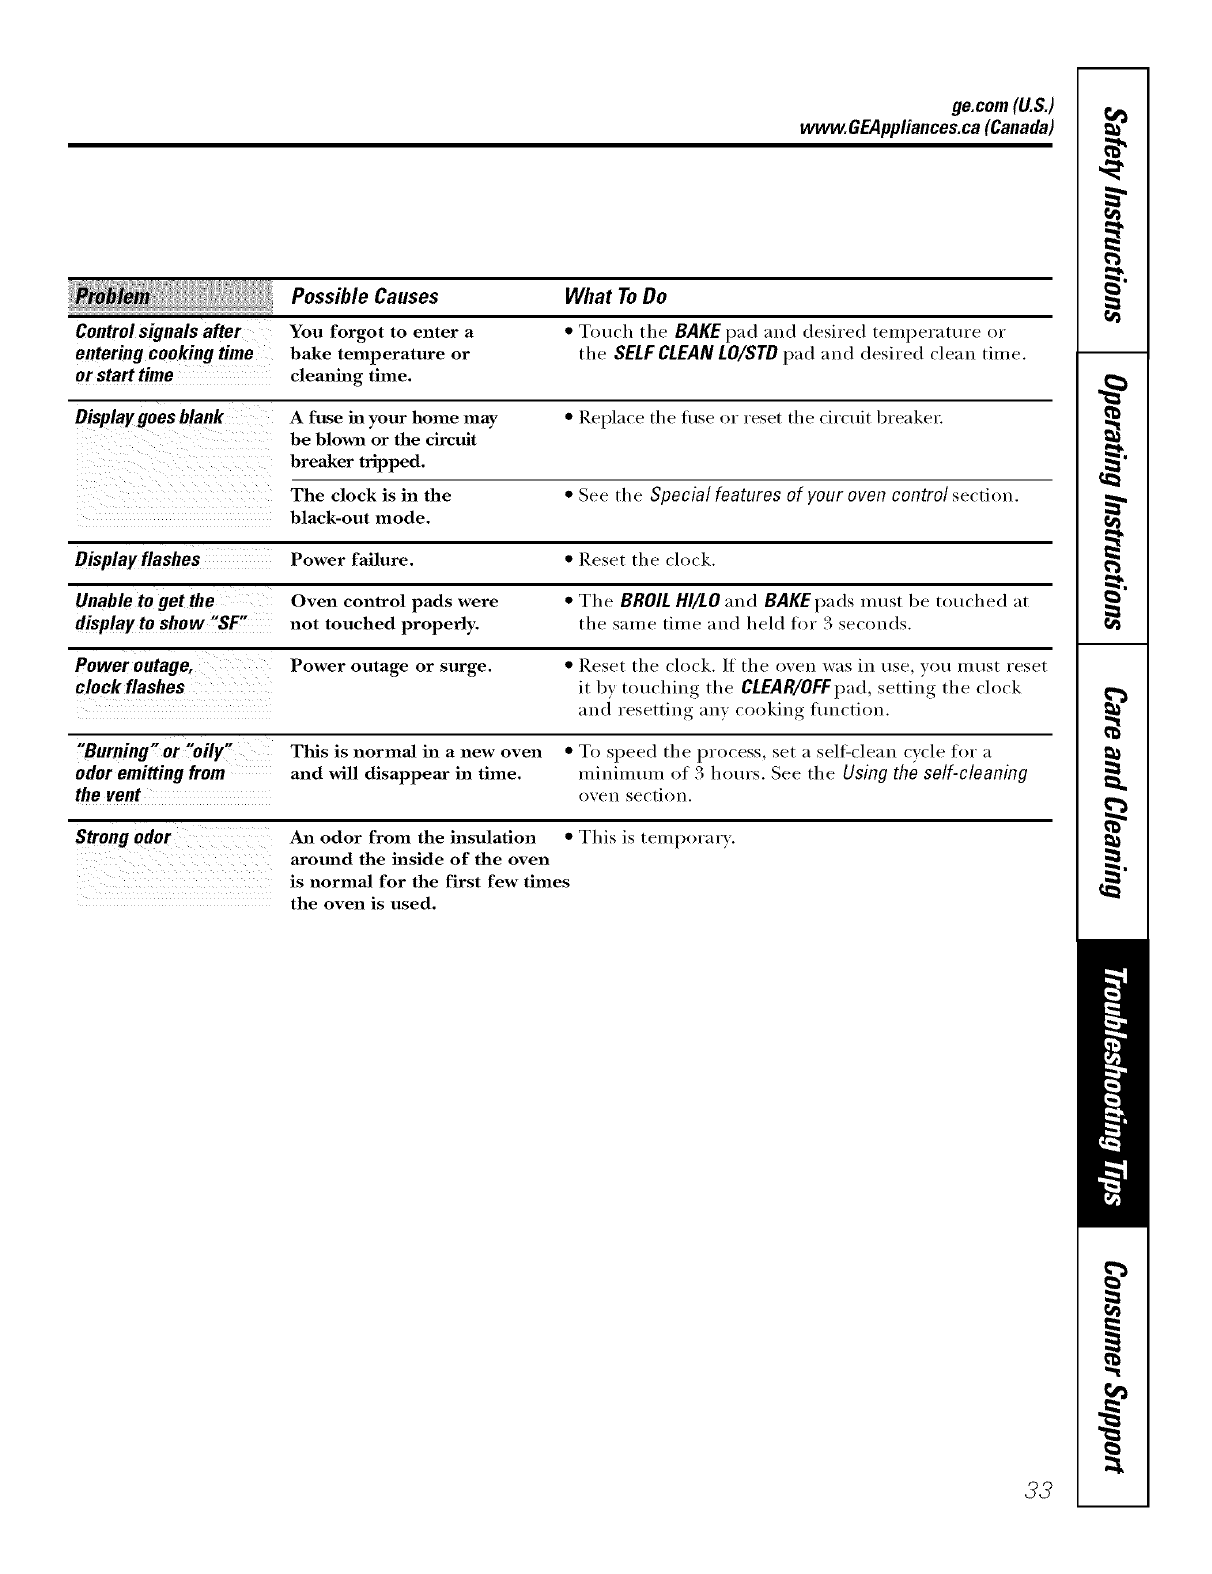
ge.com(U.S.)
www.GEAppliances.ca(Canada)
Possible Causes What ToDo
Control signals after You forgot to enter a • Touch tile BAKE pad and desired temperature or
entering cookingtime bake temperature or the SELFCLEANLO/STDpad and desired clean time.
or start time cleaning time.
Display goes blank A fuse in your home may *Replace tile fi/se or reset tile circuit breaker:
be blowlz or the circuit
breaker tripped.
The clock is in the *See the Special features of your oven control section.
black-out mode.
Displayflashes Power failure. *Reset the clock.
Unable to get the Oven control pads were * The BROIL HI/LO and BAKE pads must be touched at
display to show "SF" not touched properly, the same time and held tm 3 secm_ds.
Power outage, Power outage or surge. *Reset the clock. ]f the oven was in use you must reset
clock flashes it by, touching, the CLEAR/OFFpad,,settiuo_ the clock
and resetting any cooking flu]orion.
"Burning" or "oily" This is normal in a new oven • To speed the })I'OCeSS, set aself=clean cycle foF _1
odoremittingfrom and will disappear in time. minimum of 3 hours. See the Using the self-cleaning
the vent oven section.
Strong odor An odor from the insulation *This is temporary.
around the inside of the oven
is normal for the first few times
the oven is used.
33
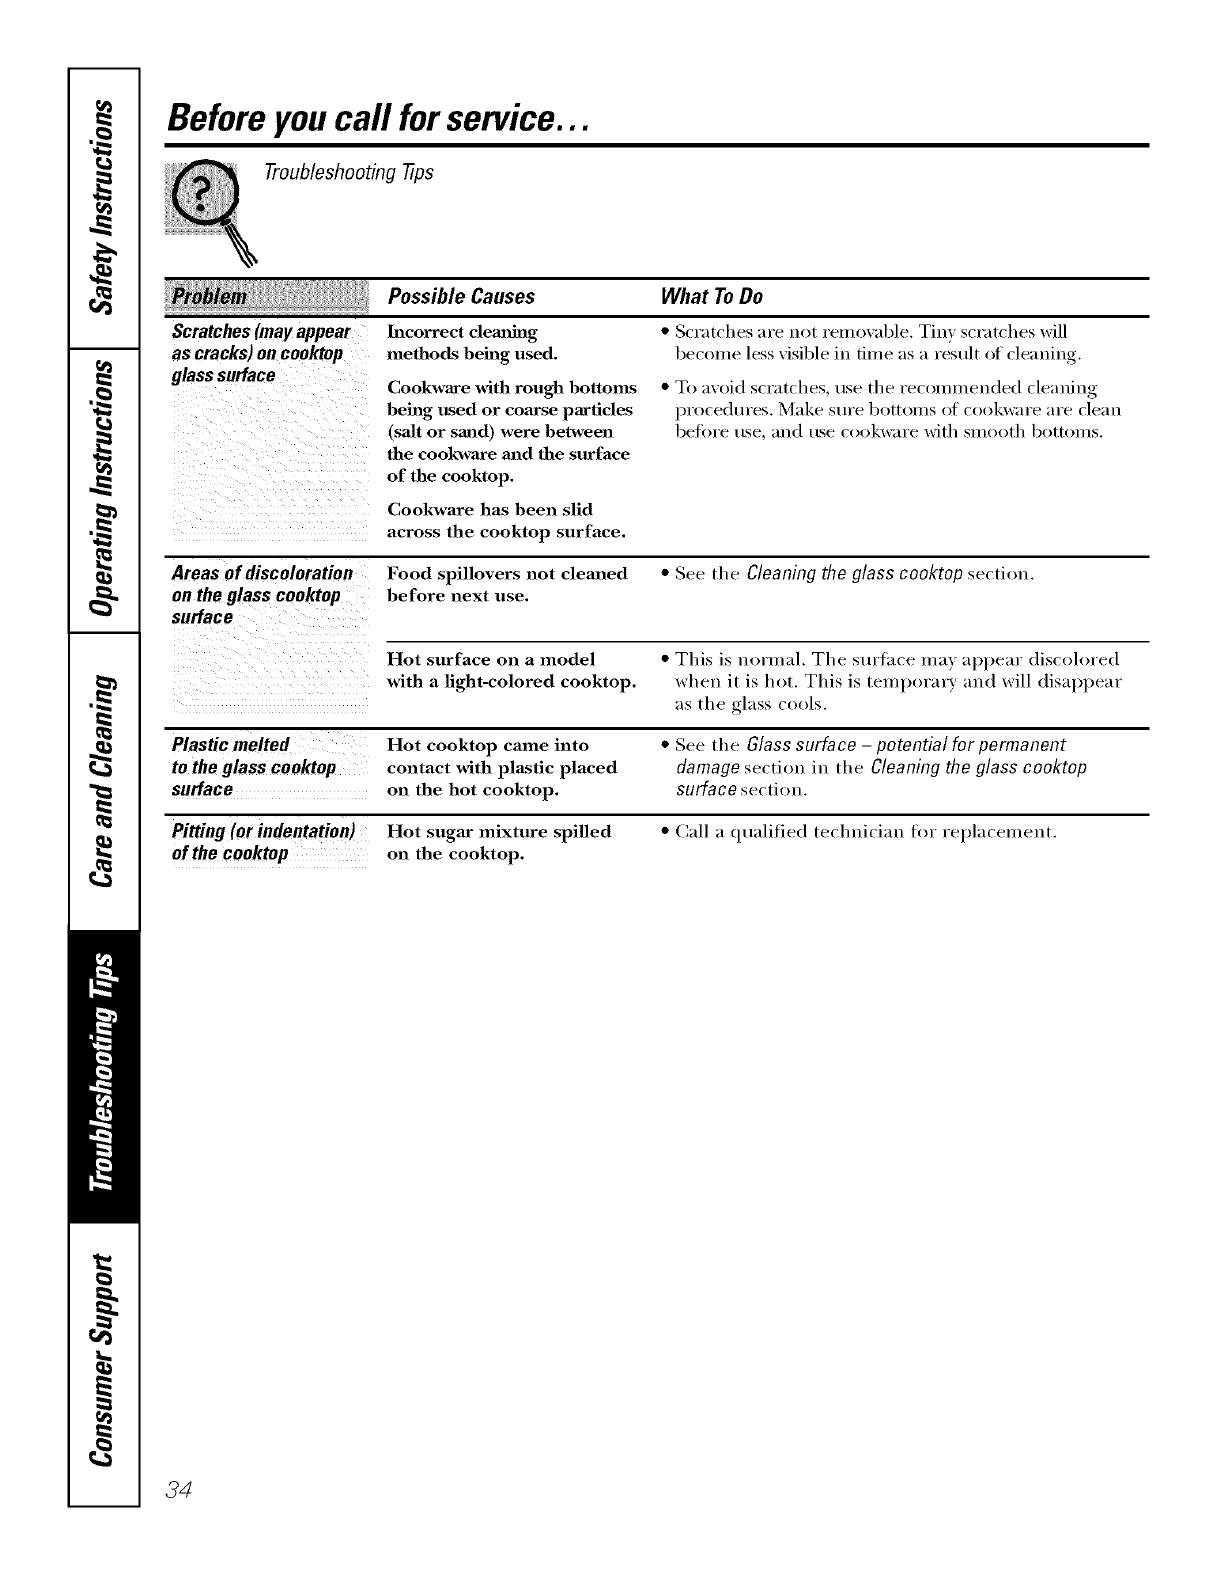
Before you call for service...
Troubleshooting tips
Scratches(mayappear
as cracks)oncooktop
glasssurface
Areas of discoloration
on the glass cooktop
surface
Possible Causes What ToDo
Incorrect clemfiug
methods being used.
Cookware with rough bottoms
being used or coamse particles
(salt or sand) were between
the cookwaxe and the surface
of the cooktop.
Cookware has been slid
across the cooktop surface.
•Scratches are not remo_al)le. Tin) scratches will
becon/e less xisible in time as a result of cleaning.
• To axoid scratches, use tile recommended cleaning
l)rocedures. Make s/Ire bottolns of cookware are clean
betore use, and use cookware with slnootl/bottolns.
Food spillovers not cleaned •See tile Cleaning the glass cooktop section.
before next use.
Hot surface on a model • This is normal. Tile surtace ma) appear discolored
with alight-colored cooktop, when it is hot. This is temporary and will disappear
as the glass cools.
Plastic melted Hot cooktop came into
to the glass cooktop contact with plastic placed
surface on the hot cooktop.
Pitting (or indentation) Hot sugar mixture spilled
of the cooktop on the cooktop.
• See the Glass surface- potential for permanent
damage section in tile Cleaning the glass cooktop
surface section.
• Call a qualified technician for replacement.
,.?4

FOR CUSTOMERS IN THE UNITED STATES
GE Service Protection Plus 'M
GE, a name recognized worldwide %r quality and dependability, offers you
Serxice Protection Plus'"--comprehensive protectkm on all yore" appliances--
No Matter What Brand!
Benefits Include:
* Backed by GE
* All brands covered
o Unlimited service calls
oM1 parts and labor costs included
o No out-of-pocket expenses
o No hidden deductibles
o One 800 number to call
We TI Cover Any Appliance.
Anywhere. Anytime. *
YOu MI1 be completel) satisfied with our service protection or )ou ma) request )our mone} back
on the remaining value of )our contract. No questions asked. It's that simple.
Protect your refl'igerator, dishwasher, washer and cbTer, range, TV, VCP. and much more--any brand!
Plus there's no extra charge fbr emergency service and low monthly financing is available. Even icemaker
cox erage and ibod spoilage protection is ottbred. You can rest easy, knowing that all your valuable
household products are protected against expensive repai_.
g_/ix _g_ g_ g_ tF_ g'tt _ at
Place ,ore" ronfidenre in GE and call us in the Ij.S. toll-free at {$UU,DZD,ZZZ_
for n/ore illtorn/_ltiOll,
_''_]l ]}I[IIIdS (Tl)_{l{!d, up Io 20 v<;u_ old in Ih{! (Olldn{!ll[}l] _,S,
Please place in envelope and mail to:
Genera/Electric Company
Warranty Registration Department
P.O. Box 32150
Louisville, KY 40232-2150
35

FOR CUSTOMERS IN THE UNITED STATES
Consumer Product Ownership Registration
Dear Customer:
Thank you for purchasing O/li product and thank you for placing your confidence ira us.
V(e are proud to haxe you as a customer!
Follow these three steps to protect your new appliance investment:
Complete mid mail
your Consumer
Product Ownership
Registration toda):
Ilavu the 12tact of
mind of knowing we
C_lll conI_ICt yOll ill
the unlikelx event of a
satbtv modification.
After mailing the
registration below,
store this (IOC/llnellt
in a satb place. It
contains information
vou will need should
you require service.
Our service number is
800.GE.CARI{S
(800.432.2737).
Read VOllr ()wller's
Manual careltflly.
It will hel l) you
operate yore- new
appliance properl>
Model Number Serial Number
I,,,,,,,,,,, I I, , ,
Important: If you did not get a registration card with your
product, detach and return the form below to
ensure that your product is registered, or register
online at ge.com.
I I I I
-Cut here
Consumer Product Ownership Registration
Model Number Serial Number
Mr. his. Mrs. Miss
Fil"st I I Last I
Nanl< II IIIIIII Naln< I I I I I I I I I I I I
Nil'e( t [
Address II IIIIIIIIIIIIIIIIIIIII
I
I
Ap,#III
(:it?,II I
Dllr Pl_c(d
hi Use I I I
._lont h
III I IIE-mail Address'
IIII
I)ay I,I
IZip
I/I
Pholle
xt_41FI I I NI,III ,_r I I I--I I I
GE Consumer&, Industrial
,_#j _ Appliances
General Electric Compang
Louisville, KY40225
ge.com
26
* Please provide your e-mail addrc,,s to rcceixe, xia e-mail, discounts, special ott_ 1"_and other important
communications from GE Appliances (GK\).
Check here if you do not want to receive communicalions from (;EA's carcflflly selected pallnel'_.
FAIL[RE TO COMPI.ETE AND 1)d{T[RN Tt tlS CM{I) DOES NOT DIMINISt t h_)l JR
W.\RI_ \N'[Y RI Gt tTS.
For more infbrmation about (;l_\'s privacy and data usage poliQ; go to ge.coln and click on
"Privacy Poli_y" or call 800.626.2224.
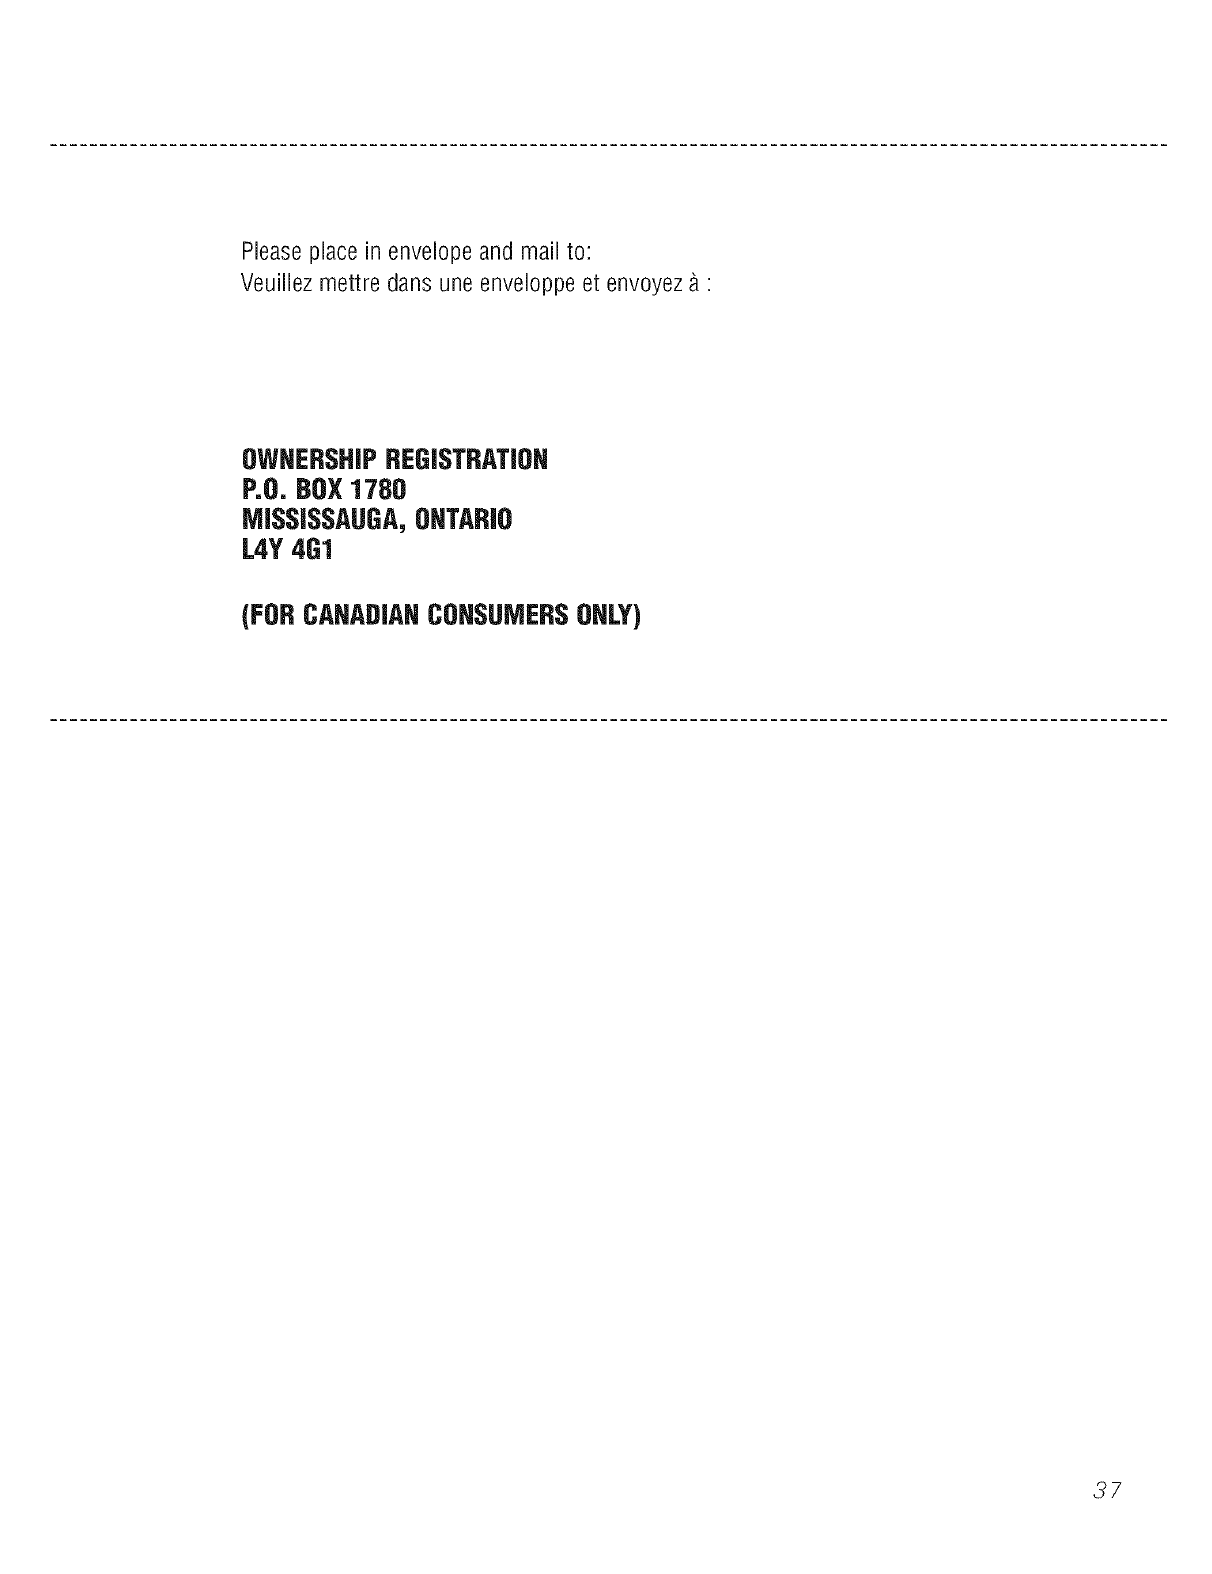
Please place in enveiope and mail to:
Veuillez mettre dans une enveioppe et envoyez _ :
OWNERSHIPREGJSTRATJOH
P.O. BOX1780
MISSISSAUGA,OHTARJO
L4Y 4G1
(FORCANADIANCOHSUMERSOHLY)
37
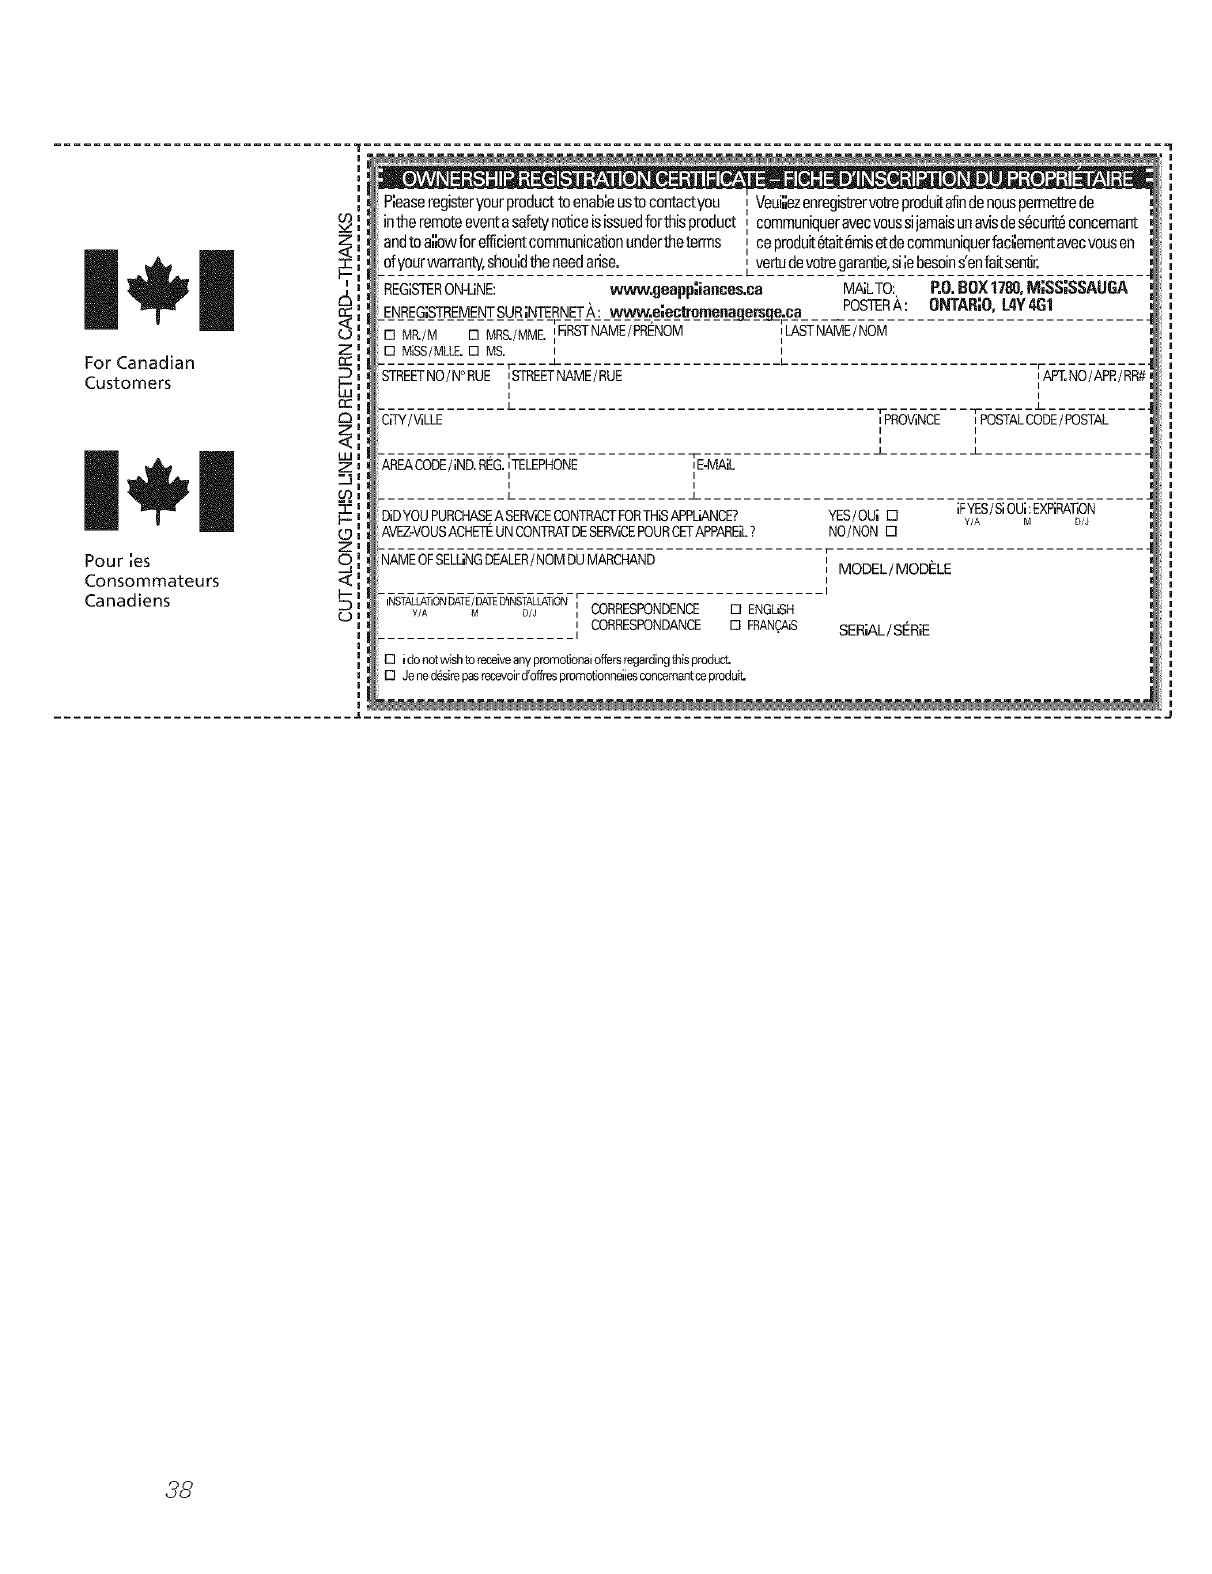
For Canadian
Customers
Pour ;es
Consommateurs
Canadiens
z I
41
DI
WI
Z_
m',
-'r-i
I--I
Z_
C.)l
P;easeregisteryourproductto enab;eustocontactyou
inthe remoteeventa safetynoticeisissuedforthis product
and to a;;owforefficientcommunicationunderthe terms
ofyourwarranty;shouldtheneedarise.
REGISTERON-LINE: _:geapp;iaaces.ca MNLTO:
ENREG;STREMENTSURINTERNET_,: w_,_q:e;ectremenag_e[sg#;ca POSTER_,:
E] MR./M D MR&/MME _FiRSTNAME/PRENOM _kASTNAME/NOM
[] MiSS/MLLE.[] MS. I I
LL
Tr
STREETNO/N° RUE ISTREETNAME/RUE IAFT. NO/APP./RR#
I I
QTY/ViLLE L ] PROVINCE _-P-O_ALCO-DE/POSTAL
I I
I I
J 1
ARFJ_CODE/iND. REG. _TELEPHONE _E-MAIL
I I
I I
J_ ±
DiDYOUPURCHASEASEFIViCECONTF1ACTFORTHiSAPPLiANCE?YES/OU;[] IFYES/SIOUI:E×PIP&?5ON
Y/A M D/J
AVE-VOUS ACHEtt_UN CONTF1ATDE SERVICEPOUR Ck_ APPAREIL? NO/NON []
NAME OFSELIJNGDEALER/NOM DU MARCHAND [
iMODEL/MODEI_
I
I
Veui;ezenregi_ervolJepmduitaflndenouspermetbede
communiqueravecvoussijamaisunavisdes6curit6concemant
ceproduit6tait_.misetdecommuniquerfaci",ementavecvousen
; vertudevotregaran'de,siiebesoinsenfairsen'dr.
P.O.BOX1780,M;SS;SSAUGA
ONTAR;O,L4Y461
INSTALLATIONDATE/DATED'INSTALLATIONr CORRESPONDENCE [] ENGLISH
Y/A M D/J I
I CORRESPONDANCE [] RANC_iS SER_L/SER_E
I
[] ido notwishto receiveanypromotionaloffersregardingfl_isproduct.
[] Jened_sirepasrecevoird'offrespromotionneiiesconcemantceproduit.
38

ge.com(U.S.)
Accessories. www.OEAppliances.ca (Canada)
Looking For Something More ?
Youcan find these accessories and many more at ge.com (U.S.) or www.GEAppliances.ca
(Canada), or call 800.626.2002 (U.S.) or 800.661.1616 (Canada) (during normal business
hours). Have your model number ready.
Gra tes Surface Burner Heads & Caps
OvenRacks Broiler Pan Cleaner
Light Bulbs Knobs
39

m
Notes.
m
m
m
x:
m
I
r_
40
Notes.
@
w
w
g
41
GEGasRange Warranty. (Forc.stomersintheUnitedStates)
All warranty service provided by our Factory Service Centers,
or an authorized Customer Care®technician. To schedule service,
on-line, 24 hours a day, vis# us at ge.com, or carl 800.GE.CARES
(800.432.2737). Please have serial number and model number
available when calling for service.
Staple your receipt here.
Proof of the original
purchase date is needed to
obtain service under the
warranty.
Fromthe date ef the
origina!purchase
GE Will Replace:
Any part(>t the range which tifils due to a defect in materials or workmanship. During this
limited one-year warranty, GE will also provide, free of charge, all labor and in-home service to
replace the (lefecti\'e part,
....
_: Service trips to your home to teach you how to use
the product.
iJi::hnproper h_sta]lation, delivery or mahltenmace.
_: FaJhtre of the product if it is abused, misused,
or used for other than the intended purpose or
used commercially.
_: Dmnage to the glass cooktop caused by hmxlened
spills of sugary materials or melted plastic that
are not clemaed according to the directions ha
the Owner's Manual.
!i/:Dmnage to the glass cooktop caused by use of clemaers
other thma the recommended clemling creams.
iJi::Replacement of house fuses or resetting of circuit
breakers.
!i/:Damage to the product caused by accident, fire, floods
or acts of God.
_: hacidentaJ or consequential dmnage caused by possible
defects with this applimace.
!i_:Damage caused after delivery.
::Ji::Product not accessible to provide required service.
EXCLUSIONOFIMPLIED WARRANTIES--Your sole and exclusive remedy is preduct repa# as provided in this Limited
Warranty.Any implied warranties, h)cloding the implied warranties of merchantability or fitness for a particular purpose,
are limited to oneyear or the shortest period allowed by law.
This warranty is extended to the original purchaser and any succeeding owner for products purchased for
home use within the USA. If the product is located in an area where service by a GEAuthorized Servicer is not
available, you maybe responsible for a trip charge or you maybe required to bring the product to an Authorized GE
Service location for service. In Alaska, the warranty excludes the cost of shipping or service calls to your home.
Some states do not allow the exclusion or limitation of incidental or consequential damages. This warranty
gives you specific legal rights, and you may also have other rights which vary from state to state. To know what
your legal rights are, consult your local or state consumer affairs office or your state's Attorney General.
Warrantor: General Electric Company.Louisville,KY 40225
42

GEGasRange Warranty. (Forc,sto,,ersi, Canada)
Aft warranty service provided by our Factory Service Centers
or an authorized Customer Care®technician. For service,
carl 1.800.361.3400.Please have serial number and model number
available when calling for service.
Staple your receipt here.
Proof of the original
purchase date is needed to
obtain service under the
warrant_
One Year
From the date of the
origina!purchase
Camco Will Replace:
Anypart ot the range which fifils due to a detect in materials or wm'kmanship. During this
limited one-year warranty,Camco will also provide, free of charge, all labor and iI_-home
service to replace the defective part.
_ Service trips to your home to teach you how to use
the product.
iJi_:Improper installation, delivery or maintenance.
::Ji_:Failure of the product if it is abused, misused, or
used for other thm_ the intended purpose or used
commerciaJl)_
_: Dmnage to the glass cooktop caused by hardened
spills of sugaxy materials or melted plastic that are not
cleaned according to the directions in the Owner's
Mmmal.
!i_ Dmnage to the glass cooktop caused by use of clemmrs
other than the recommended cleaning cretans.
iJi::Replacement of house fuses or resetting of circuit
breakers.
iJi::Dmnage to the product caused by accident, fire, floods
or acts of God.
_: h_ddentaJ or consequential dmnage caused by possible
defects with this applimlce.
!_,_Dmnage caused after delivery.
!i_Product not accessible to provide required service.
EXCLUSIONOFIMPLIED WARRANTIES--Your sole and exclusive remedy is productrepa# as providedin this Limited
Warranty.Any implied warranties, hlcloding the implied warranties of merchantabiliiy or fituess for a particular purpose,
are limited to oneyear or theshortest period allowed by law.
WARRANTOR IS N()T RESPONSIBLE F()R CONSEQUENTIAI, DAMAGES. ]
Warrantor: CAMC() IN(:. ]
11
43

ConsumerSupport.
GEAppliancesWebsite Inthe_.8.:go.corn
Have a question or need assistance with your appliance? Try the GE Appliances Website 24 hom_ a day,
any day of the year'. For greater comvnience and fhster se_Mce, pm can now download ()wner's Manuals,
order patqrs, catalogs, or e\ en schedule se_Mce on-line. You can also "_sk Our Team of Experts'"" your questions,
and so much more_. In Canada: www.GEApplia_aces.ca
ScheduleService ,,the_.,.8.:go.corn
Expe_ (;E repair service is onl} one step awa} fl'om _,our doo_: Get on-line and schedule ",our service at }our
convenience 24 hom_ am day of the ?ear! Or call 800£;E.CARES (800A32.2737) during n(mnal business hom_.
In Canada, call 1.800.361.3400.
RealLifeDesignStudio .,the_,8:oo.com
GE suppo_s the Llnive_al Design concept--products, services and enviromnents that can be used by people (ff
all ages, sizes and capabilities. We recognize the need to design tot a wide range of physical and mental abilities
and impairments. For details of OE's Universal Design applications, including ldtchen design ideas for people with
disabilities, check out our Website today. For the heating impaired, please call 800.TDD.GEAC (800.833.4322).
In Canada, contact: Managex; Consmner Relations, Camco, Inc.
Snite 310, I Factox_" I,ane
Moncton, N.B. E1C 9M3
ExtendedWarranties In the U.S.: go.corn
Purchase a (;E extended warranty and learn about special discounts that are available while }our warranty is still
•o(( -c _c ,in etibct. You can pro'chase it on-line am_ime, r call 8 ) ).626.2224 during nom_al business horus. (;E Consmner
Home Services will still be there after }our warrant} expires. In Canada, call 1.800.661.1616.
PartsandAccessories In the U.S.: go.corn
Individuals qualified to sel_'ice their own appliances can have pmqrs or accessories sent direcdy to their homes
(VISA, MasterCard and Discover caids axe accepted). Order on-line today, 24 hours every clay or by phone at
800.626.2002 during normal business hours.
Instructions contained in this manual cover procedures to fie performed by any user. Other servicing generally should he
referred to qualified service personnel Caution must he exercised, since #npreper servicing may cause unsafe operation.
Customers in Canada should consult the yellow pages for the nearest Camro service centeL or call 1.800.661.1616.
ContactUs In the U.S.: go.corn
If you are not satisfied with the service you receive fl'om GE, contact us on ore" Website with all the details
including your phone numbe_; or write to: General Manage_; Customer Relations
GE Appliances, Appliance Park
Louisville, KY 40225
In Canada." www.GEAppliances.ca, or write to: Directo_; Consumer P.elations, Camco, Inc.
Snite 310, 1 Facto_ y I,ane
Moncton, N.B. E 1C 9M3
RegisterYourAppliance .,the_,8:oo.com
Register your new appfiaaace on-line-at your convenience! Timel) product registration will al]o_ for enhanced
communication and prompt service under the ter/ns of }our warranty, should the need arise. You ma_ a/so mail
in the pre-p_inted registration card included in the })acldng, material. In Canada: www.GFAppliaxtces.ca
Printed it7 flTe United States
