GIGA BYTE TECHNOLOGY 28713NEON Touch-charge Air Presenter Mouse User Manual Interface
GIGA-BYTE TECHNOLOGY CO., LTD. Touch-charge Air Presenter Mouse Interface
User manual
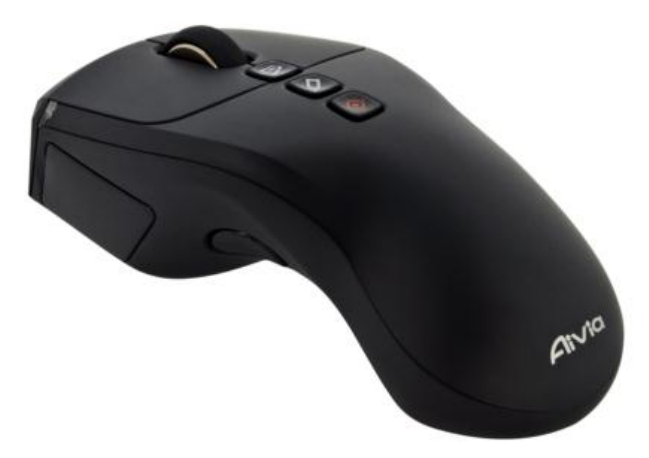
Aivia Neon
Touch-Charge Air Presenter Mouse
User’s Manual
All other brands and trademarks are the properties of their respective owners.
The product specifications are subject to change without notice.

Introduction
Congratulations on your purchase of the most innovative touch-charge air presenter mouse. With an incredible
sensitivity to surface details and high tracking speed than other mice, this touch-charge air presenter mouse can
track reliably on tricky wood-grain surfaces. It is much more advanced than you imagine and will make you more
productive and comfortable.
Features
Dynamic air presenter mouse
USB nano-receiver with touch and charge function
Accurate 1200DPI laser tracking system
Equipped with laser pointer
Free-Scrolling with laser pointer
Hardware Installation
1. Make sure the Power on-off switch on the mouse in ON
2. The LED light will blink if the mouse power is on
△ Note
The unit offers a strong power saving management. Once the mouse accesses sleeping mode, to clip any key on
the mouse is compulsory to wake it up.
Power on/off: There is a power on/off switch designed to save the batteries power while non-usage of a longer
period.
Connect the Receiver
1. Turn on your PC
2. Connect the receiver to USB on PC
Communication: The mouse & the Receiver
The 2.4GHz RF mouse features a dual-way transmission technology which enables the mouse and the receiver
auto-communication.

Auto-link mode
1. Make sure the Power On/Off switch on the mouse is ON
2. Operate the mouse, and cursor’s movement is mapping mouse movement. Now the mouse and the receiver
is auto-linked successfully.
Manual-link mode
If you find the communication channel does not connect well, you can use the software communication tool to
re-connect the mouse & the receiver to reset a new channel ID. You are able to get to software on the website.
△Note
While the mouse is working, if encountering any interference, the mouse and the receiver will automatically
source out and transfer to another channel. During transferring, the cursor movement may have a second delay.
Charge the batteries
1. Open the battery cover and attach to the USB nano-receiver. An indicator light will start to blink to show that
the battery is charging.
2. Charge your mouse until the indication light stops blinking.
△Note
The red LED light indicates that batteries inside needs to be re-charged.
Trouble Shooting
1. Make sure you have connected the receiver correctly on the PC’s USB port
2. For the best performance, we suggest you to locate the receiver with a distance from other electric devices,
such as the computer monitor or external storage devices
3. Make sure you have set the communications between the receiver and the mouse. Refer to the
communication section.
4. If you find the communication channel does not work well, you may use the software connection tool to
re-connect the mouse & receiver and reset a new channel ID. You are able to get to software on the website.
5. Some system devices might conflict with the mouse. Confirm the IRQ/address settings of these devices for
conflicts, and change the settings as required.
6. Make sure that you are not working the mouse on glossy or reflective surfaces.
FCC Statement
This equipment has been tested and found to comply with the limits for a class B digital device, pursuant to Part
15 of the FCC Rules. These limits are designed to provide reasonable protection against harmful interference in a
residential installation.
This equipment generates uses and can radiate radio frequency energy and, if not installed and used in
accordance with the instructions, may cause harmful interference to radio communications. However, there is no
guarantee that interference will not occur in a particular installation if this equipment does cause harmful
interference to radio or television reception, which can be determined by turning the equipment off and on, the
user is encouraged to try to correct the interference by one of the following measures:
1. Reorient or relocate the receiving antenna.
2. Increase the separation between the equipment and receiver.
3. Connect the equipment into an outlet on a circuit different from that to which the receiver is connected.
To assure continued compliance, any changes or modifications not expressly approved by the party responsible
for compliance could void the user's authority to operate this equipment. (Example-use only shielded interface
cables when connecting to computer or peripheral devices).
This device complies with Part 15 of the FCC Rules. Operation is subject to the following two conditions:
(1) This device may not cause harmful interference. and
(2) This device must accept any interference received, including interference that may cause undesired operation.
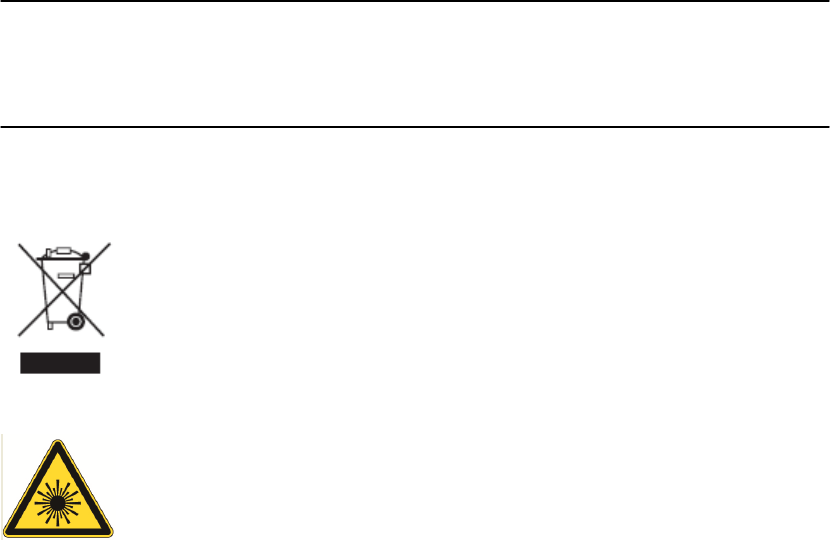
This symbol on the product or in the instructions means that your electrical and electronic
equipment should be disposed at the end its life separately from your household waste. There
are separate collection system for recycling in the EU.
For more information, please contact the local authority or your retailer where you purchased
the product.
Class 2 Laser Product
Laser radiation
Do not stare into beam