GIGA BYTE TECHNOLOGY GN-WIKG Wireless mini-PCI Module User Manual GN WIKG EN
GIGA-BYTE TECHNOLOGY CO., LTD. Wireless mini-PCI Module GN WIKG EN
Contents
- 1. user manual part 1
- 2. user manual part 2
- 3. user manual part 3
user manual part 2
7
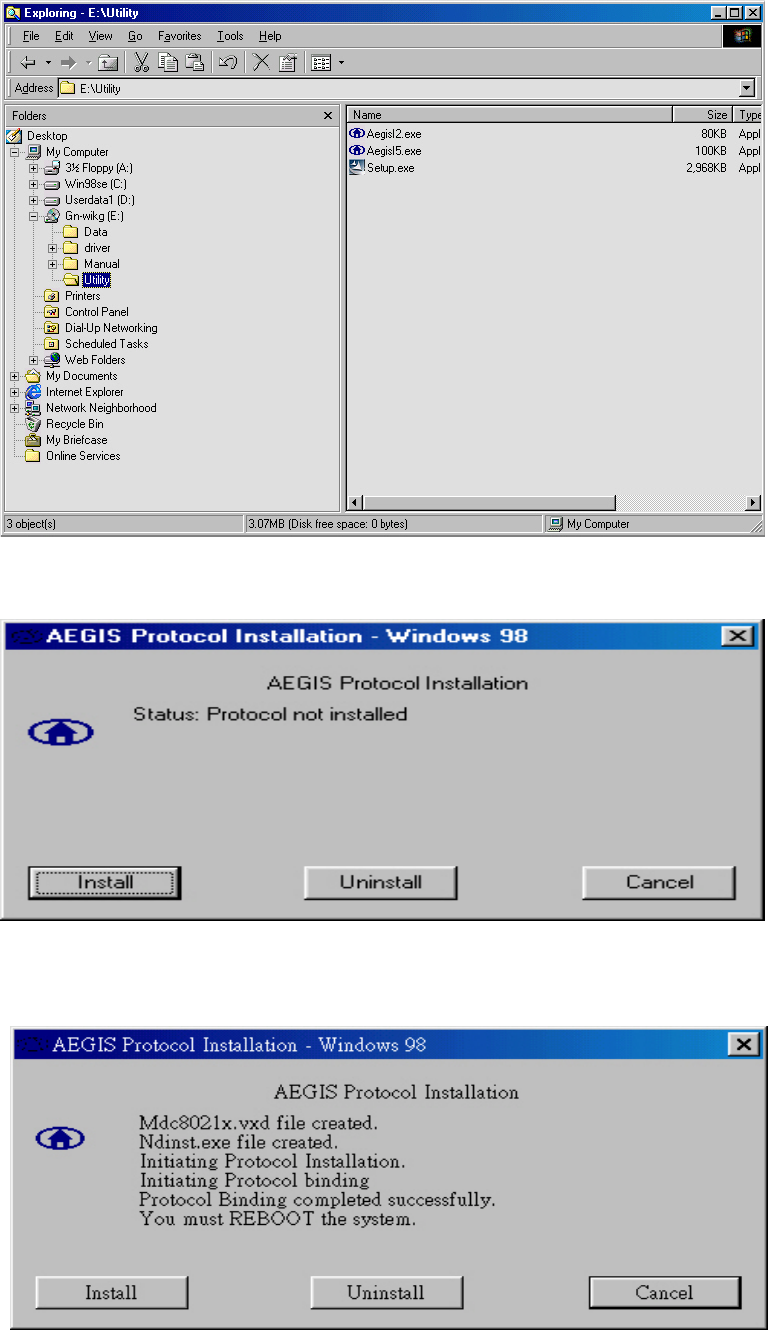
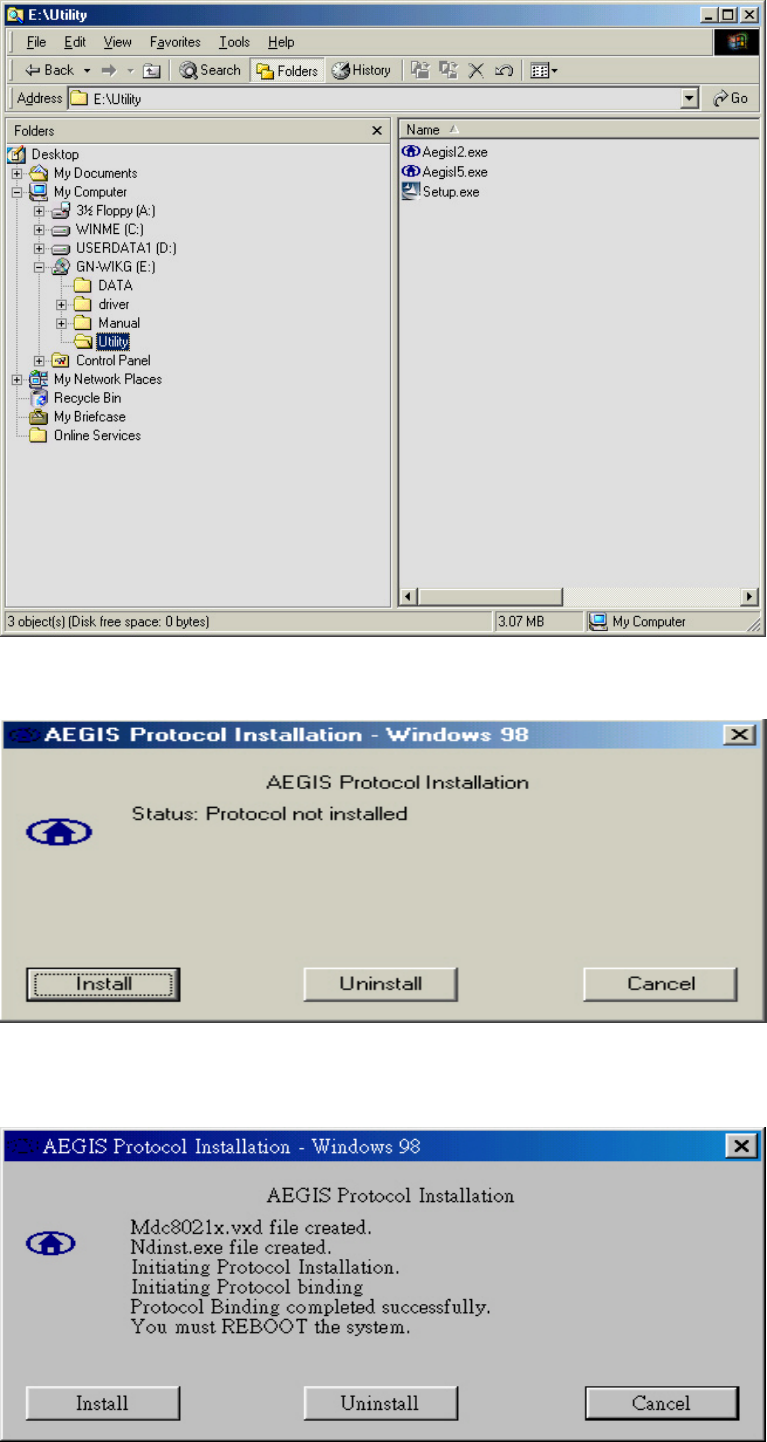
Step 9: The Windows file explorer opens. Double-click on the file “AegisI2.exe”.
Step 10: When the AEGIS Protocol Installation window appears click the Install button to
begin installing program files.
Step 11: When the message AEGIS Protocol Installed Successfully appears in the
dialog box, click the Cancel button. Windows® 98 may or may not automatically
reboot your PC.
8
2-3. Driver & Utility Installation - Windows® ME
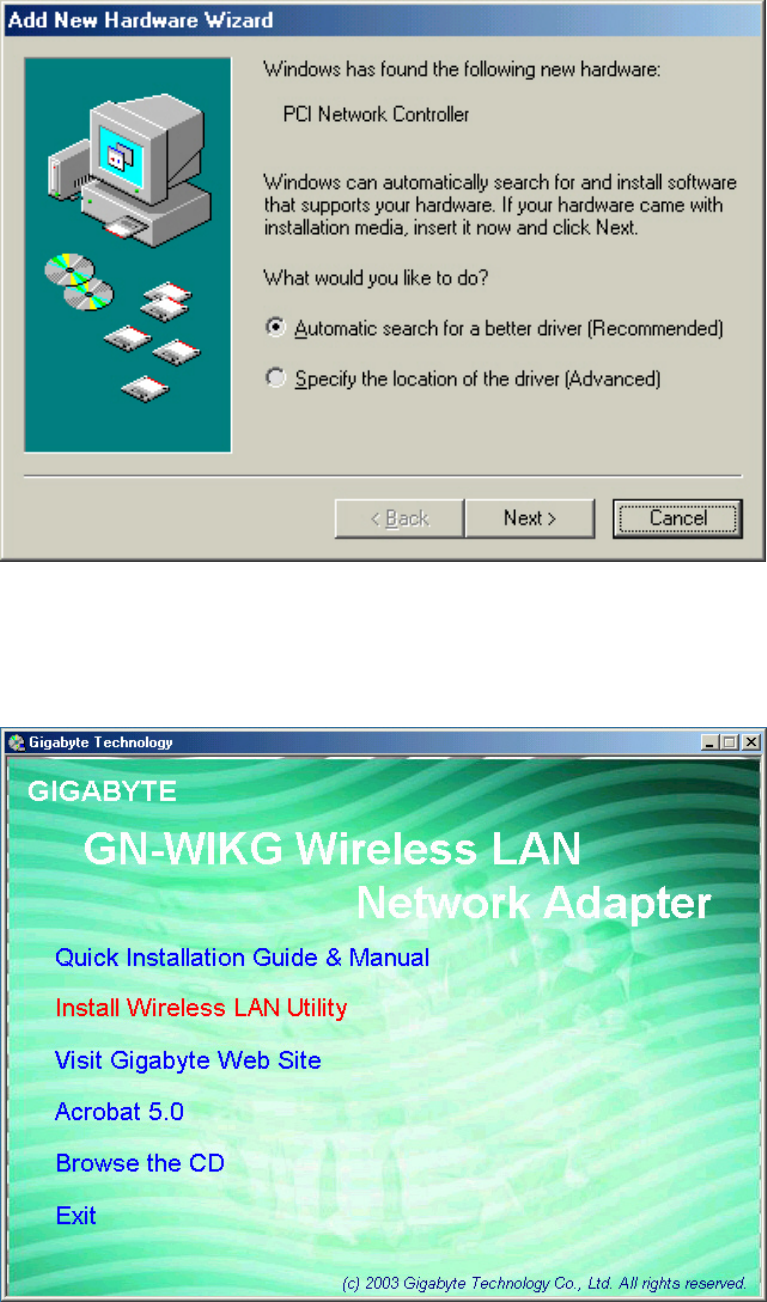
Step 1: When the Add New Hardware Wizard screen appears, click Cancel to exit.
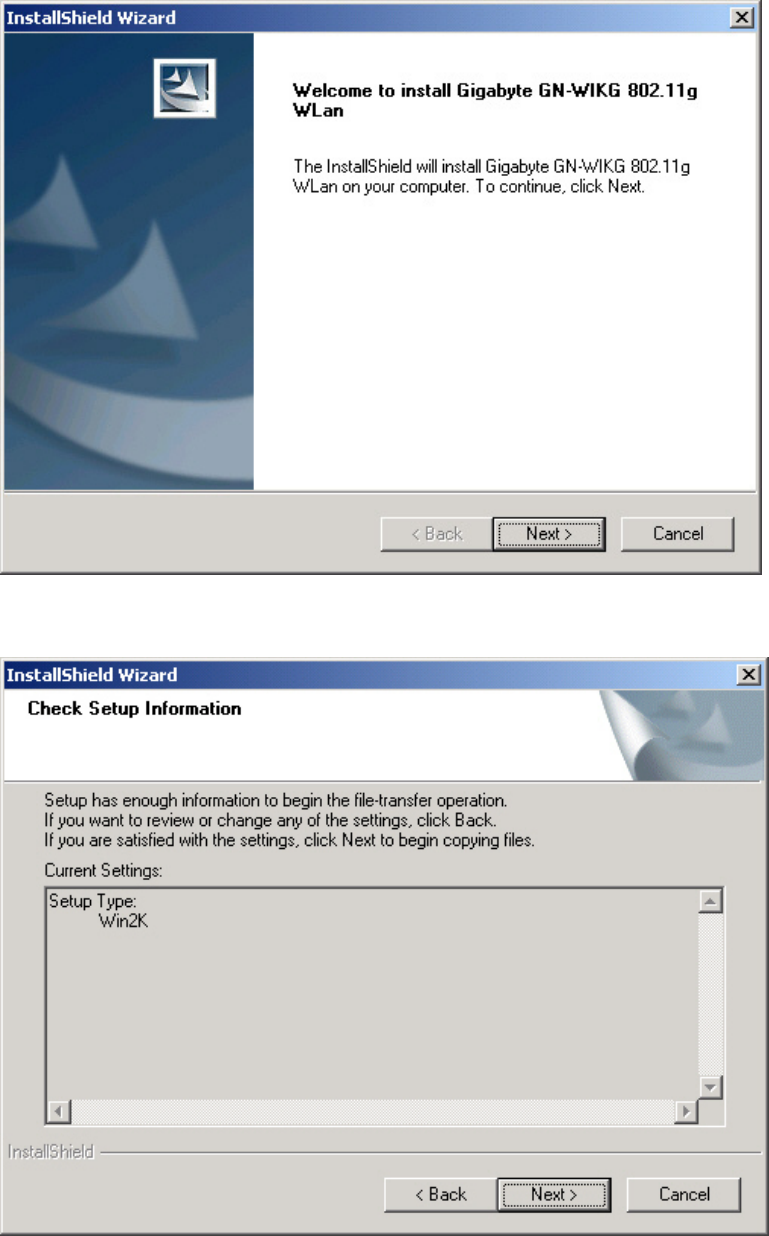
Step 2: Insert the GN-WIKG Installation CD into the CD-ROM drive. The GIGABTYE
GN-WIKG Wireless Mini-PCI Adapter setup screen appears.
Step 3: Drag your mouse over Install Wireless LAN Utility and click on it to start the
utility installation program.
9
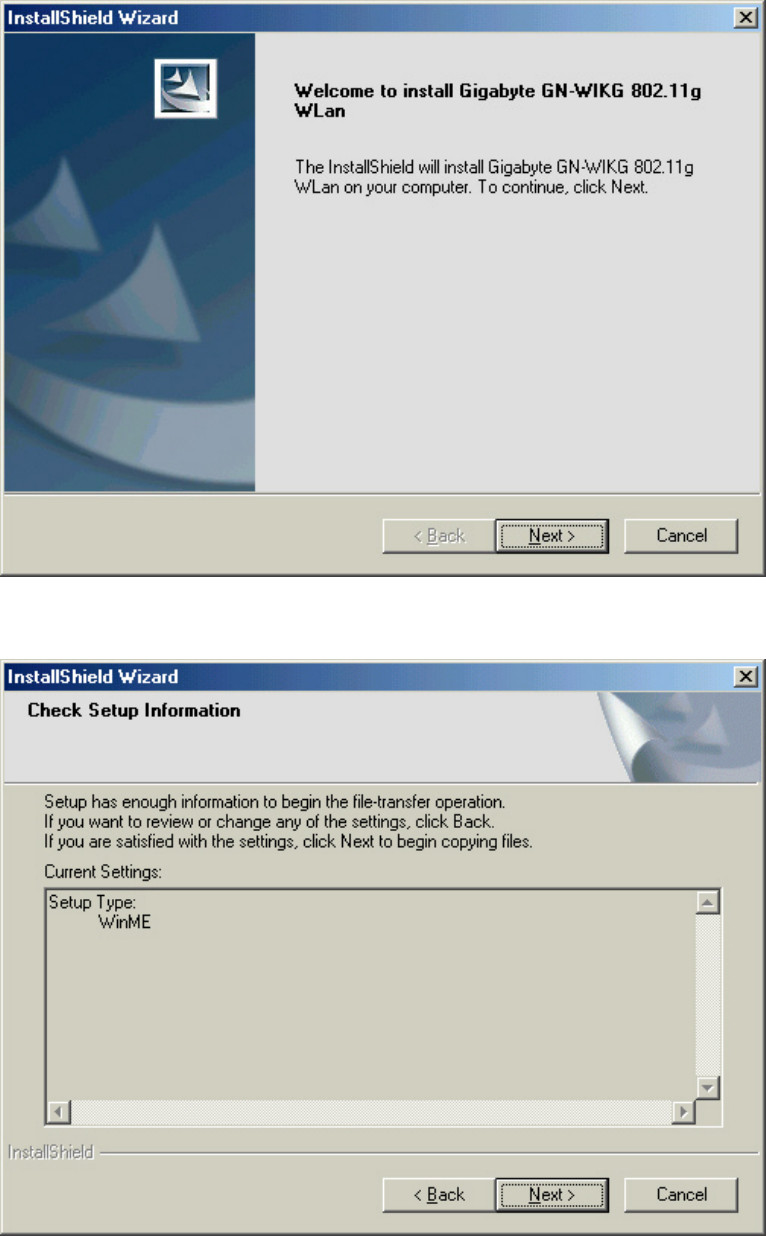
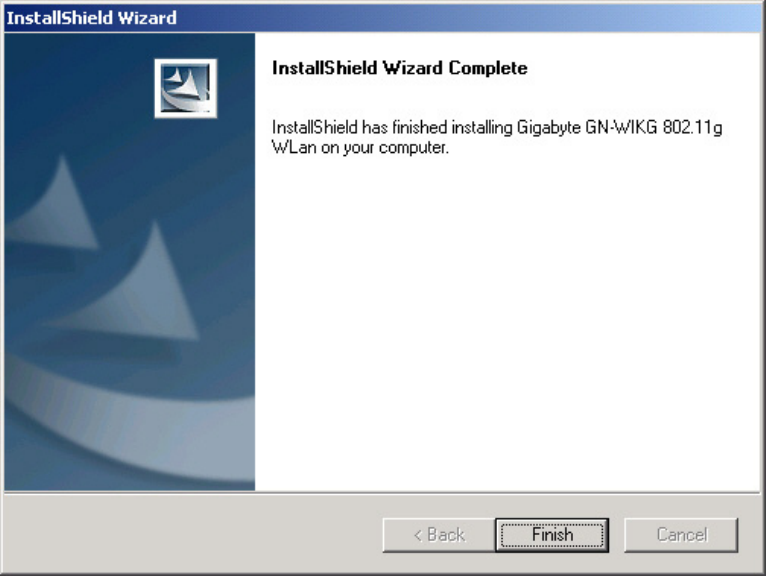
Step 4: When the Welcome screen appears, click Next.
Step 5: The Check Setup Information screen displays the Operating System of your
computer. If it is correct, click Next to continue.
10
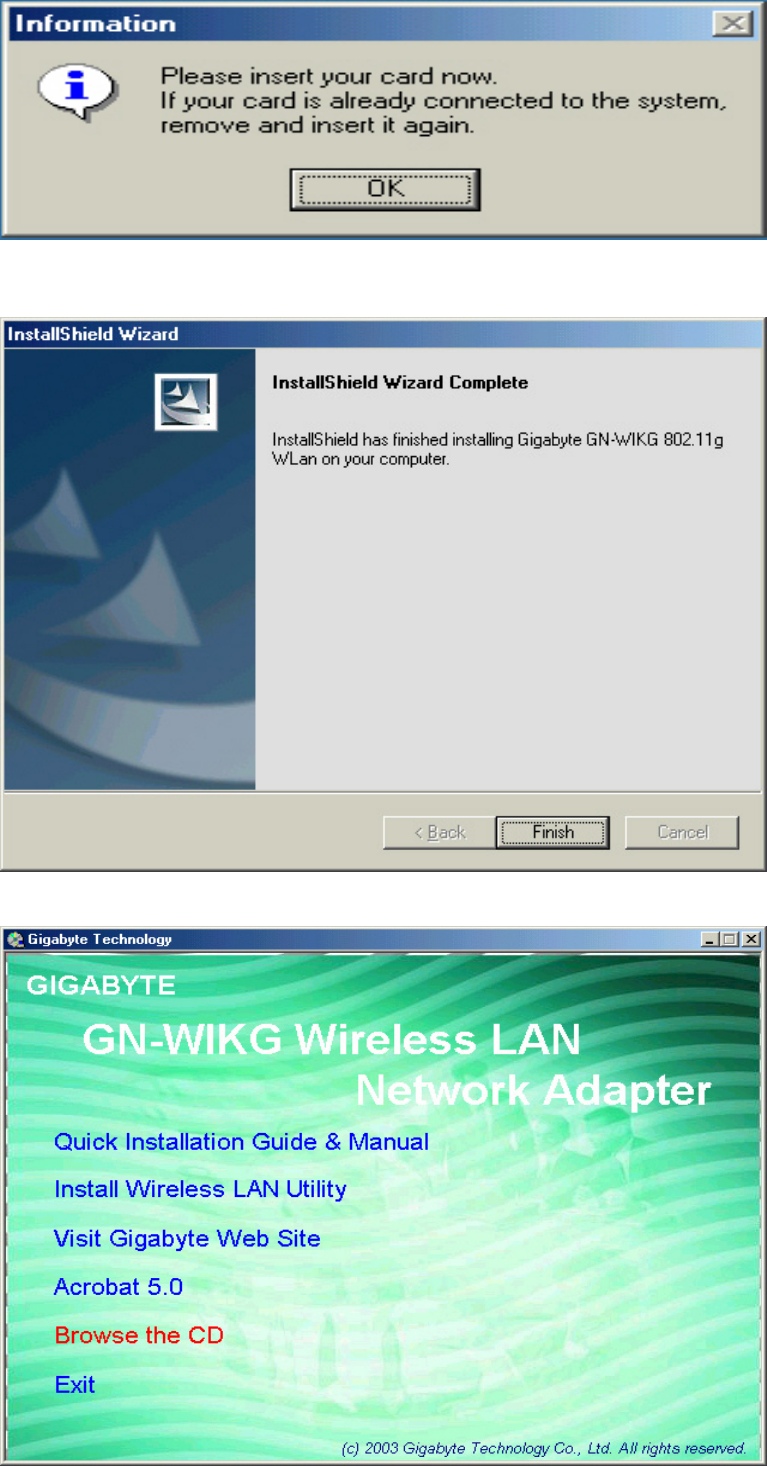
Step 6: An information box screen appears. Click OK to go to the next screen.
Step 7: After the software utility installation is complete, click Finish. You are now
ready to install 802.1x authentication software.
Step 8: Drag your mouse over Browse the CD and click on it.
11
Step 9: The Windows file explorer opens. Double-click on the file “Aegisl2.exe”
Step 10: When the AEGIS Protocol Installation window appears click the Install button to
begin installing program files.
Step 11: When the message AEGIS Protocol Installed Successfully appears in the
dialog box, click the Cancel button. Windows® ME may or may not
automatically reboot your PC.
12
2-4. Driver & Utility Installation - Windows® 2000
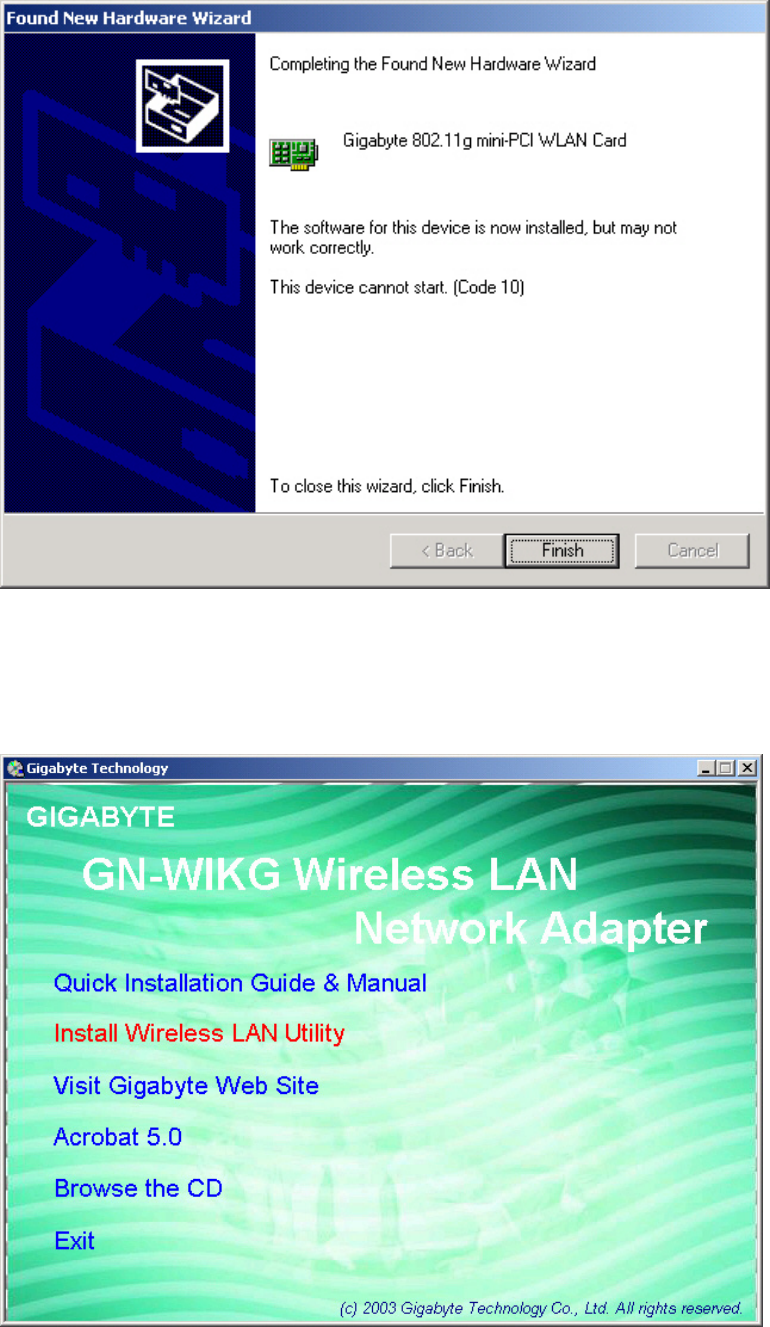
Step 1: When the Found New Hardware Wizard screen appears, click Cancel to exit.
Step 2: Insert the GN-WIKG Installation CD into the CD-ROM drive. The GIGABTYE
GN-WIKG Wireless Mini-PCI Adapter setup screen appears.
Step 3: Drag your mouse over Install Wireless LAN Utility and click on it to start the
utility installation program.
13
Step 4: When the Welcome screen appears, click Next.
Step 5: The Check Setup Information screen displays the Operating System of your
computer. If it is correct, click Next to continue.
14
Step 6: After the software utility installation is complete, click Finish. You are now
ready to install 802.1x authentication software.
15
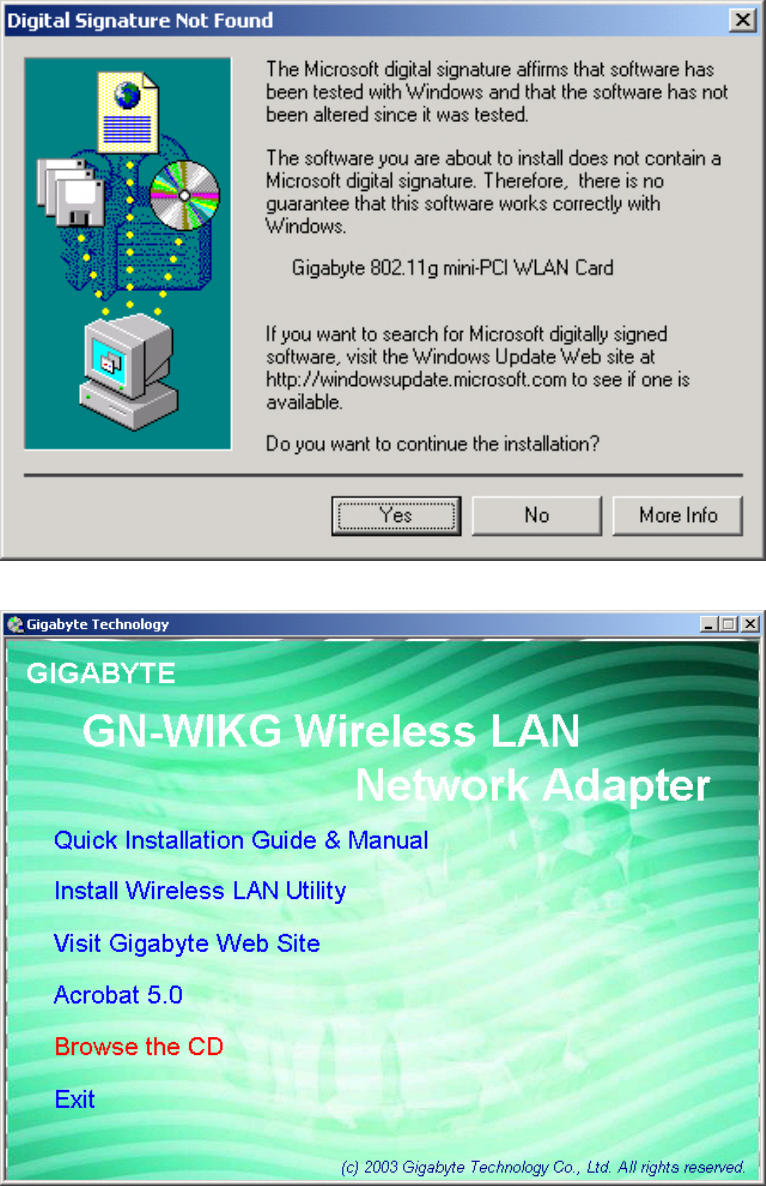
Step 7: If the screen below appears, this does not mean there is a problem. Click Yes to
continue.
Step 8: Drag your mouse over Browse the CD and click on it.
16
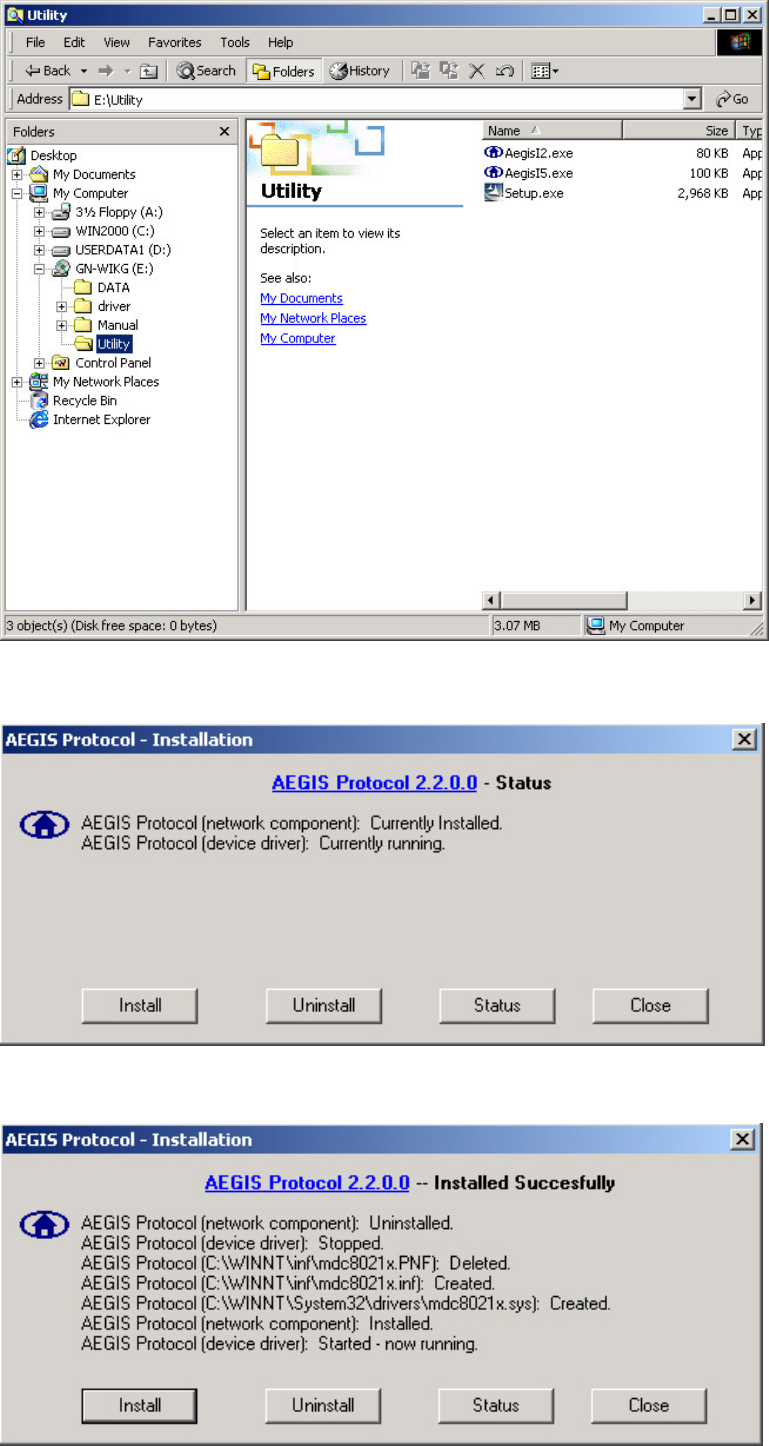
Step 9: The Windows file explorer opens. Double-click on the file “AegisI2.exe”.
Step 10: When the AEGIS Protocol Installation window appears click the Install button to
begin installing program files.
Step 11: When the message Installed Successfully appears in the dialog box, click the
Close button. Windows® 2000 may or may not automatically reboot your PC.