GIGA BYTE TECHNOLOGY M1028 Touch Note User Manual M1028 R1 1
GIGA-BYTE TECHNOLOGY CO., LTD. Touch Note M1028 R1 1
UserManual.wiki
>
GIGA BYTE TECHNOLOGY
>
M1028 User Manual
User Manual
Navigation menu
Upload a User Manual
Namespaces
Wiki Guide
HTML
PDF
Info
Views
User Manual
Discussion / Help
Navigation
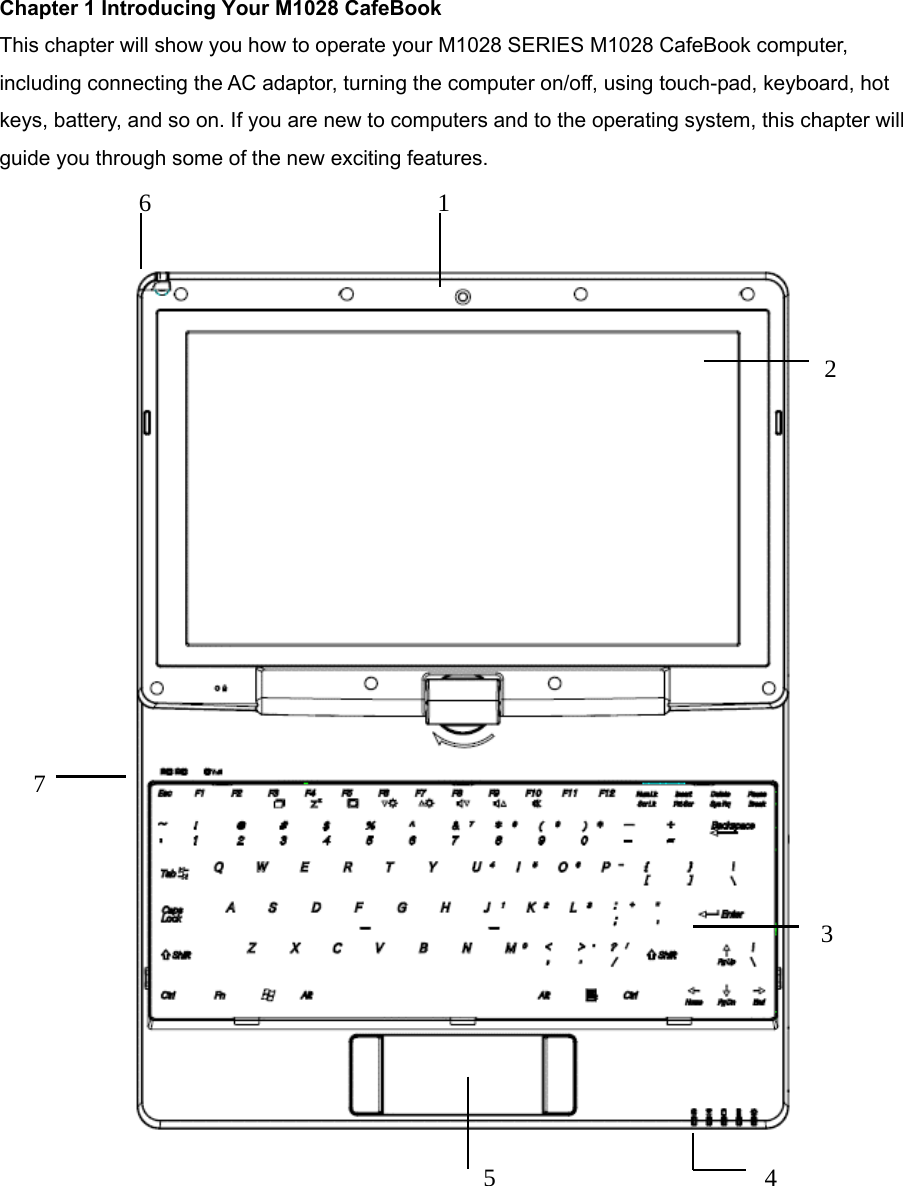
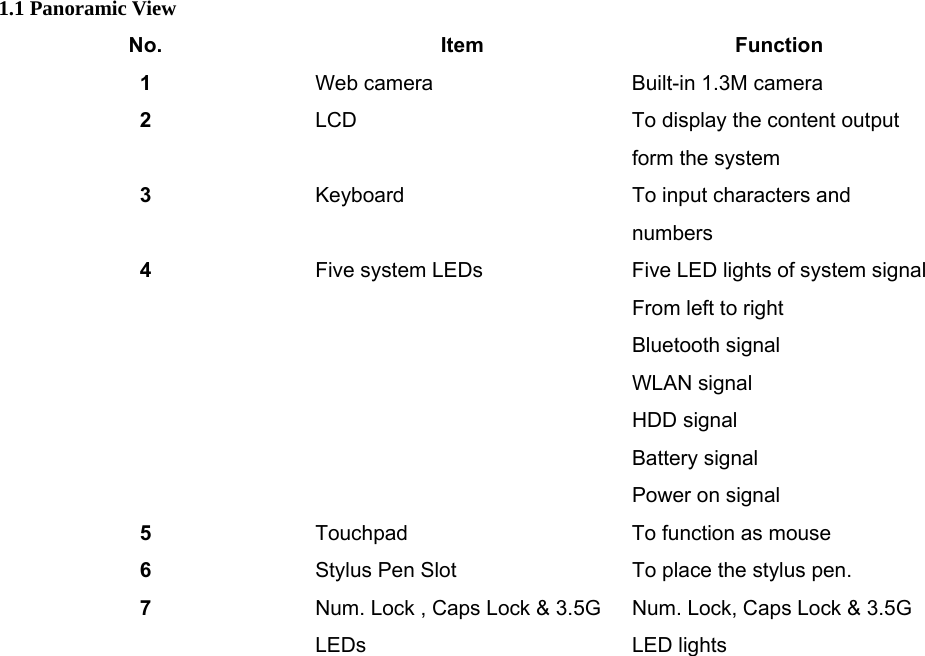
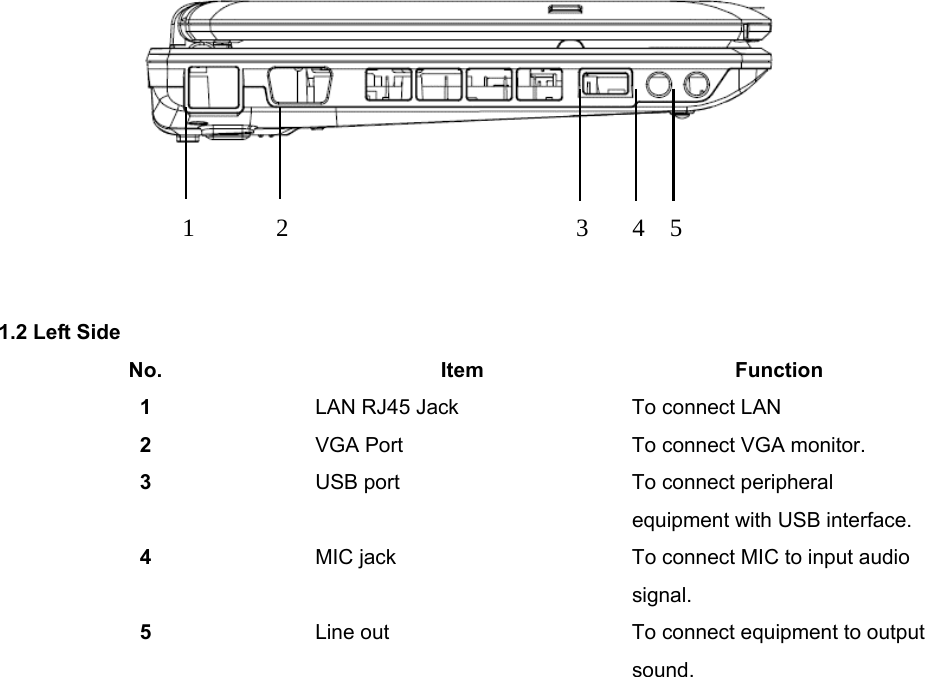
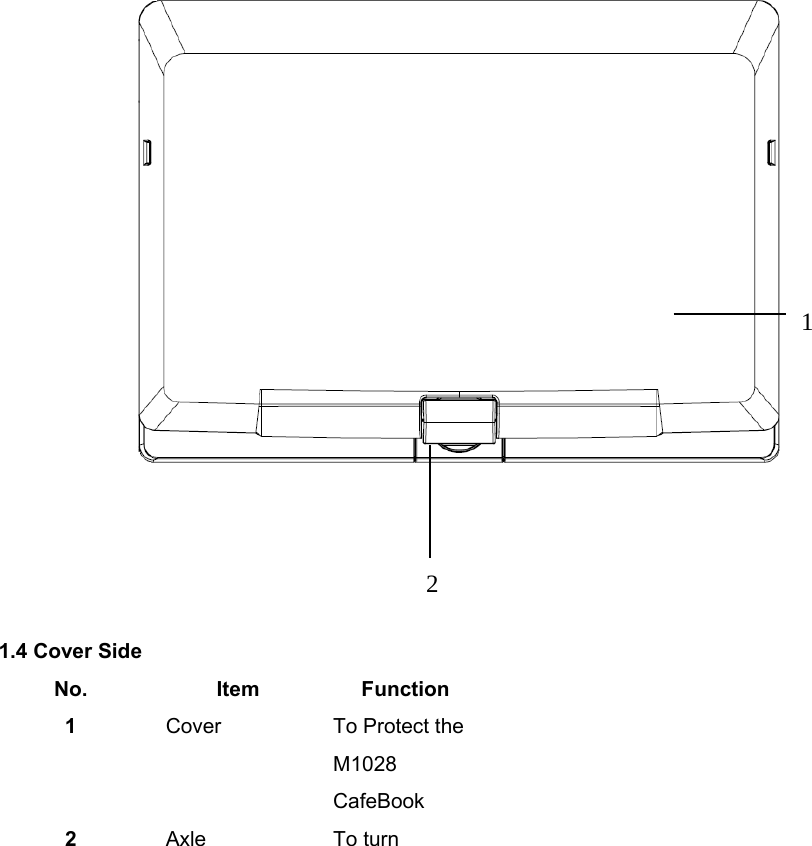
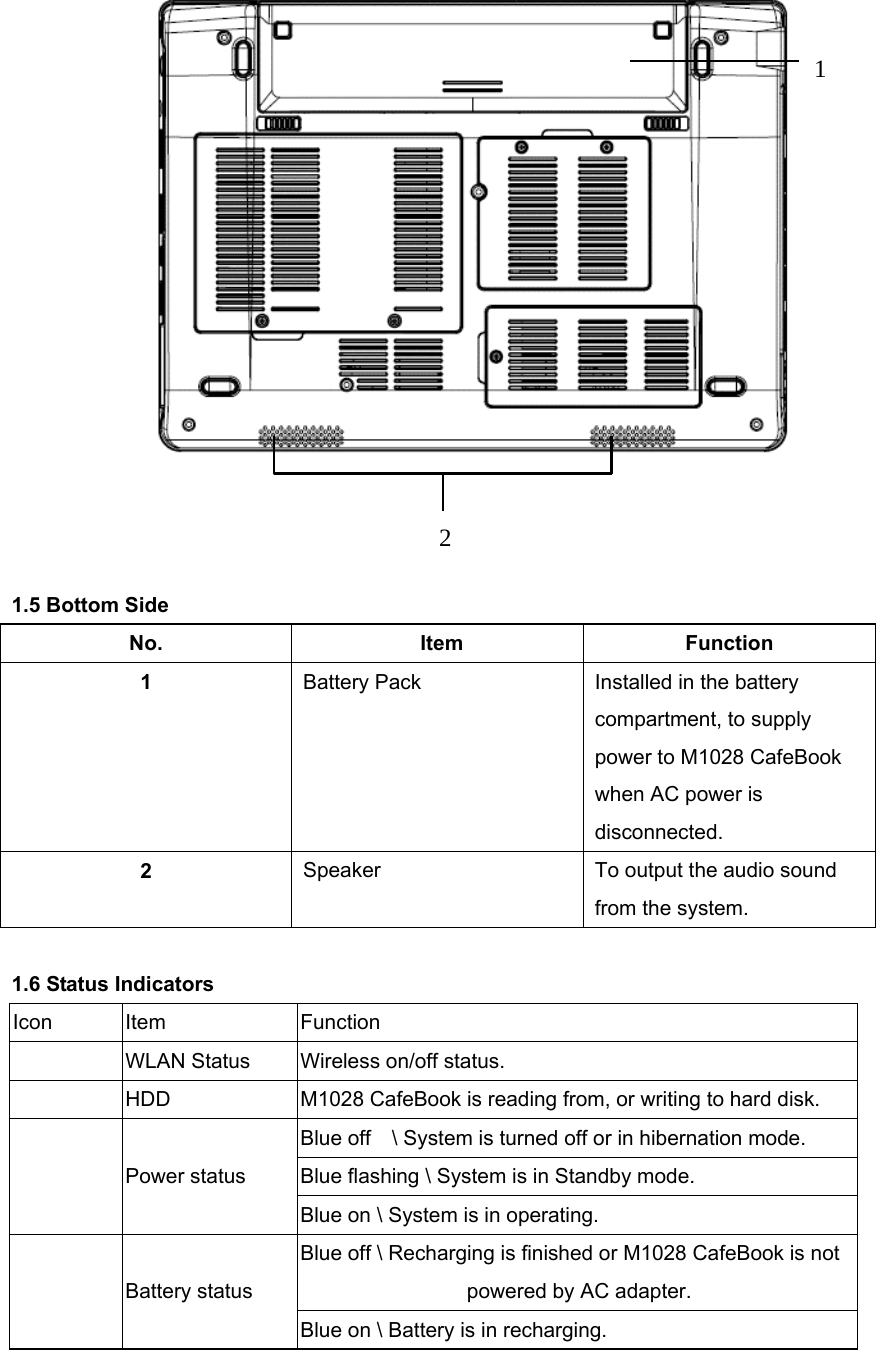


![1. In the notification area next to your task bar, double-click the Safe Removal icon. Safe Removal displays a list of Plug and Play devices that support safe removal and that are currently attached to the system. If you do not see the Safe Removal icon, your device does not support safe removal, and you cannot unplug or eject your device using Safe Removal. 2. In Safely Remove Hardware, in the list of devices, select the device that you want to unplug or eject, and then click Stop. This tells the system that you will be unplugging or ejecting the device. 3. In Stop a Hardware device, click OK. A notification appears stating that it is now safe to unplug or eject the device. Caution Unplugging or ejecting a device that supports safe removal without first using the Safe Removal application to warn the system can cause data to be lost or your system to become unstable. For example, if you use Safe Removal, however, you can warn the system before you unplug or eject a device, preventing possible loss of data. Note For removable storage devices that can safely be removed while the system is on, the system disables write caching by default. It does this so the devices can be removed without loss of data. When write caching is disabled, however, the system will likely experience slower performance, so be sure to enable write caching when you have finished removing the device. Appendix I Specification Processor Intel® Atom 1.6GHz N270 OS Microsoft Windows XP compliance / Linux/ VISTA Core Logic Intel® 945GSE ] Memory DDRII-533 SO-DIMM X 1, Max 2 GB For the compatible HDDs & RAMs by model, please refer to GIGABYTE AVL List Video Interface Intel® 945GSE](https://usermanual.wiki/GIGA-BYTE-TECHNOLOGY/M1028/User-Guide-1077941-Page-29.png)