GMP EMS CLAPPERPLUS Clapper Plus with remote control User Manual
GMP EMS Limited Clapper Plus with remote control
GMP EMS >
User Manual
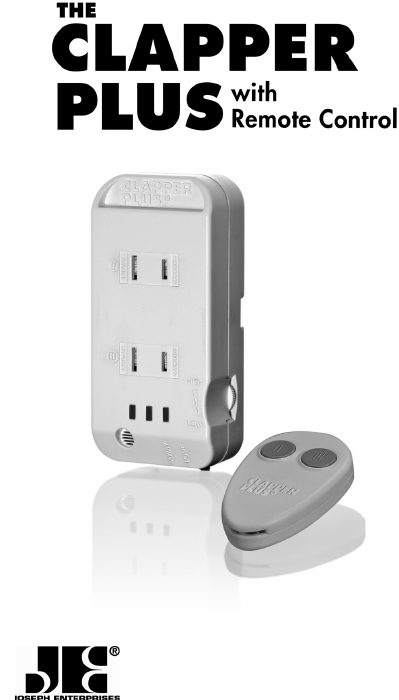
Joseph Enterprises, Inc.
425 California Street, Suite 300
San Francisco, California 94104

Congratulations! You now have the convenience, exi-
bility and security of The Clapper Plus. No other product
allows you to control your lights and appliances by sound
and RF (Radio Frequency) remote control.
With The Clapper Plus, you can turn on or off up to two
different appliances by clapping your hands. Clap two
times to operate one appliance and three times to operate
a different appliance. In addition to clapping, you can also
turn on or off your appliances by pressing the buttons on
the remote control.
The Clapper Plus also has a special AWAY mode. In
this mode almost any noise will turn on the connected
appliance(s) which can be used as a limited function security
device to discourage potential intruders. The AWAY mode
is also great for temporarily turning on lights when entering
a dark room such as a garage or basement. In this mode
there is no need to clap or press any button -- any noise will
turn on the lights!
For QUICK INSTRUCTIONS on operating your Clapper
Plus, please refer to the yellow Quick Tips card.
— 2 —
— 3 —
Clap Indicator
Lights Sensitivity Dial
Home/Away
Switch
Microphone
2 Clap Socket
3 Clap Socket
Operates
appliance plugged
into socket II
Operates
appliance
plugged into
socket III
— 4 —
OPERATING YOUR APPLIANCES
BY CLAPPING
How to operate an appliance with 2 claps:
1. Slide the Home/Away switch to the Home position.
2. Turn the dial up (Counter Clockwise) to the highest
sensitivity setting(# 9).
a. Adjust it down to reduce the Clapper from
detecting unwanted noise
3. Plug an appliance into the top receptacle (II) of The
Clapper Plus.
4. Plug the Clapper Plus into the wall socket.
5. Make sure any power switches on the appliance or lamps
are in the on position.
6. You can now turn your appliance on and off by clapping.
You don’t have to clap very hard! The clapping sequence is
more important than how loudly you clap.
CLAP (pause) CLAP (pause) (pause) (pause)
where each pause is approximately ½ second long. The
three pauses after the second clap are very important since
the Clapper Plus must determine that you are not going to
clap a third time. If you did clap a third time, the appliance
connected to the III clap receptacle would activate..
— 5—
HOW TO OPERATE AN APPLIANCE
WITH 3 CLAPS:
1. Slide the Home/Away switch to the Home position.
2. Turn the dial up (Counter Clockwise) to the highest
sensitivity setting(# 9).
a. Adjust it down to reduce the Clapper
from detecting unwanted noise.
3. Plug an appliance into bottom receptacle (III)
of the Clapper Plus.
4. Plug Clapper Plus into the wall socket.
5. Make sure any power switches on the appliance
or lamps are in the on position.
6. You can now turn your appliance on and off by clapping.
You don’t have to clap very hard. The clapping sequence
is more important than how loudly you clap:
CLAP (pause) CLAP (pause) CLAP (pause)
where each pause is approximately ½ second long. The
last pause after the third clap is very important since the
Clapper Plus must determine if you are not going to clap
a fourth time. If you did clap a fourth time, the appliance
would not activate.
— 6 —
Clap Sensitivity
You can adjust your Clapper Plus to respond to soft or loud
claps, as well as adjust for the noise level in your room.
By adjusting the sensitivity dial on the Clapper you can
adjust the Clapper’s sensitivity to your claps and reduce
detecting unwanted noise. Turning the dial fully counter
clockwise(# 9) is the highest sensitivity. In this position
the Clapper will detect soft claps.
As you turn the dial clockwise the sensitivity is reduced.
This give you control over the claps it will detect and help
you reduce false activation due to external noises.
Clap Detection Lights
The three red lights on the face of the Clapper Plus will
help you determine the proper way to clap your appliances
on or off. Each clap detection light will glow when a proper
clap (or similar sound) is detected.
Claps that are too soft will not be detected. Claps that are
too fast together or too long apart will be rejected as noise
and as a result the appliance will not turn on. When the
Clapper Plus detects the rst clap the rst light will glow.
The second light will glow if a second clap is detected
about ½ second after the rst clap occurs. If the Clapper
Plus does not detect a third clap, it will activate the
— 7—
appliance attached to the “II Clap side.” If a third clap is
detected, then the third light will glow and the appliance
connected to the “III Clap Side” will activate.
OPERATING YOUR APPLIANCES
USING THE REMOTE CONTROL
Installing the remote switch battery
1. Remove battery cover by using a coin and turn clockwise.
2. Insert the included C2032 Lithium battery positive (+)
side facing toward you.
3. Replace the battery cover. Use a coin and turn
counter-clockwise to lock the cover.
Operating your appliance with the remote
1. Set the sensitivity dial to the best position for
the room you are in (as described above).
2. Plug an appliance into Top or Bottom receptacle
of the Clapper Plus.
3. Plug the Clapper Plus into the wall socket.
4. Make sure any power switches on the appliance
or lamps are in the on position.
5. Now you can use the remote switch or clap to turn
the appliances on or off.
— 8 —
Press, hold and release the II button to turn on the
appliance plugged into the Top (II receptacle) of the
Clapper Plus. Press it again to turn it off.
Press, hold and release the III button to turn on appliance
plugged into the bottom (III receptacle) of the Clapper.
Press it again to turn it off.
Double Sided Tape
The remote can be attached to your wall or dresser using
the special tape included. Attach the tape on the back of the
remote. The adhesive allows for repositioning and
removes cleanly from most painted surfaces without damage.
If the tape does not stick anymore it can be rejuvenated by
wiping it clean with water.
Place a small amount of water on your nger tip. Wipe
the tape clean and allow to air dry. This can be repeated as
many times as needed.
Key Ring
The wire key ring (enclosed) can be attached to the end of
the remote to make the remote more portable. Connect to a
keychain and be able to turn on your lights as you are enter-
ing your house, or use a safety pin to attach to your clothing
— 9—
THE AWAY MODE
When in the AWAY mode, both appliances will turn on
with the detection of any sound.
To operate The Clapper Plus in the AWAY mode
1. Slide the Home/Away switch to the Away position. Both
attached lamps will turn on for 10 seconds. is allows
you to leave the room with the lights on.
2. Aer the 10 seconds the lights turn o and the
Clapper Plus is ready to detect any noise.
3. e Le Red clap detection light will blink to
indicate the Clapper is in the Away Mode.
4. When the Clapper detects a sound your appliances will turn
on and remain on for about 10 minutes and then turn off.
The Clapper will then reset itself until the next sound is heard.
5. Set the sensitivity dial to the best position for the level
of noise you want to detect ( #9 Most sensitive, #1 Least
Sensitive).
TIPS
• Start at the lowest sensitivity by turning sensitivity dial
clockwise to #1 and then increase the sensitivity to the
level you desire.
• Sliding the Home/Away switch from “Away to Home and
— 10 —
back to the Away” position again will reset the timer. This
can be helpful when determining the correct dial setting.
HINTS AND TIPS
1. If the Clapper Plus does not turn on
while Clapping
a. Make sure the Clapper Plus is plugged in properly.
When the clapper is rst plugged in the red lights
on the front of the Clapper Plus will sequence
through a startup pattern.
b. Make sure the Appliance is plugged into the Clap
II or Clap II receptacle.
c. Make sure the Appliance is turned on. You can tell
if the appliance is on by the orange glow next to the
Clap II or Clap III receptacle.
d. Make sure the Claps are loud enough and have
the correct timing. See above for the timing of
the claps.
e. e Clapper Plus is protected by a non-replace
able fuse. If one of the sockets is overloaded the fuse
will blow and will permanently disable the Clapper.
f. Don’t cover the Clapper with drapes or place
behind furniture that will block the Clap’s sound
—11 —
from reaching the Clapper.
g. Even though it is not required, the Clapper works
best when there is a direct line of sight from the
clapping sounds to the Clapper.
h. In a larger rooms with echos, the Clapper may
detect an echo as noise and reject the Clap. To
avoid this problem, turn the Clapper dial to
lower sensitivity(smaller numbers).
2. If the Clapper Plus does not turn on the
appliance when the remote button is pressed.
a. Make sure the battery is good and install correctly
b. Move the Remote to another position. Move it up
or down or move it closer to the Clapper Plus. Keep
the Remote away from metal objects or walls that
will interfere with the Radio waves.
c. Make sure the remote is within 25 feet of the Clapper.
d. Make sure the appliance is plugged into the correct
outlet on the Clapper Plus and the button you are
pressing corresponds to that outlet.
e. Sometimes it is good to reset the Clapper
and the Remote.
i. To reset the Clapper Plus unplug it and wait 10
— 12 —
seconds and plug it back into the wall socket.
ii. To reset the Remote remove and replace the battery.
YOU CAN OPERATE UP TO 4 CLAPPER
PLUS UNITS INDEPENDENTLY OF
EACH OTHER
Overview
Normally, if you have a Clapper Plus in one room and
a second Clapper Plus in the next room, the Remote
Control(s) will control both units. To have the Clapper
Plus units work independently, follow the instructions
below:
The Clapper Plus works with Radio Frequencies much
like your TV. To operate multiple Clappers independently
you need to set the Radio Frequency, “Channel”, for
each Clapper Plus base units and also for its remote.
Each Clapper Plus and its remote can be set to channel
1, 2, 3 or 4.
When rst plugged in, the Clapper Plus unit start out set
at channel 1. When the battery is put into the remote, the
remote’s channel is also set to 1.
Each Clapper Plus remote control has two buttons, Button
II and Button III. These normally are used to control the
— 13—
appliances (lamps) plugged into the Clapper Plus base unit,
but when both are pressed at the same time, they are used
to set the channels on the Remote and also send a signal to
the Clapper Base unit to set its channel.
SETTING CLAPPER PLUS CHANNELS
STEP BY STEP INSTRUCTIONS:
1) Plug the Clapper into the wall socket where you want
to use it.
2) Place the Home/Away switch into the AWAY position.
In the Away Mode:
a. The right LED will ash
b. and appliances or lamps plugged into the Clapper
they will turn on for 10 seconds.
3) Set the channel by pressing and releasing both buttons
on the Remote Control at the same time. Press both
1, 2, 3 or 4 times depending on the Channel number
you want to set.
a. NOTE: When pressing the buttons on the remote,
hold them down until you see all three Red lights on
the Clapper Plus turn on, then release the buttons.
4) Place the Home/ Away switch to the HOME position
and you are done.
— 14 —
CONFIRMING THE CHANNEL SETTING
You can conrm that the Clapper Base unit and the Remote
are set to the correct channel.
This is easy because it happens automatically each time
you press one of the remote’s buttons. The Clapper Plus
base will display (after 4 seconds) the channels by ashing
the Red lights on the Clapper.
To allow you to see which channel the Clapper Base and
the remote are set at, the Clapper Red indicator lights ash
once for each channel. For channel 1, the lights ash once,
for Channel two the lights ash twice, etc.
The Middle light shows the channel the Clapper Base is set at
The Right light shows the channel the Remote is set at.
Example 1; Press, hold and release a remote button
(wait 4 seconds) and if both the Middle and Right red
lights ash three times, they are both set to channel 3.
Example 2: If the Middle ashes 1 time and the
Right Light ashes 2 times this means the
Clapper Base is set for Channel 1 and the Remote
is set for channel 2. (In this conguration the Remote
will not control the Clapper Base.
Unplugging the Clapper will reset the channel to 1.If you
have more units to set, repeat steps 1 through 4.
— 15 —
HINTS AND TIPS:
1. Each time you start the channel setting process the
Channel number starts at Channel 1.
2. If the Clapper is unplugged or there is a power fail in
your home, the Clapper base will default base to channel
1. (But the remote will not) They will now be at different
channels and not operate.
3. If the Clapper and Remote are not on the same channel.
Just start over and set the channels as described above to
get them working again.
IMPORTANT SAFETY NOTES
1. Do not use The Clapper Plus with any electrical heating
appliances such as toasters, hair dryers, coffee pots, etc.
2. Do not use The Clapper Plus with any appliance that can
create a re hazard with prolonged use.
3. The maximum wattage for an appliance is 200 watts in
either outlet. Do not exceed 400 watts total.
4) Do not plug the Clapper into a dimming circuit. This will
damage the Clapper and is a re hazard.

— 16 —
Compliance Statement (Part 15.19)
This device complies with Part 15 of the FCC Rules.
Operation is subject to the following two conditions:
1. This device may not cause harmful interference, and
2. This device must accept any interference received,
including interference that may cause undesired operation.
Warning (Part 15.21)
Changes or modications not expressly approved by the party
responsible for compliance could void the user’s authority to operate
the equipment.
FCC interference statement
This equipment has been tested and found to comply with the limits
for a Class B digital device, pursuant to Part 15 of the FCC Rules.
These limits are designed to provide reasonable protection against
harmful interference in a residential installation. This equipment
generates uses and can radiate radio frequency energy and, if not
installed and used in accordance with the instructions, may cause
harmful interference to radio communications. However, there is no
guarantee that interference will not occur in a particular installation. If
this equipment does cause harmful interference to radio or television
reception, which can be determined by turning the equipment o and
on, the user is encouraged to try to correct the interference by one of
the following measures:
• Reorient or relocate the receiving antenna.
• Increase the separation between the equipment and receiver.
• Connect the equipment into an outlet on a circuit dierent
from that to which the receiver is connected.
• Consult the dealer or an experienced radio/TV technician for help.
This portable transmitter with its antenna complies with FCC’s FRO
exposure limits for general population / uncontrolled exposure.

— 17 —
Industry Canada Statement per Section 4.0 of RSP-100
The term “IC:” before the certication / registration number only
signies that the Industry Canada technical specications were met.
Section 7.1.5 of ROSS-GEN
Operation is subject to the following two conditions:
1) this device may not cause harmful interference, and
2) this device must accept any interference received, including
interference that may cause undesired operation.
WE WELCOME YOUR FEEDBACK
Please feel free to write us at: jei@jeiusa.com or mail to:
JOSEPH ENTERPRISES
425 California Street #300, San Francisco, CA 94104
Many questions can be answered by listening to our pre-
recorded Clapper Plus Hotline at 800-557-5856.
(CHECK IF WE CAN PRE-RECORD)
— 18 —
30 DAYS LIMITED WARRANTY
Joseph Enterprises offers a thirty(30) day limited warranty
to the original purchaser of the Clapper®. The warranty
covers defects in workmanship or materials.
Should The Clapper® prove to be defective within the
thirty (30) days from the date of purchase, the product
will either be repaired or replaced, at Joseph Enterprises’
discretion, free of charge.
To receive warranty service, return the product insured,
along with proof of purchase included on the back of
the product.
This particular warranty shall disclaim Joseph Enterprises’
obligation and sole responsibility respecting the product
and all other warranties, implied or expressed, including
implied warranties of tness for a specic purpose. Joseph
Enterprises does not authorize retailers and others to make
any warranty concerning the product.
Some states do not permit time limitations on an implied
warranty, or limitation or exclusion of incidental or conse-
quential damages, so the above limitations may not pertain
to you. This warranty grants you specic legal rights and
you may also have additional rights that vary from state
to state.
— 19 —
Important:
The Clapper Plus® must be insured if its returned —
Joseph Enterprises cannot assume any responsibility
for loss or damage to uninsured shipments. A copy
of the sales receipt or other proof of purchase MUST
be enclosed with the returned merchandise to qualify
under the terms of the warranty(please do not send
the original document). If you fail to include the proof
of purchase date, the cost of service in effect at the time
of return will be charged. Please enclose information
regarding the nature of the problem, as well as name,
address, city, state and zip code. The product should
be carefully packaged to protect against mishandling
during shipment.