GN Audio USA M5390BS Multiuse Base User Manual User MAnual
GN Netcom Inc Multiuse Base User MAnual
UserManual.wiki
>
GN Audio USA
>
M5390BS User Manual
>
User MAnual
Contents
1.
User Manual
2.
User MAnual
3.
Annex to User Manual
User MAnual
Navigation menu
Upload a User Manual
Namespaces
Wiki Guide
HTML
PDF
Info
Views
User Manual
Discussion / Help
Navigation
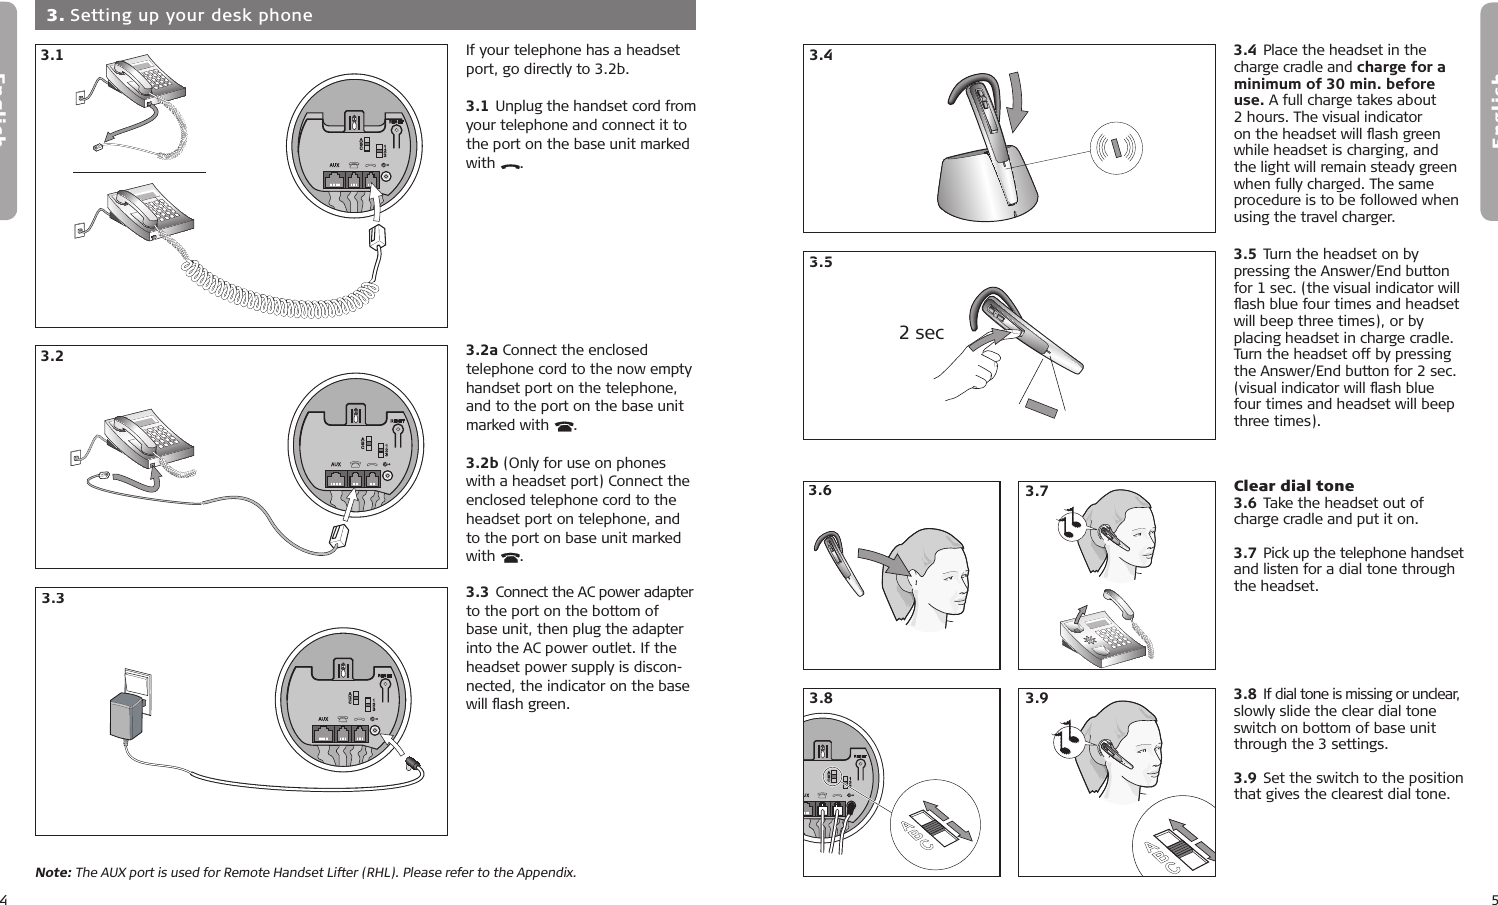
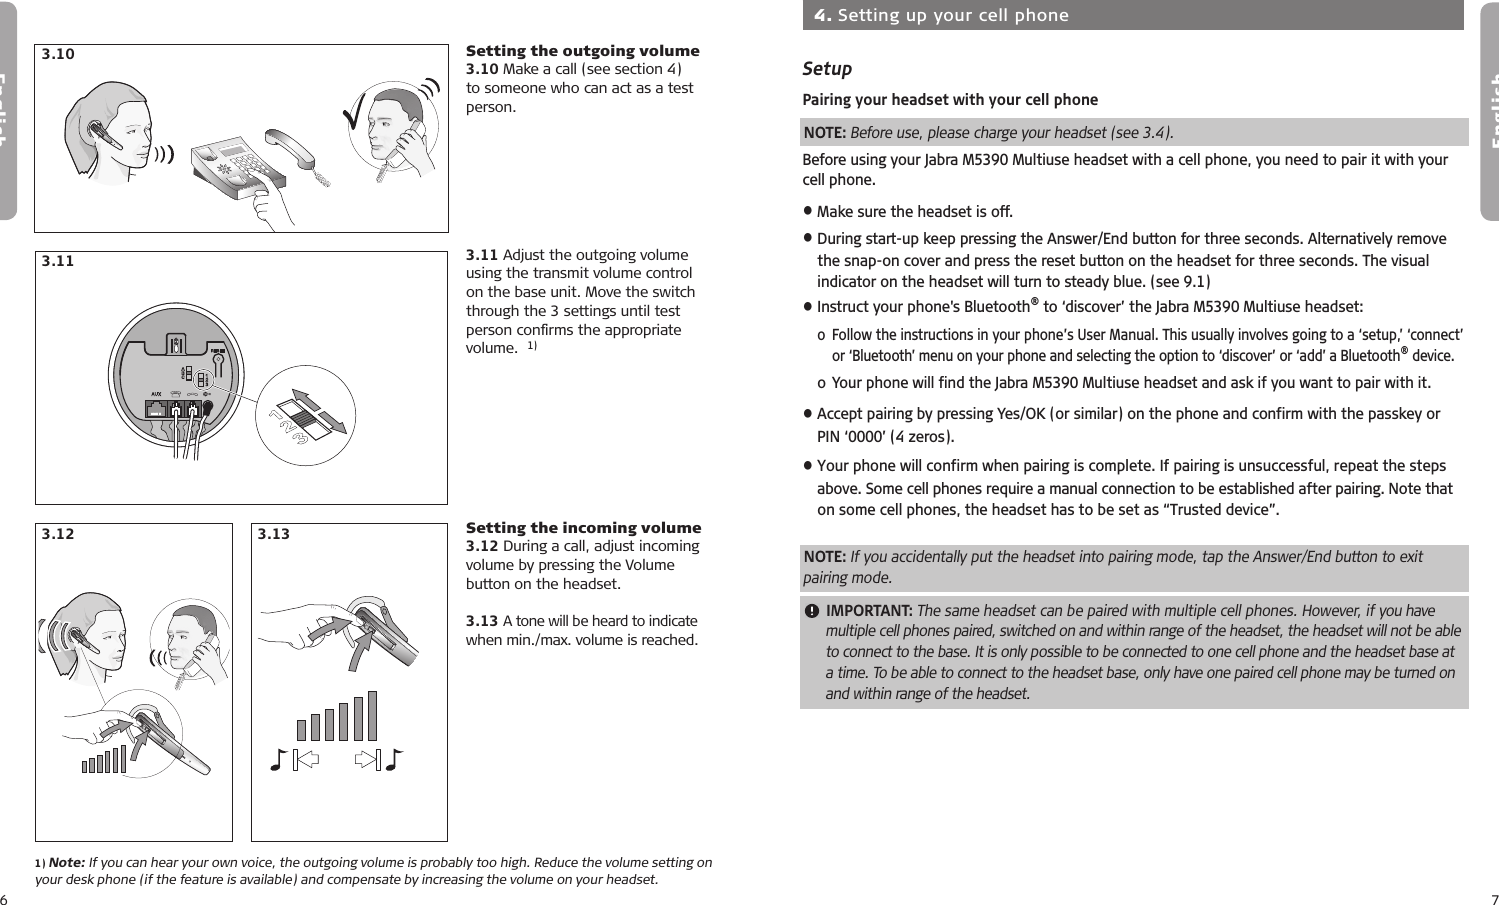
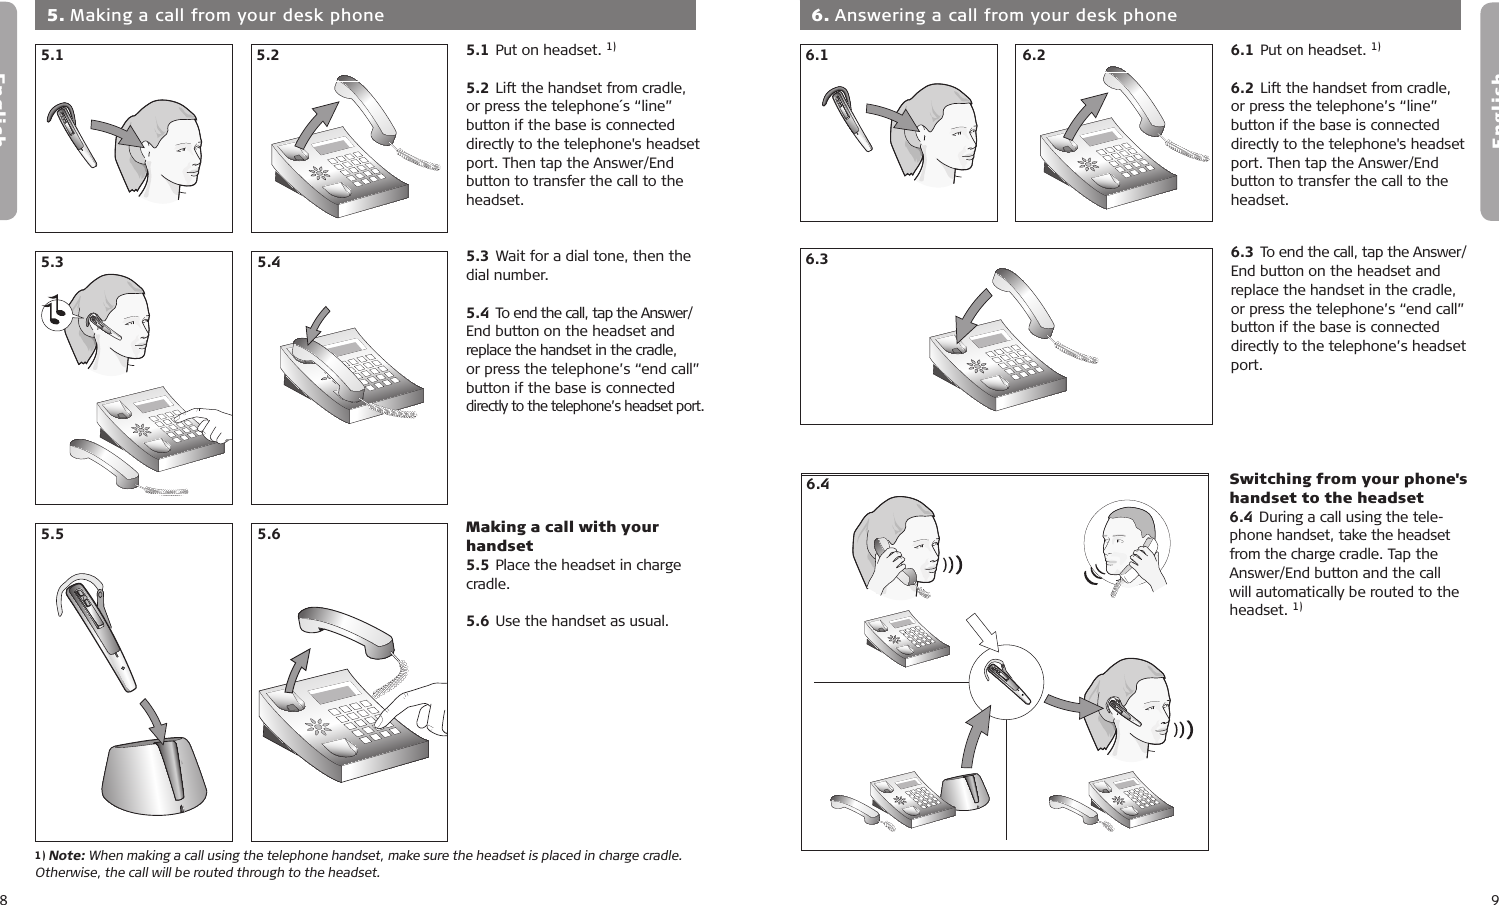
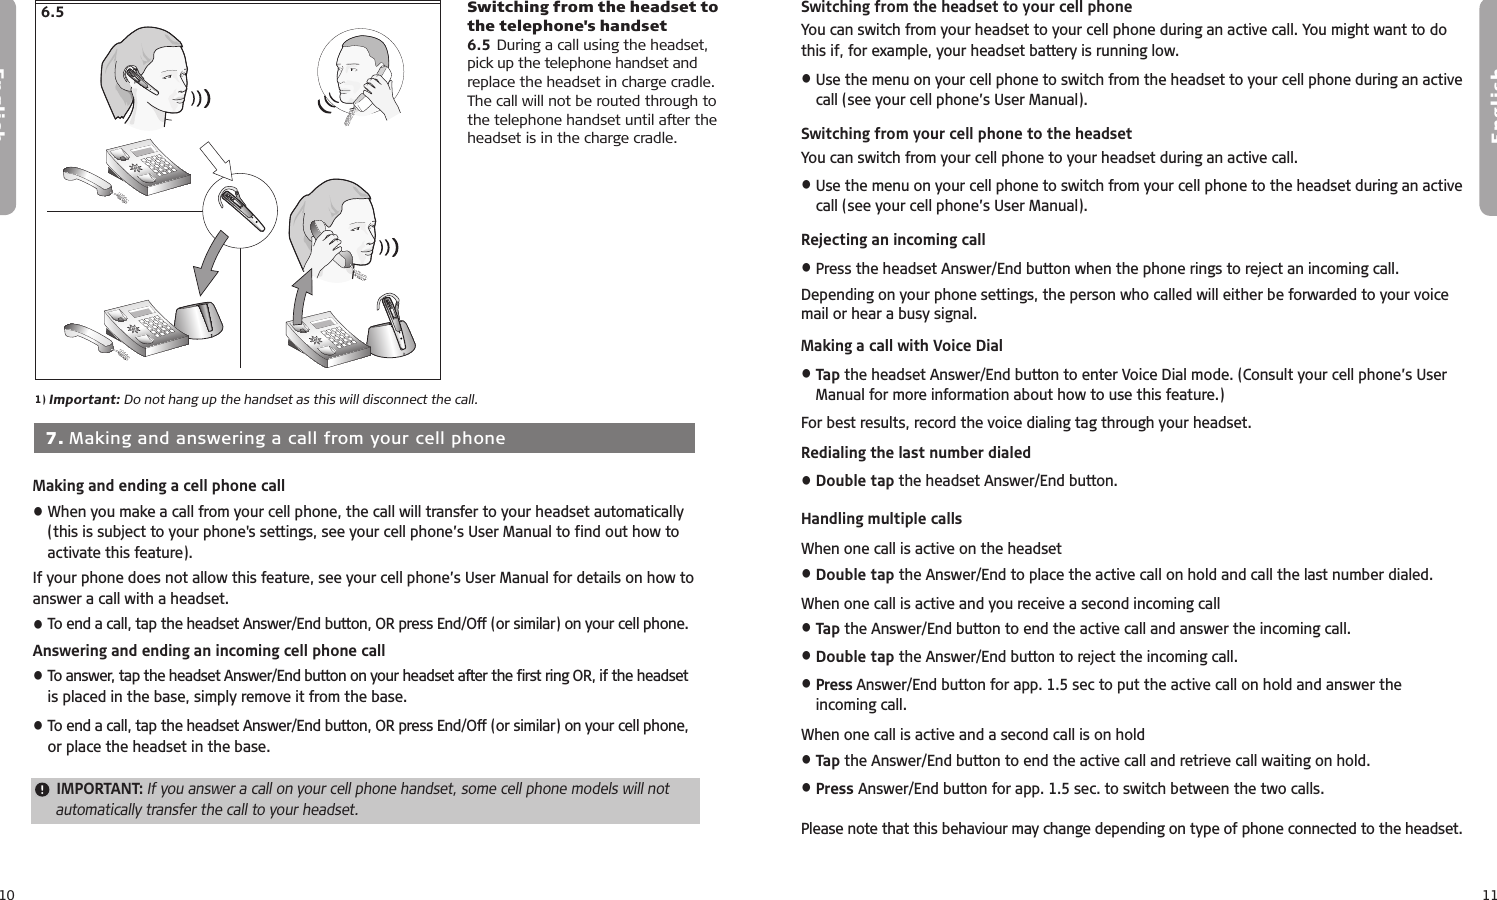
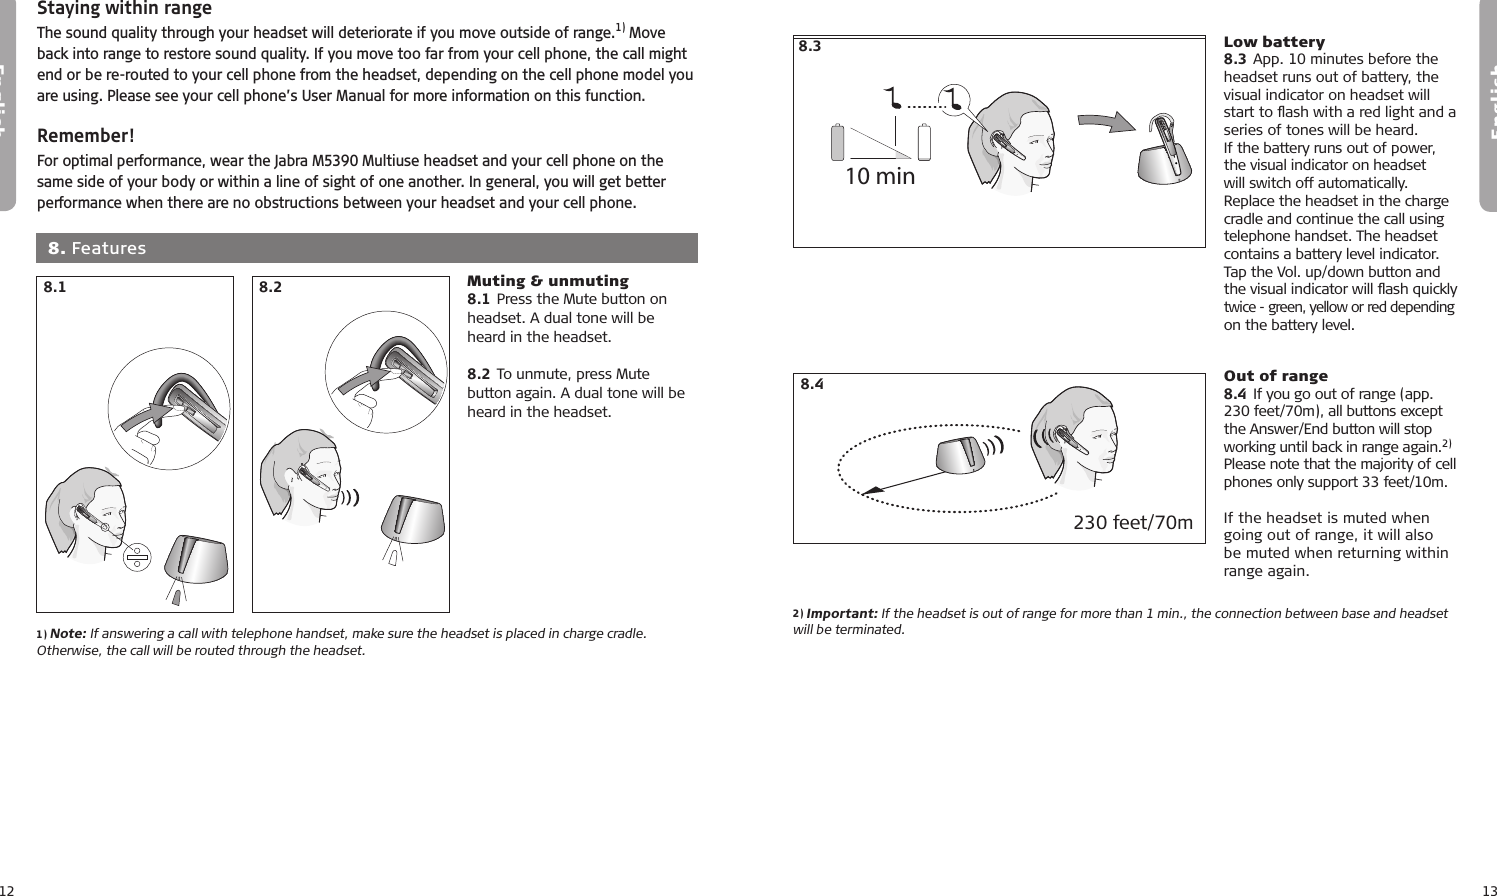
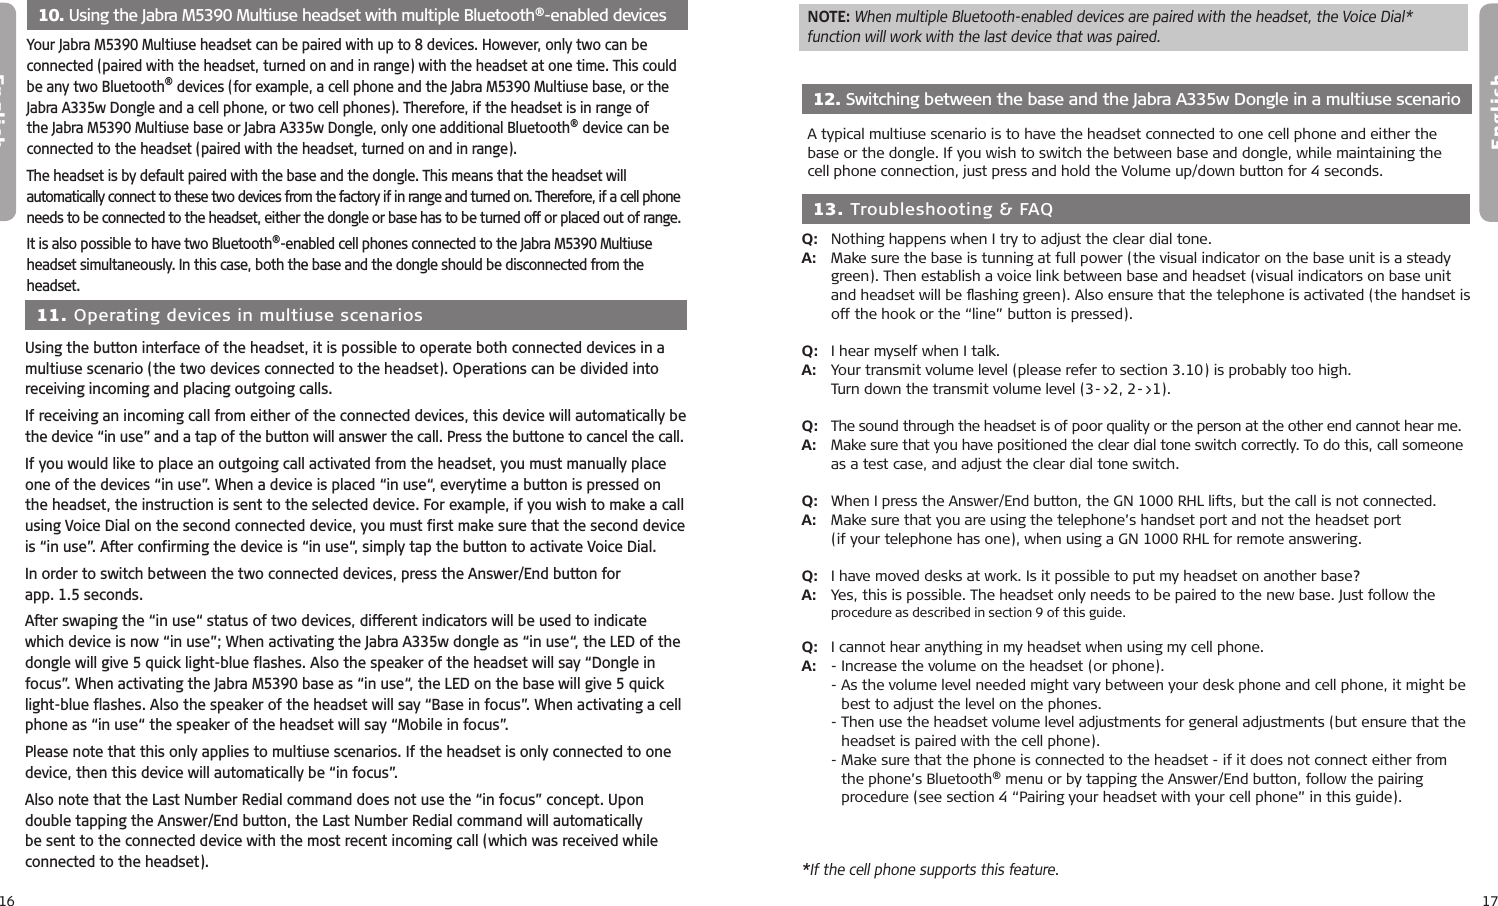
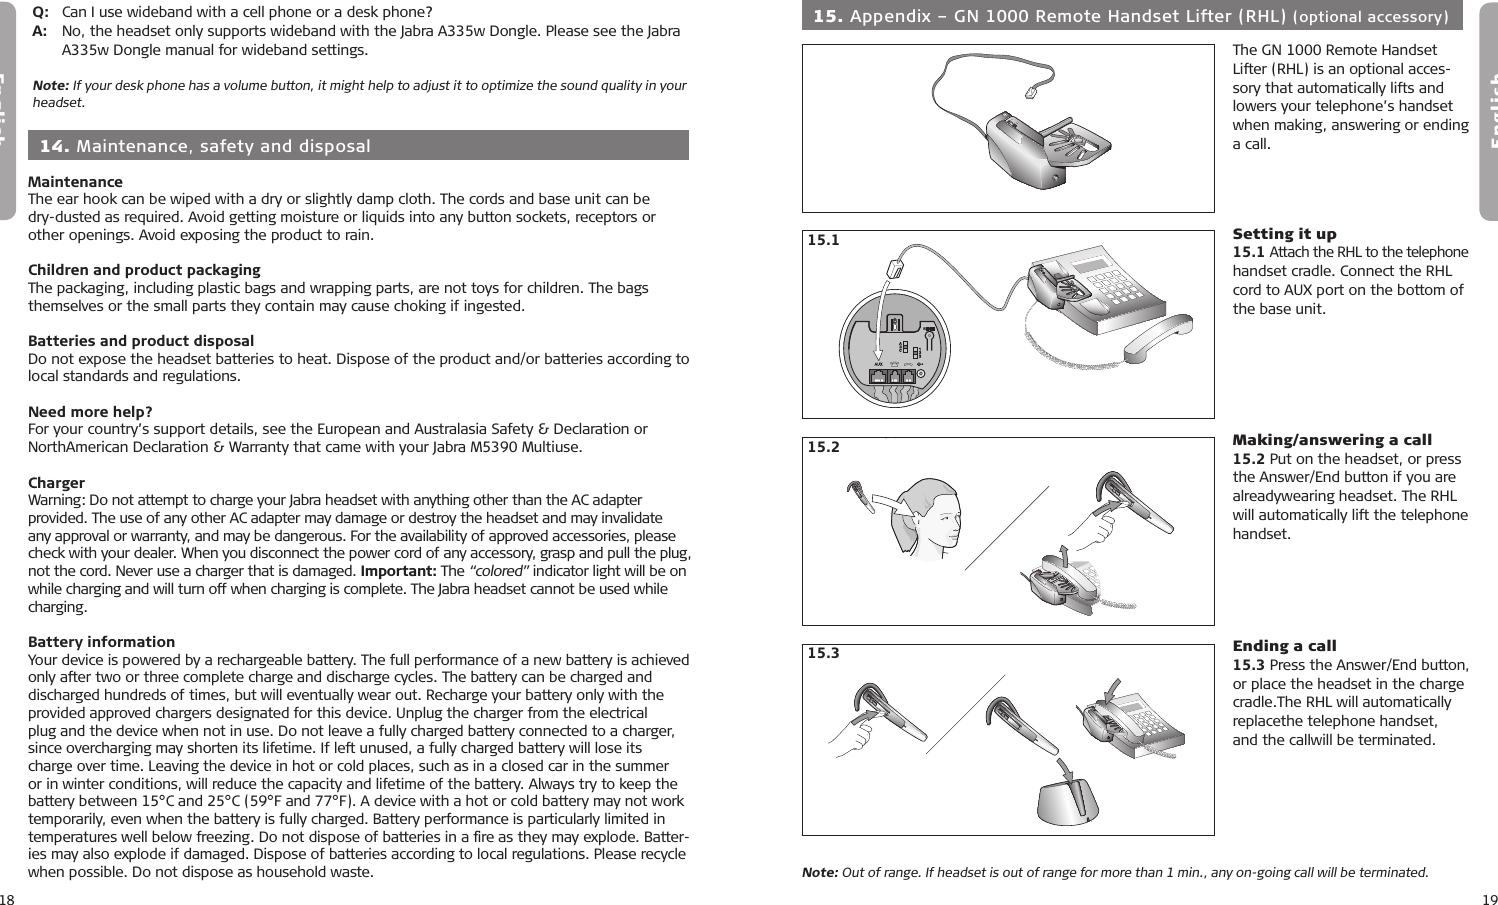
![2English3English 1. OverviewHeadset[1] Visual indicator [2] Answer/End button[3] Volume up/down[4] Ear hook[5] Mute button[6] Microphone[7] Reset button[8] Snap-on cover (replaceable)Base unit[9] Charge cradle[10] Visual indicator[11] Clear dial tone switch[12] AUX port[13] Telephone port[14] Handset port[15] AC power adapter port[16] Transmit volume[17] Reset button[18] Headset switchCords & adapters[19] Connection cord[20] AC power adapter[21] Dongle[22] Travel charger[23] USB cable for travel charger 2. Fitting the headset Fitting to the headset to your ear2.1 Open the hinged ear hook as wide as possible. 1)2.2 Hold the headset to your ear so that the speaker fits comfort-ably and the microphone points towards your mouth. 2.3 Close the hinged ear hook around your ear.2.4 Adjust the ear hook for a comfortable fit.Fitting the headset to your left ear2.5 Pull the ear hook hinge from the slot and insert it on the opposite side of the headset into the slot marked with L. Perform steps 2.1 – 2.4 above.2.12.22.32.42.52.62.12.22.32.42.52.62.12.22.32.42.52.62.12.22.32.42.52.61) Note: The headset is configured by default for use with the right ear.2.12.22.32.42.52.62.1 2.22.3 2.42.5Definition of “Tap, double tap and press”:Tap = Press the button for up to 0.8 sec.Press = Press a button for longer than 0.8 sec, and release before 1.5 sec. Listen for a tone.Double tap = Two taps made within 0.5 sec. 10919201513121411 1617182223211235468712354687!](https://usermanual.wiki/GN-Audio-USA/M5390BS.User-MAnual/User-Guide-992462-Page-2.png)