GOLD ARRAY TECHNOLOGY BEIJING SLASH300 3D Printer User Manual
GOLD ARRAY TECHNOLOGY BEIJING LLC. 3D Printer
User Manual

GETTING STARTED
SLASH 3D printer quick start guide

UNIZ PRINTING SYSTEM
A. SLASH 3D Printer
B. Power Cord
C. USB Cable
D. Extra Resin Bottle(s)
E. Clean Bottle
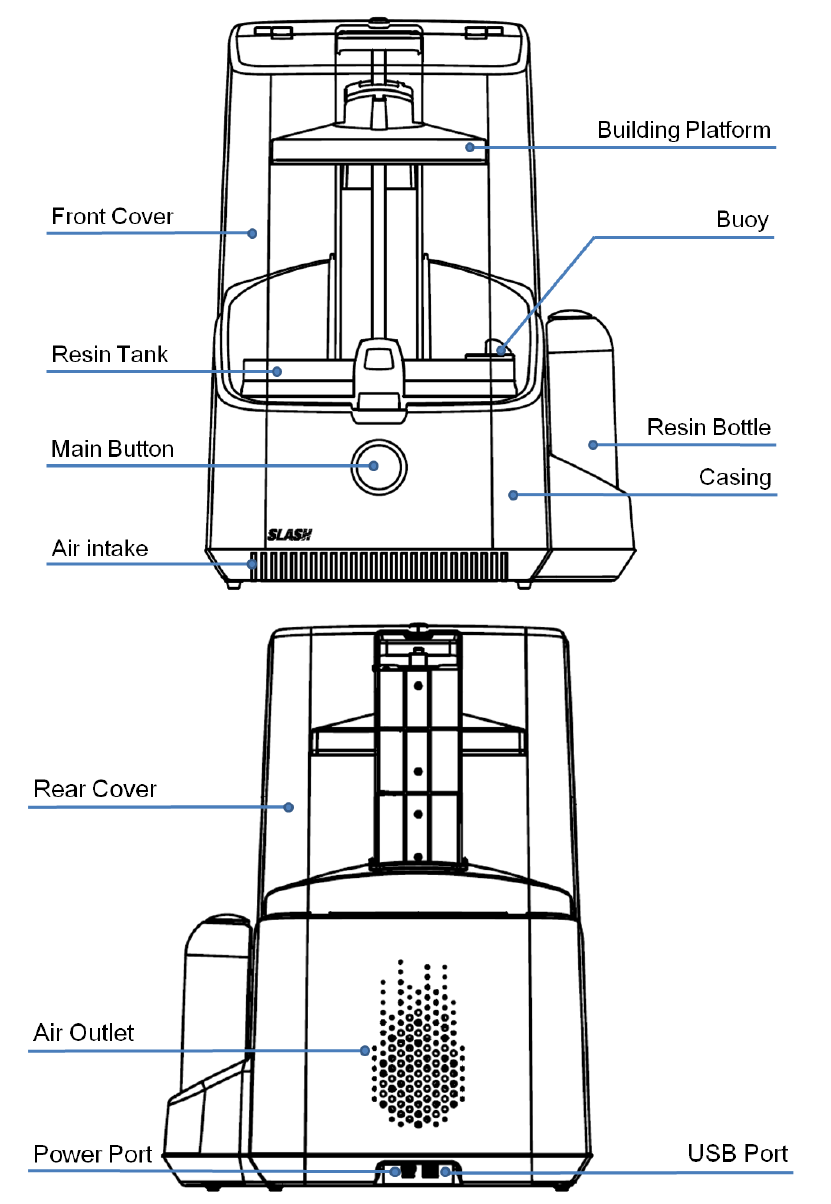
PRODUCT DESCRIPTION
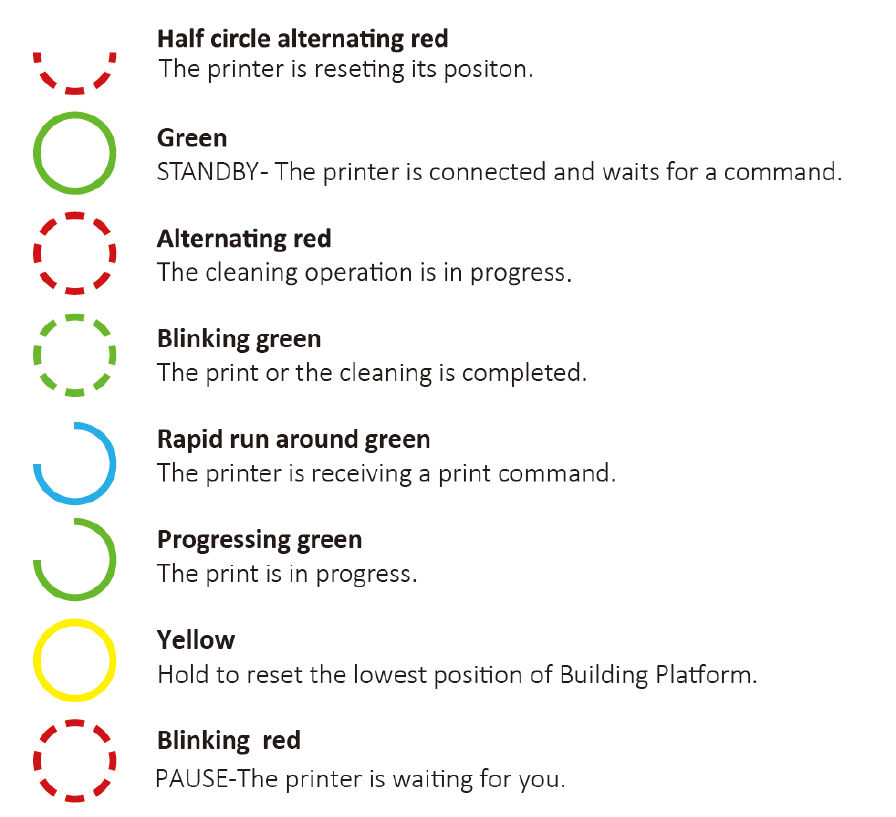
ACTION BUTTON COLOR GUIDE
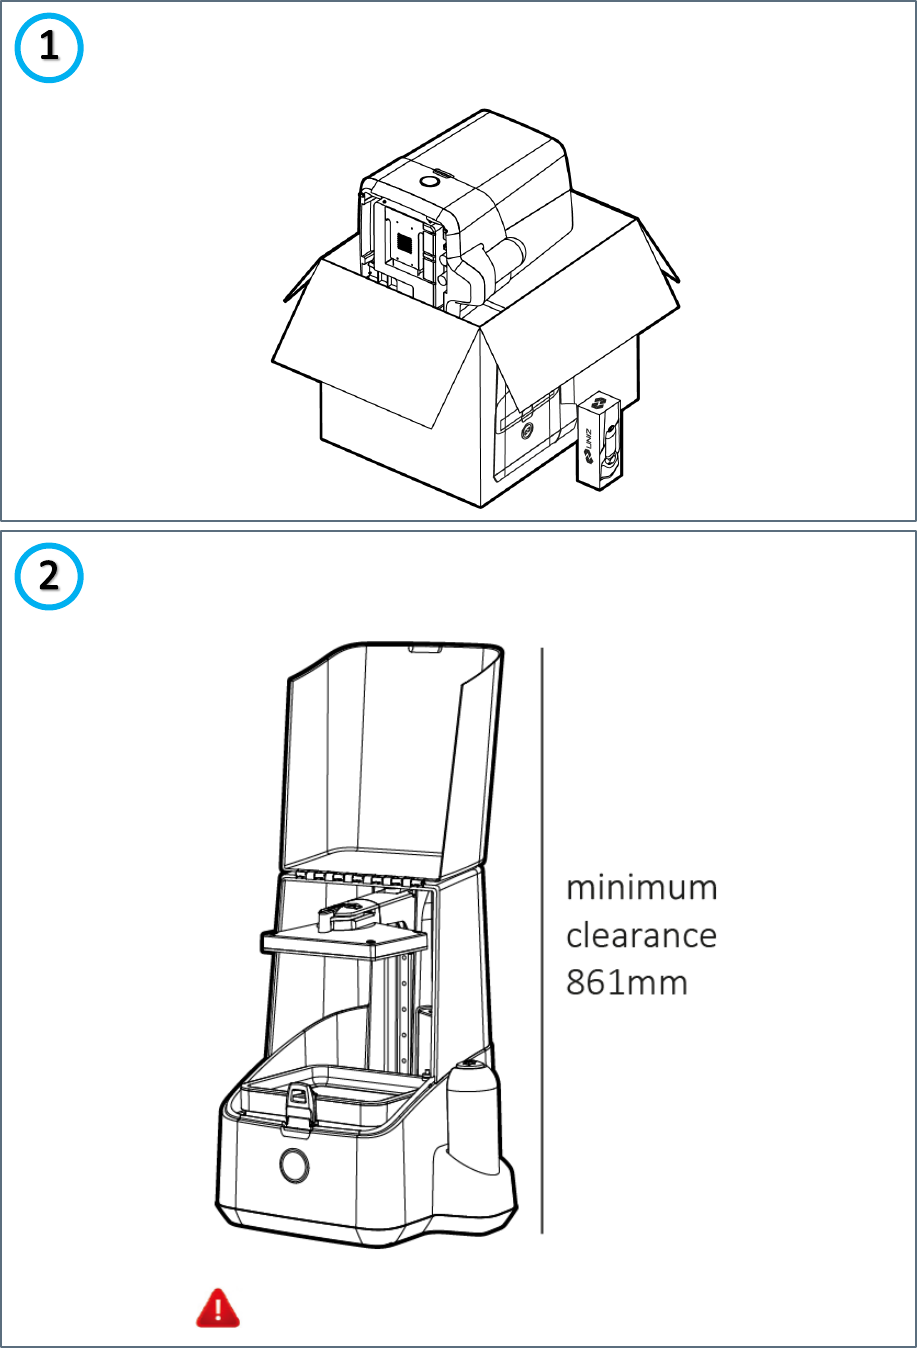
UNPACK YOUR SYSTEM
SET-UP YOUR PRINTER
Put SLASH on a flat horizontal platform.
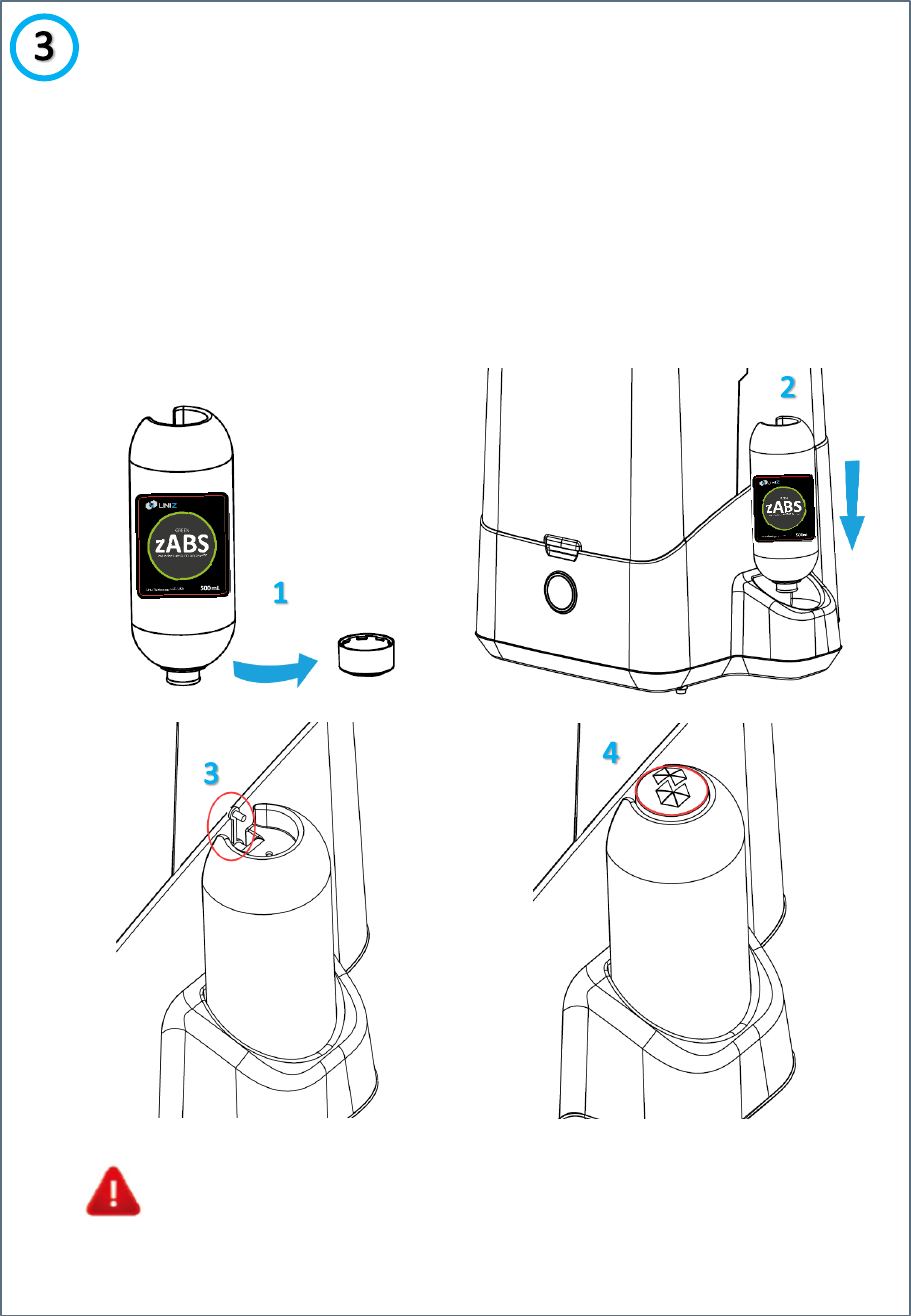
LOAD THE RESIN
1. Remove rigid cap.
2. Puncture the rubber cap with the needle and push it all the
way down into the bottle holder.
3. Pull the plug (small) on top to open the vent.
4. Put rigid cap at the opposite side of bottle
Do not remove the rubber cap at any time.
Never fill the resin tray manually; the pump will do this for you.
Beware of the sharp Needle.
LIGHT IT UP
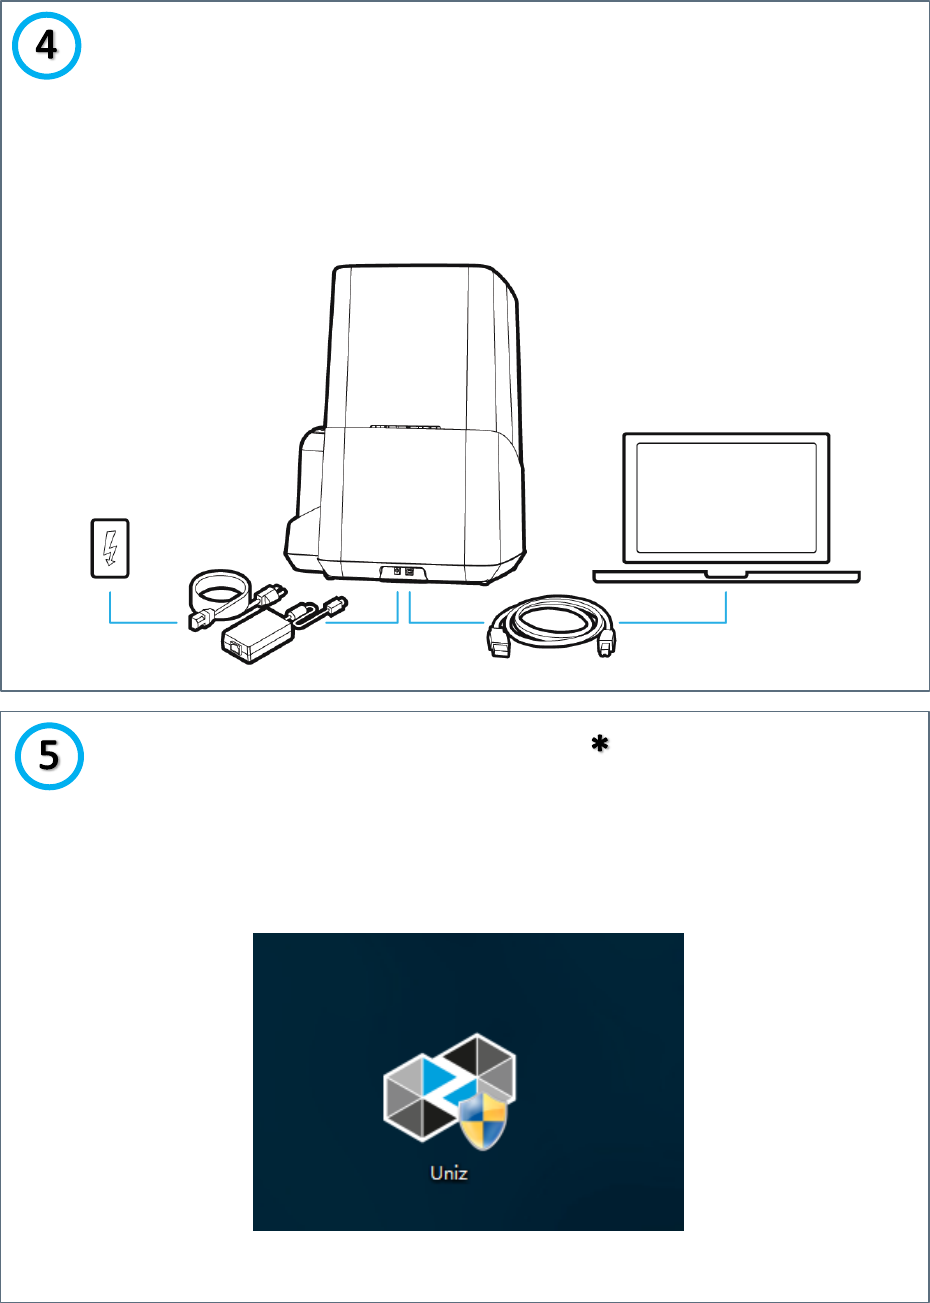
USING THE SOFTWARE
* Please refer to the “Software manual” for more details.
1. Plug in USB cable and connect to your computer.
2. Plug in power cord and turn on.
1. Double click the icon on the desktop of computer. (Please
keep USB connection at this time)
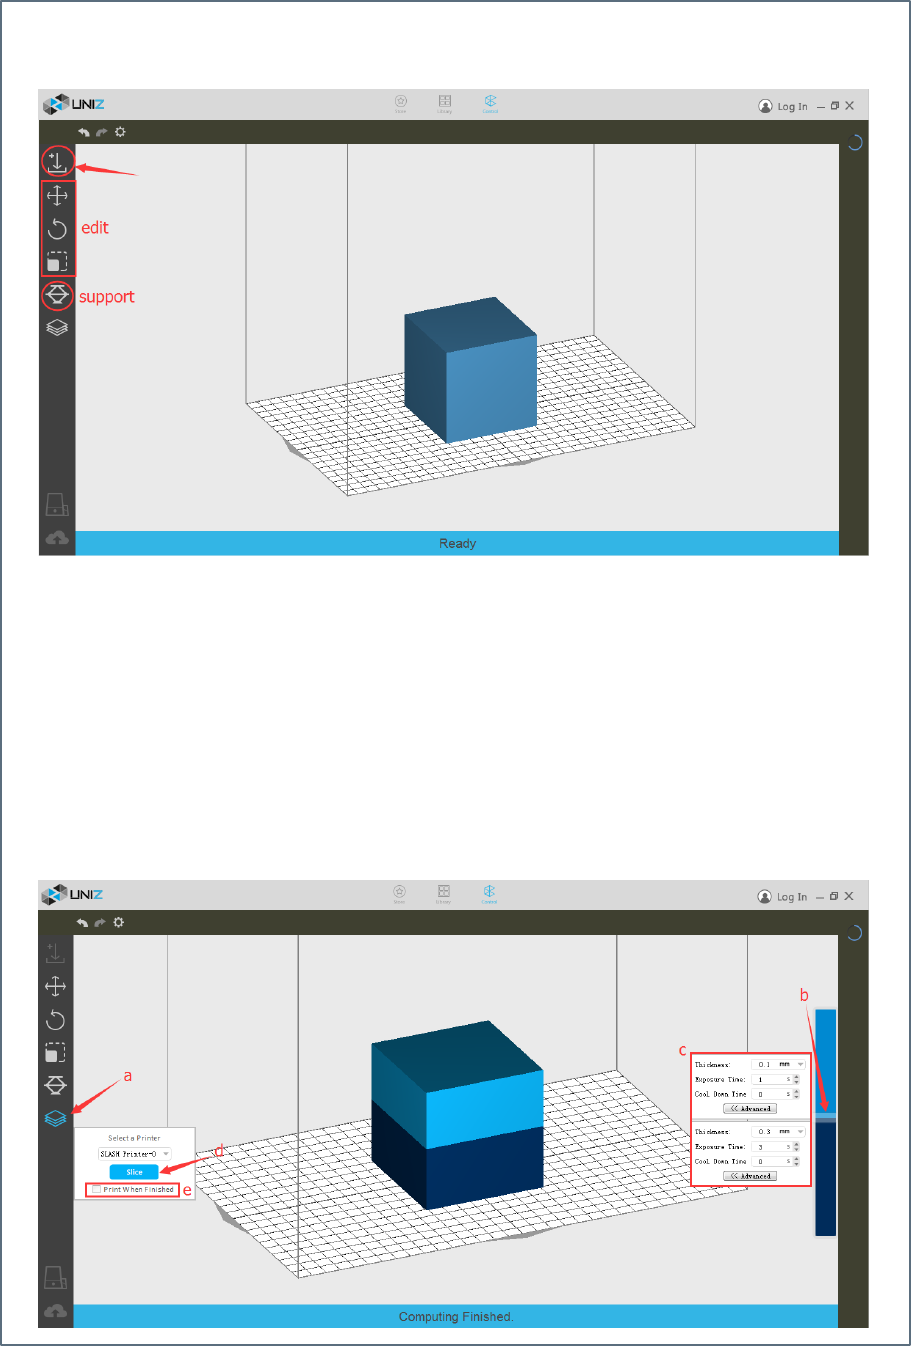
a. Click the “SLICE” button;
b. Click the sliding bar on the right to choose slicing parameter;
c. Define parameters of different zones;
d. Start slicing (check the box to skip verify process).
e. It will start to print when slice finished if you pitch on this.
2. Load a model (*.stl).
3. Start slicing.
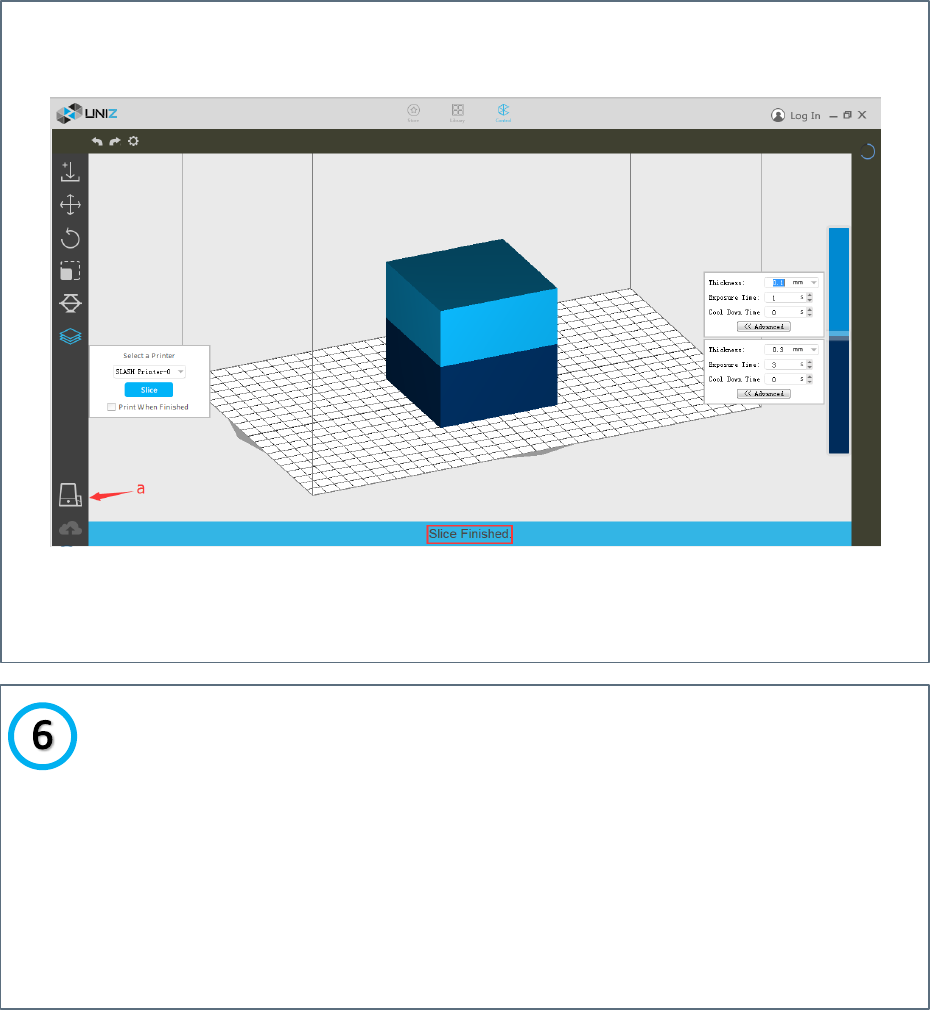
a. When slicing is finished, click “print” to send data to SLASH and
start to print.
POST PRINT
4. Print.
1. Clean the bottom of Building Platform (Wipe off any uncured
resin).
2. Rotate the lock arm.
3. Take it off.
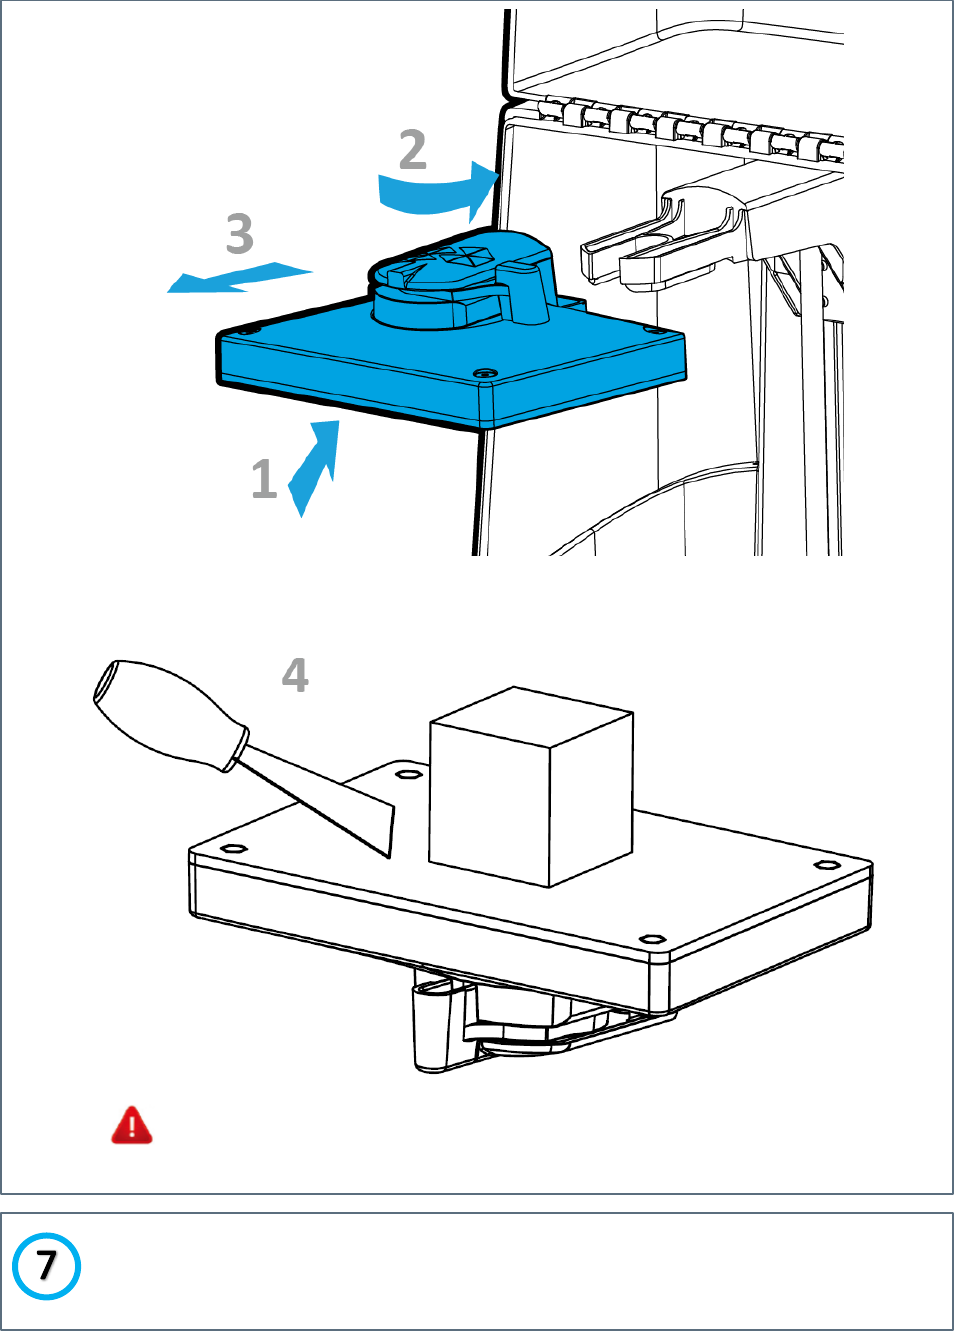
ENJOY!
4. Shovel the model off from Building Platform with a scrapper.
Watch out for the scrapper, and don’t hurt your hand!
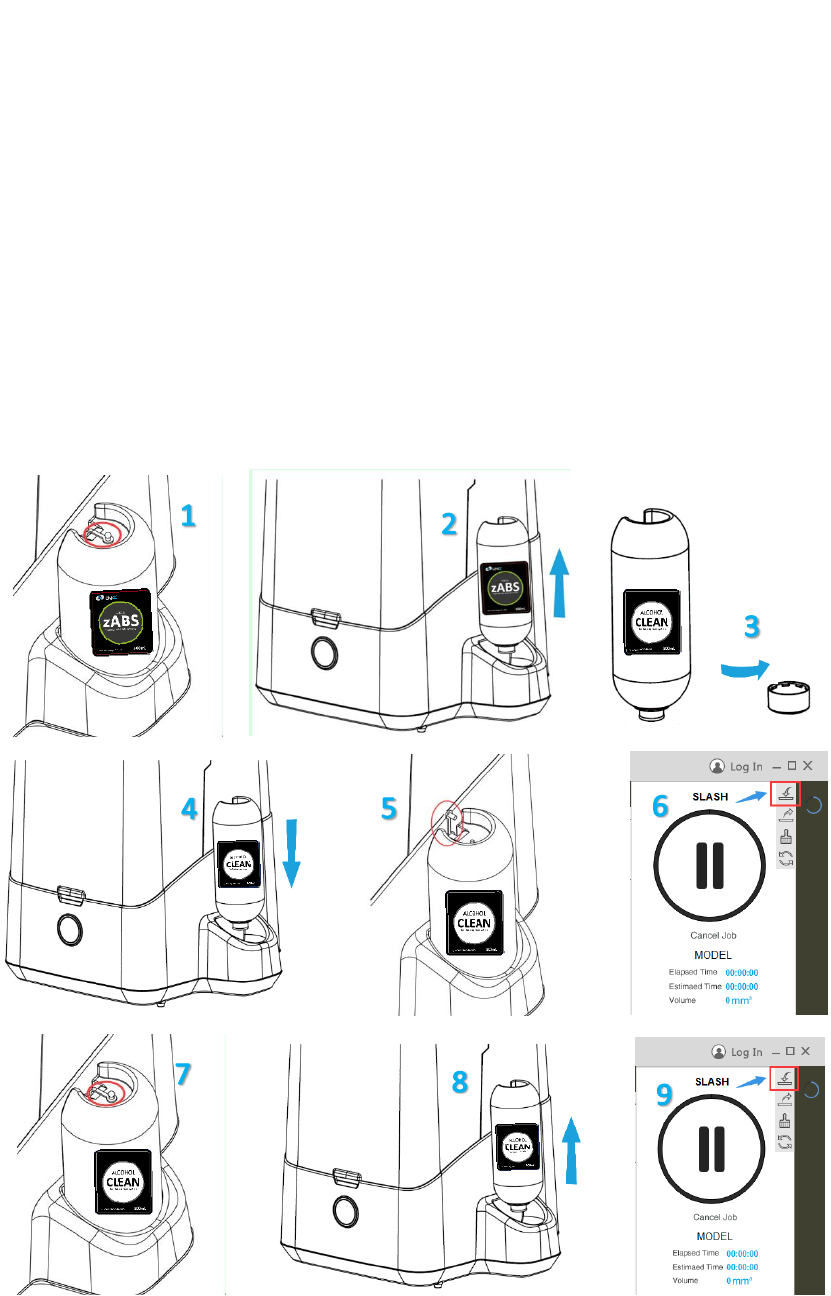
How to Clean the Resin System
1. Push the plug (small) in to close the vent.
2. Take the Resin Bottle off and put it on the desk.
3. Remove rigid cap of Clean Bottle.
4. Puncture the rubber cap with the needle and push it all the
way down into the bottle holder.
5. Pull the plug (small) on top to open the vent.
6. Click the ‘FILL’ to flush the resin system with alcohol.
7. Push the plug (small) in to close the vent.
8. Take the Clean Bottle off and put it on the desk.
9. Click the ‘FILL’ to drain alcohol in the resin system.
CAUTION
1. Please place the printer on a horizontal flat surface.
2. Always wipe the build platform clean before
removing it from the printer.
3. Double check the build platform and bottom of
resin tank (vat) for debris to prevent damage to the
LCD module.
4. Before printing, make sure build platform and resin
tank (vat) are locked in place.
5. Due to the smaller size of the current buoy, it is
recommended to withdraw some resin (can be
controlled manually in the software) before each
printing to prevent resin from overflow. This will be
fixed in the final product with the appropriate size
buoy implemented.
6. Please restrain from using pause function too
frequently, this will cause layer marks and sometime
failed prints.
7. Make sure the orange cover is closed all the way
(this will be controlled by magnetic lock sensor in final
product). Keep away from intensive light and heat
sources.
8. Keep the air inlet and vent holes clear.
9. Always clean the buoy module when cleaning the
resin tank (vat).
10. Keep the buoy module away from excessive heat to
prevent deform and malfunctioning of the resin
control system.;
DECLARATION
1. Due to refractive index mismatch of the prototype
printer, the printed parts will have distinctive ‘water
marks’ which will not be present in the final product.
2. Some parts (Build platform with ARM, several
locking mechanisms) doesn’t have perfect fit due to
the prototype silicone molding process. These will be
in perfect fit in the final product.
3. Since the temperature control module is still being
implemented, the current noise level is maintained at
65dB for maximum cooling effectiveness. Noise
control switch will be added to the final product
(55dB).

FCC STATEMENT :
This device complies with Part 15 of the FCC Rules. Operation is subject to the following
two conditions:
(1) This device may not cause harmful interference, and
(2) This device must accept any interference received, including interference that may
cause undesired operation.
Warning: Changes or modifications not expressly approved by the party responsible for
compliance could void the user's authority to operate the equipment.
NOTE: This equipment has been tested and found to comply with the limits for a Class B
digital device, pursuant to Part 15 of the FCC Rules. These limits are designed to provide
reasonable protection against harmful interference in a residential installation.
This equipment generates uses and can radiate radio frequency energy and, if not
installed and used in accordance with the instructions, may cause harmful interference to
radio communications. However, there is no guarantee that interference will not occur in a
particular installation. If this equipment does cause harmful interference to radio or
television reception, which can be determined by turning the equipment off and on, the
user is encouraged to try to correct the interference by one or more of the following
measures:
between the equipment and receiver.
receiver is connected.
FCC Radiation Exposure Statement
This equipment complies with FCC radiation exposure limits set forth for an uncontrolled
environment. This equipment should be installed and operated with minimum distance
20cm between the radiator & your body