Classic 3 Way Solenoid Cleaning
2018-07-13
: Gaggia Classic 3-Way Solenoid Cleaning Classic_3-Way_Solenoid_Cleaning Classic Gaggia
Open the PDF directly: View PDF ![]() .
.
Page Count: 2
Gaggia 3 way solenoid disassembly and cleaning instructions:
The solenoid is the black/blue cube (depending on year), part # 27 on the Classic, and part #21 on most
Baby models.
You will want to do the following to remove:
1) Turn off and unplug the espresso machine. Make sure that it is cool before beginning the
procedure.
2) Remove the top of the machine. Use the exploded diagram for references, as the setup will differ
based on model/production date.
3) Locate the solenoid. It will be behind the boiler, slightly to the left if you are facing the front of the
machine. It looks like a black or blue cube with a tube coming out of the top.
4) Remove the tubing (usually black in color) coming from the top of it by squeezing and sliding the small
clamp up the tube. Remove the top nut that is now accessible on the top of the black cube.
5) Remove the wires, keeping track of which one goes on which post. You can use a marker to mark
each one.
6) Now lift the solenoid cube straight up and out of the machine. You will now see a metal shaft exposed.
Look underneath the metal shaft, and locate the 2 Allen bolts that hold the lower assembly onto the boiler.
(The 2 o-rings, part 29 (Classic)/part 17 (Baby) are right behind the assembly you are removing – be
careful not to lose these)
7) Remove the 2 bolts, and the entire shaft assembly. Once off of the machine, unscrew the brass nut
located near the bottom of the metal shaft. This will release it from the lower assembly as seen above.
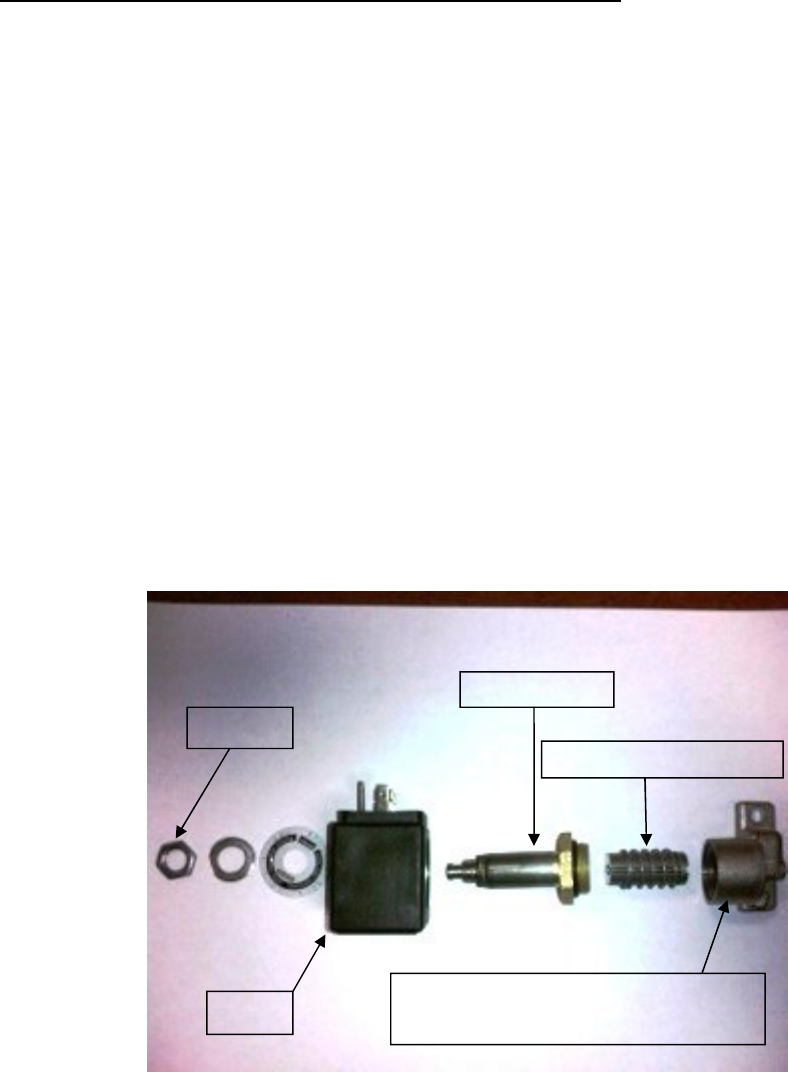
Once this is apart you will see a spring wrapped piece of metal that has an internal spring of its own.
Top Nut
Cube
Metal Shaft
Internal Solenoid Piece
Lower Assembly
–
2
Allen bolts hold
this to the boiler
body
8) Press inwards on either end of the small metal piece, making sure the plastic caps on either end of the
internal spring can be compressed a bit, and that they pop out afterwards.
9) Using a paperclip or other small device, clean the holes in the Upper shaft and lower assembly. There
will be 4 holes, making 2 passageways, both of which should be clear. You can also use your espresso
machine descaler to make sure that the metal parts are clean.
10) Lubricate the internal solenoid piece with food safe grease, and re-install with the narrower end
pointing downwards. The narrower end will have a larger button in the center.
11) Re-install after cleaning and re-lubricating in reverse order.
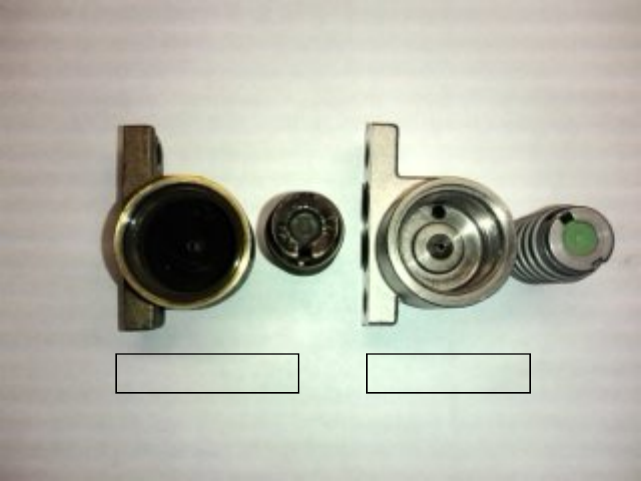
Dirty Solenoid
Clean Solenoid
