Galaxy Microsystems GSKU-WHDI-T10 WHDI Stick User Manual 555100 0283 000
Galaxy Microsystems Ltd. WHDI Stick 555100 0283 000
UserManual.wiki
>
Galaxy Microsystems
>
GSKU WHDI T10 User Manual
manual
Navigation menu
Upload a User Manual
Namespaces
Wiki Guide
HTML
PDF
Info
Views
User Manual
Discussion / Help
Navigation
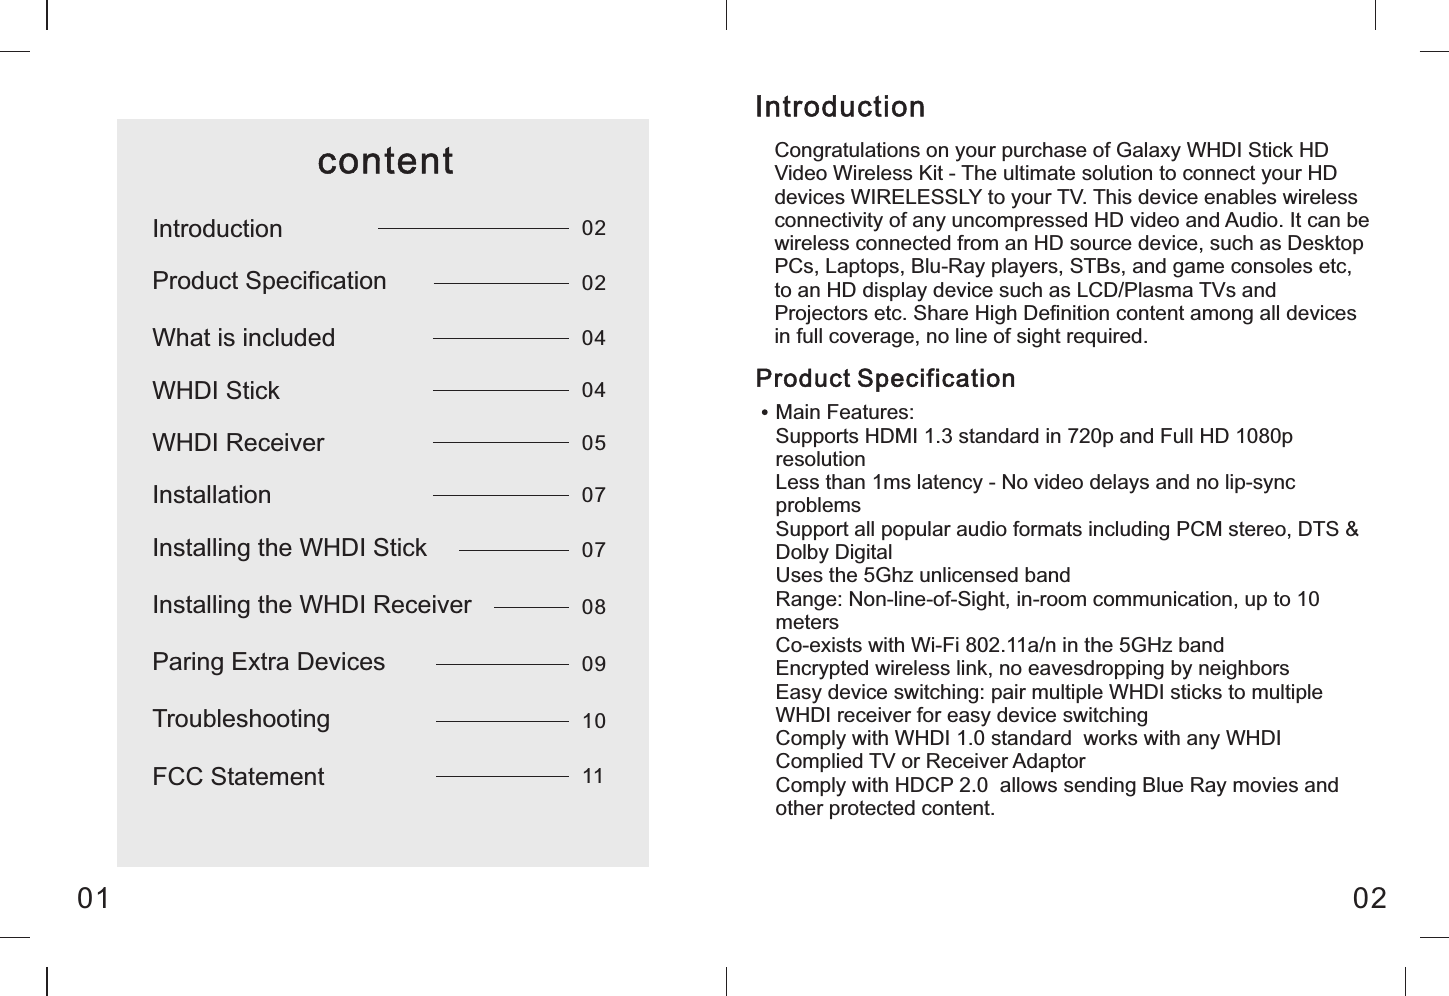
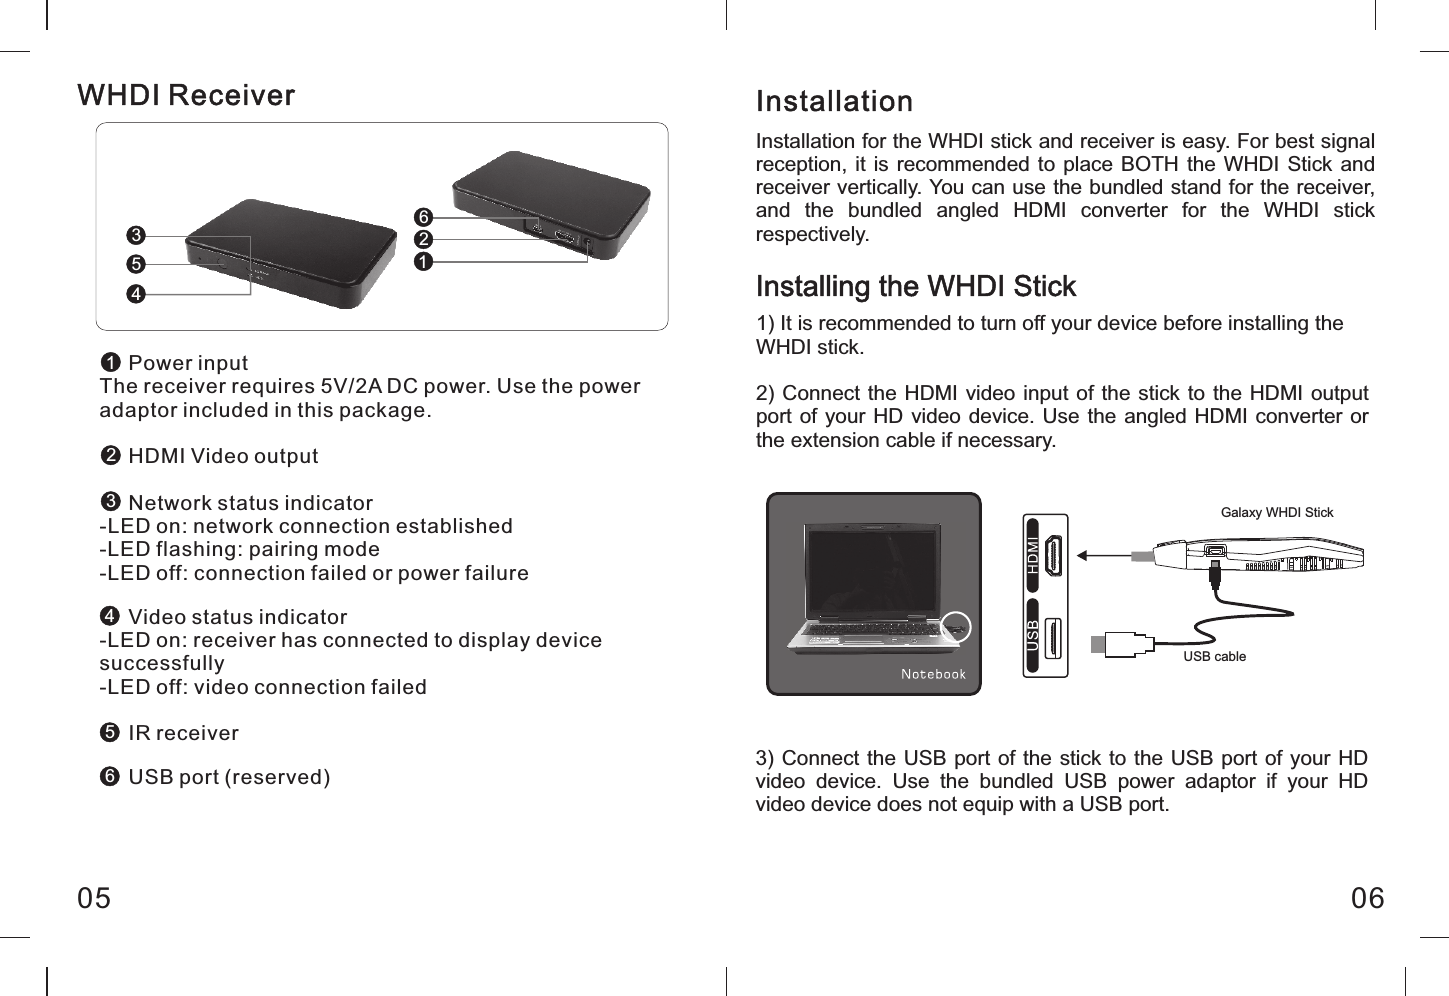
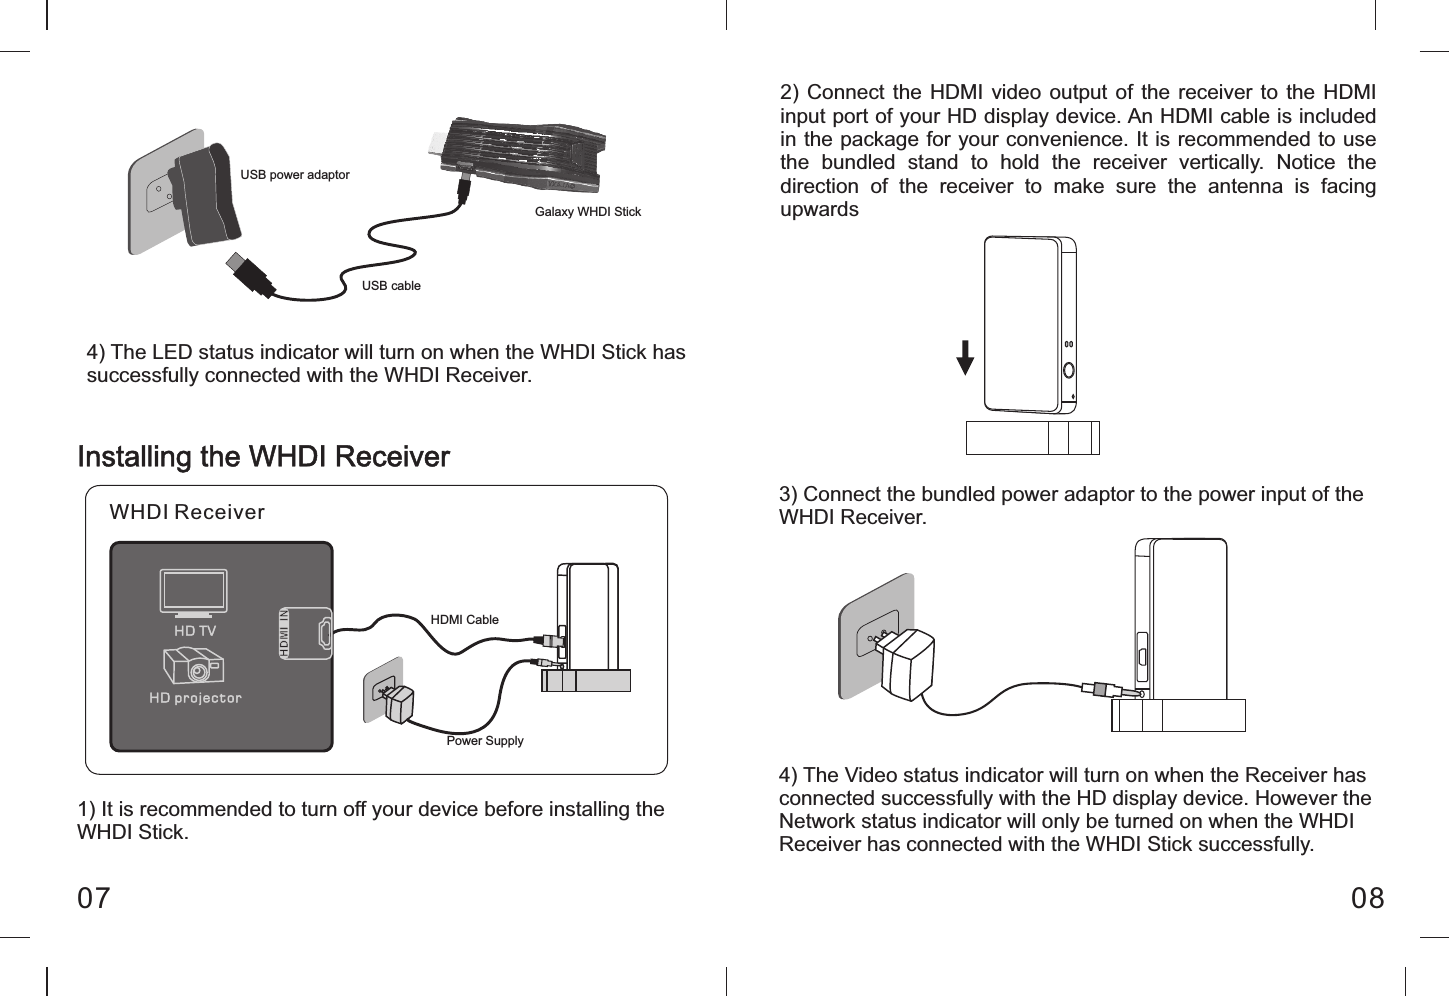
![Galaxy WHDI Transmitter StickDimensions: 107mm x44mm x16mmMaximum 12dBm transmission powerPower consumption: up to 2.5Watt for Full HD resolutionUSB Powered [5V 0.5A]Interface: HDMI in x1, Mini USB x1Galaxy WHDI ReceiverBundled with IR receiver for deviceairing/switchingDimensions: 148mm x96mm x20mmReceiver Sensitivity ≤ - 65 dBmInput Voltage: 5V/2A DC (AC adaptor included)Interface: HDMI out x1, DC in x1, IR in x1, Mini USB x1 (Reserved)WHDI StickUSB portThe stick uses standard USB port as input power. When you are using devices without USB port, you can use the bundled USB power adaptor.What is included0403HDMI Video InputStatus Indicator-LED on: connection established-LED flashing: pairing mode-LED off: connection failedPairing keyUse this key to put the stick into “pairing” mode. Please check the steps provided in this manual for more details112233](https://usermanual.wiki/Galaxy-Microsystems/GSKU-WHDI-T10/User-Guide-1439926-Page-3.png)