Garmin Canada M7BT NIKE, AY4301 User Manual PSA26028thmay
DynaStream Innovations Inc. NIKE, AY4301 PSA26028thmay
UserManual.wiki
>
Garmin Canada
>
M7BT User Manual
>
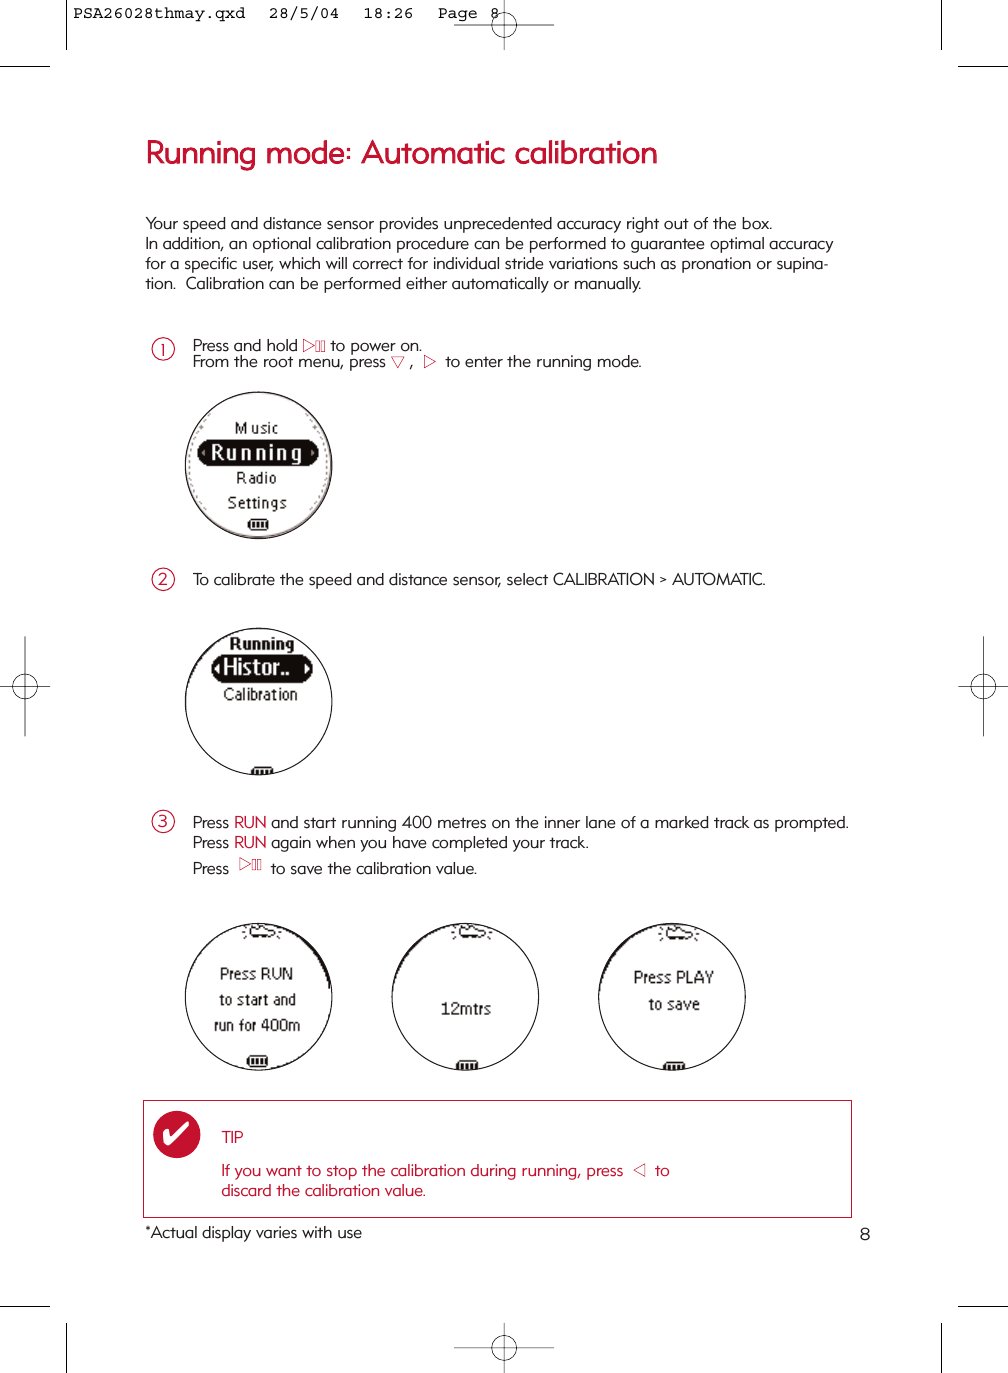
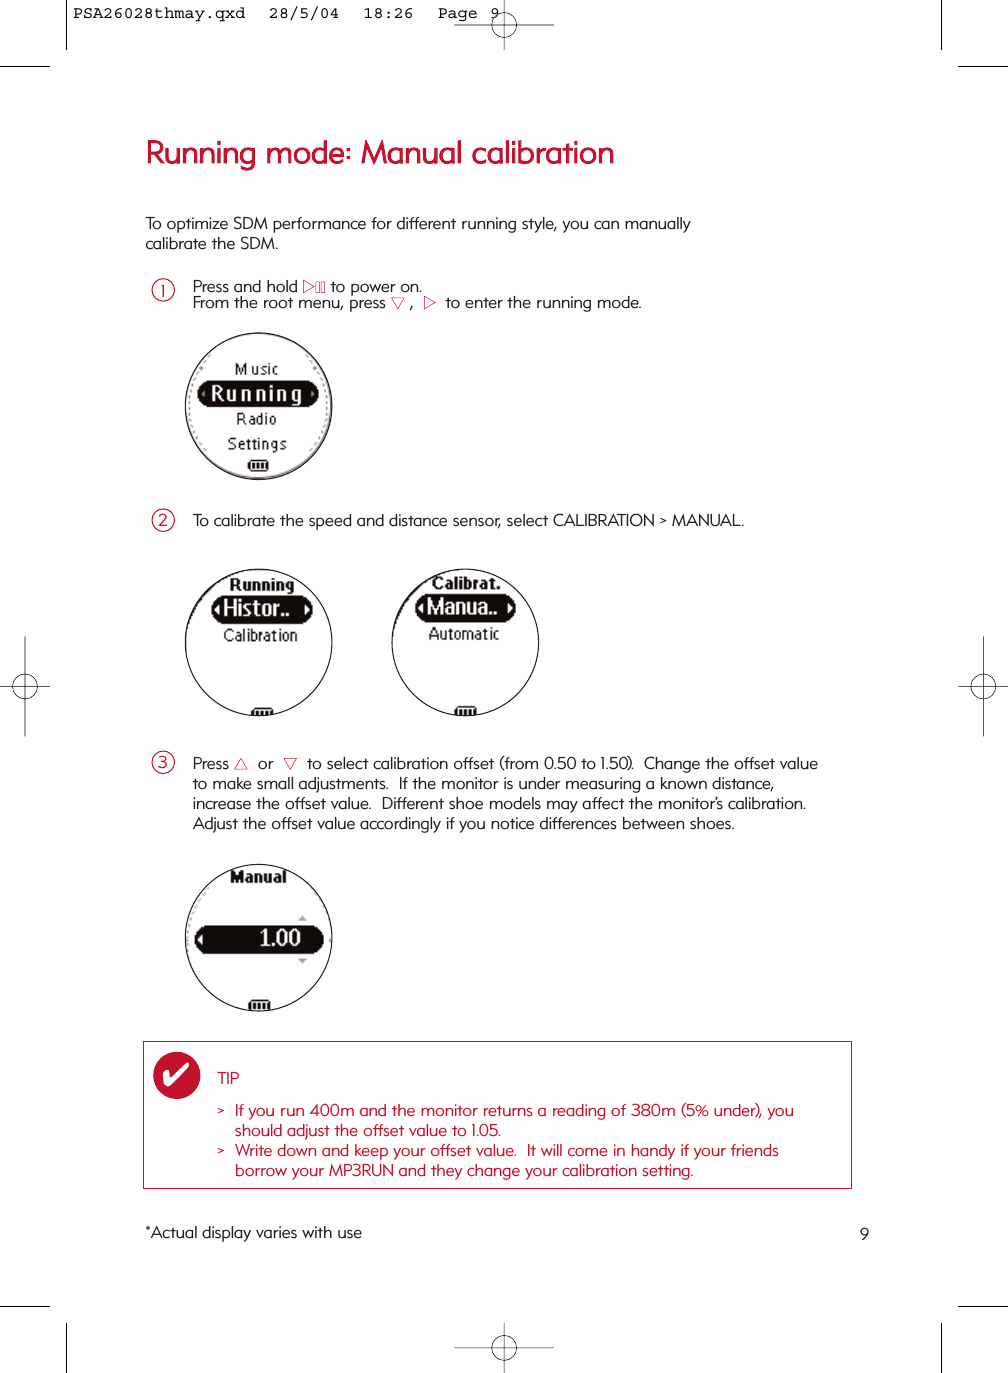
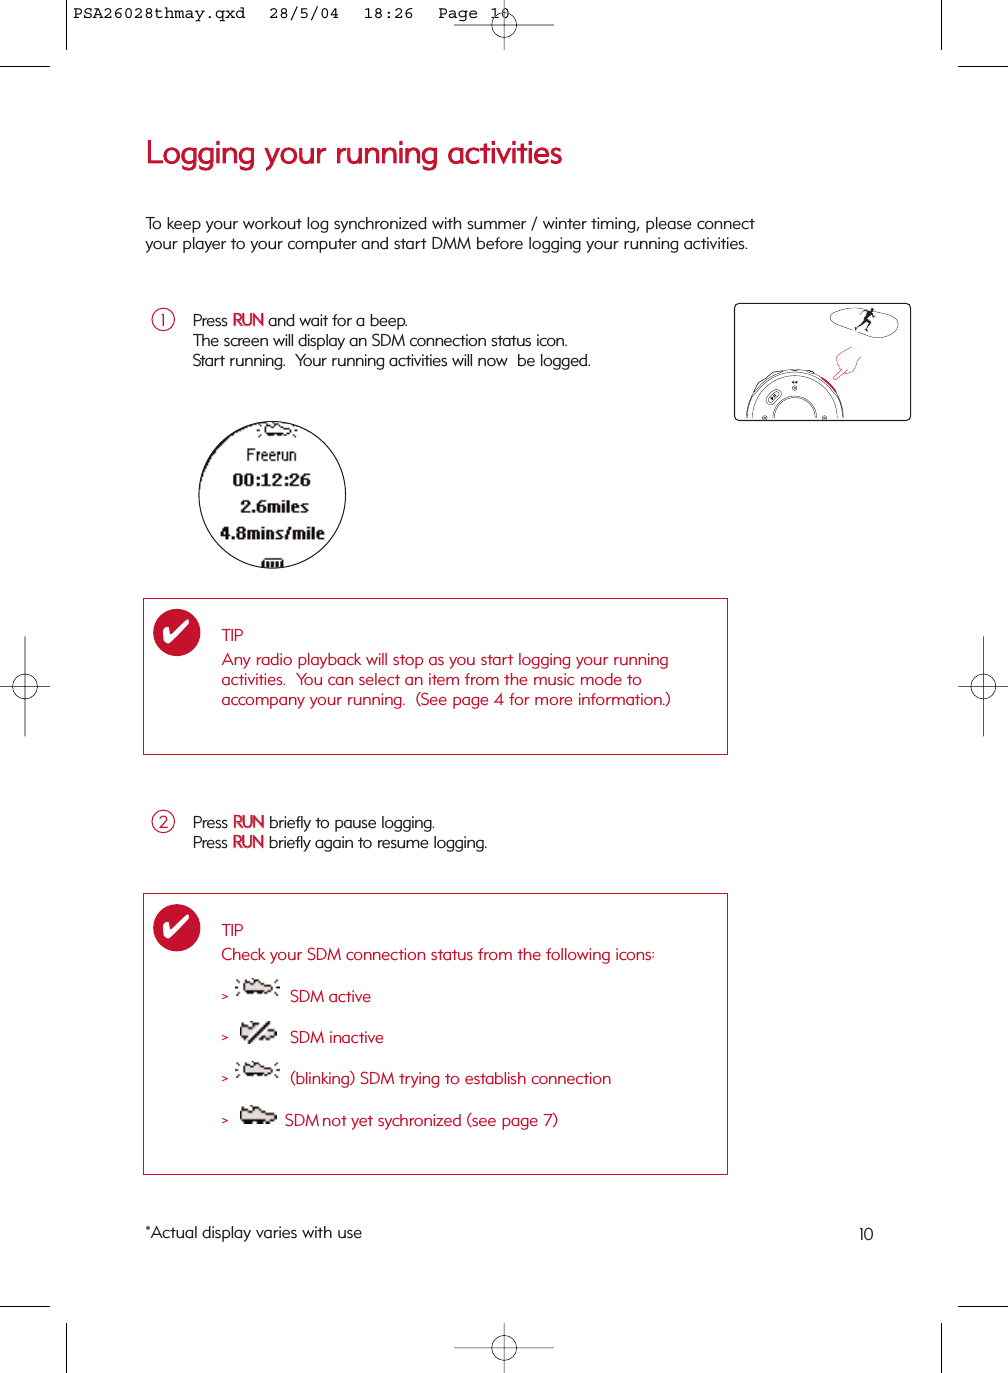
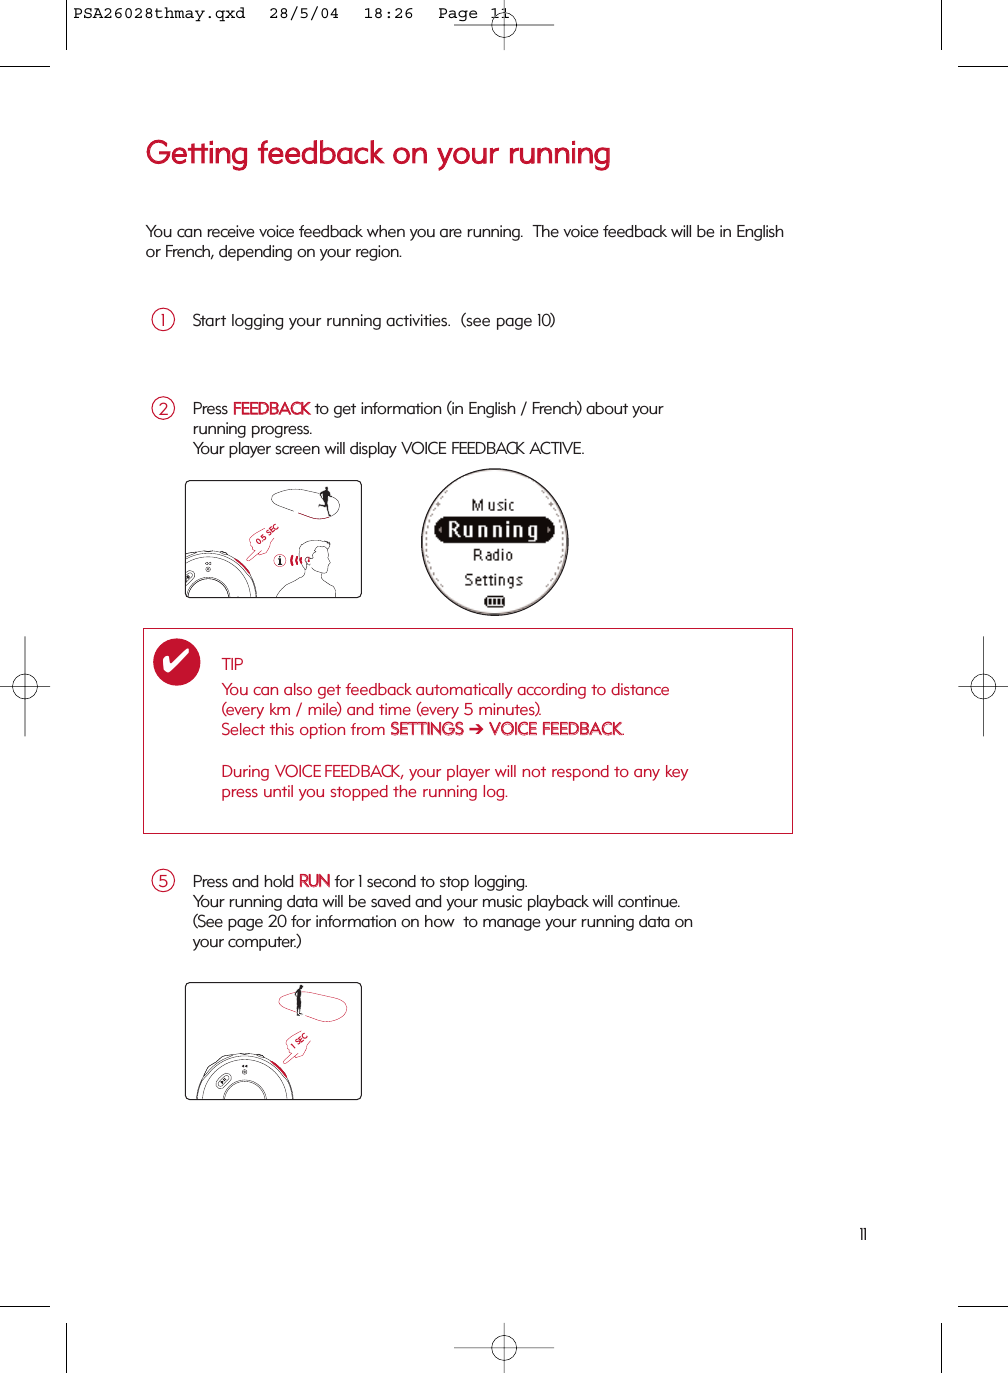
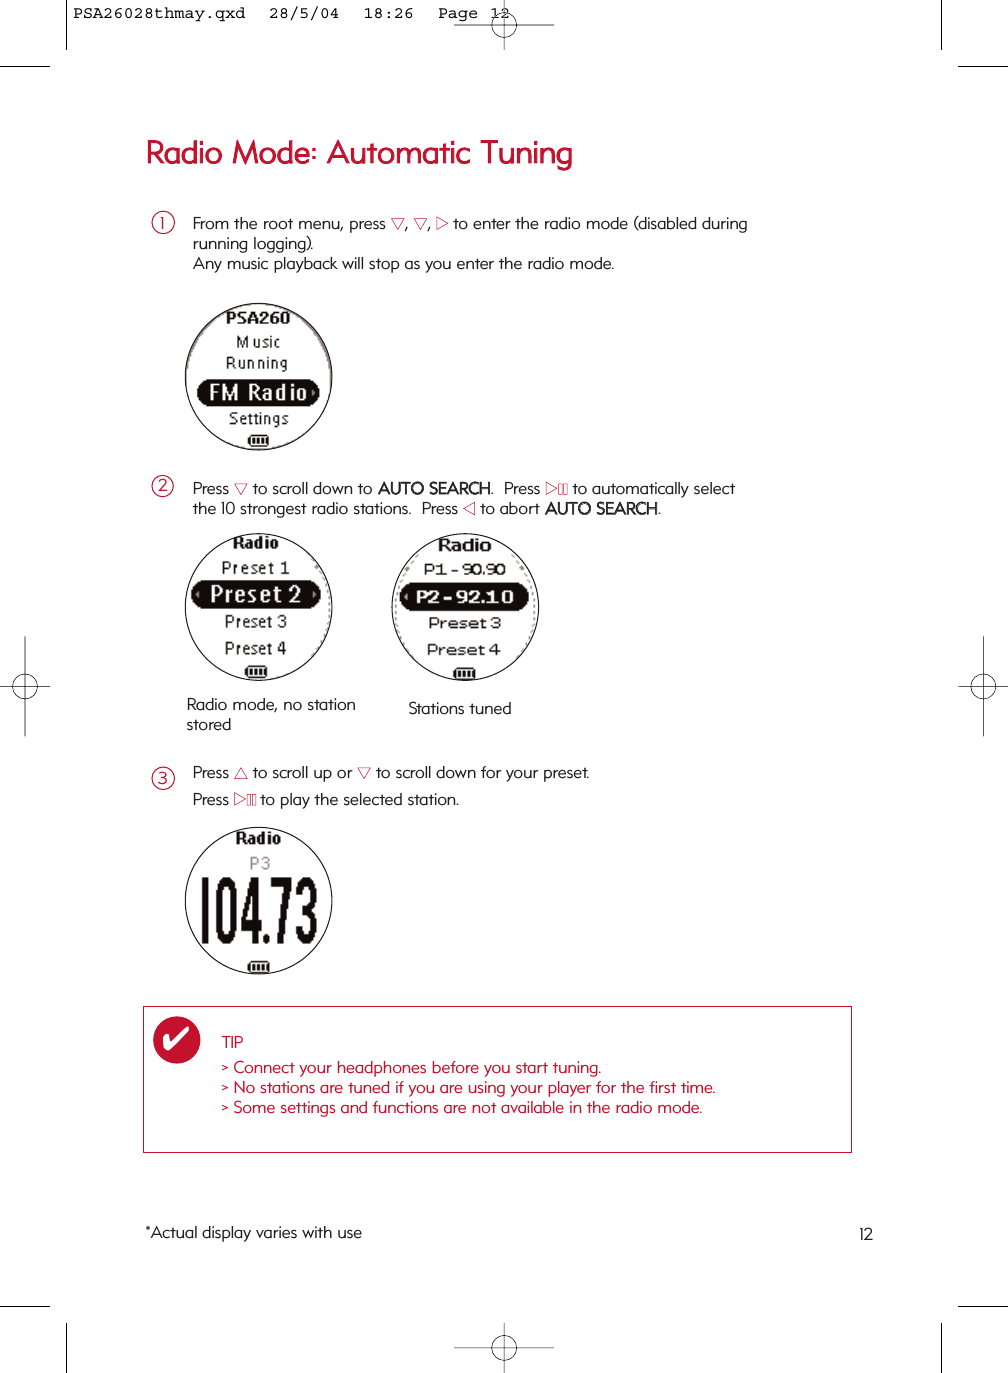
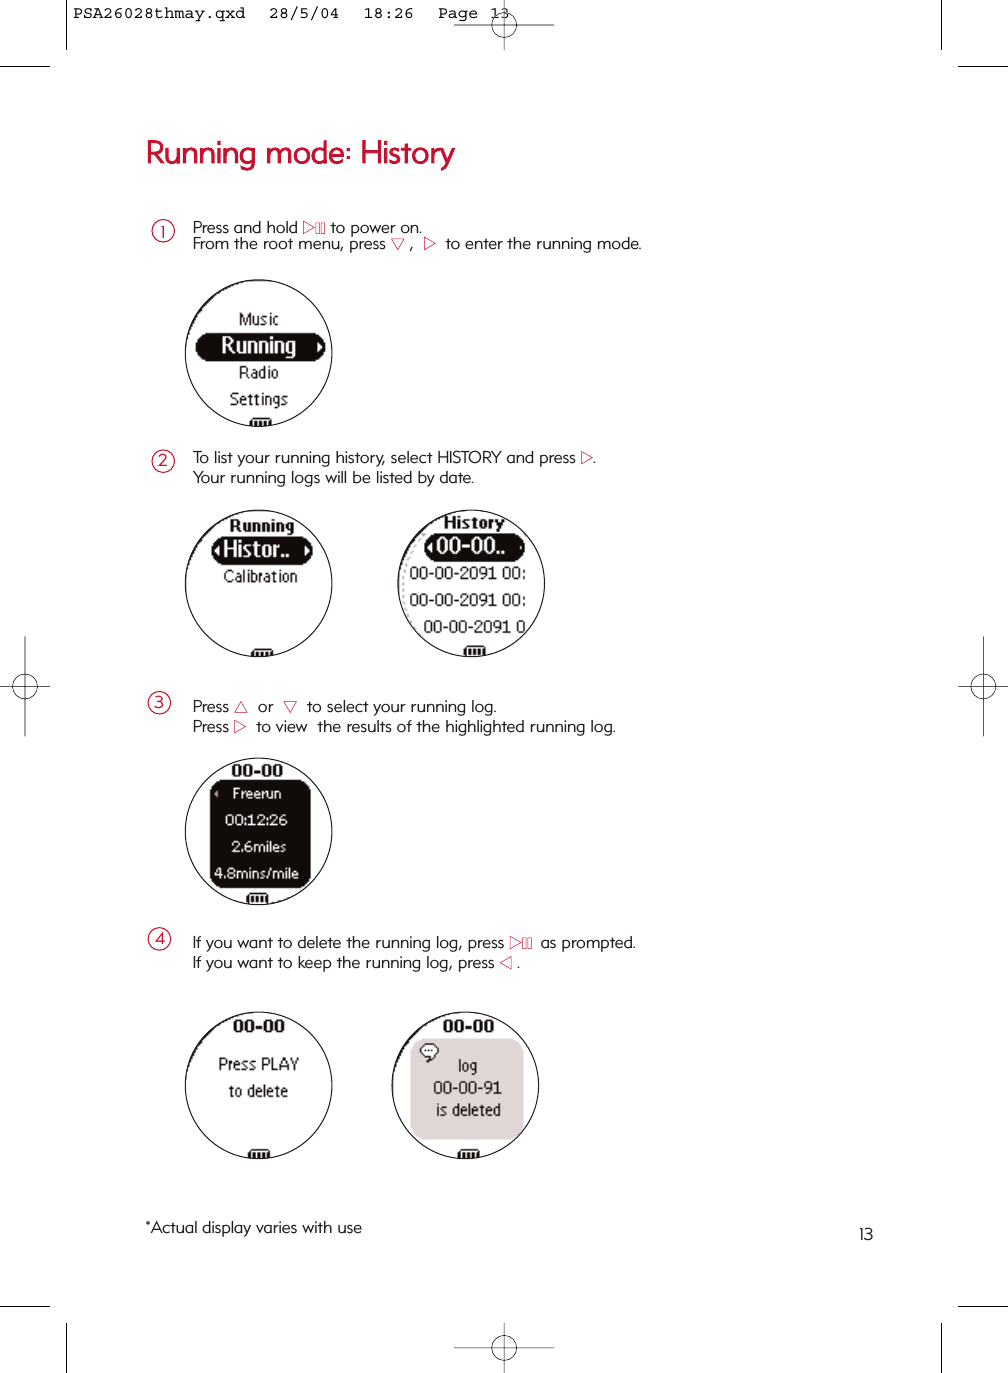
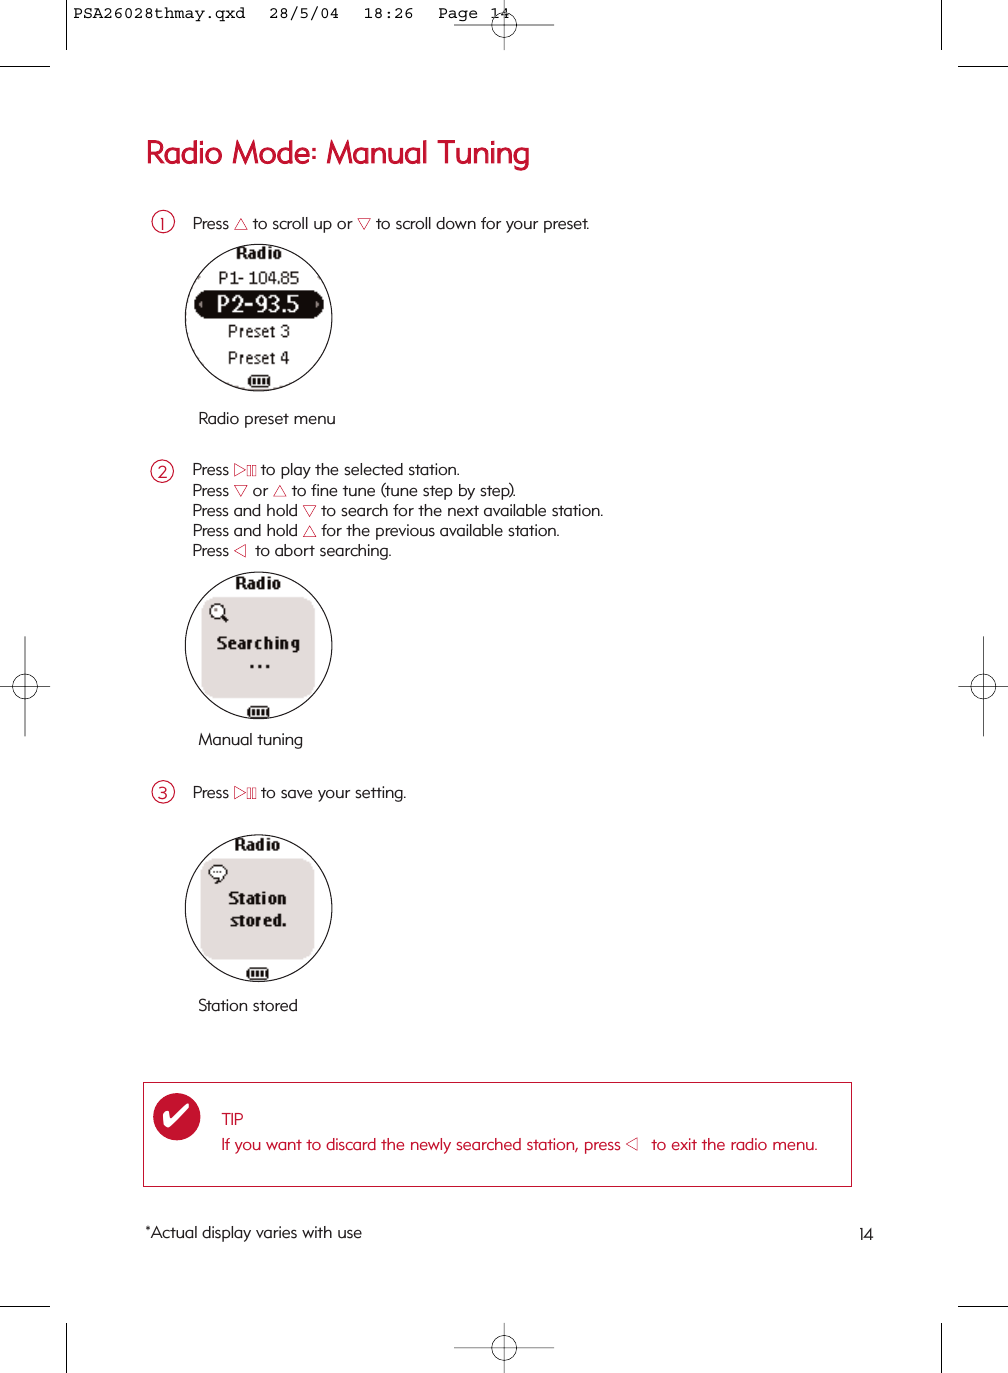
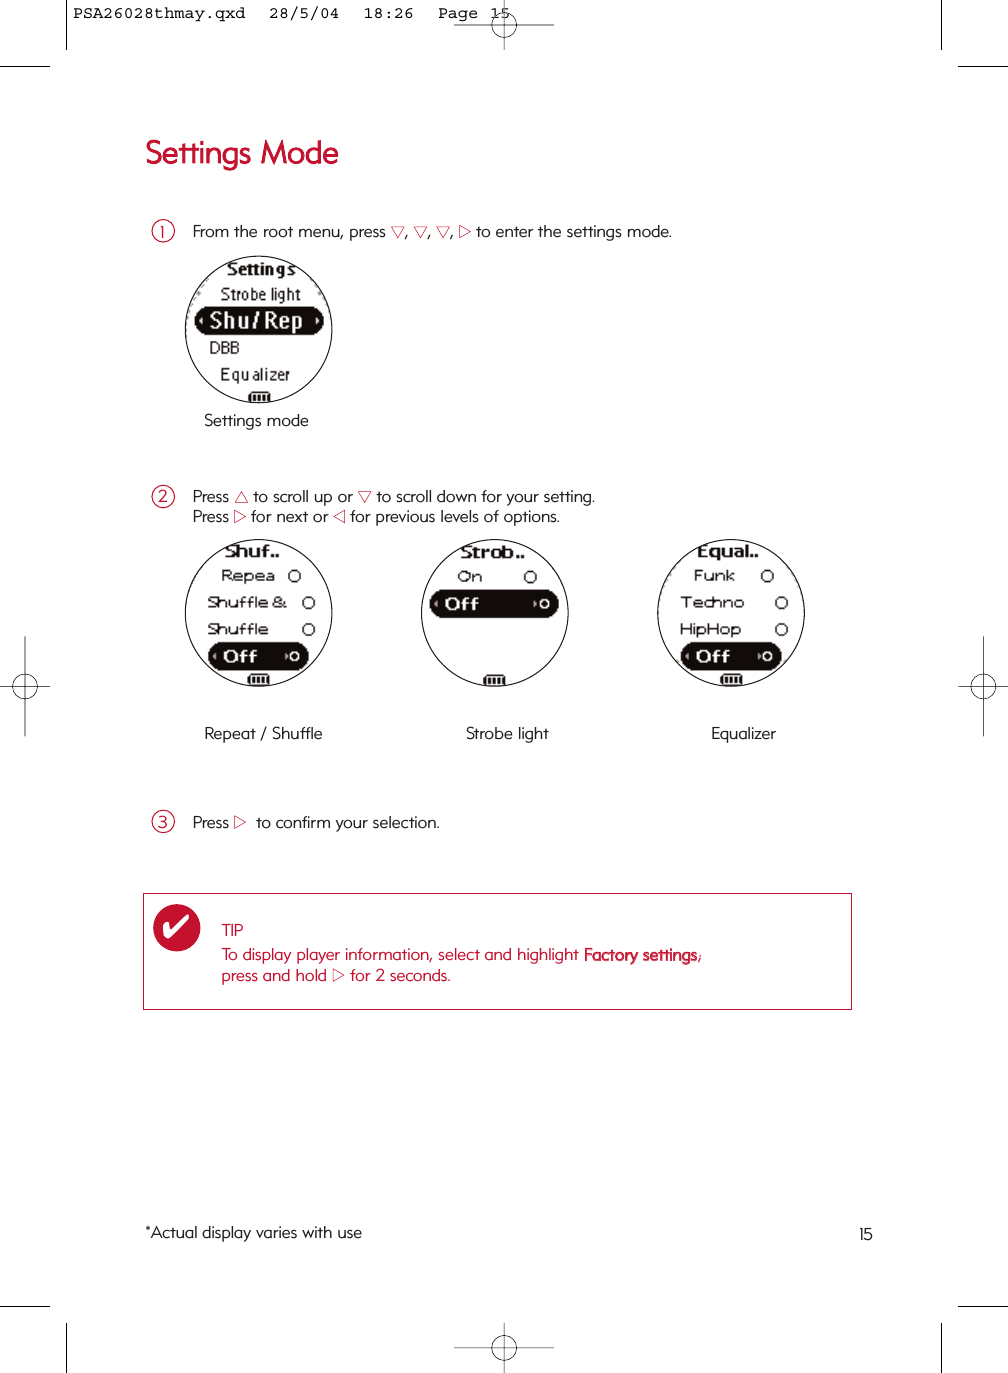
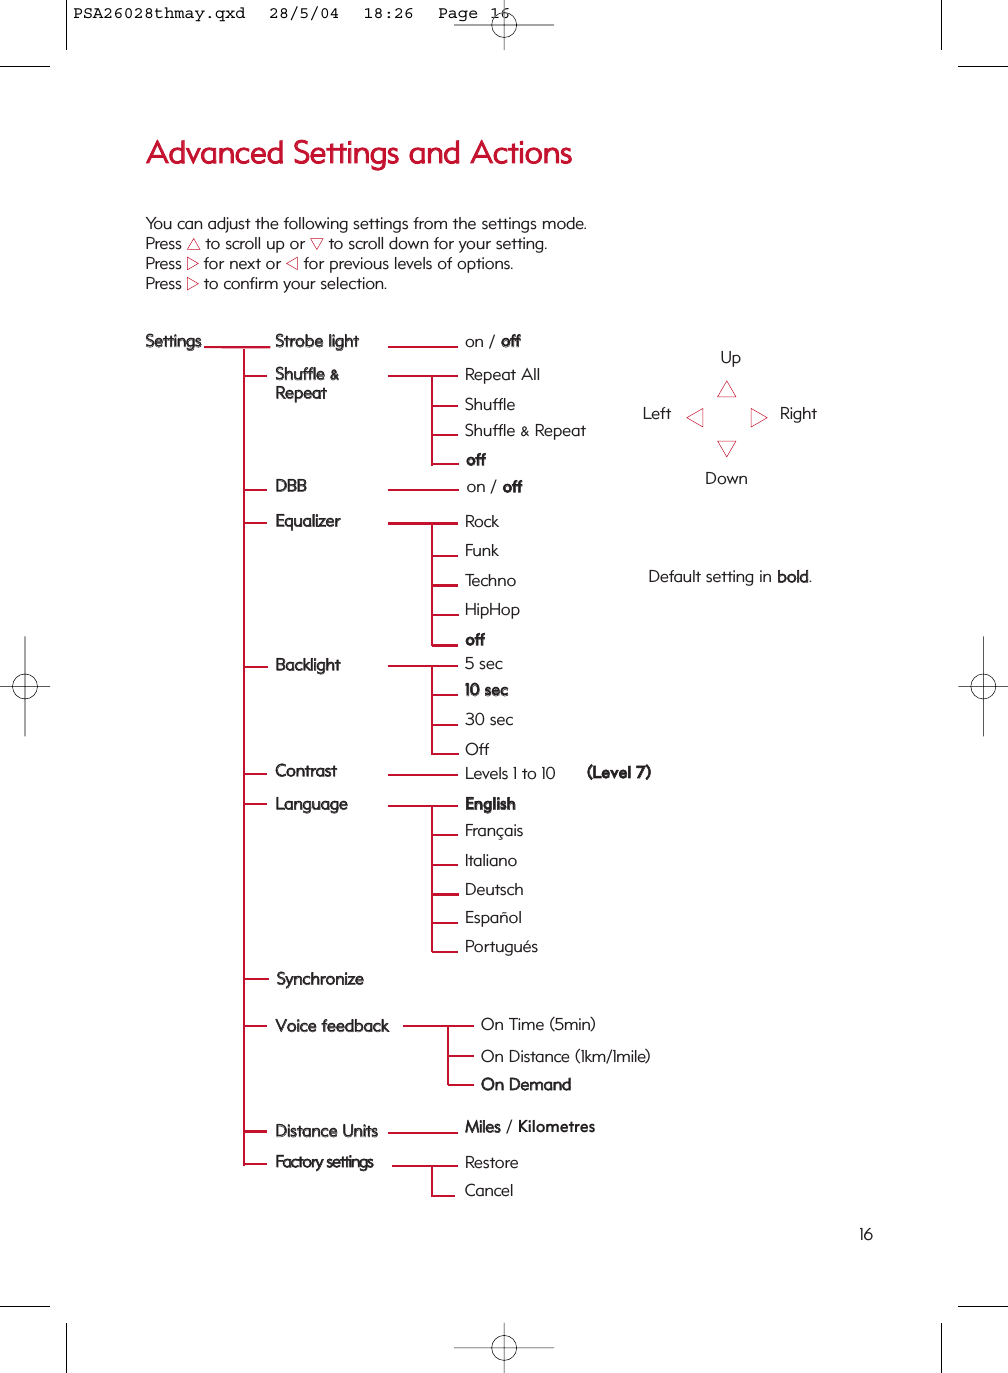
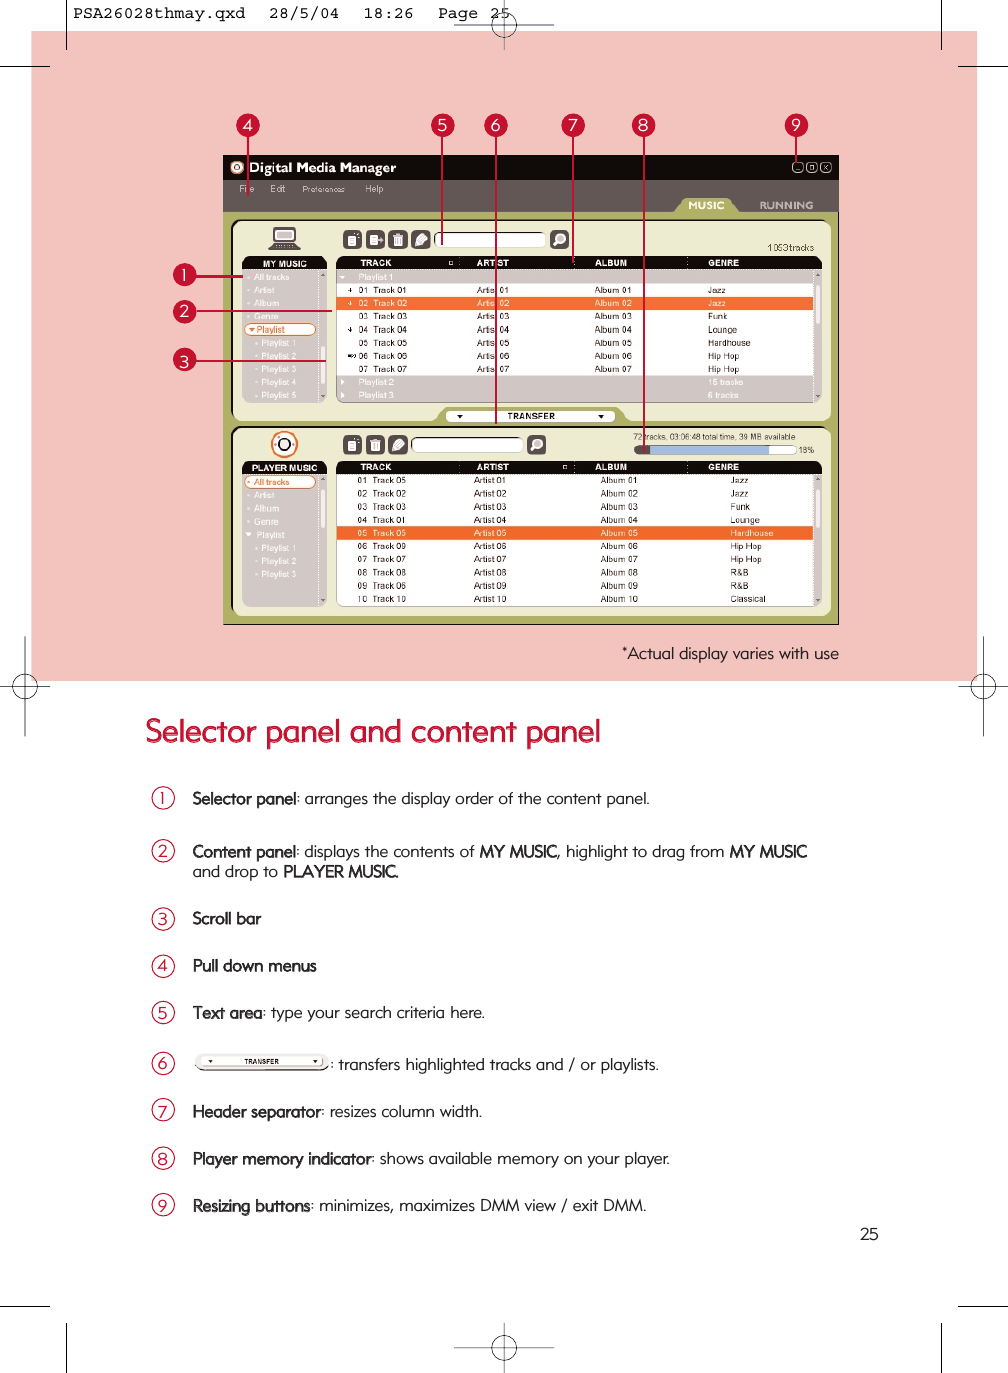
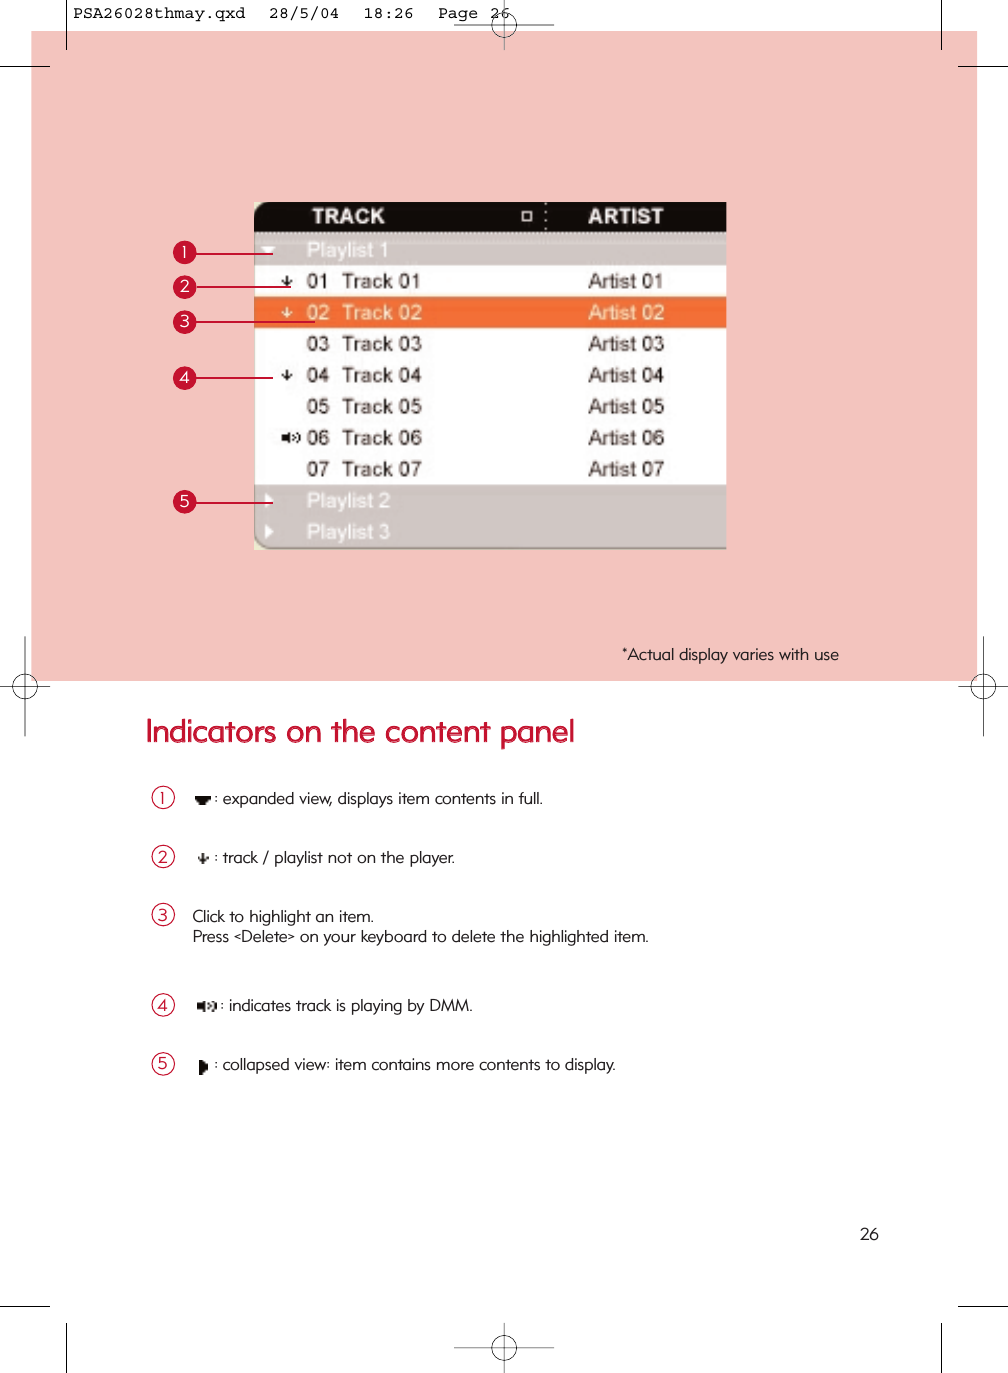
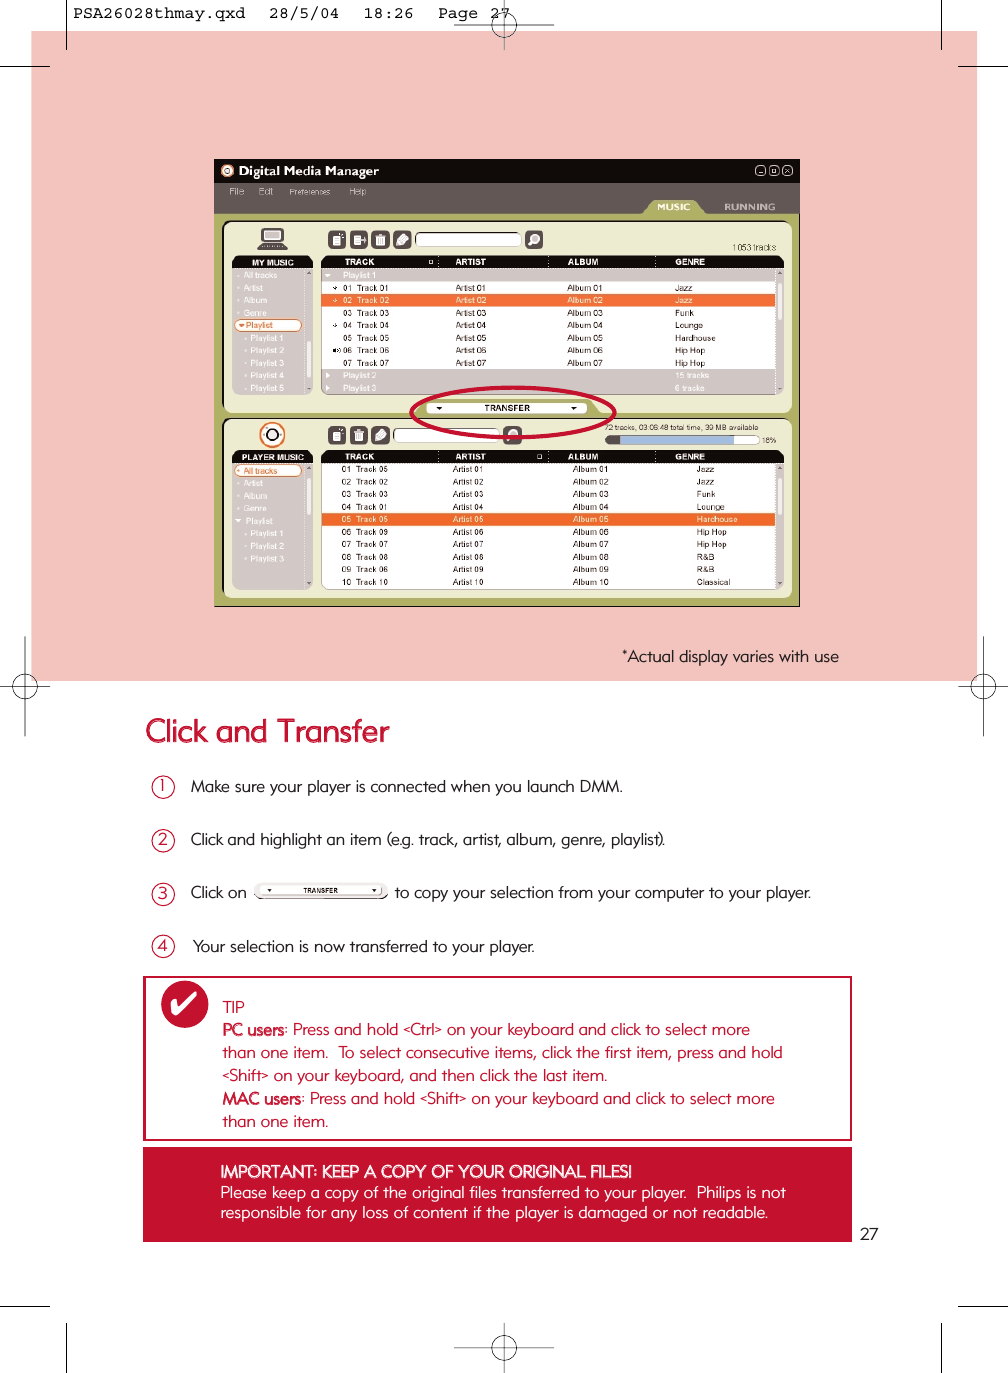
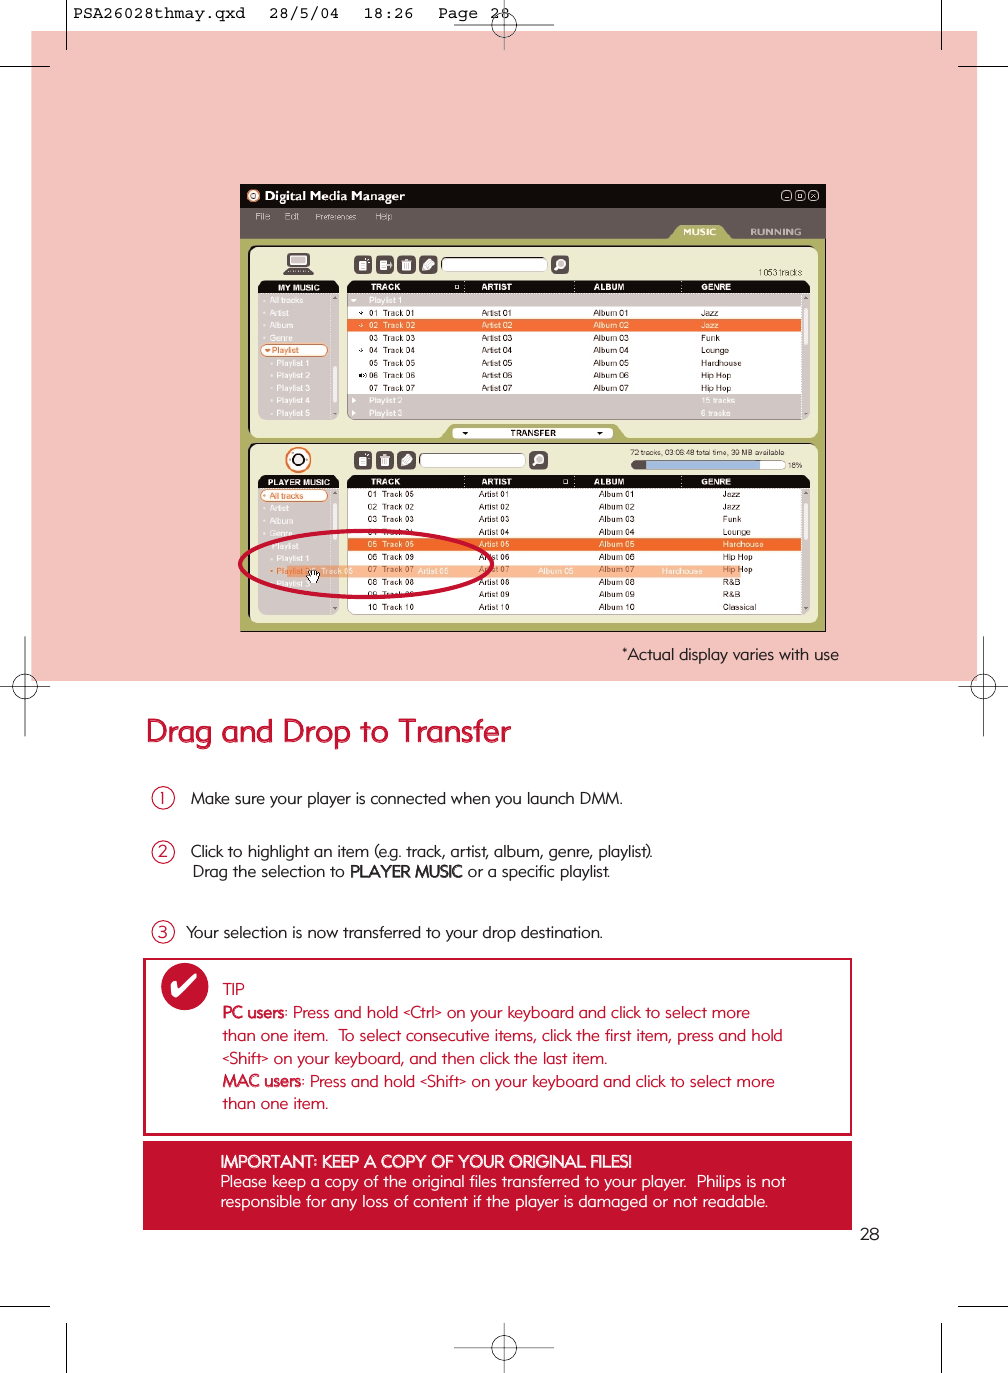
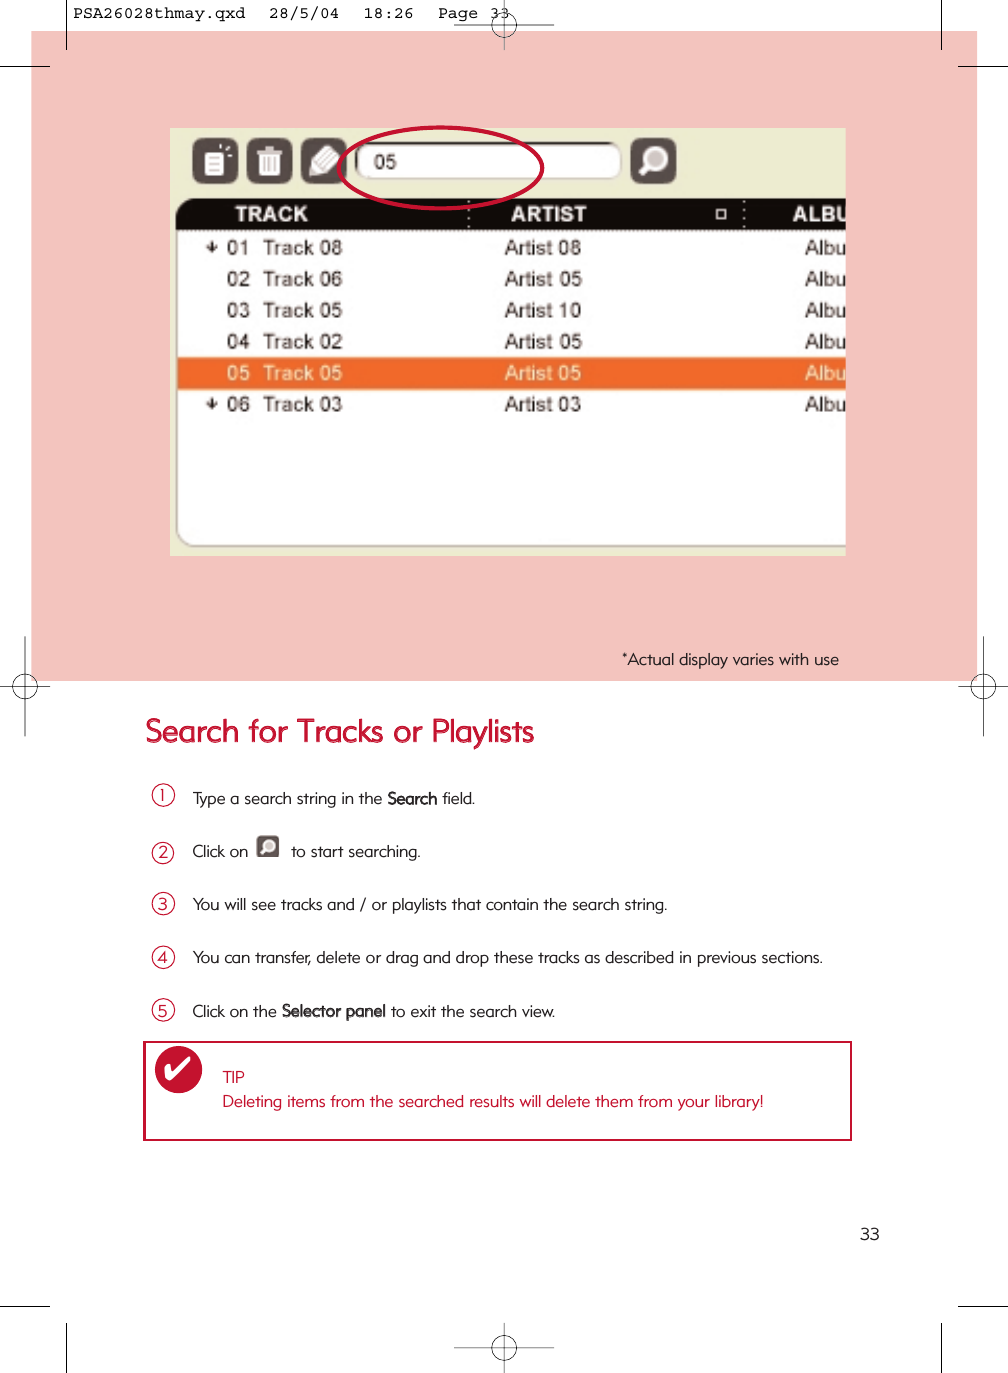
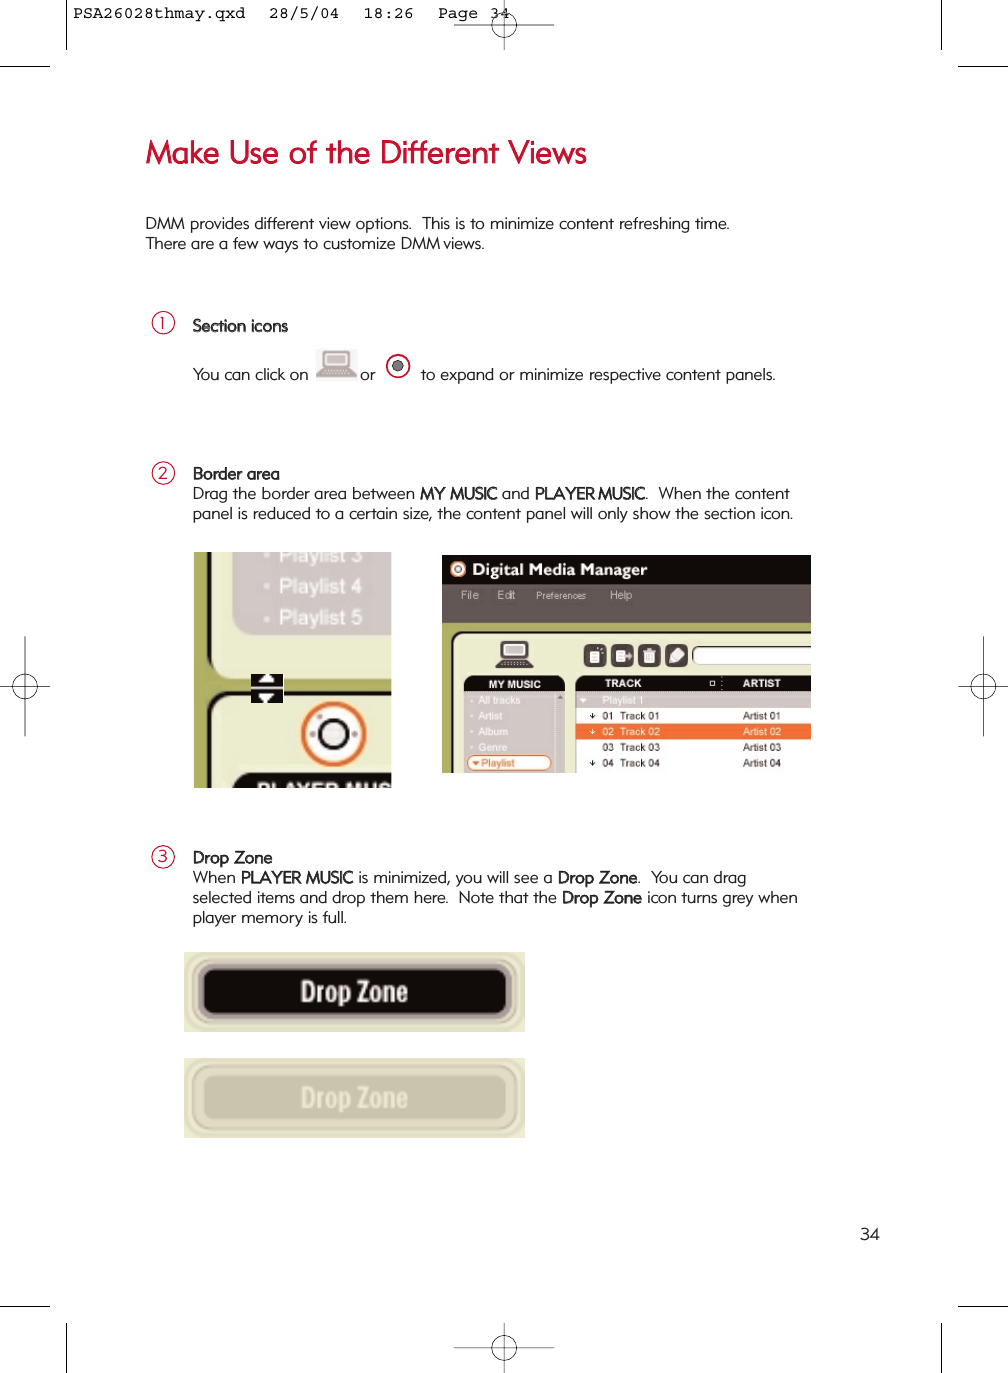
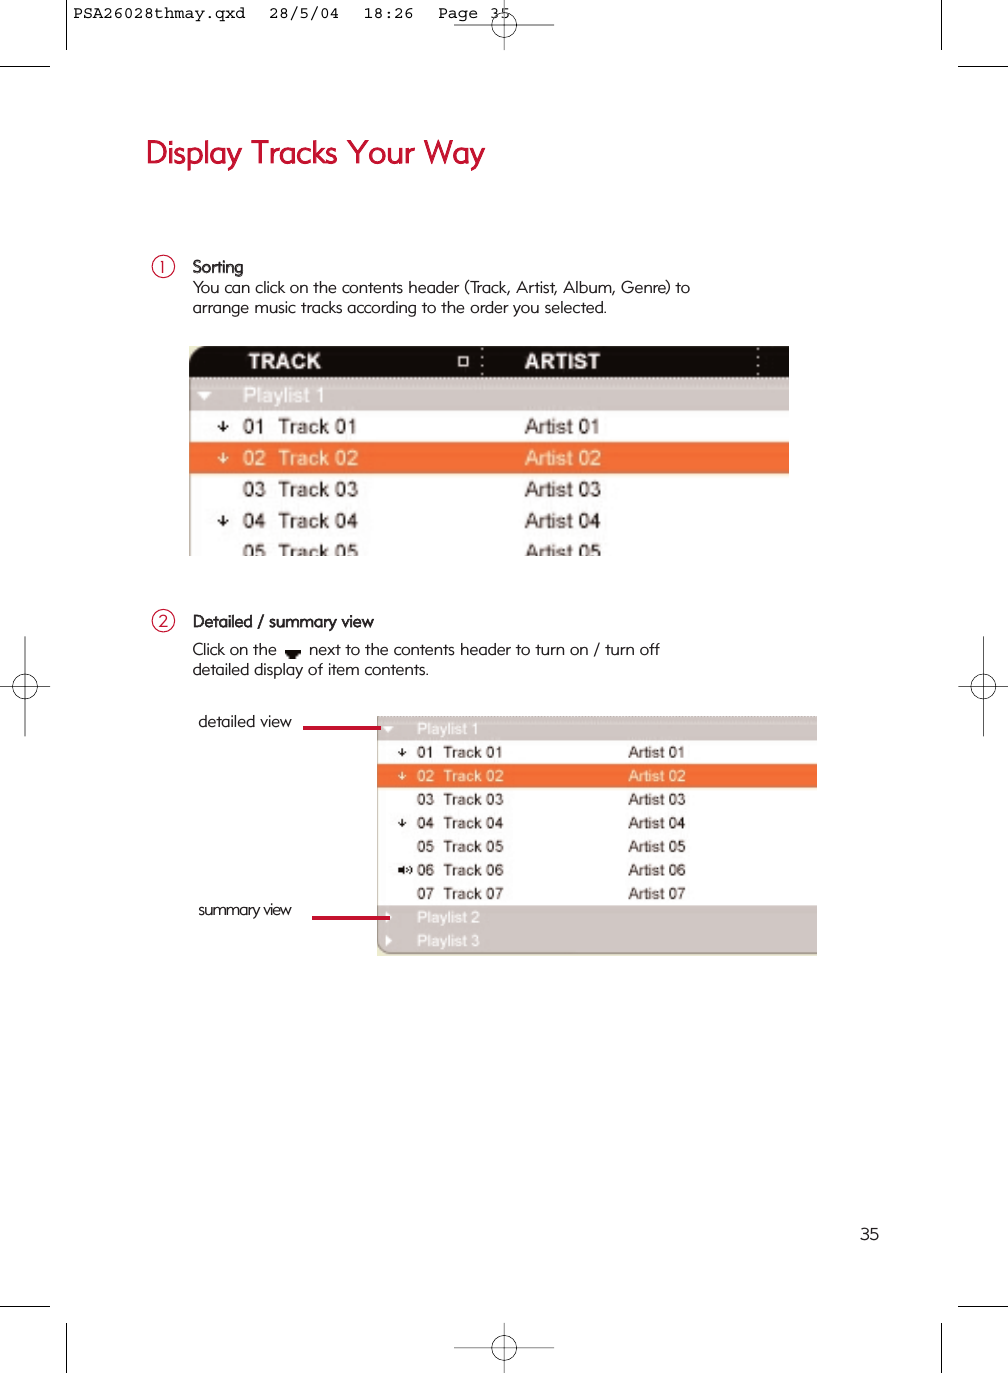
USERS MANUAL
Contents
1.
USERS MANUAL
2.
REVISED USERS MANUAL
USERS MANUAL
Navigation menu
Upload a User Manual
Namespaces
Wiki Guide
HTML
PDF
Info
Views
User Manual
Discussion / Help
Navigation

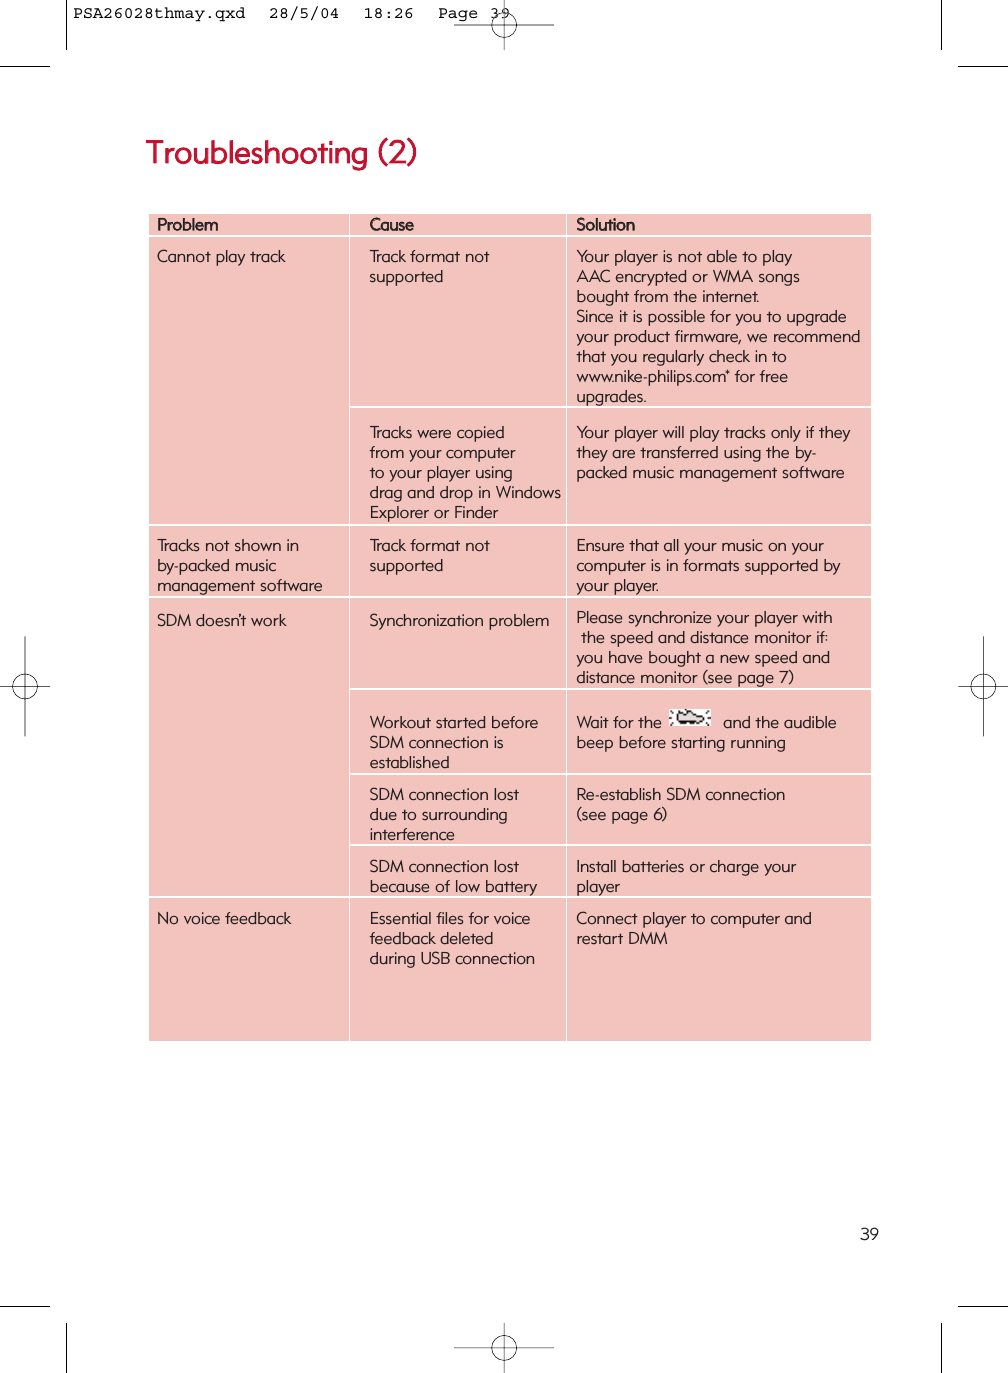
![PPrroobblleemmCCaauusseeSSoolluuttiioonnCannot power on player Battery drained Charge the battery(See page 1, step 2)Loose key press Press and hold 22;;for 2 secondsUSB connected Disconnect player from computer (See page 1, step 5)Firmware / databse error Connect player to computer andrestart DMMUSB doesn’t work Loose connection Check connectionWrong OS version Your operation system must beWin 98SE or Mac OS 10.3 or laterUSB driver not installed Windows 98SE user only: install the USB driver provided in by-packed CDPlayer connected to Connect your player to another Mac keyboard USB portPlayer does not respond Player busy Press and hold [VOLUME +] and 33 to reset. Press and hold 22;;for 2 seconds to power on again if the power on screen does not appear automaticallyAutomatic power off Your player automatically powers if there is no operation and no music played within 60 seconds.Press and hold 22;;to power on.TTrroouubblleesshhoooottiinngg ((11))If a fault occurs, first check the points listed. For further help and other troubleshooting tips,please also check out FAQ for your player at www.nike-philips.com. If you are unable to find a solution from these hints, consult your dealer or service center.WARNING: Under no circumstances should you try to repair the set yourself, as this will invalidatethe warranty.38PSA26028thmay.qxd 28/5/04 18:26 Page 38](https://usermanual.wiki/Garmin-Canada/M7BT.USERS-MANUAL/User-Guide-454515-Page-39.png)