Contents
- 1. Users Manual
- 2. Users Manual_Statement
Users Manual
CONFIDENTIAL
This drawing and the specifications contained herein are the property of
GARMIN Ltd. or its subsidiaries and may not be reproduced or used in whole or
in part as the basis for manufacture or sale of products without written
permission.
Garmin Ltd. or its subsidiaries
C/O Garmin International, Inc.
1200 E. 151st Street
Olathe, Kansas 66062 USA
Sheet 1 of 1
Specification Control Document
Drawing Number:
190-01933-90
Description:
FUSION StereoActive Watersport Stereo QSM (ML)
Revision:
1
Drawn By:
KEG 08/04/16
Revision History
Rev.
Date
Description of Change
ECO No.
1
08/04/16
Experimental Release
----
Printing Specifications
Tolerance:
±0.0787" (±2 mm)
Material:
Cover: 120-lb coated. Text: 80-lb woodfree. Approved equivalents allowed.
Color:
Cover: 4-color process. Text: Black ink.
Bindery:
Saddle stitch. Approved equivalents allowed.
Folds:
Not Applicable
Trimmed Dimensions:
260 mm x 160 mm
Finished Dimensions:
130 mm x 160 mm
Notes:
This part shall comply with Garmin Banned & Restricted Substances (GPN 001-00211-00).
Content Management System (CMS) Details
GUID:
GUID-4559D1B6-3AF6-40E6-B836-D60F876C8C54
Version:
1
Language(s):
EN-US, FR-FR, IT-IT, DE-DE, ES-XM, PT-BR, NL-NL
Notes
®
FUSIONENTERTAINMENT.COM
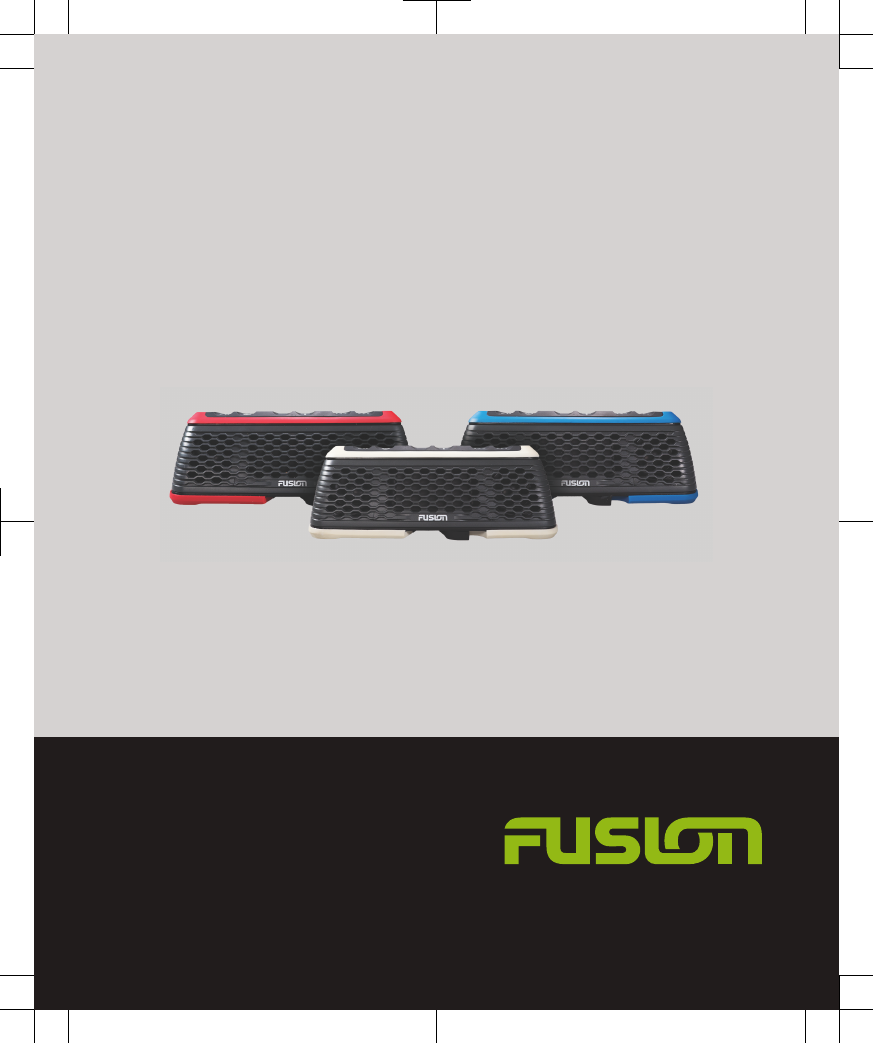
FUSION® STEREO
ACTIVE
™
Quick Start Manual
ENGLISH
Getting Started
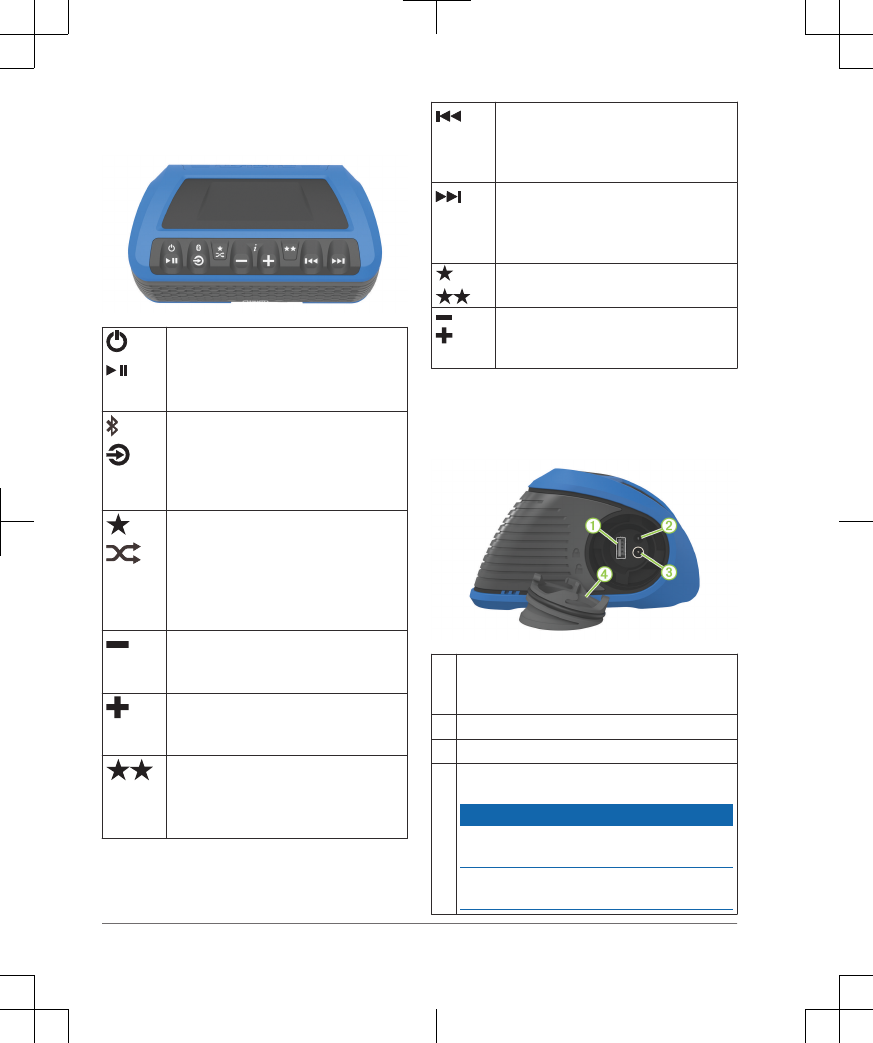
STEREOACTIVE Controls
• Press and hold to turn on the stereo.
• Press and hold to turn off the stereo.
• AM/FM: Press to mute.
• USB/Bluetooth®: Press to pause.
• Press and hold to put in Bluetooth
discoverable mode to pair with a
Bluetooth wireless device.
• Press to move through the available
sources.
• AM/FM:
◦ Press and hold to save the
current station as a preset.
◦ Press to select the preset station.
• USB flash drive: Press to start and
stop shuffling.
• Press to decrease the volume.
• Press and hold to quickly decrease
the volume.
• Press to increase the volume.
• Press and hold to quickly increase
the volume.
AM/FM:
• Press and hold to save the current
station as a preset.
• Press to select the preset station.
• AM/FM/Weather band: press to tune
to the previous station.
• USB/Bluetooth: press to skip to the
previous track.
• AM/FM/Weather band: press to tune
to the next station.
• USB/Bluetooth: press to skip to the
next track.
and Press and hold both keys to cycle
through and select the tuner region.
and Press both keys to hear information
about the battery status, source, and
station.
NOTE: The weather band is available only in
North America.
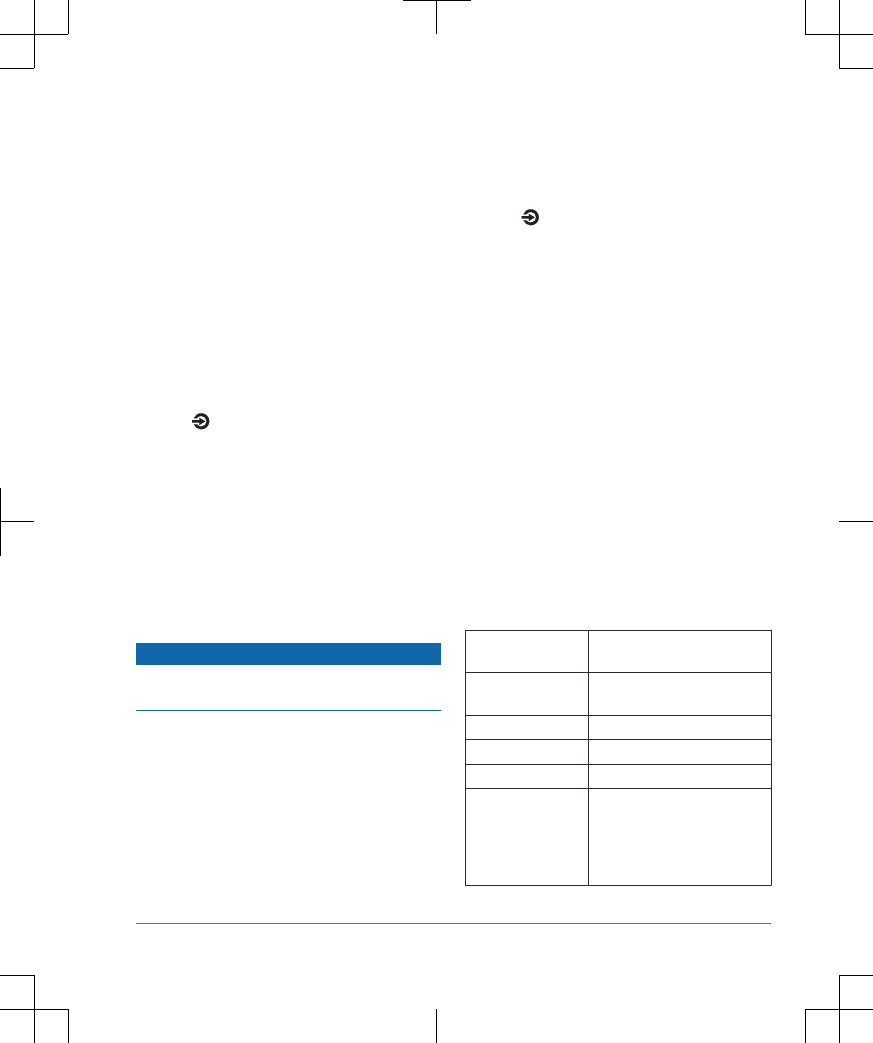
STEREOACTIVE Connectors
ÀUSB port for your mobile device connection or
a low-profile USB flash drive. Charges your
mobile device.
ÁCharging status LED
ÂPower cable port
ÃEnd cap. When properly replaced, this end
cap provides a water tight cover.
NOTICE
The end cap must be properly replaced to
achieve the IPX7 water rating.
The end cap does not float and is not tethered
to the stereo. Use caution when removing it.
2 Getting Started
NOTE: The other end of the stereo provides a
place for you to connect a lanyard to tether the
stereo.
Downloading the Owner's Manual
For more information about the features
discussed in this manual, download the latest
owner's manual and translations of manuals
from the web.
1 Go to www.stereoactive.com.
2 Select the Product Support tab.
3 Under Manuals & Downloads, select a
manual to download.
Attaching the FUSION Puck™ Mount
You can attach the puck mount to a flat
surface using the included adhesive or
screws. Refer to the manual for the item on
which you are mounting the puck mount for
information about the preferred mounting
style.
If these mounting options are not sufficient for
your mounting surface, go to
www.stereoactive.com for more mounting
accessories.
Attaching the Puck Mount Using Adhesive
NOTICE
Before placing the adhesive on the mounting
surface, make sure that the location and
orientation are correct. It is extremely difficult
to remove the adhesive. The adhesive and
puck mount cannot be reused after being
removed from a surface. Some mounting
surfaces might be damaged after removing the
adhesive.
1Select an appropriate location for the
stereo.
Before securing the puck mount, make
sure it is oriented in the preferred direction.
2Thoroughly clean and dry the mounting
surface using a mixture of water and
isopropyl alcohol.
The mounting surface must be free of dirt,
debris, wax, or coatings.
3Remove the white backing from the
adhesive.
4Press the adhesive to the bottom of the
puck mount.
5Remove the red backing from the
adhesive.
6Carefully orient the puck mount, and press
the puck mount firmly onto the mounting
surface.
7Allow the puck mount to sit at room
temperature for 72 hours.
NOTICE
Before attaching the stereo to the puck mount,
allow the adhesive to bond to the mounting
surface for 72 hours. Failure to allow adequate
bonding time may cause the mount to detach
from the surface, which could result in damage
to the stereo or mount.
Attaching the Puck Mount Using Screws
NOTICE
Before screwing into the surface, check with
the manufacturer of the item on which you are
mounting the puck to verify that screws should
be used. Some surfaces are too thin to
support screws, and the adhesive should be
used on these surfaces.
1Select an appropriate location for the
stereo.
Before securing the puck mount, make
sure it is oriented in the preferred direction.
Getting Started 3
2Using the puck mount as a template, mark
the location of the holes.
3Remove the mount.
4Using a drill bit appropriate for the
mounting surface, drill the pilot holes.
5Secure the mount to the surface with the
included screws or other screws suitable
for the surface.
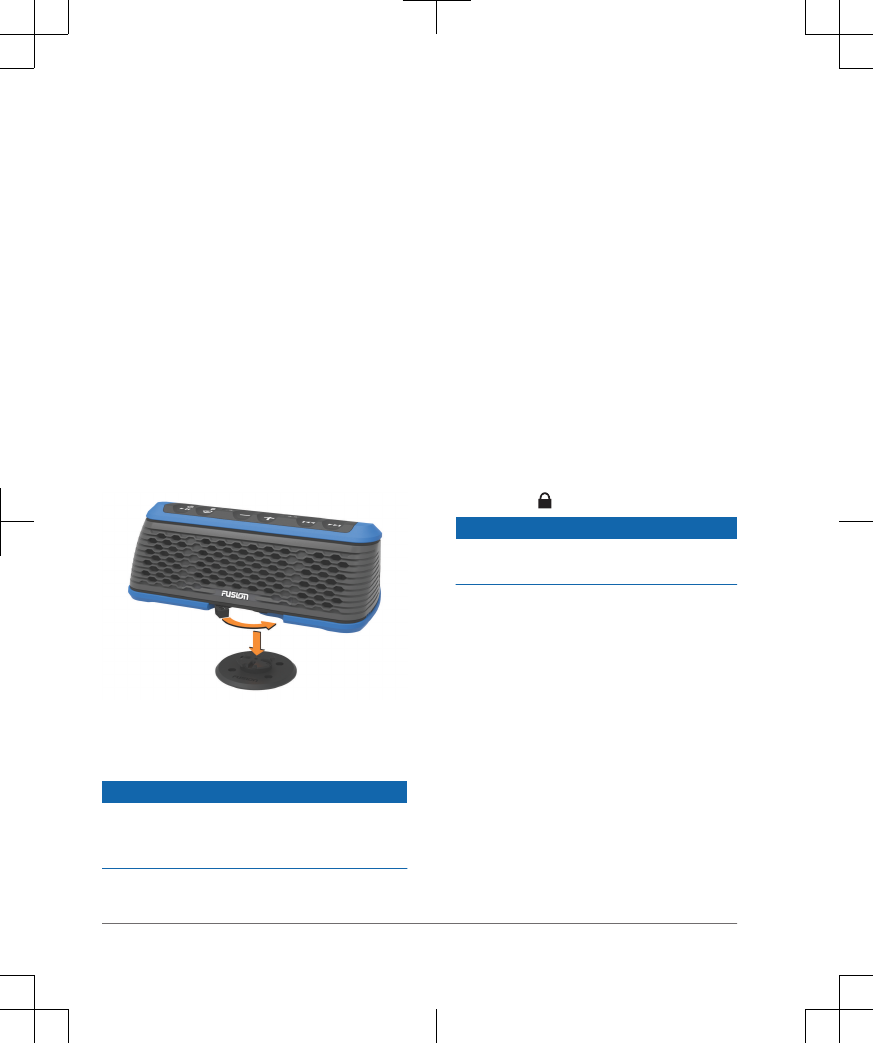
Attaching the Stereo to the Puck
Mount
1Slide the locking lever fully to the left.
2Place the stereo on the puck in the
direction that provides the best listening
experience.
You can place the stereo on the puck in
four different directions to aim the
speakers in the right direction.
3Slide the locking lever to the right to lock
the stereo on the puck.
Charging the STEREOACTIVE Stereo
NOTICE
To prevent corrosion, thoroughly dry the
power port and the surrounding area before
charging.
NOTE: The battery will not charge when
outside the temperature range of 10° to 45°C
(50° to 113°F).
1Twist the end cap counter-clockwise and
pull off the cap.
2Plug the power cable into the power port.
3Plug the AC power adaptor into a standard
wall outlet.
When the battery is charging, the LED is
on.
4Charge the battery completely.
It takes approximately 3 hours to fully
charge the battery. The LED turns off
when the stereo is fully charged.
5Remove the power cable.
6Insert the end cap and twist it clockwise as
far as it will turn, aligning the dot on the
cap with the on the stereo.
NOTICE
The end cap must be properly replaced to
achieve the IPX7 water rating.
Installing a Different Language for the
Voice Prompts
You can change the language of the voice
prompts. Choose from Dutch, French,
German, Italian, and Spanish.
1Go to www.stereoactive.com.
2Select the Product Support tab.
3Under Software Updates, select the
language to install.
4Follow the on-screen instructions.
Connecting Devices
You can connect media player devices to the
stereo using Bluetooth wireless technology or
4 Connecting Devices
the USB port. You can also control the stereo
with a Garmin® watch. For a list of a
compatible devices, go to
www.stereoactive.com.
Controlling the Stereo with a
Compatible Bluetooth Device
You can play media from a compatible
Bluetooth device using the Bluetooth wireless
connection.
1Enable Bluetooth on your compatible
Bluetooth device.
2Bring the compatible Bluetooth device
within 10 m (33 ft.) of the stereo.
3On the STEREOACTIVE stereo, press and
hold until you hear Discoverable.
4On your compatible Bluetooth device,
select StereoActive from the list of
discovered devices.
5If your compatible Bluetooth device does
not connect to the stereo, repeat steps 1
though 4.
6Play music using your Bluetooth device.
Controlling the Stereo with a
Compatible USB Device
NOTICE
The end cap must be properly replaced to
achieve the IPX7 water rating.
You can connect a USB flash drive,
compatible Apple® IAP2 device, or compatible
Android™ AOA device to the USB port to play
music and charge compatible Apple or
Android devices.
Controlling the Stereo with a Garmin
Watch
For more information about the watch, see the
watch manual at www.garmin.com/manuals.
1Following the instructions in the watch
manual, install the FUSION-Link™ app
from the Connect IQ™ store onto the
watch.
2On the STEREOACTIVE stereo, press and
hold until you hear Discoverable.
3Bring the watch within 3 m (10 ft.) of the
stereo.
NOTE: Stay 10 m (33 ft.) away from other
ANT® devices while pairing.
4Open the FUSION-Link app on the watch.
The first time you open the app on the
watch, the watch automatically pairs with
and connects to the stereo. If you need to
pair to another stereo, in the FUSION-Link
app, select Settings > Pair new.
5Control the audio playback using the
FUSION-Link app on the watch.
After the devices are paired, they connect
automatically when they are turned on, within
range, and the app is open on the watch.
More Information
Specifications
Water rating Fully gasketed, floatable, IEC
60529 IPX7*
Dimensions (W × H
× D)
236 mm (9.29 in.) × 82 mm
(3.23 in.) × 139 mm (5.47 in.)
Weight 1.3 kg (2.87 lb.)
Battery type Rechargeable lithium-ion
Battery life Up to 20 hr.
Charging
requirements
100 to 240 Vac AC power
adaptor (included) or 12 Vdc
2 A car adaptor (optional
accessory); charges within
3 hours
More Information 5
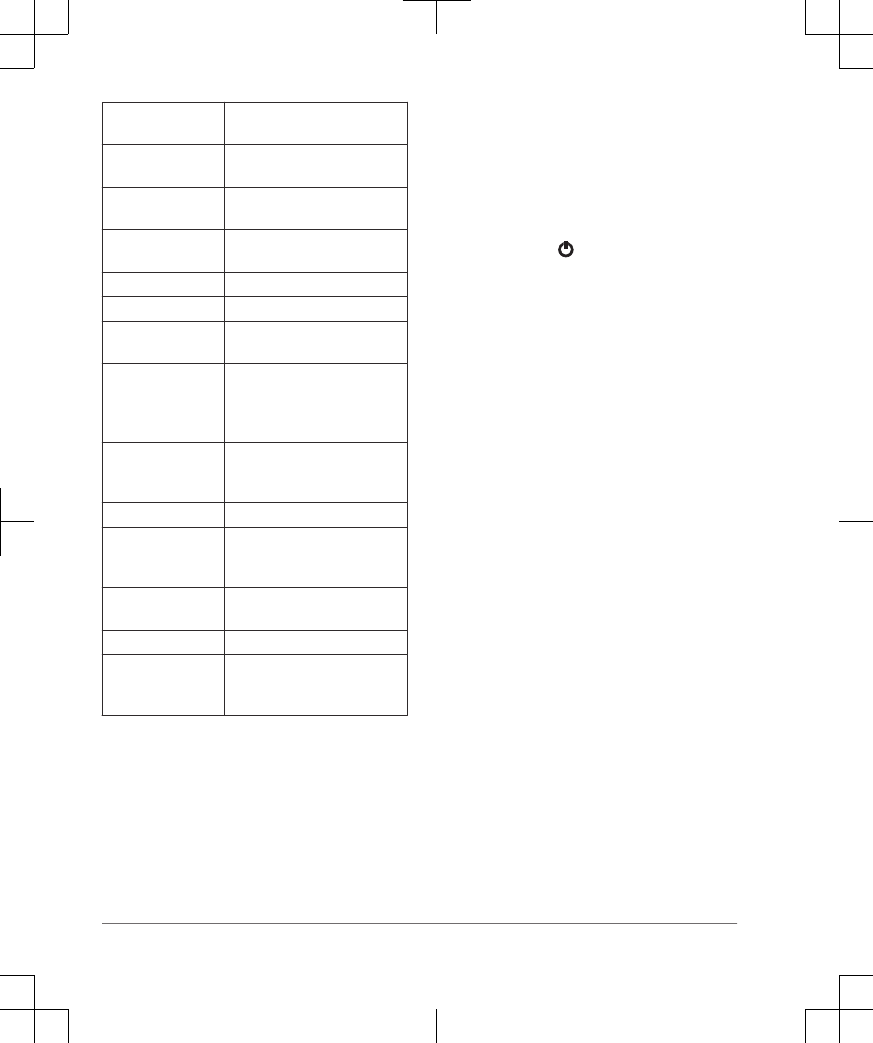
Operating
temperature range
From 0° to 50°C (from -32°
to 122°F)
Charging
temperature range
From 10° to 45°C (from 50°
to 113°F)
Long-term storage
temperature range
From -20° to 70°C (from -4°
to 158°F)
Bluetooth wireless
range
Up to 10 m (33 ft.)
Bluetooth profiles A2DP, AVRCP
Bluetooth version 4.1
ANT wireless
range
Up to 3 m (10 ft.)
USB Type A port for USB flash
drive or media player
connection, also provides 1 A
charging
USB compatibility Android Open Accessory
(AOA) devices, iAP2 Apple
devices
USB format FAT32
USB audio format MP3, max. 250 files per
folder, max. 8 GB USB flash
drive
Speakers 2 x 2.5 in. with passive
radiator
Amplifier Class D, 2 x 20 W RMS
Tuner FM/AM (Japan, Australasia,
Europe, USA), weather band
(North America only)
*The device can withstand submersion in 1
meter of water for up to 30 minutes.
Exceeding this will result in permanent
damage to the stereo and void your warranty.
Registering Your STEREOACTIVE
Help us better support you by completing our
online registration today.
• Go to www.fusionentertainment.com.
• Keep the original sales receipt, or a
photocopy, in a safe place.
Troubleshooting
My stereo does not respond to my key
presses
• Charge the stereo (page 4).
• Press and hold for 12 seconds.
There is interference on the audio when
listening to AM radio
• Remove the power cable from the stereo’s
power cable port, and move the stereo
away from the AC power adaptor.
• Unplug the AC power adaptor from the
wall outlet.
• Move the stereo away from other AC
power adaptors.
6 More Information


®
FUSIONENTERTAINMENT.COM
FUSION SUPPORT
New Zealand 09 369 2900
Australia
Europe
USA
Pacific
1300 736 012
+44 (0) 370 8501244
623 580 9000
+64 9 369 2900
Garmin®, the Garmin logo, FUSION®, and the Fusion logo are
trademarks of Garmin Ltd. or its subsidiaries, registered in the USA
and other countries. FUSION Puck™ and StereoActive™ are trademarks
of Garmin Ltd. or its subsidiaries. These trademarks may not be used
without the express permission of Garmin.
Android™ is a trademark of Google™ Inc. Apple® is a trademark of
Apple Inc., registered in the U.S. and other countries. Bluetooth® word
mark and logos are owned by the Bluetooth SIG, Inc. and any use of
such marks by Garmin is under license. Other trademarks and trade
names are those of their respective owners. 190-01933-90_01
August 2016
Printed in Taiwan