GemTek Technology A910805 Wireless AP Client User Manual Manual
Gemtek Technology Co., Ltd. Wireless AP Client Manual
Manual
Before You Begin
You must have at least the following:
An Ethernet-enabled device, such as a game console, laptop or desktop computer,
network printer or set-top box that will connect to the DWL-810
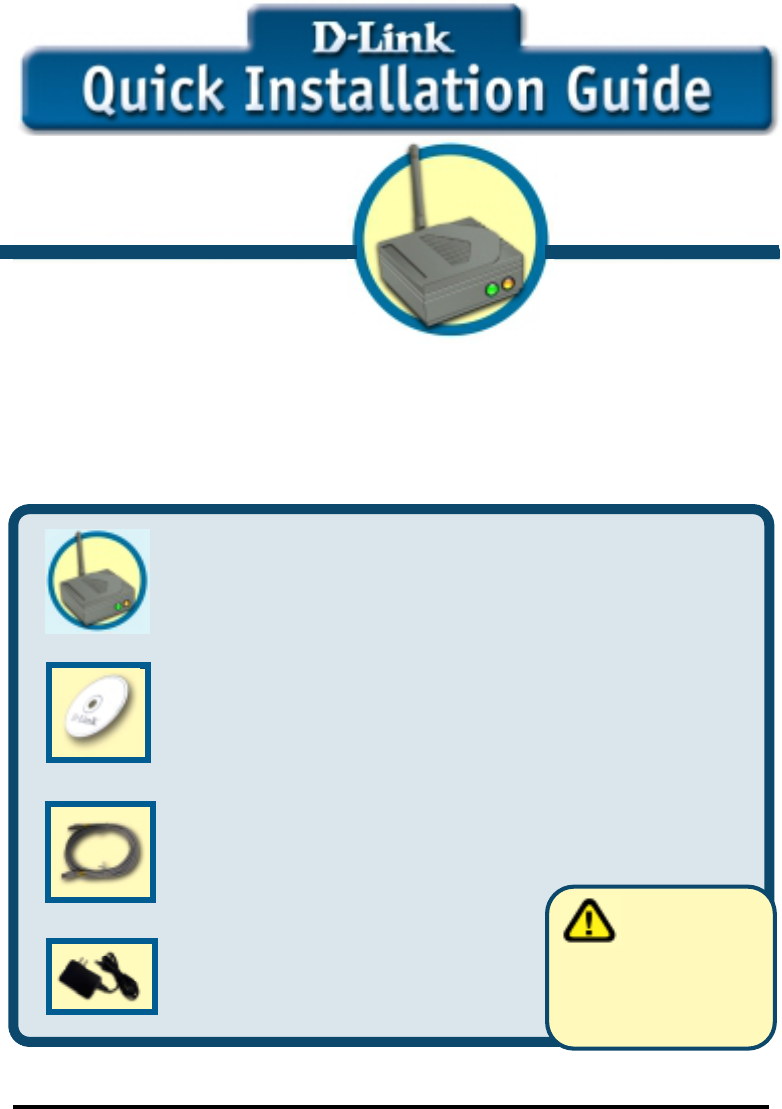
Check Your Package Contents
These are the items included with your DWL-810 purchase:
If any of the above items are missing, please contact your reseller.
©2002 D-Link Systems, Inc. All rights reserved. Trademarks or registered trademarks are the property of their respective
holders. Software and specifications subject to change without notice. DWL-810. 07082002
DWL-810
D-Link Air™
Ethernet-to-Wireless Bridge
• DWL-810 Ethernet-to-Wireless Bridge
• CD-ROM (containing Manual and Warranty)
• Ethernet (CAT5 UTP) Cable
• 5V DC 2.5A Power Adapter
Using a power
supply with a different
voltage rating will damage
this product and void its
warranty.
Web-based Configuration will
require a current web browser, i.e.,
Internet Explorer 5.x, Netscape
Navigator 4.x.
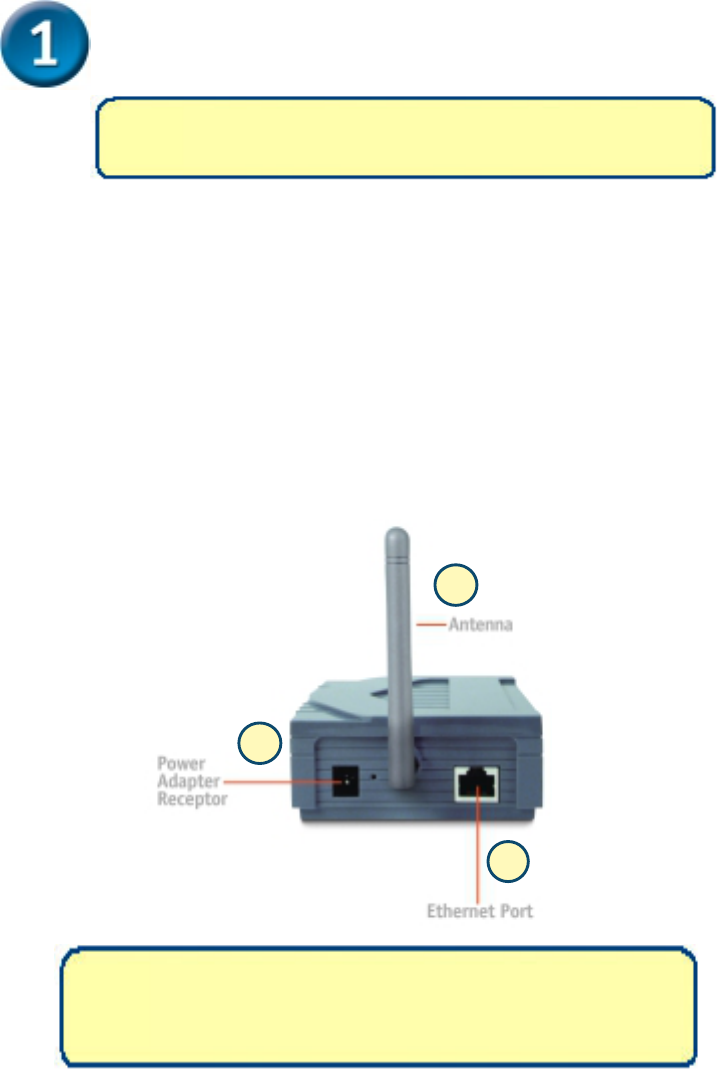
Connecting the DWL-810 Ethernet-to-Wireless
Bridge to your Ethernet-enabled device
A. First, connect the power adapter to the receptor at the back panel of the
DWL-810 and then plug the other end of the power adapter to a wall
outlet or power strip. The Power LED will turn ON to indicate proper
operation.
B. Insert one end of the Cross-Over Ethernet cable (included) to the Ethernet
port on the back panel of the DWL-810 and connect the other end to the
Ethernet port located on the device (e.g., a Set Top Box, Gaming Console,
laptop or desktop computer, or network printer.) The LED light will
illuminate to indicate proper connection.
C. The antenna is used by the DWL-810 to connect to other 802.11b
wireless devices.
If you are wirelessly connecting the DWL-810 to an
Access Point or Wireless Router on a larger wireless
network, additional configuration is required (see
Step 3 )
No configuration of the DWL-810 is needed if your setup is
similar to Setup #1 (shown on the following page, in Step 2.)
B
C
A
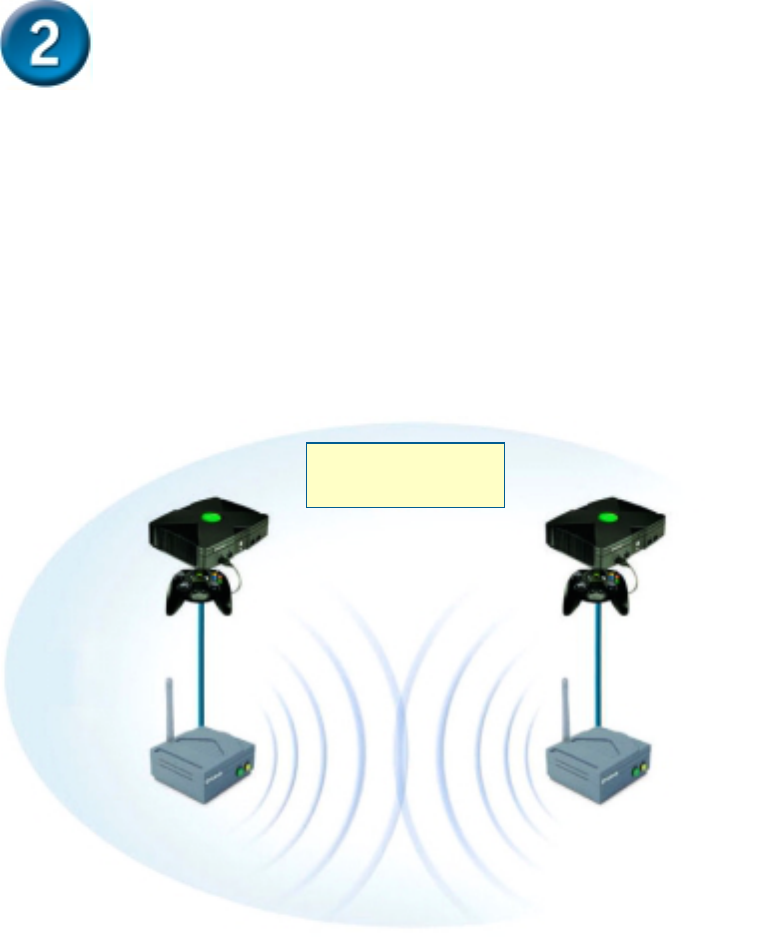
How the DWL-810 Ethernet-to-Wireless
Bridge Connects to other Wireless
Devices
When you have completed the steps in this Quick Installation Guide,
and you have connected the DWL-810 to your host computer, set
top box, or gaming console, you will be able to wirelessly connect
to other 802.11b wireless devices to share files, join multiplayer
video games or even share your internet connection over the
wireless network (Setup #2.)
Setup #1
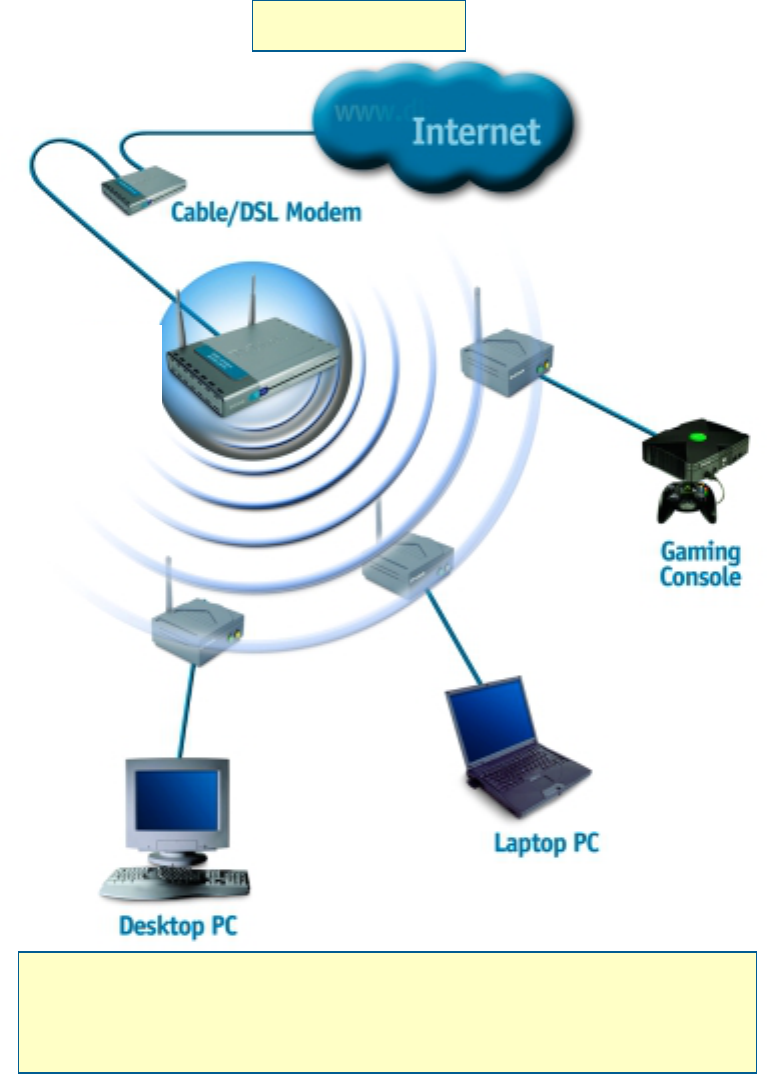
Setup #2
If you are connecting in Setup #2 mode (as shown above), please
continue to Step 3 in this guide. If you are connecting in Setup #1
mode, no further configuration is needed! You are ready to enjoy your
connection with the DWL-810 right now!
Wireless
Router
Web-based Configuration
If you need to configure the DWL-810, follow the steps below:
Before You Begin the Configuration
It’s best to use a computer (with an Ethernet adapter) that is connected directly to the
DWL-810 for configuration. The default IP address for the DWL-810 is 192.168.0.30
with a Subnet Mask of 255.255.255.0. You will need to assign your computer a Static
IP address within the same range as the DWL-810’s IP address in order to configure
the DWL-810. See the Appendix in this Quick Installation Guide if you need
assistance in assigning a Static IP address.
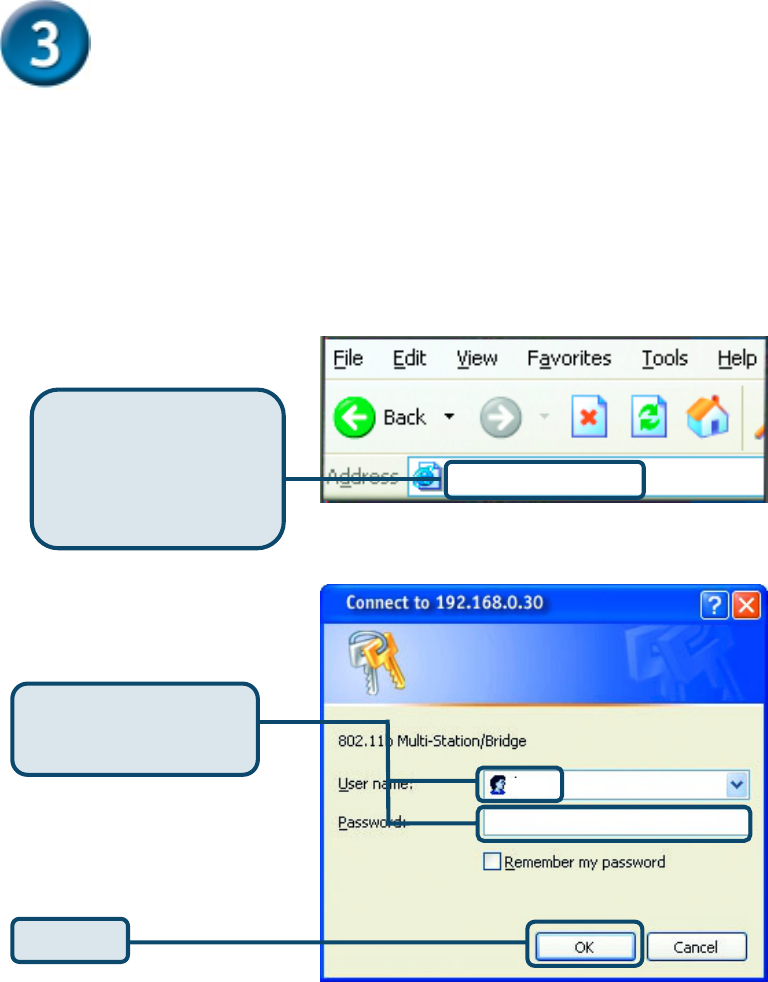
The configuration window will open, as shown on the next page.
Type “admin” for the
username and leave the
password field blank.
Click OK
The logon pop-up
screen will appear.
htt
p
://192.168.0.30
Open your Web
browser and type
“http://192.168.0.30”
into the URL address
box. Then press the Enter
or Return key.
admin
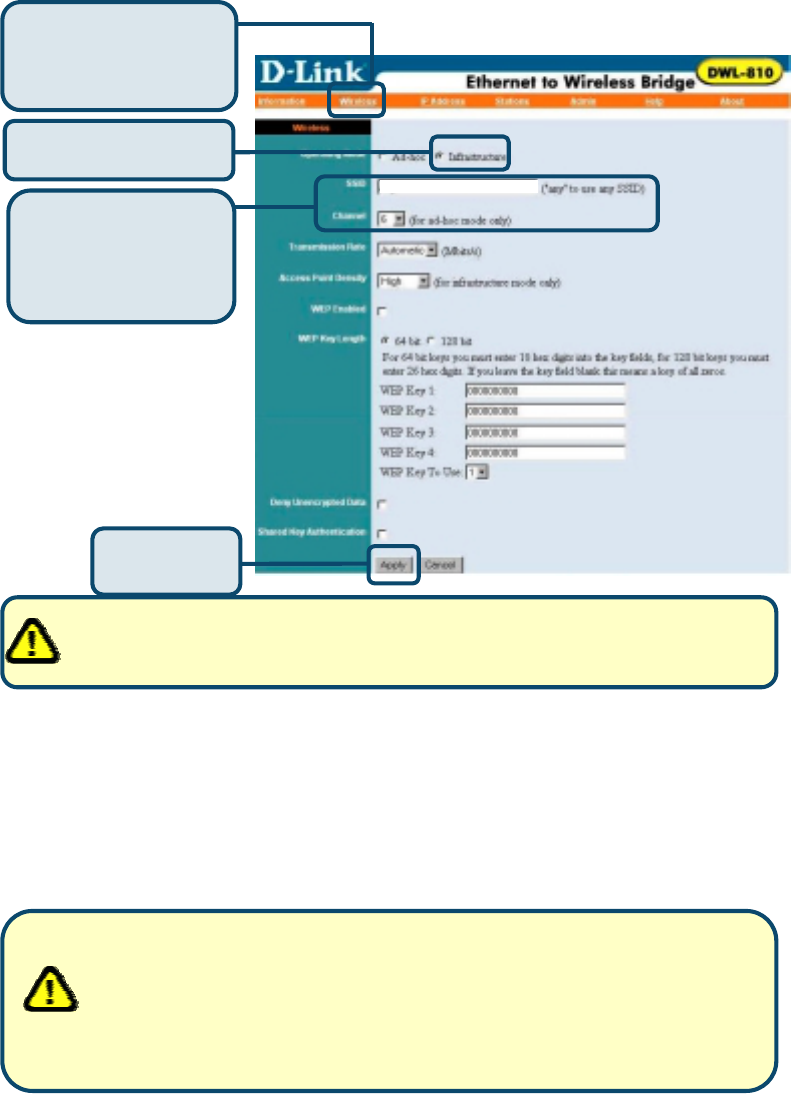
Configuration
You can change the
SSID and Channel
settings to match an
existing wireless
network.
Changes will not take effect until you reboot the DWL-810. To reboot,
click on Admin at the top of this screen. In the Admin window, click
reboot to save the changes.
You have completed the Configuration of the
DWL-810!
APPENDIX
Assigning a Static IP Address in Windows
To assign a Static IP Address to the laptop or computer that you are using to configure
the DWL-810, please do the following:
Click on
Apply
Select Infrastructure
The default wireless
settings are:
SSID = default
Channel = 6
default
Click Wireless in
the Configuration
menu. This screen
will appear.
(The following illustrations show Windows XP with the D-Link DWL-650+
Wireless Cardbus Adapter. Other operating systems and other wireless
network adapters will have similar procedures for assigning a Static IP
A
ddress.)
If the computer you are using for configuration already has a Static IP
Address, be sure to make a note of it. You will need to re-input the
original Static IP Address after you configure the DWL-810.
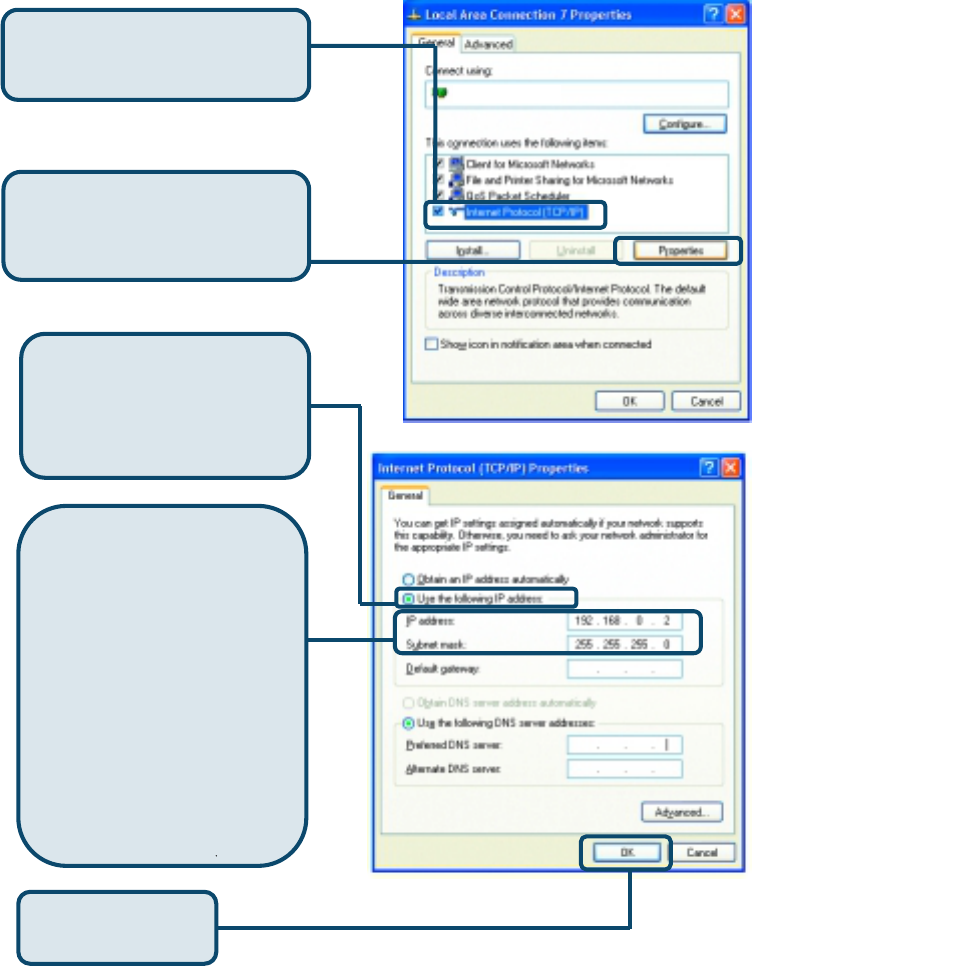
Go to Start > Double- click on Control Panel > Double-click on Network
Connections > Right-click on Local Area Connections > Click Properties
You have completed the assignment of the Static IP Address. Please see Web
Configuration in the manual for more information on the configuration of the DWL-
810 when you are installing it in a network, as shown in Setup #2 in this Quick
Installation Guide.
D-Link DWL-650+
Highlight Internet Protocol
(TCP/IP)
Click Properties
Select Use the following
IP address in the Internet
Protocol (TCP/IP)
Properties window
Input your IP address and
subnet mask. (The IP
Address must be within the
same range as the DWL-
810. The IP Address of the
DWL-810 is 192.168.0.30.
You can assign 192.168.0.2
for your laptop. No two
computers can have the
same IP Address. Assign
a subnet mask of
255.255.255.0.)
Click OK

Technical Support
You can find the most recent software and user documentation on
the D-Link website. D-Link provides free technical support for
customers within the United States for the duration of the warranty
period on this product. U.S. customers can contact D-Link
technical support through our web site or by phone.
D-Link Technical Support over the Telephone:
(877) 453-5465
24 hours a day, seven days a week
D-Link Technical Support over the Internet:
http://support.dlink.com
email: support@dlink.com
Federal Communication Commission Interference Statement
This equipment has been tested and found to comply with the limits for a Class B digital device,
pursuant to Part 15 of the FCC Rules. These limits are designed to provide reasonable
protection against harmful interference in a residential installation. This equipment generates,
uses and can radiate radio frequency energy and, if not installed and used in accordance with
the instructions, may cause harmful interference to radio communications. However, there is no
guarantee that interference will not occur in a particular installation. If this equipment does cause
harmful interference to radio or television reception, which can be determined by turning the
equipment off and on, the user is encouraged to try to correct the interference by one of the
following measures:
- Reorient or relocate the receiving antenna.
- Increase the separation between the equipment and receiver.
- Connect the equipment into an outlet on a circuit different from that to which the receiver is
connected.
- Consult the dealer or an experienced radio/TV technician for help.
FCC Caution: To assure continued compliance, (example - use only shielded interface cables
when connecting to computer or peripheral devices) any changes or modifications not expressly
approved by the party responsible for compliance could void the user's authority to operate this
equipment.
This device complies with Part 15 of the FCC Rules. Operation is subject to the following two
conditions: (1) This device may not cause harmful interference, and (2) this device must accept
any interference received, including interference that may cause undesired operation.
IMPORTANT NOTE:
FCC Radiation Exposure Statement:
This equipment complies with FCC radiation exposure limits set forth for an uncontrolled
environment. This equipment should be installed and operated with minimum distance 20cm
between the radiator & your body.
This transmitter must not be co-located or operating in conjunction with any other antenna or
transmitter.