GemTek Technology WSETH Wireless Space User Manual Manual Part 2
Gemtek Technology Co., Ltd. Wireless Space Manual Part 2
UserManual.wiki
>
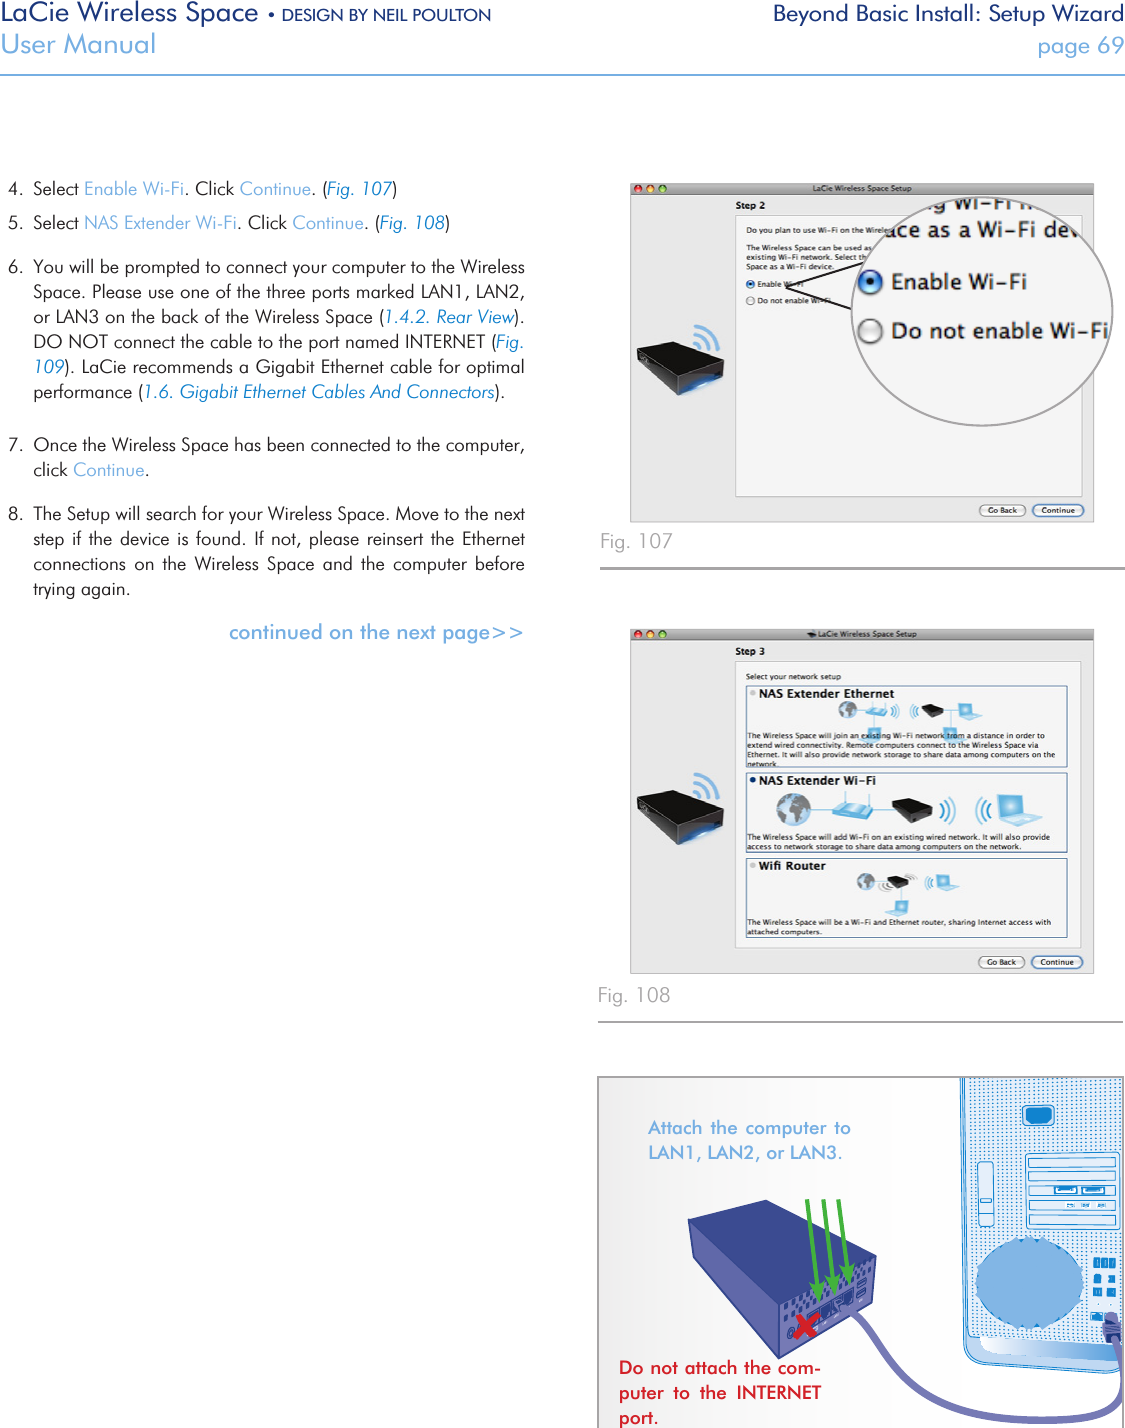
GemTek Technology
>
WSETH User Manual
>
Manual Part 2
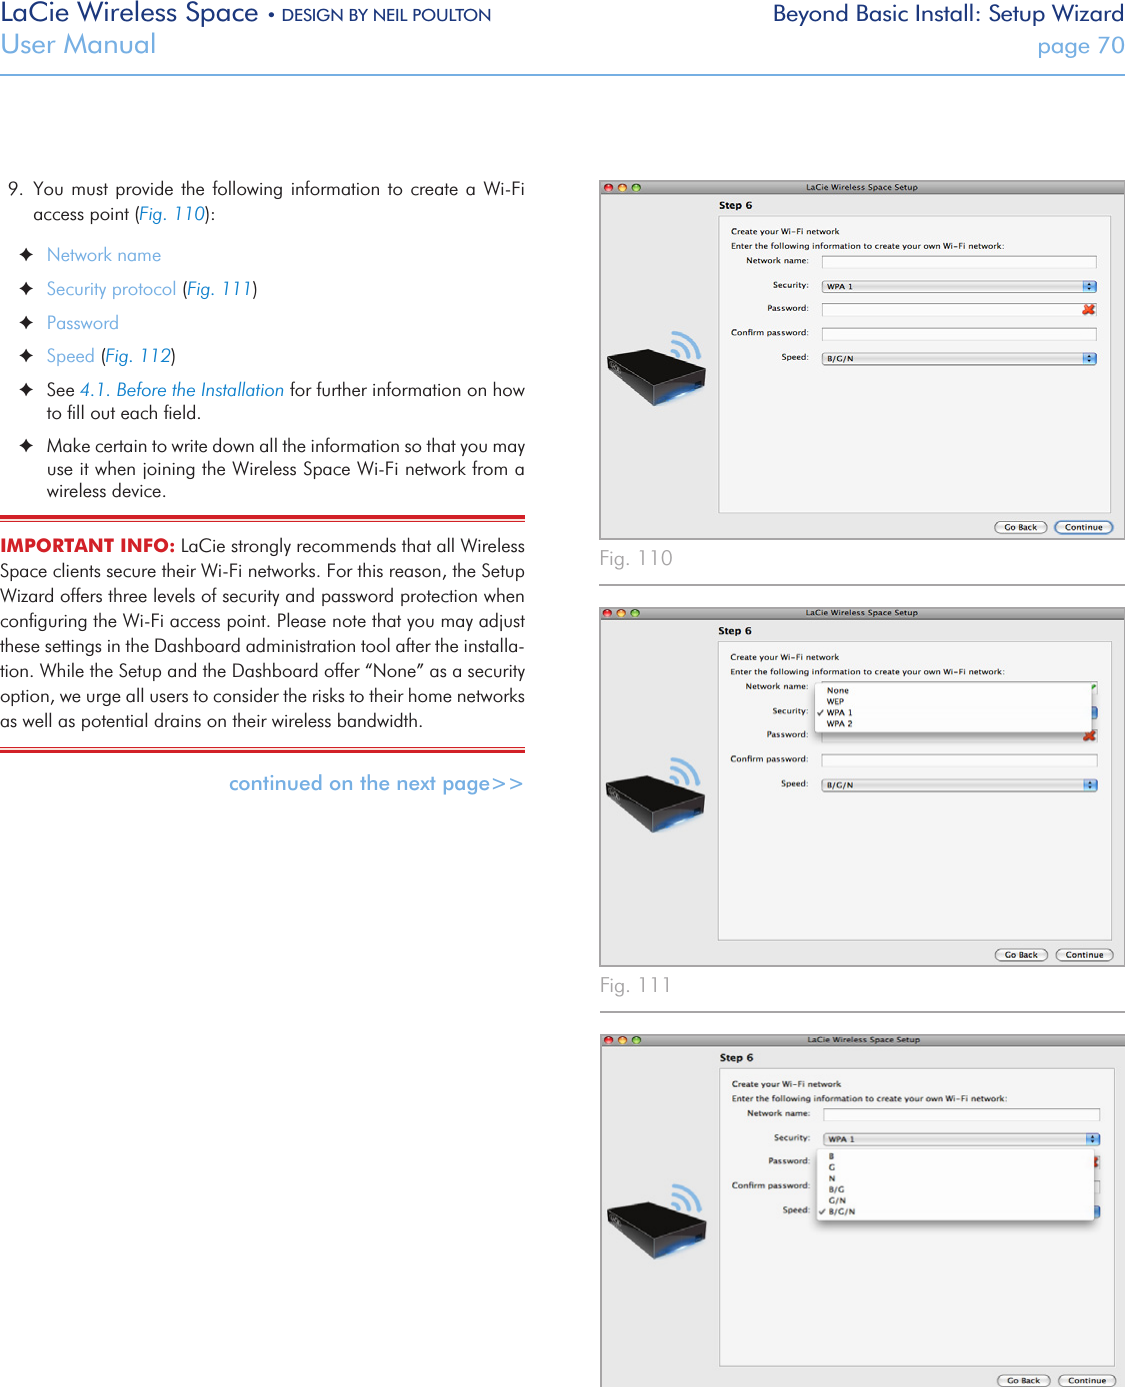
Contents
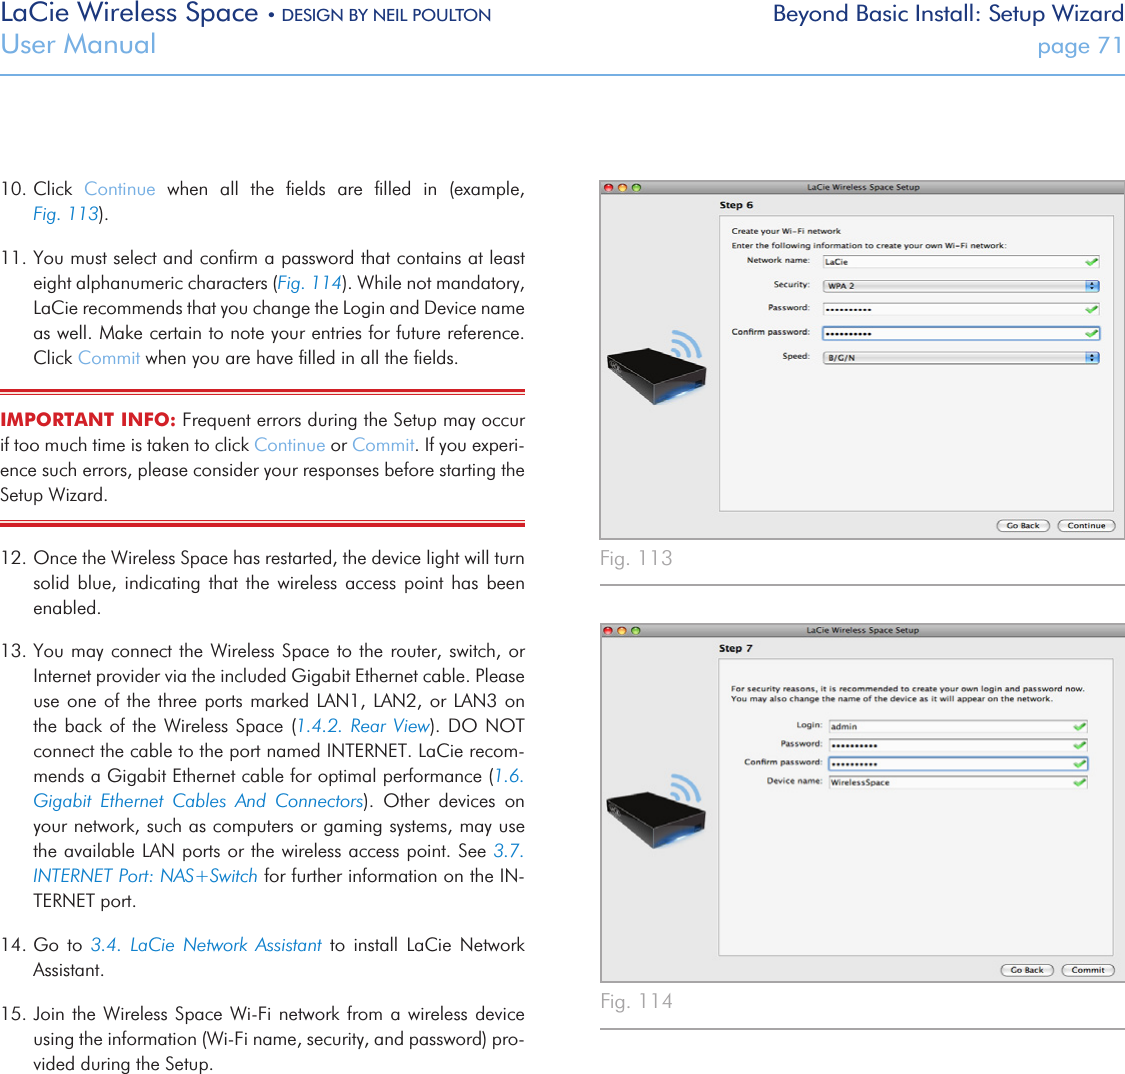
1.
Manual Part 1
2.
Manual Part 2
3.
Manual Part 3
4.
Manual Part 4
Manual Part 2
Navigation menu
Upload a User Manual
Namespaces
Wiki Guide
HTML
PDF
Info
Views
User Manual
Discussion / Help
Navigation
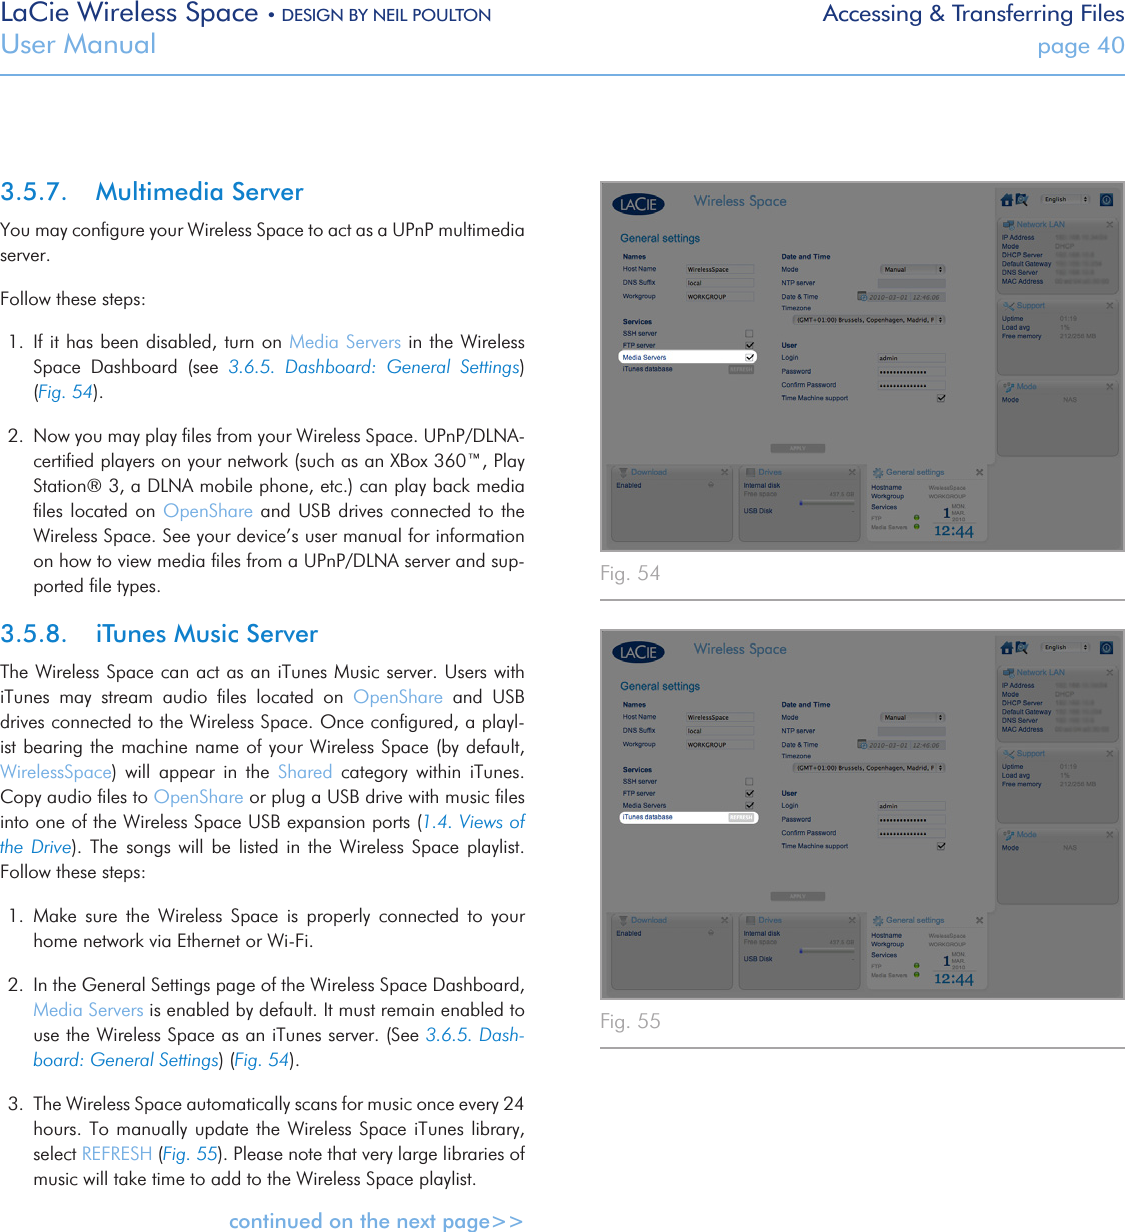
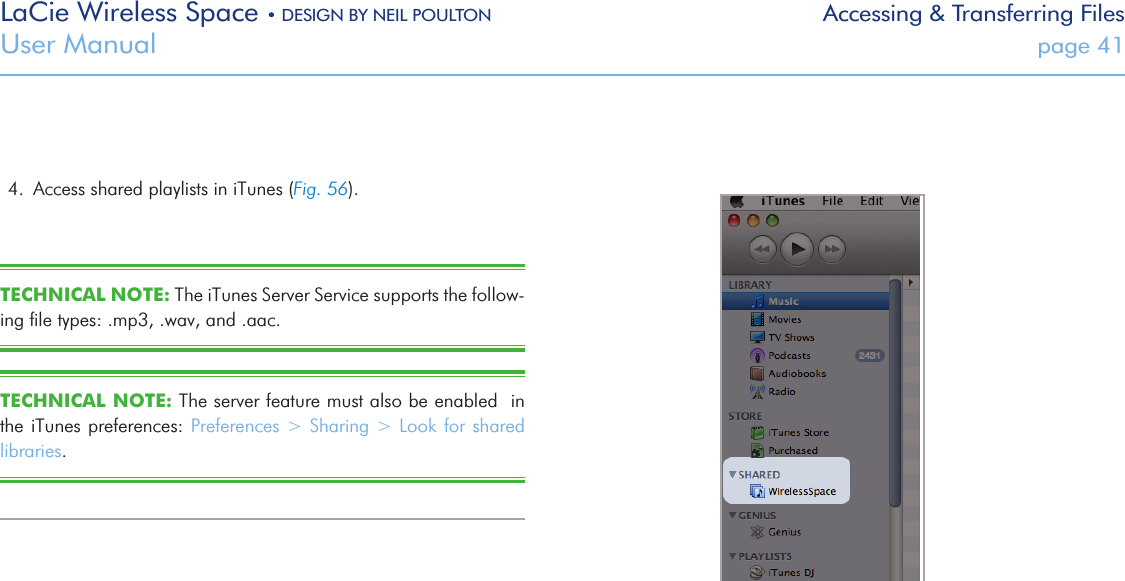
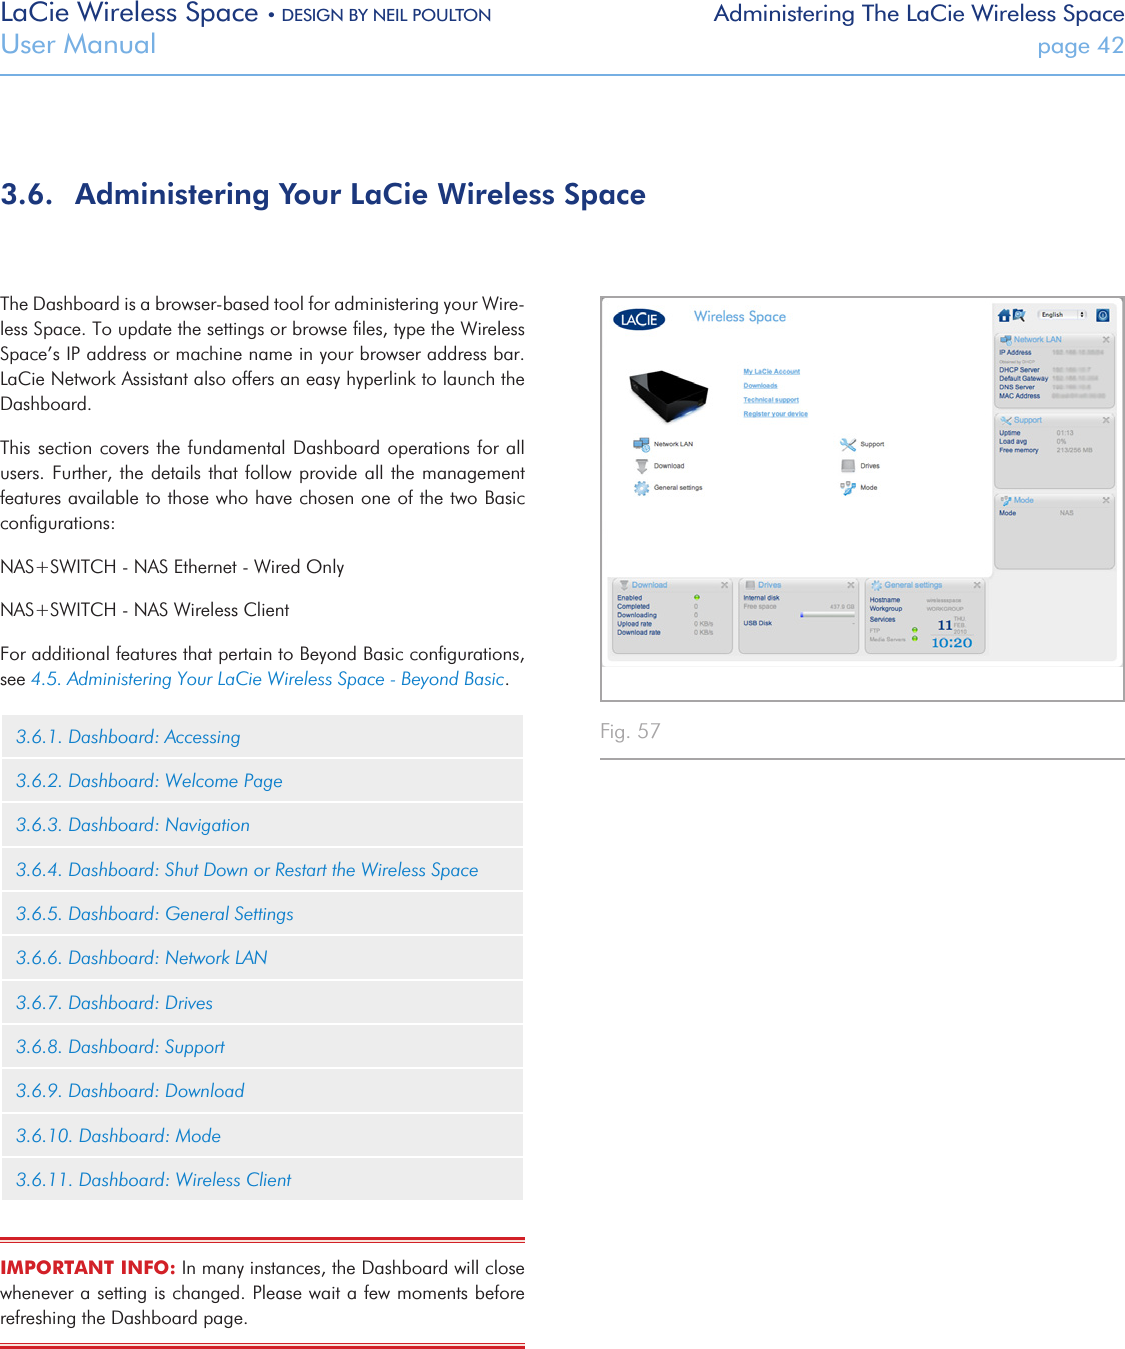
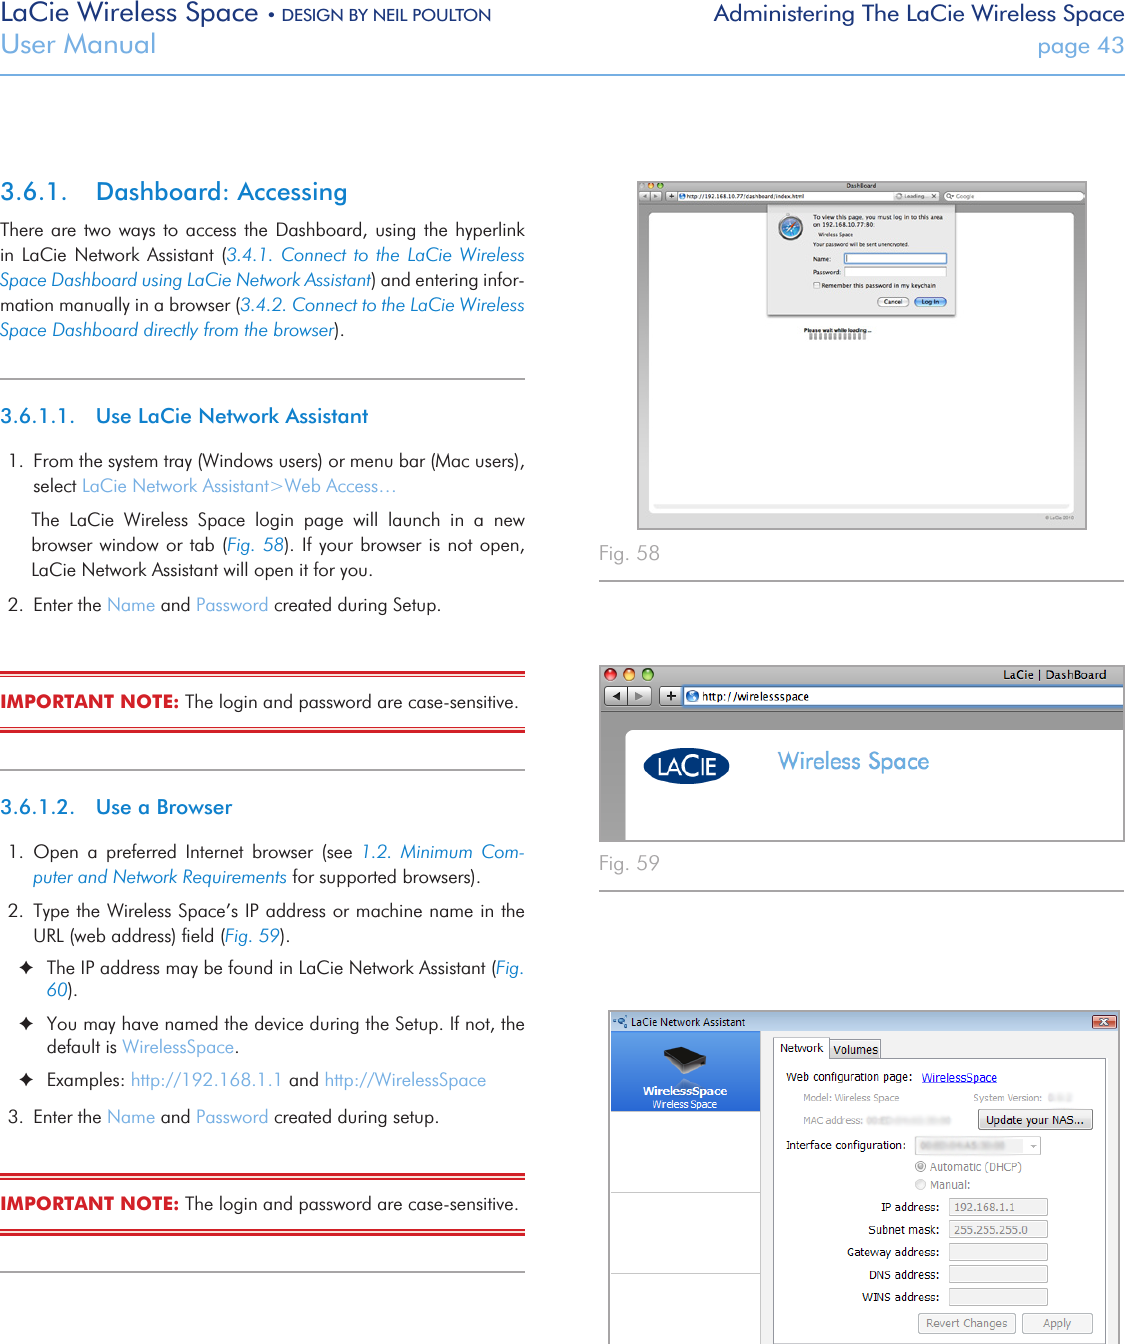
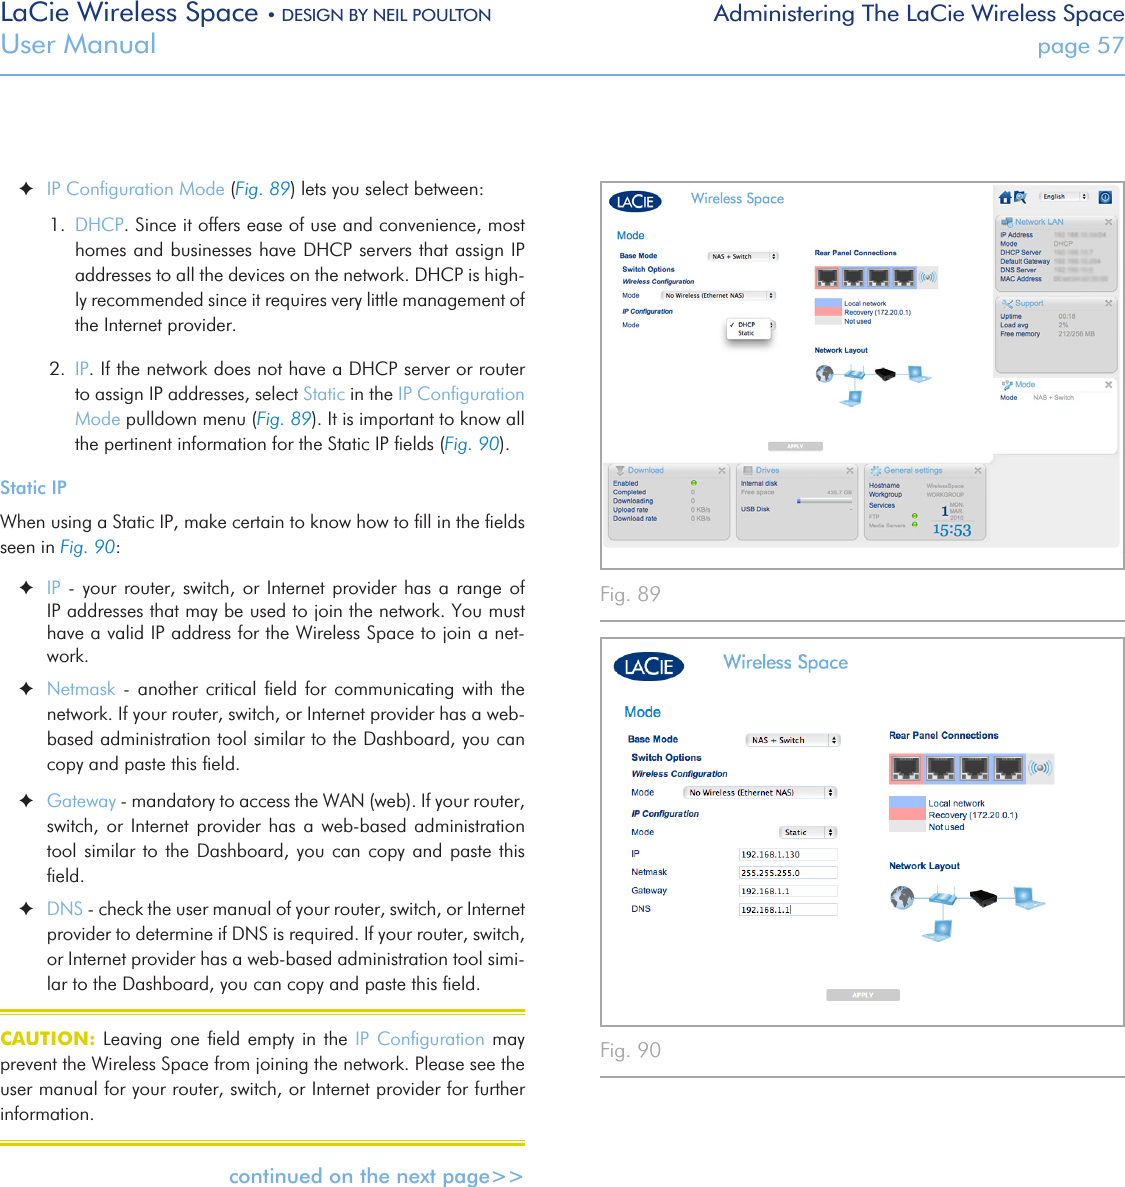
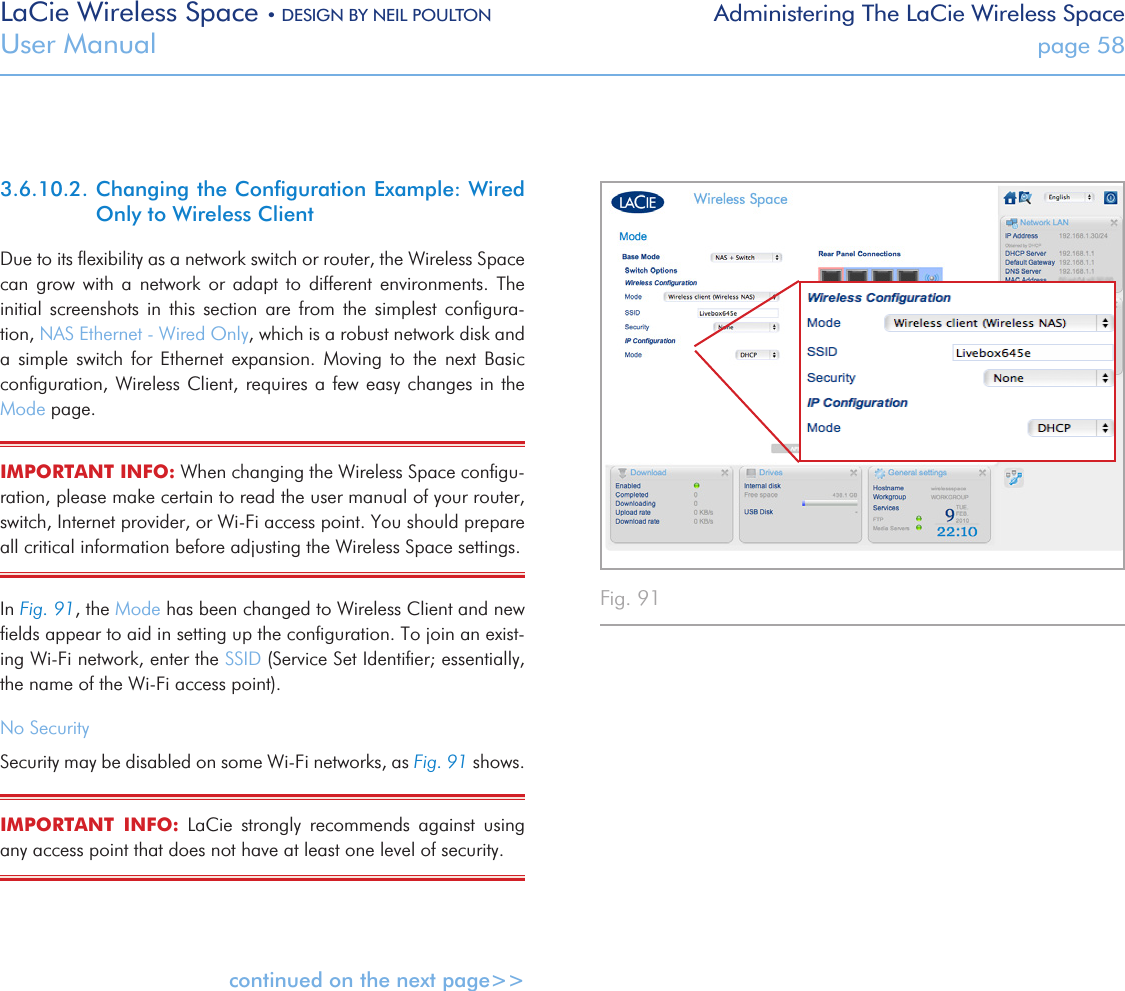
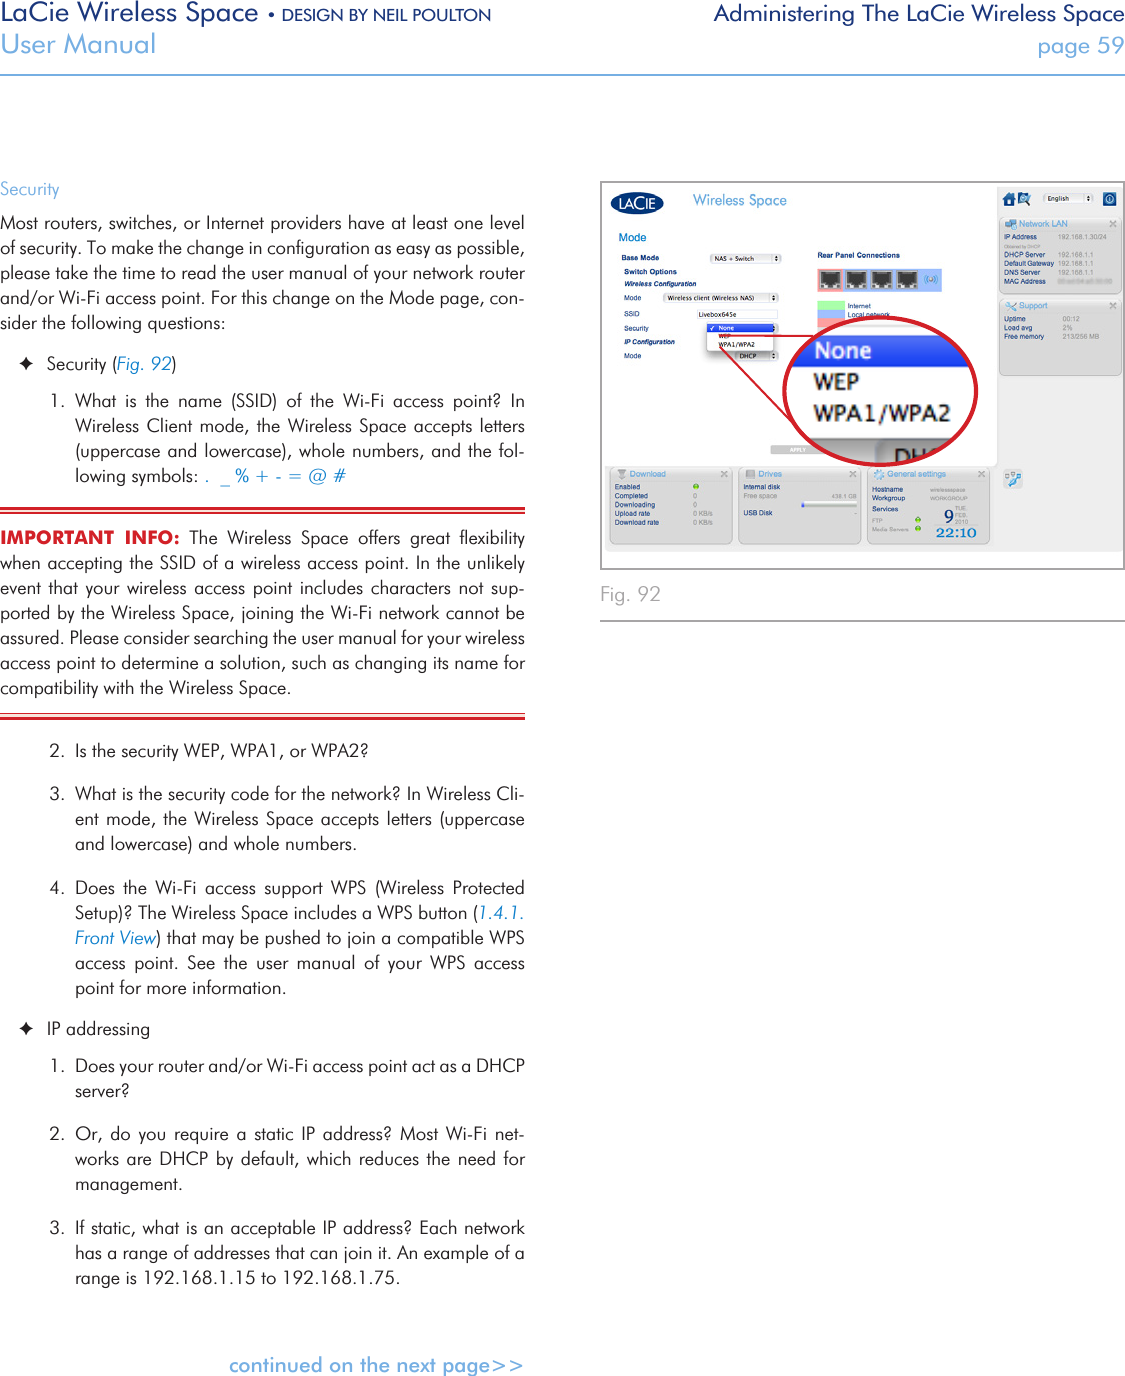
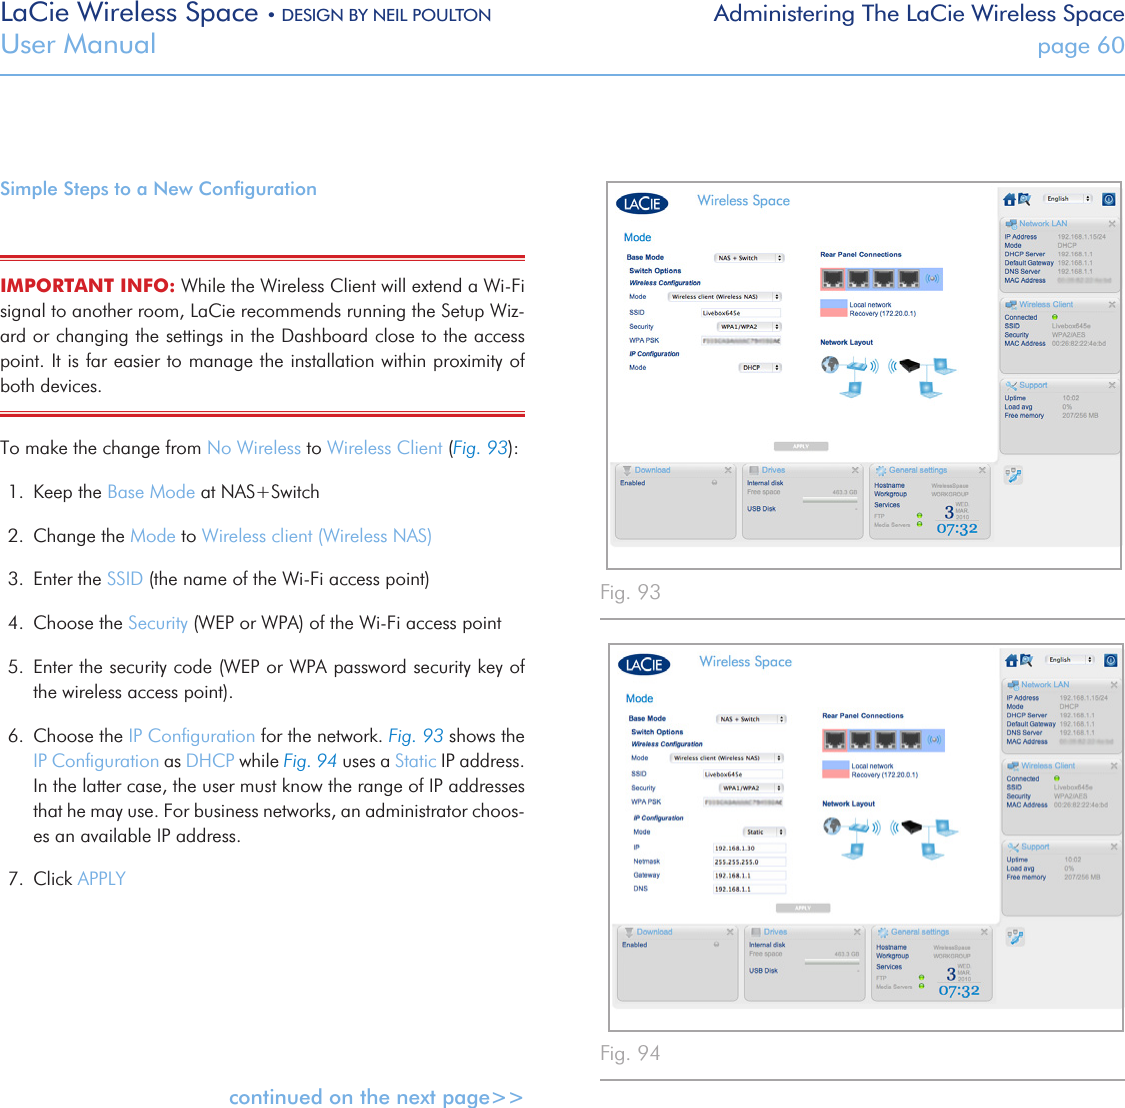
![LaCie Wireless Space • DESIGN BY NEIL POULTON Accessing & Transferring FilesUser Manual page 393.5.6. Accessing Shares via FTPThe FTP protocol is used to transfer files from one computer to an-other through a local network or over the internet. This protocol al-lows you to exchange files with your friends or relatives securely, as only people who know the password will have access.MANUAL NOTE: The FTP service is enabled by default. To change the setting, see 3.6.5. Dashboard: General Settings.To connect to the Wireless Space remotely via FTP, enter the address information in your FTP software (Fig. 52) or in the URL bar of a web browser (Fig. 53):ftp://[IP address]TECHNICAL NOTE: See 3.4. LaCie Network Assistant for instruc-tions on finding your Wireless Space’s IP address.Example: ftp://192.168.10.149You may have to enter the login and password created during setup. Fig. 52 Fig. 53](https://usermanual.wiki/GemTek-Technology/WSETH.Manual-Part-2/User-Guide-1269895-Page-3.png)