GemTek Technology A911028 Hotspot Acess Point User Manual Manual
Gemtek Technology Co., Ltd. Hotspot Acess Point Manual
UserManual.wiki
>
GemTek Technology
>
A911028 User Manual
Manual
Navigation menu
Upload a User Manual
Namespaces
Wiki Guide
HTML
PDF
Info
Views
User Manual
Discussion / Help
Navigation

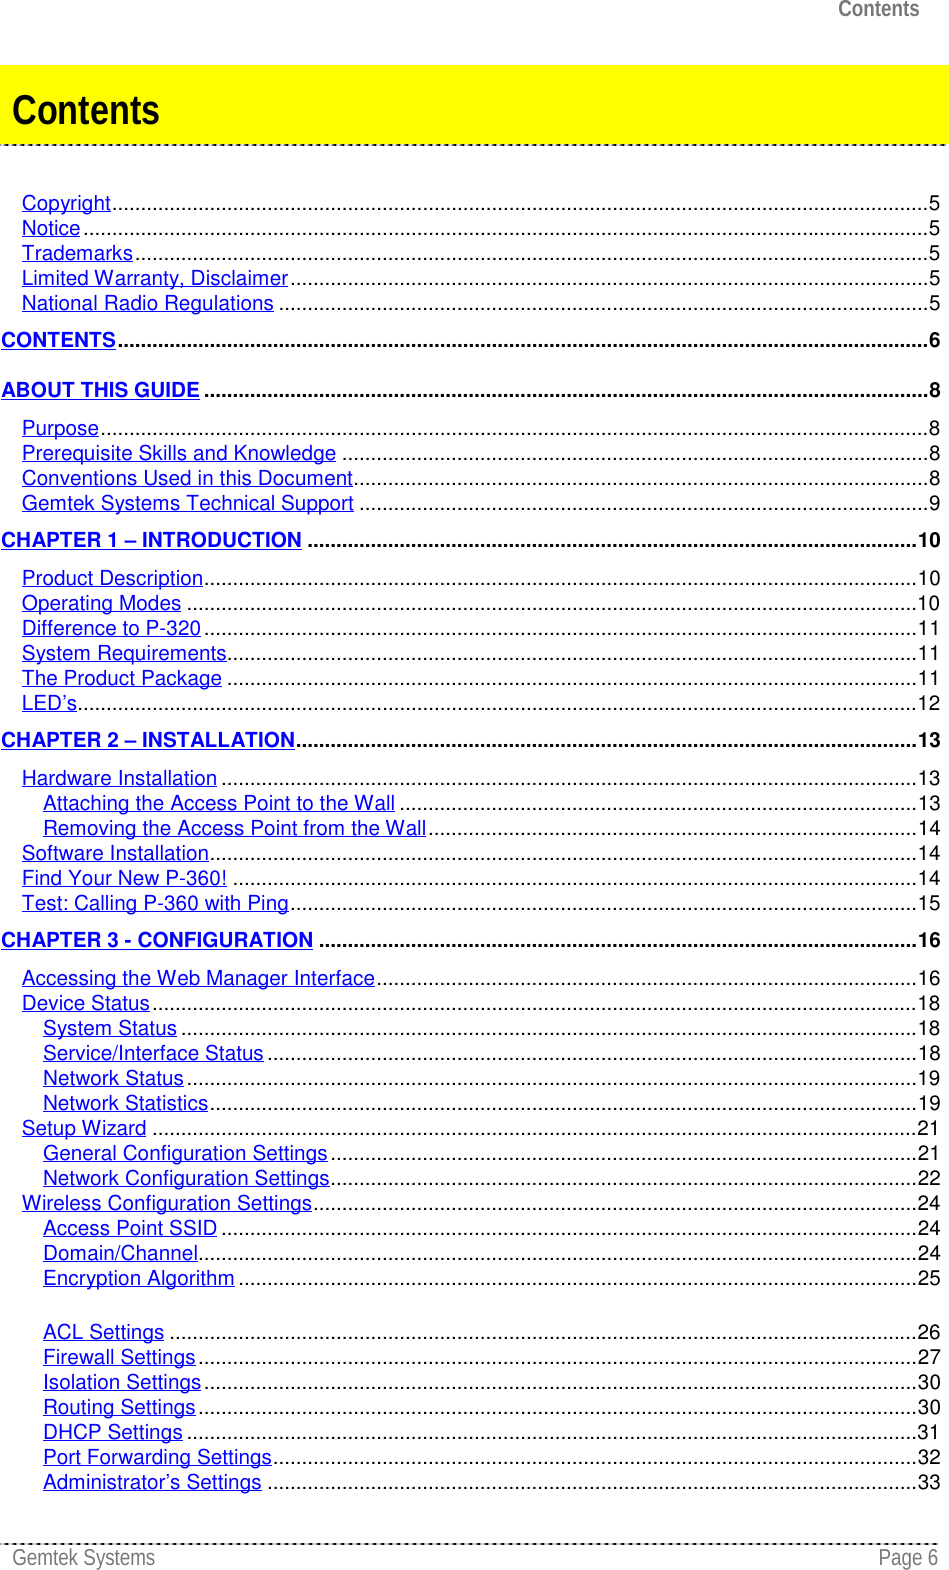
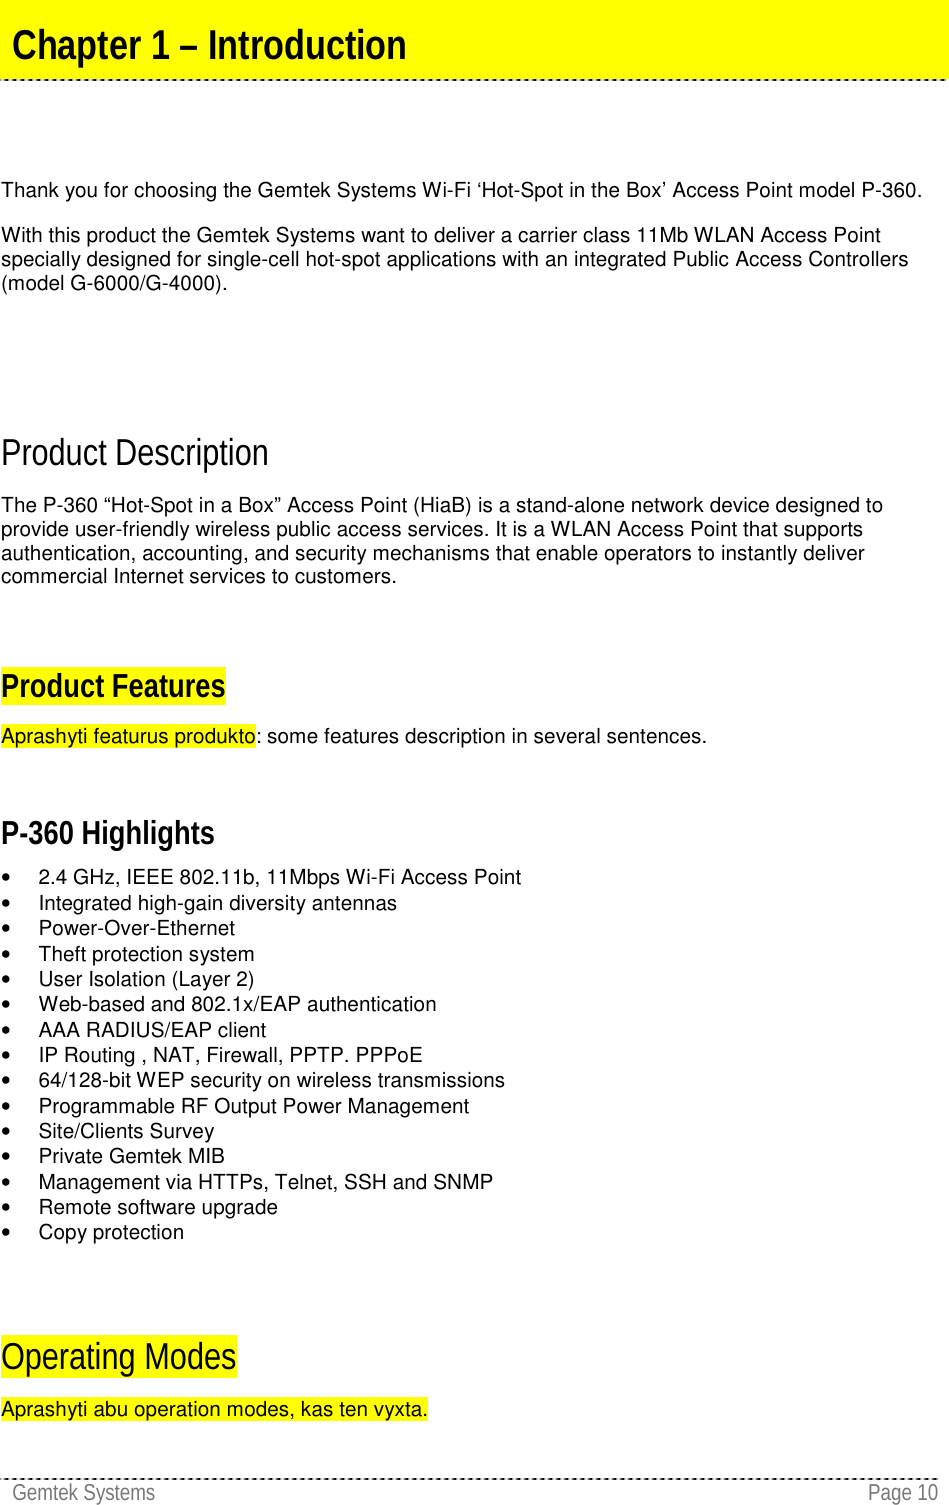
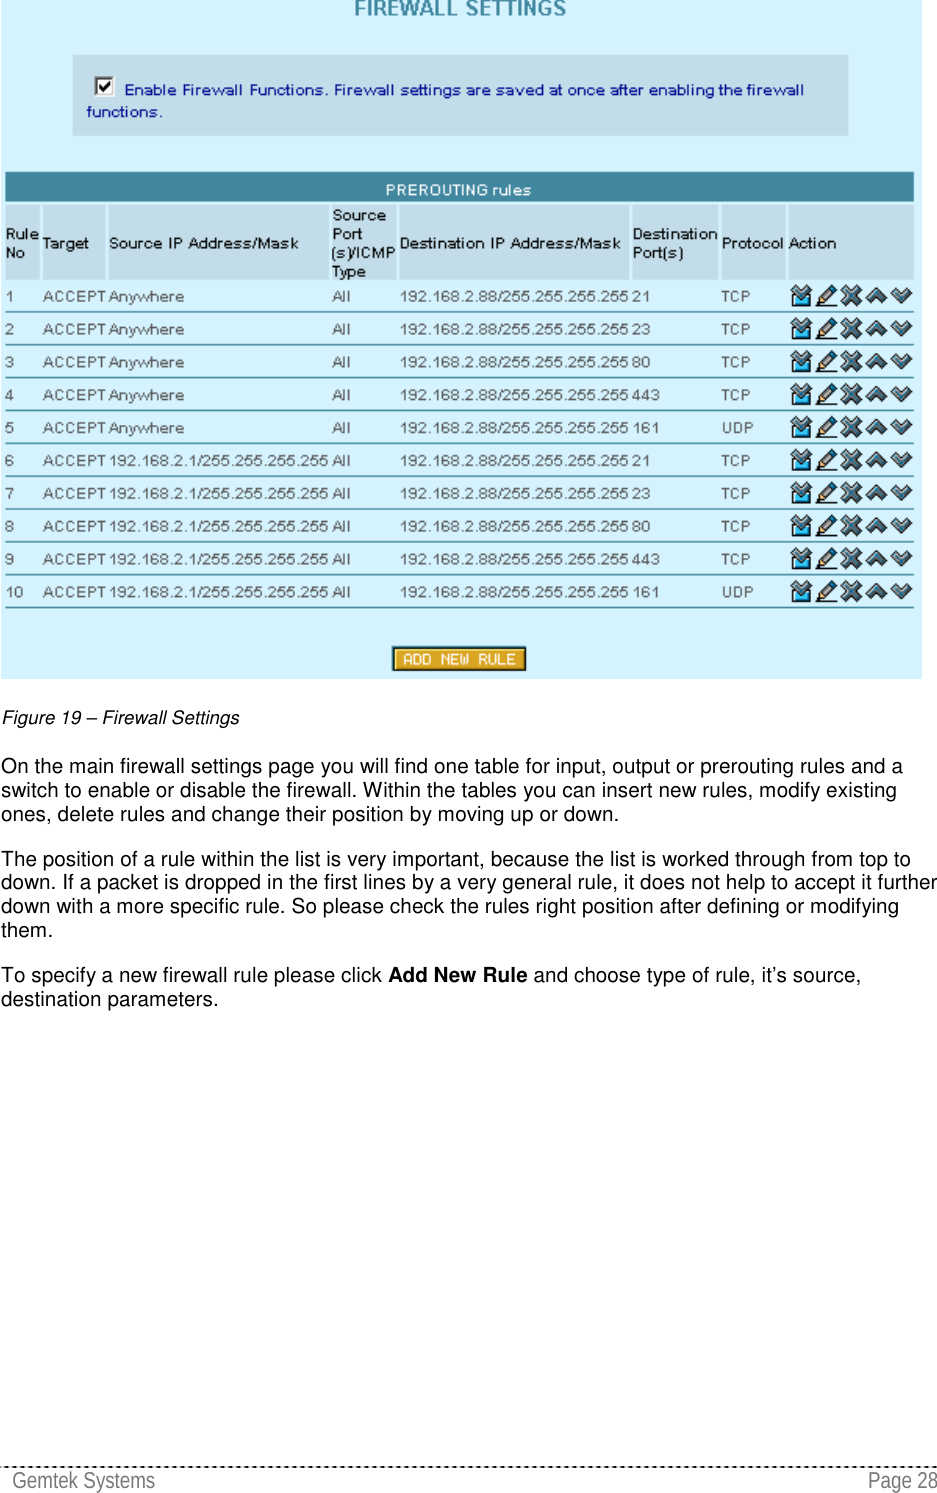
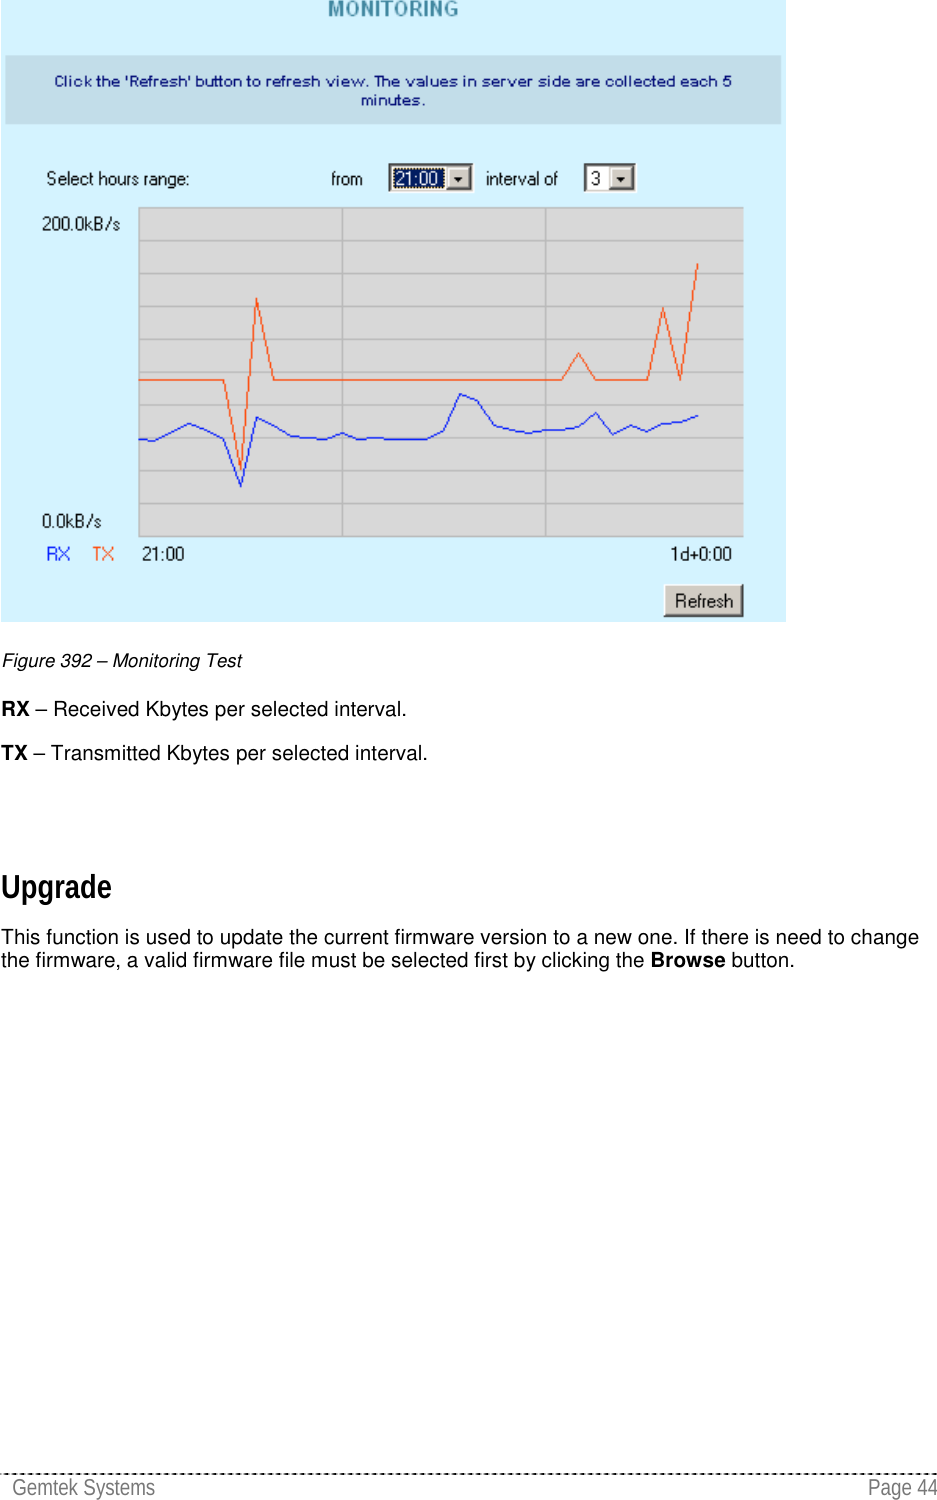
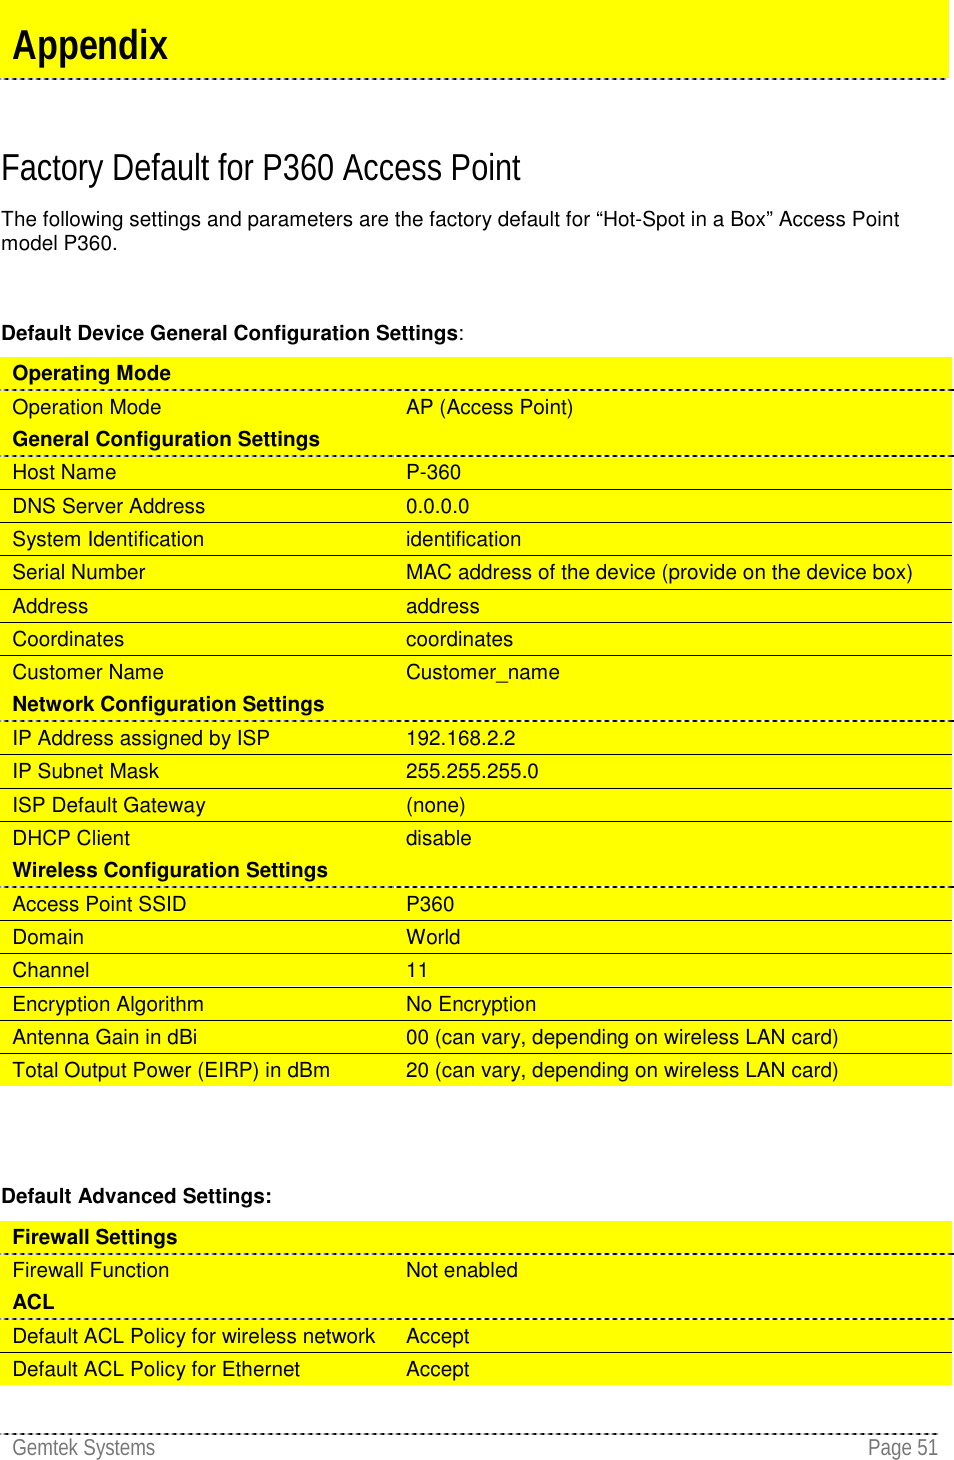
![Gemtek Systems Page 24Wireless Configuration SettingsAccess Point SSIDDepending on the device mode selection, parameters available in the Wireless Configuration Settingspage will vary. Because of the complexity and quantity the wireless parameters are spitted into thesimple units.Figure 14 -- Wireless Configuration Settings (1)Access Point SSID is a unique name for your wireless network. It is case sensitive and must notexceed 32 characters. The default SSID is "xxxxx " but you should change this to a personal wirelessnetwork name.The SSID may not contain special characters like [ ] { } / \ or spaces. Only dots andunderscores are allowed.In Access Point mode SSID must be made known to all mobile clients, or they have to use the “autoconnect to any wireless network” function in their WLAN card.If you are running more than one P-360 and want to enable the roaming function, please use thesame SSID in all access points.Domain/ChannelFigure 15 – Wireless Configuration Settings (2)Domain: full frequency range of the 2.4 GHz ISM band is not permitted to be used in all countries.Depending on the selection of the regulatory domain here the available frequency channels will vary.Channel: Frequency channels are used to avoid interference between nearby access points. If youwish to operate more than one access points in overlapping coverage areas, we recommend adistance of at least four channels between the chosen channels. For example, for three Access Pointsin close proximity choose channels 1, 5 and 11.Refer to the regulatory domains chapter in the appendix to get more informationconcerning the regulations valid for your country and set the parameters forfrequency channel to the permitted values!](https://usermanual.wiki/GemTek-Technology/A911028/User-Guide-287983-Page-23.png)

![Gemtek Systems Page 48[Overview of all configuration interfaces, such as:CLISMTPHTTPSSHDescription of all parameter/command of the configuration menu should be provided in this section.]Reference Guide](https://usermanual.wiki/GemTek-Technology/A911028/User-Guide-287983-Page-47.png)
![Gemtek Systems Page 50[General hints, common problems, FAQ, technical support goes here.]Troubleshooting](https://usermanual.wiki/GemTek-Technology/A911028/User-Guide-287983-Page-49.png)
![Gemtek Systems Page 53[Glossary of the document is used to define terminology specific to the problem domain, explainingterms, which may be unfamiliar to the reader.]Glossary](https://usermanual.wiki/GemTek-Technology/A911028/User-Guide-287983-Page-52.png)
![Gemtek Systems Page 54[Index of the document.]Index](https://usermanual.wiki/GemTek-Technology/A911028/User-Guide-287983-Page-53.png)