GemTek Technology WACC-134AN Wireless video bridge (Access Point or Client) User Manual 1Ez N0001 09292011
Gemtek Technology Co., Ltd. Wireless video bridge (Access Point or Client) 1Ez N0001 09292011
UserManual.wiki
>
GemTek Technology
>
WACC 134AN User Manual
User Man_MXF-WACC-134AN_rev. 1
Navigation menu
Upload a User Manual
Namespaces
Wiki Guide
HTML
PDF
Info
Views
User Manual
Discussion / Help
Navigation
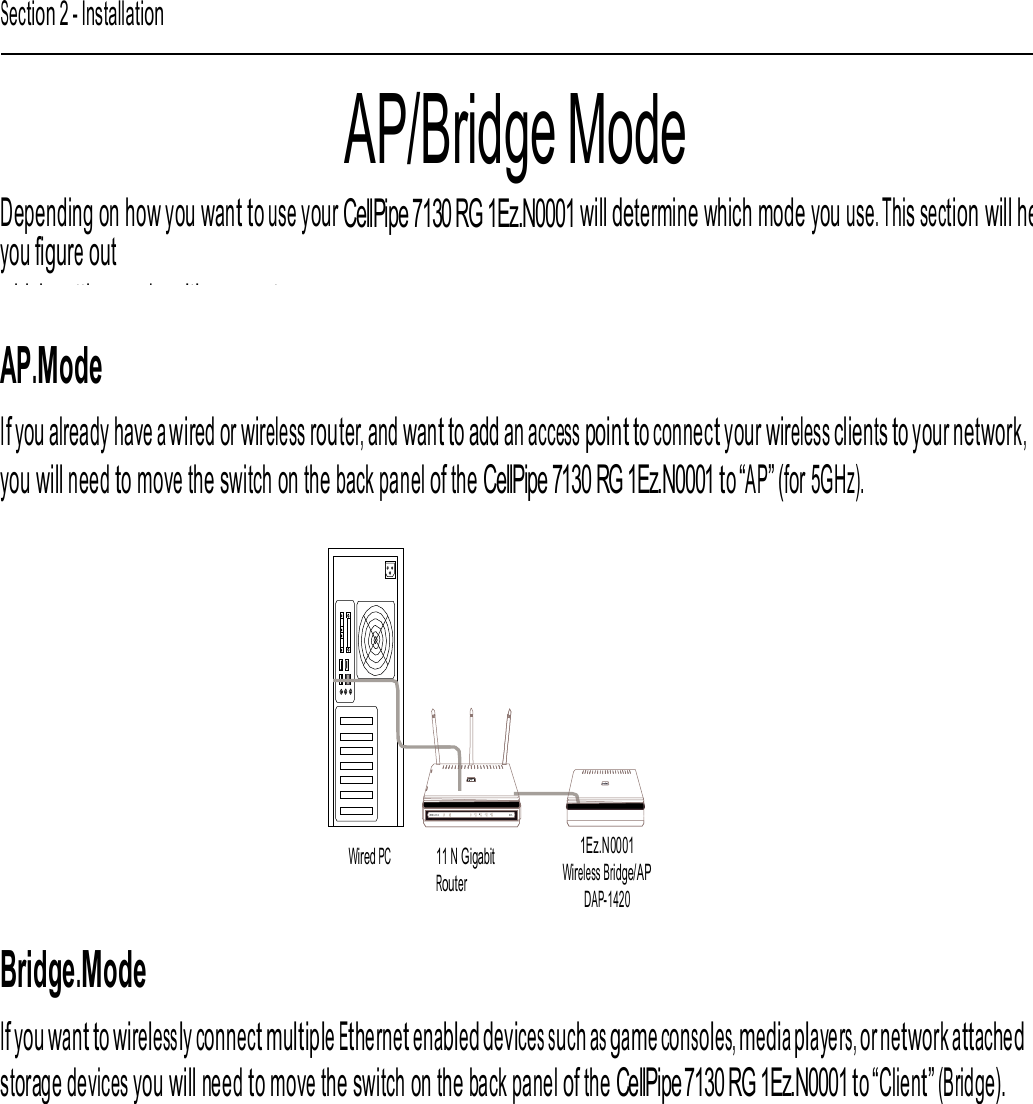
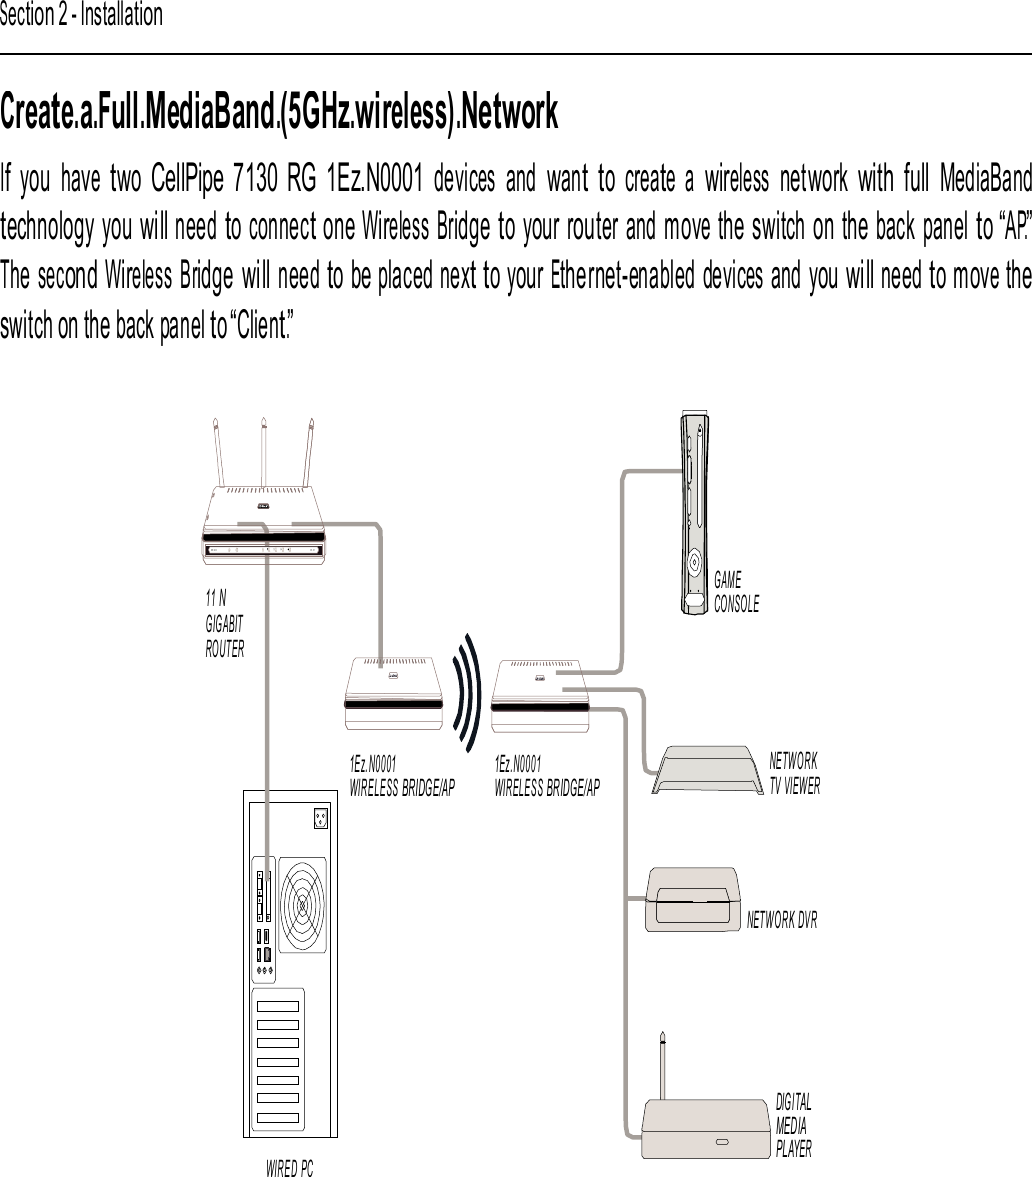
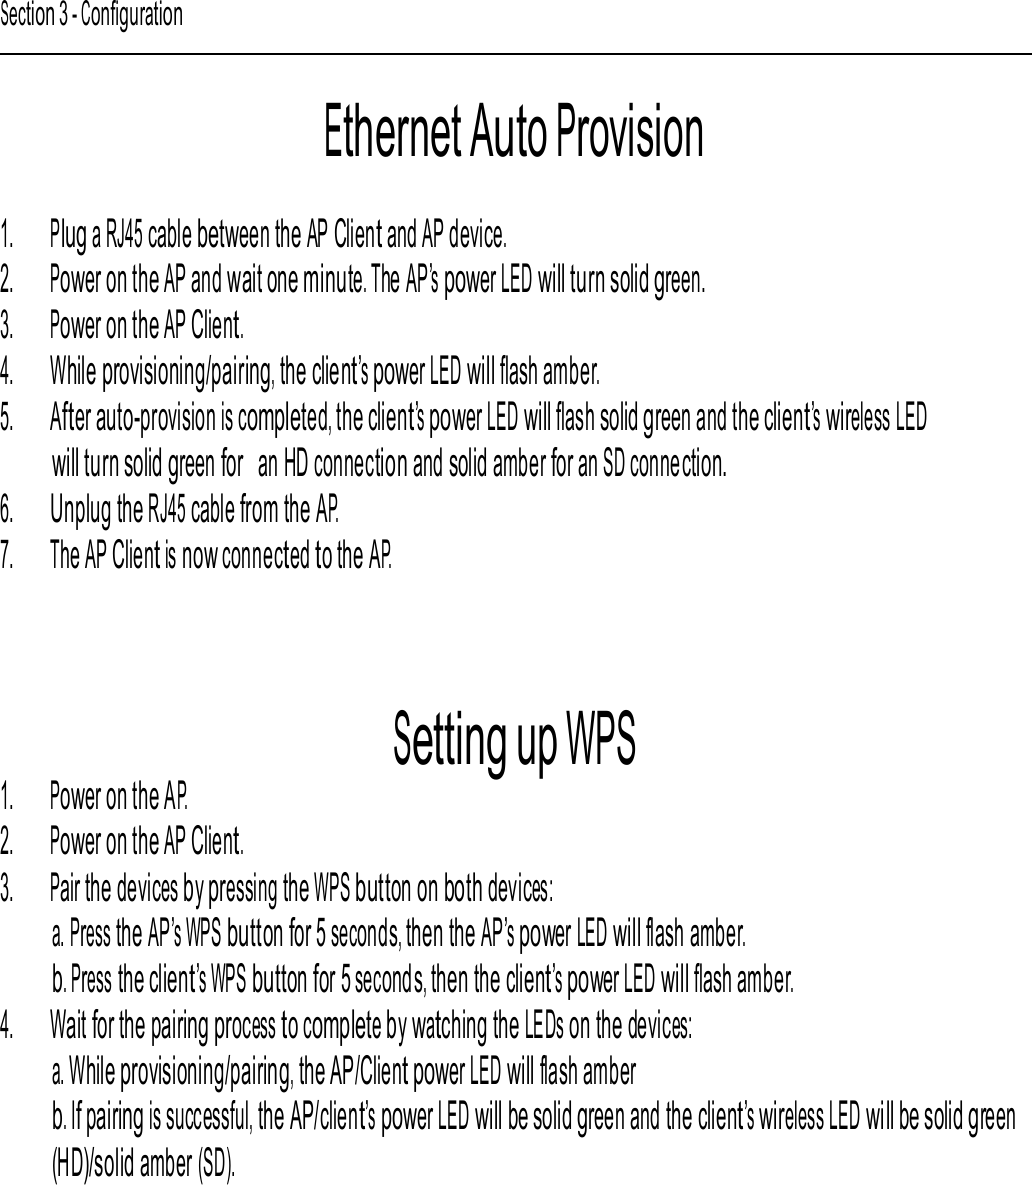
![Section 2 - Installation Installation This section will walk you through the installation process. Placement of the CellPipe 7130 RG 1Ez.N0001 is very importaDo not place the CellPipe 7130 RG 1Ez.N0001 in an enclosed area such as a closet, cabinet, or in the attic or garage. Wall mounting Pre-Requirements • Anchors • Screws • Drill & Drill bit 1. Locate a high position on the wall that is free of obstructions and insert two screws in the wall 5 cm (2 in.) apart. Do not insert the screws all the way into the wall. Important! Make sure that the screws are securely fixed to the wall and strong enough to hold the weight of the CellPipe 7130 RG (recommended screw type and size: Nylon wall plug [T8x25mm] and screws [T3.5x16mm]). 2. Align the holes on the back of the CellPipe 7130 RG with the screws on the wall and then hang the CellPipe 7130 RG on the screws. Stand-up mounting Snap the cradle into the holes located on the side of the CellPipe 7130 RG and then place it on a desk so that LEDs are visible. CellPipe 7130 RG 1Ez.N0001 9](https://usermanual.wiki/GemTek-Technology/WACC-134AN/User-Guide-1559736-Page-8.png)