General Dynamics Itronix IX260PNL3054BT Rugged Laptop PC with 802.11b/g WLAN & Bluetooth User Manual KBCIX260PRO2200 Manual
General Dynamics Itronix Corporation Rugged Laptop PC with 802.11b/g WLAN & Bluetooth KBCIX260PRO2200 Manual
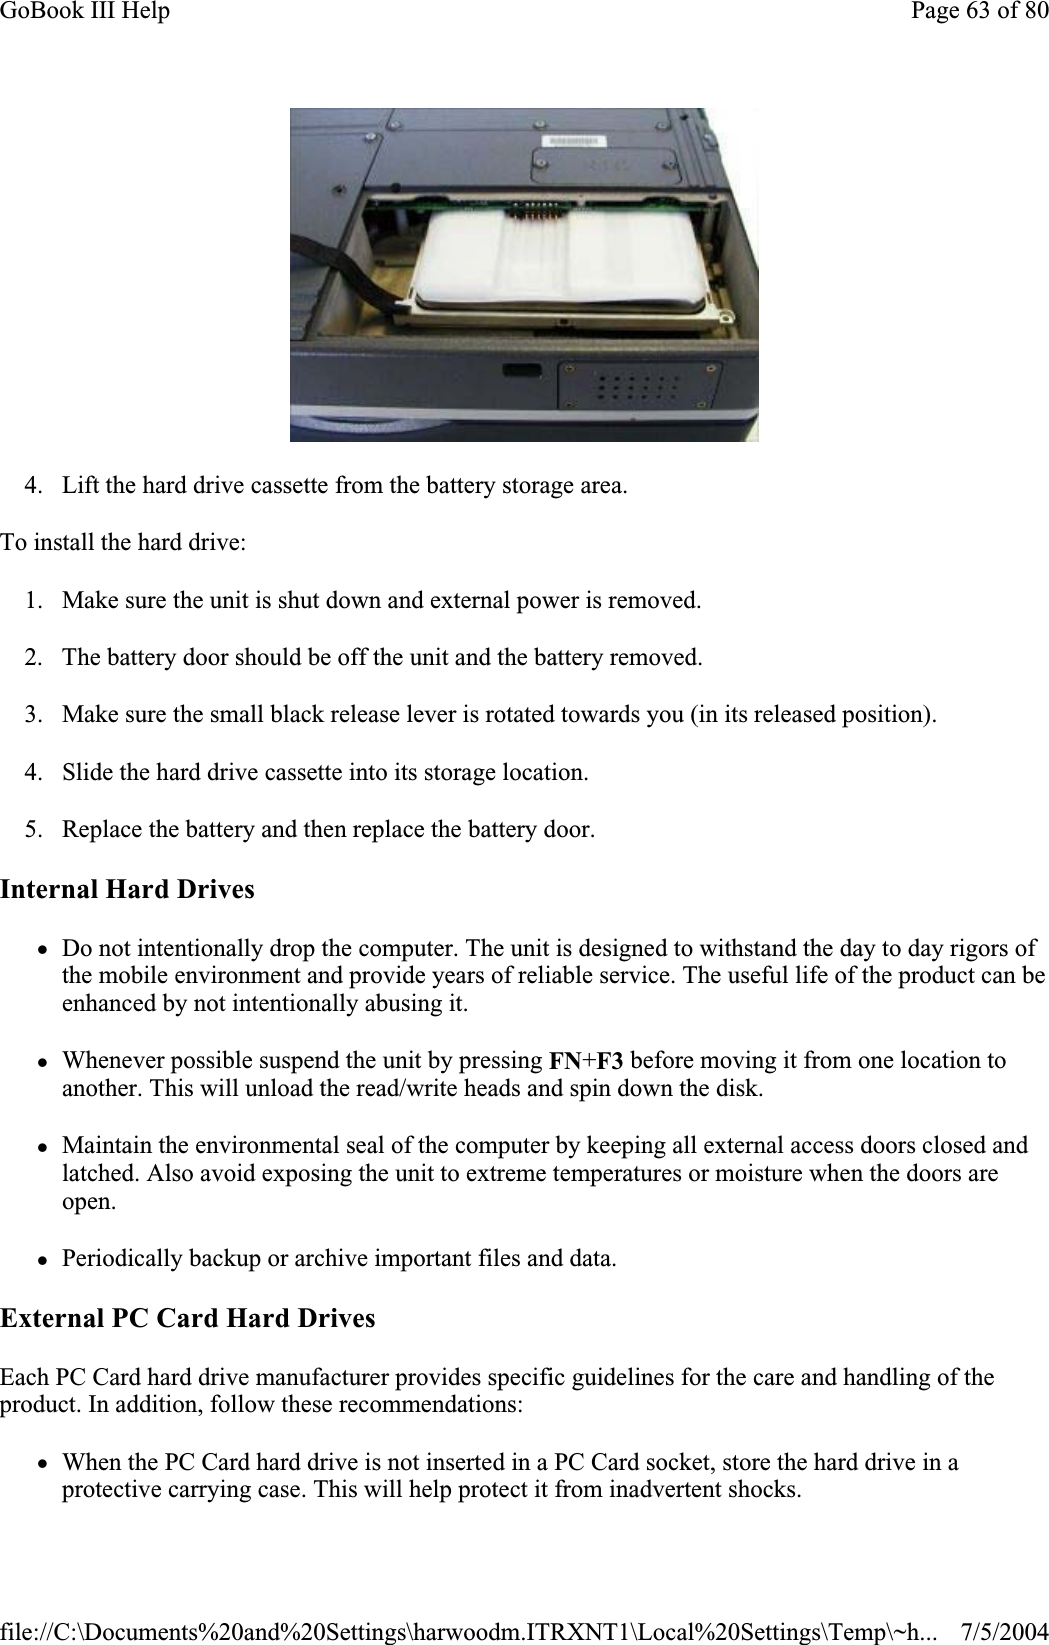
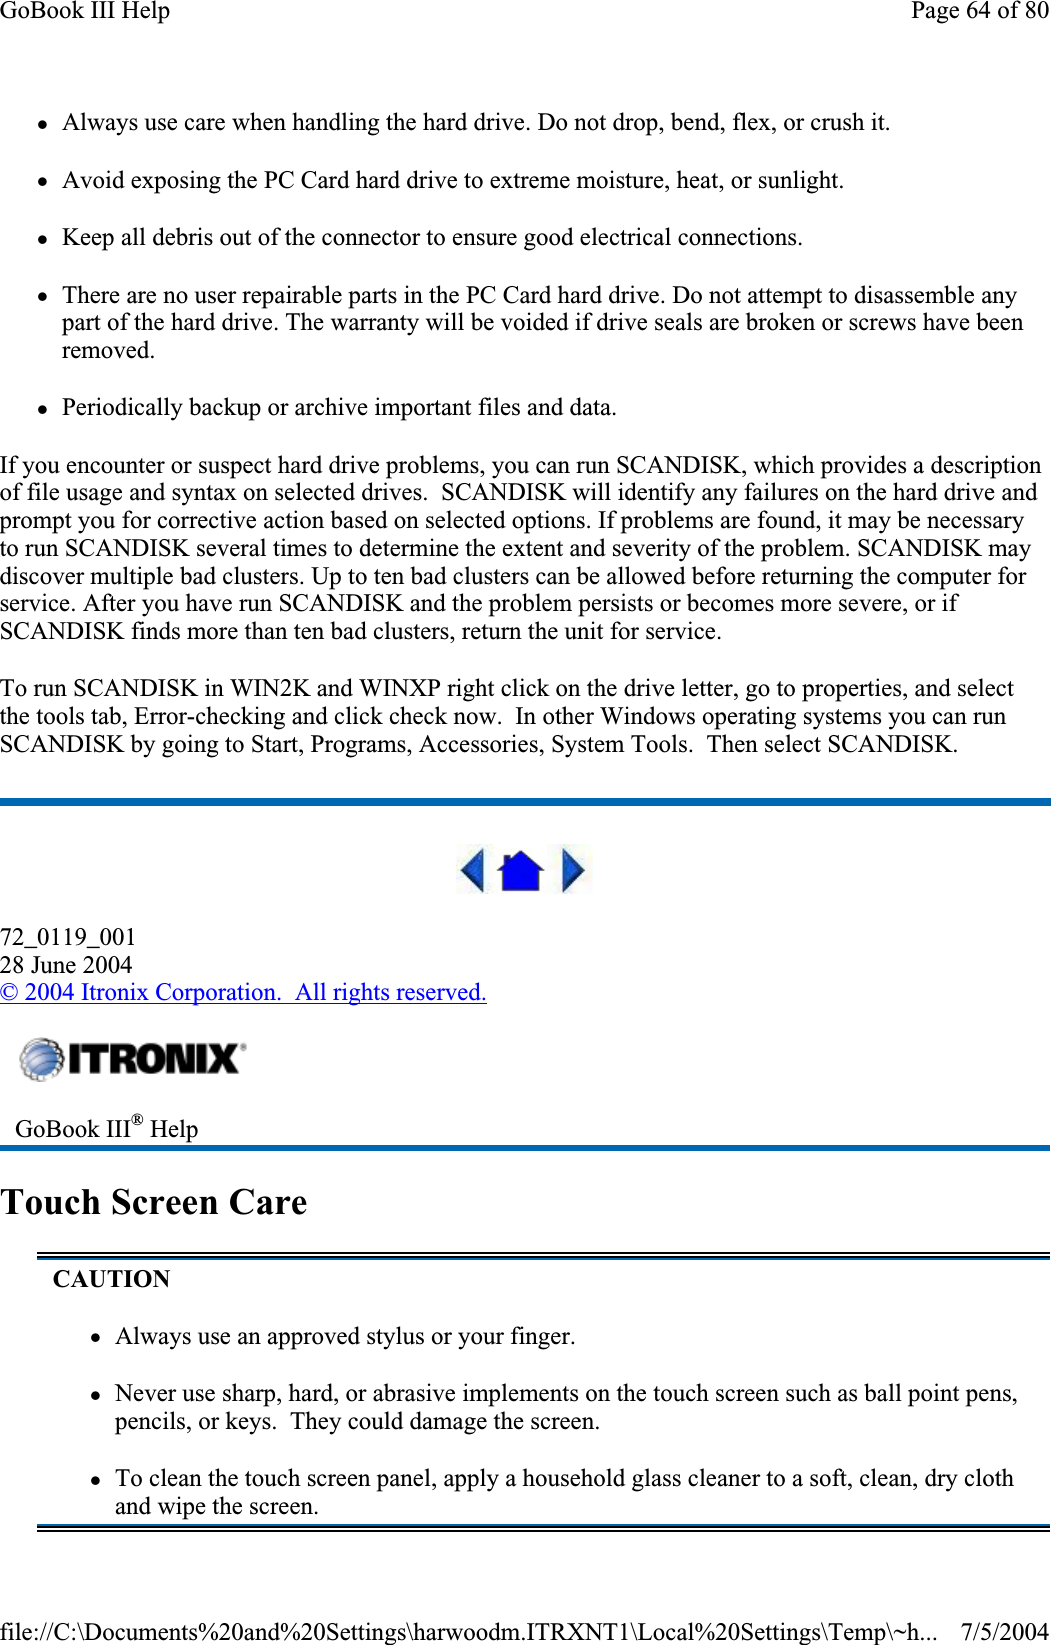
Contents
- 1. users manual
- 2. radio specific safety info
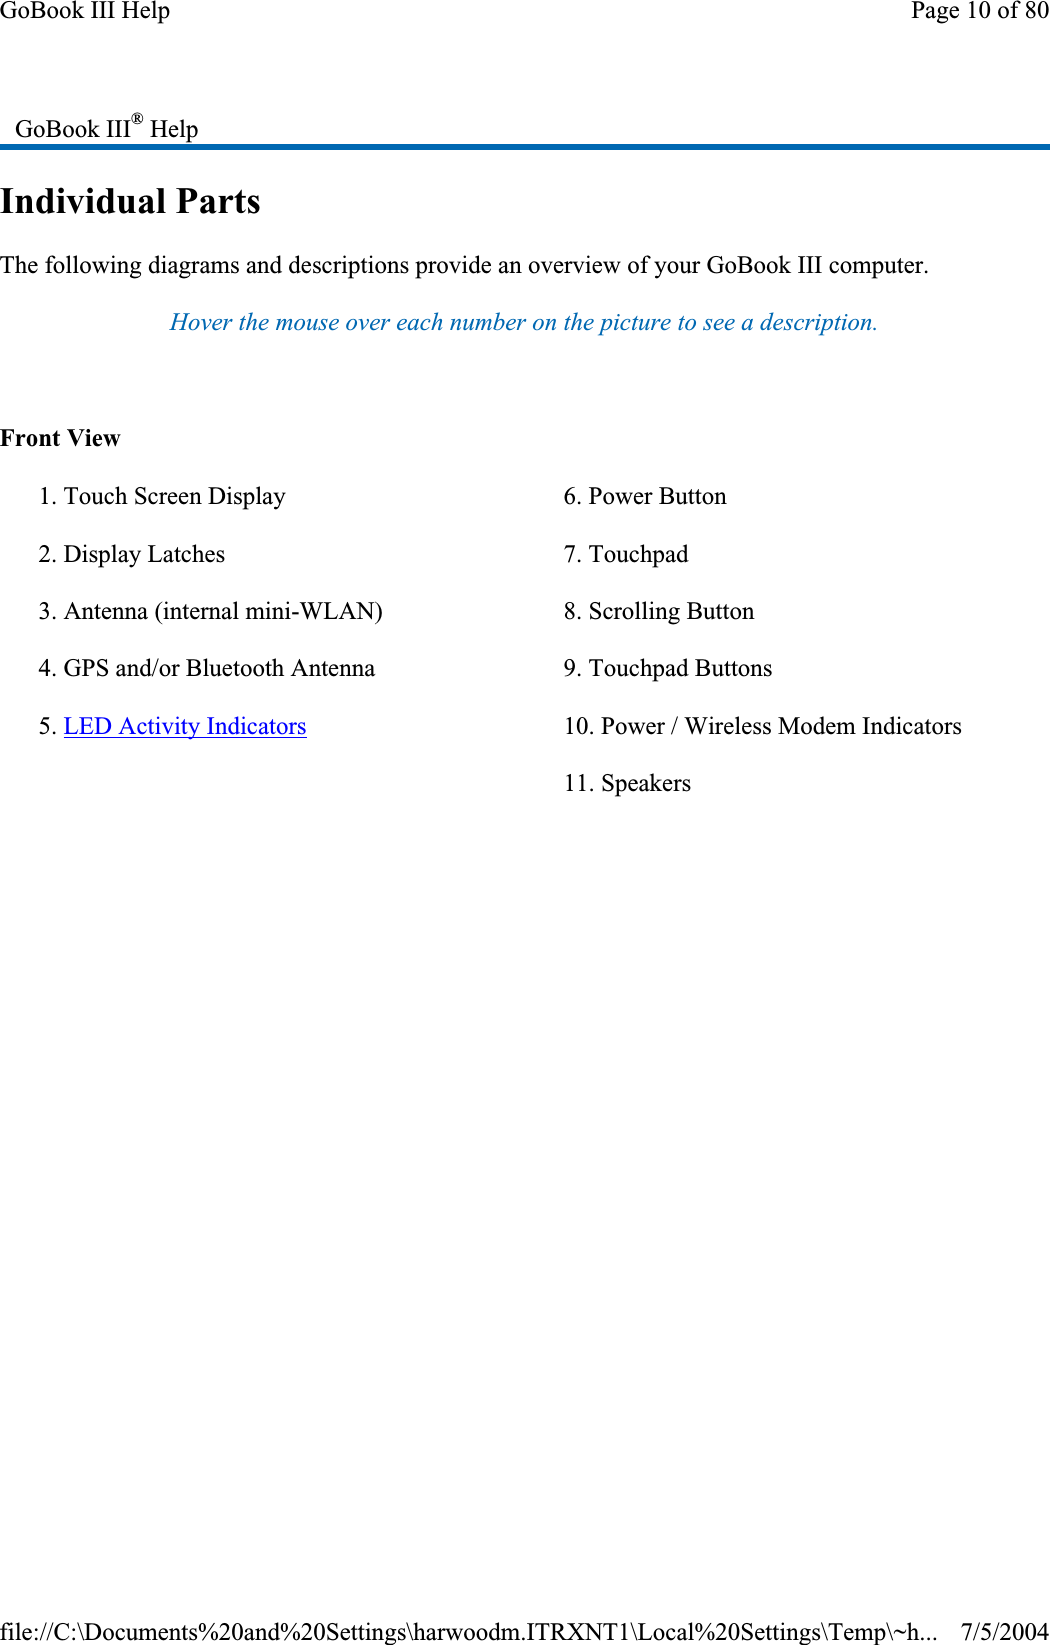
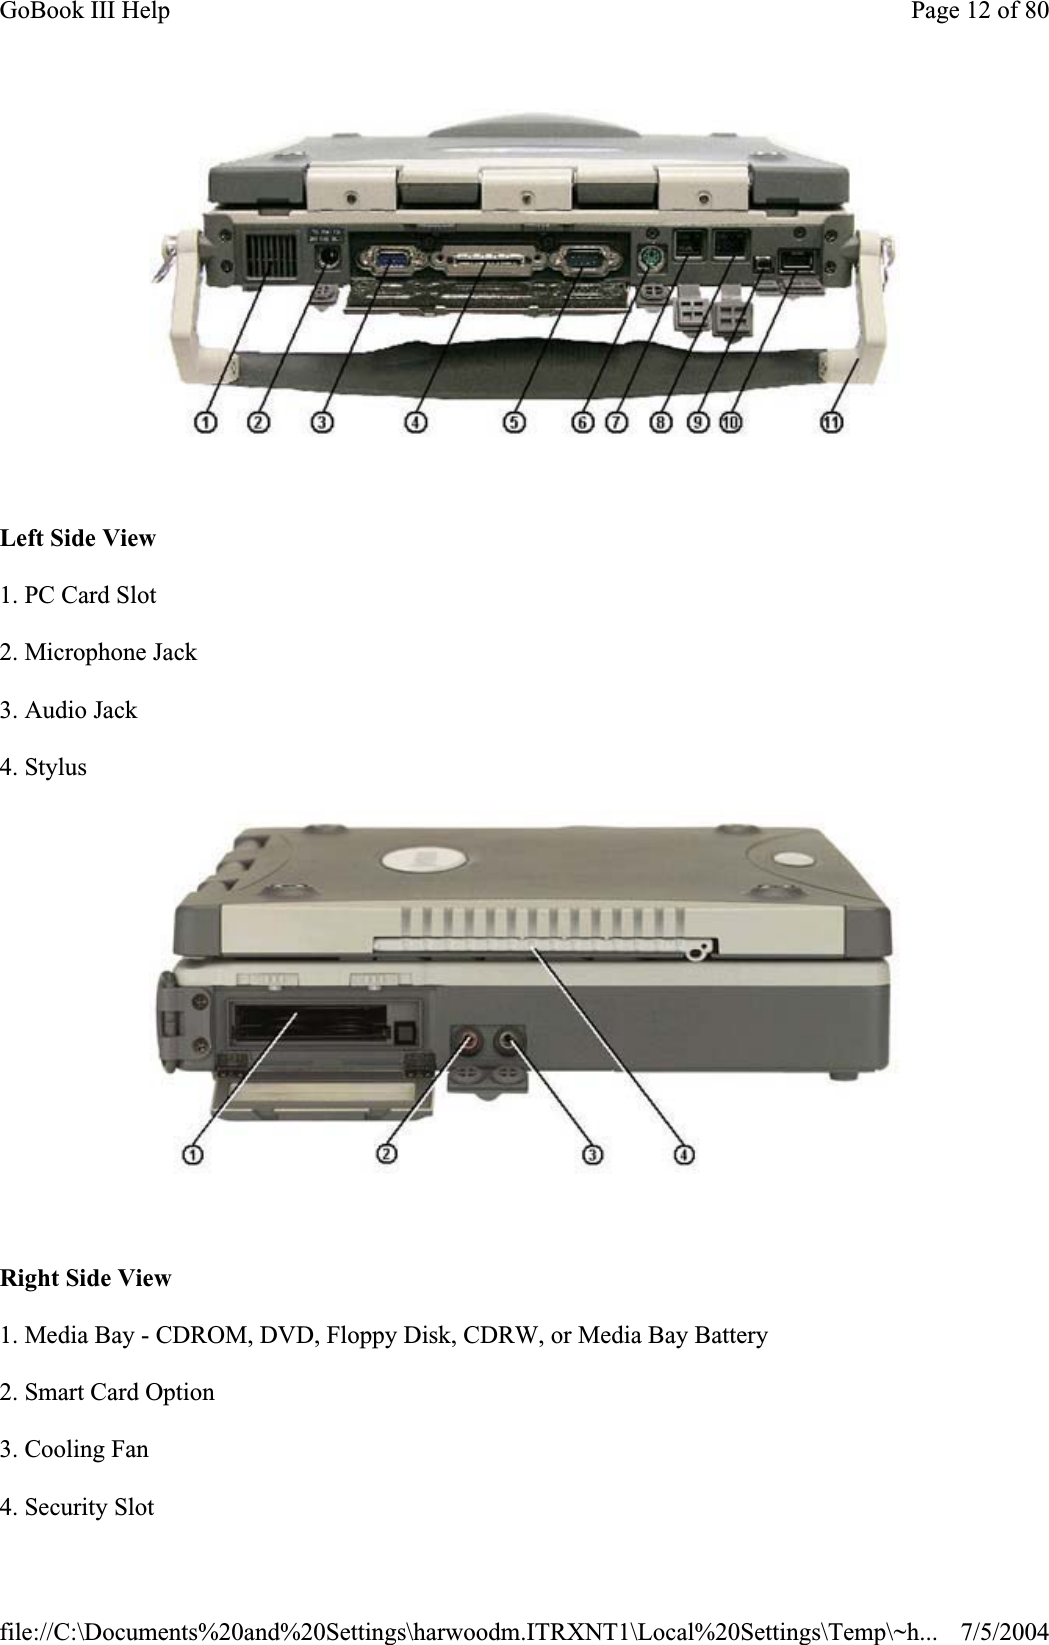
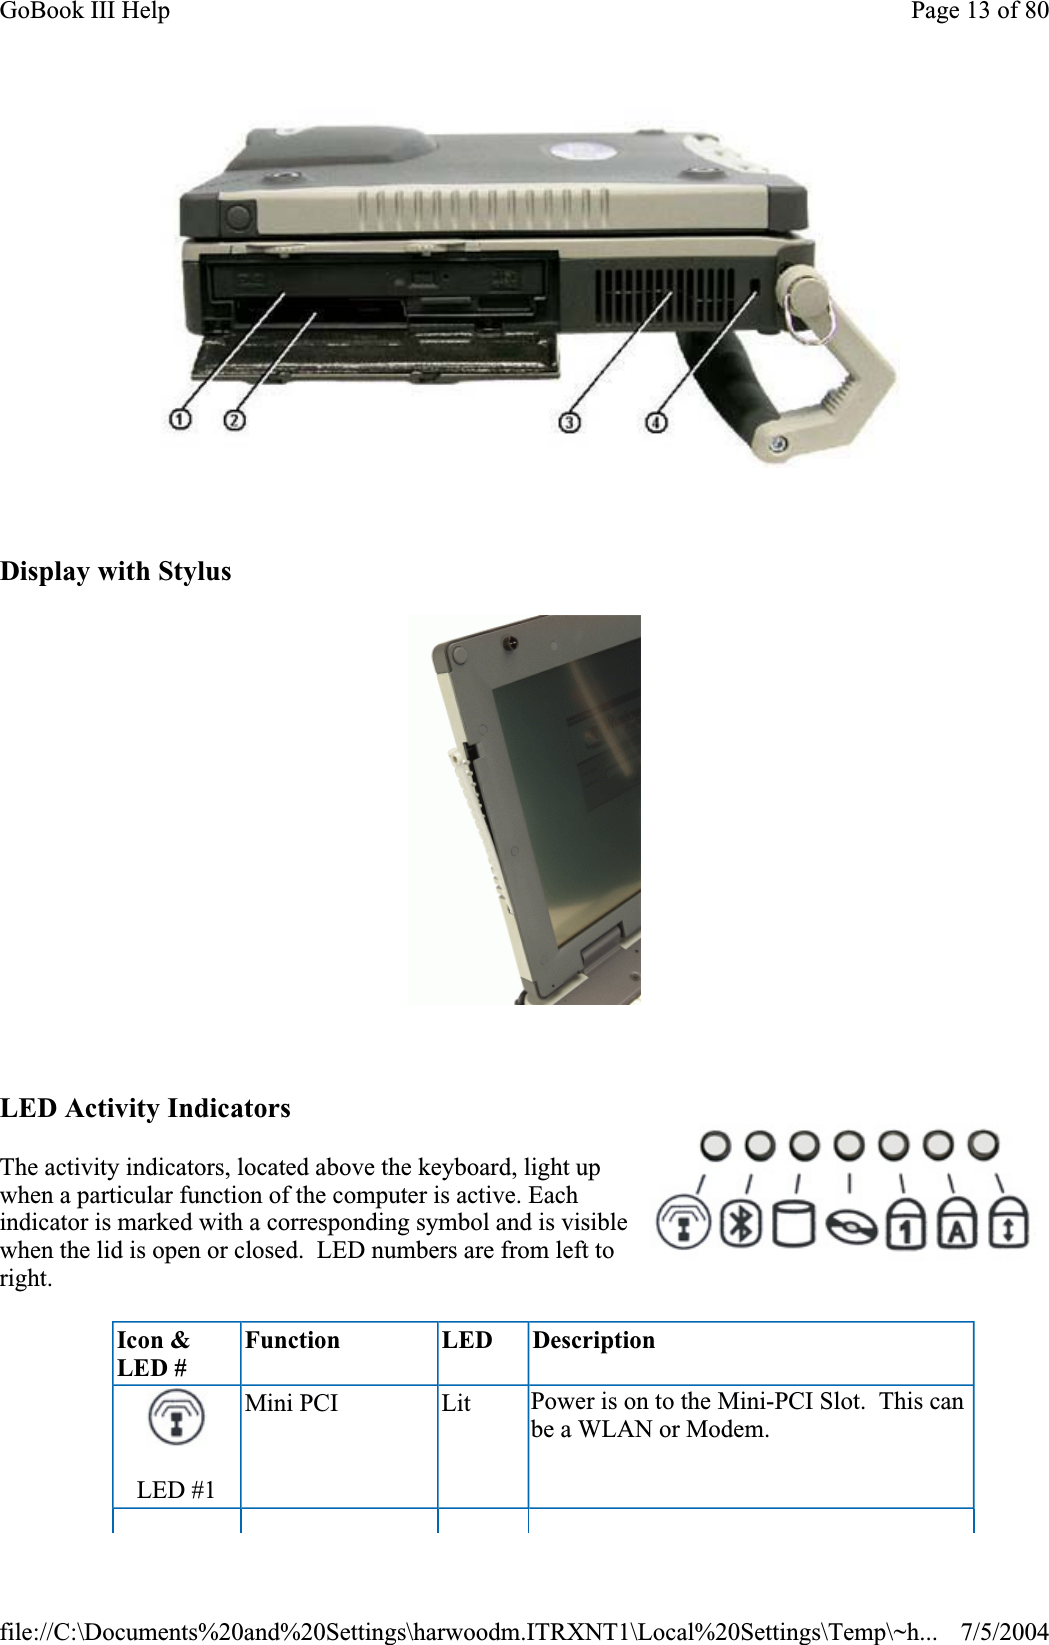
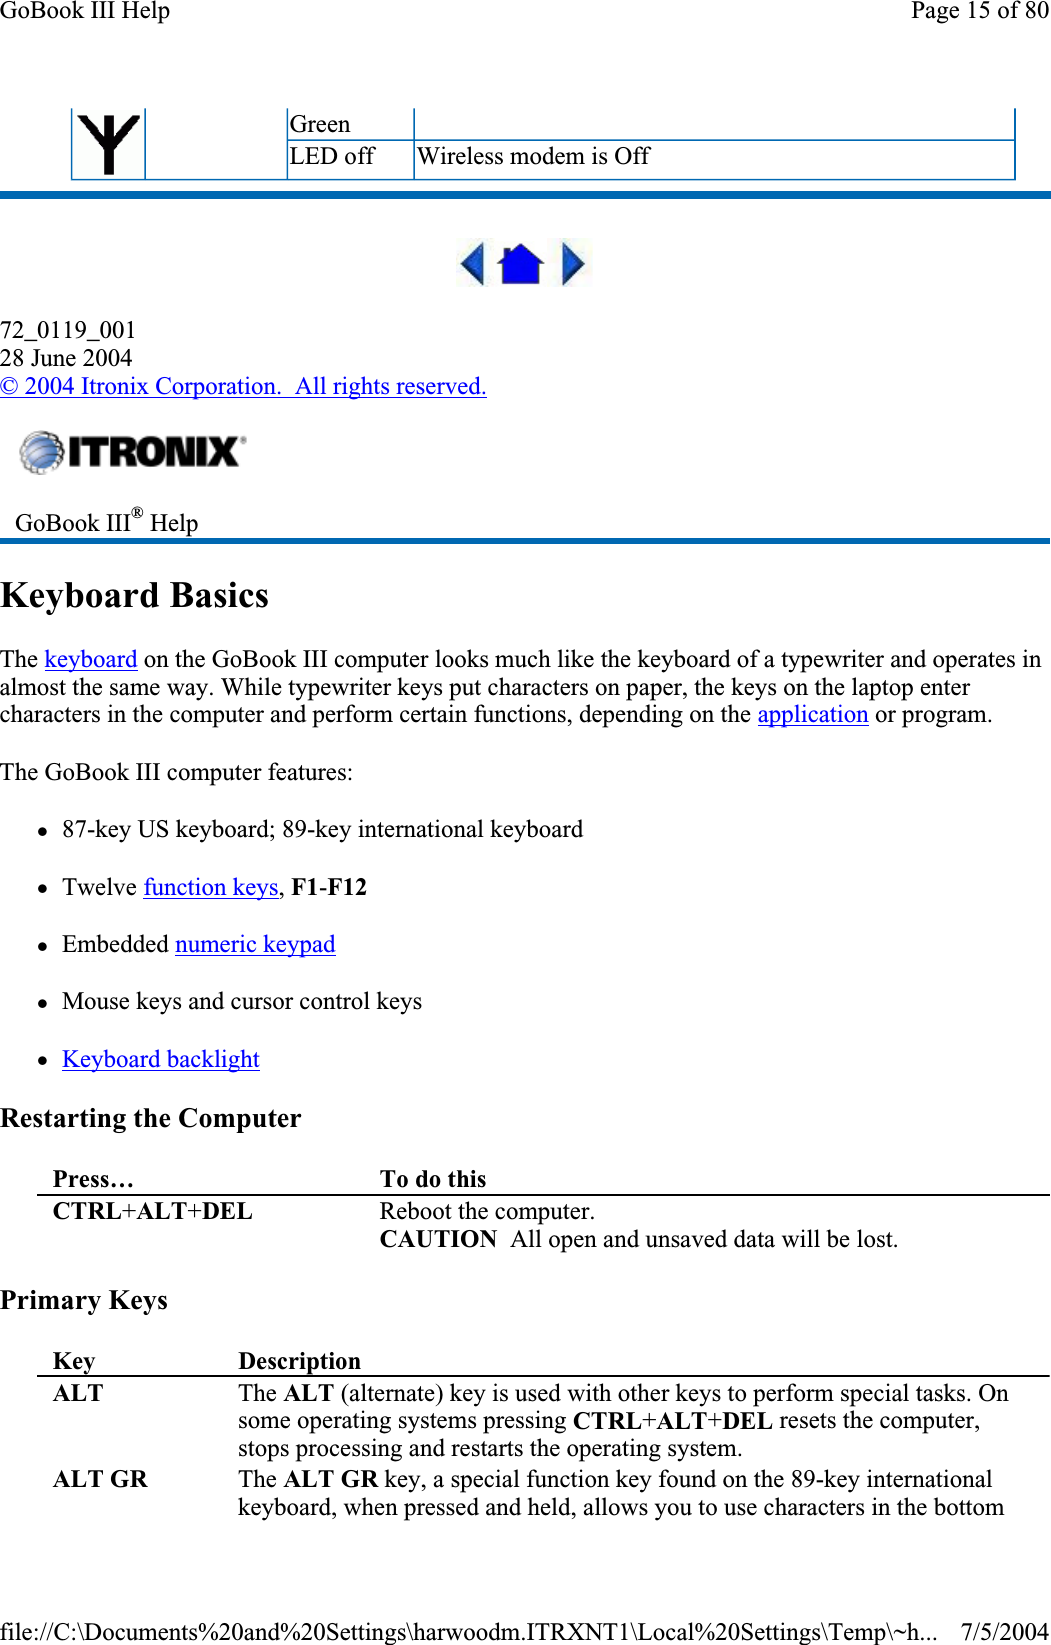
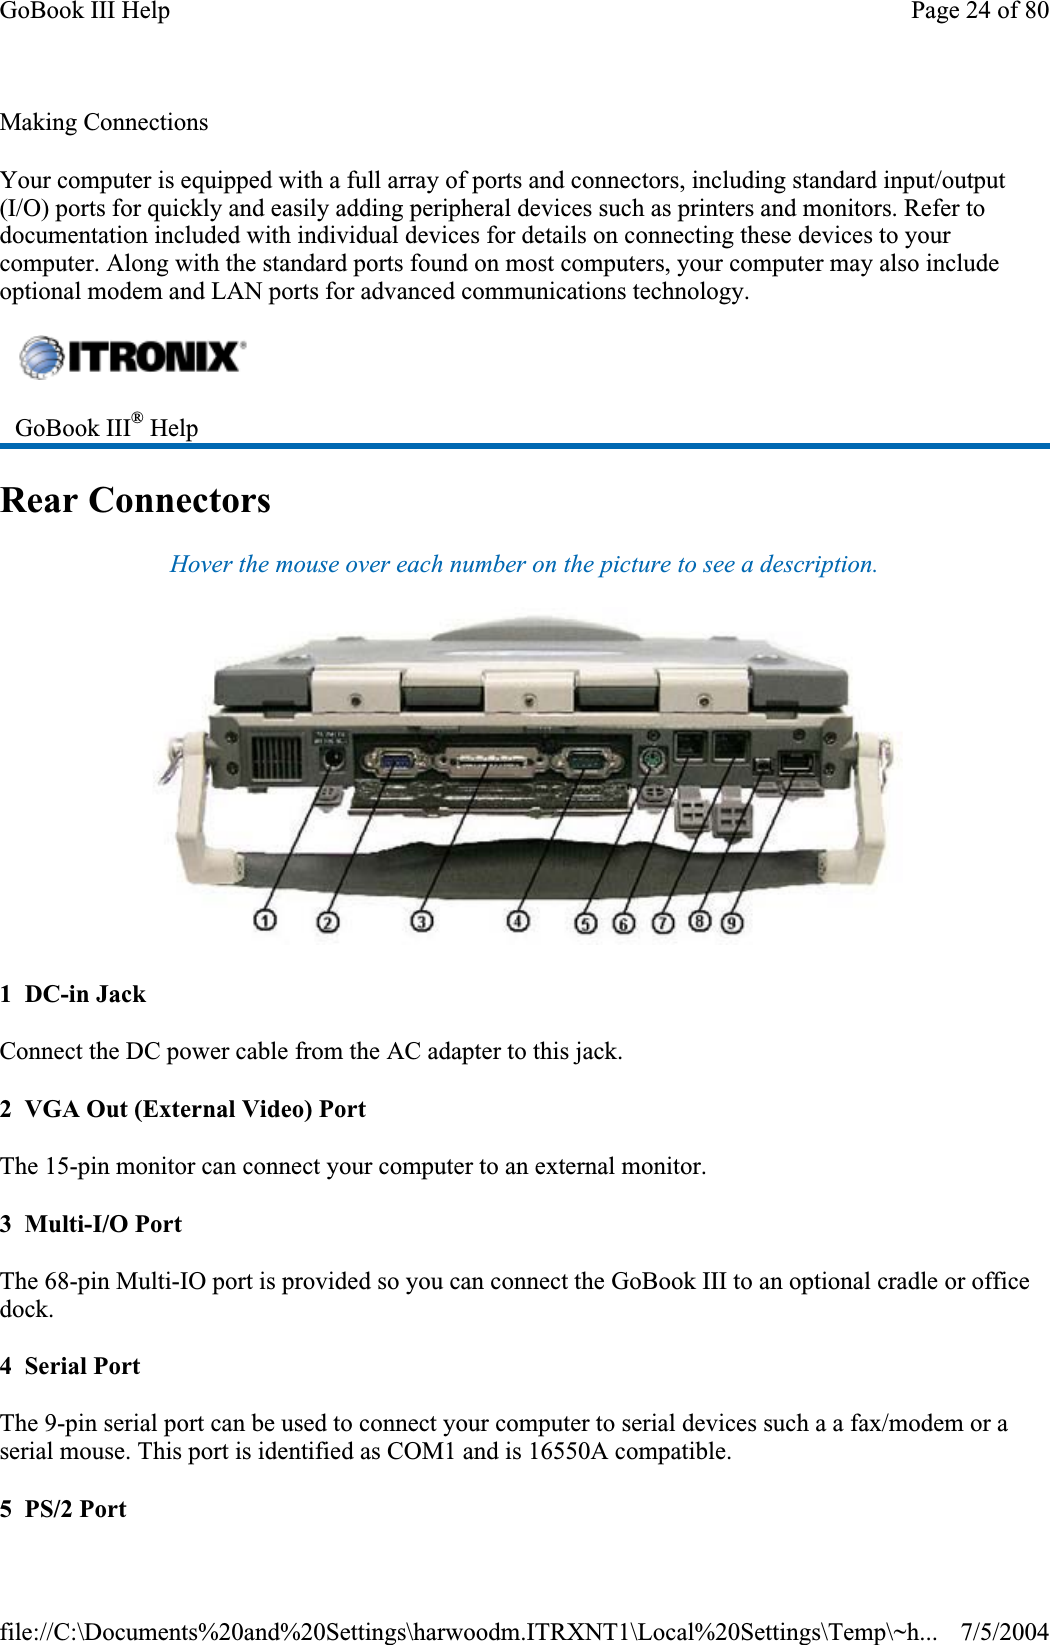
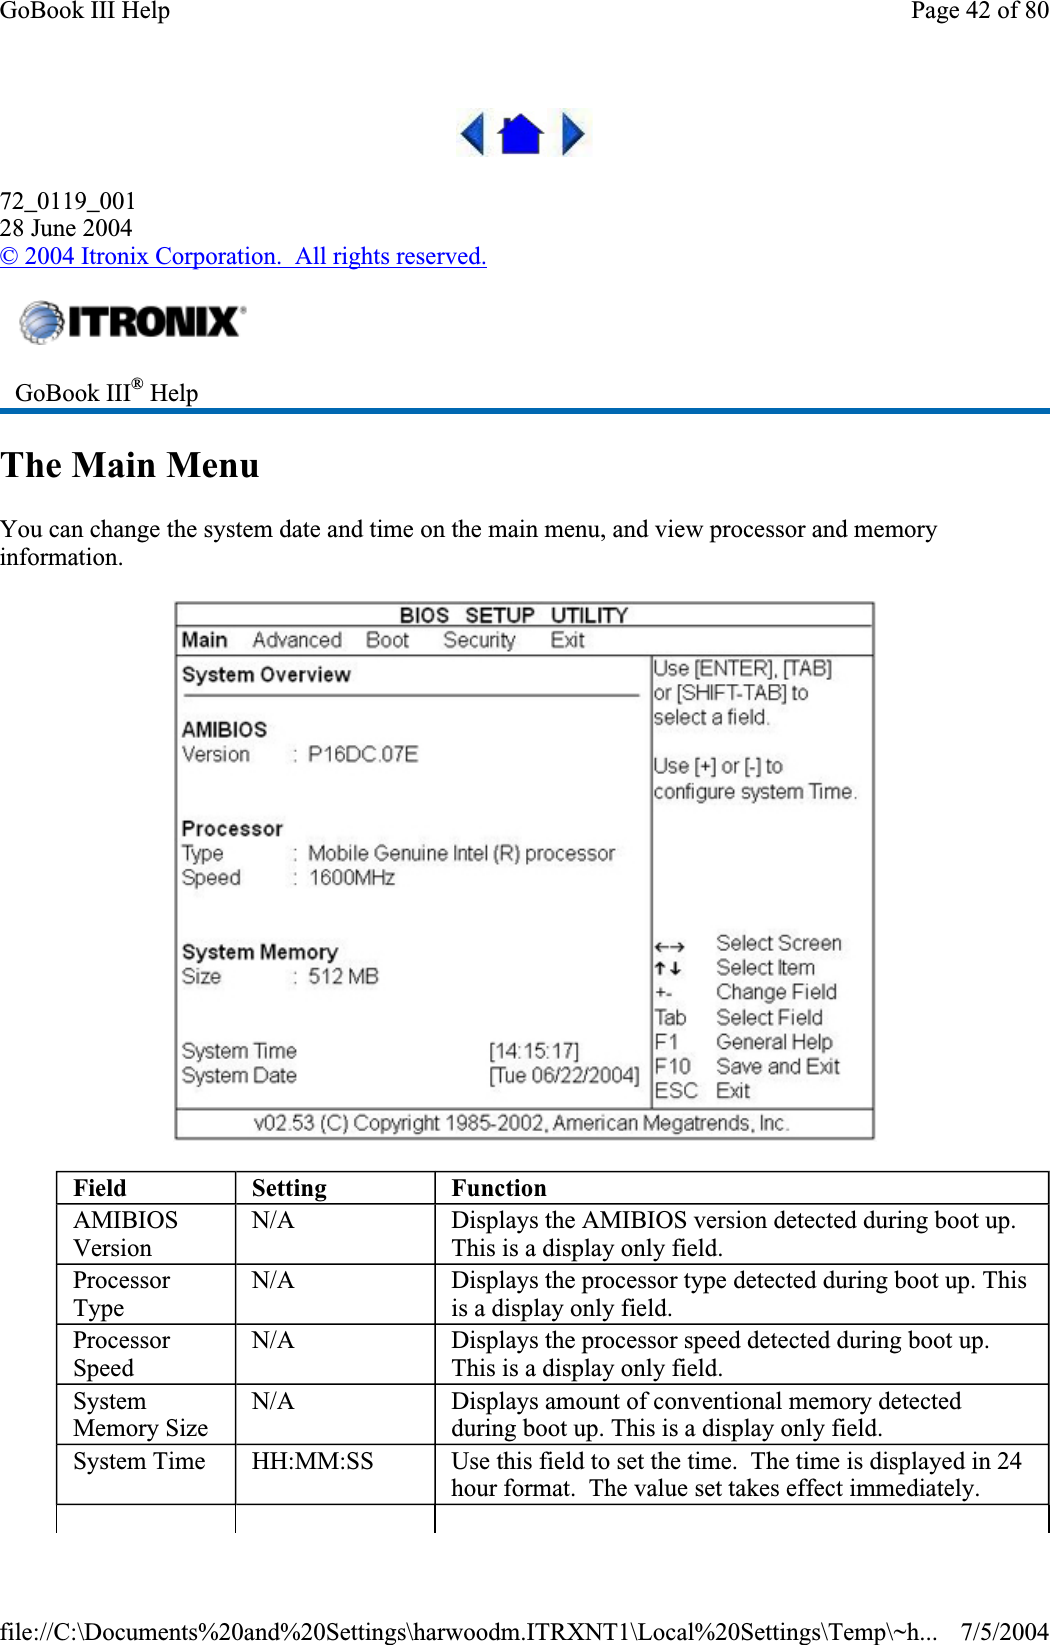
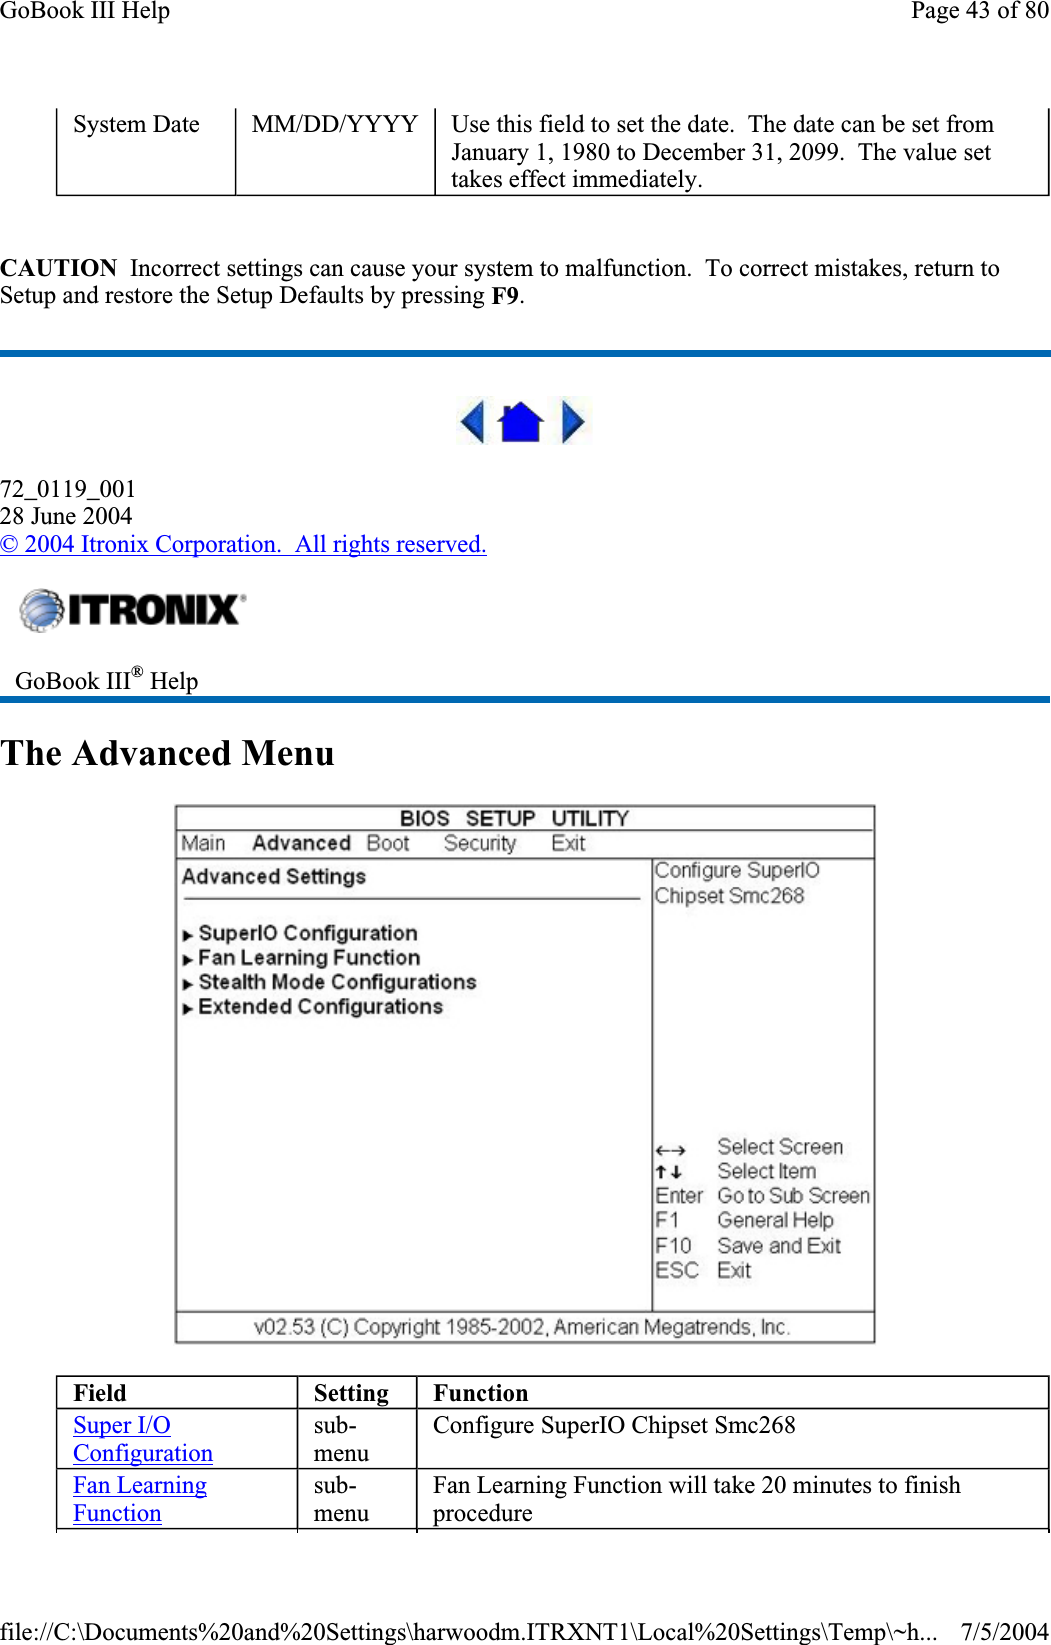
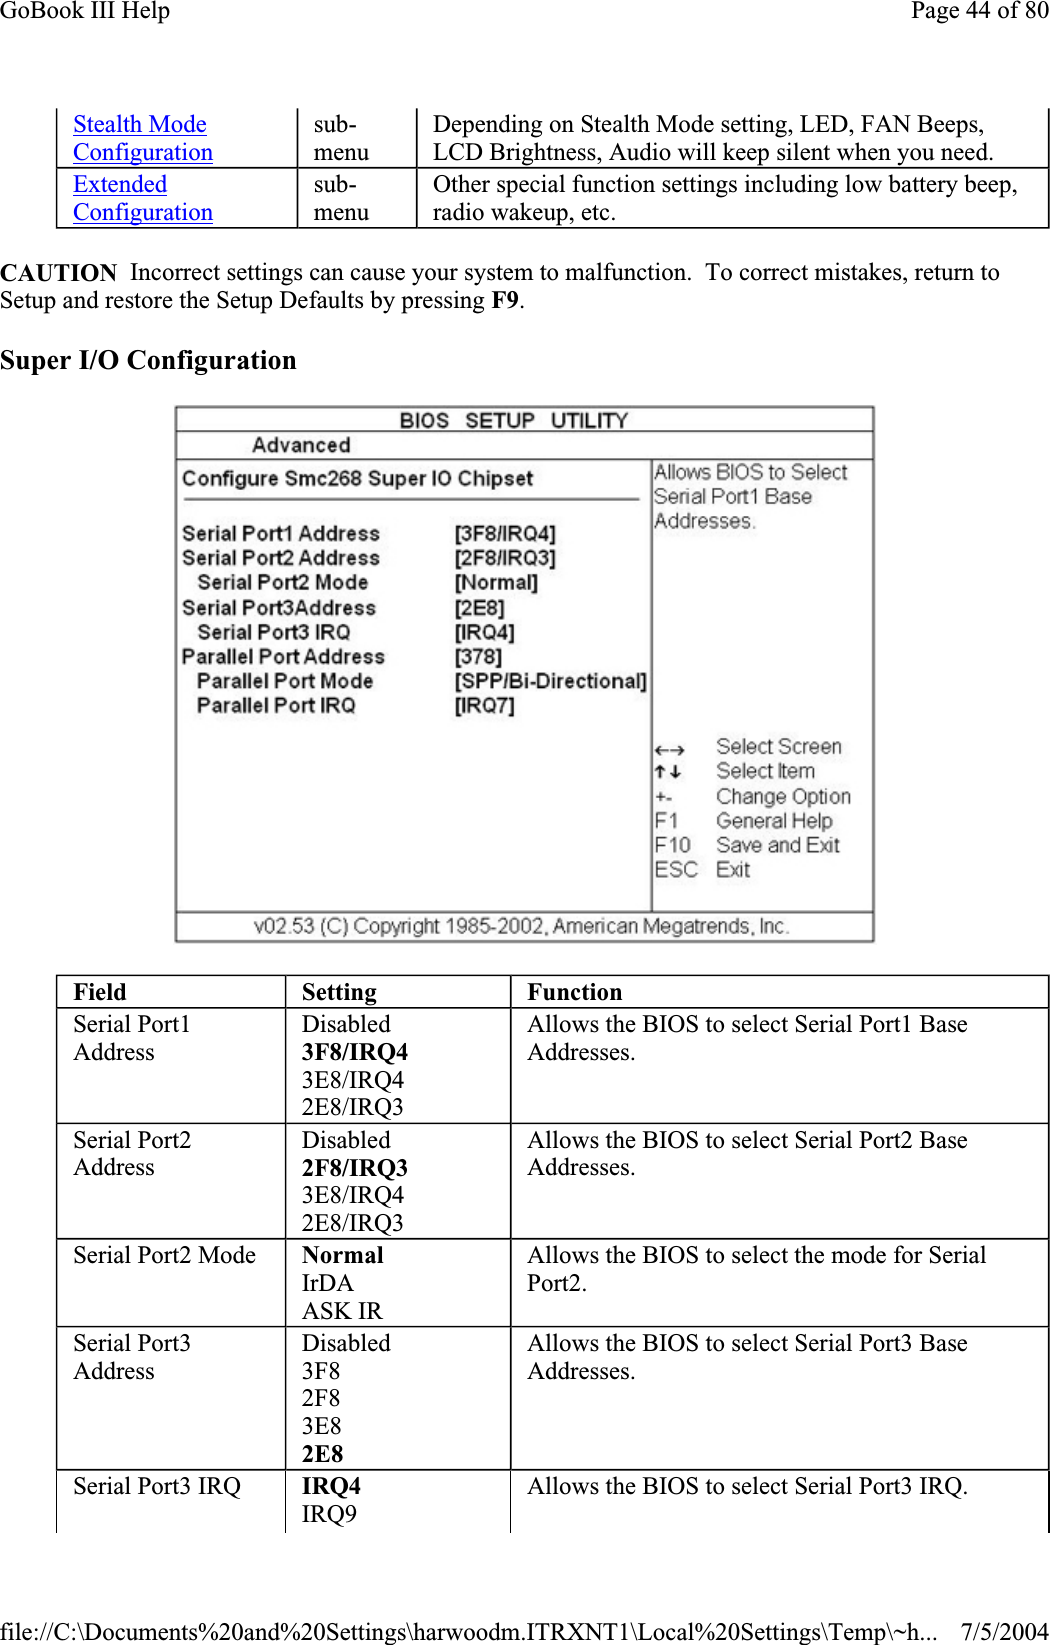
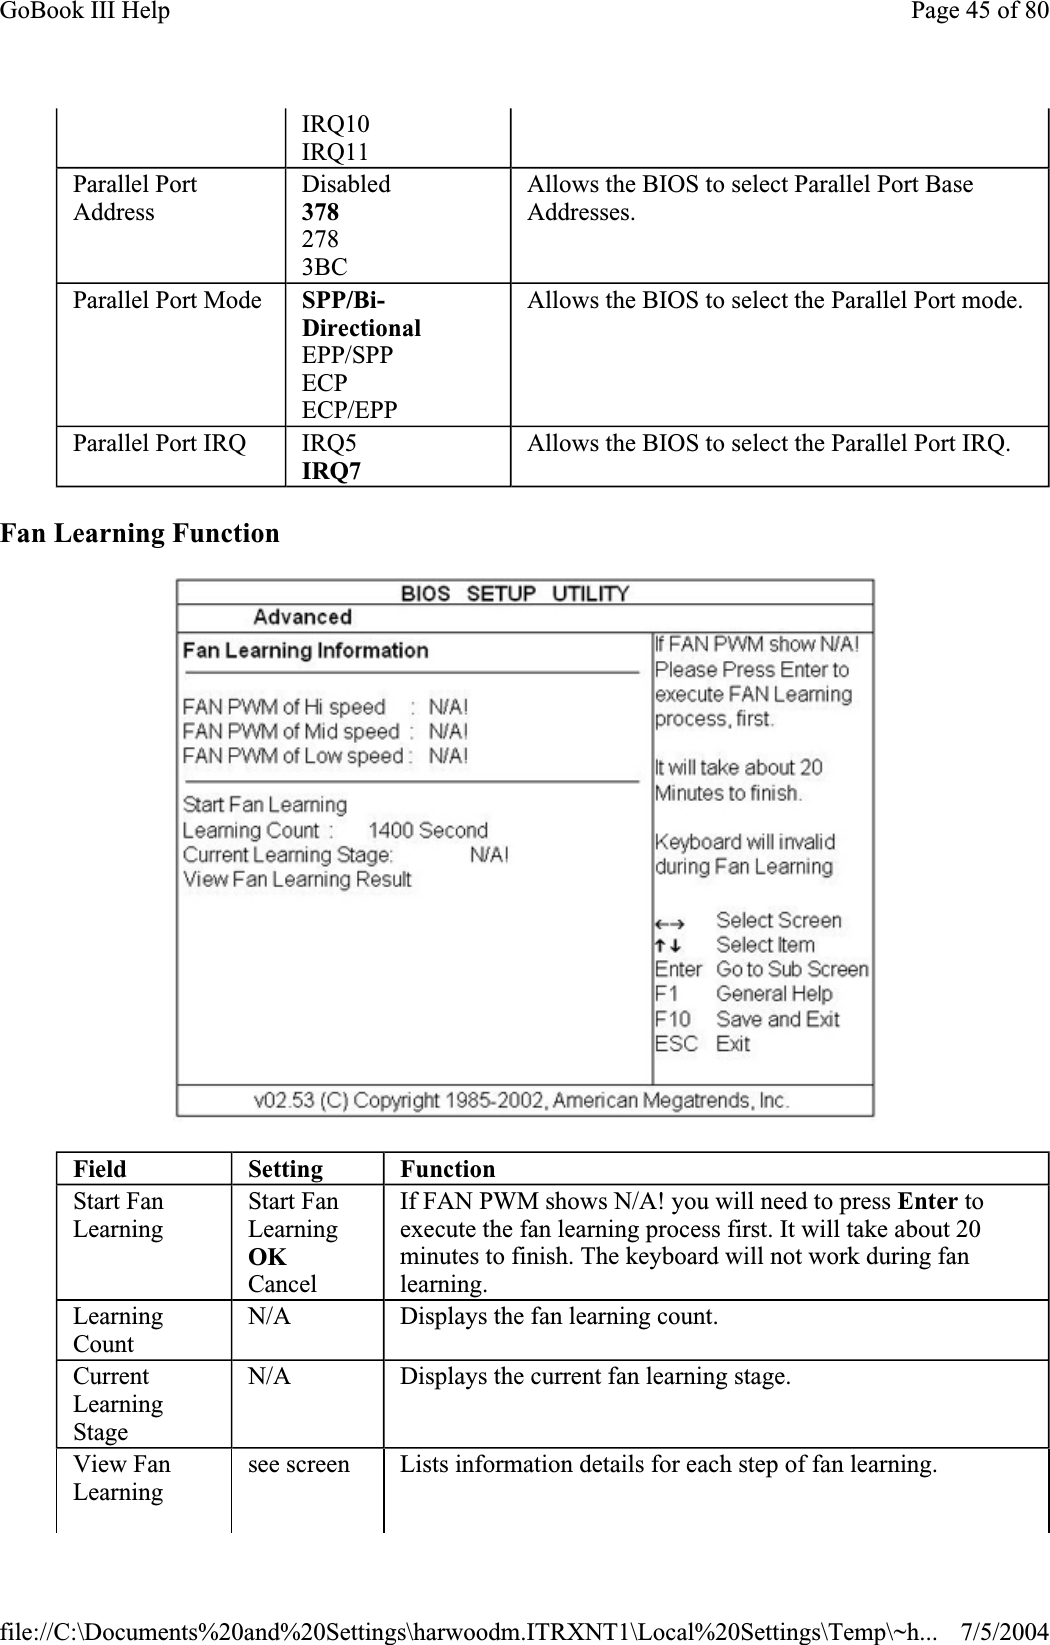
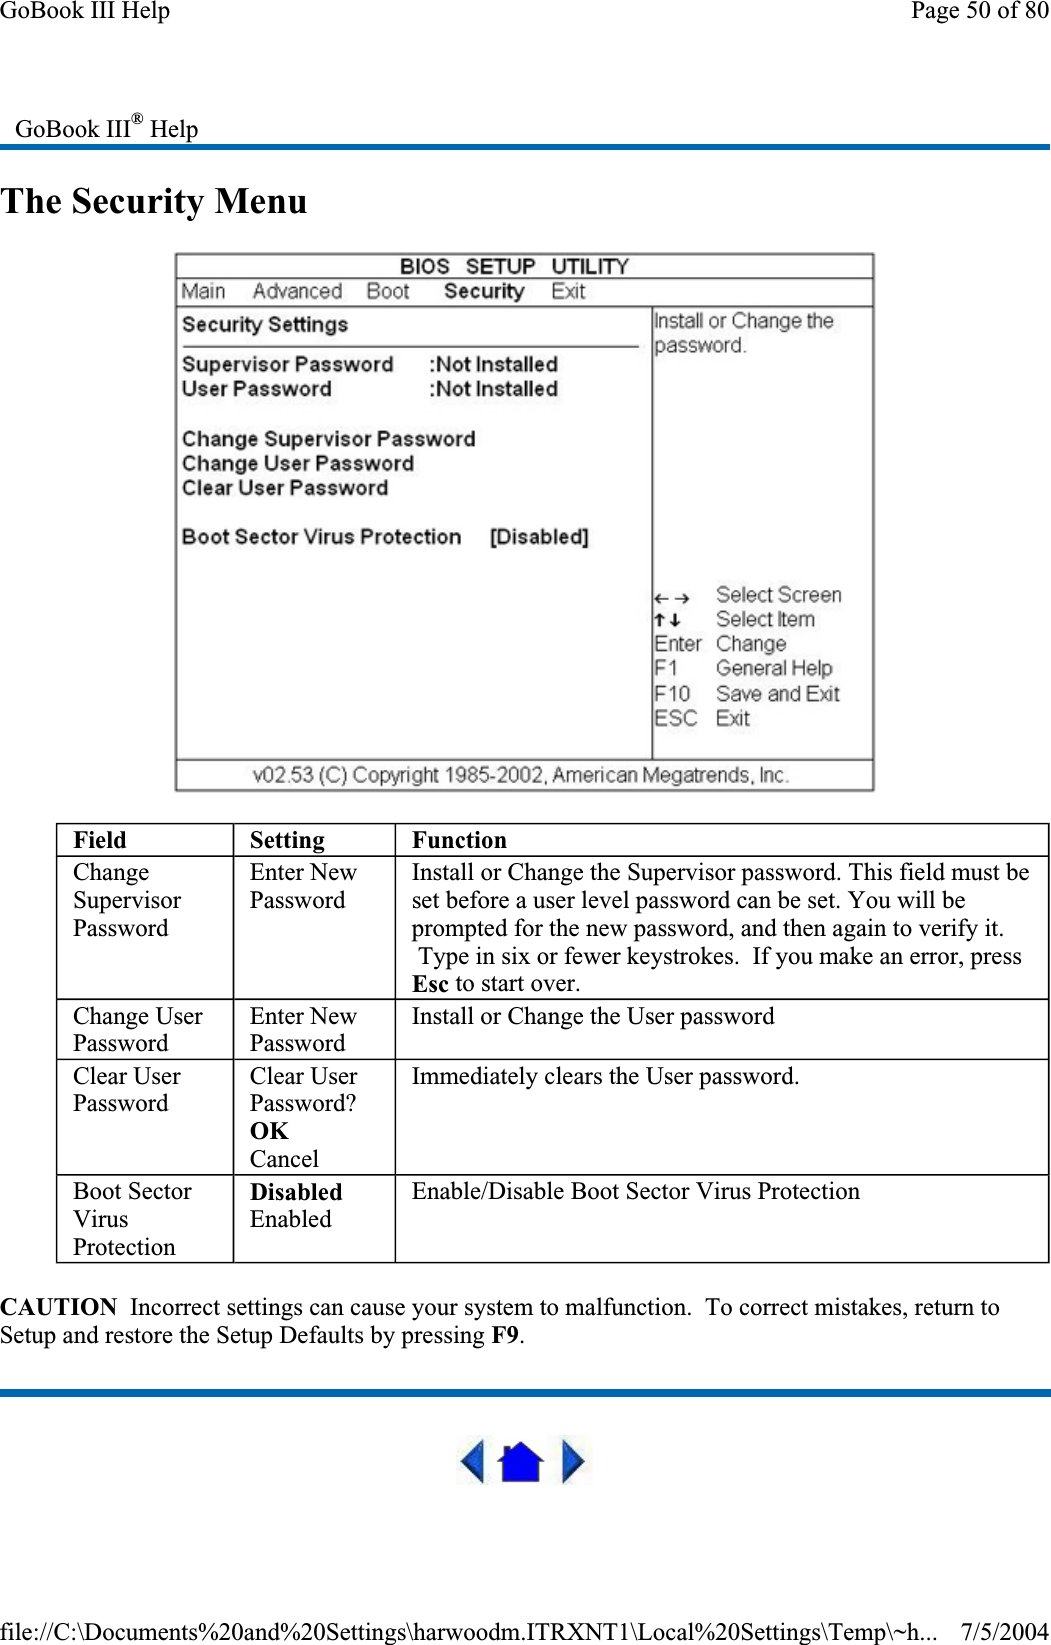
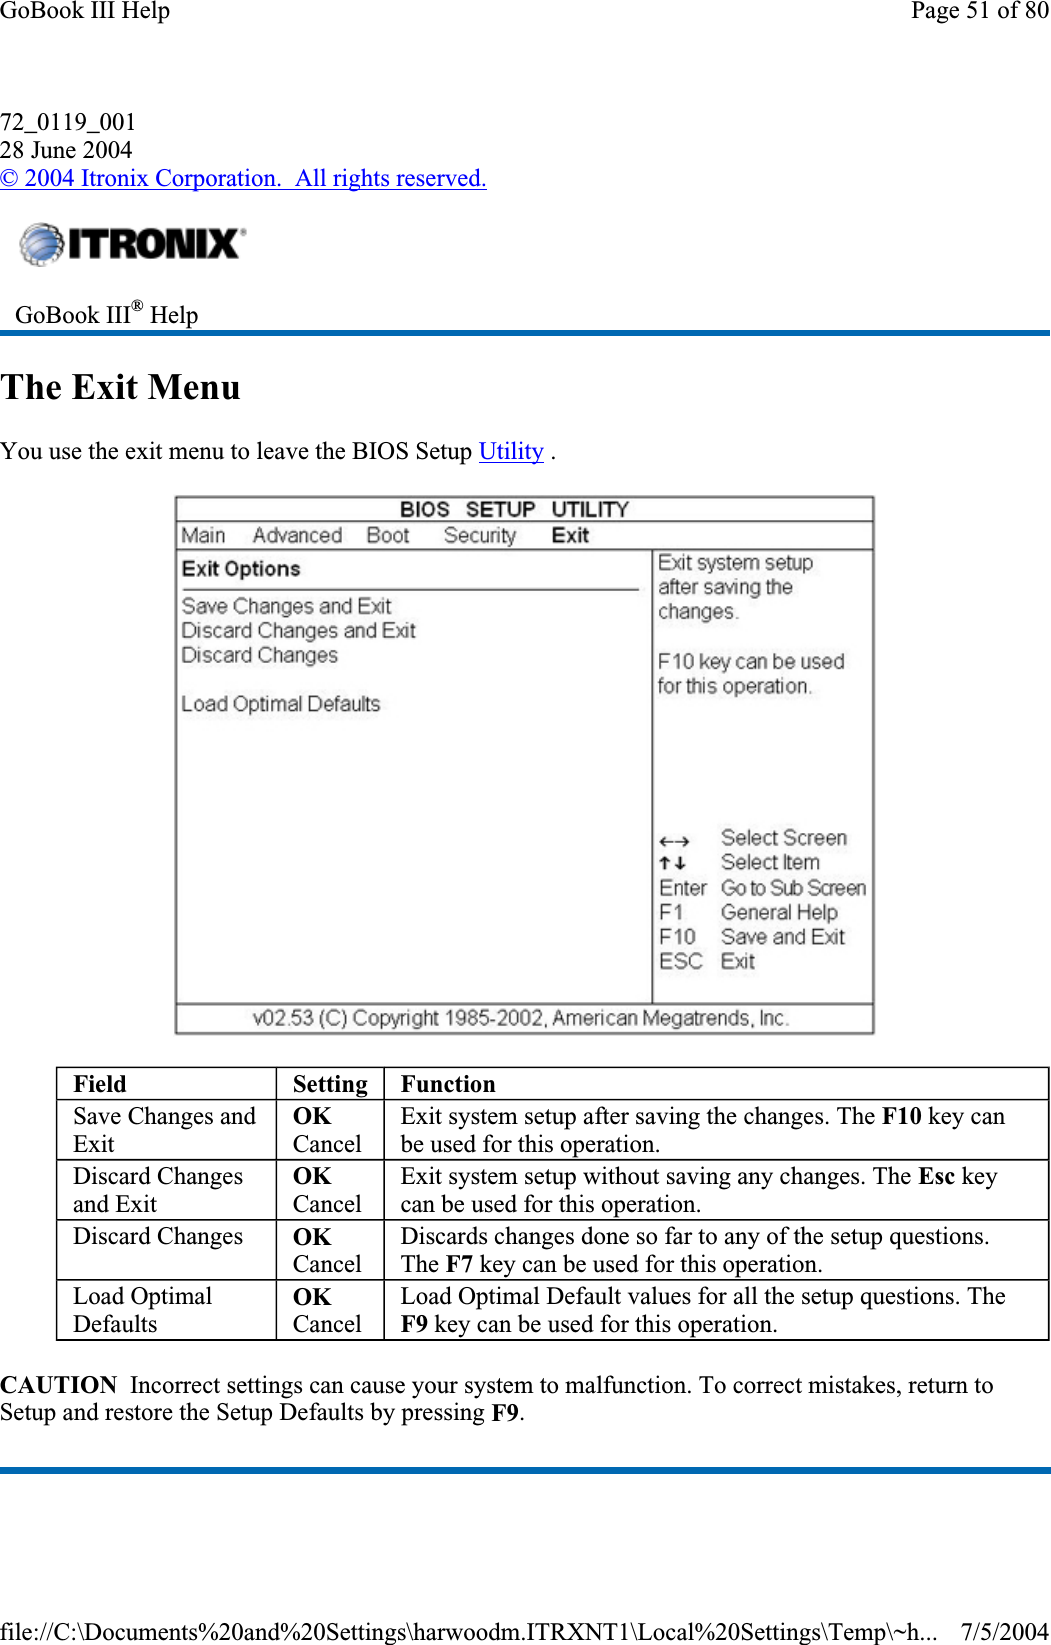
users manual

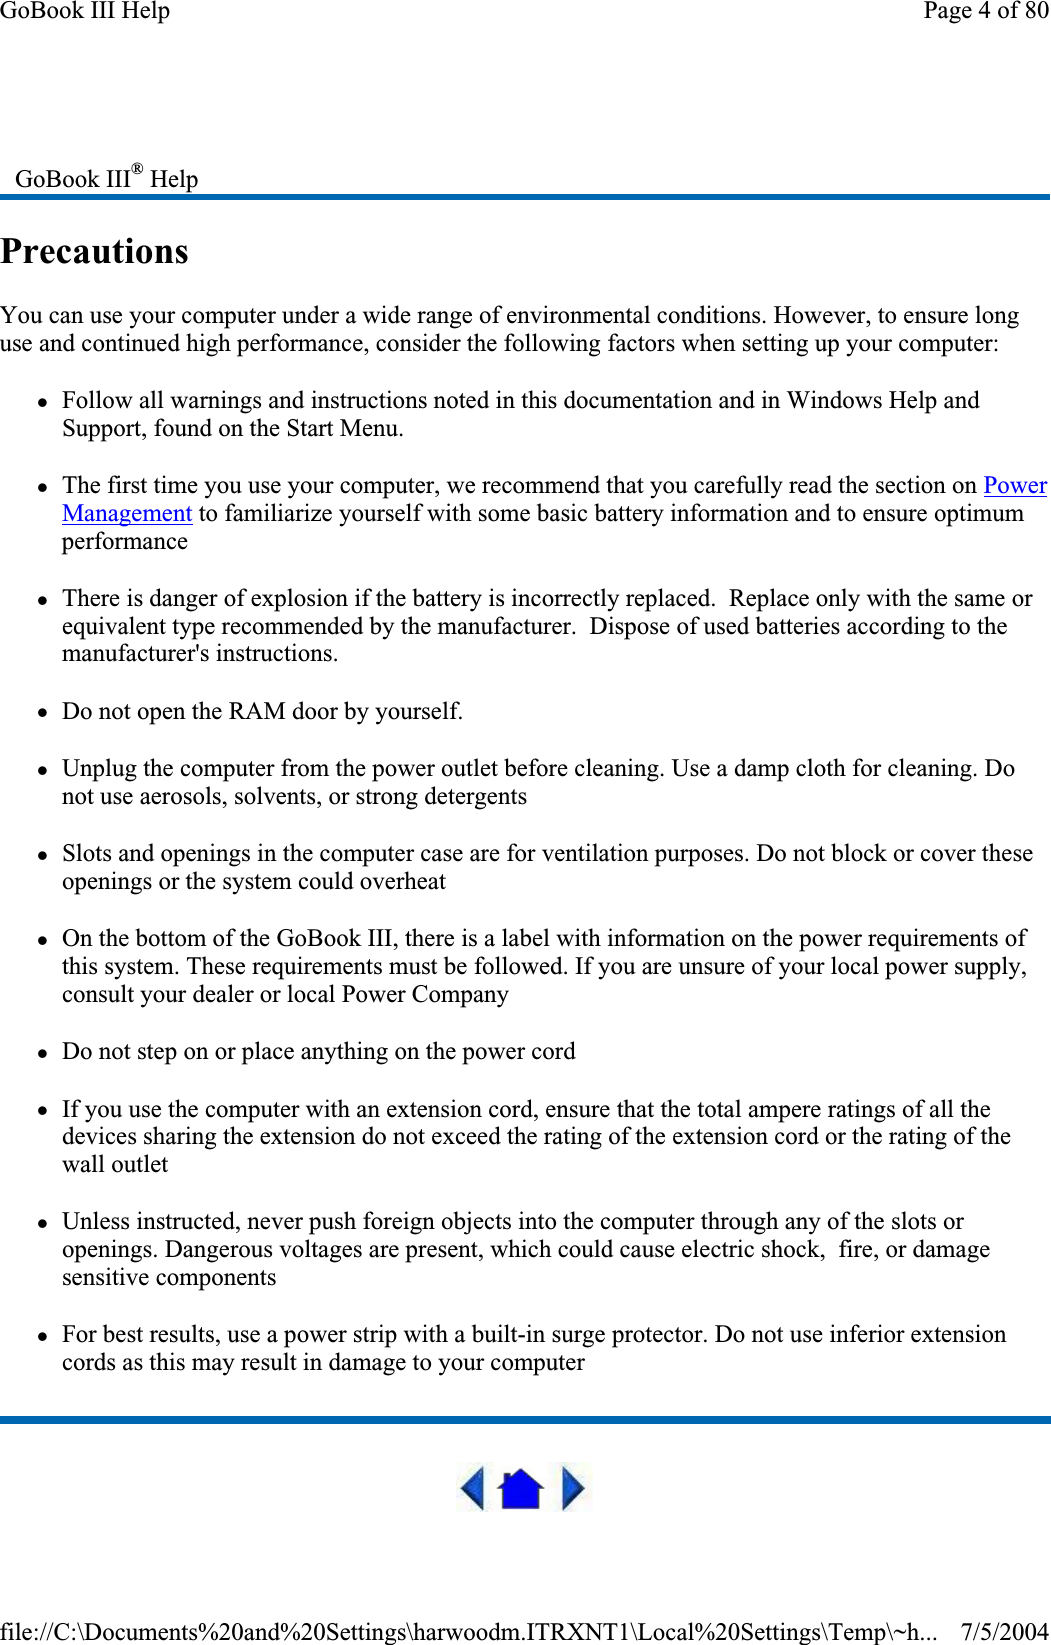


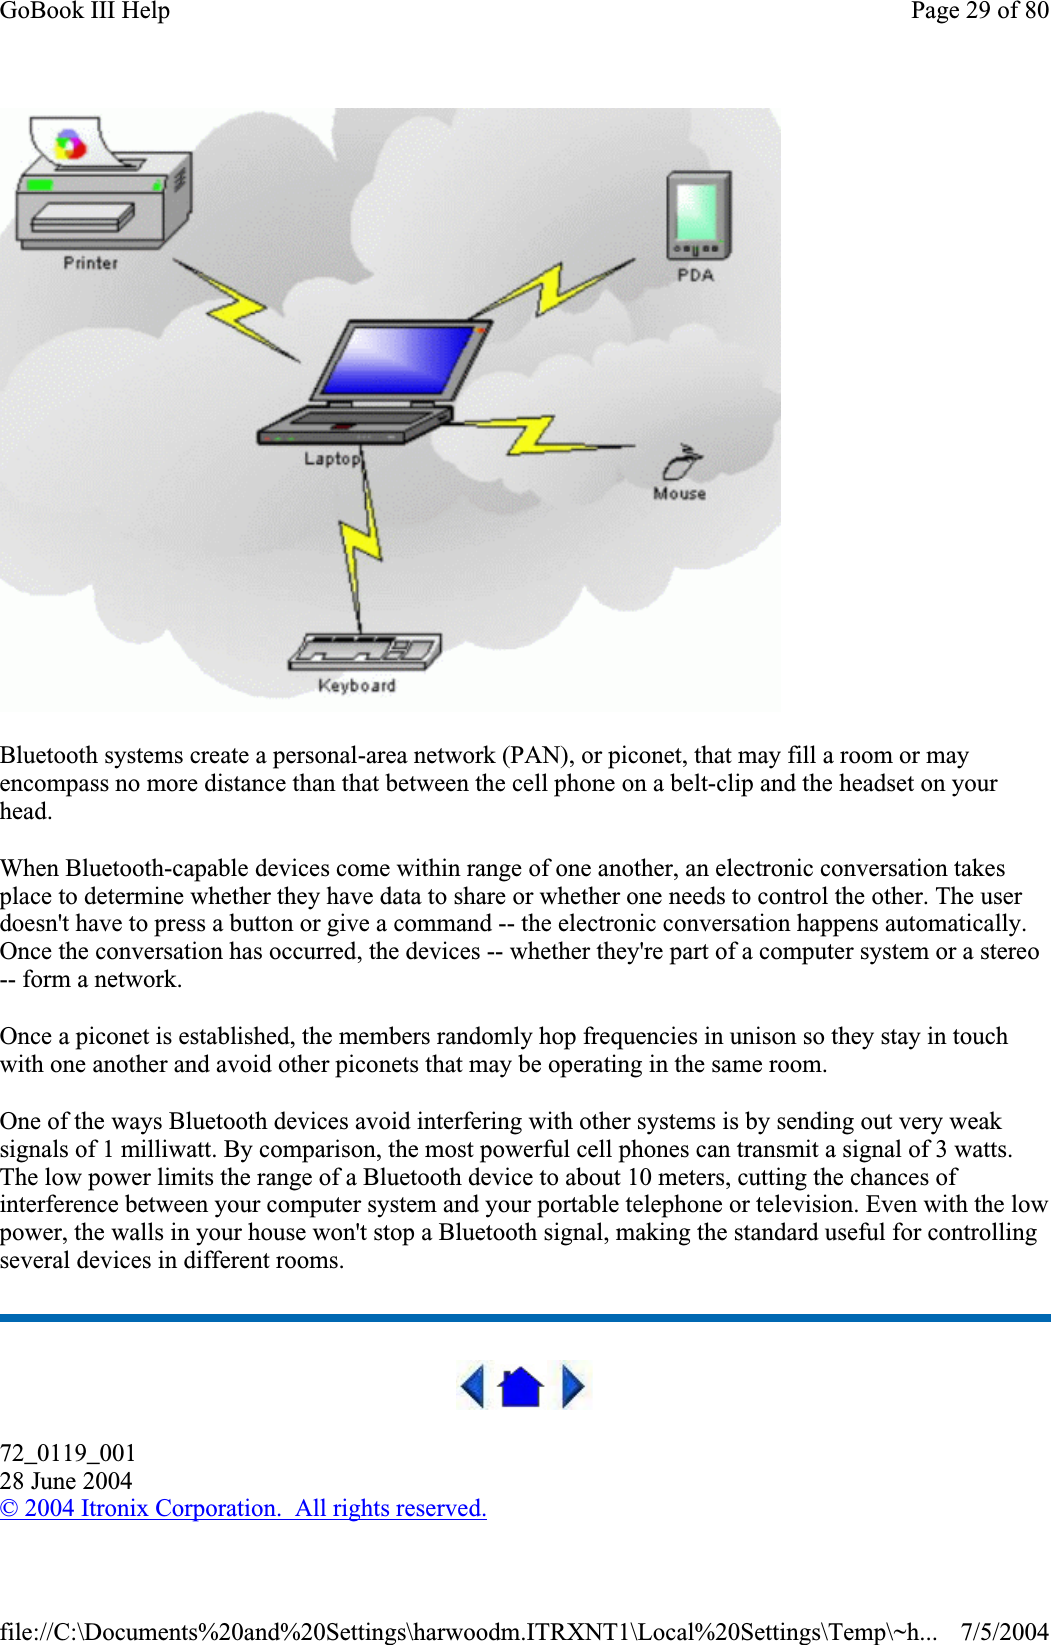

![zThere is a delay of 10 to 15 seconds before the CD-ROM drive is recognized. zDrivers may not be installed. Contact your organization’s help desk for assistance. The computer locks up when I remove the PC card zBefore you remove the card, select the PC card icon on the taskbar (in the tray area near the clock in the lower right corner), and choose “Stop [card name] card.” The computer locks up when inserting a PC card zBecause of the combination media bay configuration on the GoBook III, the computer may not be locked up. Instead, it may be taking a couple of minutes before the system recognizes the PC card slot.72_0119_00128 June 2004©2004 Itronix Corporation. All rights reserved.Pen/Touch Screen When I try to use the stylus on my touch screen, nothing happens zIf you cannot select objects accurately with the stylus, you may need to recalibrate the touch screen.To calibrate the touch screen1. From the Start Menu, select Programs, Mobile Computer Tools and then choose Touch Screen Calibrator. This opens the Calibration Applet. 2. Click on the Calibrate button. 3. After you have completed calibration by touching the highlighted points using an approved stylus, select OK to have the new settings take effect.The touch screen display warps or pillows in high humidity zThe computer remains functional; however, moving the computer to a more suitable environment GoBook III® HelpPage 79 of 80GoBook III Help7/5/2004file://C:\Documents%20and%20Settings\harwoodm.ITRXNT1\Local%20Settings\Temp\~h...](https://usermanual.wiki/General-Dynamics-Itronix/IX260PNL3054BT.users-manual/User-Guide-508818-Page-79.png)
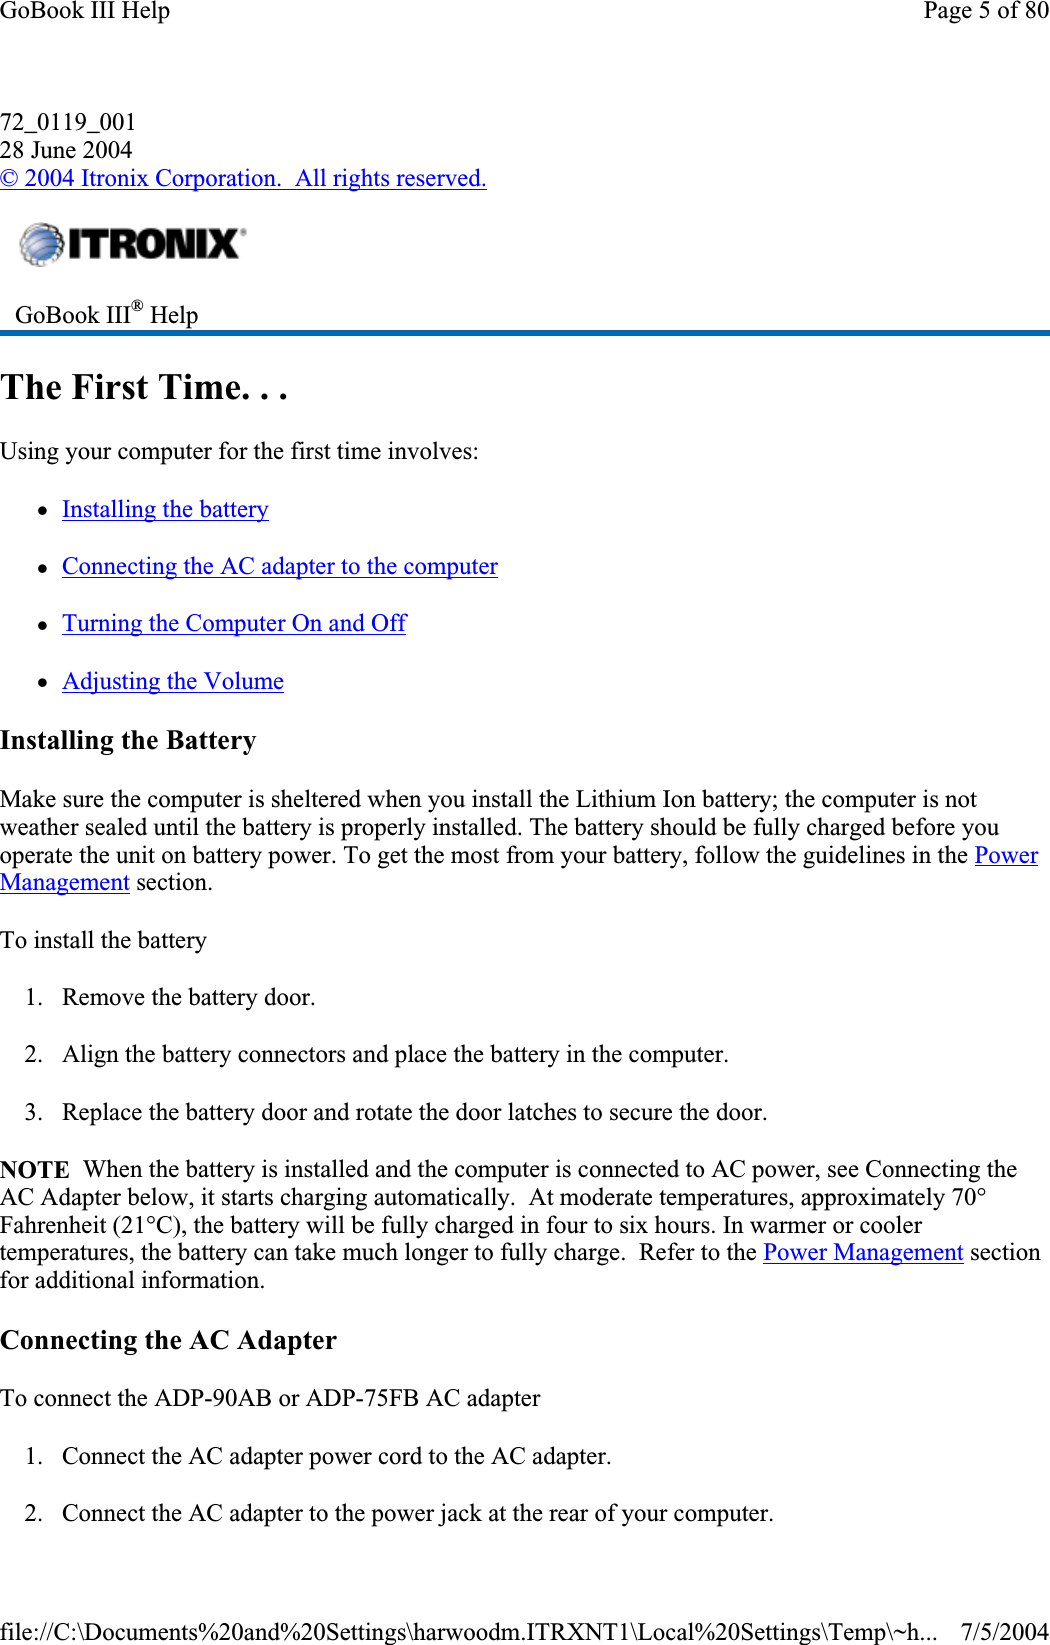
![documentation for instructions about entering this information.Warnings and CautionsWARNING It is important that only authorized Itronix personnel attempt repairs on Itronix equipment as this might void any maintenance contract with your company. Unauthorized service personnel might be subject to shock hazard on some Itronix equipment if removal of protective covers is attempted. Changes or modifications not expressly approved by the party responsible for compliance could void the users authority to operate the equipment. There is danger of explosion if the battery is incorrectly replaced. Replace only with the same or equivalent type recommended by the manufacturer. Dispose of used batteries according to the manufacturer's instructions. The product you have purchased is powered by a rechargeable battery. The battery is recyclable and, under various state and local laws, it may be illegal to dispose of this battery into the municipal waste stream. Do not crush the battery or place it in a fire. Check with your local solid-waste officials for details on recycling options or proper disposal. CAUTION Internal components of the GoBook III (IX260+) computer will be damaged if exposed to contaminants. When dust covers, the PC card door, or the bottom access panel are open on the computer, shield the unit from all contaminants such as liquids, rain, snow, and dust. Internal radio(s) may have an individual FCC Identifier which are not applicable to this configuration. Only the FCC ID shown on the label located on the bottom of the IX260+ Laptop PC is applicable. The IX260+ Laptop PC must not beco-located or operating in conjunction with any other antenna or transmitter other than specified in the FCC ID filing. This device may contain a WAN radio transmitter, a WLAN radio transmitter, and a PAN radio transmitter. To comply with FCC RF exposure requirements when using the WAN radio transmitter, a minimum separation distance of 20 cm must be maintained between the external dipole antenna and all users/bystanders. When using the WLAN and/or PAN transmitter, a minimum separation distance of 20 cm must be maintained between the back side of the display screen and users/bystanders.The WAN radio and WLAN/PAN transmitters should be turned off before carrying the Laptop PC in order to comply with FCC RF exposure requirements. "The equipment has been approved to [Commission Decision "CTR21"] for pan-European single terminal connection to the Public Switched Telephone Network (PSTN). However, due to differences between individual PSTNs provided in different countries the approval does not, of itself, give an unconditional assurance of successful operation on every PSTN network termination point.In the event of problems, you should contact your equipment supplier in the first instance.Safety InformationEnclosed with each IX260+ Laptop PC is the Radio specific safety information. Do not proceed with out reviewing the Information provided on that document. Do not proceed beyond a WARNING or CAUTION until the indicated conditions are fully understood and met. 72_0119_001 mod 7/4 28 June 2004 Page 3 of 3Legal Information7/7/2004file://C:\Documents%20and%20Settings\harwoodm.ITRXNT1\Desktop\Marks%20shared%...](https://usermanual.wiki/General-Dynamics-Itronix/IX260PNL3054BT.users-manual/User-Guide-508818-Page-83.png)