Genie 2040L User Manual AC BELTDRIVE GDO Manuals And Guides L0911001
GENIE Garage Door Opener Manual L0911001 GENIE Garage Door Opener Owner's Manual, GENIE Garage Door Opener installation guides
User Manual: Genie 2040L 2040L GENIE GENIE AC BELTDRIVE GDO - Manuals and Guides View the owners manual for your GENIE GENIE AC BELTDRIVE GDO #2040L. Home:Garage Door & Opener Parts:Genie Parts:Genie GENIE AC BELTDRIVE GDO Manual
Open the PDF directly: View PDF ![]() .
.
Page Count: 16

Operation and Maintenance Manual 3563435770
AC Powered Belt Drive
TABLE OF CONTENTS
Warranty Information ................... 2
Your Documentation Package .......... 3
Safety Information ...................... 4
Safety Features ......................... 4
Important Installation Instructions ....... 4
Pre-lnstallation Checklist ................ 5
Adjustments ......................... 9-10
Programming the Remote Control ..... 11
Installation of Light Bulb ............... 19
Troubleshooting Guide ............. 20-21
Parts List and Explosion ................ 22
Accessories ............................ 23
COMPLETE WITH INTELLICODE
REMOTE CONTROL AND SERIESil
ELECTRONICS
For up to 7' 6" tall Doors.
Included Wail Control MUST be installed prior to
Operation of this Garage Door Operator.
Safe-T-Beam ®Safety ReverseSystem Must be Installed
and the Force Controls MUST be Properly Set to
closedoor.
This Equipment meets or exceeds all Federal, State and
UL325 Safety Requirements.
Having Difficulty? Need Help?
Pleasecallus:1-800-35-GENIE(354-3643)
www.geniecompany.com
Pleasehave Modelinformationready when _g.
For Help, call 1-800-35-GENIE or visit www.geniecompany.com
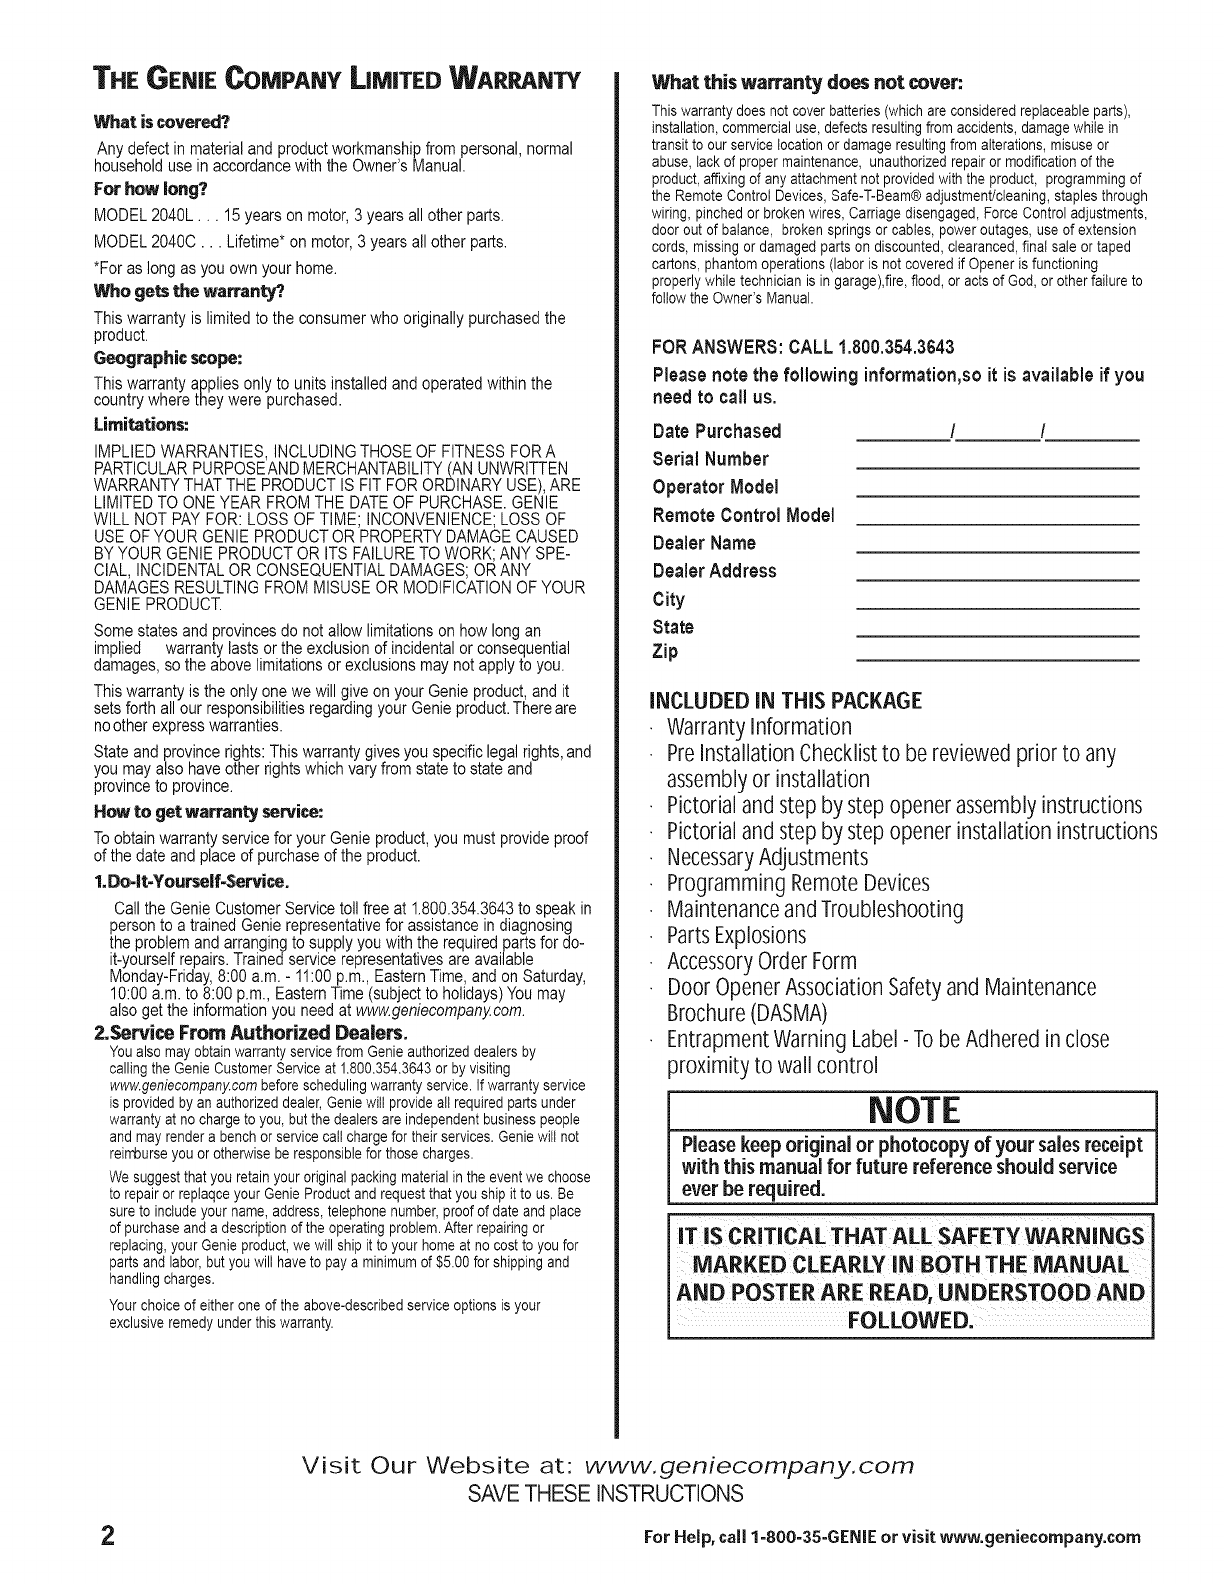
THE GEN|E COMPANY LiMiTED WARRANTY
What is covered?
Any defectin materialand productworkmanshipfrom personal,normal
householdusein accordancewith the Owner'sManual.
For how long?
MODEL2040L... 15years on motor,3 years allother parts.
MODEL2040C... Lifetime*on motor,3 yearsall other parts.
*Foras long as you ownyour home.
Who gets the warranty?.
This warranty is limitedto the consumer who originally purchasedthe
product.
Geographic scope:
This warranty appliesonly to unitsinstalled andoperated within the
countrywhere they were purchased.
Limitations:
IMPLIEDWARRANTIES, INCLUDINGTHOSEOF FITNESSFORA
PARTICULARPURPOSEANDMERCHANTABILITY(AN UNWRITTEN
WARRANTYTHAT THEPRODUCTIS FIT FORORDINARYUSE),ARE
LIMITEDTO ONEYEAR FROMTHEDATEOF PURCHASE.GENIE
WILL NOT PAYFOR: LOSS OFTIME; INCONVENIENCE;LOSSOF
USEOFYOUR GENIEPRODUCTOR PROPERTYDAMAGECAUSED
BYYOUR GENIEPRODUCTOR ITS FAILURETO WORK;ANY SPE-
CIAL,INCIDENTALOR CONSEQUENTIALDAMAGES;ORANY
DAMAGESRESULTINGFROMMISUSEOR MODIFICATIONOFYOUR
GENIEPRODUCT.
Somestates and provincesdo notallow limitationsonhow longan
implied warranty lastsor the exclusionof incidentalor consequential
damages,so the above limitationsor exclusionsmaynot applyto you.
This warrantyis theonly onewe will give on your Genieproduct,and it
setsforth all our responsibilitiesregardingyour Genie product.Thereare
noother expresswarranties.
Stateand provincerights:This warrantygivesyou specificlegal rights,and
you may also haveother rightswhich varyfrom stateto state and
provinceto province.
How to get warranty service:
To obtainwarranty servicefor your Genieproduct,you must provideproof
of the date and placeof purchase of the product.
1._-It-Your_lf-$ervice.
Call the Genie Customer Service toll free at 1.800.354.3643 to speak in
person to a trained Genie representative for assistance in diagnosing
the problem and arranging to supply you with the required parts for do-
it-yourself repairs. Trained service representatives are available
Monday-Friday, 8:00 a.m. - 11:00 p.m., Eastern Time, and on Saturday,
10:00 a.m. to 8:00 p.m., Eastern Time (subject to holidays) You may
also get the information you need at www.geniecompanjzcom.
2.Service From Authorized Dealers.
You also may obtain warrantyservice from Genie authorizeddealers by
calling the Genie CustomerServiceat 1.800.354.3643or by visiting
www.genieoompany.combefore schedulingwarranty service. If warranty service
is provided by an authorizeddealer,Geniewilt provide all requiredparts under
warranty at no charge to you, but the dealers areindependentbusiness people
and may rendera bench or servicecall chargefor their services. Geniewilt not
reimburseyou or otherwisebe responsiblefor those charges.
We suggest that you retainyour original packing material in the event we choose
to repair or replaqceyour Genie Productand requestthat you ship it to us. Be
sure to includeyour name, address,telephone number,proof of date and place
of purchaseand a description of the operatingproblem.After repairing or
replacing,your Genie product,we will ship it to your home at no cost to you for
parts and labor, but youwilt have to pay a minimumof $5.00 for shipping and
handling charges.
Your choice of either one of the above-describedserviceoptions is your
exclusive remedyunder this warranty.
What this warranty does not cover:
Thiswarrantydoesnotcoverbatteries(whichareconsideredreplaceableparts),
installation,commercialuse,defectsresultingfromaccidents,damagewhilein
transitto ourservicelocationordamageresultingfromalterations,misuseor
abuse,tackof propermaintenance,unauthorizedrepairormodificationofthe
product,affixingof anyattachmentnotprovidedwiththeproduct,programmingof
theRemoteControlDevices,Safe-T-Beam®adjustment/cleaning,staplesthrough
wiring,pinchedorbrokenwires,Carriagedisengaged,ForceControladjustments,
dooroutofbalance,brokenspringsor cables,poweroutages,useof extension
cords,missingordamagedpartsondiscounted,clearanced,finalsaleortaped
cartons,phantomoperations(laboris notcoveredif Openerisfunctioning
properlywhiletechnicianis in garage),fire,flood,oractsofGod,orotherfailureto
followtheOwner'sManual.
FORANSWERS:CALL 1.800.354.3648
Pleasenote the following information,soit is available if you
need to call us.
Date Purchased / /
Serial Number
Operator Model
Remote Control Model
Dealer Name
DealerAddress
City
State
Zip
iNCLUDED IN THiS PACKA6E
WarrantyInformation
ProInstallationChecklistto be reviewed prior to any
assemblyor installation
Pictorialand step by step opener assemblyinstructions
Pictorialand step by step opener installation instructions
NecessaryAdjustments
Programming Remote Devices
Maintenanceand Troubleshooting
PartsExplosions
AccessoryOrder Form
DoorOpener AssociationSafetyand Maintenance
Brochure(DASMA)
EntrapmentWarning Label- Tobe Adhered in close
proximity to wall control
NOTE
Pleasekeeporiginal or photocopyof yoursalesreceipt
with this manual for future reference should service
ever be required.
SCRmCALTHATSAFETYW N NOSl
AND POSTER ARE READ, UNDERSTOOD AND J
FOLLOWED'
Visit Our Website at: www.geniecompany.com
SAVETHESE INSTRUCTIONS
2For Help, call 1-800-35-GENIE or visit www.geniecompany.com
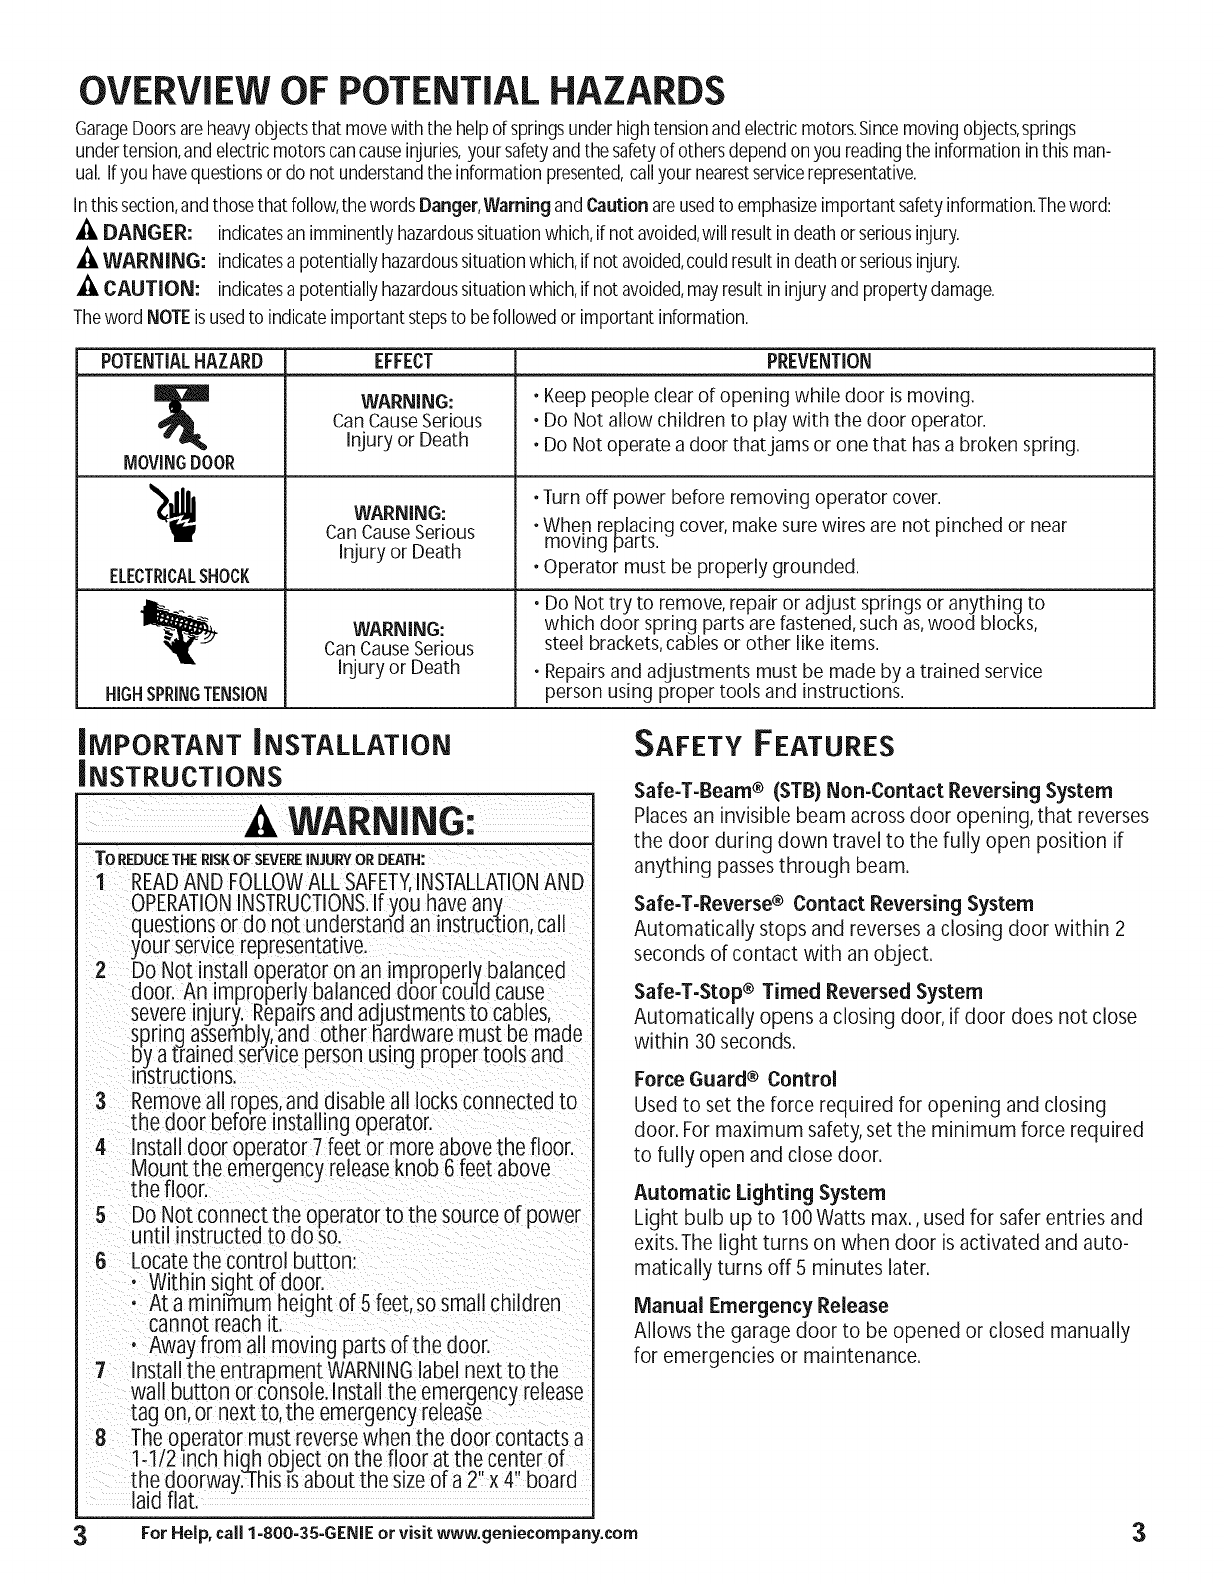
OVERVIEW OF POTENTIAL HAZARDS
GarageDoorsareheavyobjectsthat movewith the helpof springsunderhightensionand electricmotors.SincemovingobJects,springs
undertension,andelectricmotorscancauseinjuries,your safetyandthe safetyof othersdependonyou readingthe informationinthis man-
ual. Ifyou havequestionsor do not understandthe informationpresented,callyour nearestservicerepresentative.
Inthissection,andthosethat follow,the wordsDanger,Warning andCaution areusedto emphasizeimportant safetyinformation.Theword:
DANGER: indicatesan imminentlyhazardoussituationwhich,if not avoided,will result indeath orseriousinjury.
_i, WARNING: indicatesa potentiallyhazardoussituationwhich,if not avoided,couldresultindeath orseriousinjury.
_i, CAUTION: indicatesa potentiallyhazardoussituationwhich,if not avoided,mayresultin injury andpropertydamage.
Theword NOTEis usedto indicateimportant stepsto befollowedor important information.
POTENTIALHAZARD EFFECT PREVENTION
I_ WARNING: • Keep people clear of opening while door is moving.
Can CauseSerious •Do Not allow children to play with the door operator.
Injury or Death •Do Not operate a door that jams or one that has a broken spring.
MOVINGDOOR
ELECTRICALSHOCK
H(GHSPRINGTENSION
WARNING:
Can CauseSerious
Injury or Death
WARNING:
Can CauseSerious
Injury or Death
• Turn off power before removing operator cover.
•Whe.nreplacing cover, make sure wires are not pinched or near
movmg paris.
•Operator must be properly grounded.
• Do Not try to remove, repair or adjust springs or anything to
which door spring parts are fastened, such as,wood blocks,
steel brackets, cables or other like items,
•Repairs and adjustments must be made by a trained service
person using proper tools and instructions.
IMPORTANT INSTALLATION
iNSTRUCTiONS
AWARNING:
To REDUCETHE RISKOF SEVERE iNJURYOR DEATH:
1 READAND FOLLOWALLSAFETY,INSTALLATIONAND
OPERATIONINSTRUCTIONS.If you haveany
questions or co not unoerstario an instruction, call
yourservicerepresentative.
2 DoNot nstalloperatoron animproperlvbalanced
door.Animproperlybalanceddoorcouldcause
severeinjury.Keparsanaadjustmentsto cables, ,
springasse(nbly,ano othernarawaremustbe ma,oe
oyatraneo serwcepersonusingproperIconsan(]
instructions.
3 Removeall ropes,and disable all locksconnected to
the door before installing operator.
4 Installdoor operator 7 feet or more abovethe floor.
Mount the emergencyreleaseknob 6 feet above
the floor.
5 Do .Notconnect the operatorto the sourceof power
until instructed to ao so.
B Locatethe control button:
: Within sight of door.
At a minimum height of 5feet, sosmall children
cannot reachit.
• Away from all moving parts of the door.
7 Installthe entrapment WARNINGlabel next to the
wall button or console.Installthe emergency release
tag on,or next to,the emergencyrelease
8 The operator must reversewhen the door contacts a
1-112Inch hicInobject on the floor at the center o[,
the doorway.This_saoout the sizeo[a 2 x 4 boar(]
laidflat. -
SAFETY FEATURES
Safe-T-Beam®(STB)Non-Contact ReversingSystem
Places an invisible beam across door opening, that reverses
the door during down travel to the fully open position if
anything passes through beam.
Safe-T-Reverse® Contact Reversing System
Automatically stops and reverses a closing door within 2
seconds of contact with an object.
Safe-T-Stop®Timed ReversedSystem
Automatically opens a closing door, if door does not close
within 30 seconds.
Force Guard ® Control
Used to set the force required for opening and closing
door. For maximum safety, set the minimum force required
to fully open and close door.
Automatic LightingSystem
Light bulb up to 100Watts max., used for safer entries and
exits.The light turns on when door is activated and auto-
matically turns off 5 minutes later.
Manual Emergency Release
Allows the garage door to be opened or closed manually
for emergencies or maintenance.
3For Help, call 1-800-35-GENIE or visit www.geniecompany.com 3

PRE-JNSTALLATION CHECKLIST
ThisOpenerincludespartsandsuppliesneededto installin most
garagesandconnectto most garagedoors.Therearemanyvariations
of garagesandgaragedoors.Afewadditionalpartsandsuppliesmay
beneededto installOpenerintoyour garageandconnectto your
garagedoor. Whilecheckingitemslistedbelow,noteanyadditional
itemsyou will need.
Tools used in this section:
• 12'+ Tape Measure • Pencil • Ladder • Level
Checkfollowing itemsbefore assembling Opener:
Checkconditionof verticalstileincenterof door,anditsconnectionto
door'stop andbottom beams.(Figure2)
AIf doorframeisnailedtogetherandnot a solidconnection,door
framemustbe bracedor reinforcedbeforeinstallingOpener.
B If dooris"lightweight"(madewith frameandskin- not solid),door
(includingdoorframe)mustbe bracedor reinforcedbefore
installingOpener.
C Adooropenerreinforcementbracketmayalsobeneededto
connectgaragedoorto Opener'sDoorBracket.ThisOpeneris
designedfor installationona properly bracedsectionaldooror
solidly bracedone-piecedoor.
D ContactyourGenieFactoryAuthorizedDealeror dealerof your
garagedoorfor anynecessarybracingandadooropener
reinforcementbracket(if needed)beforeproceeding.
E Ifyou haveawoodendoor,measuredoor'sthickness.Ifyour door
is lessthan 2"thick,bracedooror useshorterDoorBracketLagScrews
(1/4"x 1-1/4"- not included)
ALIGNMENT, OPERATION,
AND BALANCE
ARaisedoor,checkalignmentandseeif it movesfreely(Figure1). If
doorappearsout of alignment,binds,or doesnot movesmoothly,
contacta GenieFactoryAuthorizedDealeror dealerof your garage
doorfor repairsandadjustmentsto doormechanism.
B Raisedoorto 3' - 4'abovegroundandcarefullylet go. Door
shouldstaystationary.Slightmovementisacceptable.Morethan
slightmovementmeansdoor isout of balance.Contacta Genie
FactoryAuthorizedDealeror dealerof your garage
doorfor repairsandadjustmentsto door mechanism.
C Checkdoortype. Makeanote of whetherit isasectionalora
one-piecedoor (Figure2).
KEEPFEETCLEAROF DOOR
4
Sectional Door One-Piece Door
Figure I Checking door balance
Ifyour doorsticks;binds:oris out of balance;haveit adjusted
by a GenieFactoryAuthorizedDealer.Doorsprings,cables,
pulleys,bracketsandassociatedhardwareaEeunderextreme
tensi6nandcancauseseriousinjuryordeath:
SECTIONAL DOOR, TORSION SPRINGS
Torsion
Springs
SECTIONAL DOOR, EXTENSION SPRINGS
Extension
Springs
Center _TJ
Stile "--_ _._.---'fy-_----_
ONE-PIECEDOOR,TRACKLESS
Header Area
Center Stile
Figure 2 Note DoorType
A TheBelt DriveGarageDoorOpenerisdesignedfor doorsup to
andincluding7'6"tall.
B If doorheightis 8'-0';youneeda RailExtensionKit.(Figure3).
(SeeAccessoriesOrderForm,Page23).
C If the door heightistallerthan 8'-0';the openeryou purchasedis
the wrongversion.Contactyour CustomerServiceRepresentative
at 1-800-354-3643.
Rail Ex!ension for __
Figure 3 Rail Extension Kit
For Help,call1-800-35-GENIEor visitwww.geniecompany.com
NOTE
The header isa heavily reinforced section of the walljust
above the top ot the garage door opening.
AFindverticalcenterlineof doorandheader:
• Closedoor.
• Measuredoorwidthat top.
• Markapoint at centerof doorandon headerdirectly
abovedoor. Drawa centerlineto connectpoints.
BFindHeaderBracketmountingheight (Figure4): (Donot attach
HeaderBracket).
• Raisedoor,watchingtop edgeof doorandstopdoor
when itsedgereachesitshighestpoint.
• Measuredistance("H")fromtop edgeof doorto floor.
- Forsectionaldoors,add1"to"H'f Markapoint
oncenterline. Bottomof HeaderBracketwill be
installedhere.
- Forone-piecedoors,add7"to"H'; Markthis pointon
centerline. Bottomof HeaderBracketwill be
installedhere.
H+1"--
/
HEADER
SECTIONAL DOOR
Figure4 Find Highest Point of Travel
NOTE
• Forboth ty.pesof doors:
- Ifthe ce_!mgin #9ur garageis so low that there
is not at leasta3" spaceabove the Header
Bracketmounting point, contact aGenieFactory
Authorized Dealer.
• If a door spring is in the way,placethe Header
Bracketabovethe spring.Do Not movethe door
spnng.
C Checkwallfor astudor asolidheaderat your mark:(Ifcheckinga
finishedwall,astudfindermaybehelpful).
• If locationisaboveHeader,a2"x 6" boardmust be
screwedto studsbesideyour markwith at leasttwo Lag
ScrewsandFlatWashers(not provided).
• Transferyour markto new mountingboard.
Checkceilingor spaceabovewhereOpenerPowerHeadwill be
mounted(Figure5):
120 Volt grounded outlet
or wiring box within 3 feet of
Power Head.
Door Center Line
A
Figure 5 Check Power Head location
Measurefrom garagedoorcenterlinetowardrearof garage:
• Approximately11'.
B Findlocationof ceiling,joistortrussabovewhereOpenerPower
Headwill beandestimatetypeandquantityof materialsneededfor
yourinstallation(Figure6).
MOUNTING EXAMPLES
Perforated Angle Iron Conduit
........................ J
Perforated Straps FINISHEDCEILINGS
Locateceiling,joistsortrussesusing
astudfinderorsimilardevice.
Attachangleiron(notincluded)to
`joistsor trussesthroughfinish
materialusingLagScrews.
OPENCEILINGSStrapsandangle
ironmayattachdirectlyto joists
ortrusses.
Figure 6 Mounting methodsfor open beamor finishedceilings
For Help, call 1-800-35-GENIE or visit www.geniecompany.com 5
CHECK CEILINGFOR GROUNDED
POWER SOURCE
ACheckthatthere isa15Amp120Voltgroundedelectrical
outletor groundedpermanentwiring box(perbuildingcode)
within 3'of OpenerPowerHead:
• If not,anoutletor wiring boxmust beinstalled.Contact
alicensedelectricianfor installation.
If buildingcodesrequirepermanentwiring,PowerHead
mustbe partiallydisassembledto installappropriate
wiring in placeof PowerCord.SeeAssemblyand
InformationPoster.
NOTE
Permanentwiring mustbe installedby a Licensed
Electrician. Not aft GenieFactoryAuthorized Dealers
are LicensedElectrician's.Contact someonewho isa
LicensedElectrician.
_4,WARNING
Do Not usean extension cord! Extensioncords can
causedangerous overheating conditions.
Do Not use portable generator! Thisproduct is
designedto operate using standard housecurrent. Do
Not usealternate power supplies,
CHECKSAFE-T-BENVl®
MOUNTING BRACKET LOCATION
Checkfor wood garageframe,jamb, or masonry at mounting
location (6" above floor) with attachment tabs facing away
from garage door (Figure 7).
A If you cannot mount Safe-T-Beam®Mounting Bracketto
wood frame:
Concrete screwsand concrete anchors (not included)
must be used to mount Bracketson masonry with
attachment tabs facing awayfrom garage door.
Source
Sensor
Safe-T-Beam® (._ ,_,'.,_1_
Mounting Bracket _ "F'%1 "
6"
Top of
Figure 7 Mounting Safe-T-Beam®Components
A Tools(Figure8):
B Additional tools to make installationeasier:
• Slotted and phillips screw-driver bits
• Stud finder
• Sheet-metal cutting snips
Checkthat the garage door locks,rope, and T-Handlesare
removed from the garage door before starting the installation.
A If your garage does not have aseparateentry door, it is
highly recommended to install a GenieEmergency ReleaseKit
(GER-2).Emergency ReleaseKit lets you open the garage door
from outside if there is apower failure. (PleaseseeAccessories
Order Form on page 23.)
Before going further, get any itemsand tools needed for
your installation
Garagedoorframereinforcementbrackets,screws,bracing
or reinforcementkits(dealer)
LagScrews(1-1/4")for awood door lessthan 2"thick (store)
Electricaloutlet and/orwiring (suppliedbya licensedelectrician)
Sufficientangleironor strappingfor hangingPowerHead(store)
100Wattlight bulb(Roughservicebulbsrecommended)(store)
GER-2EmergencyReleaseKit forentry duringpowerfailure(store)
Woodfor header,ceiling,and/ordoor bracingreinforcement
(if needed)
MasonryfastenersforSafe-T-Beam®Bracketinstallation,(if needed)
Masonrydrill bit (if needed)
ExtensionKit(for8'GarageDoors)
Go to Assembly and Installation Poster for full
Installation Instructions.
Drill I_
6o 7
Adjustable Wrench L_
Hammer
1/16" 5/32"
Drill Bit Drill Bit
Wire
Stripper
Safety Glasses
12' 4
Tape
Phillips Screwdriver
Flat Blade Screwdriver
Pencil
Hack Saw Wrench
888888
1/4" 5/16" 3/8" 7/16" 1/2" 9/16"
Sockets
Carpenter's Level
Figure 8 Recommended Tools
6For Help, call 1-800-35-GENIE or visit www.geniecompany.com
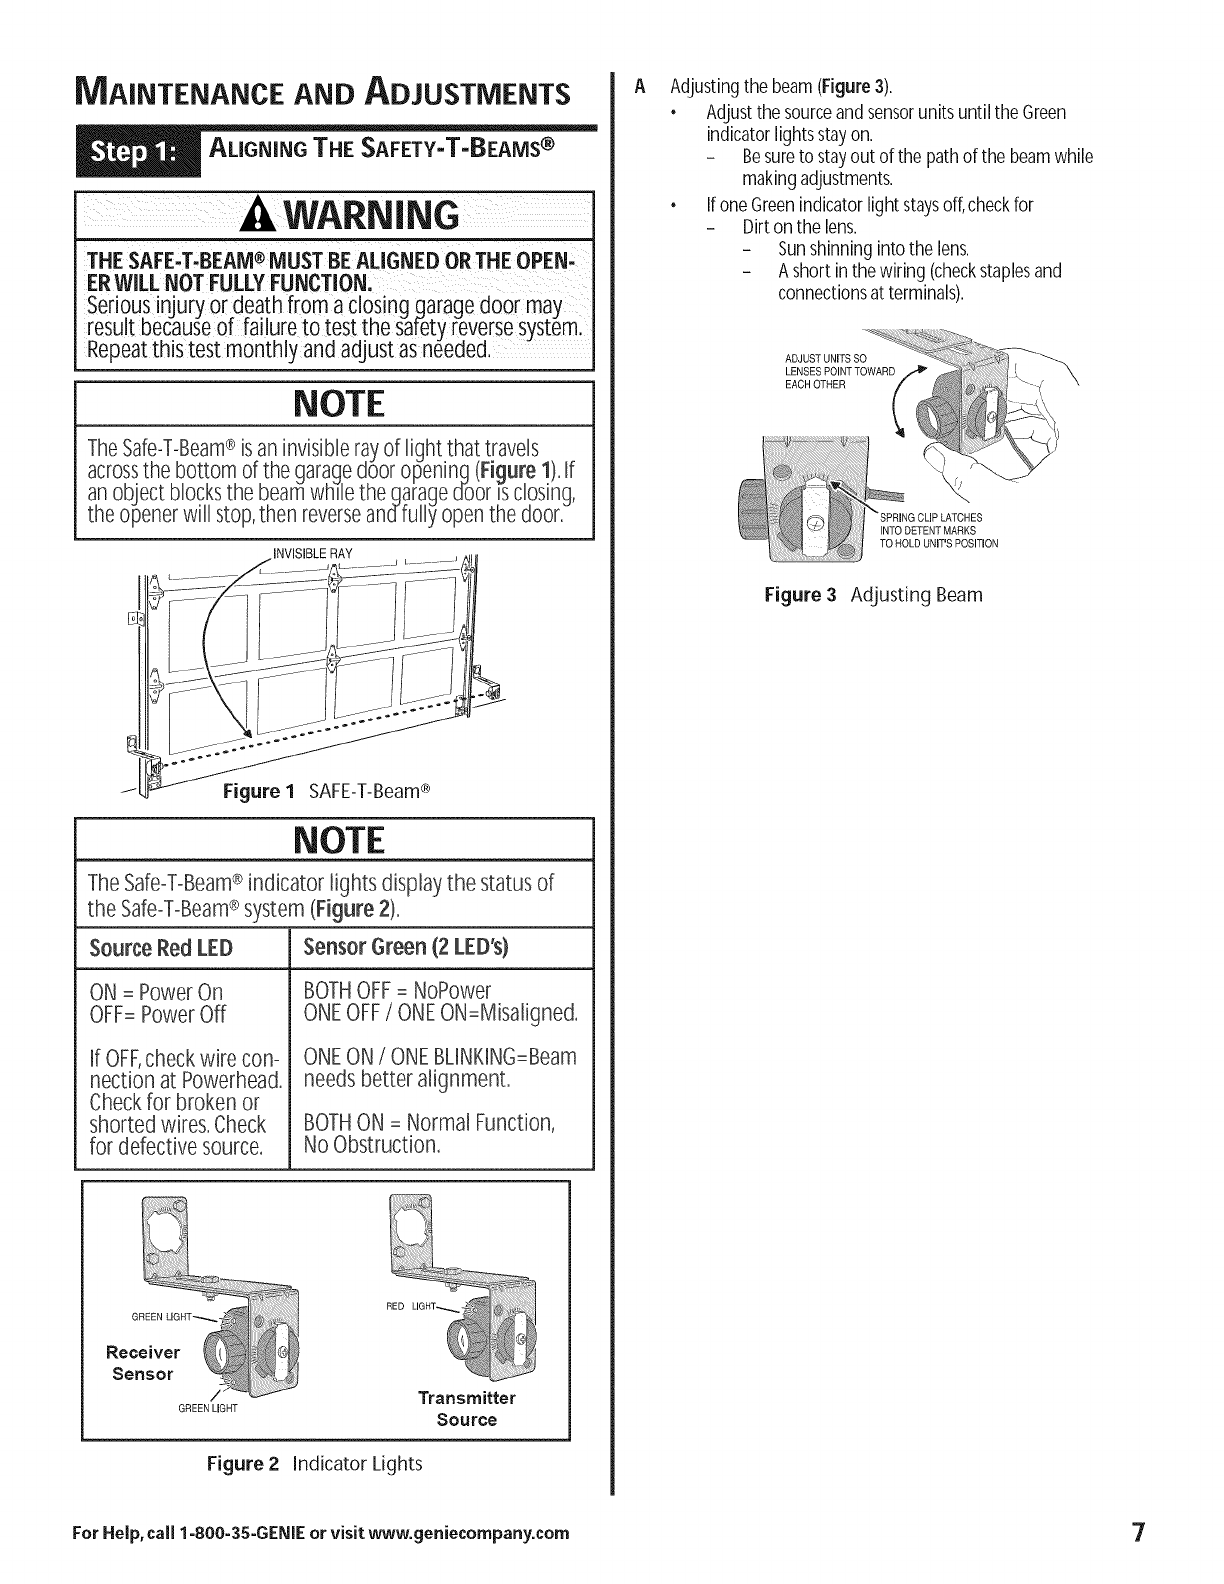
MAINTENANCE AND ADJUSTMENTS A
WARNING
THESAFE.T.BEAM®MUST BEAUGNED ORTHEOPEN-
ERWiLLNOTFULLYFUNCTION.
Seriousinjury or death from a closinggarage door may
result becauseof failure to test the satetyreversesystem.
Repeatthis test monthly and adjust asneeded.
NOTE
TheSafe-T-Beam®isan invisibUerayof Hghtthat traveUs.
acrossthe bottom ot the garagedoor openinq(Figure1).If
anobject bbcks the beamwh,Uetheqarage door !sdosing,
the openerwill stop,then reverseandfuHyopenthe door.
INVISIBLERAY [....... J
Figure I SAFE-T-Beam®
NOTE
The Safe-T-Beam®indicator lights displaythe statusof
the Safe-T-Beam®system (Figure 2).
Source £ed LED Sensor 6teen (2 LED's)
ON = PowerOn
OFF= PowerOff
If OFF,check wire con-
nection at Powerhead.
Checkfor broken or
shorted wires.Check
for defective source.
BOTHOFF= NoPower
ONEOFF/ONEON=Misaligned.
ONEON/ONEBLINKING=Beam
needsbetter alignment.
BOTHON = Normal Function,
NoObstruction.
RED LIGHT_
GREEN LIGHT Transmitter
Source
Figure 2 Indicator Lights
Adjustingthe beam(Figure3).
•Adjustthe sourceandsensorunitsuntil the Green
indicatorlightsstayon.
- Besureto stayout of the pathof the beamwhile
makingadjustments.
• IfoneGreenindicatorlight staysoff,checkfor
- Dirton the lens.
- Sunshinninginto the lens.
- Ashortinthe wiring (checkstaplesand
connectionsat terminals).
ADJUST UNITS SO
LENSES POINT TOWARD
EACH OTHER
INTO DETENT MARKS
TO HOLD UNIT'S POSITION
Figure 3 Adjusting Beam
For Help, cail 1-800-35-GENIE or visit www.geniecompany.com 7

iBe surethe camaqeisdisengagedfromthe belt before
i performingthefollowingportionoftheSafety_T:Beam®
i testing.Thecarriaqeisdisengagedwhenthe reease
i leverispointingdown (Figure_,).
Checkthe reversefunction.
• Checkthatthe Carriageisdisengaged(Figure4).
• Pressthe wall buttonto movethe bullet (Figure5)to the
openposition(awayfromthe door)(Figure4).
- Observethe belt asit travelsandadjusttension
if necessary.
• Pressthewallbuttonto startthe bulletin theclosedirection.
Blockthe Safe-T-Beam®while the bullet ismovingtoward
the door(Figure6).
- Thebullet muststopandreversedirectionwhenthe
beamisblocked.
Checkthe forcedclosurefeature(Figure7).
•Blockthe Safe-T-Beam®.
• Pressthe wall buttonandverifythatthe bulletmovesin
the closedirectionaslongasyou hold the button but
reverseswheneveryou let goof the button(Figure7).
CLOSETHE DOOR BEFOREPULLING
THE CARRIAGERELEASEHANDLE
CAUTION!
PULLTHE RED CARRIAGE
RELEASEHANDLETO
DISENGAGETHE OPENER
FROMTHE DOOR
BEFOREPERFORMmNG
MAINTENANCESTEPS
3&4 __._.._
Figure 4 Disengage carriage
DOOR
Figure 5 observe bullet travel
BLOCK THE BEAM
WHILE THE BULLET
iS MOVING DOWN.
Figure 6Block the beam
PLACEAN OBJECT iN
THE BEAM'S PATH.
Figure 7 Block the beam
MAINTENANCE AND ADJUSTMENTS
_&WARNING
A moving garagedoor may.causeseriousinjury or death.
.Keeppeople clearof open.ingwhile door ismoving.
• Donot allowchildren to play.with RemoteControls.
Ifthe SafetyReversedoesnot walk properly:
• Closethe door and disconnectthe Opener using
the EmergencyReleaseCord. _ .
• Donot usethe door Opener,RemoteControls,or
WirelessKeypad. ^ ,
• Referto the door and door Openeruwners
Manualsbeforeattemp!inganyrepairs.
. Stayclearof the openers 5elt,the door and any
oth.ermoving partswhen operating the opener
with a remote control
A ToProgramoneButtonof a RemoteControl
• LocateLearnButtonand LearnIndicatorLightonsideof
PowerHead(Figure1).
GHT
LEARN BUTTON
Figure 1 Learn Code Button and Indicator Light
• Pressand releaseLearnButton.RedLearnIndicatorLightwill
blink2times persecond.
• PressRemoteControlButtononcewithin 30
seconds(Figures2 and 3). RedLearnIndicatorLightwill
staylit.
• PressRemoteControlButtonagain.RedLearnIndicatorLight
will goout,indicatingthat memoryisstored.
ProgrameachadditionalRemoteusingstepAabove.
315 Mhz
/1/ _ l(_-_requency Fr;qwiUtehcY
,( [ \(:::[_//_, _' Switch
390 Mhz
1 Button Compact Remote 3 Button Compact Remote
w/Docking Station w/Docking Station
Figure 2 Genie Remote Controls
NOTE
OnJyone remote button can be entered at a time. Repeat
A and Bfor eachremote button to be programmed.
8 For Help, call 1-800-35-GENIE or visit www.geniecompany.com
RemoteControlOperation.
• PressButtonon RemoteControl.Garagedoorwill move.
• PressButtonagain.Garagedoorwill stop:
Thedoorautomaticallystopsatthe endof theopenor
closecycle.
• PressButtonagain.Garagedoorwill reverse.
• SomeRemoteControlsareequippedwith aflashlight.The
Genielogoisthe button whichoperatesthe light.Thereisa
backlightunderthe button. Whenit doesnot light,it
indicatesthe batteryneedsreplaced.
Frequency
Flashlight Button Switch
1 Button 3 Button
Remote Large
w/Flashlight Remote
w/Flashlight
\
3 Button
Remote
w/Flashlight
Figure 3 Genie Remote Controls
NOTE
• EachRemoteControlmust beprogrammedseparately.
• TheRemoteControlswill not causethe door Openerto close
the garagedoor if the Safe-T-Beam®Systemismalfunctioning.
• WhenProgrammingthe RemoteControls,theymust beat
least24"fromthe AntennaWire.
• Ifthe redLearnIndicatorLight blinksapproximately4times
persecond,programminghasstopped,repeattheabovesteps.
• EachButtonon a2or 3ButtonRemoteControlisfor a
differentOpener.YoucannotusemorethanoneButtonper
Remote,perOpener.
• A maximumof sevenRemoteControlsorWirelessKeypads
can bestoredinto the Receiverat onetime.If aRemote
Controlbecomeslost,or if youwantto deleteaRemote
Controlor Wirelesskeypad,see"ToEraseall ReceiverMemory"
Should aremotebecomelostorstolenit isimperativethat
the remotecontrolcodesbeerasedfromthe receiver
memoryand newCodesprogrammed,to preventthe
missingremotefrom beinga'Bleto operatethe door opener.
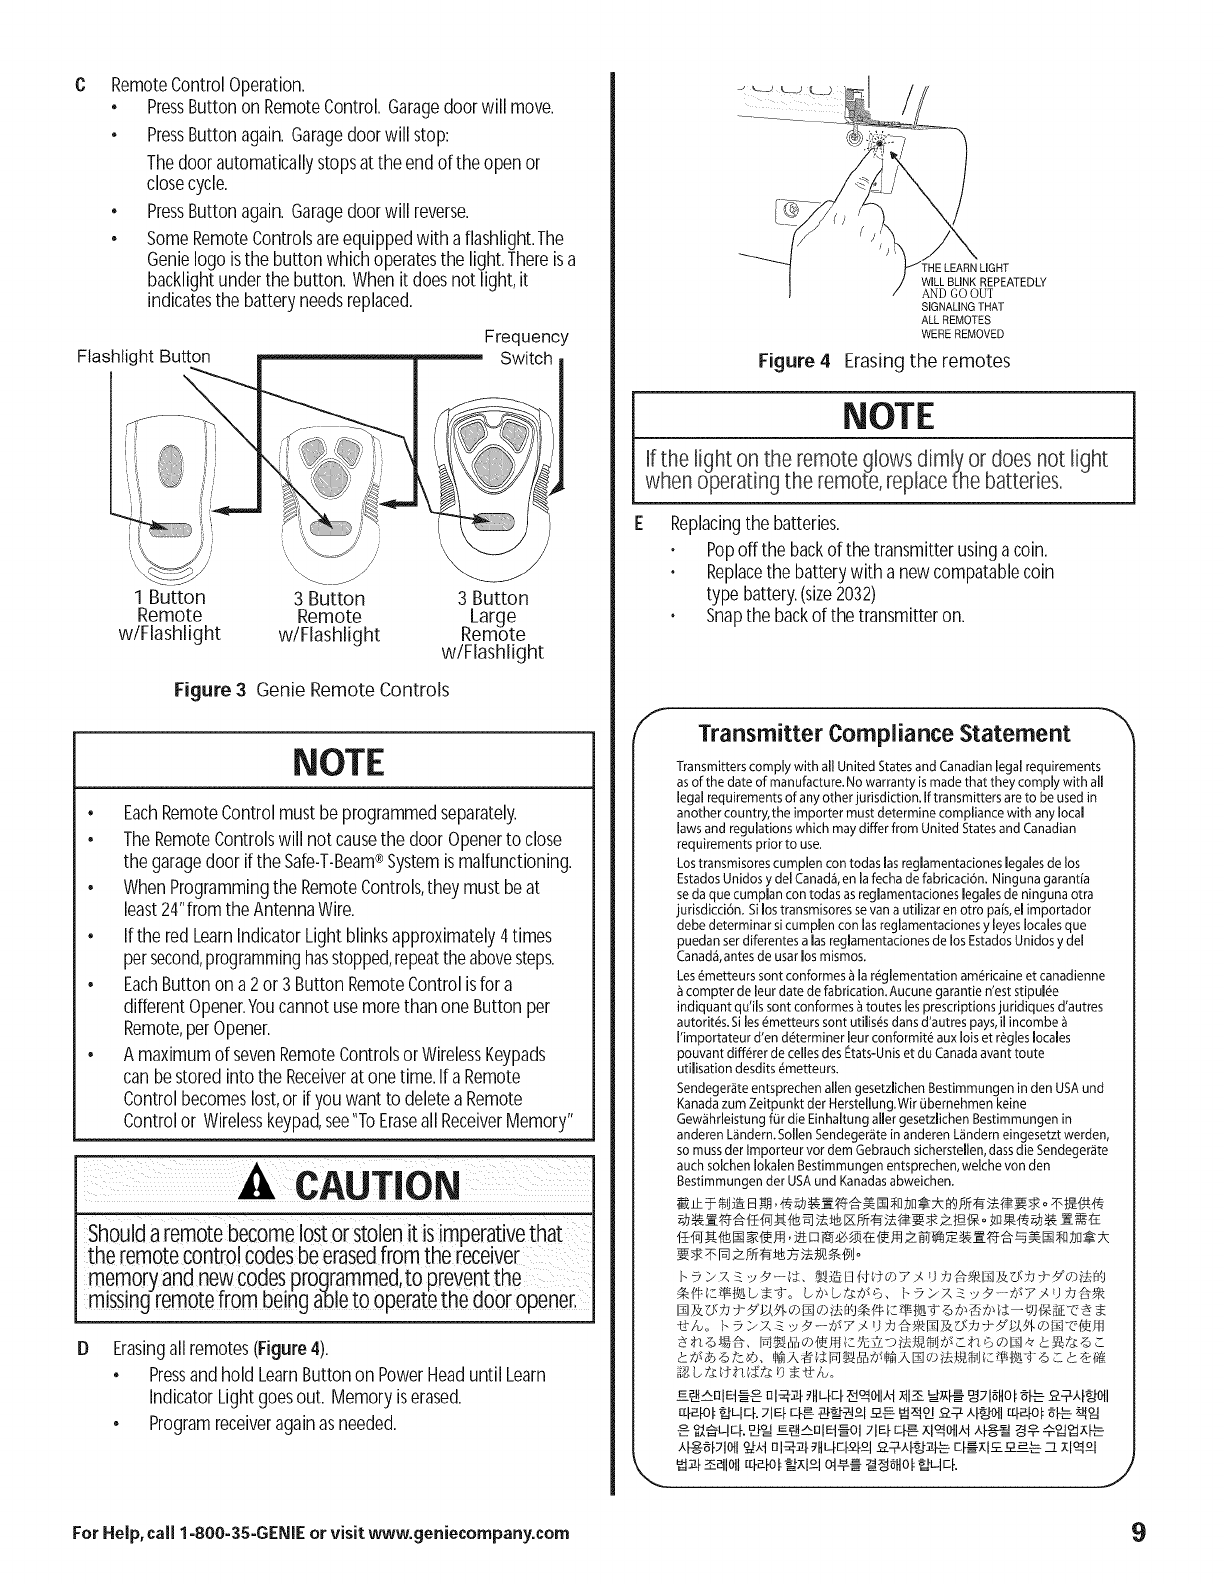
Erasingall remotes(Figure4).
•Pressandhold LearnButtonon PowerHeaduntil Learn
IndicatorLightgoesout. Memoryiserased.
•Programreceiveragainasneeded.
Figure 4
LIGHT
WILL BLINK REPEATEDLY
AND GO OUT
SIGNALINGTHAT
ALL REMOTES
WERE REMOVED
Erasing the remotes
NOTE
if the fight on the remote glows dimly,or doesnot fight
when operating the remote,replacethe batteries.
E Replacingthe batteries.
Popoff the backof the transmitterusingacoin.
Replacethe batterywith anewcompatablecoin
typebattery.(size2032)
Snapthe backof the transmitteron.
/Transmitter Compliance Statement
Transmitters comply with all United States and Canadian legal requirements
asof the date of manufacture. No warranty ismade that they comply with all
legal requirements of any other jurisdiction. If transmitters are to be used in
another country, the importer must determine compliance with any local
laws and regulations which may differ from United States and Canadian
requirements prior to use.
Lostransmisores cumplen con todas las reglamentaciones legales de los
Estados Unidos y del Canad& en la fecha de fabricaci6n. Ninguna garant[a
seda que cumplan con todas as reglamentaciones legales de ninguna otra
jurisdicd6n. Silos transmisores sevan autilizar en otro pars,el importador
debe determinar si cumplen con las reglamentaciones y leyeslocales que
puedan ser diferentes alas reglamentaciones de los Estados Unidos y del
Canada,antes de usar los mismos.
Les_metteurs sont conformes ) la r_glementation am@icaine et canadienne
compter de leur date de fabrication.Aucune garantie n'est stipuRe
indiquant qu'ils sont conformes _toutes les prescriptions juridiques d'autres
autorit_s. Si les_metteurs sont utilis_s dans d'autres pays,il incombe
I'importateur d'en d_terminer !eur conformit_ aux lois et r&,gleslocales
pouvant diff@er de celles des Etats-Unis et du Canada avant toute
utilisation desdits _metteurs.
Sendeger_ite entsprechen allen gesetzlichen Bestimmungen in den USAund
Kanada zum Zeitpunkt der Herstellung.Wir Obernehmen keine
Gew,_hrleistung for die Einhaltung aller gesetzlichen Bestimmungen in
anderen L_indern.Sollen Sendeger_te in anderen L_inderneingesetzt werden,
so muss der Importeur vor dem Gebrauch sicherstellen, classdie Sendegerate
auch solchen Iokalen Bestimmungen entsprechen, welche yon den
Bestimmungen der USA und Kanadas abweichen.
[r}_lOi__L-Iq-._IEFEI-_ _21 _R _q_ £-7 Xt&mll[rtz_01__I'_ _°=I
o_,@L.iq"uj._ --_@*'UlEd--_OI21EFr-F_ xl_011>,tX}÷_ _o-_q_°_xl-_
xM£a_lOtl _xt nl_,_l- _Hqq£PI £-7,q&_l-__ q-_Xl£_--e-_ z[ xlqOl
For Help, call1-800-35-GENIE or visit www.geniecompany.com 9
FCCAND IC CERTiFiED
ll devicescomply with Part15 of the FCCRules. . •
peration issubjectto the following two conditions:(1)
this devicemaynot causeharmful interference,and (2)
this devicemustacceptany interferencereceived,
including interterencethat maycause
undesiredoperation.
ABOUTDUALFREQUENCY
REMOTETRANSMITTERS
Yourgaragedoor opener(GDO)featuresa uniquedual fie.
quencyremotecontrolsystemfor reliableservice intoday's
crowdedairwaves.Overcrowdedairwavesmay intermittently
interfere withGDO'Sremotecontrolsystem.Thedual
frequency featuregreatlyreducesthe possibilityof
unwantedinterference.
Thereceiverinthe GDG'Spowerheadcanreceivesignalsat 315
AND390MHz.Theremoteis factory setat 315iViHz.SeeFigure
2and3on page11for frequency selectorswitch.
Switchyourremotecontrol frequencywhen:
•Remotedoesnot haveadequaterange,
• Remoteworksinconsistentlywith freshbattery
installed-LEDfeedbacklightsupwhenpressingbutton.
• Programmingyour car'sHomeLink®system.
Toprogram aHomeLink®device:
(ThisGDOisHomeLink®compatible.)
• Usea smallflat screwdriverto switchthe frequency
selectorto 390MHz.
• Followthe HomeLink®instructionsin yourcar
owner'smanual.
• Resetthe remotecontrolfrequencyto 315MHzfor
everydayuse.
AWARNING
Stay clearof the openerisbelt: d0or andall Othermoving I
parts during this test. I
/i i_ii i i i
Be surethe carriageis disengagedfrom the belt during
the initial limit adjustments, Thecarriage is disengaged
when the releaseleveris pointing down. DONOT
ENGAGETHECARRIAGEUNTILINSTRUCTED:
CAUTION i
Setthe OpenandCloselimitscarefullylsetting thelimits
I beyondwherethe doorcanphysicallytravelcouldcause I
l damageto the door,the doorhardwareoropener. I
10
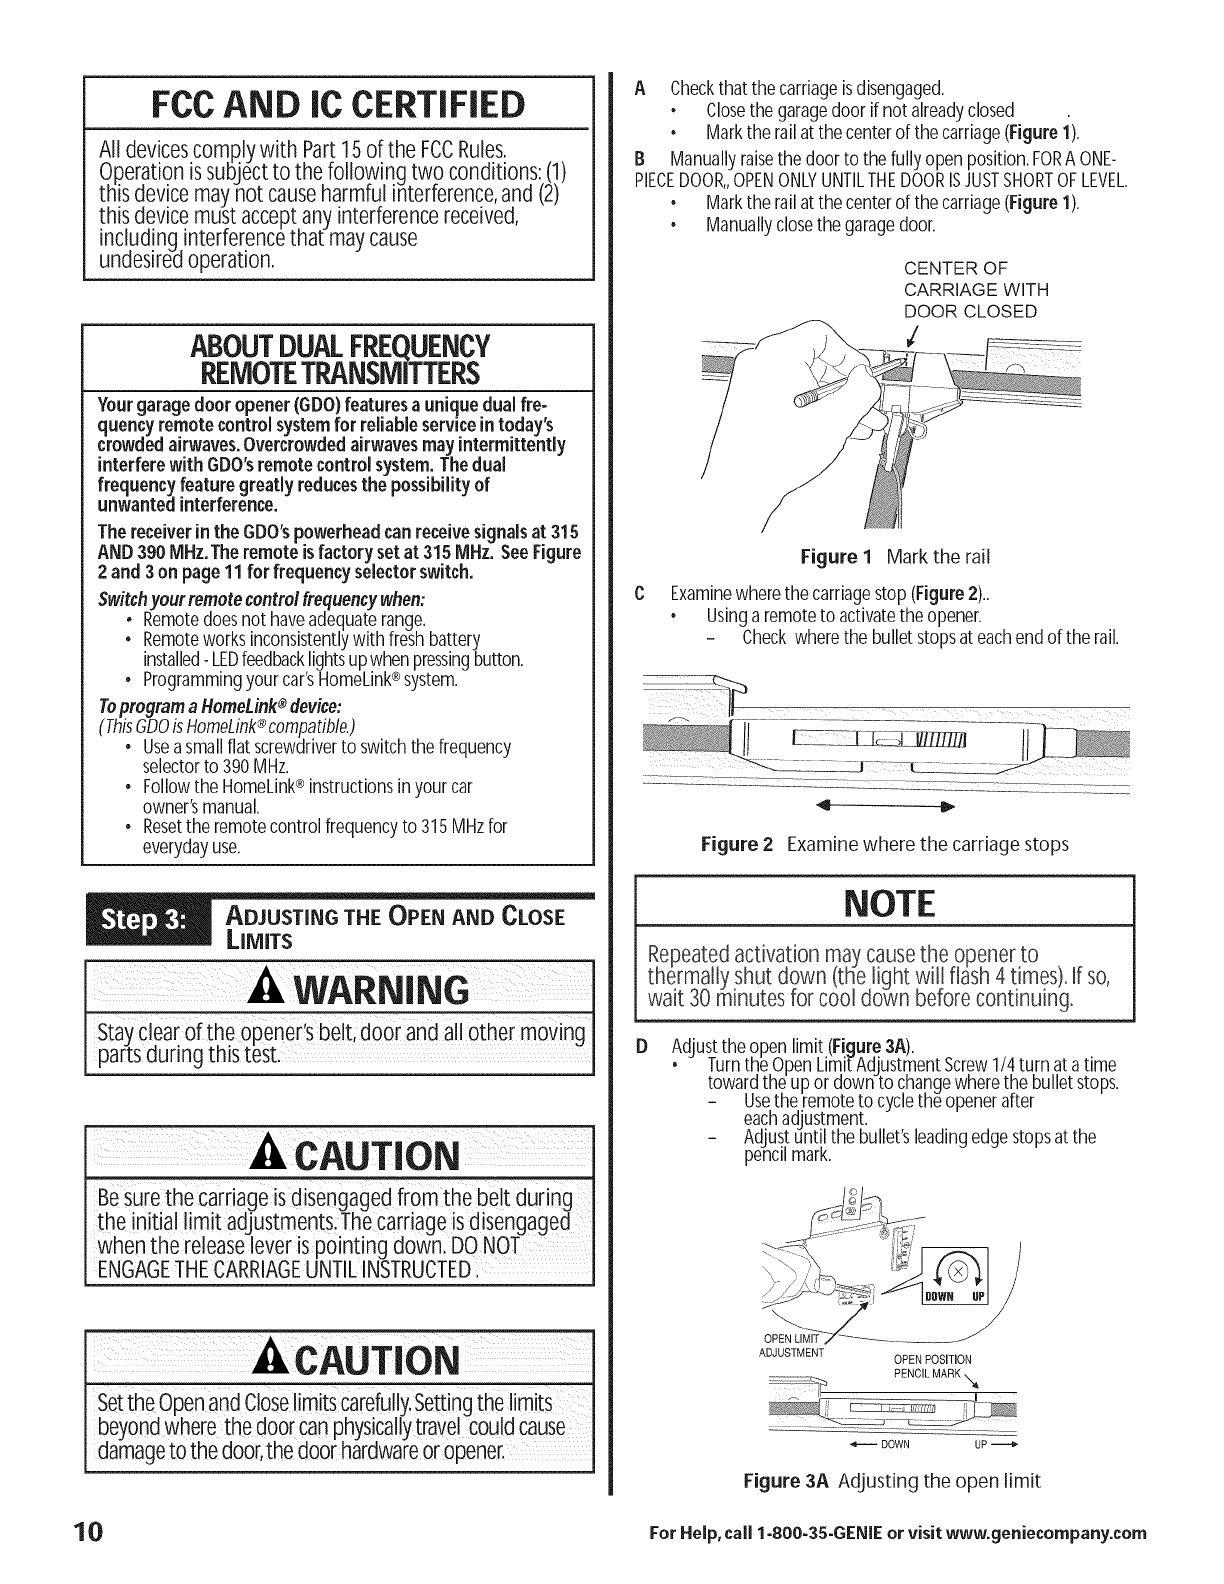
A Checkthatthe carriageis disengaged.
• Closethe garagedoor if not alreadyclosed
• Markthe railatthe centerof the carriage(Figure1).
B Manuallyraisethe doorto the fullyopenposition.FORAONE-
PIECEDOOR,,OPENONLYUNTILTHEDOORISJUSTSHORTOFLEVEL.
• Markthe railatthe centerof the carriage(Figure1).
• Manuallyclosethe garagedoor.
CENTER OF
CARRIAGE WITH
DOOR CLOSED
Figure 1 Mark the rail
Examinewherethe carriagestop(Figure2)_
•Usinga remoteto activatethe opener.
- Checkwherethe bulletstopsat eachendof the rail.
Figure 2Examine where the carriage stops
NOTE
Repeatedactivation maycausethe opener to .
thermally shut down (tHelight will flash 4 times).If so,
wait 30 minutes for cool down before continuing.
D Adjustthe open limit (Figure3A).
• Turnthe OpenLimit:AdjustmentScrew1/4turn at atime
towardthe upor downto changewherethe bulletstops.
- Usethe remoteto cyclethe openerafter
eachadjustment.
- Adjustuntil the bullet'sleadingedgestopsatthe
pencilmark.
ADJUSTMENT OPEN POSITION
PENCIL MARK,_
DOWN UP
Figure 3A Adjusting the open limit
For Help,call1-8OO-35-GENIEor visitwww.geniecompany.com
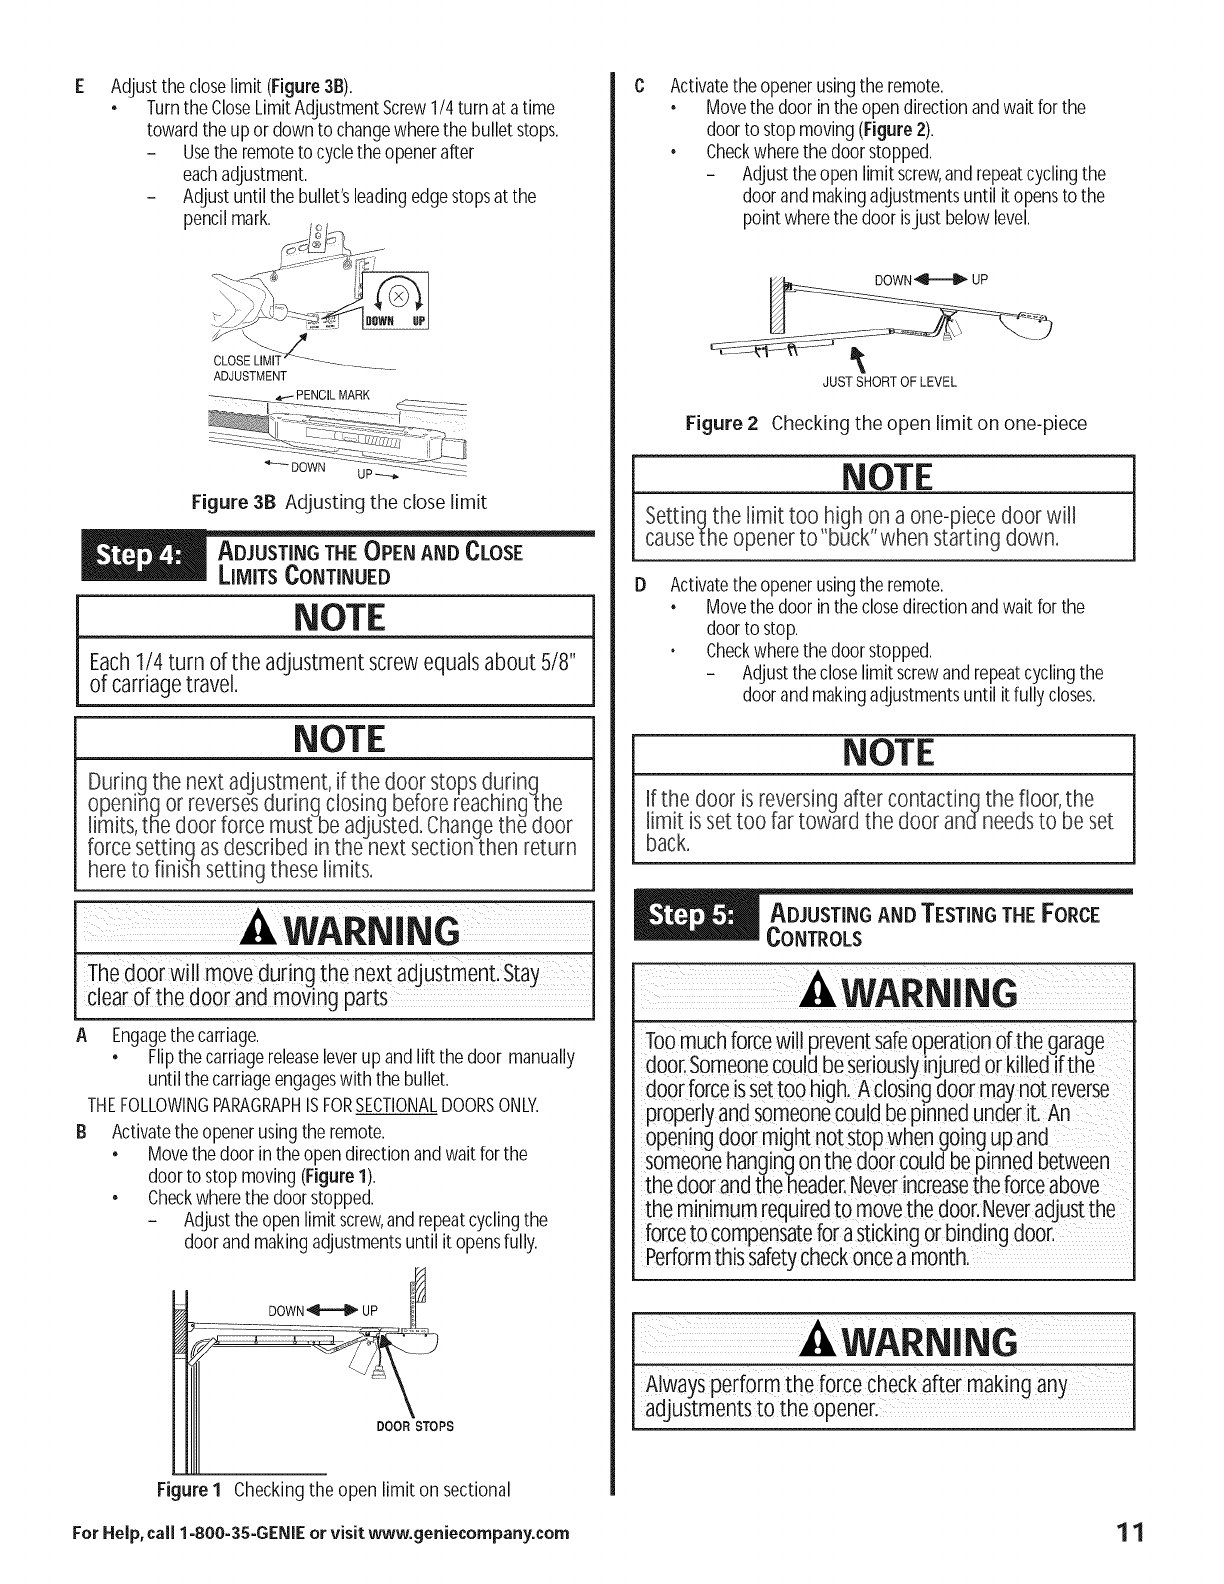
Adjustthecloselimit(Figure3B).
•Turnthe CloseLimitAdjustmentScrew1/4turn at atime
towardthe upor downto changewherethe bullet stops.
- Usethe remoteto cyclethe openerafter
eachadjustment.
- Adjustuntil the bullet'sleadingedgestopsat the
pencilmark.
Figure 3B Adjusting the close limit
LiMiTS CONTINUED
NOTE
Each1/4 turn of the adjustment screwequals about 5/8"
of carriagetravel.
NOTE
During the next adjustment, if the door stopsdurinq
openinq or reversesduring closing before reaching-the
limits,the door force must beadjusted. Changethe door
torce settinqas described in the next section then return
hereto finish setting these limits.
WARNING
The door Will move during thenext adjustment:Stay
Ic earof the door and mov ng parts
A Engagethe carriage.
• Flipthecarriagereleaseleverup andlift the door manually
until the carriageengageswith the bullet.
THEFOLLOWINGPARAGRAPHISFORSECTIONALDOORSONLY.
Activatethe openerusingthe remote.
• Movethe doorin theopendirectionandwait forthe
doorto stopmoving(Figure1).
• Checkwherethe doorstopped.
- Adjustthe openlimitscrew,andrepeatcyclingthe
doorandmakingadjustmentsuntil it opensfully.
DOWN_ UP
DOOR STOPS
Figure I Checkingthe open limit on sectional
ForHelp,call 1-800-35-GENIEor visitwww.geniecompany.com
Activatethe openerusingthe remote.
• Movethe doorinthe opendirectionandwaitfor the
doorto stopmoving(Figure2).
• Checkwherethe doorstopped.
- Adjusttheopen limitscrew,andrepeatcyclingthe
doorandmakingadjustmentsuntil it opensto the
point wherethe door isjust below level.
JUST SHORT OF LEVEL
Figure 2Checking the open limit on one-piece
NOTE
Settinq the limit too high on a one-piecedoor will
cause_heopener to"buck" when starting down.
D Activatethe openerusingthe remote.
• Movethe doorinthe closedirectionandwaitfor the
doorto stop.
Checkwherethe doorstopped.
- Adjustthecloselimit screwandrepeatcyclingthe
doorandmakingadjustmentsuntil it fully closes.
NOTE
f the door is reversingafter contactinq the floor,the
imit is set too tar toward the door and needsto be set
back.
-4,WARNING
Toomuchforcewill preventsafeoperationof the garage
door.Someonecouldbeseriouslyinjuredor killedifthe
door forceissettoo high.Aclosingdoormaynot reverse
properlyandsomeonecouldbe pinnedunder it. An
openingdoor mightnot stopwhen goingup and
someonehangingonthe doorcouldbe pinnedbetween
the doorandthe header.Neverincreasethe forceabove
the minimumrequiredto movethe door.Neveradjustthe
forceto compensateforastickingorbinding door
Performthis safetycheckoncea month.
Always perform the force Checkafter making any I
adjustments to the opener.
11

ALocatethe CLOSEFORCEadjustmentscrew(Figure1).
•Usethe remotecontrolto cyclethe doorduring
thesetests.
•Startwith the dooropen.
•Turnthecloseforceadjustmentscrew1/8-turnat atime
inthe decreasedirectionuntil the doorreversesmidway
while closing.
•Turnthecloseforceadjustment1/8-turnat atime inthe
increasedirectionuntil the doorfully closes
without reversing.
NOTE
Verylight, wellbalanceddoorsmaynot beableto be
adjusted using the above steps. Ifso,set the close
torce to minimum.
: :
CLOSE FOROE
ADJUSTMENT
ADJUSTING THE _
CLOSE FORCE DECREASE INCREASE
Figure I Adjusting close force
NOTE
Duringthe nextadjustment,if the doorstopsdurinq
openingorreversesduringclosingbeforereachingthe
limits,tt_edoorforcemust-beadjusted.Changethedoor
tomesettinqasdescribedin the nextsectionthen return
hereto finishsetting theselimits.
TESTTHE SAFETYREVERSE
Totestthe safetyreverse(Figure2).
•Openthe garagedoor.
•Laya 2"x 4" boardflatso it will bestruckbythe centerof
the doorasit closes.
• Usingthe remotecontrol,closethe door.
- Thedoormustreversewithin 2secondsof hitting
the board.
• Ifthe doorstopsbut doesnot reverse,the closeforce
mustbedecreased.
• Repeatthis testuntil the doorreversesasrequired.
2x4BOARD
Figure 2 Checking safety reverse
LocatetheOPENFORCEadjustmentscrew(Figure3).
• Usetheremotecontrolto cyclethe doorduringthesetests.
• Startwiththe doorclosed.
• Turntheopenforceadjustmentscrew1/8-turnatatimeinthe
decreasedirectionuntilthedoorstopsmidwaywhileopening..
• Turntheopenforceadjustment1/8-turnatatimeinthe
increasedirectionuntilthedoorfullyopenswithoutstopping.
ADJUSTINGTHE
OPENFORCE
DECREASEINCREASE
OPEN FORCE
ADJUSTMENT
Figure 3Open force adjustment
IMPORTANT SAFETY
INSTRUCTIONS
,& WAllING: TOREDUCETHE
RISKOf SEVEREINJURYORDEATH
1 READANDFOLLOWALLINSTRUCTIONS.
2 NeverletchildrenoperateorplaywiththeDoorControls.
KeeptheRemoteControlawayfromchildren.
3Alwayskeepthemovingdoorinsightandawayfrom
peopleandobjectsuntilthedooriscompletelyclosed.
NOONESHOULDCROSSTHEPATHOFAMOVINGDOOR.
4 NEVERGOUNDERA STOPPED,PARTIALLYOPENDOOP_
5 TestOpenermonthly.ThedoorMUSTreverseoncontact
with a 1:1/2 highobject(ora2 x 4 boardlaidflat)at the
centerotthedoorwayonthe.floor.Afteradjustingeither
theForceor theLimitoftravel,retestthe DoorOpener.
Failureto adjusttheOpenerproperlymaycausesevere
injuryor death.
Ii Whenpossibleusethe EmergencyReleaseonlywhenthe
doorisclosed.Usecautionwhenusingthis Releasewith
thedooropen,Weakorbrokenspringsarecapableof
increasingthe rateof doorclosureandincreasingthe risk
ofsevere_njuryordeath.
7KEEPGARAGEDOORSPROPERLYBALANCED.SeeOwner's
Manua!.Animproperl_balanceddoorincreasestheriskof
severeinjuryor death.HaveaGenieFactorvAuthorized
Dealermakerepairsto cables,springassemblies,and
otherhardware.
8 SAVETHESEINSTRUCTIONS.
12 For Help, call 1-800-35-GENIE or visit www.geniecompany.com
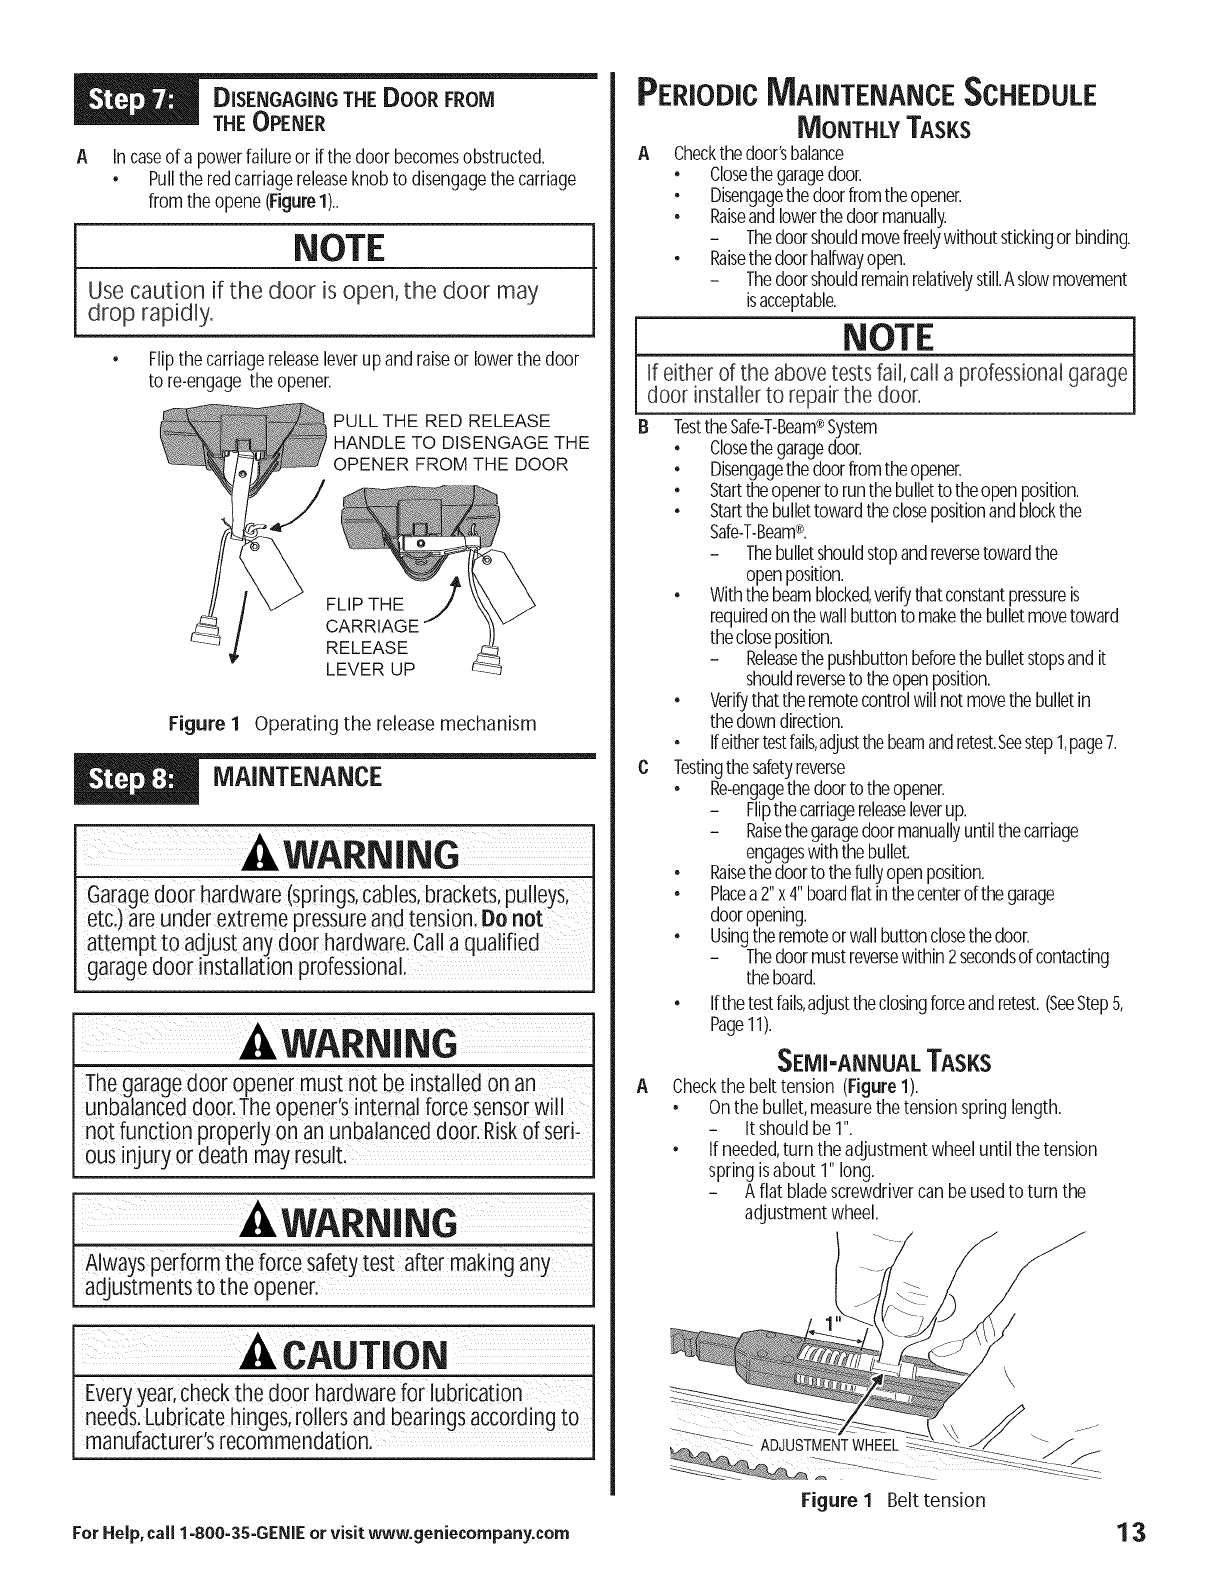
A In caseof apowerfailureor if the door becomesobstructed.
• Pullthe redcarriagereleaseknob to disengagethe carriage
fromthe opene(Figure1)..
NOTE
Use cautionifthe door isopen,the door may
droprapidly.
• Flipthe carriagereleaseleverupandraiseor lowerthe door
to re-engagethe opener.
PULL THE RED RELEASE
HANDLE TO DISENGAGE THE
OPENER FROM THE DOOR
FLIP THE
CARRIAGE
RELEASE
LEVER UP
Figure 1 Operating the release mechanism
Garage door hardware(springs;cables;braCketsipul eys
etc,) are under extremepressure and tension,Do not
attempt tOadjust any door hardware,Calla qualified
garage door installation professional.
WARN ING
The garagedoor openermus! not be installed on an
unbalanced door.The openers internal forcesensorwill
not function properly on an unbalanced door.Riskof seri,
ous injury or death mayresult,
WARNING
Alwaysperformthe forcesafetytest_ter makingany I
adjustments to the opener. I
CAUTION
Eveg year,checkthe doorhardwarefor lubrication
needs.Lubricatehinges,to!letsandbearingsaccordingto
manufacturer'srecommendat on. I
PERIODIC MAINTENANCE SCHEDULE
MONTHLY TASKS
ACheckthedoor'sbalance
• Closethe garagedoor.
• Disengagethe doorfromtheopener.
• Raiseandlowerthe doormanually
- Thedoorshouldmovefreelywithoutstickingorbinding.
• Raisethedoorhalfwayopen.
- Thedoorshouldremainrelativelystill.Aslowmovement
isacceptable.
NOTE
If either of the abovetests fail,call a professionalgarage
door installer to repair the door.
B TesttheSafe-T-Beam®System
• Closethe garagedoor.
• Disengagethe doorfromtheopener.
• Starttheopenerto runthebulletto theopenposition.
• Startthe bullettowardtheclosepositionandblockthe
Safe-T-Beam®.
- Thebulletshouldstopandreversetowardthe
openposition.
• Withthe beamblocked,verifythatconstantpressureis
requiredonthewallbuttonto makethebulletmovetoward
thecloseposition.
- Releasethepushbuttonbeforethebulletstopsandit
shouldreversetotheopenposition.
• Verifythatthe remotecontrolwillnot movethebulletin
the downdirection.
• Ifeithertestfails,adjustthebeamandretest.Seestep1,page7.
C Testingthe safetyreverse
• Re-engagethedoorto theopener.
- Flipthecarriagereleaseleverup.
- Raisethegaragedoormanuallyuntilthecarriage
engageswiththebullet.
• Raisethedoorto thefullyopenposition.
• Placea2"x 4"boardflatinthecenterof thegarage
dooropening.
• Usingtheremoteorwallbuttonclosethedoor.
- Thedoormustreversewithin2secondsofcontacting
the board.
• Ifthetestfails,adjusttheclosingforceandretest.(SeeStep5,
Page11).
A
SEMI-ANNUAL TASKS
Checkthe belt tension (Figure1).
•Onthe bullet,measurethe tensionspringlength.
- Itshould be1".
•If needed,turn the adjustmentwheeluntil the tension
springisabout 1"long.
- Aflat bladescrewdrivercan beusedto turn the
adjustmentwheel.
Figure 1 Belt tension
For Help, call 1-800-35-GENIE or visit www.geniecompany.com 13
A
UNSCHEDULED MAINTENANCE
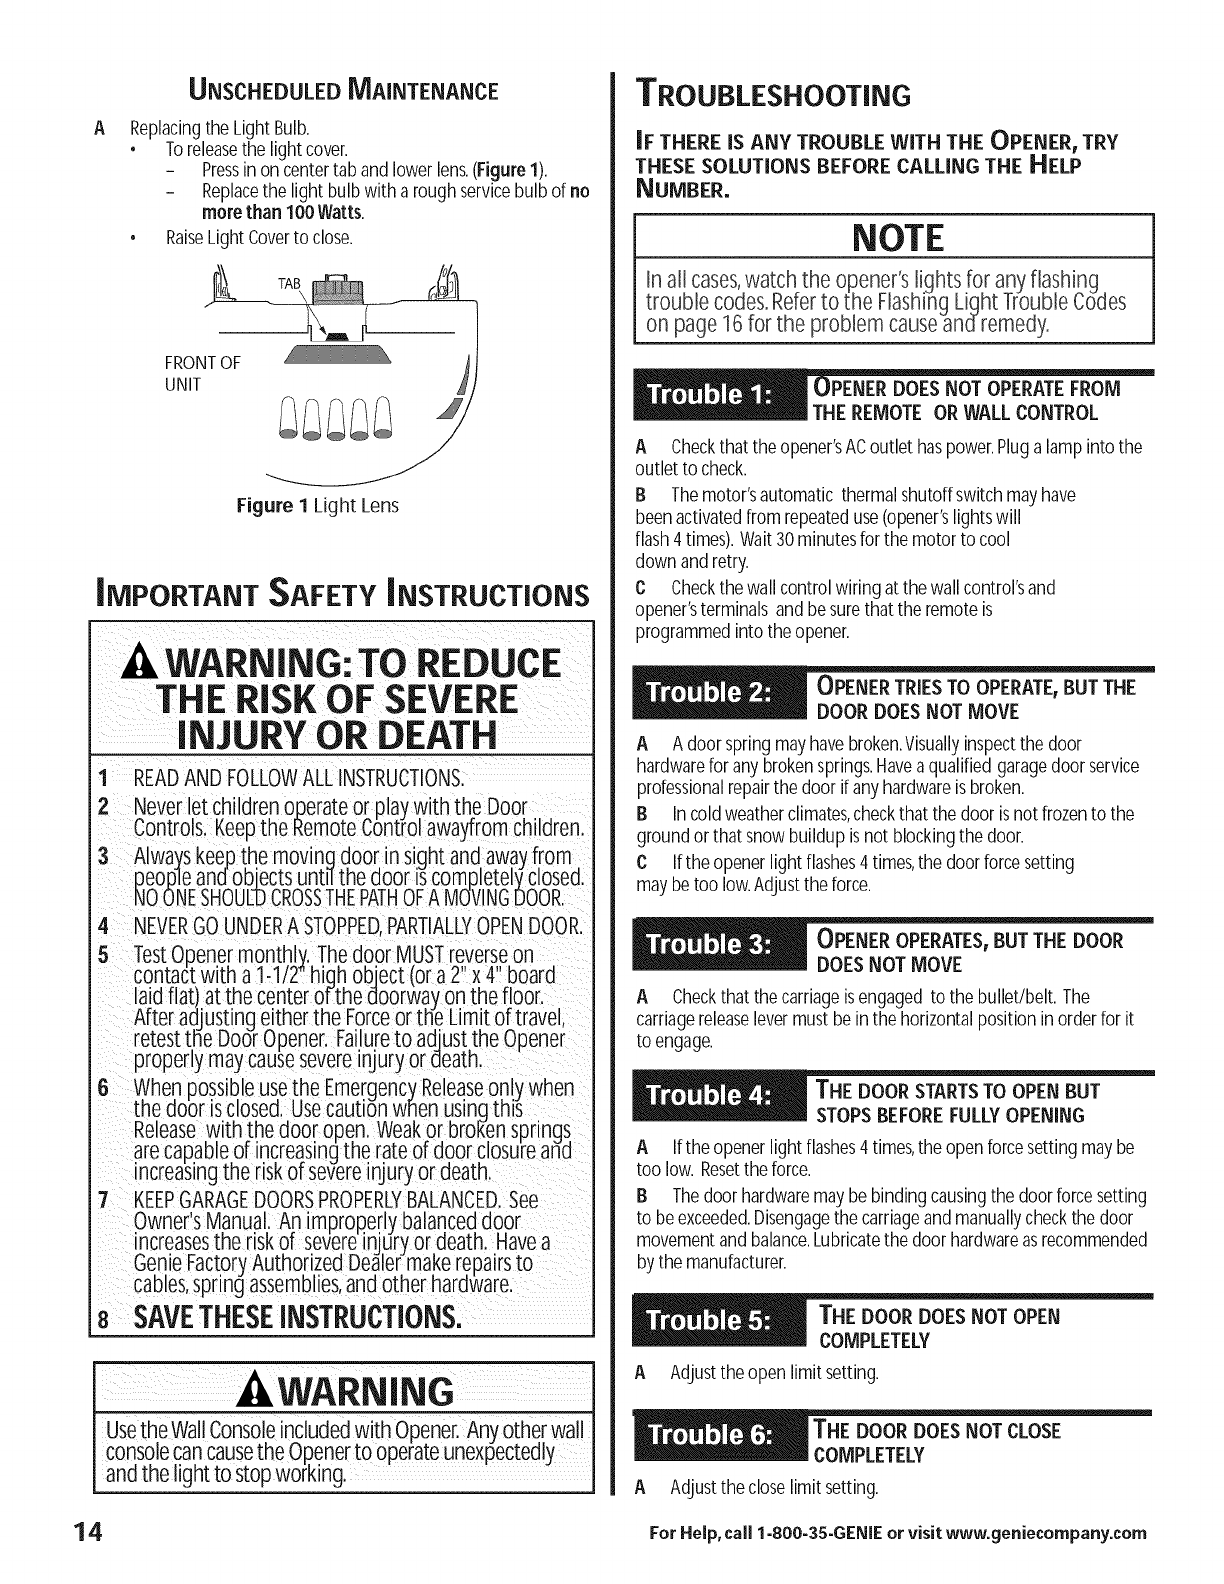
Replacingthe LightBulb.
• Toreleasethe light cover.
- Pressin oncentertab andlowerlens.(Figure1).
- Replacethe light bulbwith aroughservicebulbof no
morethan 100Watts.
• RaiseLightCoverto close.
TAB
FRONTOF
UNIT
Figure 1 Light Lens
IMPORTANT SAFETY INSTRUCTIONS
AWARNING: TO REDUCE
THE RISKOF SEVERE
INJURY OR DEATH
I READANDFOLLOWALLINSTRUCTIONS.
ever let childrenoperateo[ playwith the Door
ontrom._,eepthe Kemotecontrol awayrromchildren.
3Alwayskee,pthe moving door in sightand,awayfrom.
peopleanaobjectsuntnthe aoor iscompmte_vmosed.
NOONESHOULDCROSSTHEPATHOFAMOVINGDOOR.
4 NEVERGO UNDERA STOPPED,PARTIALLYOPENDOOR,
5TestOpene.rmonthly/.Thedoor MUSTreverseon
contactwith a 1-1/2 hign object (or a 2 x 4 board
laid flat/ at the center qt-the doorw.ay on the floor. ,
After adjusting _ther the_orce or tlie Lim!t or.travel,
retest the uoor upener. _ailure to adjust.the upener
proper y may causesevere injury or death.
6 When possible use the Emergency Reease only when
the door is closed, Usecaution when usincIthis
Release with the door open. Weakor brol_ensprings
are capable or increasing the rate of aoor .closurean(]
increasing the risKor severe injury or aeath.
"/ KEEPGARAGEDOORSPROPERLYBALANCED.See
Owner's Manual. An improperly balanced door
ncreasesthe risKor severe injury or,aeath. Havea
Genie Factory Authorized Dealer maKe repairs to
cables,sprin_ assemblies, an(] other narc]ware,
8SAVETHESEINSTRUCTIONS.
WARNING
IUse theWallCons01.eincludedWithOpener.Anyother wal!I
I consolecancausethe upener to operateunexpectedly
land the light to stopworking. I
TROUBLESHOOTING
IFTHERE IS ANY TROUBLE WiTH THE OPENER, TRY
THESE SOLUTIONS BEFORE CALLING THE HELP
NUMBER.
NOTE
In all cases,watch the opener's lights for any flashing
trouble codes.Referto the FlashingLight TroubleCodes
on page 16for the problem causeandremedy.
IPENER DOES NOT OPERATE FROM
THE REMOTE OR WALL CONTROL
A Checkthat the opener'sACoutlet haspower.Plugalamp intothe
outlet to check.
B Themotor'sautomatic thermalshutoffswitchmayhave
beenactivatedfrom repeateduse(opener'slightswill
flash4times).Wait30minutesfor the motorto cool
down andretry.
C Checkthe wall controlwiring at the wallcontrol'sand
opener'sterminalsandbesurethatthe remoteis
programmedinto the opener.
OPENER TRIESTO OPERATE,BUT THE
DOOR DOES NOT MOVE
A Adoorspringmayhavebroken.Visuallyinspectthe door
hardwarefor anybrokensprings.Havea qualifiedgaragedoorservice
professionalrepairthe door if anyhardwareis broken.
B In coldweatherclimates,checkthat the doorisnot frozento the
groundor thatsnowbuildupis not blockingthe door.
C If the openerlight flashes4 times,the doorforcesetting
maybetoo low.Adjustthe force.
A Checkthatthe carriageisengagedto the bullet/belt. The
carriagereleaselevermustbein the horizontalpositioninorderfor it
to engage.
THE DOOR STARTS TO OPEN BUT
STOPS BEFORE FULLYOPENING
A Ifthe openerlight flashes4 times,the openforcesettingmaybe
too low. Resetthe force.
B Thedoorhardwaremaybebindingcausingthe doorforcesetting
to beexceeded.Disengagethe carriageandmanuallycheckthe door
movementandbalance.Lubricatethe doorhardwareasrecommended
by the manufacturer.
A Adjusttheopen limitsetting.
A Adjusttheclose limitsetting.
14 For Help, call 1-800-35-GENIE or visit www.geniecompany.com
THE DOOR STARTS TO CLOSE BUT
REVERSESBEFORE FULLY CLOSING
AIfthe openerlight flashes4 times,the closedoorforcesettingmay
betoo low.
BThedoorhardwaremaybebindingcausingthe doorforcesetting
to beexceeded.Disengagethe carriageandmanuallycheckthe door
movementandbalance.Lubricatethe door hardwareasrecommended
bythe manufacturer.
C TheSafe-T-Beam®hasbeeninterruptedwhile the doorisclosing
(openerlight flashes3times),orthe Safe-T-Beam®isout of alignment.
AIt is normal for the lights to stay on for about 5 minutes
after being activated.
B If the lights were turned on using the light button on the
wall control, they will stay on until they are turned off using
the wall control light button or the door is cycled open or
shut.
OPENER DOES NOT OPERATE
FROM THE WALL CONTROLr BUT
DOES FROM THE REMOTE
A Check the wall control wiring at the wall control and
opener terminals.
B Check the wiring between the wall control and the
opener. Look for any staples that have cut into the wire's
insulation or wire that has been pinched. If the opener light
flashes 2 times when the remote is used,the wall control
wires are shorted and the bad section must be replaced.
OPENER DOES NOT OPERATE
FROM THE REMOTEr BUT DOES
WITH THE WALL CONTROL
ABe sure that the remote is programmed into the opener.
B Check the remote's battery.The red light should light up
when ever the remote button is pressed.
A Ifthe openerlightsflash5 timeswhenthe remoteis
activated,andthe door doesnot open,the vacation
switchison.Turnthevacationswitchoff
(optionalaccessory).
REMOTECONTROLWILL NOT
OPERATEAT A DISTANCEFROM
THE OPENER.
A Besurethatthe opener'santenna(theshortwhitewireon the
backof theopener)isextendedupwardfromthe opener.
B Checkthe remote'sbattery.
C Remotecontroloperatingdistancewill varydependingonthe
amountof interferenceandmetalobstaclesinthe pathof the signal.
A Examineall remotesprogrammedintothe opener.Checkfor
itemsthat might bepressingona remotebutton.Lookfor remotes
stuffedbetweenseatcushionsof the car.
B Ifa remotehasbeenlostorstolen,erasethe opener'smemory
to preventthe missingremotefrom activatingthe opener.
Reprogramthe remainingremotesinto the opener.
C Checkthe wiring betweenthe wallcontrolandthe opener.Look
for staplesthat havecut into the wire'sinsulation,or wirethat has
beenpinchedbyaobject.Replaceany badwire.
B Examinethe wiring at the opener'sterminalsandthe wall
controlterminals.Lookfor anywiresthatarecloseto or touching
adjacentterminals.
A Lubricatethe doorhardwareasrecommendedbythe garage
doormanufacturer.
THE OPENERWILL NOT OPERATE
BECAUSEOF A POWERFAILURE
Pullthe carriagereleasehandleto disengagethe openerfrom
the door.Thedoorcan beoperatedmanuallyuntil powerisrestored.
For Help, call 1-800-35-GENIE or visit www.geniecompany.com 15
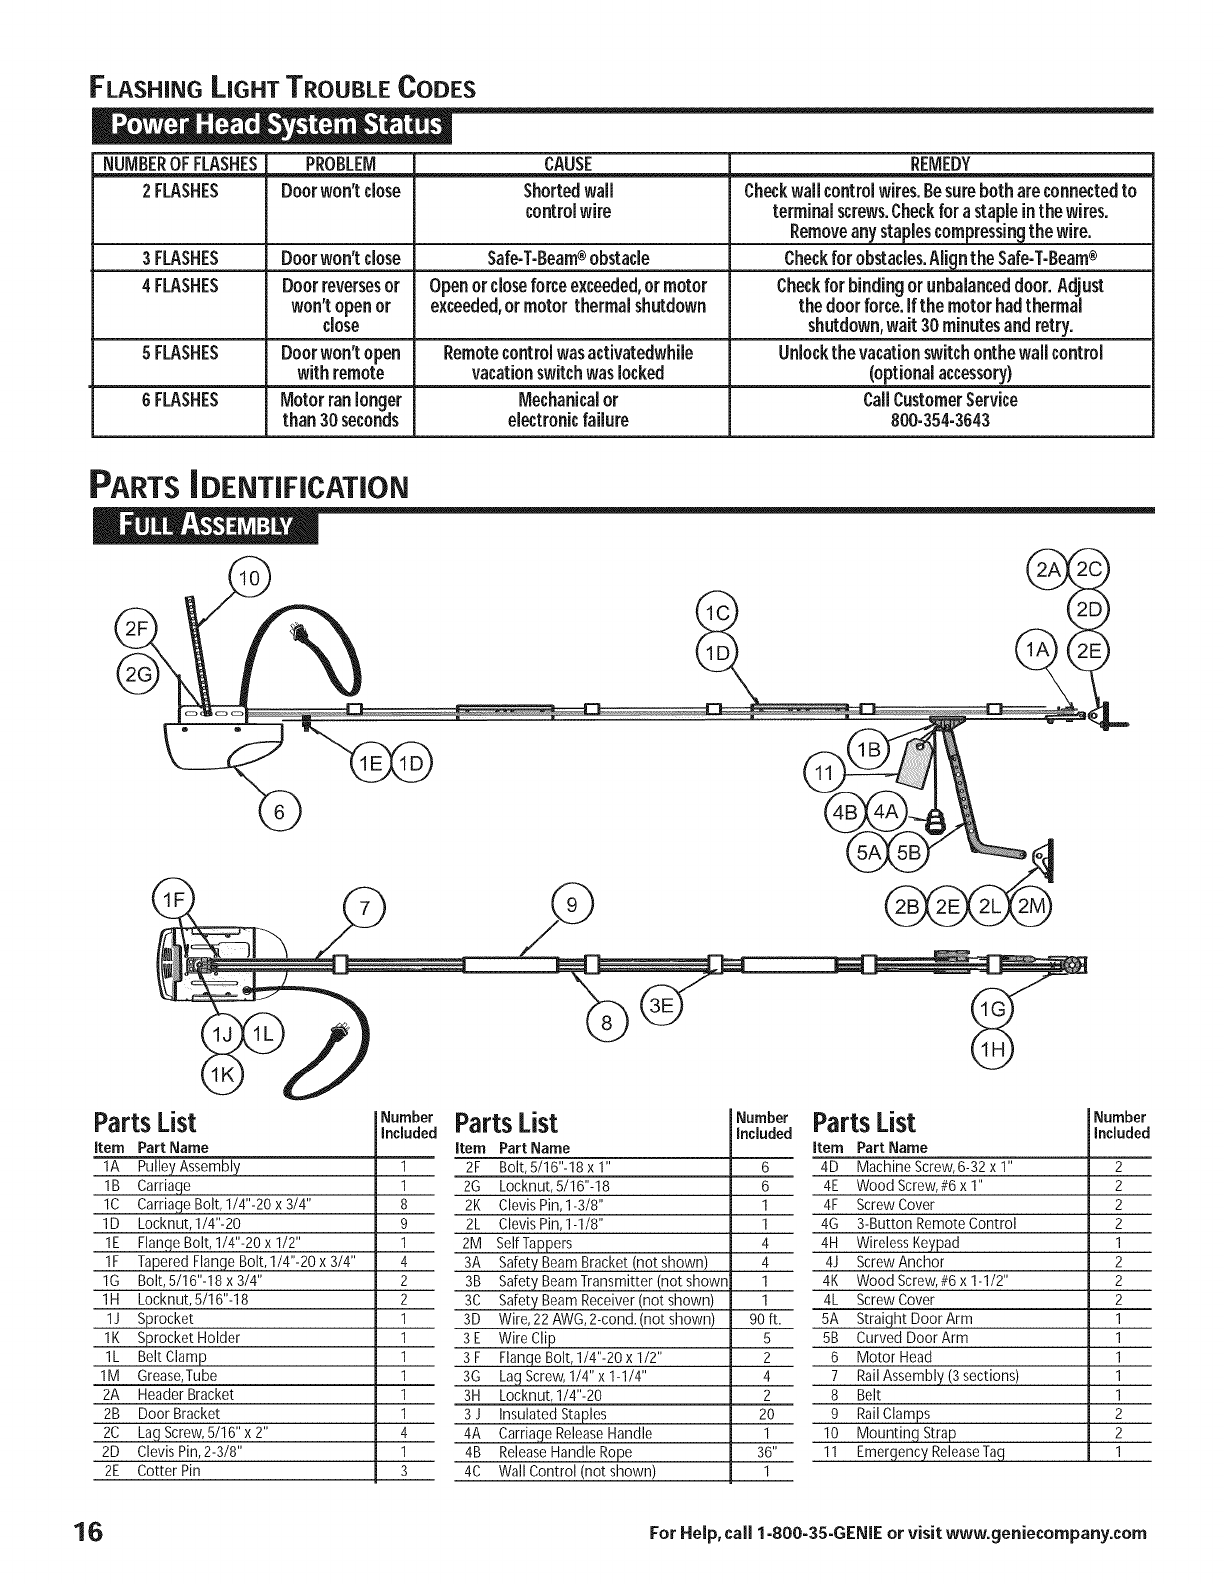
FLASHING LIGHT TROUBLE CODES
NUMBEROF FLASHES
2FLASHES
3FLASHES
4FLASHES
Door won't close
Doorreversesor
won'topenor
close
Doorwon'topen
CAUSE
Shortedwall
controlwire
Safe.T-Beam®obstacle
Openorcloseforceexceeded,ormotor
exceeded,ormotor thermalshutdown
REMEDY
Checkwallcontrolwires.Besurebothareconnectedto
terminalscrews.Checkfor astapleinthe wires.
Removeanystaplescompressingthewire.
Checkfor obstacles.Alignthe Safe-T-Beam®
Checkfor bindingor unbalanceddoor.Adjust
thedoorforce,ifthe motorhadthermal
shutdown,wait30minutesandretry.
Unlockthe vacationswitchonthewallcontrol5FLASHES Remotecontrolwasactivatedwhile
with remote , vacationswitchwaslocked , (optionalaccessory)
6FLASHES Motorranlonger Mechanicalor CallCustomerService
than30seconds electronicfailure 800-354-3643
PARTS iDENTiFiCATiON
PartsList
item Part Name
1A PulleyAssembly
1B Carriaqe
1C Carriaqe Bolt, I/4"-20 x 3/4"
1D Locknut,1/4"-20
1E Flanqe Bolt,1/4"-20 x 1/2"
1F Tapered Flange Bolt, 1/4"-20 x 3/4"
1G Bolt,5/16"-lSx3/4"
1H Locknut, 5/16"-18
1J Sprocket
1K Sprocket Holder
1L Belt Clamp
1M Grease,Tube
2A Header Bracket
2B Door Bracket
2C Lag Screw,5/16" x 2"
2D Clevis Pin,2-3/8"
2E Cotter Pin
NumberParts List
Included
1
1
8
9
1
4
2
2
1
1
1
1
1
1
4
1
3
item Part Name
2F Bolt,5/16"-18 x 1"
2G Locknut,5/16"-18
2K ClevisPin,l-3/8"
2L ClevisPin,l-I/8"
2M SelfTappers
3A Safety Beam Bracket (not shown)
3B Safety Beam Transmitter (not shown
3C Safety Beam Receiver (not shown)
3D Wire,22 AWG,2-cond.(not shown)
3E Wire Clip
3 F Flange Bolt, 1/4"-20 x 1/2"
3G Lag Screw,1/4"x 1-1/4"
3H Locknut,1/4"-20
3 J Insulated Staples
4A CarriaqeRelease Handle
4B ReleaseHandle Rope
4C Wall Control (not shown)
Number Parts List
included item Part Name
6 4D Machine Screw,6-32 x 1"
6 4E Wood Screw,#6 x 1"
1 4F Screw Cover
1 4G 3-Button Remote Control
4 4H Wireless Keypad
4 4J ScrewAnchor
1 4K Wood Screw,#6 x 1-1/2"
1 4L Screw Cover
90ft. 5A Straight DoorArm
5 5B Curved DoorArm
2 6 Motor Head
4 7 RailAssembly (3 sections)
2 8 Belt
20 9 RailClamps
1 10 Mounting Strap
36" 11 Emergency ReleaseTag
1
Number
included
2
2
2
2
1
2
2
2
1
1
1
1
1
2
2
1
16 For Help, call 1-800-35-GENIE or visit www.geniecompany.com
