Gentex CTHL3 Universal Garage Door Opener in Mirror User Manual Exhibit D Users Manual per 2 1033 b3
Gentex Corporation Universal Garage Door Opener in Mirror Exhibit D Users Manual per 2 1033 b3
Gentex >
Exhibit D Users Manual per 2 1033 b3
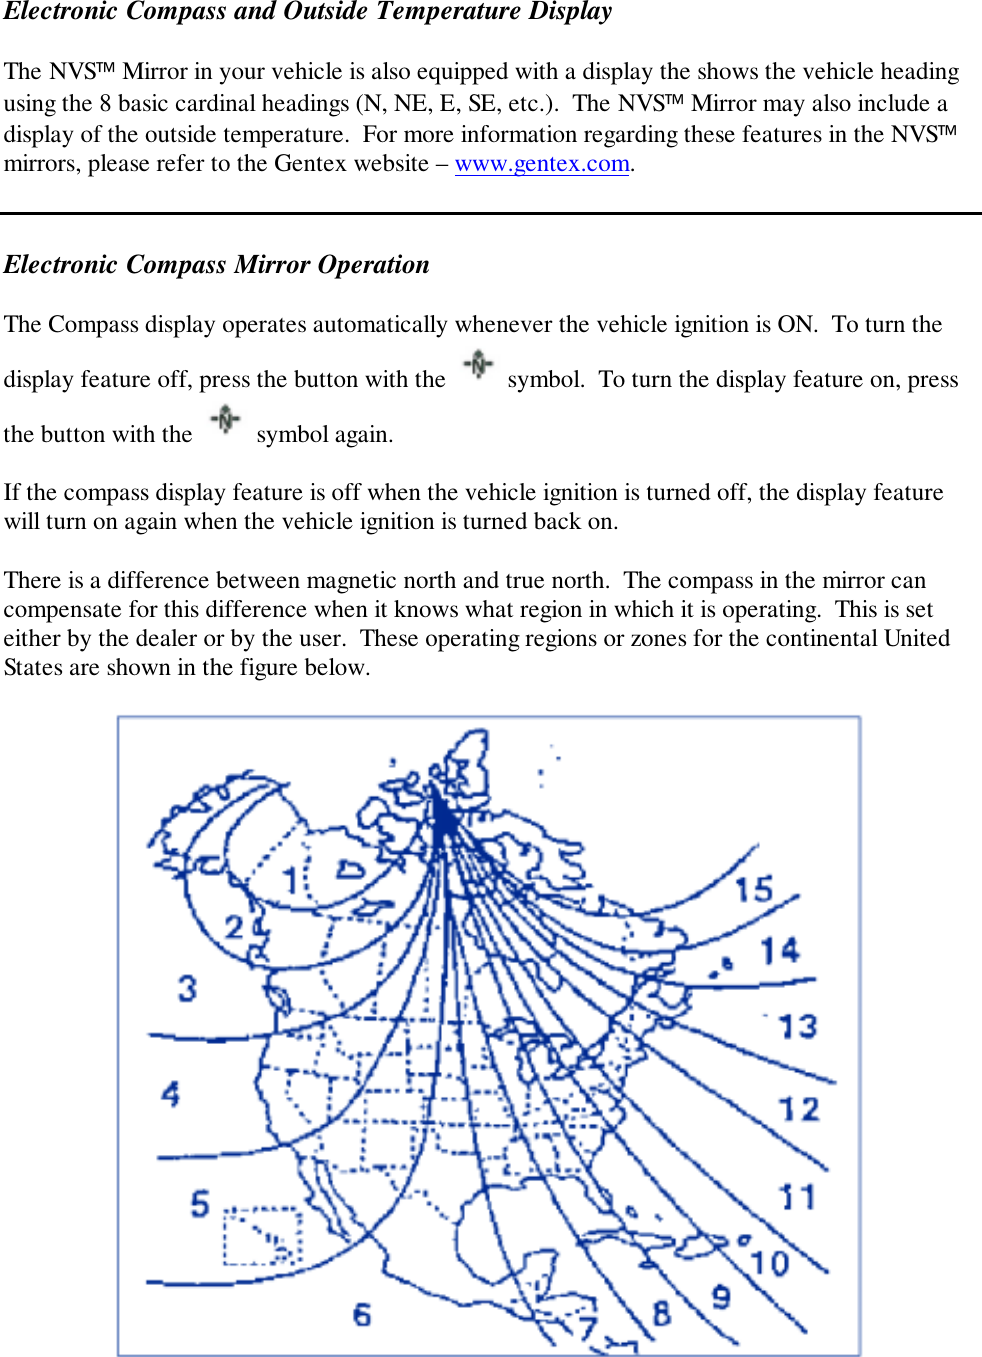
![EXHIBIT D: OWNER’S MANUAL [2.1033(A3)]Recommended Owners Manual for Automatic-Dimming NVS Mirror with Homelink® seriesUniversal Garage Door Opener, Electronic Compass and Outside Temperature Display.Automatic-Dimming NVS Mirror with Homelink®, Electronic Compass andOutside Temperature DisplaySuggested Owner’s Manual TextDecember 2001Automatic-Dimming Night Vision Safety (NVS) MirrorThe NVS Mirror in your vehicle is the most advanced way to eliminate dangerous andannoying glare in the rearview mirror during any driving situation. For more informationregarding NVS mirrors and other applications, please refer to the Gentex website –www.gentex.com.PrecautionsThe NVS Mirror automatically reduces glare during driving conditions based upon light levelsmonitored in front of the vehicle and from the rear of the vehicle. These light sensors are visiblethrough openings in the front and rear of the mirror case. Any object that would obstruct eitherlight sensor will degrade the automatic dimming control feature.OperationThe NVS Mirror operates automatically whenever the vehicle ignition is ON. The status of theautomatic dimming feature is indicated by a green light on the face of the mirror.To turn the automatic dimming feature off, press the button with the button. The indicatorlight will turn off to indicate that the automatic dimming feature is off.To turn the automatic dimming feature on, press the button with the button again. Theindicator light will also turn on.If the automatic dimming feature is off when the vehicle ignition is turned off, the automaticdimming feature will become active when the vehicle ignition is turned back on.](https://usermanual.wiki/Gentex/CTHL3/User-Guide-232743-Page-1.png)