Getac Technology 048 Notebook Computer User Manual
Getac Technology Corp. Notebook Computer
UserManual.wiki
>
Getac Technology
>
048 User Manual
>
Users manual - Pt 2
Contents
1.
User manual - Pt 1
2.
User manual - Pt 2
3.
Users manual - Pt 1
4.
Users manual - Pt 2
Users manual - Pt 2
Navigation menu
Upload a User Manual
Namespaces
Wiki Guide
HTML
PDF
Info
Views
User Manual
Discussion / Help
Navigation
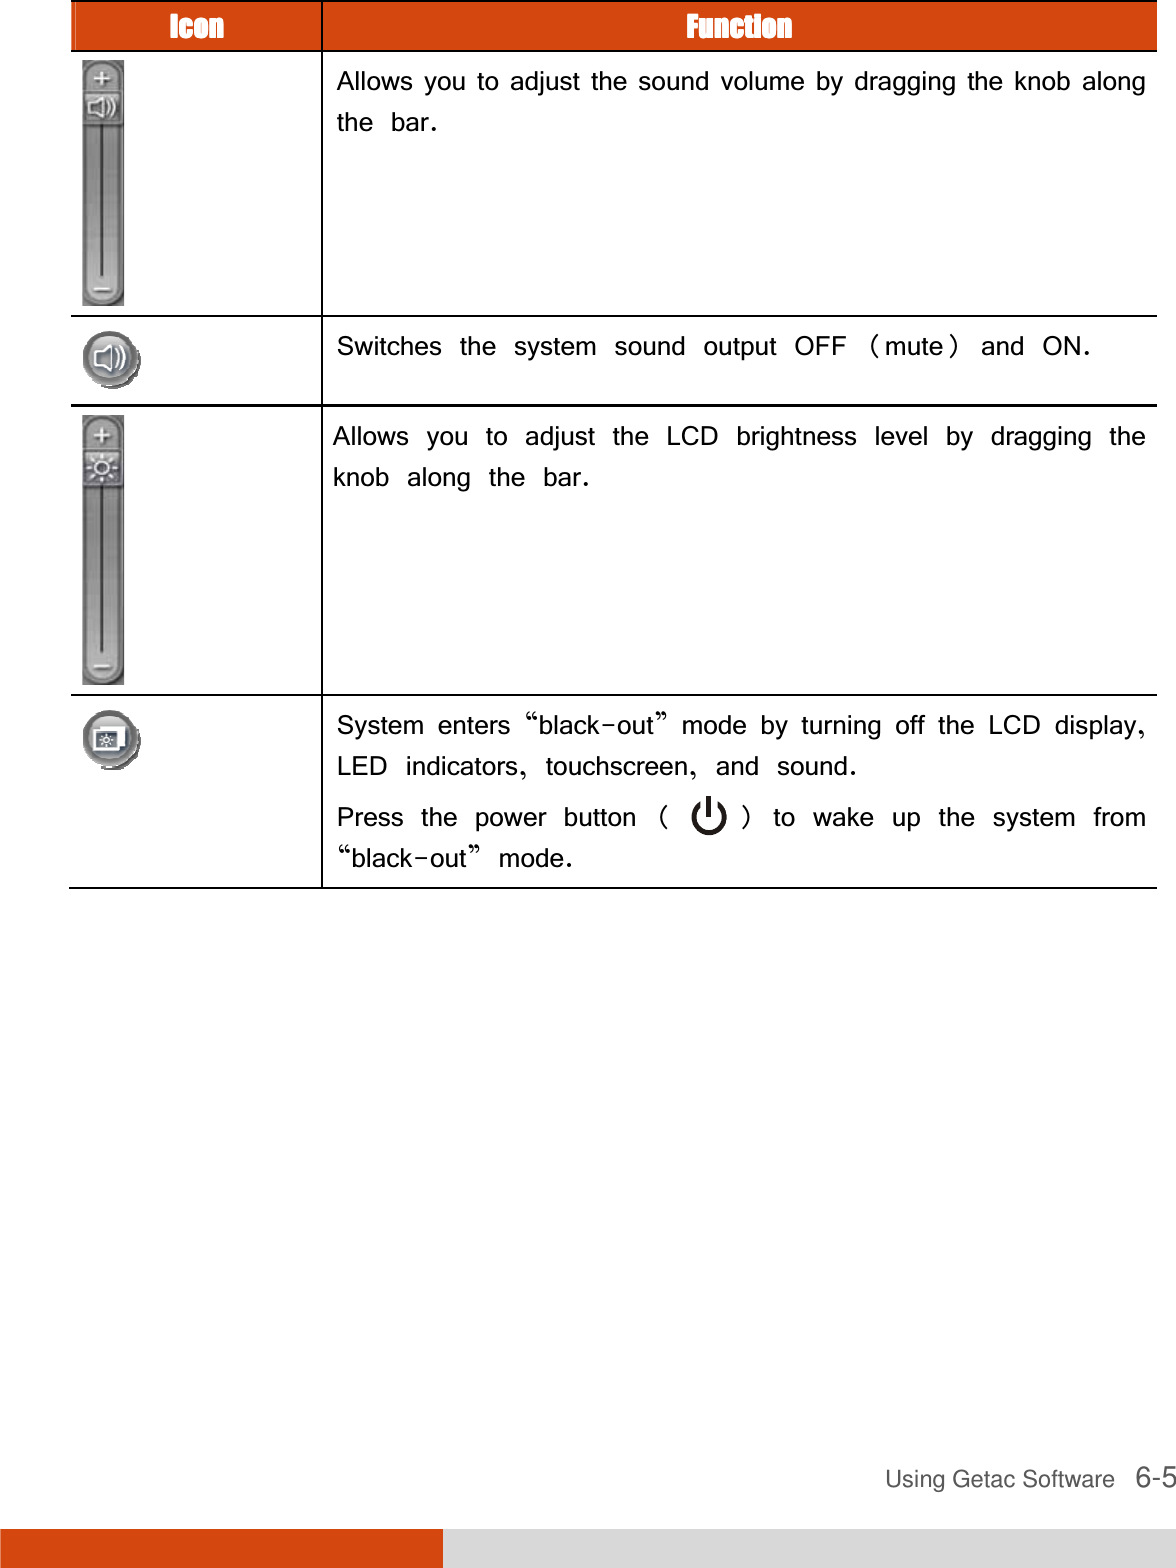
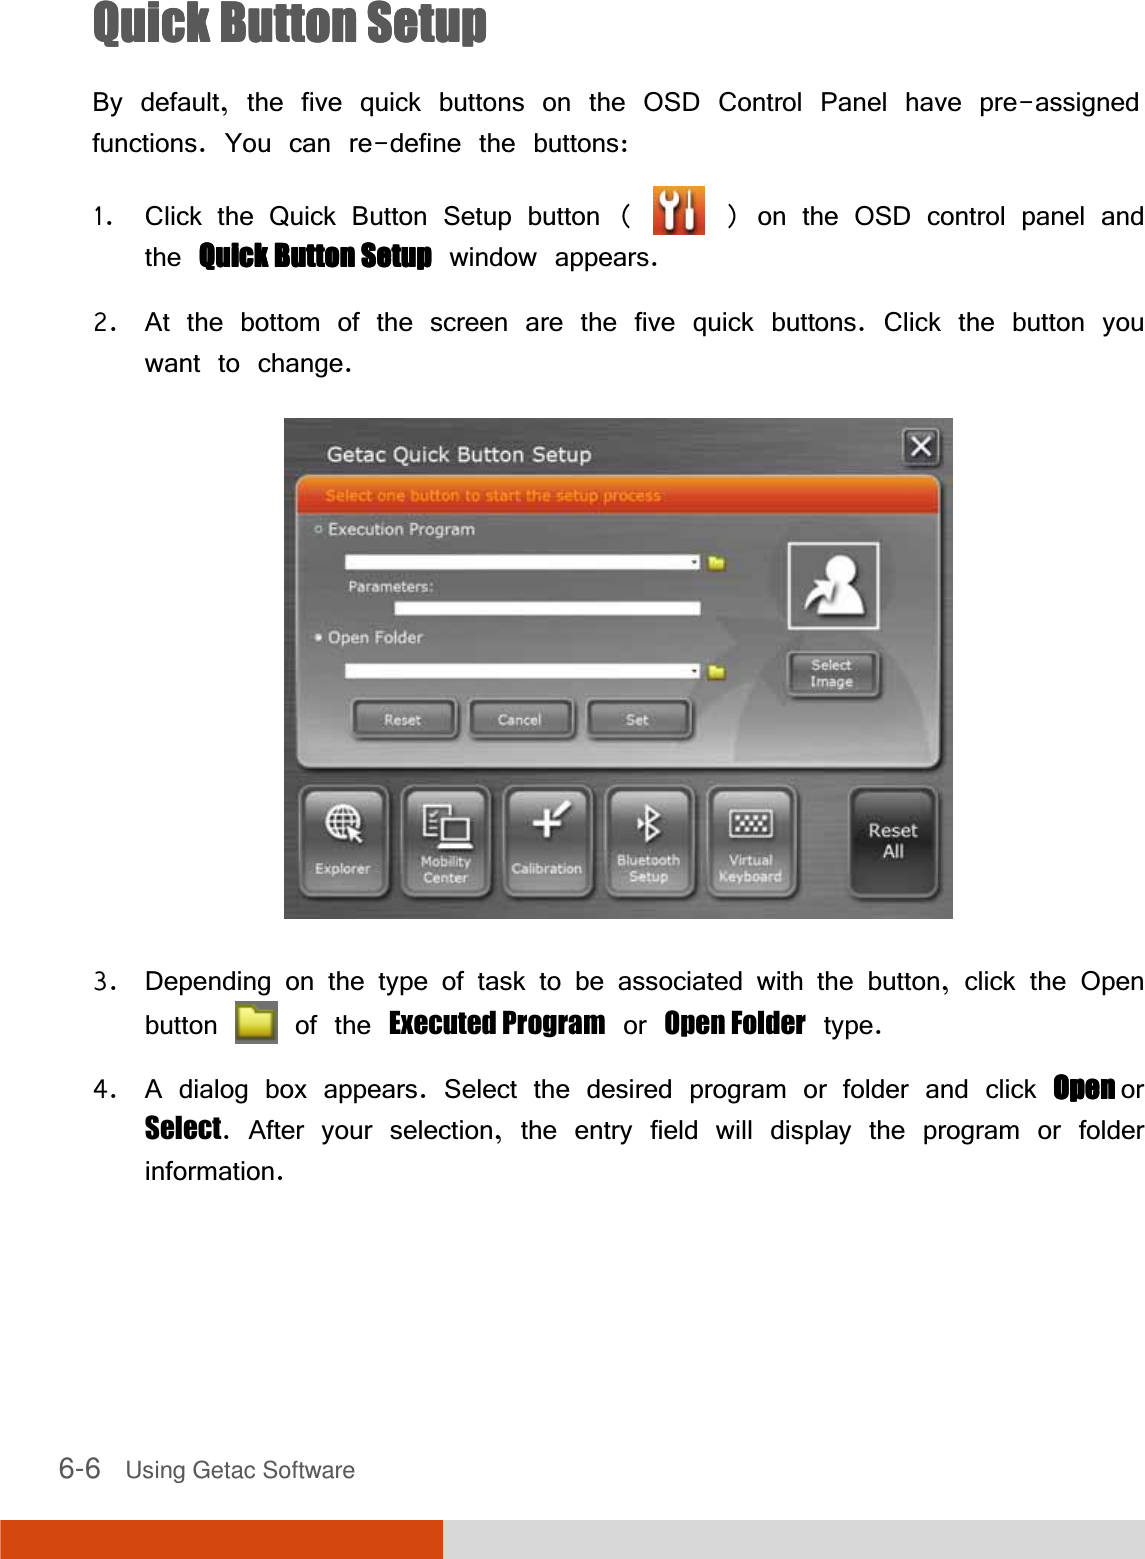
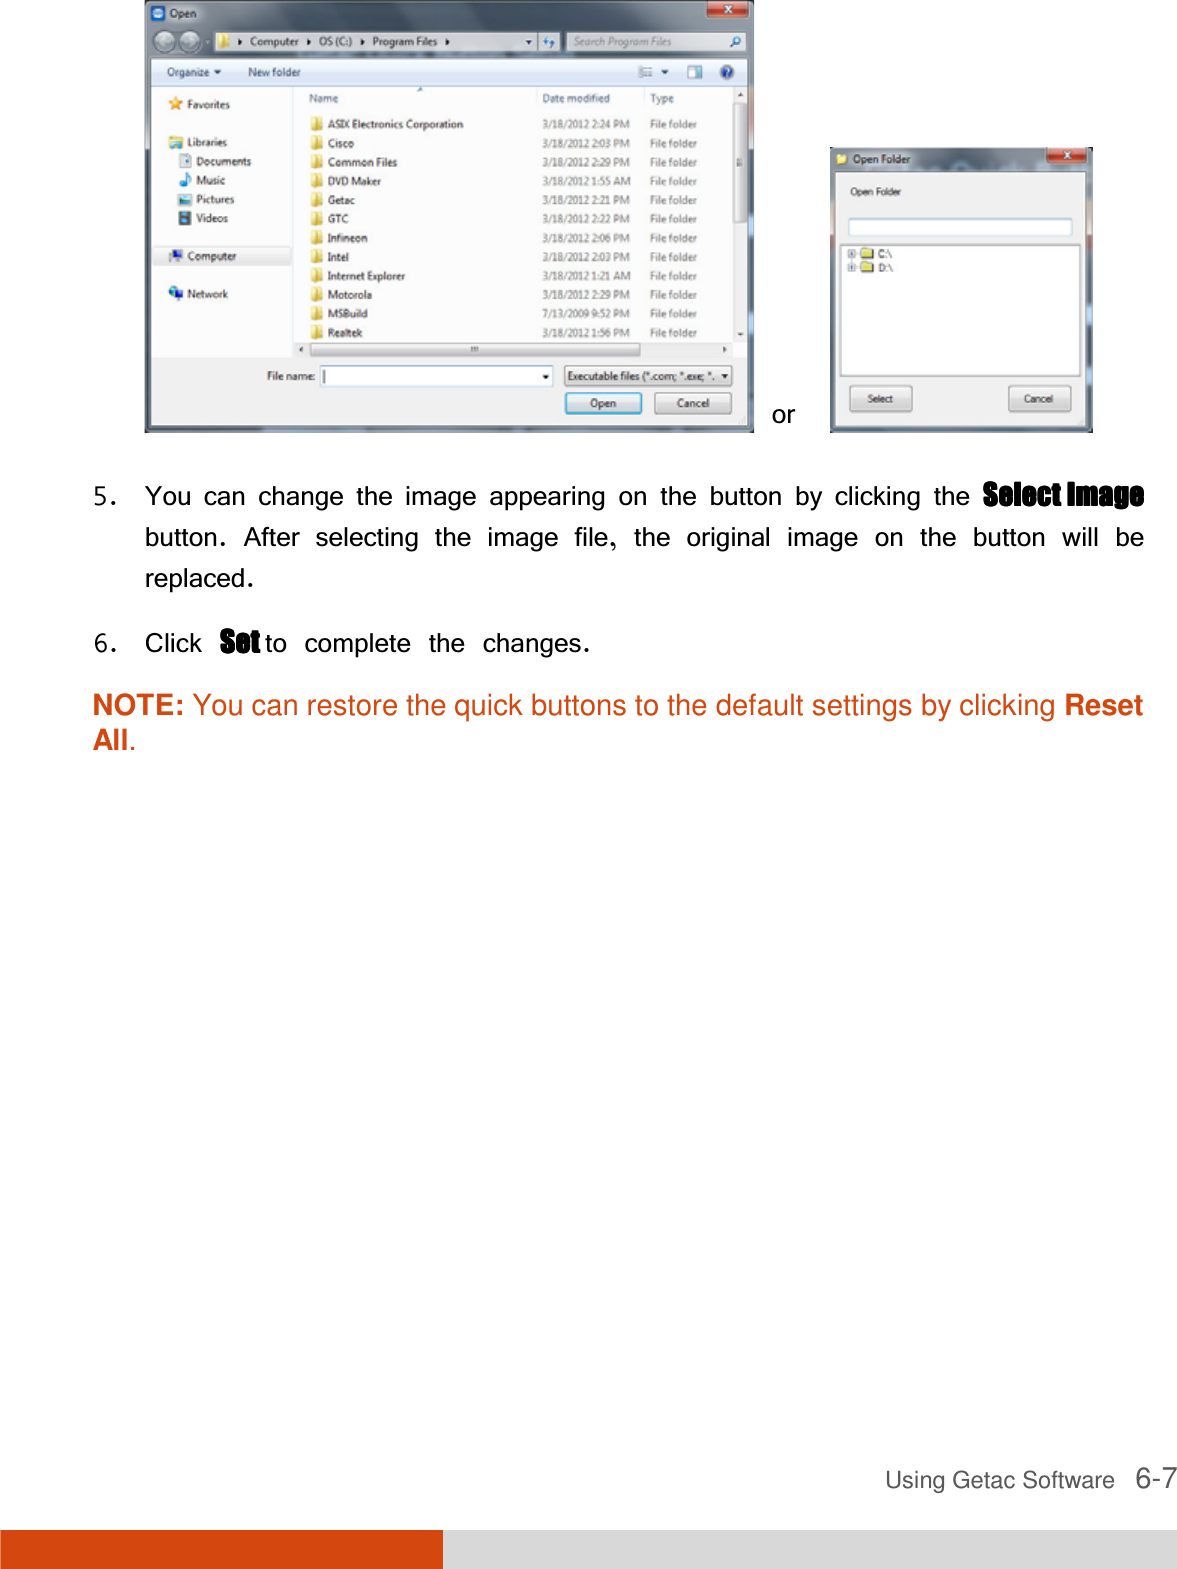

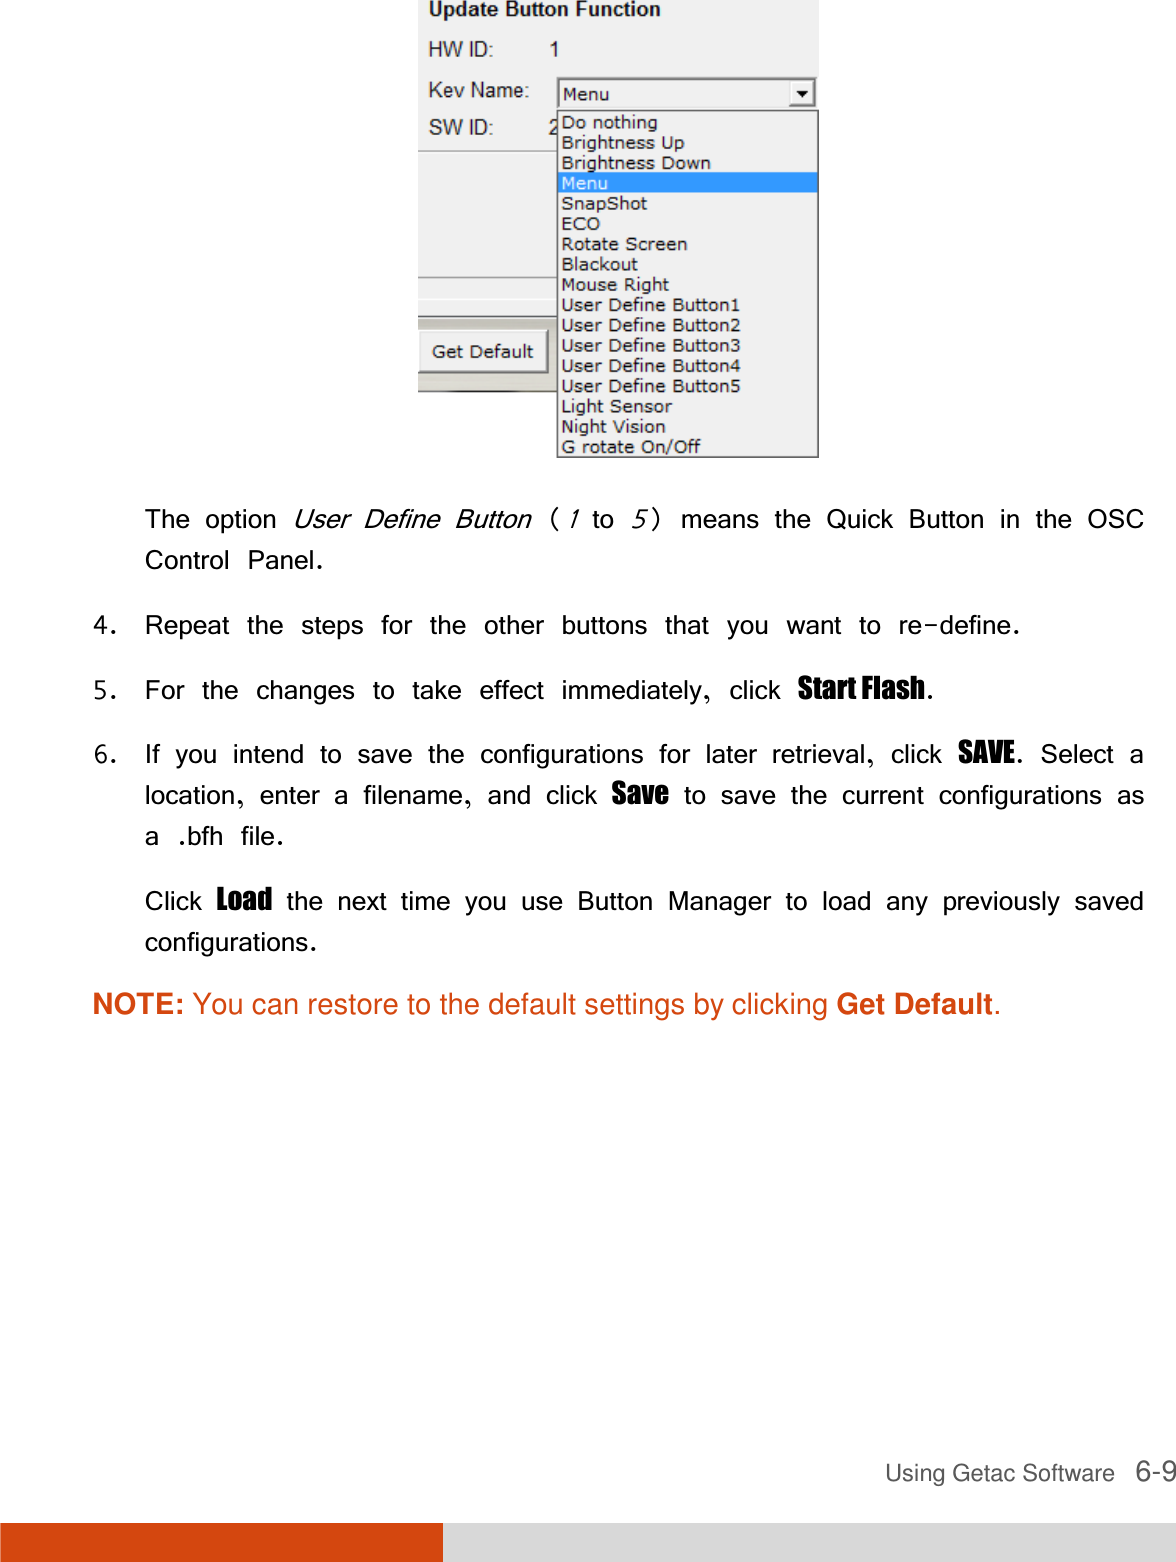
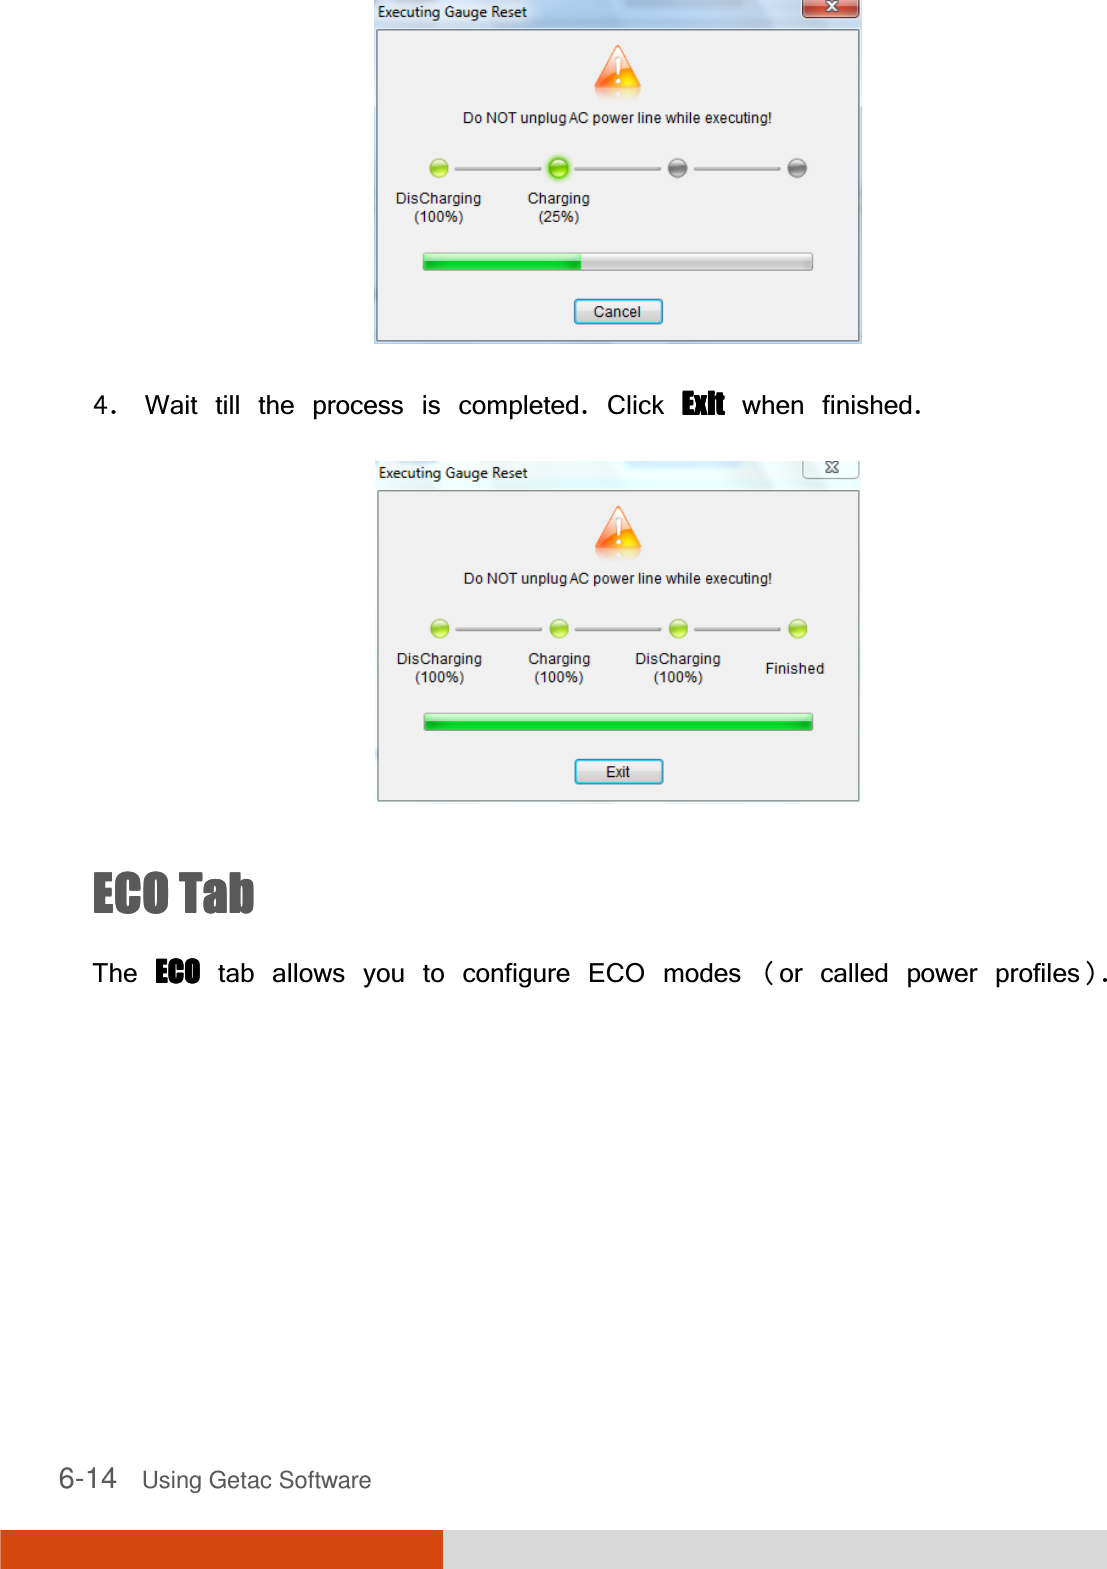
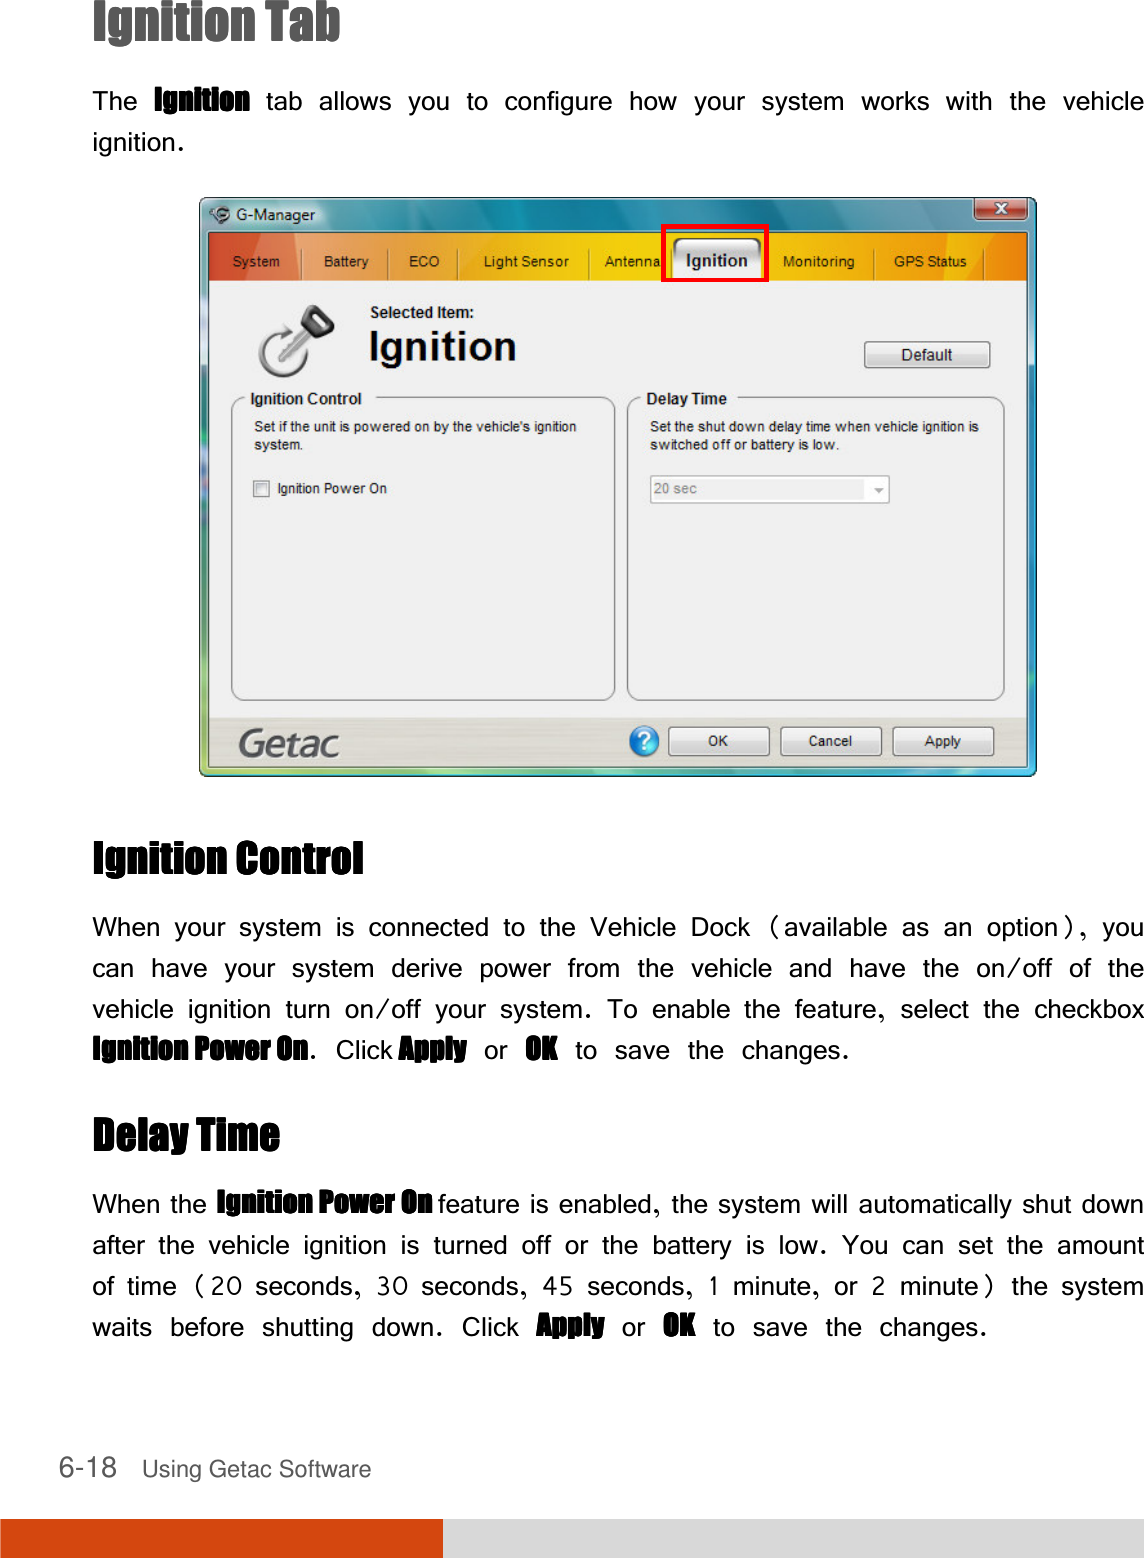
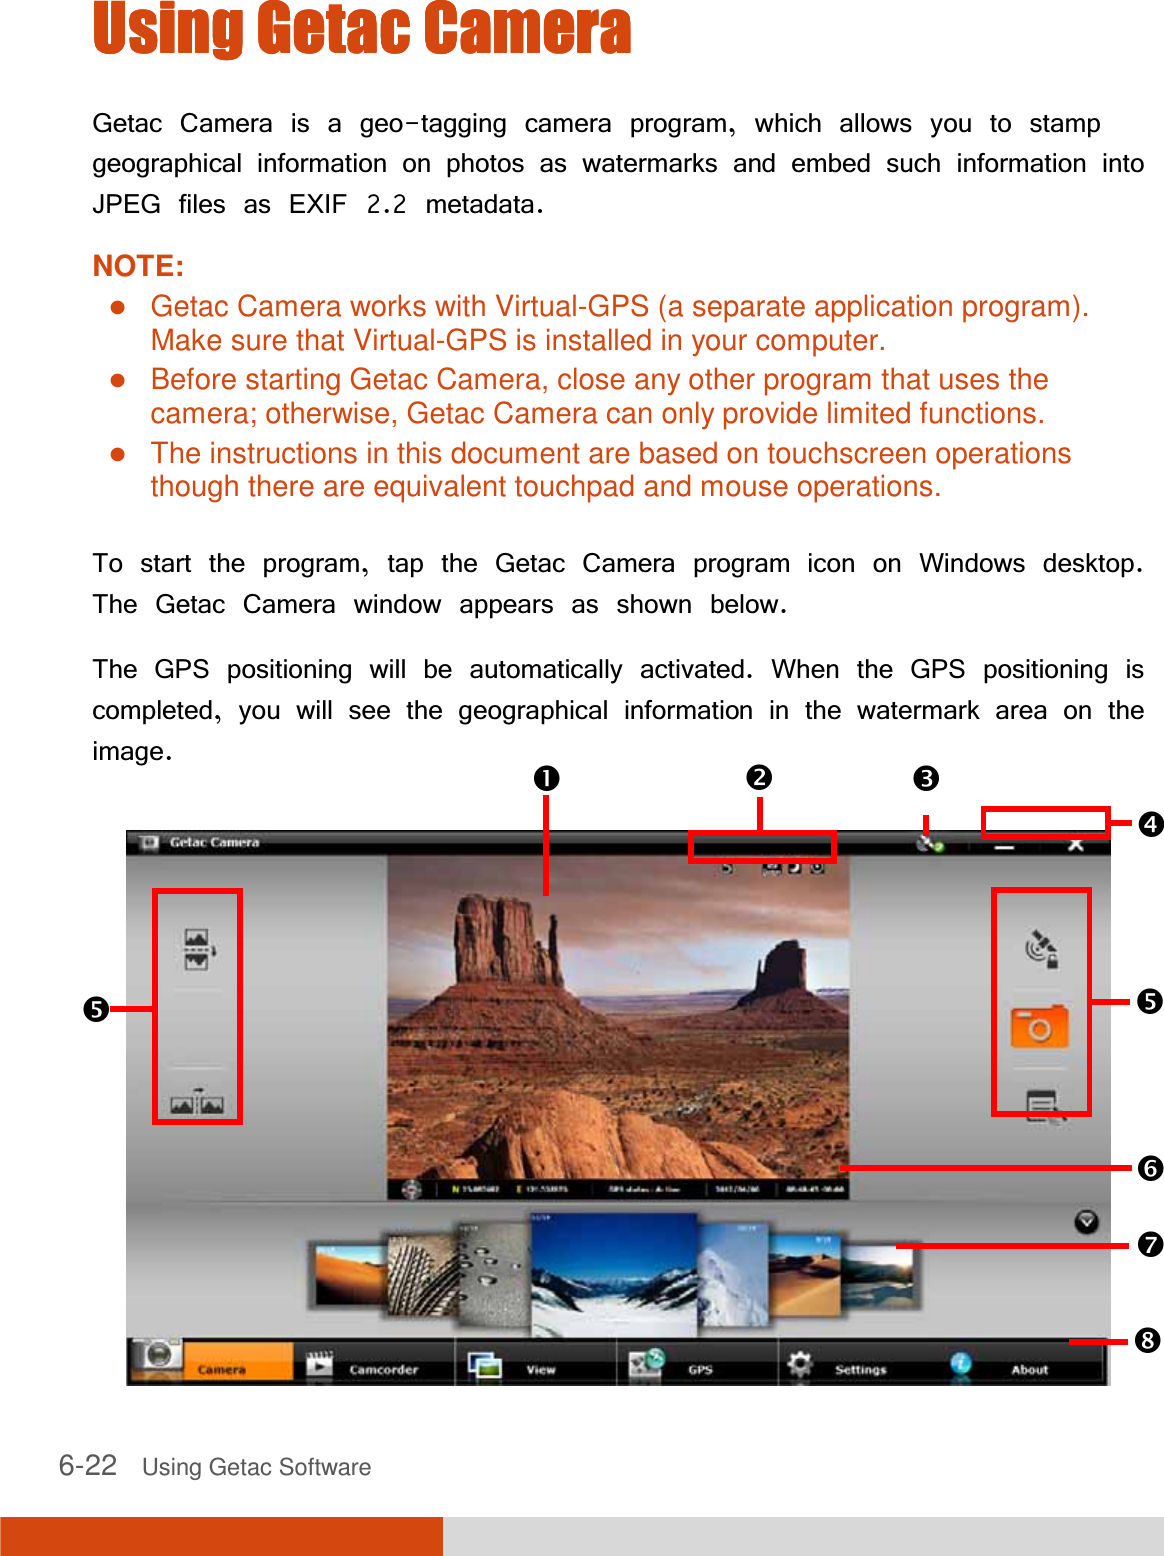
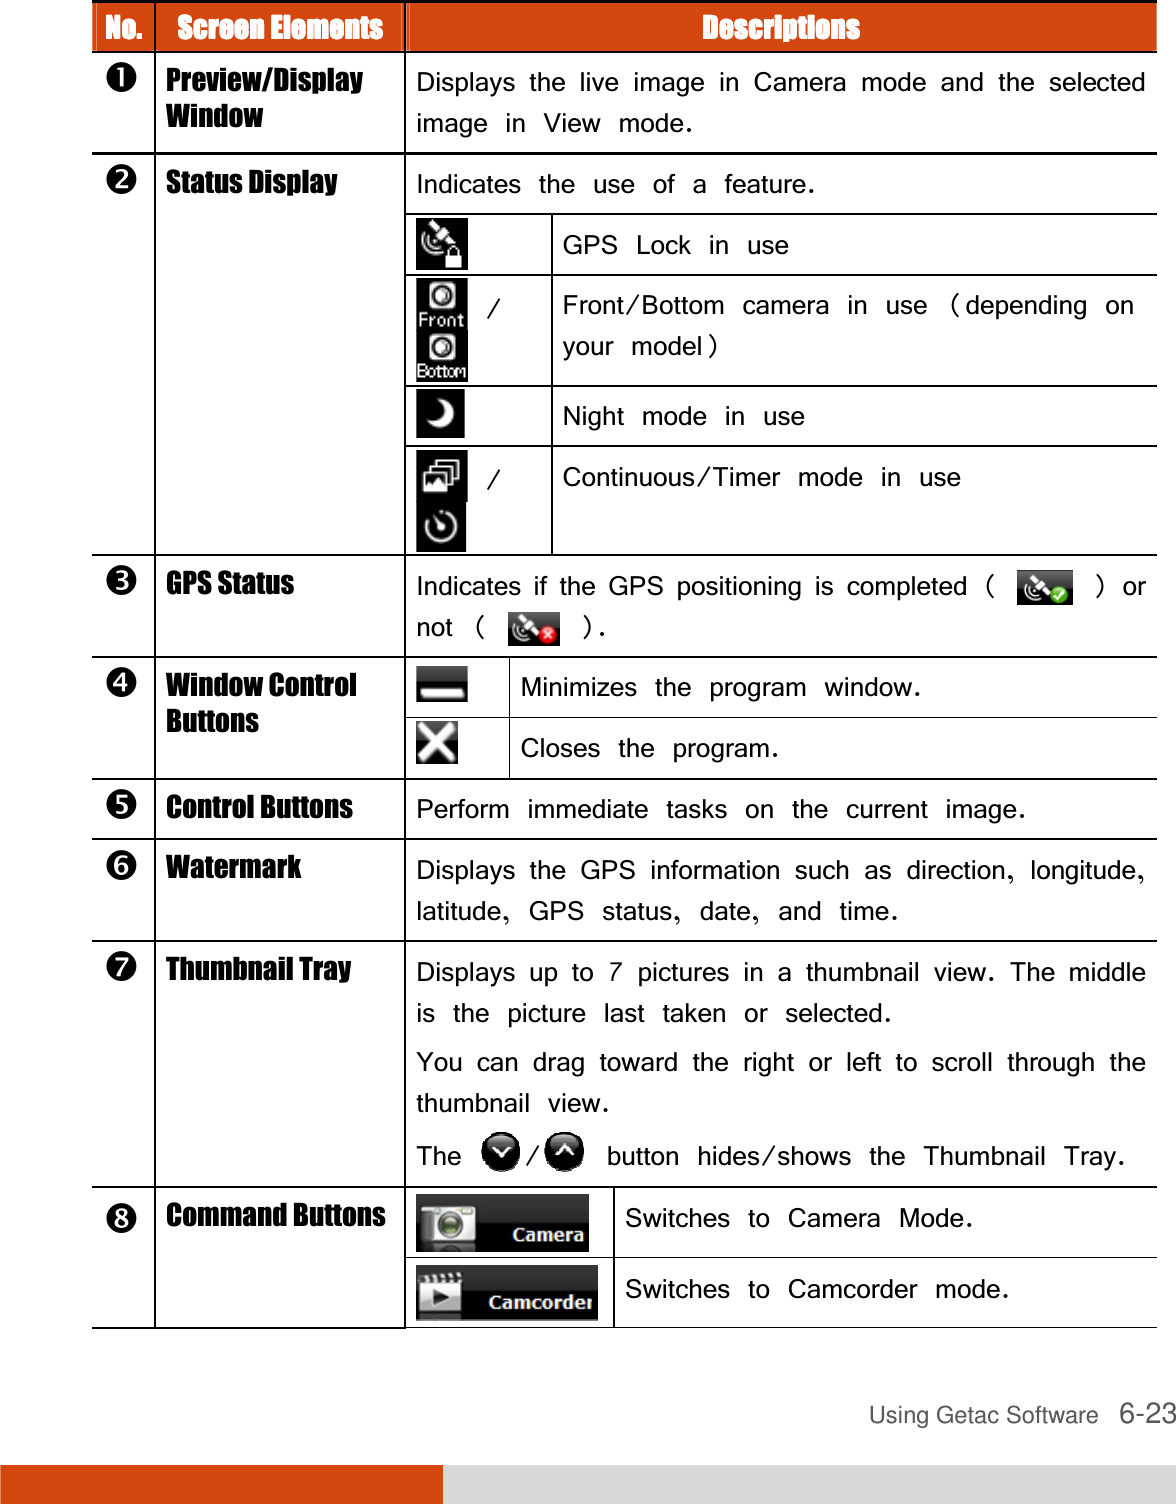
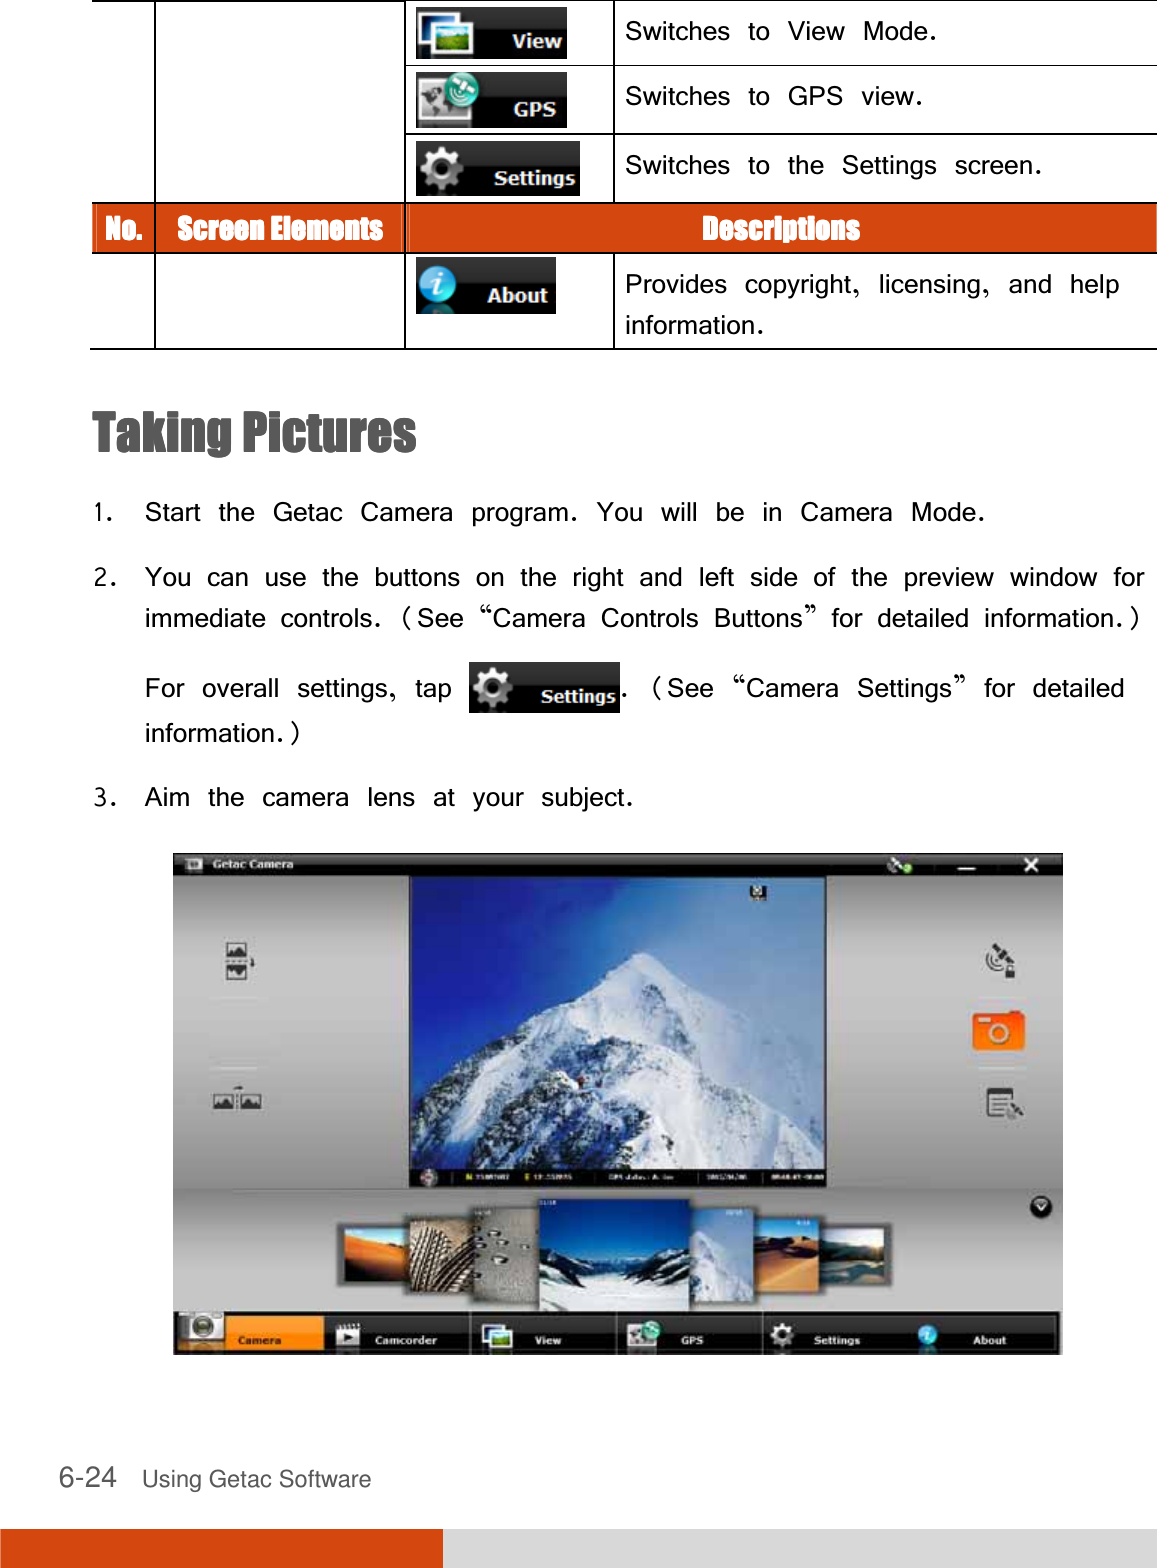

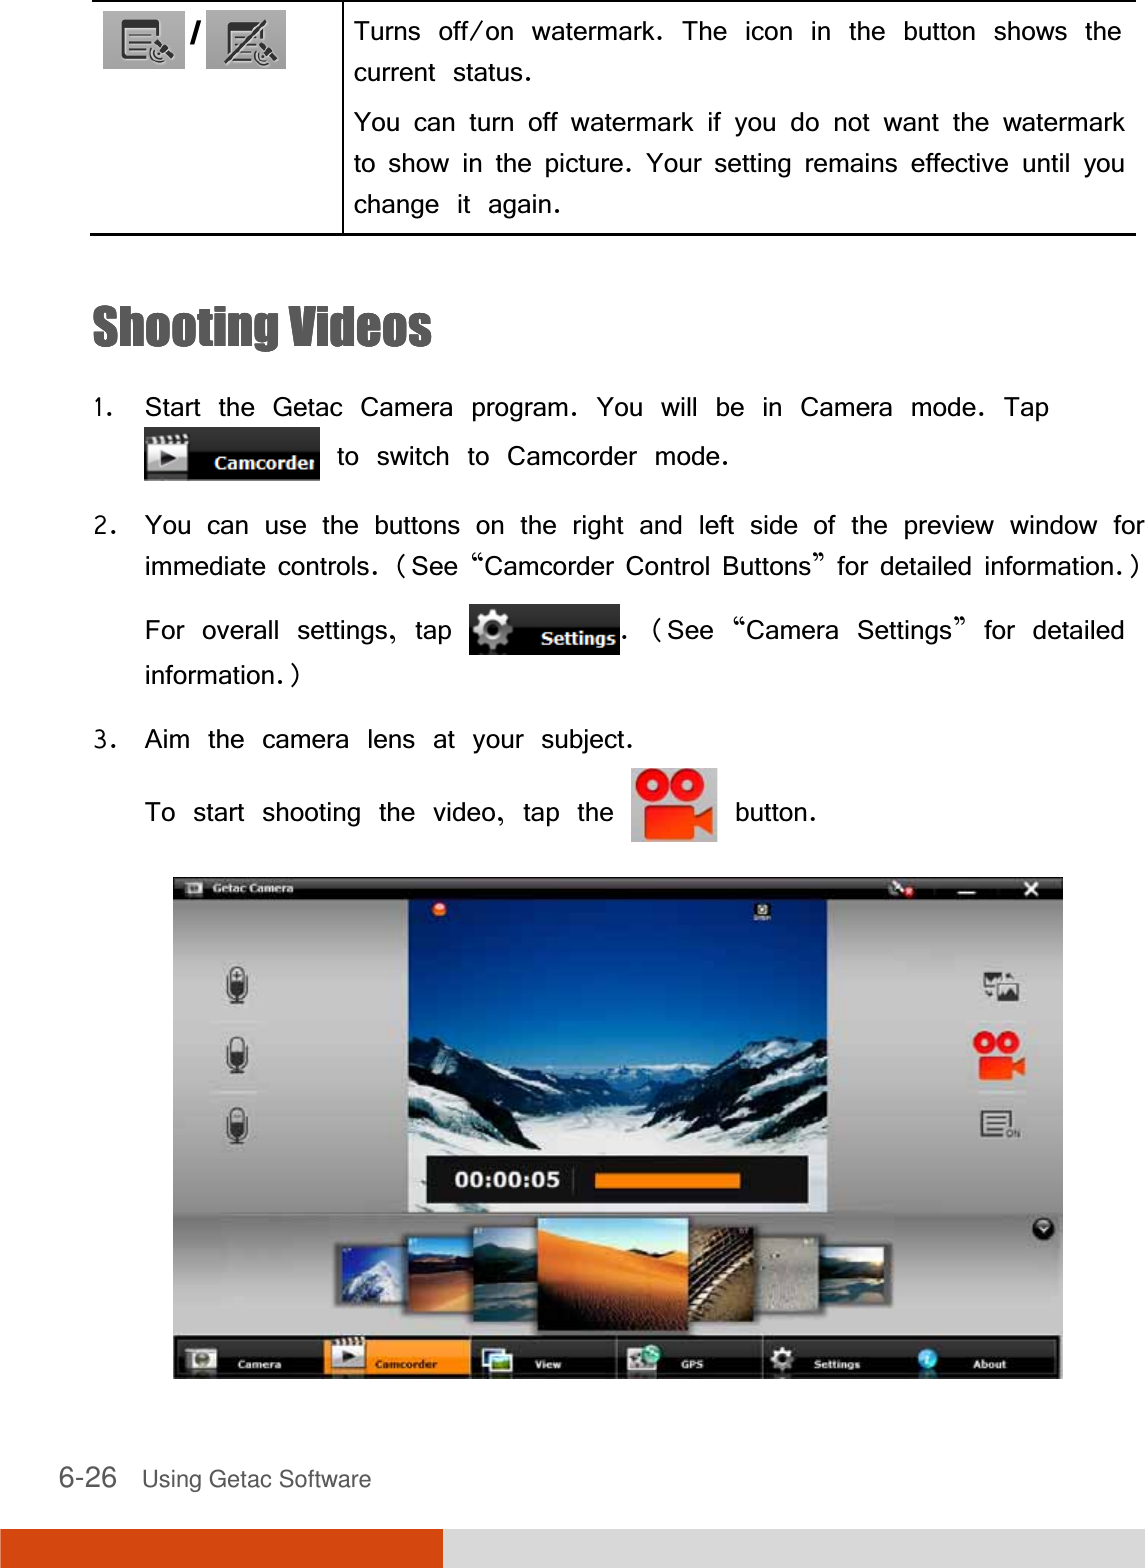
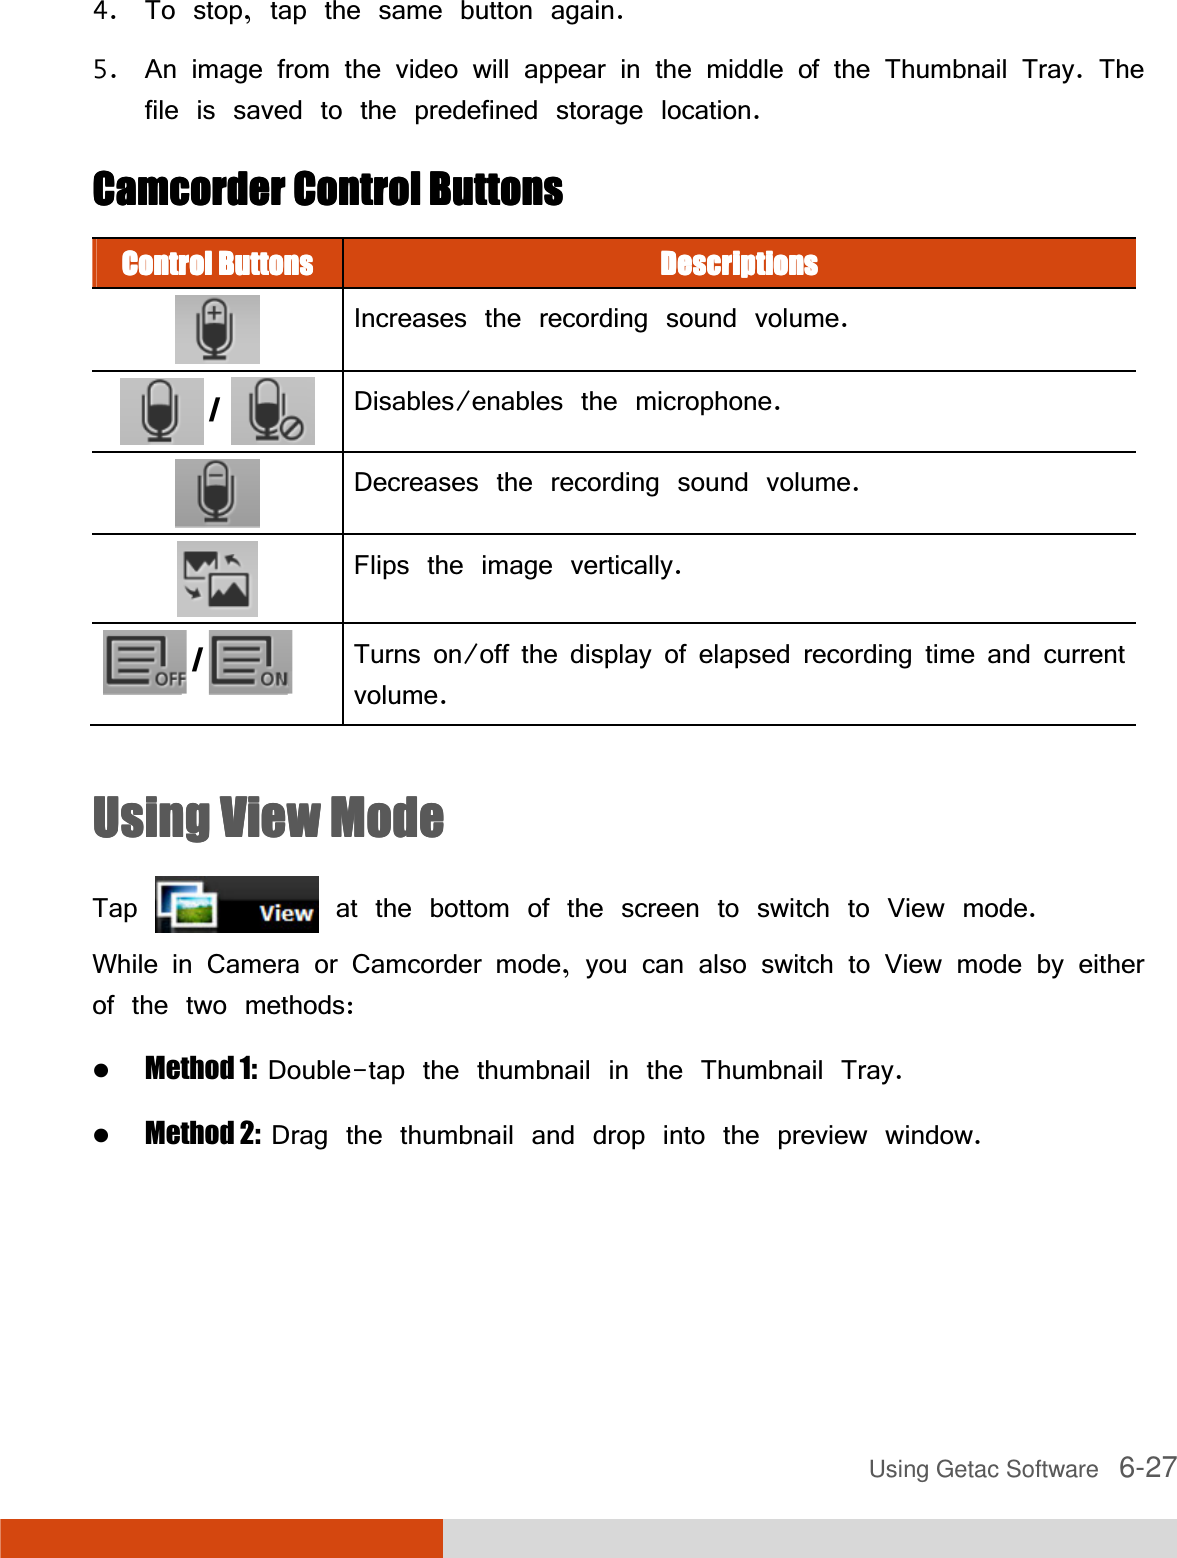
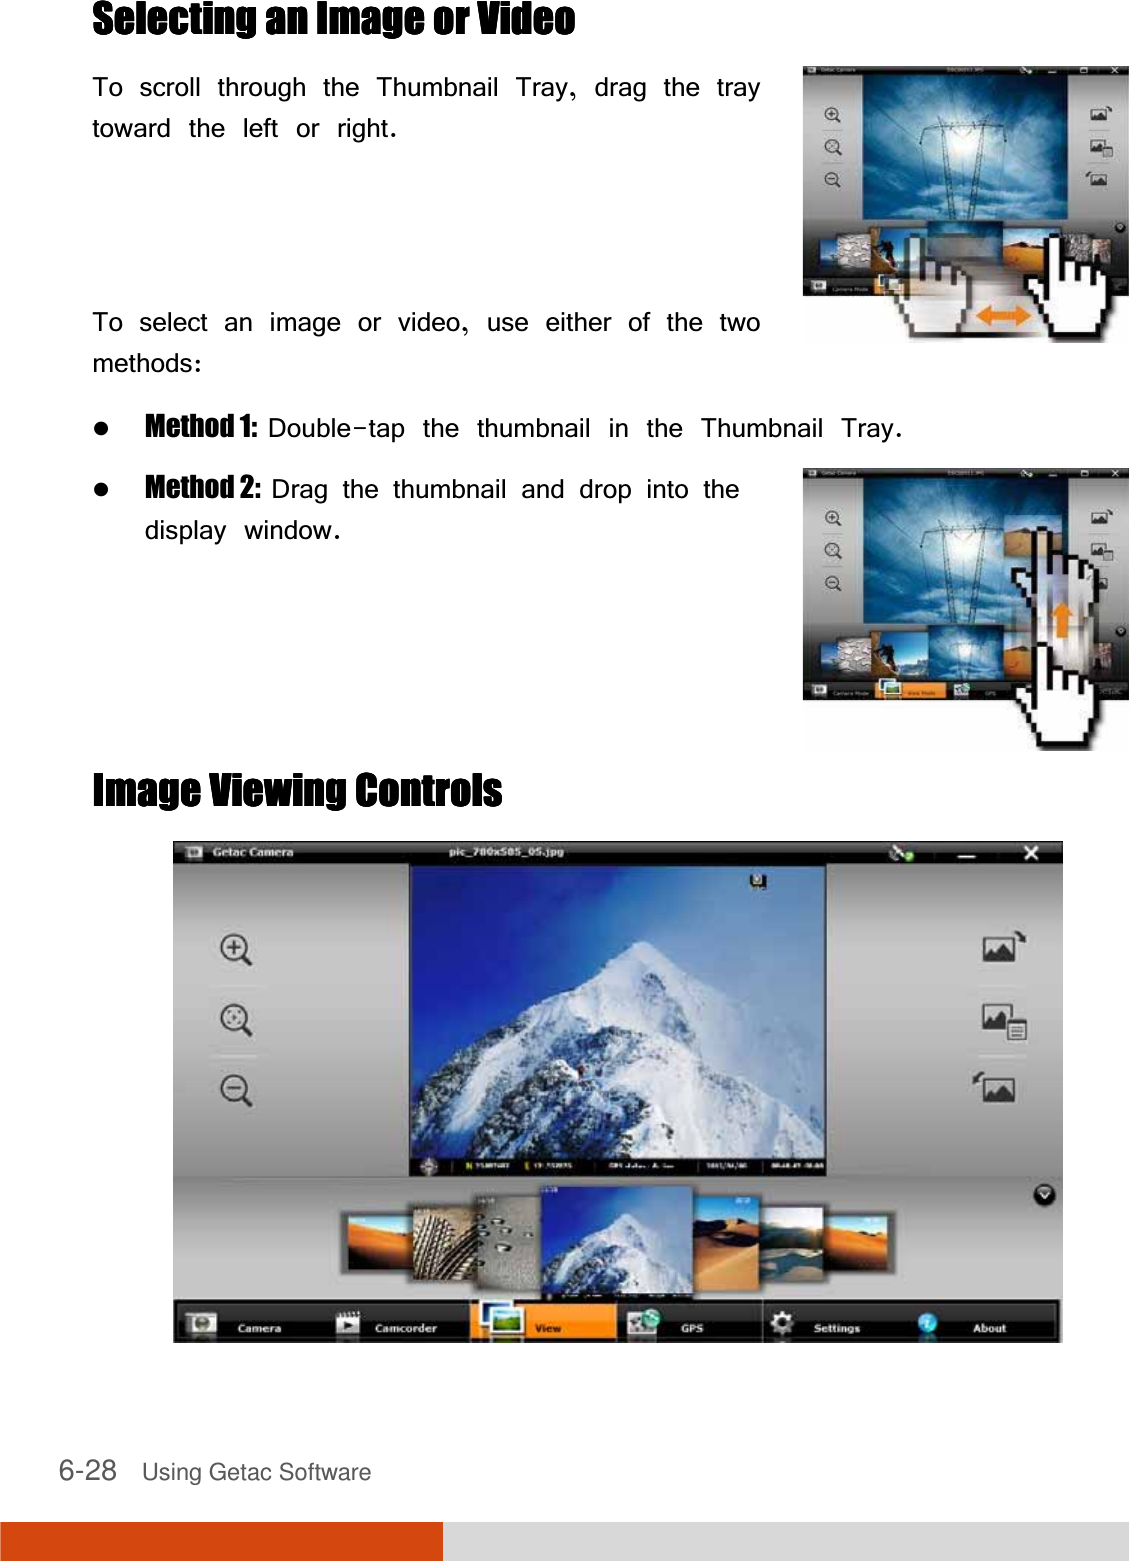

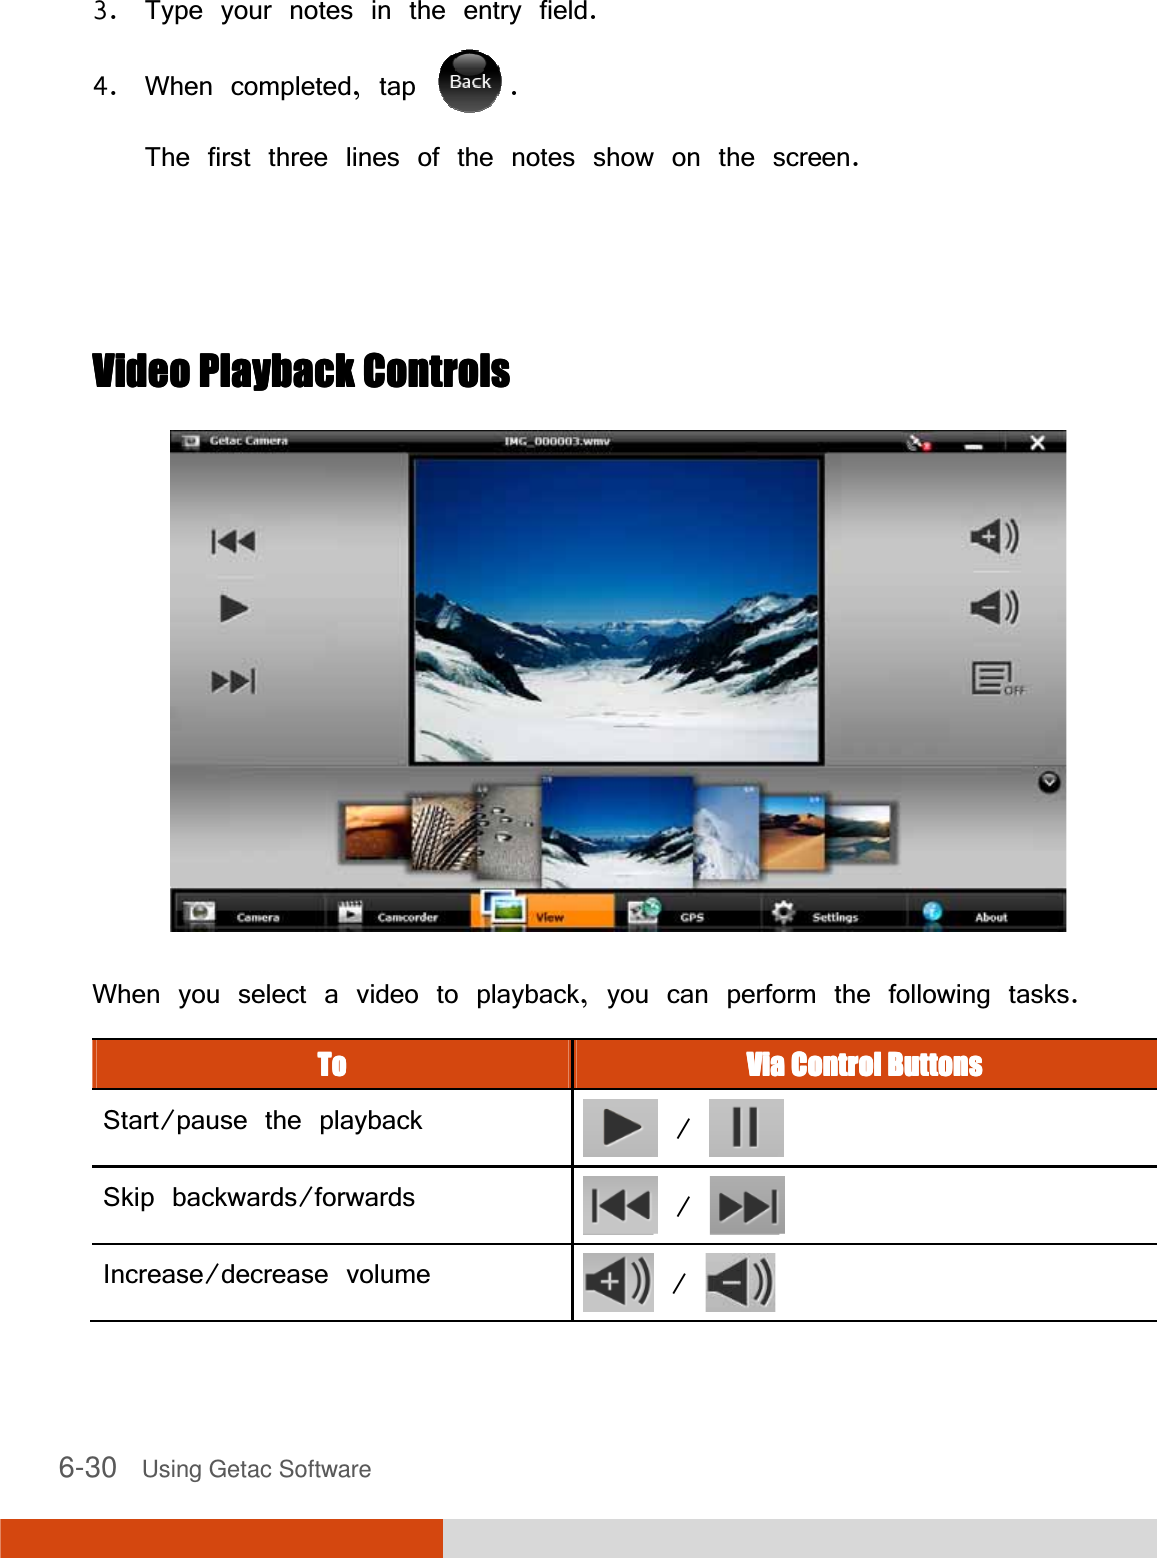
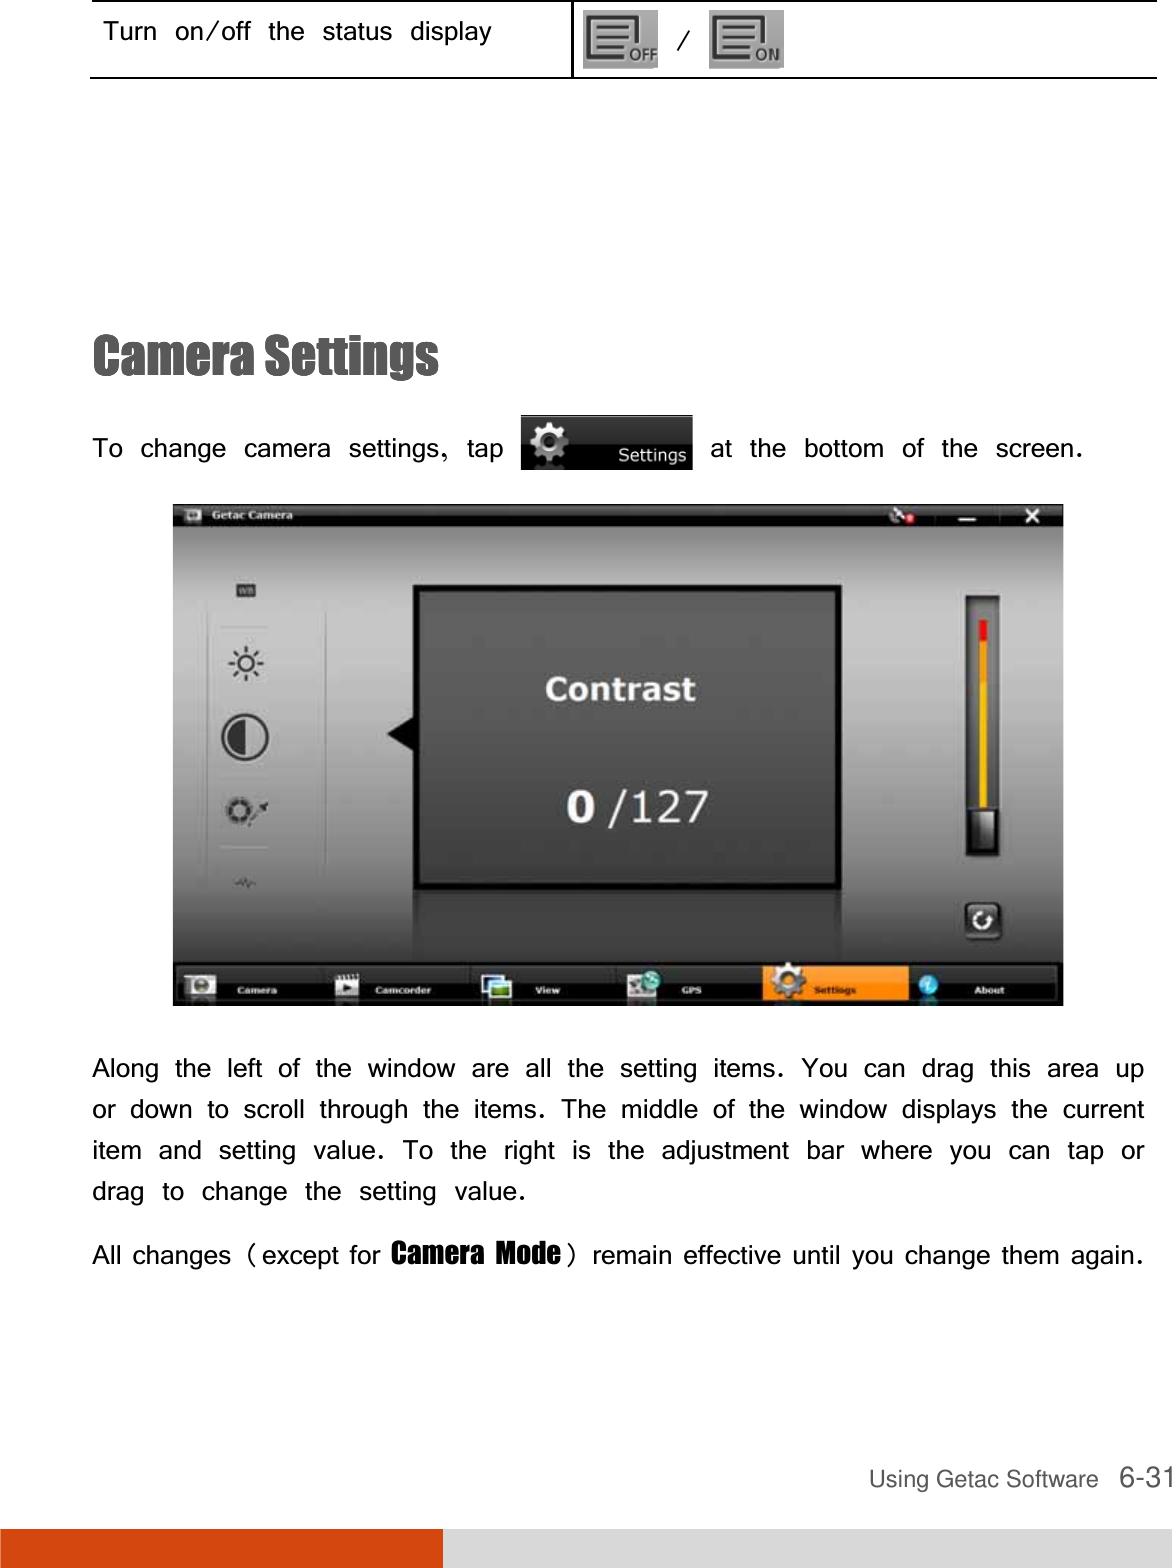
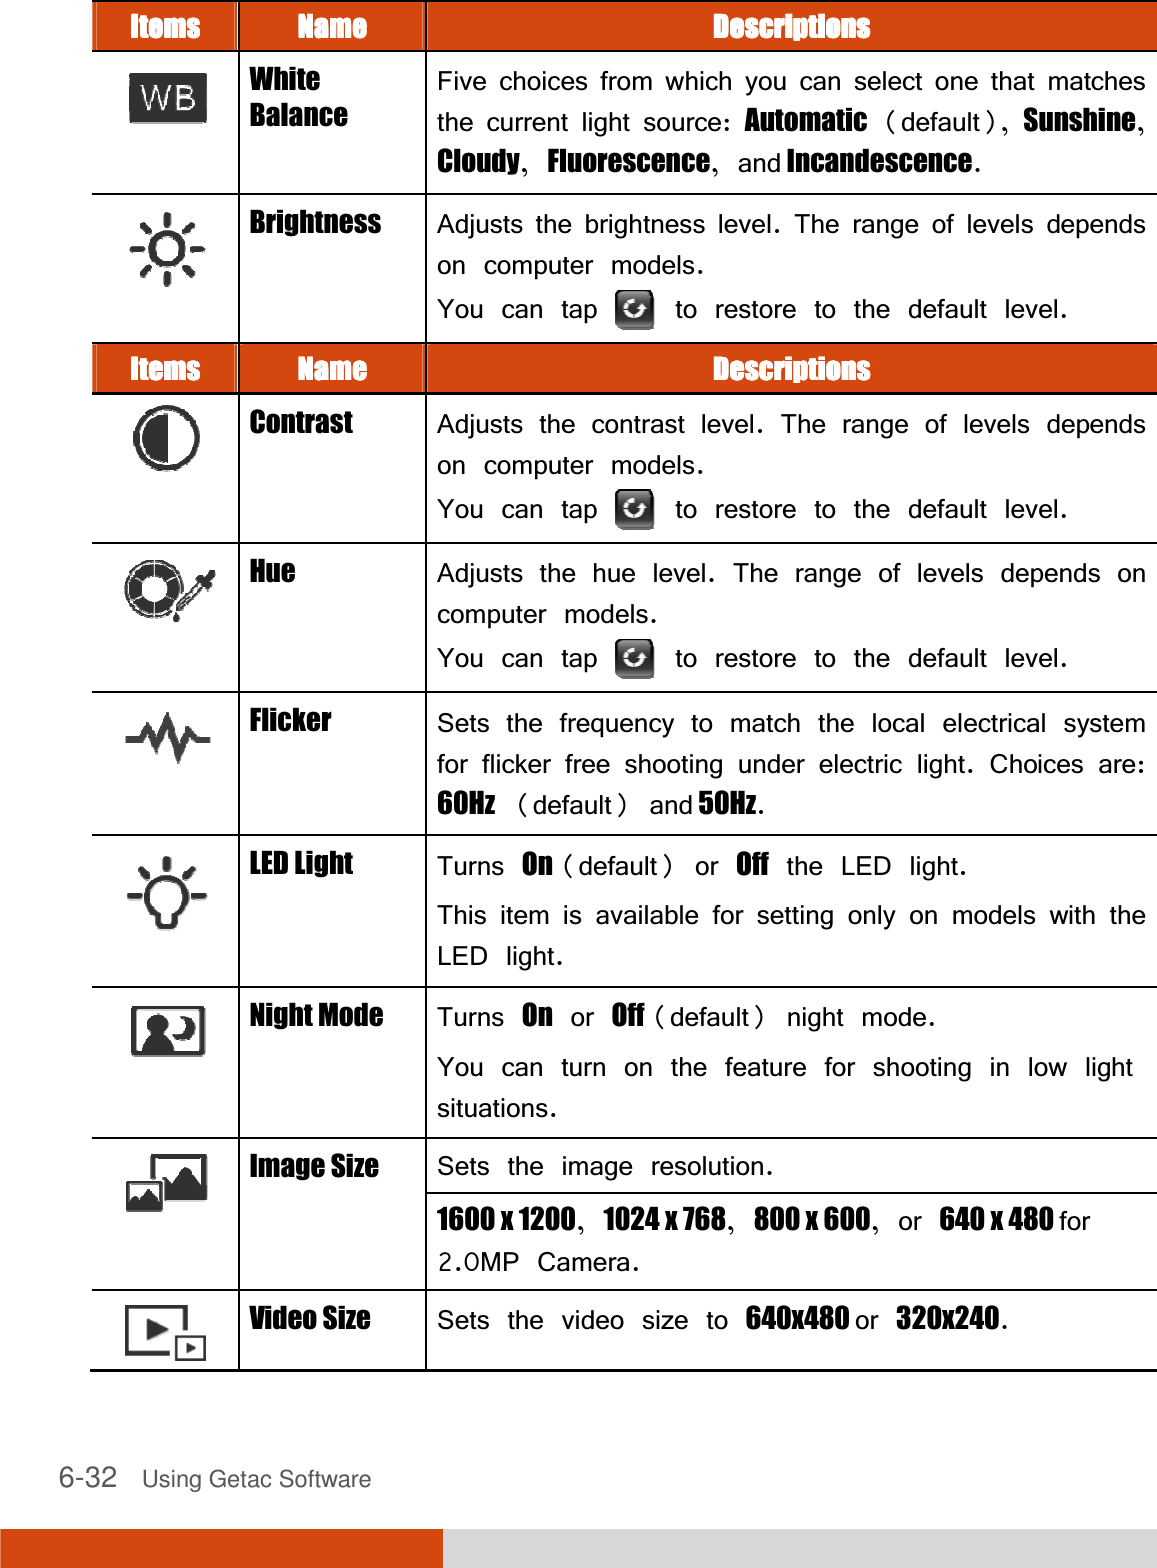
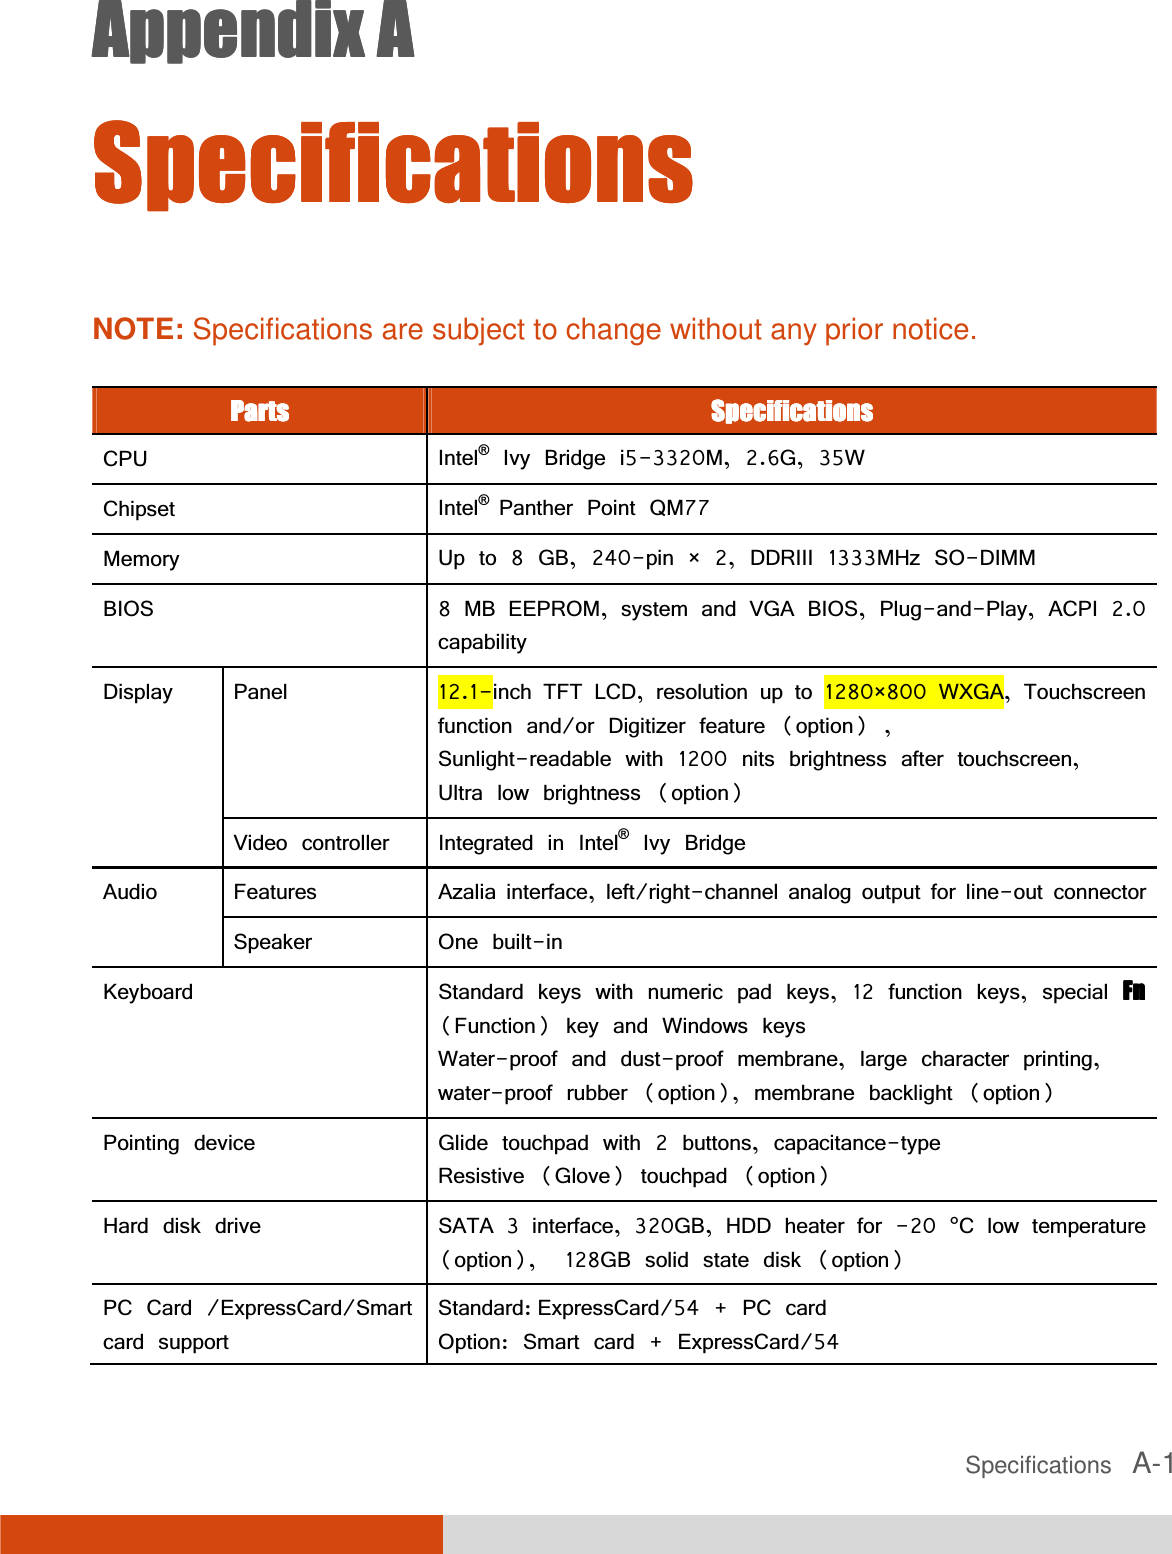
![6-34 Using Getac Software The default location is Users\[user name]\Pictures folder that contains the original images. A subfolder named Thumbs contains a copy of the same images (with filename prefix Thumb_) for the thumbnail view. NOTE: If you are adding or deleting images using File Explorer, make sure to work on both the correct folder and its Thumbs subfolder. ItemsItemsItemsItems NameNameNameName DescriptionsDescriptionsDescriptionsDescriptions Time Option Displays the time throughout the program according to one of the two choices: System time zone (default) The time zone setting of the computer is taken into consideration. If the current location is in daylight saving time, the time will be adjusted accordingly. UTC The time is based on Coordinated Universal Time. Filename Prefix The default filename prefix is IMG. The complete filename is IMG_xxxxxx.jpg (where xxxxxx = sequential number). When the sequential number has reached 999999 and you are taking the next picture, a message will pop up to ask you to change the prefix. You can change the prefix by typing the characters (limited to A~Z, a~z, 0~9, - and _) in the entry field. Maximum number of characters allowed is 10.](https://usermanual.wiki/Getac-Technology/048.Users-manual-Pt-2/User-Guide-1830219-Page-38.png)