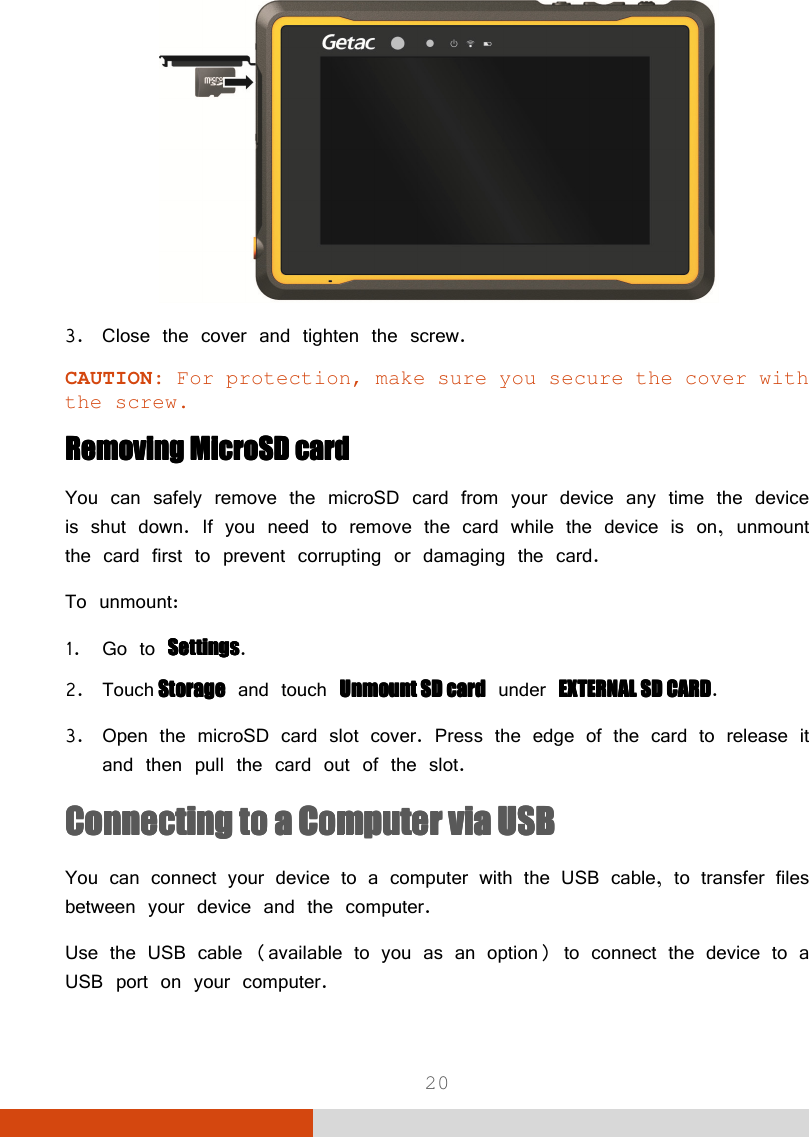
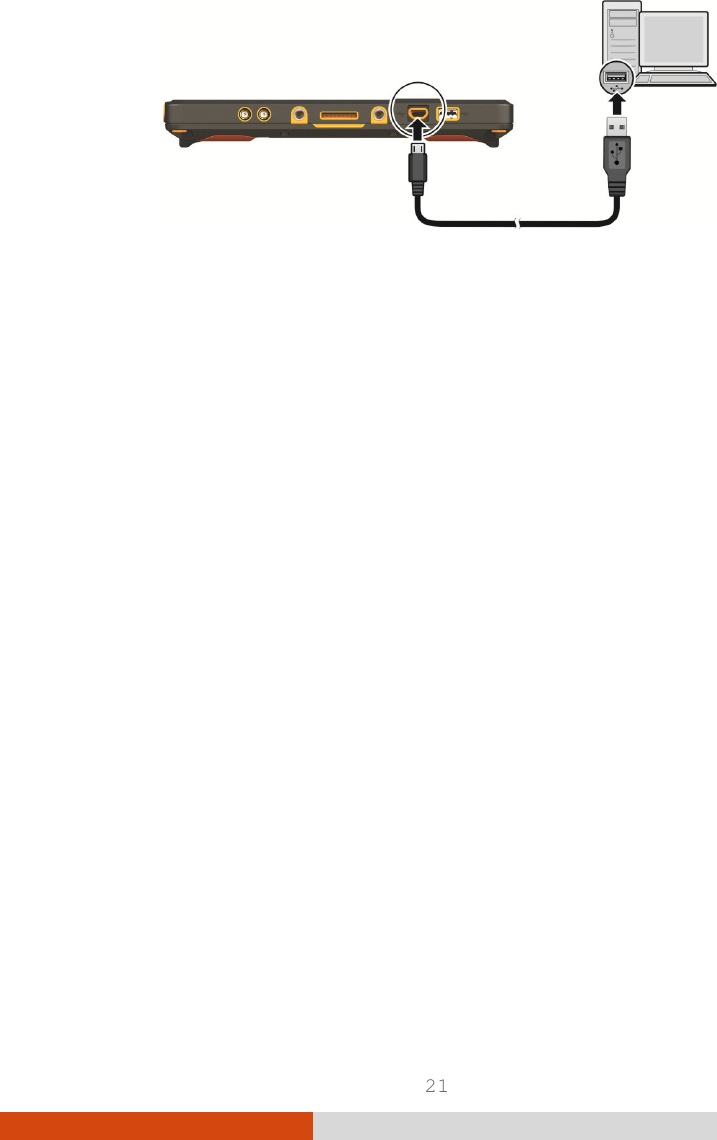
Getac Technology ZX70U UHF RFID reader User Manual ZX70 English Manual add IC terms
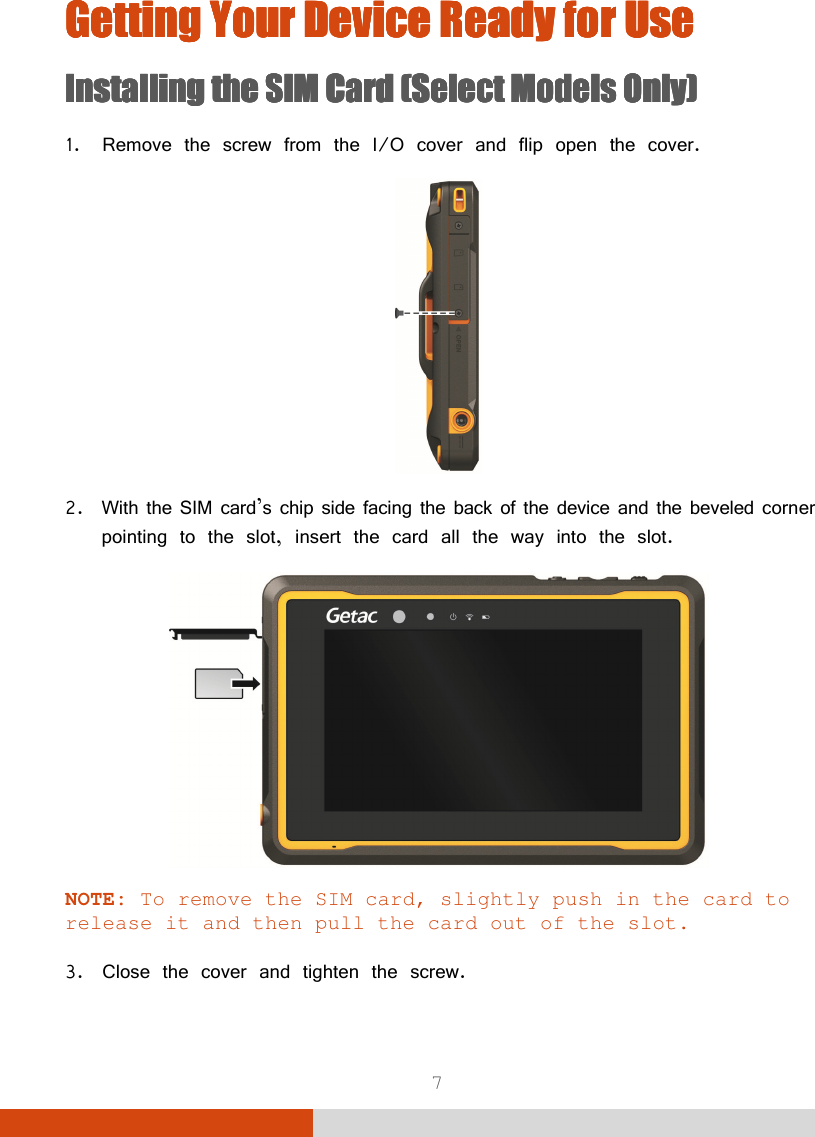
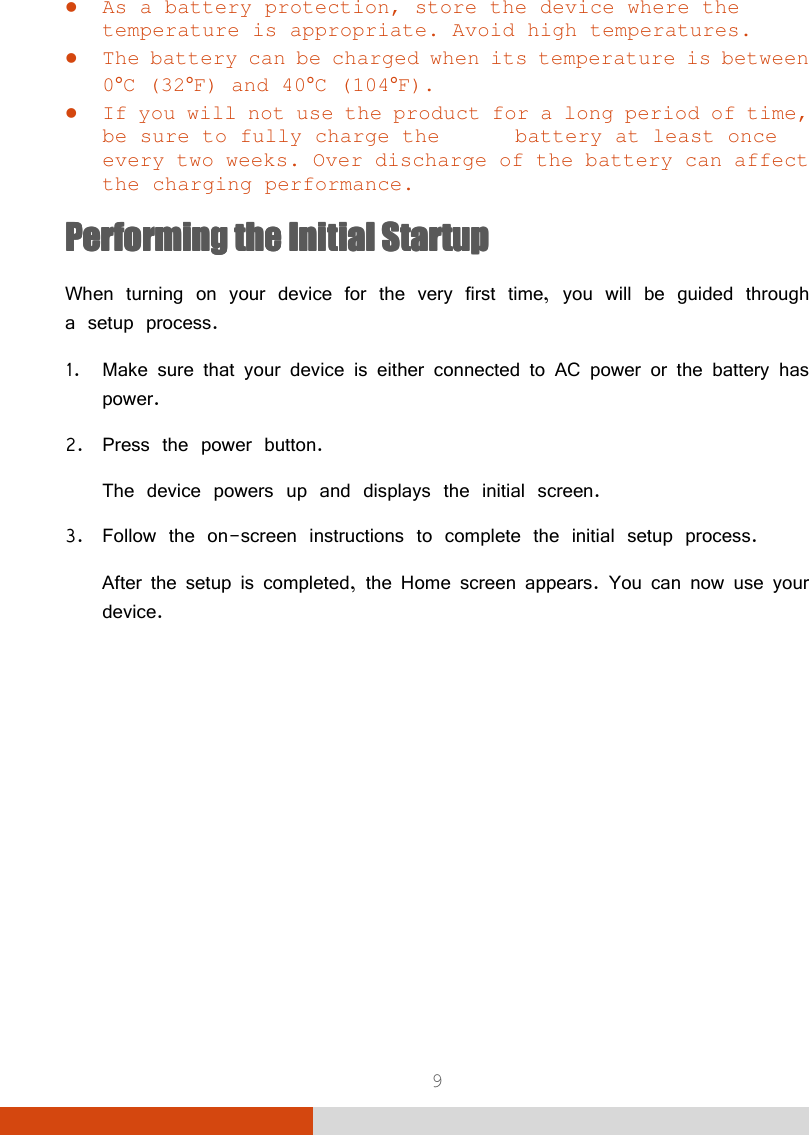
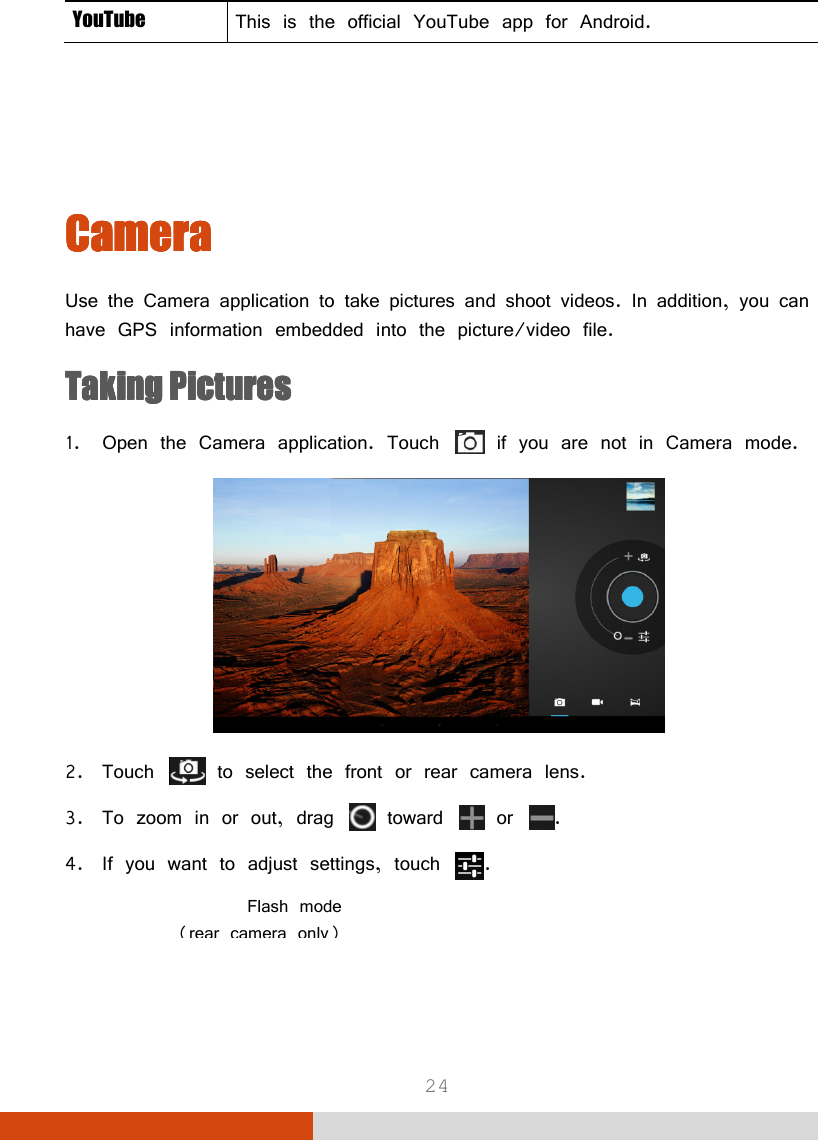
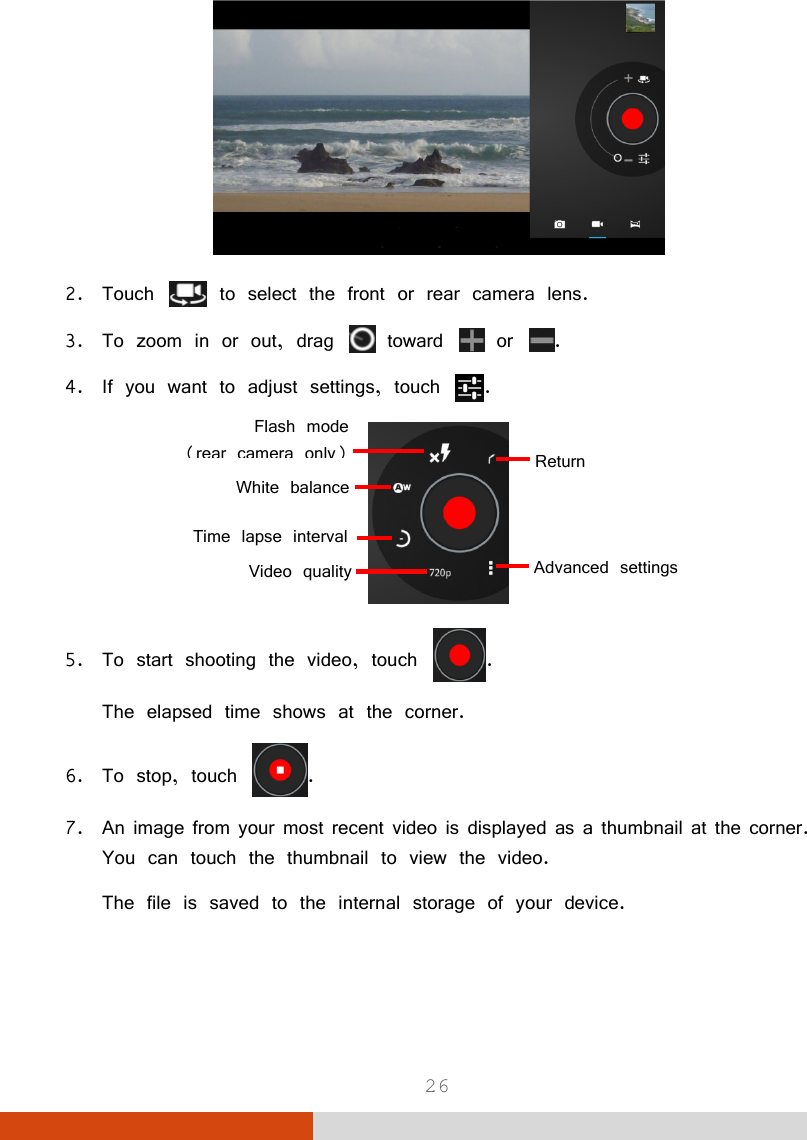
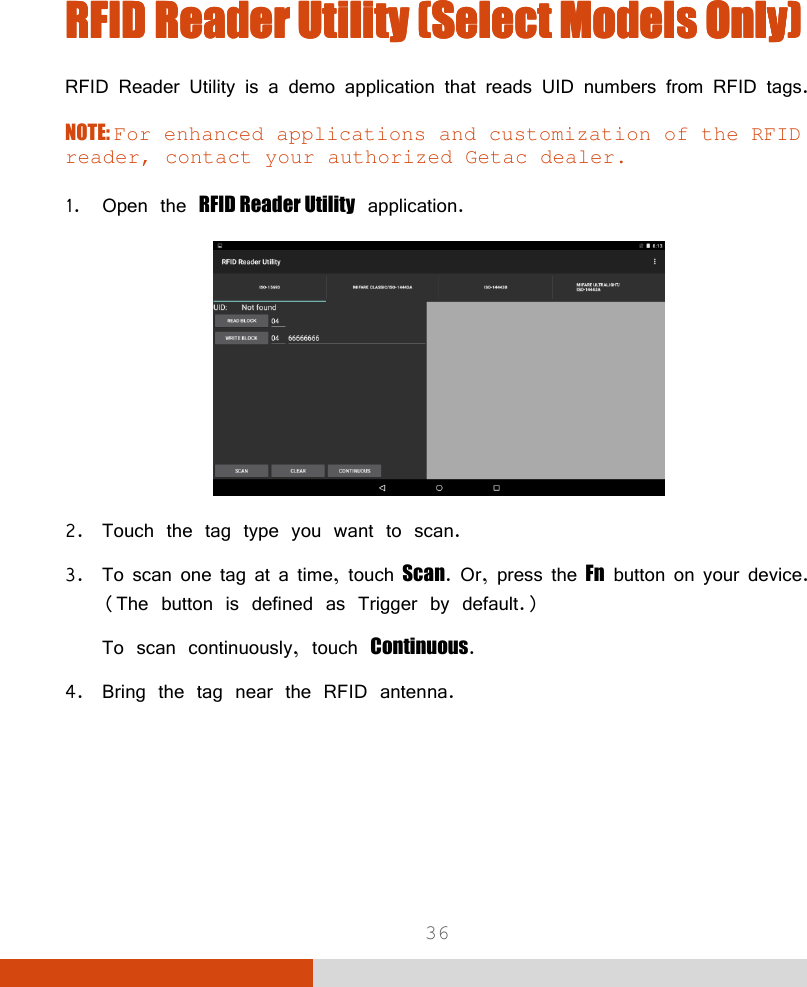
Getac Technology Corporation UHF RFID reader ZX70 English Manual add IC terms
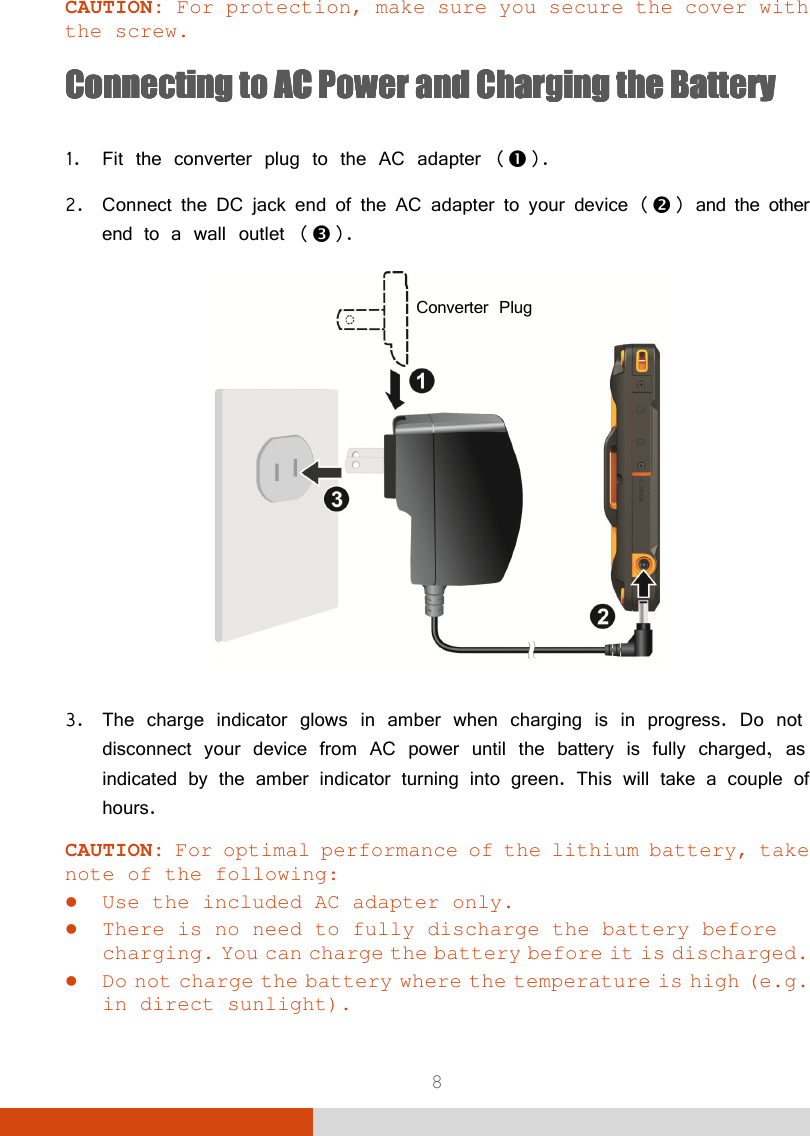
Contents
- 1. User Manual Host
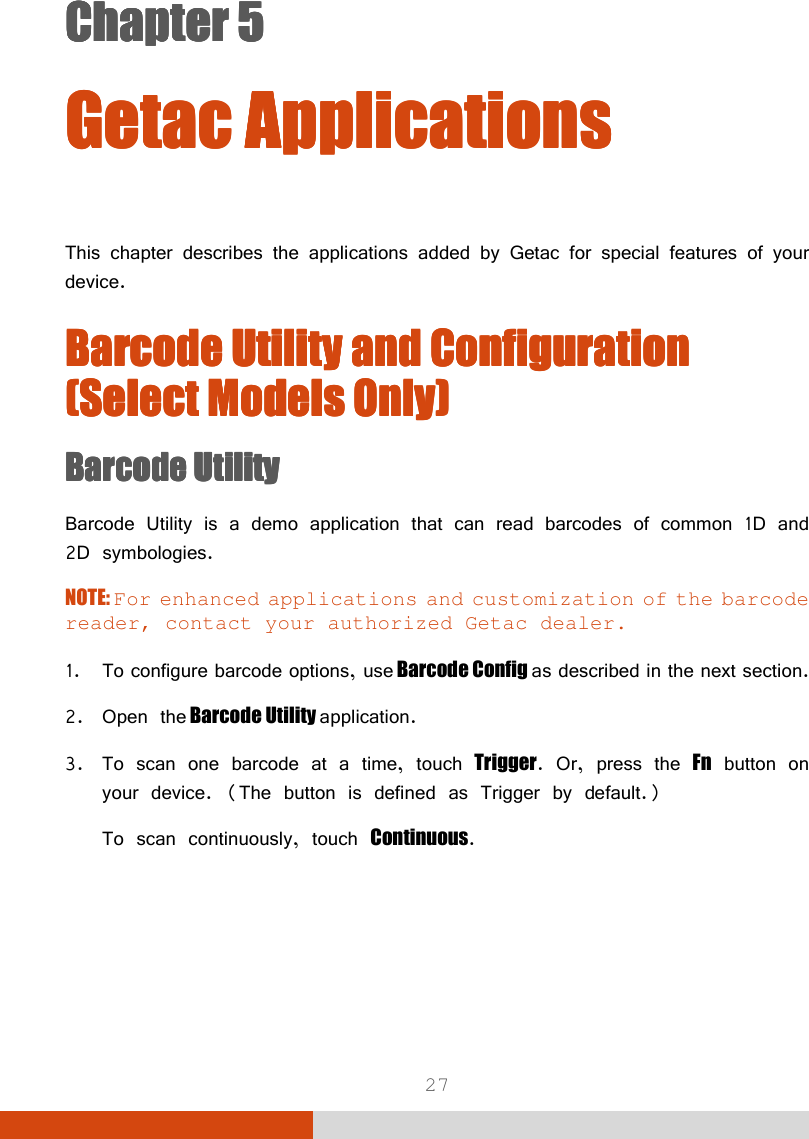
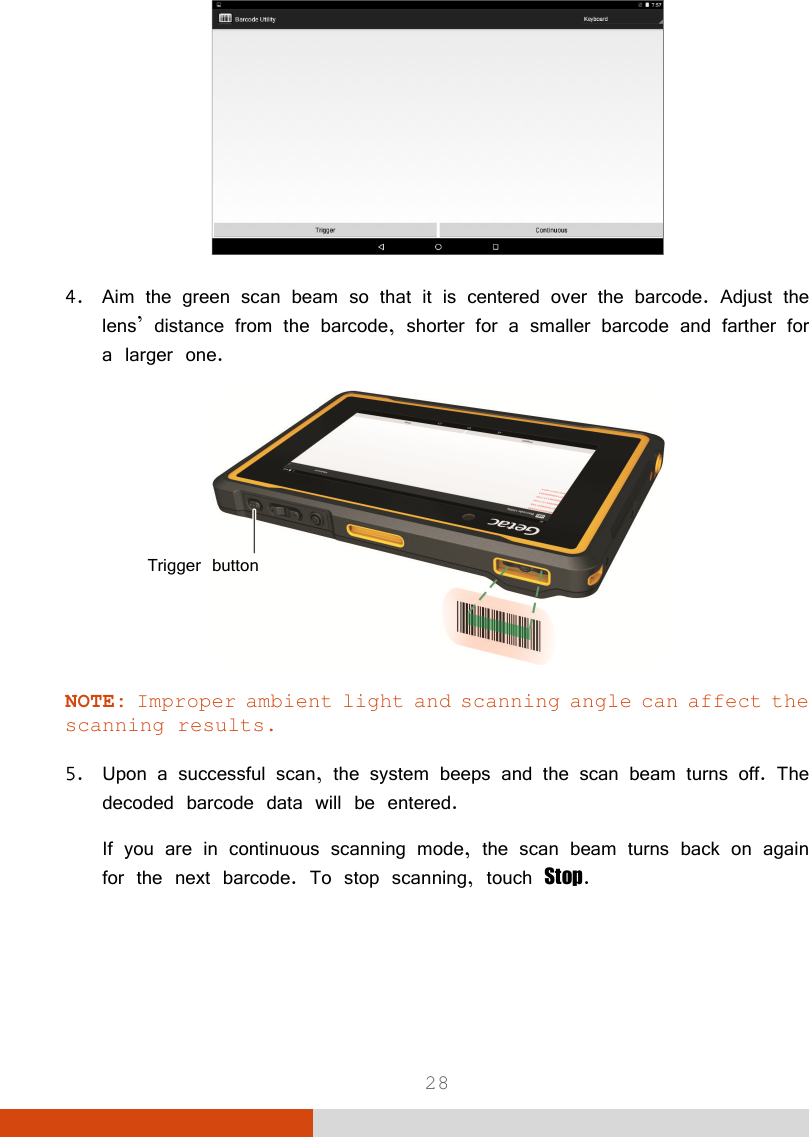
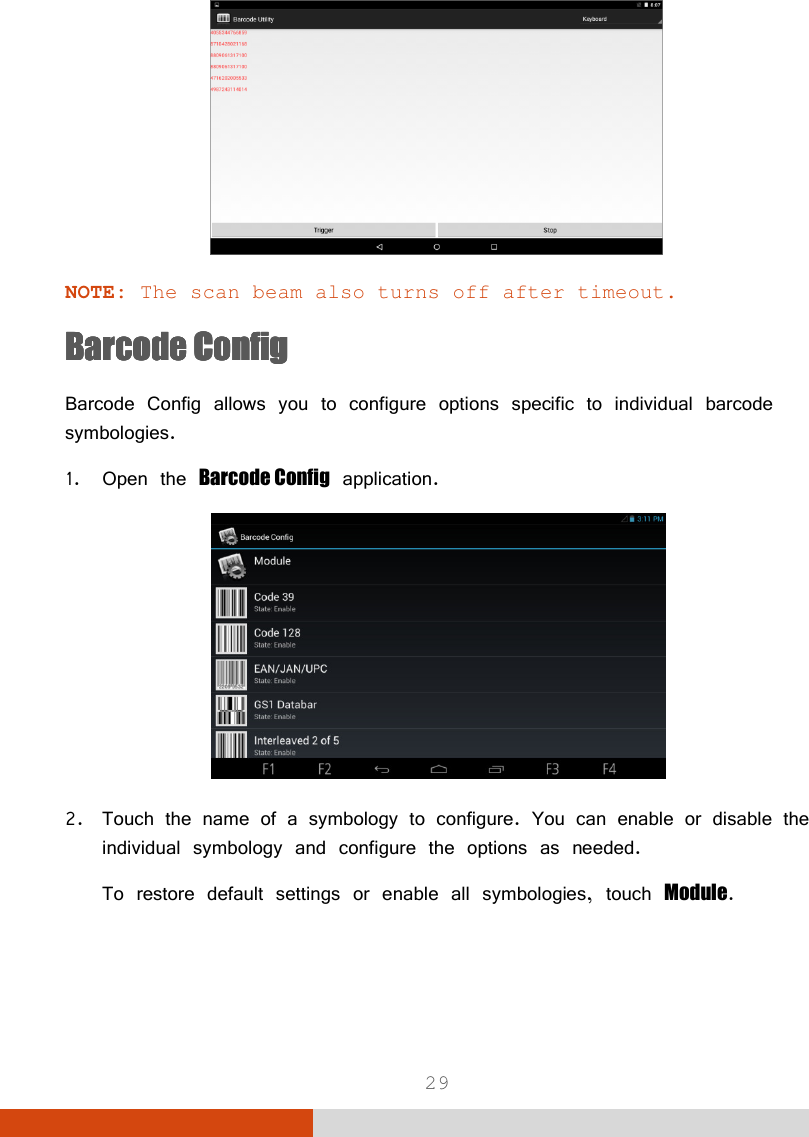
- 2. User Manual Statement
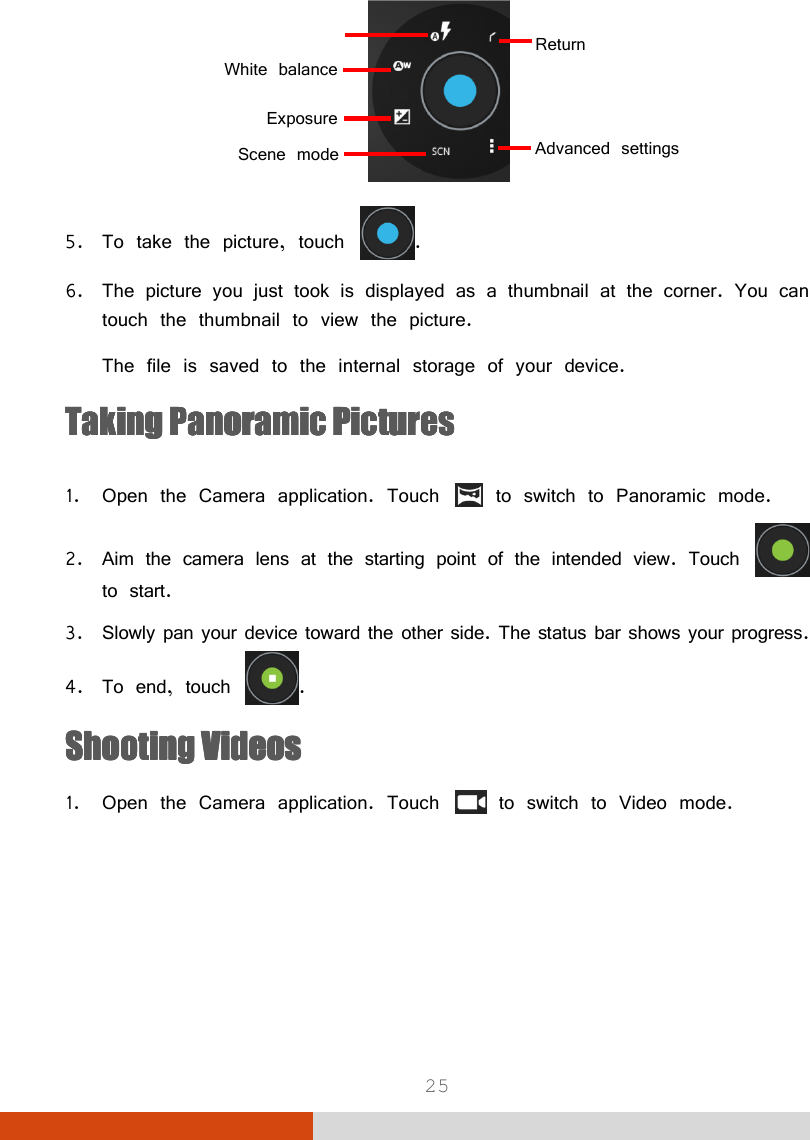
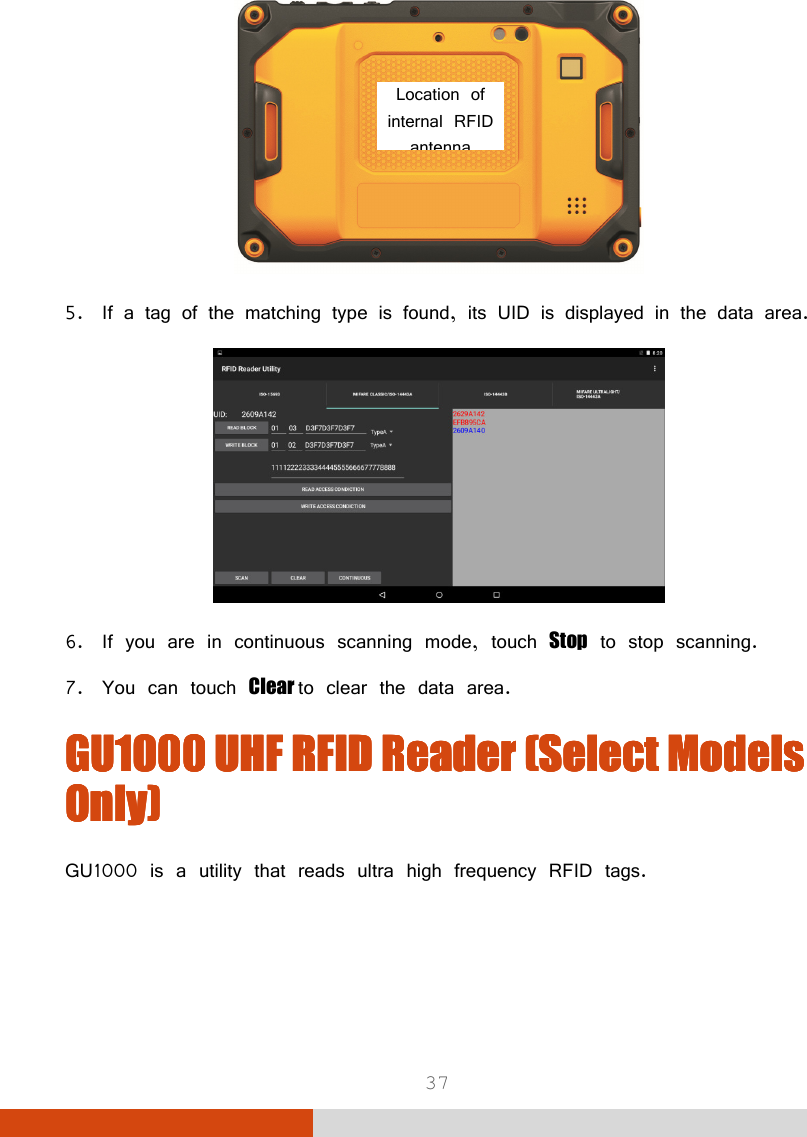
- 3. User Manual Module
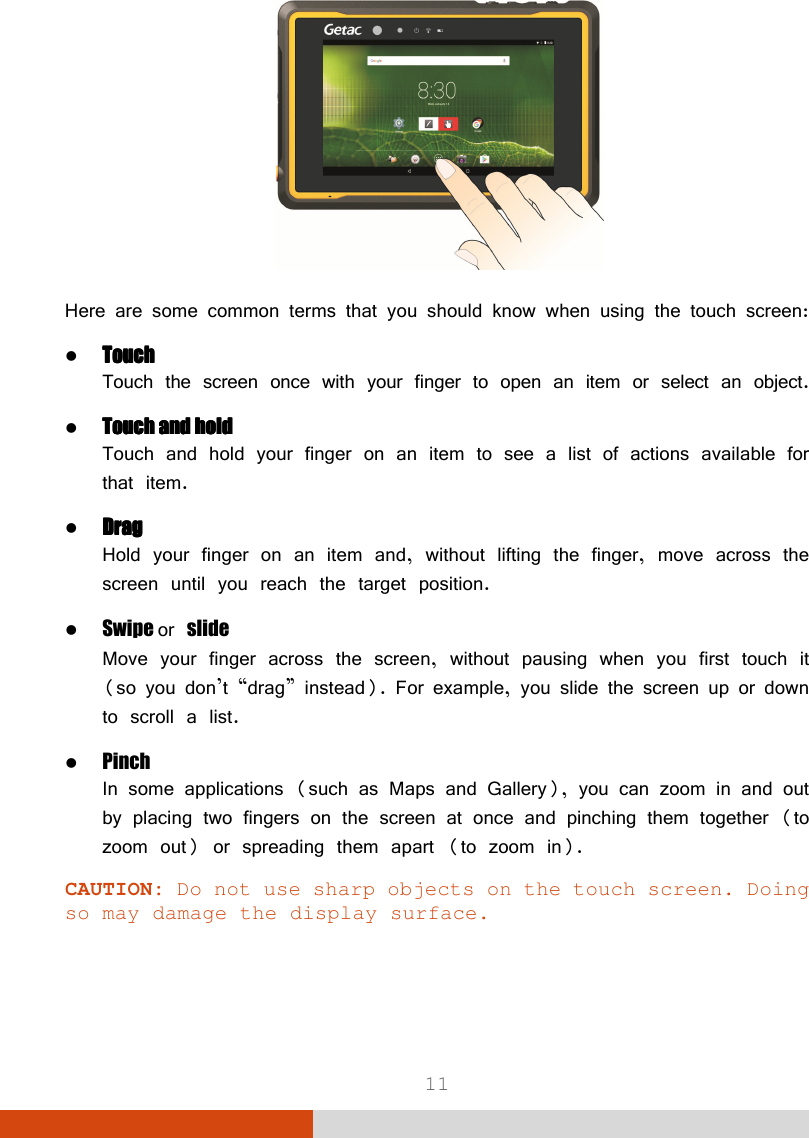
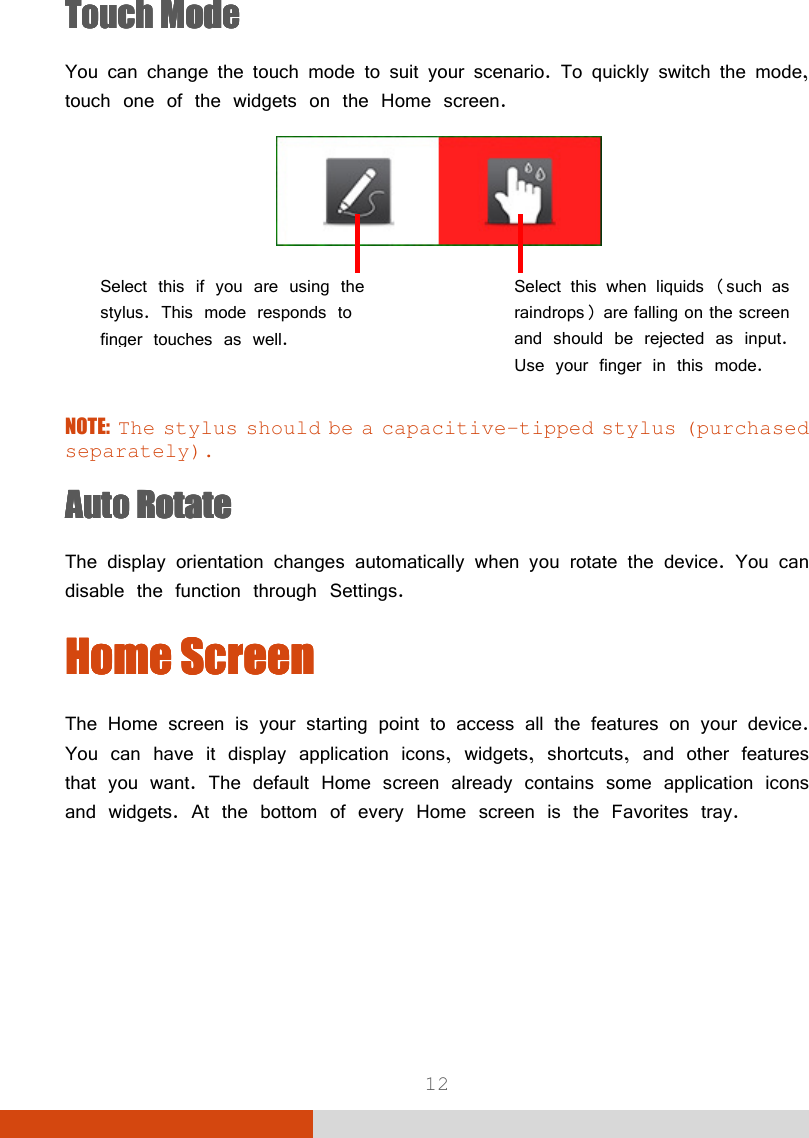
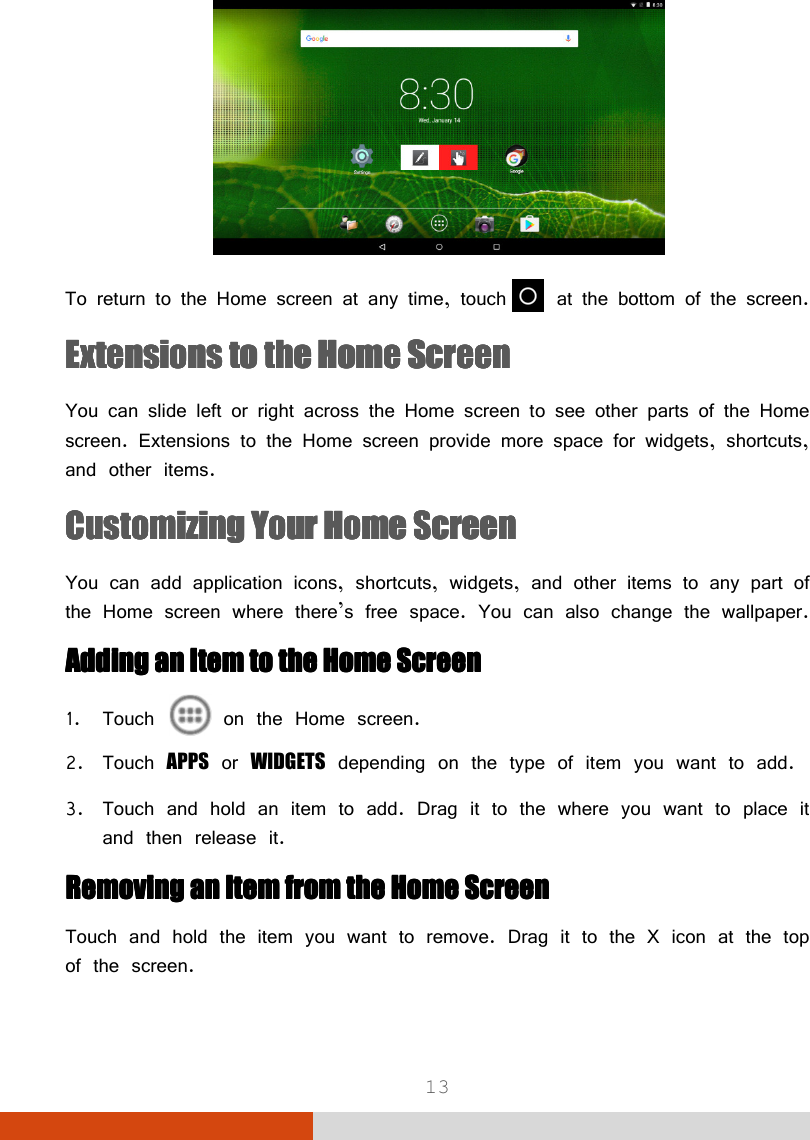
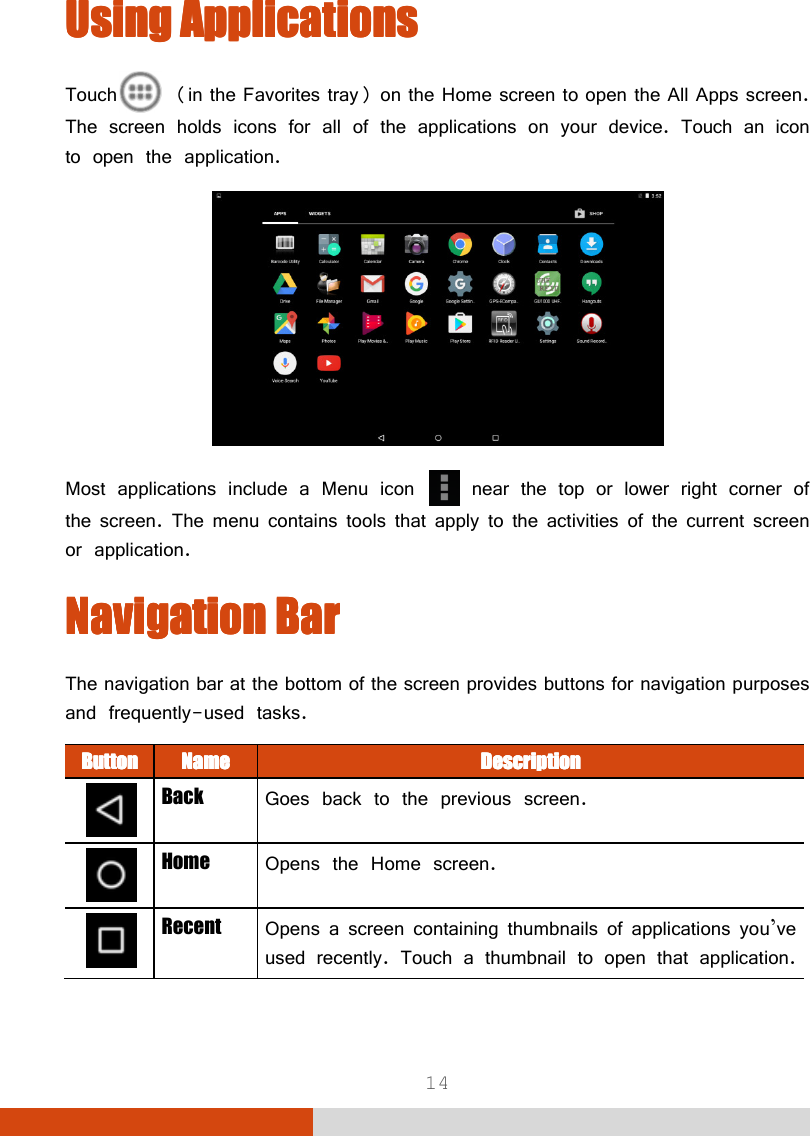
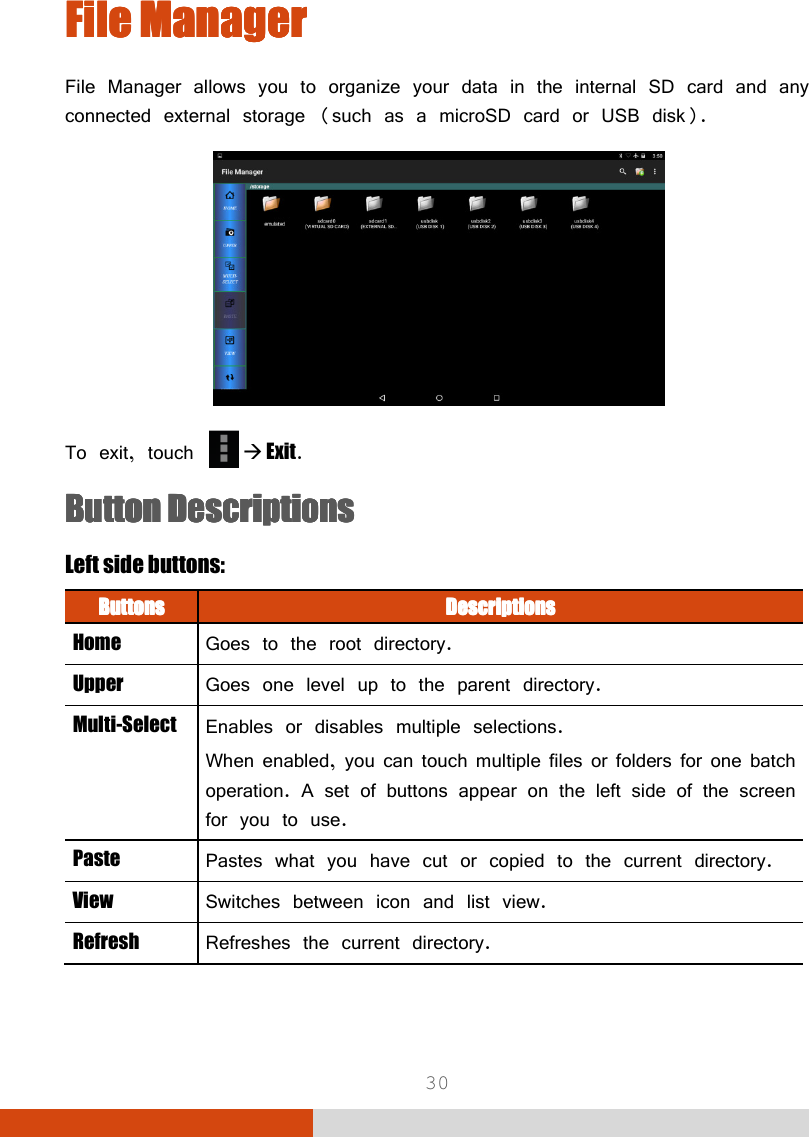
User Manual Host