Giant Electronics L3800 Two Way Radio with FRS User Manual manual
Giant Electronics Ltd Two Way Radio with FRS manual
User Manual
1 of 11
User Manual
Model: L3400

2 of 11
SAFETY AND GENERAL INFORMATION
Important Information for Safe and Efficient Operation
Please read this information before using your radio.
Safety and General
1. Do not transmit more than 50% of time. It is important as the radio generates measurable RF
energy exposure only when transmitting.
2. Do not open the radio. Any unauthorized modification may invalidate the guarantee.
3. Radio frequency signals transmitted may cause interference to hearing aids.
4. Turn off the radio when near medical equipment.
5. This product should not be used by people with pacemakers.
6. Do not use the radio when driving a vehicle or operating machinery.
7. Do not use the radio when on board aircraft.
8. Do not hold the antenna when transmitting.
9. Do not use the radio when the antenna has damaged.
10. Turn off the radio and remove the batteries if you are not going to use it for a long time.
11. Do not attempt to charge alkaline batteries.

3 of 11
OPERATIONAL CAUTIONS
1. Never dispose of batteries in a fire. There is a serious risk of explosion and /or the release of
highly toxic chemicals.
2. Do not expose your product to direct sunlight, extreme cold or place it near heating
appliances.
3. Do not submerge any part of your product in water and do not use it in damp, humid or wet
conditions.
4. Do not expose your product to fire, explosive or other hazardous conditions. For example, at
petrol stations or areas where explosive products are used.
4 of 11
Transmit and Receive Procedures
Your wireless hand-held portable transceiver contains a low power transmitter. When the
Push-to-Talk (PTT) button is pushed it sends out radio frequency (RF) signals. The device is
authorized to operate at a duty factor not to exceed 50%. In August 1996, the Federal
Communications Commissions (FCC) adopted RF exposure guidelines with safety levels for
hand-held wireless devices.
RF Exposure
CAUTION: To maintain compliance with the FCC's RF exposure guidelines hold the transmitter
and antenna at least 1 inch (2.5 centimeters) from your face and speak in a normal voice, with the
antenna pointed up and away from the face. If you wear the handset on your body while using the
headset accessory, use only the supplied belt clip for this product and when transmitting, take it out
of the belt to ensure that the antenna is at least 1 inch (2.5 centimeters) from your body.
Use only the supplied antenna. Unauthorized antennas, modifications, or attachments could
damage the transmitter and may violate FCC regulations.

5 of 11
TALKING AND LISTENING
Read this manual carefully before use.
Your radio has 14 channels. All radios in your group must be set to the same channel and CTCSS
code in order to communicate.
• For maximum clarity, hold radios 5 to 7 centimeters from
mouth.
• Press and hold and speak into the microphone.
• To receive messages, release .
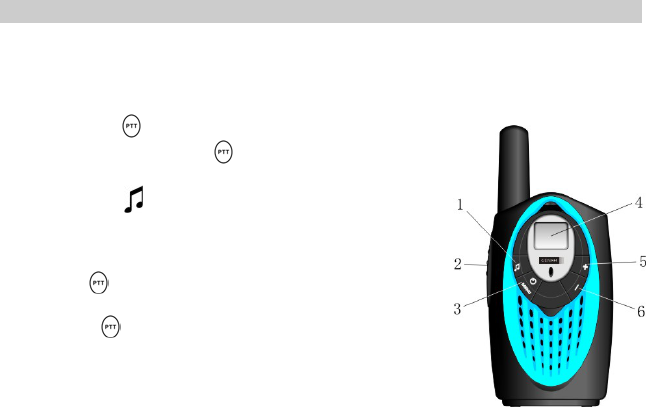
1. Call Tone Key
• Short press to send a single call tone
• Long press sends the call tone maximum 10 times, and
returns to standby mode automatically.
2. PTT Key
• Push to transmit, release to listen
• Pressing has 60 second limit
• In menu mode, push to confirm selection
3. MENU Key
• Long press to turn radio on or off
• Short press enters menu mode

6 of 11
-- Press one time to enter MENU mode, press + or – to select RF channel.
-- Press two times to enter CTCSS Code Setting mode, press + or – to set the CTCSS code.
-- Press three times to enter CALL TONE Setting mode, press + or – to set the call tone.
-- Press four times to enter SCAN mode, press + or – to set RF scan function ON or OFF.
-- Press five times to enter KEY LOCK mode, press + or – to set key lock function ON or
OFF.
-- Press six times to enter MONITOR mode, press + or – to set volume high or low.
-- Press seven times to exit the menu mode. It will be automatically exited the menu mode, if
you have not pressed any key for several seconds when you in any mode.
4. LCD
5/6. +/– Key
• Increase/decrease volume (volume level flashes and v displays)
• In menu mode, increase/decrease channe/CTCSS code/call tone (channel/CTCSS code/call
tone number flashes) or toggle selection Y/N
Battery meter
Channel display digit
Interference Eliminator Code (CTCSS)
Volume control
Scanning

7 of 11
Keypad locked
Turning Your Radio On And Off
To turn on, press and hold MENU key. Press and hold MENU key until the display blank to turn
off the radio.
Volume
When power up, press + or – key to adjust your volume.
Select Channel
1. Press MENU key. The channel number will begin to flash.
2. Use + or – key to change channel.
3. Press key to set a new channel.
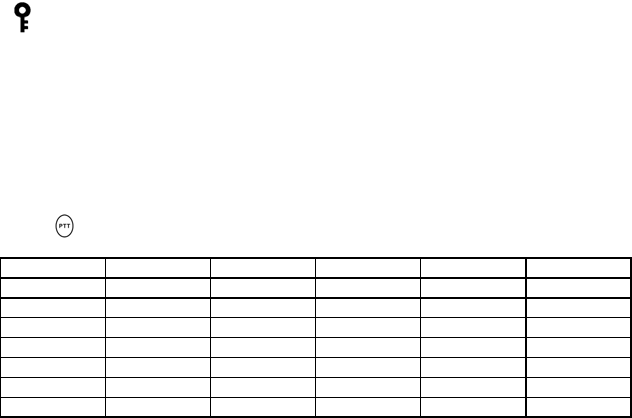
Channel Freq (MHz) Description Channel Freq (MHz) Description
1 462.5625 FRS 8 467.5625 FRS
2 462.5875 FRS 9 467.5875 FRS
3 462.6125 FRS 10 467.6125 FRS
4 462.6375 FRS 11 467.6375 FRS
5 462.6625 FRS 12 467.6625 FRS
6 462.6875 FRS 13 467.6875 FRS
7 462.7125 FRS 14 467.7125 FRS

8 of 11
Select CTCSS Code
The radios must be of same channel and CTCSS code (you can disable the CTCSS code by setting
it to 0) in order to communicate.
1. Press MENU key twice. The CTCSS code number will begin to flash.
2. Use + or – key to change CTCSS code.
3. Press key to set new CTCSS code.
Scan
Use scanning to monitor channels for transmissions, or to find someone in your group who has
accidentally changed channels.
1. Press MENU four times until scan icon flashing and “Y” or “-” display.
2. Press either
+ Until “Y” displays to turn scanning on.
– Until “-” displays to turn scanning off.
3. Press to confirm.
When the radio detects channel activity, it stops scanning and you can hear the transmission.
Press within 5 seconds to respond.
Scan Advance
If scan stops on a channel that you don’t want to listen to, briefly press + or – key to resume

9 of 11
scanning for the next active channel.
Key Lock
Use key lock function to avoid accidentally changing the radio setting.
1. Press MENU five times until key lock icon flashing and “Y” or “-” display.
2. Press either
+ Until “Y” displays to turn key lock on.
– Until “-” displays to turn key lock off.
3. Press to confirm.
4. In key lock mode, +, – and MENU keys are all disabled. However, you can still use and
to transmit voice or call tone.
5. To exit Key Lock, press and hold MENU until an exit tone rings and the icon disappears.
Call Tone
A call tone alerts others you want to talk.
To send a call tone to other radios in your Group, press .
Your radio has 5 different call tones. To select between the 5 call tones:
1. Press MENU three times until a “C” displays on the upright;
2. Press + or – to change the call tone, “0” is no call tone.

10 of 11
3. Press
to confirm.
Monitor
Use monitor function to detect the activity of the channel you set.
To enter monitor function, press MENU six times.
You will hear a lot of noise if there is nobody using the current channel.
To exit the function, press MENU again or press .
FCC INFORMATION
This device complies with Part 15 of the FCC Rules. Operation is subject to the following two
conditions: 1) this device may not cause harmful interference, and 2) this device must accept any
interference received, including interference that may cause undesired operation.
NOTE: This equipment has been tested and found to comply with the limits for a Class B digital
device, pursuant to Part 15 of the FCC Rules. These limits are designed to provide reasonable
protection against harmful interference in a residential installation. This equipment generates, uses
and can radiate radio frequency energy and, if not installed and used in accordance with the
instructions, may cause harmful interference to radio communications.
However, there is no guarantee that interference will not occur in a particular installation. If this
equipment does cause harmful interference to radio or television reception, which can be determined
11 of 11
by turning the equipment off and on, the user is encouraged to try to correct the interference by one or
more of the following measures:
- Reorient or relocate the receiving antenna.
- Increase the separation between the equipment and receiver.
- Connect the equipment into an outlet on a circuit different from that to which the receiver is
connected.
- Consult the dealer or an experienced radio/TV technician for help.
Warning:
Changes or modifications to this equipment not expressly approved by the party responsible
for compliance could void the user's authority to operate the equipment.
Any adjustment to this equipment is recommended to be performed by or under the immediate
supervision and responsibility of a person certified as technically qualified to perform transmitter
maintenance and repair duties in the private land mobile services and fixed services by an
organization or committee representative of users of those services.
Replacement of any transmitter component (crystal, semiconductor, etc.) for this equipment could
result in violation of FCC rules.