Giant Electronics O2400 2.4GHz FHSS Cordless Telephone System User Manual address
Giant Electronics Ltd 2.4GHz FHSS Cordless Telephone System address
User Manual

OLYMPIA
®
OL2400
OWNER’S MANUAL
2OLYMPIA OL2400 Owner's Manual
Copyright
© 2002, Wave Industries Ltd. All Rights Reserved.
Reproduction, adaptation, or translation without prior written permission is
prohibited, except as allowed under the copyright laws.
First Edition: June 2002
Trademark Information
Olympia® is a registered trademark of Olympia International Holdings Ltd.
Warranty
The information contained in this document is subject to change without notice.
Wave Industries makes no warranty of any kind with respect to this information.
Wave Industries shall not be liable for any direct, indirect, incidental,
consequential, or other damage alleged in connection with the furnishing or use of
this information.
Printed in China
OLYMPIA OL2400 Owner's Manual 3
TABLE OF CONTENTS
IMPORTANT SAFETY INSTRUCTIONS.............................................................4
SAFETY INSTRUCTIONS FOR BATTERIES......................................................6
1Features.................................................................................................................7
2Layout of Keys and Indicators..............................................................................8
2.1 Key Functions: .............................................................................................8
2.2 LCD Display Indications............................................................................10
3Installation and Charging of the Battery Pack....................................................11
4Handset Registration Procedure .........................................................................13
5Display Messages & Audio Alert.......................................................................14
5.1 Display Message: .......................................................................................14
5.2 Audible Alerting.........................................................................................16
6Operation Guide .................................................................................................17
6.1 Making External Calls................................................................................17
6.2 Redialing ....................................................................................................18
6.3 Receiving Calls...........................................................................................18
6.4 Flash ...........................................................................................................19
6.5 Page Call ....................................................................................................19
6.6 Making Internal Calls.................................................................................20
6.7 Call Toggling..............................................................................................20
6.8 Call Transfer/Forward ................................................................................21
6.9 Call Back....................................................................................................22
6.10 Conference................................................................................................22
6.11 Muting the Microphone............................................................................23
6.12 Call Waiting .............................................................................................23
7Menu Structure ...................................................................................................25
7.1 Call Log......................................................................................................26
7.2 Phone Book Operation ...............................................................................28
7.3 Handset Volume .........................................................................................32
7.4 Ring Volume ..............................................................................................32
7.5 Ring Pattern................................................................................................33
7.6 Auto Answer...............................................................................................34
7.7 Key Click....................................................................................................35
7.8 Key Lock....................................................................................................35
7.9 Handset Name ............................................................................................37
7.10 Select LANGUAGE.................................................................................37
7.11 Clear Message Waiting.............................................................................38
7.12 Dial Method..............................................................................................38
8Overview of Telephone Functions......................................................................40
9Consumer Information........................................................................................45

4OLYMPIA OL2400 Owner's Manual
IMPORTANT SAFETY INSTRUCTIONS
BEFORE USING YOUR TELEPHONE EQUIPMENT, BASIC SAFETY
PRECAUTIONS SHOULD ALWAYS BE FOLLOWED TO REDUCE
THE RISK OF FIRE, ELECTRIC SHOCK AND INJURY, INCLUDING
THE FOLLOWING
1) Read and understand all instructions.
2) Follow all warnings and instructions marked on the product.
3) Unplug this product from the wall outlet before cleaning. Do not use liquid
cleaners or aerosol cleaners. Use a damp cloth for cleaning.
4) Do not use this product near water, for example, near a bath tub, wash bowl,
kitchen sink, laundry tub, in a wet basement, or near a swimming pool.
5) Do not place this product on an unstable cart, stand, or table. The product may
fall, causing serious damage to the product.
6) Slots and openings in the cabinet and the back or bottom are provided for
ventilation. To protect it from overheating, these openings must not be
blocked or covered. The openings should never be blocked by placing the
product on the bed, sofa, rug, or other similar surface. This product should
never be placed near or over a radiator or heat register. This product should
not be placed in a built-in installation unless proper ventilation is provided.
7) This product should be operated only from the type of power source indicated
on the marking label. If you are not sure of the type of power supply to your
home, consult your dealer or local power company.
8) Do not allow anything to rest on the power cord. Do not locate this product
where the cord will be damaged by persons walking on it.
9) Do not overload wall outlet extension cords, as this can result in the risk of
fire or electric shock.
10) Never push objects of any kind into this product through cabinet slots as they
may touch dangerous voltage points or short out parts that could result in a
risk of fire or electric shock. Never spill liquid of any kind on this product.
11) To reduce the risk of electric shock, do not disassemble this product. Instead,
when some repair work is required, take the unit to a qualified technician.
Opening or removing covers may expose you to dangerous voltages or other
risks. Incorrect reassembly can cause electric shock when the appliance is
subsequently used.
12) Unplug this product from the wall outlet and refer servicing to qualified
service personnel under the following conditions:
a) When the power supply cord or plug is damaged or frayed.
b) If liquid has been spilled into the product.
c) If the product has been exposed to rain or water.
OLYMPIA OL2400 Owner's Manual 5
d) If the product does not operate normally by following the operating
instructions. Adjust only those controls, that are covered by the operating
instructions because improper adjustment of other controls may result in
damage and will often require extensive work by a qualified technician to
restore the product to normal operation.
e) If the product has been dropped or cabinet has be damaged.
f) If the product exhibits a distinct change in performance.
13) Avoid using a telephone(other than a cordless type) during an electrical storm.
There may be a remote risk of electrical shock from lightning.
14) Do not use the telephone to report a gas leak in the vicinity of the leak.

6OLYMPIA OL2400 Owner's Manual
SAFETY INSTRUCTIONS FOR BATTERIES
Safety Instructions for Batteries
Handset Battery Pack
CAUTION:
Danger of explosion if battery is incorrectly replaced. Use only an Olympia Phone
approved battery pack in the handset of your OL2400 Cordless Telephone. To
reduce the risk of fire or injury, always do the following when replacing,
discarding, or charging battery, When handling the batteries, be careful not to short
the battery with conducting materials such as rings, bracelets, and keys. The
Battery or conducting material may overheat and cause burns. Use only the
following type and size of battery pack:
FOR HANDSET UNIT:
GP60AAAH3BMX 3.6V 600mAh GPI INTERNATIONAL LIMITED
CONTAINS NICKEL-METAL HYDRIDE
BATTERY. BATTERY MUST BE RECYCLED
OR DISPOSED OF PROPERLY
1) Do not dispose of the battery in a fire. The cell may explode. Check with local
codes for possible special disposal instructions.
2) Do not open or mutilate the battery. Released electrolyte is corrosive and may
cause damage to the eyes or skin. It may be toxic if swallowed.
3) Exercise care in handling batteries in order not to short the battery with
conducting materials such as rings, bracelets and keys. The battery or
conductor may overheat and cause burns.
4) Charge the batteries provided with or identified for use with this product only
in accordance with the instructions and limitations specified in this manual.
5) Observe proper polarity orientation between the battery(ies) and battery
charger.
6) Do not mix old and new batteries in this product.
7) Do not mix batteries of different sizes or from different manufacturers in this
product.
SAVE THESE INSTRUCTIONS

OLYMPIA OL2400 Owner's Manual 7
1 Features
• Over 16 million security codes for call security
• CID/Call Waiting CID capable – stores the 20 most recent CID records
(requires CID service from your local phone company)
• Alphanumeric display shows CID time and date plus phone status
• 5 phone number redial
• Exchangeable face panels
• 50 name and number phonebook
• Microphone mute feature
• Audible low battery and out of range warnings
• Headset jack
• Multiple Handset capability – up to 4
• Page function from Base
• Tone/Pulse dialing
• Key Click – programmable ON/OFF
• Key Lock – programmable ON/OFF
• Auto Answer (out of cradle) – programmable ON/OFF
• (2) two-way intercom calls can take place simultaneously
• Call Transfer – Handset to Handset
• Auto Hold during Call Transfer
• Adjustable Earpiece Volume Control (8 levels)
• Programmable Ringer OFF/Volume Control (6 levels)
• 10 selectable Ringer Tones
• Rechargeable Ni-NH battery pack
8OLYMPIA OL2400 Owner's Manual
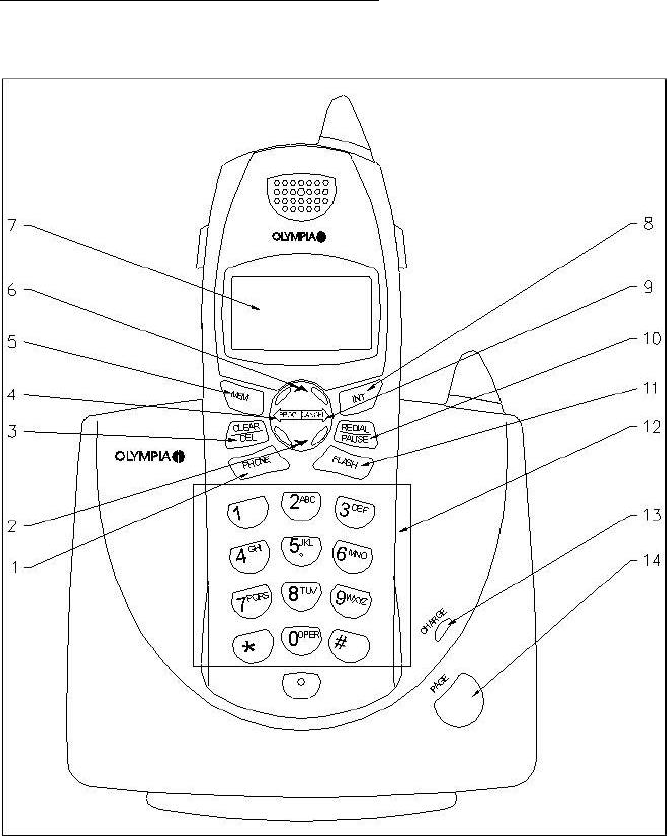
2 Layout of Keys and Indicators
2.1 Key Functions

OLYMPIA OL2400 Owner's Manual 9
1. Phone key Press to make or receive a call. Press again to
end a call
2. Down key For navigation
3. Clear/Delete key Delete input / Microphone muting
4. Program key Menu selection / Confirm input
5. Memory key Phone book memory
6. Up key For navigation
7. LCD Display Provides information such as Caller ID and
programming data
8. INT key For internal calls
9. Cancel key Exit menu
10. Redial/Pause key Last number called / Pause
11. Flash key For use with call waiting service
12. Keyboard Dialing telephone numbers
13. Charge LED Lights when Handset is charging in the base
14. Page Press at Base to page all registered Handsets
10 OLYMPIA OL2400 Owner's Manual
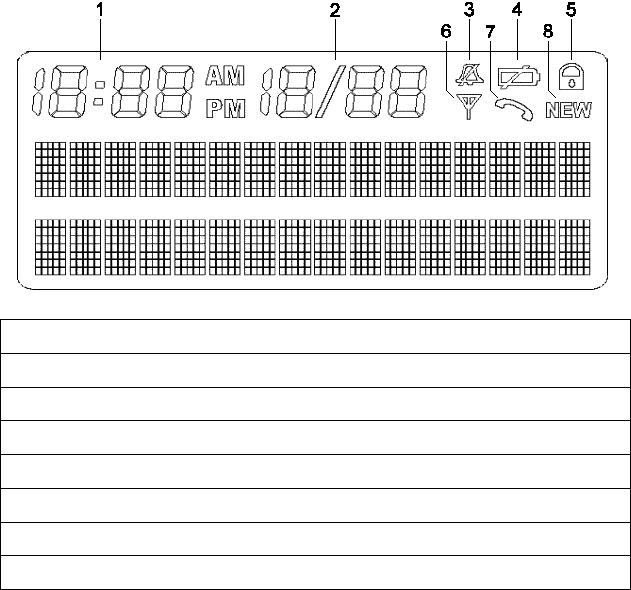
2.2 LCD Display Indications
1. Caller ID Time
2. Caller ID Date
3. Ringer OFF icon (displayed when user turns the ringer off)
4. Low battery icon (on only if battery voltage is low)
5. Key lock icon (displayed when user locks the keypad)
6. In Service icon (displayed when Handset is ‘in range’ of the Base)
7. Off Hook icon (displayed when Handset is on an external or intercom call)
8. NEW icon (displayed when new Caller ID records have been received)
OLYMPIA OL2400 Owner's Manual 11
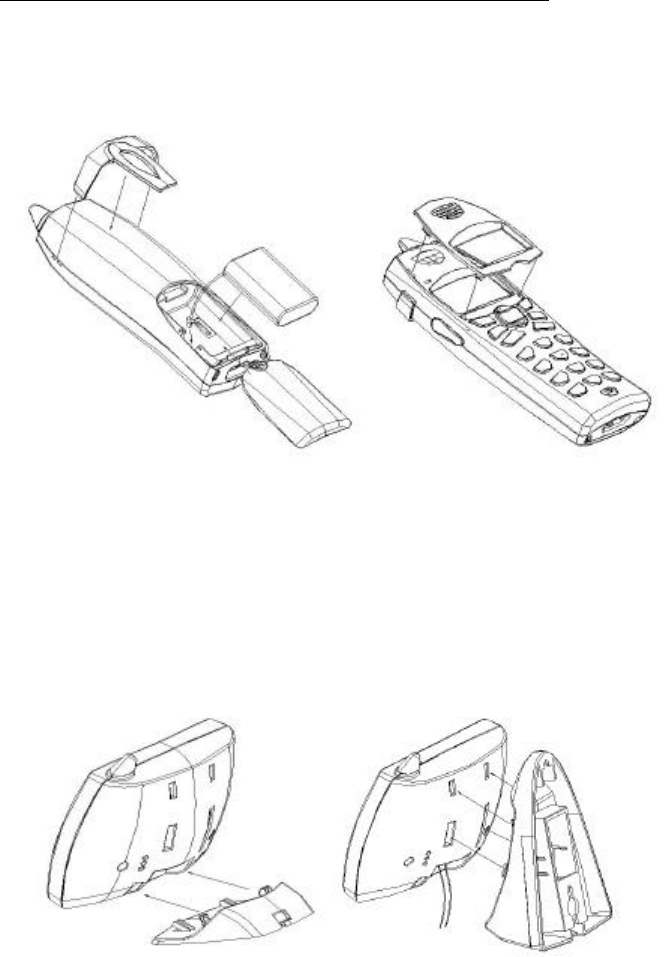
3 Installation and Charging of the Battery Pack
1) Open the battery compartment by sliding the cover down.
2) Plug the Battery Pack connector into the Handset battery socket. Place the
battery pack and wires in the compartment.
3) Close the battery compartment.
4) Mount the belt clip and one of the provided face panels on the Handset.
5) Choose the appropriate mounting bracket. The smaller bracket is for desk or
countertop installations. The larger bracket is for wall mounting. You must
use one of these brackets. Thread the telephone cord and DC power cord
through the large opening in the bracket. Plug the two cords into the
corresponding jacks on the bottom of the Base.
6) Snap the bracket into place on the back of the Base. If you are using the desk
top bracket, run the two cords through the channel at the back of the bracket.
If you are wall mounting the Base, carefully line up the slots on the wall
mount bracket with the studs on the telephone wall plate, and carefully mount
the telephone on the wall.
12 OLYMPIA OL2400 Owner's Manual
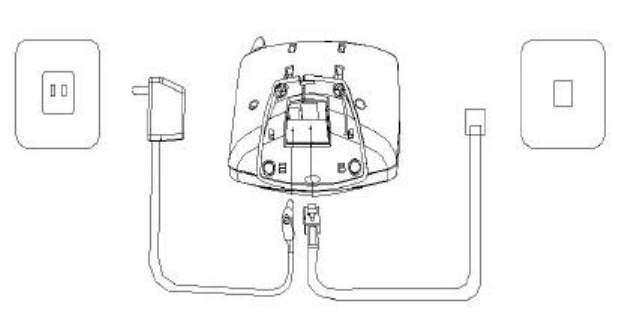
7) Connect the telephone line cord to the telephone jack, and the power supply to
a live power outlet. Make sure you are not using an outlet controlled by a
switch.
8) Place the Handset in the Base. The Handset and Base communicate with each
other automatically. This process may take a minute.
9) Leave the Handset in the Base for 10 hours so that the battery pack is fully
charged.
The CHARGE indicator on the Base glows when the Handset is charging.

OLYMPIA OL2400 Owner's Manual 13
4 Handset Registration Procedure
A Handset which has not been registered will display:
NOT REGISTERED
PLACE IN BASE
Plug the power supply into a live electrical outlet and the DC connector into the
bottom of the Base. Place the Handset (with battery pack plugged in) into the Base
cradle. In approximately 60 seconds, the Handset will beep, indicating registration
has been completed. The Handset display will say “READY.”
A previously registered Handset will display “OUT OF SERVICE” if taken out
of range or if the Base loses power.
OUT OF SERVICE
Return to the Base, or power up the Base again, then place the Handset in the Base
cradle. In approximately one minute, the Handset will regain its registration.

14 OLYMPIA OL2400 Owner's Manual
5 Display Messages & Audio Alert
5.1 Display Message
The handset provides a number of status messages in the display either in the idle
state or during conversation.
The following status messages are shown in the idle display.
When the handset is out of range, an "out of service" message is shown in line one.
OUT OF SERVICE
When the handset has no valid registration, the display shows:
NOT REGISTERED
PLACE IN BASE
If a new battery has been inserted and the battery voltage is too low to guarantee
significant conversation time, the display shows:
PLACE IN CHARGER
When the battery pack has first reached a minimal charge (but no enough to assure
continuous operation), it will display “CHARGING.”
CHARGING
When a handset has completed registration, it will display "READY."
READY
If the phone line is disconnected, "NO LINE" is displayed.
READY
NO LINE
When the keypad is locked, the status is presented in line two.
READY
KEY LOCKED

OLYMPIA OL2400 Owner's Manual 15
If the phone line is in use (by another telephone connected to the same line), “EXT
IN USE” is displayed. It is still possible to go off-hook during this condition.
If one handset is engaged in an external call, the message is presented in line two
of the other handset’s display.
READY
EXT IN USE
In the presence of new, unplayed voicemail messages, “MESSAGE WAITING” is
displayed.
READY
MESSAGE WAITING
When there is one or more new Caller ID records in the call log, the status is
presented in line two: e.g.
READY
10 CALL/3 NEW
When the ringer is switched off, the status is presented in line two.
READY
RINGER OFF
The following messages may occur in the display during conversation.
When the battery low level is reached, the "charge battery" recommendation is
shown in line two.
TALK 1:32:56
CHARGE BATTERY
When the microphone is muted, the status is presented in line two.
TALK 1:32:56
MIC MUTE

16 OLYMPIA OL2400 Owner's Manual
5.2 Audible Alerting
Out of range
• A one-time triple beep will be heard at the Handset.
Low battery
• When off hook, a double beep will be heard in the earpiece.
• When on hook, a double beep will be heard at the Handset.
Charging
• The Handset will emit a single beep when placed in the Base charger.
Registration
• The Handset will emit a single beep indicating successful registration.
• If the registration procedure fails, the Handset will emit a double beep.
Other earpiece tones/alerts
• Conference call establishment (second handset has joined conversation)
• Busy tone
• Congestion tone
• Call waiting
• Microphone mute
• Dial tone
• Ring back tone
Other handset tones/alerts
• Illegal key press (during programming mode)
• Programming confirmation

OLYMPIA OL2400 Owner's Manual 17
6 Operation Guide
6.1 Making External Calls
6.1.1 Post Dialing
1) Press the key and wait for dial tone
2) Dial the telephone number 030 1234
3) End the call by placing the handset in the cradle or pressing the PHONE key
6.1.2 Pre-dialing
1) Dial the telephone number; e.g. 555-5555
2) Delete any incorrect entry with short press or whole entry with long press
3) Press the key to dial the number
4) End the call by placing the handset in the cradle or pressing the PHONE key
Inserting a Pause in Dialing String
When programming a number into the phone book, press REDIAL/PAUSE to
insert a two-second pause in the dialing sequence. This is useful when speed
dialing on a PBX system. Each press of REDIAL/PAUSE adds two additional
seconds to the pause
Press the key to insert a pause and “P” appears in the display.

18 OLYMPIA OL2400 Owner's Manual
6.2 Redialing
Each system handset stores the last 5 telephone numbers dialed.
6.2.1 Post-dialing
1) Press PHONE key and wait for dial tone.
2) Press REDIAL until you see the desired number.
3) Press PROG to dial the displayed number.
4) End your call by placing the handset in the cradle or pressing PHONE.
6.2.2 Pre-dialing
1) Press REDIAL until you see the desired number.
2) Press PHONE.
3) End your call by placing the handset in the cradle or pressing PHONE.
6.3 Receiving Calls
When an external call is received, all the handsets ring; EXTERNAL CALL is
shown on the display.
6.3.1 The Handset Is Located in the Cradle

OLYMPIA OL2400 Owner's Manual 19
1) Take the handset from the cradle; a connection is automatically established
when the AUTO ANSWER function is activated
OR
Press the PHONE key or any key from 1…9, 0, *, # when the AUTO
ANSWER function is deactivated, to answer the call
or 1/…9/ 0/ */ #
2) End your call by placing the handset in the cradle or pressing PHONE.
6.3.2 The Handset Is Not Located in the Cradle
1) Press the PHONE key or any key from 1…9, 0, *, # to answer the call.
or 1/…9/ 0/ */ #
6.4 Flash
During external call, a flash is generated on the line by pressing the key
6.5 Page Call
The page call function is used as an aid to locate the handsets.
6.5.1 Paging from Base
Paging of all handsets is done by pressing the Page key in Base unit.
6.5.2 Paging from Handset
Paging of all handsets is done by making an internal call to all handset as
shown in the next section ’Making internal calls’.
20 OLYMPIA OL2400 Owner's Manual
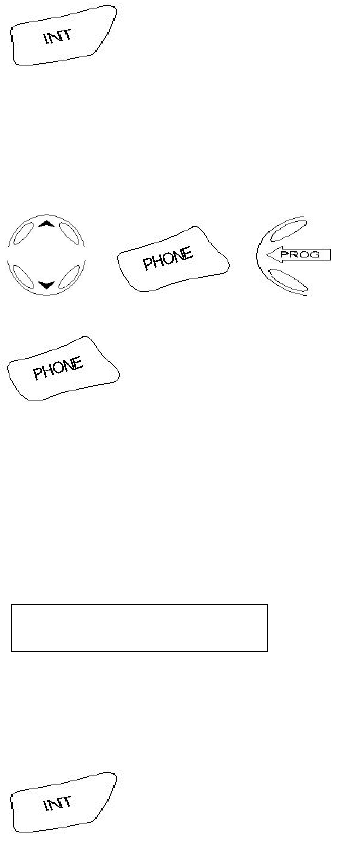
6.6 Making Internal Calls
In order to carry out internal calls, more than one handset must be registered on
the same base station.
1) Press the key.
2) Press the number of the required handset or ‘*’ key to page all handsets.
1...4 *
OR
Press the UP/DOWN key to select the desired handset(s) in the menu, then
press PHONE or PROG.
, /
3) End the call by placing the handset in the cradle or pressing the PHONE key.
Note: If an external call is received during an internal call, a short acoustic
signal is issued.
6.7 Call Toggling
If a portable is engaged in an external connection, it is possible to put the
external call on hold and establish an internal call in the same way as the
previous section ‘Making internal calls’.
Then the display will become as below if handset #1 is selected.
TALK 1:35:06
HANDSET #1 H
The 'H' in the right hand side of the third line indicates having the external call
on hold.
It is possible to toggle between an internal call and external call by pressing the
key.
OLYMPIA OL2400 Owner's Manual 21
The ‘H’ is displayed too as below, when the internal call is put on hold.
TALK 1:35:50
EXTERNAL CALL H
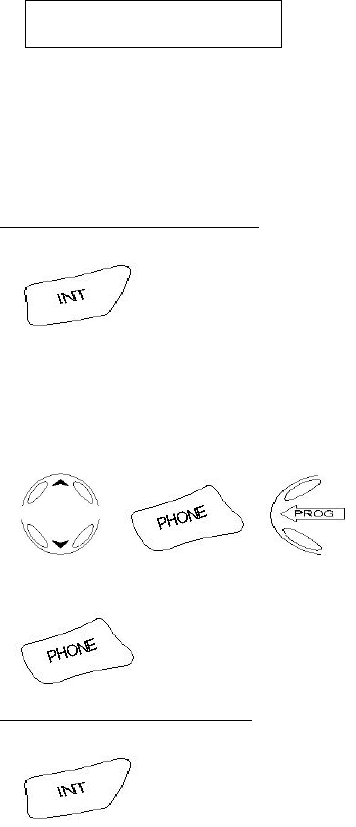
6.8 Call Transfer/Forward
An incoming call can be transferred or forwarded to the other handset during
an ongoing call. The difference is that, when the call is transferred, the first
handset waits for the other to answer before ending the connection, but when
the call is forwarded, the first handset ends its connection immediately.
6.8.1 The Call is Transferred
1) Press the key (the external call is put on hold)
2) Press the number of the required handset or ‘*’ key for all handsets.
1... 4 *
OR
Press the UP/DOWN key to select the desired handset(s) in the menu, then
press PHONE or PROG (the external call is put on hold).
, /
3) After the other handset has answered, press PHONE, or place your handset
in the charge cradle.
6.8.2 The Call is Forwarded
1) Press the key (the external call is put on hold)

22 OLYMPIA OL2400 Owner's Manual
2) Press the number of the required handset or ‘*’ key for all handsets.
1 .. 4 *
OR
Press the UP/DOWN key to select the desired handset(s) in the menu, then
press PHONE or PROG. (the external call is put on hold)
, /
3) Without waiting for an answer, press PHONE, or place the handset in the
charger.
6.9 Call Back
After call forwarding, a callback is generated in the forwarding handset if the
forwarded call is not answered within a certain period. If there is no CID
information available ‘Call back’ is shown in the display; otherwise normal
CID information is shown. If the returned call isn't answered within a certain
period, the phone automatically goes on hook.
6.10 Conference
It is possible to establish a conference between two handsets and the external
line.
But only the first handset connected to the external line is allowed to transmit
DTMF digits to the line. If digit keys are pressed on the second handset, they
are blocked in the base station.
If the handset has a connection to the external line, a conference is immediately
established when another handset goes off hook by:
Press the key
If a handset has an active connection (internal or external) and another
connection on hold, a conference can also be established by holding down the
key.

OLYMPIA OL2400 Owner's Manual 23
Either handset can leave the conference by pressing PHONE.
The connection continues between the remaining handset and the external party.
6.11 Muting the Microphone
During conversation,
1) Press the CLEAR/DEL key to mute the handset microphone during a call.
2) Press CLEAR/DEL again to return to the two-way conversation.
6.12 Call Waiting
6.12.1 Call Waiting on Intercom
If the handsets are engaged in an internal connection and an external incoming
call arrives, the users are notified about this by a beep in the earpiece. The
identity of the caller is presented in the display in the same way as a normal
external call. The waiting call can be answered by pressing PHONE on either
handset.
Then the internal connection is disconnected automatically.
If the waiting call is not answered, the display returns to previous screen after
several seconds
Press and hold INT to disconnect the internal call without answering the
waiting external call.
6.12.2 Call Waiting on Second External Call
The user may connect to a second external call upon hearing an alerting tone
through the earpiece.

24 OLYMPIA OL2400 Owner's Manual
The waiting call can be answered by pressing FLASH.
FLASH clears the second line in the display. If the waiting call is not answered,
the display presentation will return back to normal ongoing call presentation
after several seconds. For more convenient use, call waiting deluxe is also
available.

OLYMPIA OL2400 Owner's Manual 25
7 Menu Structure
IDLE
CALL LOG RECALL
PHONE BOOK STORE
HANDSET VOLUME
RING VOLUME
EXTERNAL
RING PATTERN INTERNAL
ON
AUTO ANSWER OFF
ON
KEY CLICK OFF
ON
KEY LOCK OFF
HANDSET NAME
ENGLISH
SPANISH
LANGUAGE
FRENCH
CLEAR MSG WAIT DTMF
DIAL METHOD PULSE

26 OLYMPIA OL2400 Owner's Manual
7.1 Call Log
7.1.1 Caller ID Review
1) Press while handset is in standby (idle) mode.
OR
Press PROG, to enter the menu at standby and then…
2) Press PROG once again, to enter Call log menu.
3) Scroll through the call log entries using and .
4) Dial the displayed CID record by pressing PHONE.
OR
5) Exit CID review mode by pressing CANCEL.
Remarks:
1. If the call log is full, the oldest entry is deleted to make room for the new
call. If the call log is empty when the user tries to enter to Call log review, a
message ‘CALL LOG EMPTY’ is displayed.
2. ‘!’-character in the right hand side of the second line indicates that the call
has not previously been reviewed. The ‘!’-character is cleared when
stepping to the next entry in the log or when leaving the call log. The
maximum length of the name shown in the second line is 16 characters. If
the name is longer, it is right truncated.
OLYMPIA OL2400 Owner's Manual 27
3. A number in the right hand side of the third line shows the call log number -
1 is the latest received call. The maximum length of the number shown in
the third line is 16 characters. If the number is longer, it is left truncated.
4. The incoming calls are sorted by the order of arrival; the latest is shown first.
A number is only contained once in the list. A new call from a caller that is
already contained in the log removes the old entry and inserts the new call.
All calls with blocked number are stored as individual calls.
7.1.2 Storing Caller ID Records
During caller ID review:
1) Scroll through the calls log using and .
2) Press PROG to select the record to be stored.
You can edit the name and number as needed.
3) Press PROG to confirm storage.
NOTE: If you attempt to store a CID record without name, an error tone will
sound, and user will be required to enter a name.
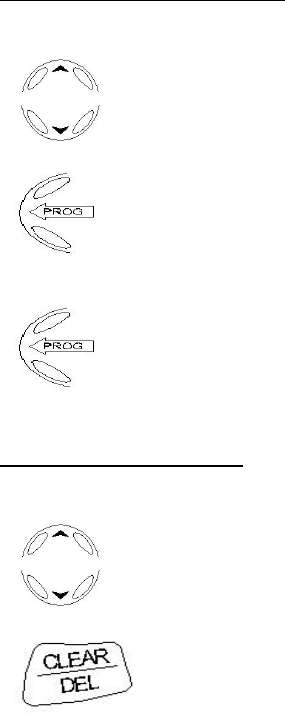
7.1.3 Erasing CID Records
During CID review:
1) Scroll through the calls log using and .
2) Press the CLEAR/DEL key to delete the displayed record.
The user will be asked ‘DELETE?’
OR
28 OLYMPIA OL2400 Owner's Manual
3) Hold down CLEAR/DEL to erase all records.
The user will be asked ‘DELETE ALL?’
4) Press PROG to confirm deletion.
OR
5) Press CANCEL to exit the calls log.
7.2 Phone Book Operation
7.2.1 Storing Names and Numbers
1) Press PROG.
2) Press to select PHONE BOOK.
3) Press PROG to confirm selection.
4) Scroll with the keys.
With STORE in the second line, press PROG.
/
5) Enter the phone number, up to 24 digits.
Numbers more than 16 digits are ‘left’ truncated, with the last 16 digits shown.

OLYMPIA OL2400 Owner's Manual 29
6) Press PROG.
7) Using the keypad, enter the name. Each ‘letter’ key offers upper and lower
case letters.
8) Press PROG.
If the Phone book is full, the Handset will display the ‘PHONEBOOK FULL’
message.
7.2.2 Phone Book Review
1) Press MEM.
OR
Press PROG, scroll through the menu choices, until RECALL is in the second
line, then press PROG.
,
2) Scroll through phone book using the keys ;
OR
Enter the first letter of the desired name.
3) Press CANCEL to exit phone book review mode.

30 OLYMPIA OL2400 Owner's Manual
7.2.3 Editing Phone Book Names/Numbers
During phone book review:
1) Scroll through the phone book using the keys,
OR
Enter the first letter of the desired name.
2) Press PROG, to enter edit mode.
Press CLEAR/DEL to erase a digit. Press and hold CLEAR/DEL to erase the
entire number.
3) Press PROG to confirm and enter name edit mode.
4) Press CLEAR/DEL or to erase the right most letter.
or
Press and hold CLEAR/DEL to erase the entire name.
5) Press PROG to confirm.
If the Phone book is full when the user tries to store a new number in it, a
message ‘PHONEBOOK FULL’ is displayed.

OLYMPIA OL2400 Owner's Manual 31
7.2.4 Deleting Phone Book Names/Numbers
During phone book review:
1) Scroll through the phone book using the keys.
2) Press CLEAR/DEL.
The user will be asked ‘DELETE?’
3) Press PROG to confirm deletion.
OR
4) Press CANCEL to exit without deleting.
7.2.5 Dialing from the Phonebook
During phone book review:
1) Scroll through the phone book using the keys,
OR
Enter the first character of the desired name.
2) Press PHONE, to dial.

32 OLYMPIA OL2400 Owner's Manual
7.3 Handset Volume
7.3.1 In Standby (Off) Mode
1) Press PROG.
2) Press two times
HANDSET VOLUME
3) Press PROG, to enter volume menu
4) Enter 0–7, 0 being the lowest and 7 the highest volume
OR
Use the keys.
5) Press PROG to confirm.
7.3.2 During Conversation
Use the keys. The screen will display the volume level in a bar graph.
The default audio volume is 2.
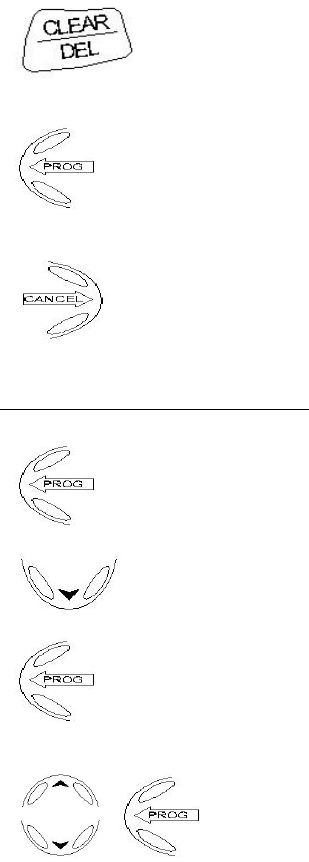
7.4 Ring Volume
1) Press PROG
2) Press three times.

OLYMPIA OL2400 Owner's Manual 33
RING VOLUME
3) Press PROG to enter volume menu.
4) Enter 0 – 6, 0 for OFF and 6 being the loudest ring;
OR
Adjust using keys. The ring is played as the volume is adjusted.
5) Press PROG to confirm.
NOTE: Ringing is switched off by adjusting the ring volume to zero. A ‘ringer
off’ icon will be displayed on the Handset if that option is selected.
The default ring volume is 6.
7.5 Ring Pattern
1) Press PROG.
2) Press four times.
RING PATTERN
3) Press PROG to enter pattern menu.
4) Press the keys to select EXTERNAL or INTERNAL ring setting, then
press PROG.
/

34 OLYMPIA OL2400 Owner's Manual
5) Enter 0 – 9, or adjust using the keys.
The user hears the different ring patterns during selection.
6) Press PROG to confirm the setting.
The default external and internal ring patterns are 0 and 1 respectively.
7.6 Auto Answer
The default setting is auto answer off. However, if you want your Handset to
answer an incoming call by simply picking it up from its cradle:
1) Press PROG.
2) Press five times.
AUTO ANSWER
3) Press PROG to enter auto answer menu.
4) To turn auto answer On, press 1 or . To disable, press 0 or .
5) Press PROG to confirm the setting.

OLYMPIA OL2400 Owner's Manual 35
7.7 Key Click
Key clicks are the sounds you hear each time a key is pressed. The default
mode is key click ON.
1) Press PROG.
2) Press six times.
KEY CLICK
3) Press PROG to enter key click menu.
4) Press 1 or to turn key click On ; press 0 or to turn key click Off.
5) Press PROG to confirm your setting.
NOTE:Key click is disabled when the key lock is on.
7.8 Key Lock
7.8.1 Locking the Keypad
It is possible to lock the handset keypad. The key lock function is set/reset by:
1) Press PROG.
2) Press seven times.
KEY LOCK
36 OLYMPIA OL2400 Owner's Manual
3) Press PROG to enter key lock menu.
4) To enable key lock, press 1 or ; to disable, press 0 or .
5) Press PROG to confirm the setting.
7.8.2 Unlocking the Keypad
When keypad is locked, the Handset will display KEY LOCKED. Pressing
any key will generate PRESS 159 TO UNLOCK on the screen.
PRESS 159
TO UNLOCK
To unlock, press 1, 5, 9
‘1’,’5’,’9’
When the keypad is locked, you can still dial and emergency call by first
pressing PHONE and then the emergency number (e.g. 000, 110, 112, 119, 911,
999). Key lock is disabled after an emergency call.
Key lock is disabled by default.

OLYMPIA OL2400 Owner's Manual 37
7.9 Handset Name
It is possible to name each handset. The name is shown in the first line during
idle mode; i.e. it replaces the "READY" indication during idle mode.
1) Press PROG.
2) Press eight times.
HANDSET NAME
3) Press PROG to enter name menu.
4) Enter name
e.g. DAD’S PHONE
5) Press PROG to confirm.
7.10 Select LANGUAGE
Your Handset display can be in English (default mode), Spanish or French.
1) Press PROG.
2) Press nine times.
LANGUAGE
3) Press PROG to enter language menu.
38 OLYMPIA OL2400 Owner's Manual
4) Press 0 for English, 1 for Spanish, 2 for French;
0/ 1/ 2
OR,
Use the keys.
5) Press PROG to confirm your selection.
7.11 Clear Message Waiting
You can remove the Message Waiting alert from the display:
1) Press PROG.
2) Press ten times.
CLEAR MSG WAIT
3) Press PROG to enter message menu.
4) Press PROG again to clear the alert or CANCEL to escape with clearing.
or
7.12 Dial Method
Your OL2400 is preset for DTMF (Tone) dialing. To change the setting:
1) Press PROG.

OLYMPIA OL2400 Owner's Manual 39
2) Press eleven times.
DIAL METHOD
3) Press PROG to enter dial method menu.
4) For Pulse dialing, press 1 or ; for Tone dialing, press 0 or .
5) Press PROG to confirm.
NOTE: If your Handset is set for Pulse dialing, if you press * during a call, the
Handset will switch to Tone dialing for the duration of the call.
40 OLYMPIA OL2400 Owner's Manual
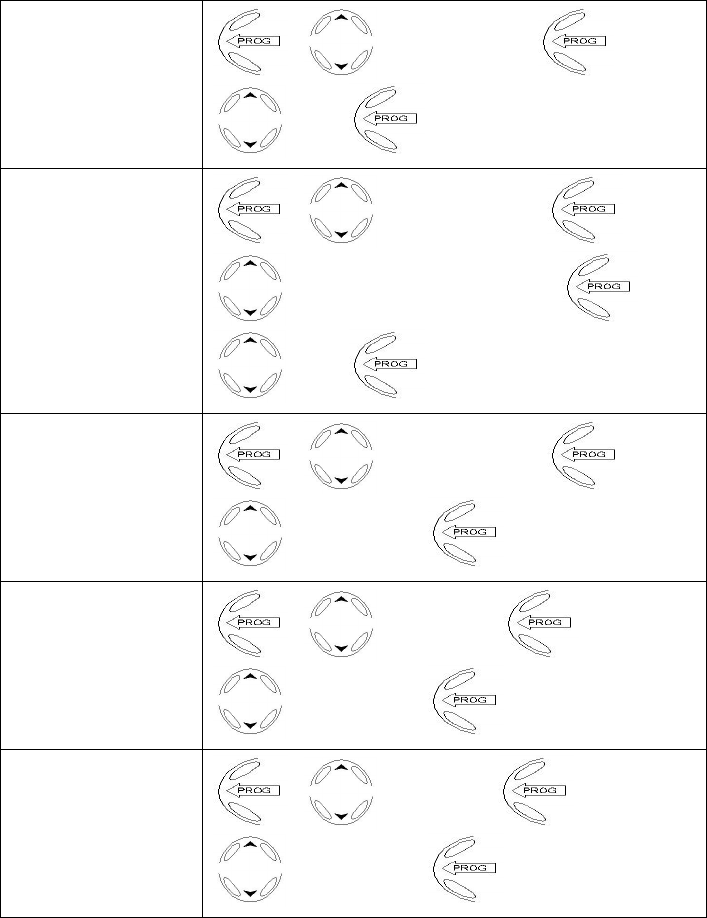
8 Overview of Telephone Functions
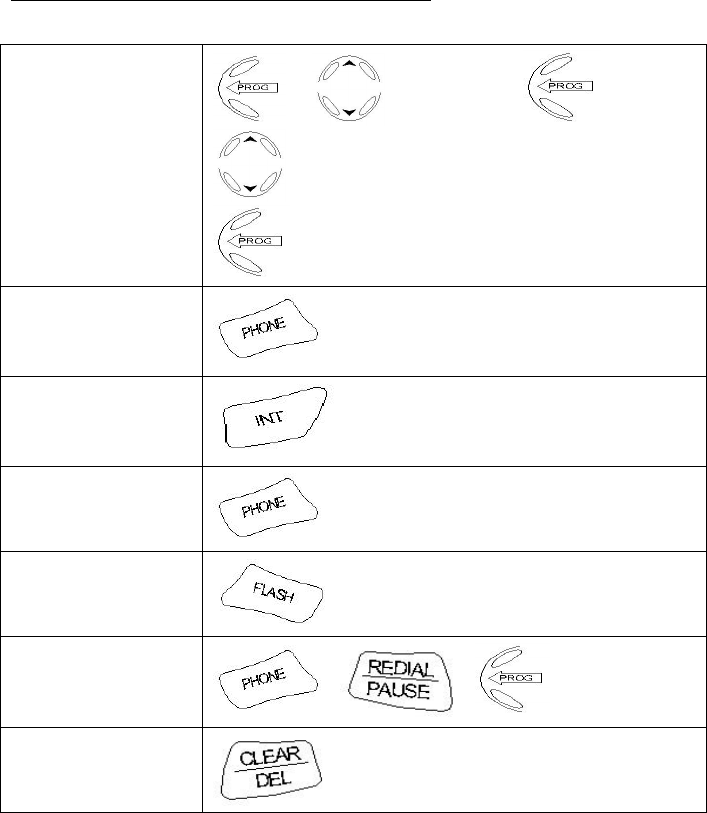
Select LANGUAGE
/ LANGUAGE / /
ENGLISH, SPANISH, or FRENCH /
Making external calls
/ 030 123 …
Making internal calls
/ 1 . . 4 or *
Receiving calls
Call back
Redialing
/ /
Mute the microphone
OLYMPIA OL2400 Owner's Manual 41
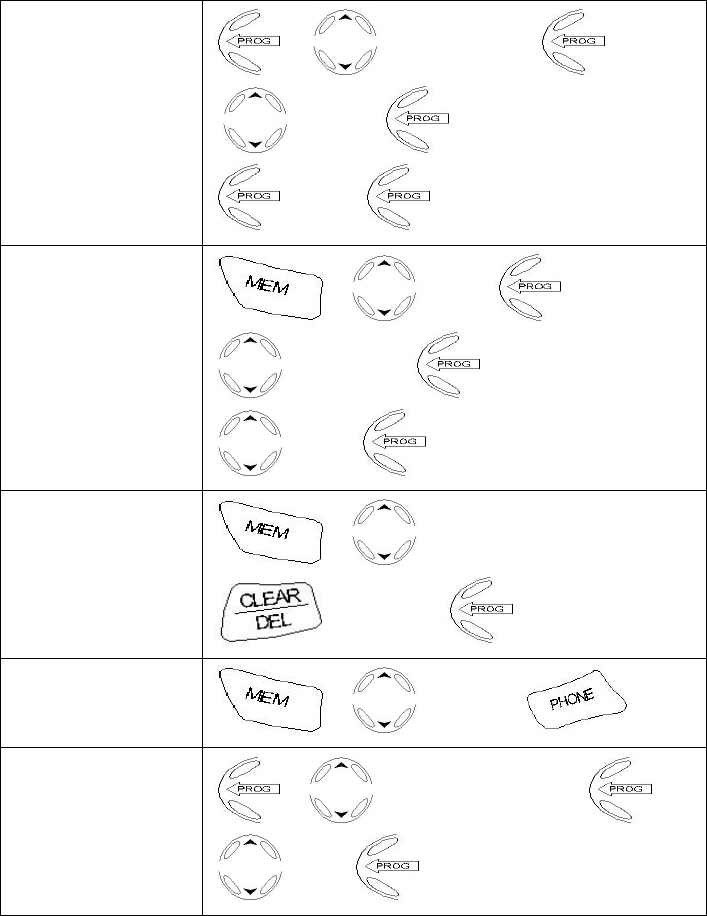
Storing call numbers
/ PHONE BOOK / /
STORE / / 030 123 /
/ ABC /
Editing call numbers
/ ABC / / 030 12345 /
/ 030 12344 / / ABC /
/ ABA /
Deleting call numbers
/ ABC /
DELETE ? /
Dialing from the
phonebook
/ e.g. ABC /
Handset receiving
volume
/ HANDSET VOLUME / /
0 .. 7 /
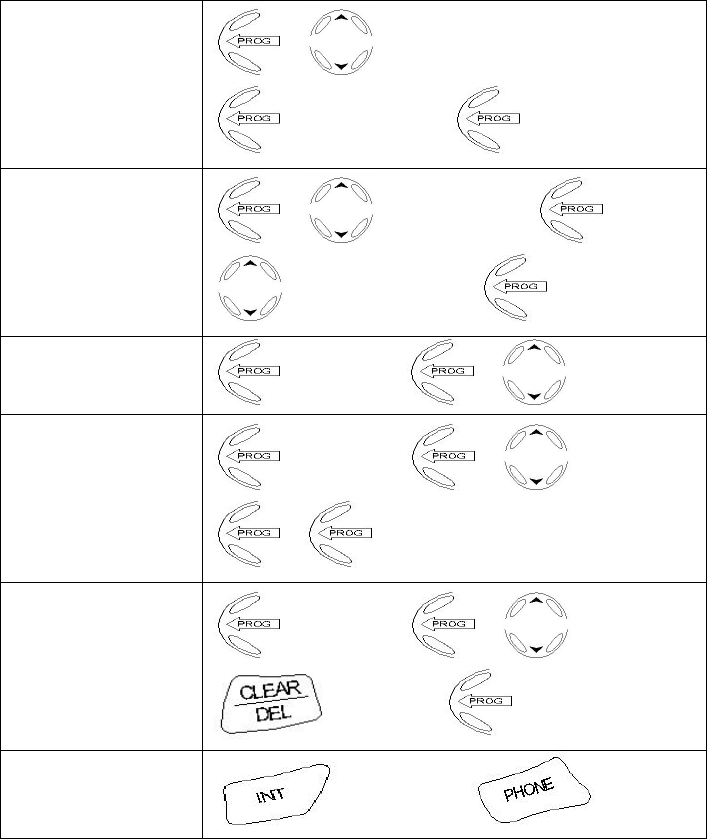
42 OLYMPIA OL2400 Owner's Manual
Handset ringing tone
volume
/ RING VOLUME / /
0 …6 /
Change ringing tone
pattern
(external / internal) / RING PATTERN / /
EXTERNAL / or / INTERNAL / /
0 …9 /
Activate / Deactivate
automatic call answer
/ AUTO ANSWER / /
ON / or / OFF /
Activate / Deactivate
key tone on handset / KEY CLICK / /
ON / or / OFF /
Activate / Deactivate
key locking on
handset / KEY LOCK / /
ON / or / OFF /
OLYMPIA OL2400 Owner's Manual 43
Enter / Change
handset name
/ HANDSET NAME /
/ e.g. MOBILE 1 /
Dialing method
/ DIAL METHOD / /
DTMF / or / PULSE /
Caller ID Review
CALL LOG / /
Caller ID Store
CALL LOG / / e.g. ABC /
/
Caller ID Erase
CALL LOG / / e.g. ABC /
DELETE ? /
Transferring calls
/ Handset no. /

44 OLYMPIA OL2400 Owner's Manual
Conference calls
When a handset has
a connection, press
the key can also be
established.
Base Page handset

OLYMPIA OL2400 Owner's Manual 45
9 Consumer Information
This equipment complies with Part 68 of the FCC rules and the requirements
adopted by the ACTA. On the back of this equipment is a label that contains,
among other information, a product identifier in the format US:
2X6WI00B2G4C230X. If requested, this number must be provided to the
telephone company.
An applicable certification jacks Universal Service Order Codes (USOC) for the
equipment is provided (i.e., RJ11C) in the packaging with each piece of approved
terminal equipment.
A plug and jack used to connect this equipment to the premises wiring and
telephone network must comply with the applicable FCC part 68 rules and
requirements adopted by the ACTA. A compliant telephone cord and modular
plug is provided with this product. It is designed to be connected to a compatible
modular jack that is also compliant. See installation instructions for details in
section (2).
The REN is used to determine the number of devices that may be connected to a
telephone line. Excessive RENs on a telephone line may result in the devices not
ringing in response to an incoming call. In most but not all areas, the sum of
RENs should not exceed five (5.0). To be certain of the number of devices that
may be connected to a line, as determined by the total RENs, contact the local
telephone company. The REN for this product is part of the product identifier that
has the format US: 2X6WI00B2G4C230X. The digits represented by 00 are the
REN without a decimal point (e.g., 03 is a REN of 0.3). The REN is separately
shown on the label too.
If this equipment OL2400 causes harm to the telephone network, the telephone
company will notify you in advance that temporary discontinuance of service may
be required. But if advance notice isn’t practical, the telephone company will
notify the customer as soon as possible. Also, you will be advised of your right to
file a complaint with the FCC if you believe it is necessary.
The telephone company may make changes in its facilities, equipment, operations
or procedures that could affect the operation of the equipment. If this happens the
telephone company will provide advance notice in order for you to make necessary
modifications to maintain uninterrupted service.
Please follow instructions for repairing if any (e.g. battery replacement section);
otherwise do not alternate or repair any parts of device except specified.
Connection to party line service is subject to state tariffs. Contact the state public
utility commission, public service commission or corporation commission for
information.
This equipment is hearing aid compatible.
46 OLYMPIA OL2400 Owner's Manual
NOTICE: If your home has specially wired alarm equipment connected to the
telephone line, ensure the installation of this OL2400 does not disable your alarm
equipment. If you have questions about what will disable alarm equipment,
consult your telephone company or a qualified installer.
Should you experience trouble with this equipment, please contact US Returns
Center, Wave Industries, with the below information for warranty information. If
the equipment is causing harm to the telephone network, the telephone company
may request that you disconnect the equipment until the problem is resolved.
QUESTIONS?????? OUR HELP LINE IS
1-866-537-0384
Wave Industries c/o Moore Co.
123 S.E. 2nd Ave., Door #13,
Portland, OR 97214
OLYMPIA OL2400 Owner's Manual 47
WARNING: Changes or modifications to this unit not expressly approved by the
party responsible for compliance could void the user's authority to operate the
equipment.
CAUTION: To maintain compliance with the FCC's RF exposure guidelines place
the base unit at least 20 cm from nearby persons.
NOTE: This equipment has been tested and found to comply with the limits for a
Class B digital device, pursuant to Part 15 of the FCC Rules. These limits are
designed to provide reasonable protection against harmful interference in a
residential installation. For body worn operation, this phone has been tested and
meets the FCC RF exposure guidelines when used with the belt clip supplied or
designated for this product. Use of other accessories may not ensure compliance
with FCC RF exposure guidelines. This equipment generates, uses and can radiate
radio frequency energy and, if not installed and used in accordance with the
instructions, may cause harmful interference to radio communications. However,
there is no guarantee that interference will not occur in a particular installation. If
this equipment does cause harmful interference to radio or television reception,
which can be determined by turning the equipment off and on, the user is
encouraged to try to correct the interference by one or more of the following
measures:
• Reorient or relocate the receiving antenna.
• Increase the separation between the equipment and receiver.
• Connect the equipment into an outlet on a circuit different from that to
which the receiver is needed.
• Consult the dealer or an experienced radio TV technician for help.
This device complies with part 15 of the FCC rules. Operation is subject to the
following two conditions: (1) This device may not cause harmful interference and
(2) This device must accept any interference received. Including interference that
may cause undesired operation.
Privacy of communications may not be ensured when using this phone.