Giant Electronics T2007 Two Way Radio with GMRS and FRS User Manual T2007 draft IB 030110
Giant Electronics Ltd Two Way Radio with GMRS and FRS T2007 draft IB 030110
User manual

LOGO
PHOTO
RADIO
USER GUIDE

SAFETY AND GENERAL INFORMATION
Important Information for Safe and Efficient Operation
Please read this information before using your radio.
Safety and General
1. Do not transmit more than 50% of time. It is important as the radio generates
measurable RF energy exposure only when transmitting.
2. Changes or modifications not expressly approved by the manufacturer could void
the user's authority to operate the equipment.
3. Radio frequency signals transmitted may cause interference to hearing aids.
4. Turn off the radio when near medical equipment.
5. This product should not be used by people with pacemakers.
6. Do not use the radio when driving a vehicle or operating machinery.
7. Do not use the radio when on board aircraft.
8. Do not hold the antenna when transmitting.
9. Do not use the radio when the antenna has damaged.
10. Turn off the radio and remove the batteries if you are not going to use it for a
long time.
Two-way Radio Operation
The device was tested for typical body-worn operations using the supplied belt-clip.
To maintain compliance with FCC RF exposure requirements, body-worn operations
are restricted to the supplied belt-clip.For hand-held operation, the radio should be
held at least 1 inch (2.5cm) from the user’s face. The use of accessories that do not
satisfy these requirements may not comply with FCC RF exposure requirements and
should be avoided. For more information about RF exposure, please visit the FCC
web site at www.fcc.gov.
OPERATIONAL CAUTIONS
1. Never dispose of batteries in a fire. There is a serious risk of explosion and /or
the release of highly toxic chemicals.
2. Do not expose your product to direct sunlight, extreme cold or place it near
heating appliances.
3. Do not submerge any part of your product in water and do not use it in damp,
humid or wet conditions.
4. Do not expose your product to fire, explosive or other hazardous conditions. For
example, at petrol stations or areas where explosive products are used.

FCC LICENSING INFORMATION
This two-way radio operates on GMRS (General Mobile Radio Service) frequencies
which require an FCC (Federal Communications Commission) license. A user must
be licensed prior to operating on any GMRS channels. Serious penalties could result
for unlicensed use of GMRS channels, in violation of FCC rules, as stipulated in the
Communications Act’s Sections 501 and 502 (amended).
Licensed users will be issued a call sign by the FCC, which should be used for station
identification when operating this radio. GMRS users should also cooperate by
engaging in permissible transmissions only, avoiding channel interference with other
GMRS users, and being prudent with the length of their transmission time.
Application for a GMRS system license can be made on FCC Form 605. You can call
the FCC Forms Hotline 1-800-418-FORM (3676). If You Have Questions about the
FCC License: Call the FCC 1-888-CALL-FCC (225-5322). You may also visit the
FCC’s Web site at http://www.fcc.gov or
http://wireless.fcc.gov/services/personal/generalmobile/ concerning GMRS.
Note: Use of this radio outside the country where it was intended to be distributed is
subject to government regulations and may be prohibited.
Warning: Any adjustment to this equipment is recommended to be performed by or
under the immediate supervision and responsibility of a person certified as technically
qualified to perform transmitter maintenance and repair duties in the private land
mobile services and fixed services by an organization or committee representative of
users of those services.
Warning: Replacement of any transmitter component (crystal, semiconductor, etc.) for
this equipment could result in violation of FCC rules.
Use only the supplied antenna. Unauthorized antennas, modifications, or attachments
could damage the transmitter and may violate FCC regulations.
FCC STATEMENTS:
This device complies with Part 15 of the FCC Rules. Operation is subject to the
following two conditions: (1) this device may not cause harmful interference, and (2)
this device must accept any interference received, including interference that may
cause undesired operation.
NOTE: This equipment has been tested and found to comply with the limits for a
Class B digital device, pursuant to Part 15 of the FCC Rules. These limits are
designed to provide reasonable protection against harmful interference in a residential
installation. This equipment generates, uses and can radiate radio frequency energy
and, if not installed and used in accordance with the instructions, may cause harmful
interference to radio communications.
However, there is no guarantee that interference will not occur in a particular
installation. If this equipment does cause harmful interference to radio or television
reception, which can be determined by turning the equipment off and on, the user is
encouraged to try to correct the interference by one or more of the following measures:
Reorient or relocate the receiving antenna.
Increase the separation between the equipment and receiver.
Connect the equipment into an outlet on a circuit different from that to which
the receiver is connected.
Consult the dealer or an experienced radio/TV technician for help.

Safety Information
3
Disposal
You are obliged to dispose of consumable goods
according to legal requirements. The adjacent symbol
indicates that electrical and electronic apparatus and
batteries no longer required must be disposed of separ-
ate from domestic waste.
Electrical and electronic devices must be disposed of
at suitable collection points provided by the public waste
authorities.
Batteries must be disposed of at the point of sale or at
the appropriate collection points provided by the public
waste authorities.
Packaging materials must be disposed of according to
local regulations.

Putting the WalkieíTalkies into Operation
4
23XWWLQJWKH:DONLHí7DONLHVLQWR2SHUDWLRQ
Safety information
Attention: It is essential to read the Safety Information
in Chapter 1 before starting up.
Charging the ZDONLHíWDONLHV
Connect the charging station as illustrated in the diagram.
For safety reasons, only use the power adapter plug supplied.
Your radio will not Transmit / Receive during charging.
Set the main switch, located on the underside of the
ZDONLHíWDONLHV, to ON.
Mains power
outlet
Before using the wDONLHíWDONLHVfor the first time, charge them for
at least 18 hours. When the walkieítalkies are connected cor-
rectly, the red LEDs light up. They go out when the walkieítalkies
are fully charged.
Do not charge the ZDONLHíWDONLHV with charging units
from other manufacturers.
For optimal battery life, remove the radio from the char-
ger after fully charging.
The current battery charge status is indicated in the display:
Full Half empty Low Empty
The wDONLHíWDONLHVQHHGWRbe recharged as soon as the
indicator flashes in the display and acoustic warning
signals are issued.
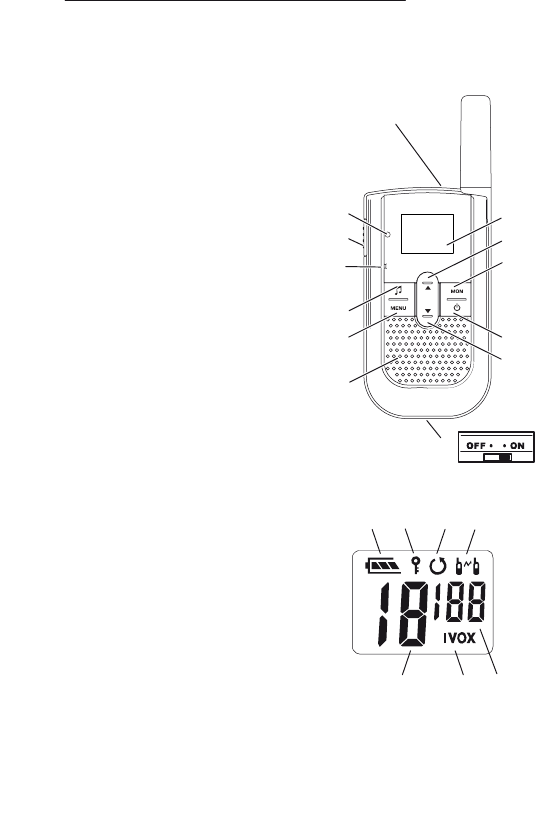
Operating Elements
6
3 Operating Elements
The features and functions of the product are depicted in the dia-
gram below.
Handset
1 Headset
2 Display
3 Volume + /
Increase setting
4 Channel scan / Monitor
5On/Off
6 Volume í/
Decrease setting
7 MainswitchOFF/ON
8 Loudspeaker
9 Menu / Key lock
10 Transmit call tones
11 Microphone
12 PTT button
13 LED, indicator
Display
1 Battery capacity
2 Key lock
3 Channel search
4 Confirmation signal
5 CTCSS / CDCSS code
6 iVOX mode / VOX mode
7 Channel
1
2
3
4
5
6
7
8
9
10
11
12
13
1234
567
11
12
Operating the Walkieí7alkies
6
4 Operating the :DONLHí7DONLHV
Display and notation of operating sequences
Press the button depicted
,Press and hold the button
displayed
,Release the button displayed
yDisplay indicator
Speak into the microphone
Switching the ZDONLHíWDONLHV on/off
7KH main switch is located on the underside of each walkieí
talkie. Set the switch to ON before switching the walkieítalkie on.
Switch the wDONLHíWDONLHon
A beep tone is heard. 7he channel and code used last
time will display and the Ready LED flashes.
Switch the walkieítalkie off
If the walkieítalkie is to remain unused for a longer
period, we recommend you set the main switch to OFF.
If set the switch to OFF for a long time, the channel and
code will return to its default setting.
Volume control
/Raise or lower the volume
(16 levels)
7UDQVPLWWLQg and receiving
7ransmitting
After pressing the button, the 7ransmit LED lights up.
If the button is pressed longer than 60 seconds, a warning
signal is issued. 7ransmission is interrupted.
, , 7ransmit
Hold the ZDONLHíWDONLH approx. 5 to 7 cm from your
mouth and speak at a normal volume. In order to talk to
other subscribers, the respective ZDONLHíWDONLHV must
be set to the same channel and &7&66/CDCSS codes.
13
Operating the WalkieíTalkies
7
Receiving
, Receive
Radio signals cannot be received when the
button is being pressed.
Selecting a channel
There are 22 radio channels available in the frequency range
462.5625 MHz to 467.7125 MHz.
1x , / , Select the channel and confirm it
Selecting the CTCSS 1/ CDCSS2code
There are 38 analogue (CTCSS 1 í 38) and 83 digital (CDCSS
39 í 121) codes available per channel. It is only possible to com-
municate using the walkieítalkies when they are each set to the
same channel and CTCSS/CDCSS codes.
The channels and the codes are transmitted as inaudi-
ble signals together with the standard voice commu-
nication. The voice communication is only transferred
to the receiving device’s loudspeaker when the chan-
nel and the code that it is set on is identical to that re-
ceived.
If another subscriber is coincidentally using the same
channel and code, switch to a different, free channel to-
gether with the person operating the device called.
1CTCSS: Continous Tone Coded Squelch System = Selective call
2CDCSS: Continous Digital Coded Squelch System = Selective call
Channel Frequency(MHz) Channel Frequency(MHz)
1 462.5625 12 467.6625
2 462.5875 13 467.6875
3 462.6125 14 467.7125
4 462.6375 15 462.5500
5 462.6625 16 462.5750
6 462.6875 17 462.6000
7 462.7125 18 462.6250
8 467.5625 19 462.6500
9 467.5875 20 462.6750
10 467.6125 21 462.7000
11 467.6375 22 462.7250

Operating the WalkieíTalkies
8
2x Activate programming mode
/ , Select the code and confirm it
An exception here is code 0 (zero). In the case of this
setting, all the calls on the set channel can be heard re-
gardless of the CTCSS/CDCSS code. To be able to
participate in the radio communication, it may be
necessary to set the necessary CTCSS/CDCSS code.
If you want to communicate with the walkieítalkies which are not
using a CTCSS/CDCSS code, you must select CTCSS/CDCSS
Scanning for a channel
Signals are searched for in the eight channels in a continuous
cycle. The icon appears in the display. If an active channel
is detected, the channel scan stops. The Ready LED flashes ev-
ery second. Press the button to enable radio communica-
tion. If the button is not pressed, channel scan resumes
after five seconds.
Start/End global channel scanning
of the output channel to 0 (zero). The scanning routine stops at
every channel on which a signal is received, regardless of the
code transmitted with the signal.
Start/End channel scanning
The output channel is the channel which is set when the
channel scan is activated.
Start/End specific channel scanning
code for output channel to an individual value.
The scanning routine only stops when a signal is received on a
channel that matches the value set.
Start/End channel scanning
If a certain channel should be scanned fully during a
channel scan", the code must be set to 0 (zero)
for this channel.
14
Operating the Walkieí7alkies
9
Resuming channel scanning
or Resume channel scanning
Excluding a channel
If a channel found during the channel scanning process should
not be considered for subsequent use, it can be excluded.
All the channels are taken into consideration again when a new
channel scan is started. During the time that the walkieítalkie is
temporarily stopped on the unwanted channel, press and hold
the / for 3 seconds to exclude that channel.
, 3 sec. or 7he channel is excluded and
channel scanning automatically
resumed
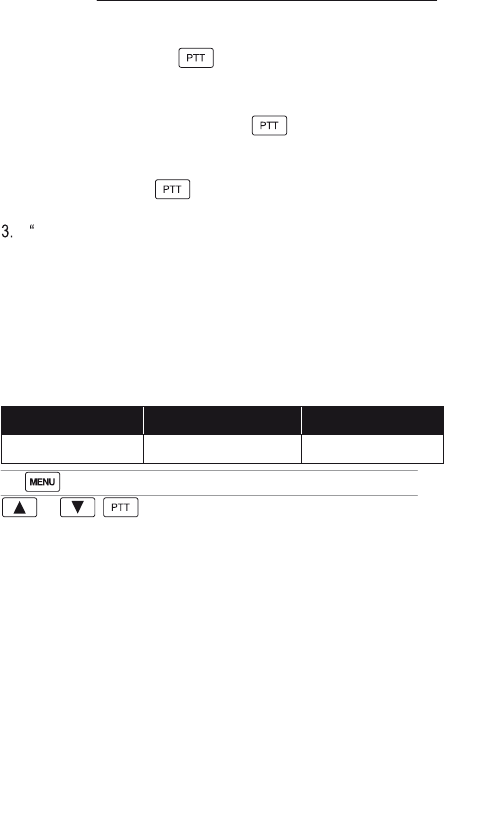
7UDQVPLt ringing tone
7KH ringing tones indicate to other subscribers that you want to
talk to them. A condition for this is that the other subscribers are
using the same channel and &7&66/&'&66 code.
6end ringing tones
6HOHFWLQJ'HDFWLYDWLQg the ringing tone
7here are 10 rLQJLQJWRQHVDYDLODEOHIRr selection. 7oGHDFWLYDte
3 x ActiYate programming mode
or ,6elect the ringing tone and
confirm it
Monitor
7he Monitor function enables the search for weak signals on the
channel currently set. If you rHFHLYHDQH[WHrnal signal, switch to
a free channel. Always communicate with other subscribers on a
free channel to prHYHQWLQWHrference.
,Monitor the channel
,End the monitoring function
15
16
17
18
Operating the Walkieí7alkies
10
Key lock
7KH key lock function prevents inadvertent modification of set-
tings. When the key lock function is activated, the icon
appears in the display.
Activating
, 3 sec. Activate the key lock
Deactivating
, 3 sec. Deactivate the key lock
Confirmation signal
7KH confirmation signal is issued on releasing the button.
7his indicates to the caller that you have ended transmission.
Activating/Deactivating the confirmation signal
Switch the walkieítalkie off. Press and hold the button and,
while doing so, switch the wDONLHíWDONLHRQDJDLn.
If the confirmation signal is activated, the icon appears in
the display.
Headset
Use the headset enclosed with the walkieítalkies.
You can put the walkieítalkie in your breast pocket, for example,
so that both hands are free. 7he headset supplied is equipped
with an additional button which can be used to transmit via
the headset.
Switch the walkieítalkie off before connecting a head-
set.
1. Switch the walkieítalkie off.
2. Insert the plug on the headset in the connection socket.
3. Switch the wDONLHíWDONLHRn.
Operating the Walkieí7alkies
11
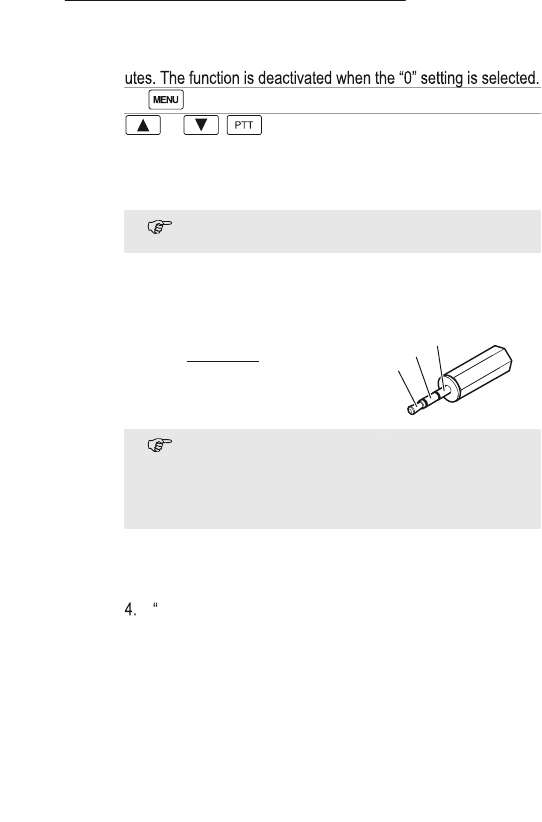
Automatic deactivation
7KH walkieítalkies can be set up so that they are automatically
switched off after a certain time. It can be set to 30, 60 or 90 min-
5 x Activate programming mode
or ,Select the time and confirm it
VOX1/ iVOX2(handsfree)
When this function is active, the walkieítalkie automatically starts
to transmit when the unit detects your voice or a sound.
When you start to speak, there is a slight delay before
the wDONLHíWDONLHVWDrts to transmit.
Activating VOX mode
When using the handsfree function in VOX mode, conversation is
carried out via the headset.
Use a commercially available headset
without a 377 button equipped with a
íSLQPPVWHreo jack plug.
Pin assignment : 1 = Loudspeaker,
2 = Microphone, 3 = Earth
Switch the walkieítalkie off before connecting a head-
set. 7he headset supplied with the wDONLHíWDONLHLVQot
designed for this function because it is equipped with a
377 button. Further information is provided on
Page 31.
1. Switch the wDONLHíWDONLHoff.
2. Insert the plug on the headset in the connection socket.
3. Switch the wDONLHíWDONLHRn.
VOX" appears in the display.
1VOX: Voice Operated 7ransmission = Noise detection
2iVOX: Intelligent Voice Operated 7ransmission = Noise de-
tection
123
Operating the Walkieí7alkies
12
Deactivating VOX mode
7o deactivate VOX mode, pull the headset plug out of the con-
nection socket or press the button.
Activating iVOX mode
When using the handsfree function in iVOX mode, conversation
is carried out via the wDONLHíWDONLH7he button on the
walkieítalkie need not be pressed to transmit.
1. Switch the walkieítalkie off.
2. Press and hold the button and, while doing so, switch
the walkieítalkie on again.
iVOX" appears in the display.
Deactivating iVOX mode
In order to deactivate iVOX mode, switch the walkieítalkie off and
on again.
Selecting VOX / iVOX sensitivity
7here are three sensitivity levels available for operation in VOX /
iVOX mode and can be selected according to the ambient
noise .
Level 1 Level 2 Level 3
High ambient noise Normal ambient noise Low ambient noise
4 x Activate programming mode
or ,Select the sensitivity and
confirm it
In Case of Problems
13
5 In Case of Problems
Should problems arise with the walkieítalkies, please refer to the
following information first. In the case of claims under the terms
of guarantee, please contact your sales outlet. There is a 2 year
period of guarantee.
Problems and solutions
Problems Solutions
Equipment does
not function
íWDONLHíWDONLHKDVQRWEHHQFKDrged
íKey lock has been activated
Transmission not
possible
íPress in fully to transmit
íChannel is being used by other
subscribers
No reception íRelease
íVolume setting is too low
íYou are outside the range of recep-
tion, change your position
íObstructions such as trees and buildí
ings impair the range
íCTCSS / CDCSS code set is not
identical to that of the other party.
íChannel is being used by other
subscribers

Technical Properties
14
6 Technical Properties
Technical data
Feature Value
Power(ERP) 0.5 W
Range 15 miles with conditional
Total operating
time
Up to 10 h (Based on 5 % transmit,
5 % receive and 90 % standby time)
Max. talk time Up to 36 min.
Charging time
(double charging
station)
Min. 18 h
Rechargeable
battery(Internal)
3.7 V Liíion Battery, 700 mAh
Power supply Input: 120 V, 60 Hz
Output: 5 V, 80 mA