Gigaset Communications S45-E45 UPCS Mobile Phone User Manual E45 USA
Gigaset Communications GmbH UPCS Mobile Phone E45 USA
UserManual.wiki
>
Gigaset Communications
>
S45-E45 User Manual
>
User Manual E45
Contents
1.
User Manual E45
2.
User Manual S45
User Manual E45
Navigation menu
Upload a User Manual
Namespaces
Wiki Guide
HTML
PDF
Info
Views
User Manual
Discussion / Help
Navigation


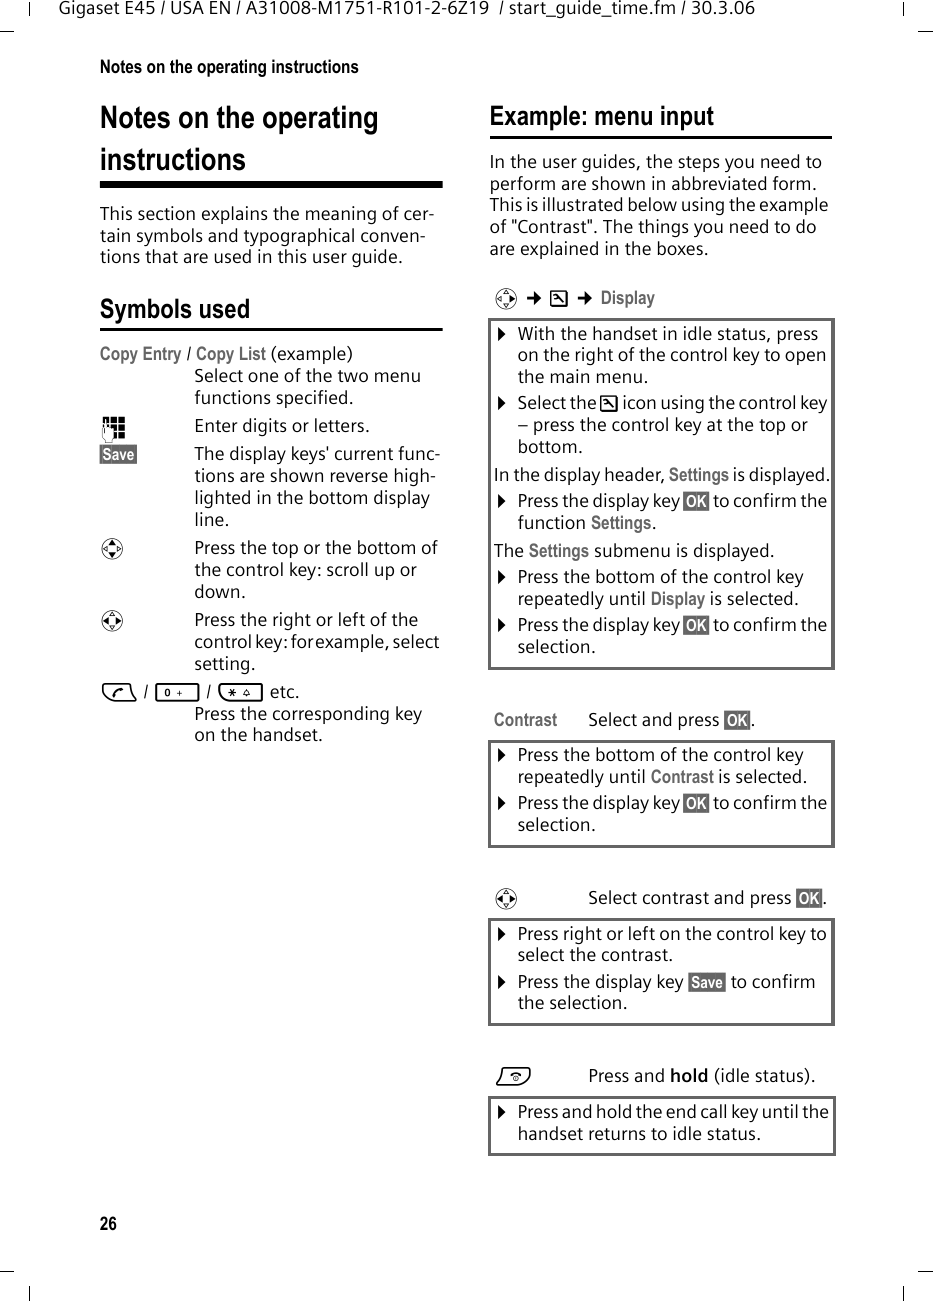
![27Notes on the operating instructionsGigaset E45 / USA EN / A31008-M1751-R101-2-6Z19 / start_guide_time.fm / 30.3.06Example: multiple line input There are many situations in which you can change the settings of a display or enter data in several lines.In this user guide symbols are used to guide you step by step through multiple line input. This is illustrated below using the example of "Setting the date and time". The things you need to do are explained in the boxes.You will see the following display (exam-ple): Writing and editing namesThe following rules apply when creating an entry:uControl the cursor with u v t s.uCharacters are added to the left of the cursor.uPress the star key * to show the table of special characters.uPress and hold the hash key # to switch from "Abc" mode to "123" and from "123" to "abc" and from "abc" to "Abc" (upper case: 1st letter upper case, all others lower case). Press the hash key # before entering the letter.uThe first letter of the name of directory entries is automatically capitalized, followed by lower case letters.Entering special characters You can call up the table of special charac-ters using the * key. Select the required character and insert it with §Insert§.Order of directory entries Directory entries are usually sorted in alphabetical order. Spaces and digits take first priority. The sort order is as follows:1. Space2. Digits (0–9)3. Letters (alphabetical)4. Other charactersTo get around the alphabetical ordering of the entries, insert a space or a digit in front of the name. These entries will then move to the beginning of the directory. Names which you have preceded with an asterisk will move to the end of the directory.Date:Enter month, day and year in 6-digit format.The date in the first line is marked with [ ] to show it is active.¤Enter the date using the digit keys.Time: Enter hours/minutes in 4-digit format. ¤Press the s key.The time in the second line is marked with [ ] to show it is active.¤Enter the date using the digit keys.Time mode: Select 12-hour or 24-hour time format.¤Press the s key.The time format is marked with [ ] to show it is active.¤Select time format.¤With 12-hour time format, use the dis-play key §am/pm§ to switch between am and pm.Date/Time Date: 06.03.06Time: [11:11]amTime Mode: 12 houram/pm Save¤Save changes.¤Press the display key §Save§.¤Then press and hold the a key.The handset changes to idle status.](https://usermanual.wiki/Gigaset-Communications/S45-E45.User-Manual-E45/User-Guide-650031-Page-27.png)