GlobalSat WorldCom DG500 GPS Data Logger User Manual DG 500 QSG ENG V0 91 20160824
GlobalSat WorldCom Corporation GPS Data Logger DG 500 QSG ENG V0 91 20160824
UserManual.wiki
>
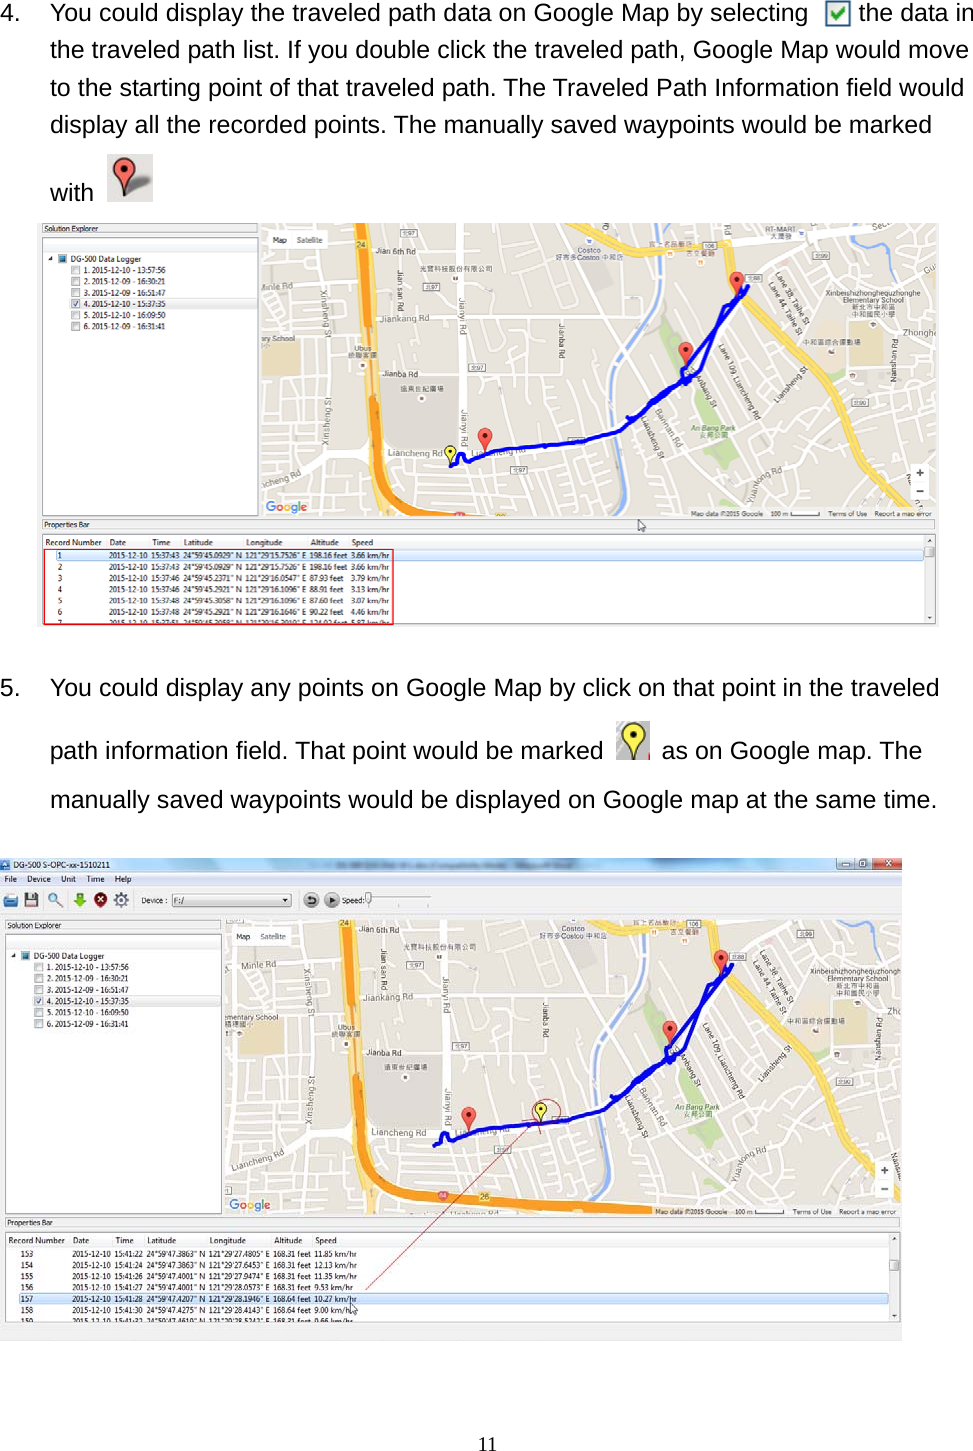
GlobalSat WorldCom
>
DG500 User Manual
Users Manual
Navigation menu
Upload a User Manual
Namespaces
Wiki Guide
HTML
PDF
Info
Views
User Manual
Discussion / Help
Navigation
![8 Chapter 3: DG-500 PC Utility Operation 3-1 PC Utility Function Uploading the recorded data Upload the traveled path data into PC and save it Saving data into different format (1) KML format for Google Earth (2) GPX format file (3) CSV format file (4) GSR format file Data logging Setting Power Saving Mode Bluetooth Status Height Limit Setting the recording interval Range:1~5 second 3-2 Main Screen Introduction Start to connect 1. Connect DG-500 and PC by USB cable. 2. Double click the icon or select [Start][All Programs][Globalsat DG-500 Tool] Globalsat DG-500 Tool You would see the main screen of DG-500 PC Utility as the screenshot below.](https://usermanual.wiki/GlobalSat-WorldCom/DG500/User-Guide-3134212-Page-8.png)

![153-6 Set the Save Points format Click on icon on tool bar or select [Device] [Device Setting] You would see the screenshot as below. Function description: Data logging format (choose the required travelled point’s detail for recording) Position and Gsensor: Record the position and G-force information. Position data would be recorded in the file format of gpl. G-force data would be recorded in the file format of gel. Position: Only record the position data and save it as the file format of gpl. Gsensor: Only record the G-force data and save it as the file format of gel. Data logging setting (choose the device setting) Power Saving Mode (on/off):](https://usermanual.wiki/GlobalSat-WorldCom/DG500/User-Guide-3134212-Page-15.png)
