GlobalSat WorldCom GA-4640 PORTABLE NAVIGATION DEVICE User Manual
GlobalSat WorldCom Corporation PORTABLE NAVIGATION DEVICE Users Manual
Users Manual

1
GA-4640 User Manual
V1.0

2
Table of Contents
1. CAUTIONS ..................................................................................................................3
2. PACKAGE CONTENTS ..............................................................................................4
3. PRODUCT FEATURES ..............................................................................................4
4. PRODUCT SPECIFICATIONS ................................................................................5
4-1 Hardware ............................................................................................................................................................. 5
4-2 GPS .......................................................................................................................................................................... 6
4-3 Software............................................................................................................................................................... 6
4-4 Certificate ............................................................................................................................................................ 6
5. PRODUCT OVERVIEW 6. GETTING STARTED .................................................7
6. GETTING STARTED ..................................................................................................8
6-1 Charging the Battery..................................................................................................................................... 8
6-2 Car Mount Installation ................................................................................................................................. 8
7. SOFTWARE .................................................................................................................9
8. TOUBLESHOOTING................................................................................................28
FCC NOTICES ................................................................................................................28

3
1. Cautions
One should not carry out any operation which could impair safety while driving or cycling.
As for the operation of this product in the aircraft, please consult the aviation company first of all.
Special care should be taken when an electronics device is engaged during a flight.
Never get closer to a place emitting intensive radio waves or radiation which could affect the operation
of this product.
Never make the navigator fall down or clash with stiff objects to project it against any damage in
appearance, battery loose, data lose or other hardware mutilation.
Never let this product expose to the humid environment or rain as the water leaked into could disable
it to the extent beyond reparation.
Never switch on this product in the dusty environment.
Over-voltage, power cable strain, bending or squeezing by heavy objects is not allowed to avoid
overheating or fire disaster.
Never deploy any chemical or detergent to clean up the navigator to prevent erosion of the surface or
paintwork.
In order to eliminate the risk of electric shock, do not touch the cable power plug with wet hands and
do plunge it into the socket completely.
Never charge the battery in a neither extreme cold nor hot place, which could damage the battery.
Keep this product which is being charged out of the reach of children.
Never put it under the direct baking sunshine or place it in a place with high temperature to avoid the
problem of over-heat to the battery or this product, which could trigger fault or danger.
Put this product on an even workbench instead of blanket, pillow or carpet which could build up the
heat to a level so high to bring forth damage.
When any sort of fault comes into being, please contract with qualified maintenance personnel for
service rather than disassemble it at your own discretion.
Keep all the wires in neat order to prevent damage-fostering tangling.
Never suppress the LCD screen violently. Never bring it to the open glaring sunshine, which could
damage this product. Please wipe the screen surface clean with soft cloth.
Never cut off the power directly in the mode of navigation, music, video and image browse, which could
lose data.
When the system is reading data from or writing date into the memory card, never take out the card
directly which could make the information stored in the memory card corrupted or lost or even crash
the system.
In the process of formatting, upload or download, never disconnect the power supply abruptly.
Otherwise, it could lead to a problem of application error.
Pay attention to the compatibility of multimedia files and the product can only play back the files in the
stipulated formats.
All the TV programs, music, movies and images are under the protection of copyright. Unauthorized
usage is deemed as an infringement to the laws of copyright.
For the sake of data safety, please back up the data on the SD/MMC card into the computer on a regular
basis.
Do not adjust the volume of speaker to maximum for a long time. Otherwise, it will cause audio
distortion.
The pictures presented in this manual are only for reference.

4
2. Package Contents
3. Product Features
1. Anti-reflective 4.3-inch high brightness touch screen
2. High performance 500MHz CPU
3. Built-in 2GB flash memory
4. Stereo earphone jack
5. Built-in 1W speaker
6. Built-in high performance GPS receiver
7. Built-in high sensitivity GPS antenna
8. SDHC SD/MMC Slot
9. Music Player
10. Video Player
11. Photo Viewer
12. e-Book
13. AVIN
14. Bluetooth car kit (optional)
15. Built-in rechargeable battery
16. High speed USB 2.0
17. LED indicators
Items Quantity
GPS Navigator 1
Car Charger 1
Bracket 1
Cradle 1
USB Cable 1
AVIN Cable 1
Data Disk 1
AC Charger (optional) 1

5
4. Product Specifications
4-1 Hardware
Processor Atlas IV 500MHz
Type Anti-reflective 4.3”high brightness LCD
touch screen
Pixel 480 x 272 (H x W)
Display
Color 65535 color
GPS Chipset SiRF Atlas IV
GPS
Antenna Built-in high performance patch ANT
Flash 2GB
DDR RAM 64MB
Memory
SD/MMC SDHC SD/MMC slot
Speaker Mono, 1W RMS @ 8W
Earphone Jack 2.5mm jack
Audio
Microphone
(optional) High sensitivity, omni-directional
Power Supply 5Vdc input via mini USB jack
Power
Battery 820mAH
Signal Format CVBS
AVIN
Video Format NTSC/PAL
Bluetooth (optional) V1.2, Class 2, with HFP
Keys Power button, Reset, Menu button
I/O USB v2.0
Operation
Temperature
-10 ºC to 60 ºC (working)
0 ºC to 40 ºC (charging)
Storage
Temperature -20 ºC to 70 ºC
Environment
Humidity 30% to 80% non-condensing
Dimensions 119 x 78 x 15 mm
Mechanical
Weight 161 g
6
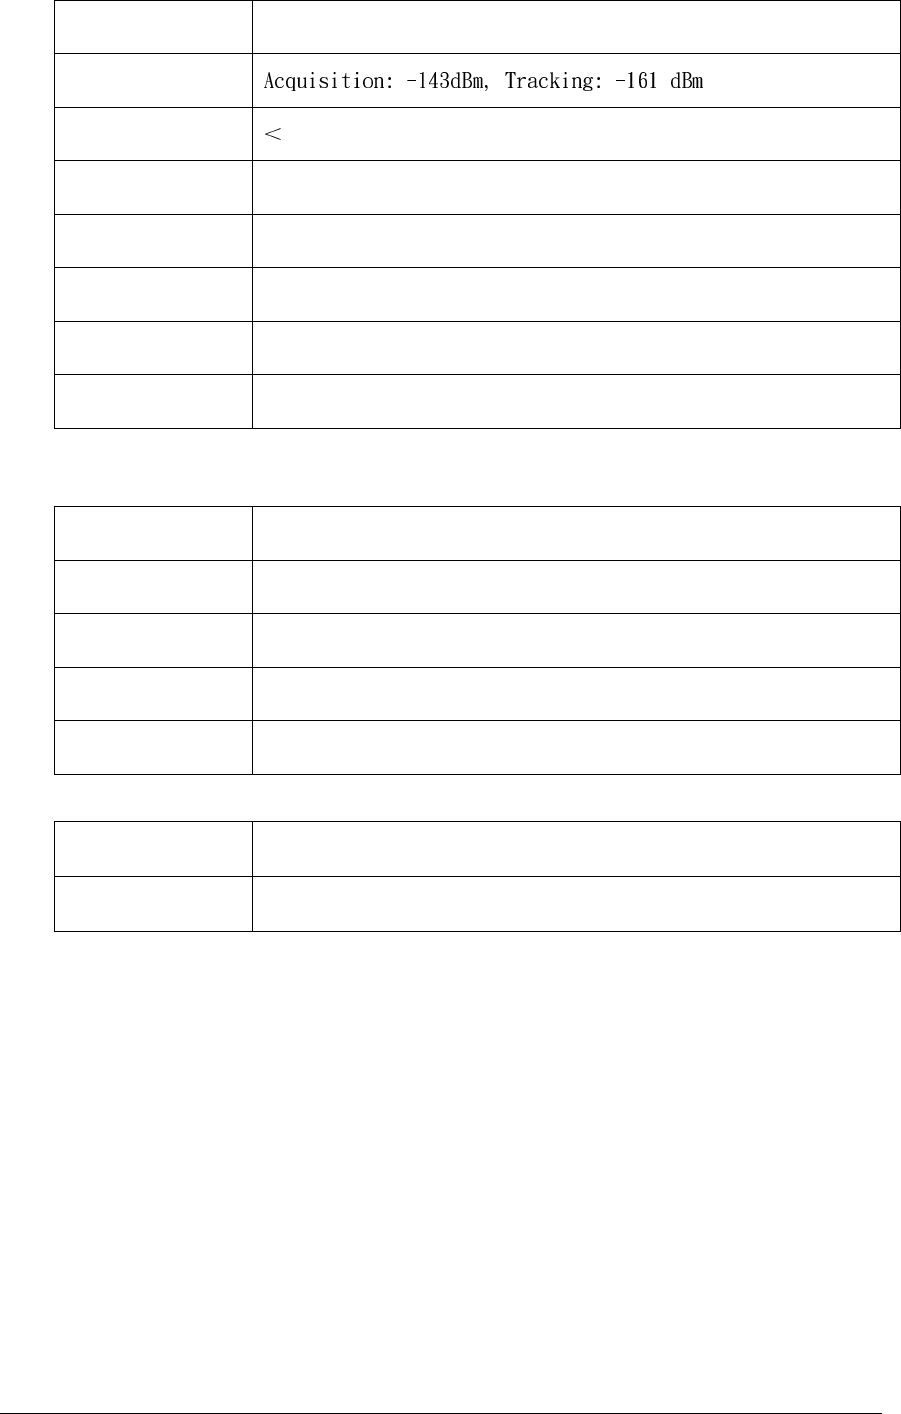
4-2 GPS
Channels 64 channels
Sensitivity
Accuracy 10 meters (2DRMS)
Velocity 0.1 m/s
Altitude 18,000 meters (60,000 feet) max
Cold Start 45 seconds average (open sky)*
Warm Start 38 seconds average (open sky)*
Hot Start 3 second average (open sky)*
*Open sky means the device should be able to see at least 7 satellites.
4-3 Software
Operation
System WINCE 6.0
Music Player WMA
Video Player WMV
Photo Viewer BMP / JPG / GIF / PNG
E-book TXT
4-4 Certificate
EMC FCC/ CE/ BSMI
Others RoHS
7
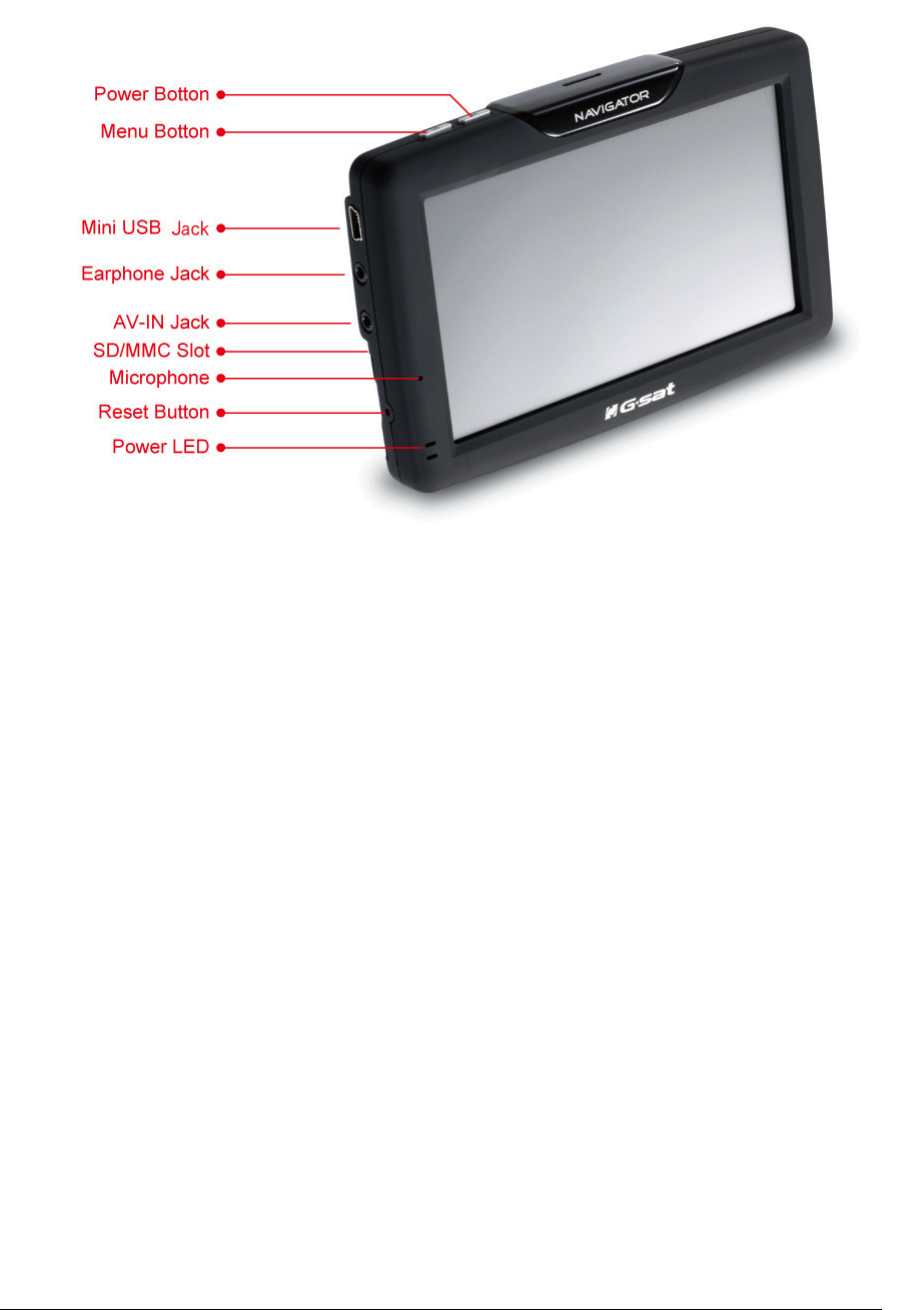
5. Product Overview

8
6. Getting Started
6-1
Charging the Battery
There are three methods to charge the GA-4640.
1. Charge by Using the Car Charger
Connect the GA-4640 to car cigarette lighter by the car charger provided.
2. Charge by Using the AC Charger
Connect the GA-4640 to wall outlet by the AC charger provided.
3. Charge by Using the USB Cable
Connect the GA-4640 to PC by the USB cable provided.
NOTE: Before using the GA-4640, please charge the battery for more than 8 hours to
get the best battery performance.
6-2 Car Mount Installation
1. Attach the bracket to the cradle provided.
2. Clean up the windshield with a dry clean cloth.
3. Place the suction cup on the windshield and flip the lever to fix the cradle on the windshield.
4. Attach the GA-4640 to the bracket provided.
5. Loose the swivel screws to adjust the GA-4640 to the proper position, and then tighten the
swivel screws.
9
7. Software
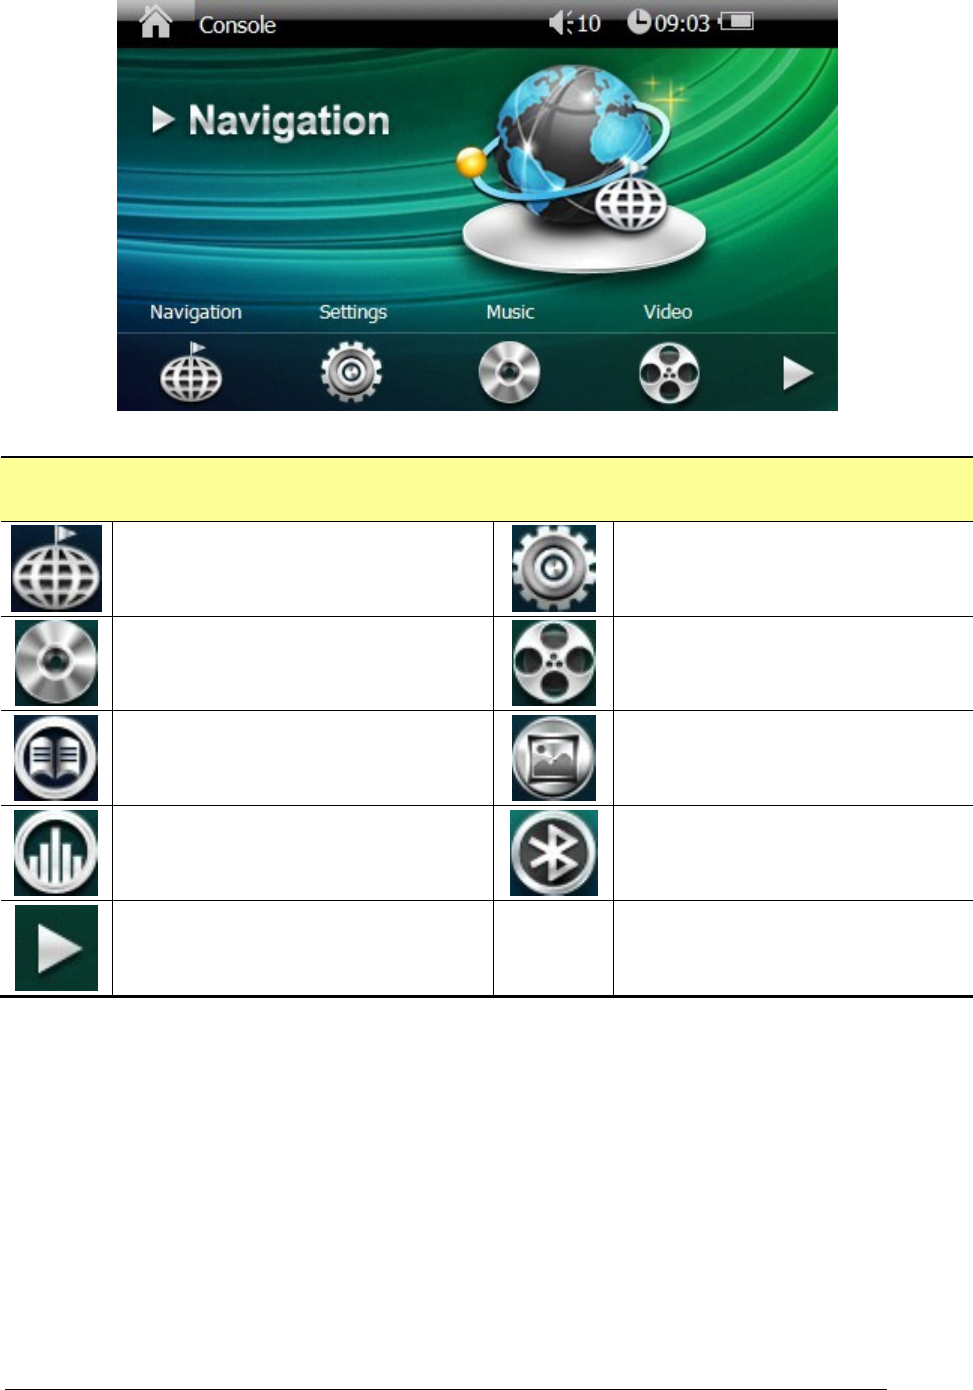
Console
Tap this icon to start the navigation
software.
Tap this icon to enter the Settings
menu.
Tap this icon to start the Music
Player application.
Tap this icon to start the Video
Player application.
Tap this icon to start the e-Book
application.
Tap this icon to start the Photo
Viewer application.
Tap this icon to start the GPS
monitor application.
Tap this icon to start the Bluetooth
application.
Tap this icon to go to the next page.
10
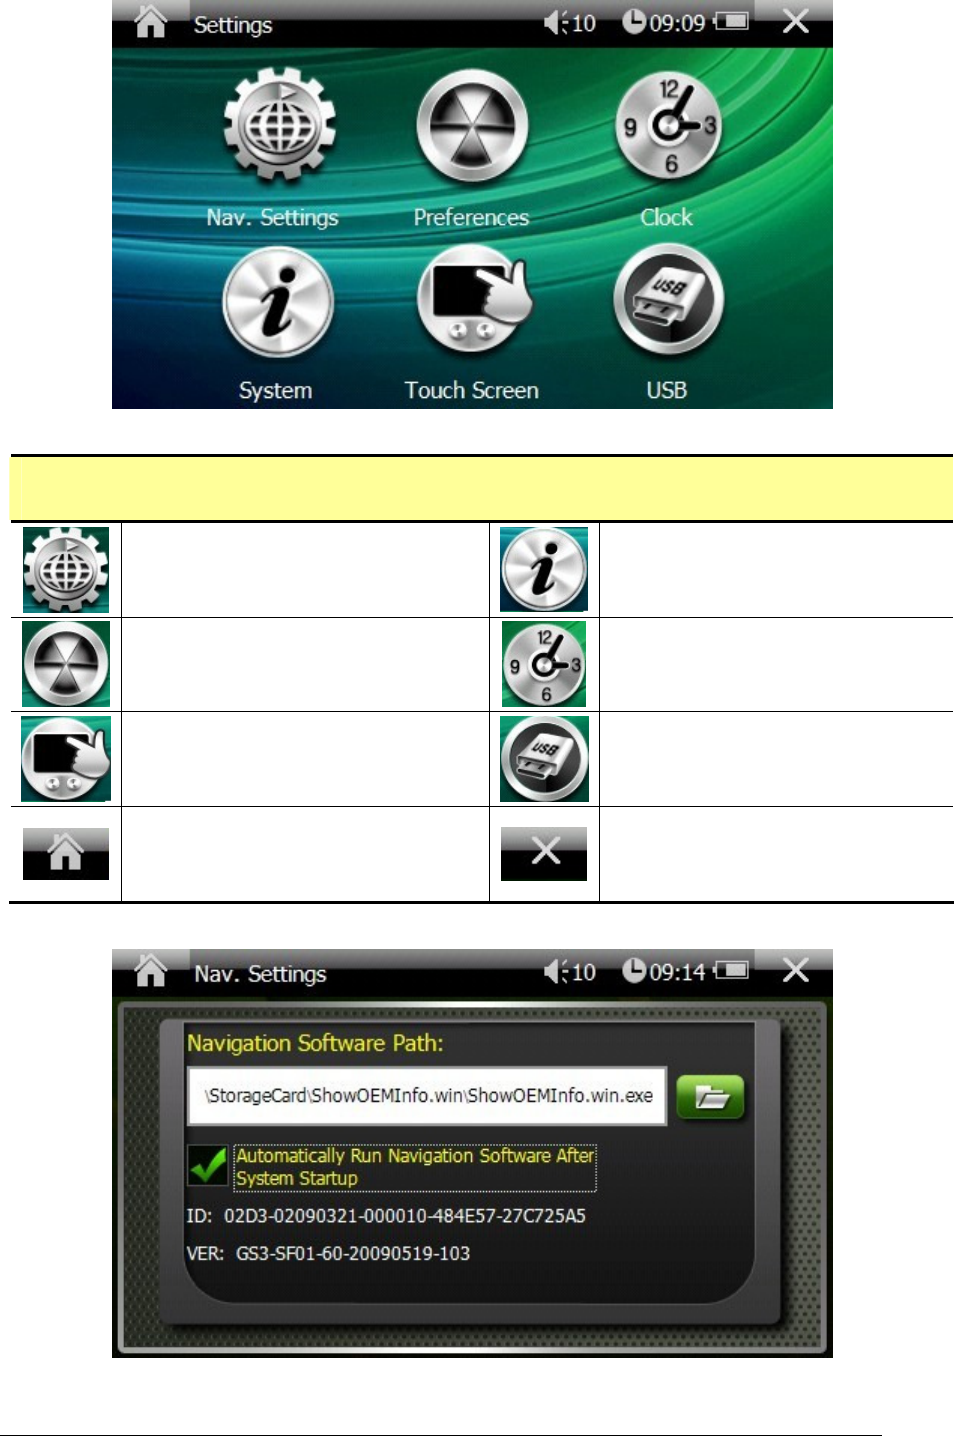
Settings
Tap this icon to enter the Nav.
Settings menu.
Tap this icon to view the system
information.
Tap this icon to enter the
Preferences setting menu.
Tap this icon to enter the Clock
menu.
Tap this icon to start the touch
screen calibration.
Tap this icon to enter the USB
menu.
Go back to the Console.
Go back to the Console.
11
Nav. Settings
Tap this icon to set the path of
the navigation software.
Check this box to enable auto-run
function.
Go back to the Console.
Go back to the Settings menu.
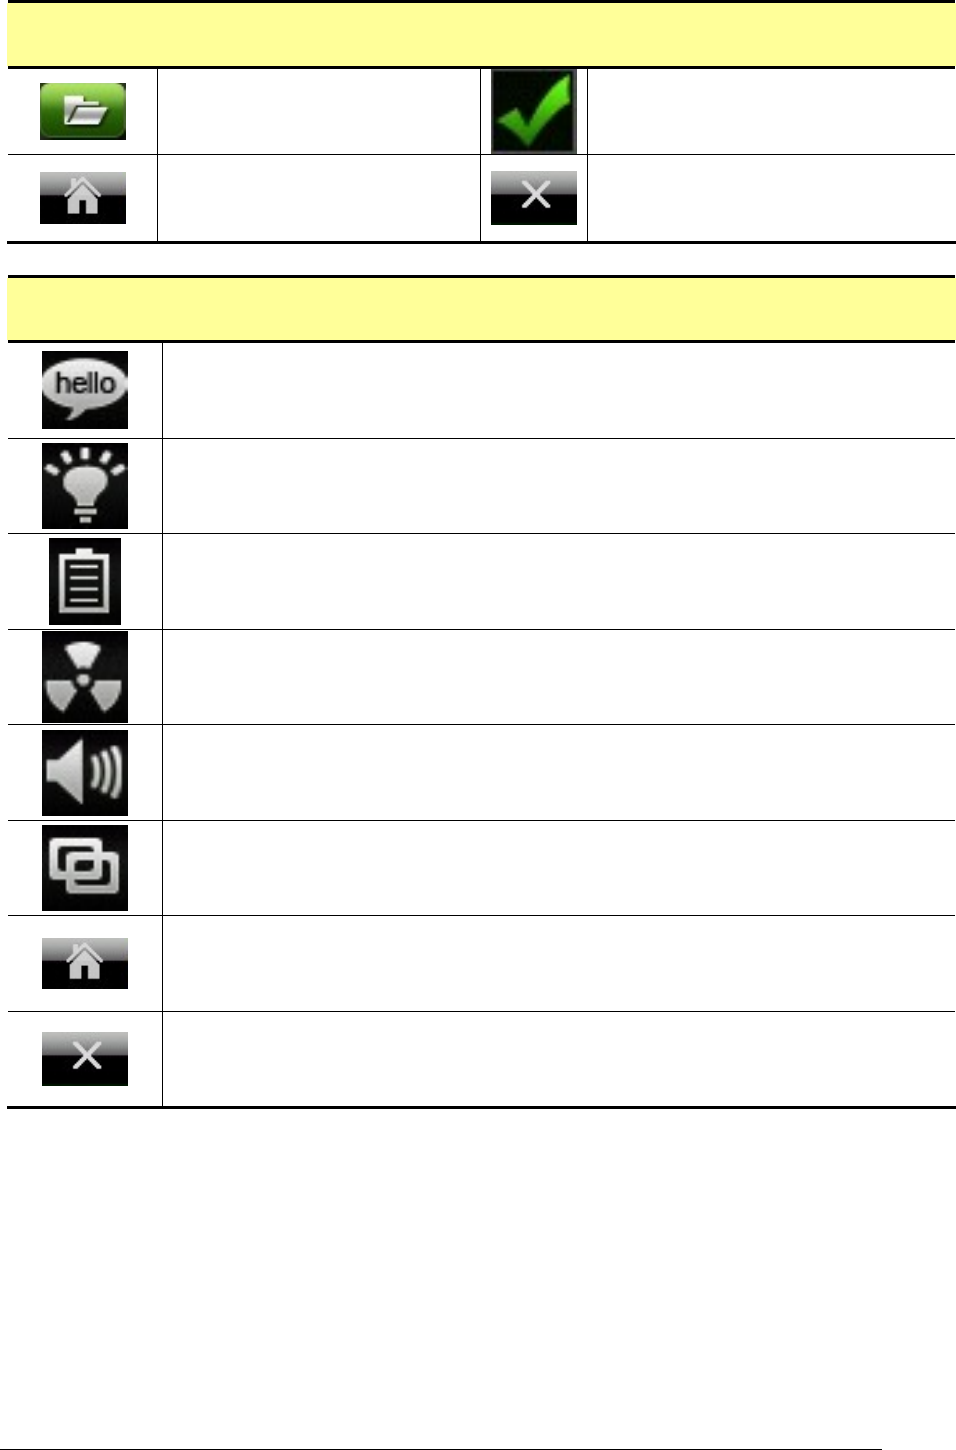
Preferences
Tap this icon to set language.
Tap this icon to set backlight.
Tap this icon to set power management mode.
Tap this icon to set switch effect.
Tap this icon to set volume.
Tap this icon to set UI style.
Go back to the Console.
Go back to the Settings menu.
12
Language
Roll the menu to select the language.
Go back to the Console.
Go back to the Settings menu.
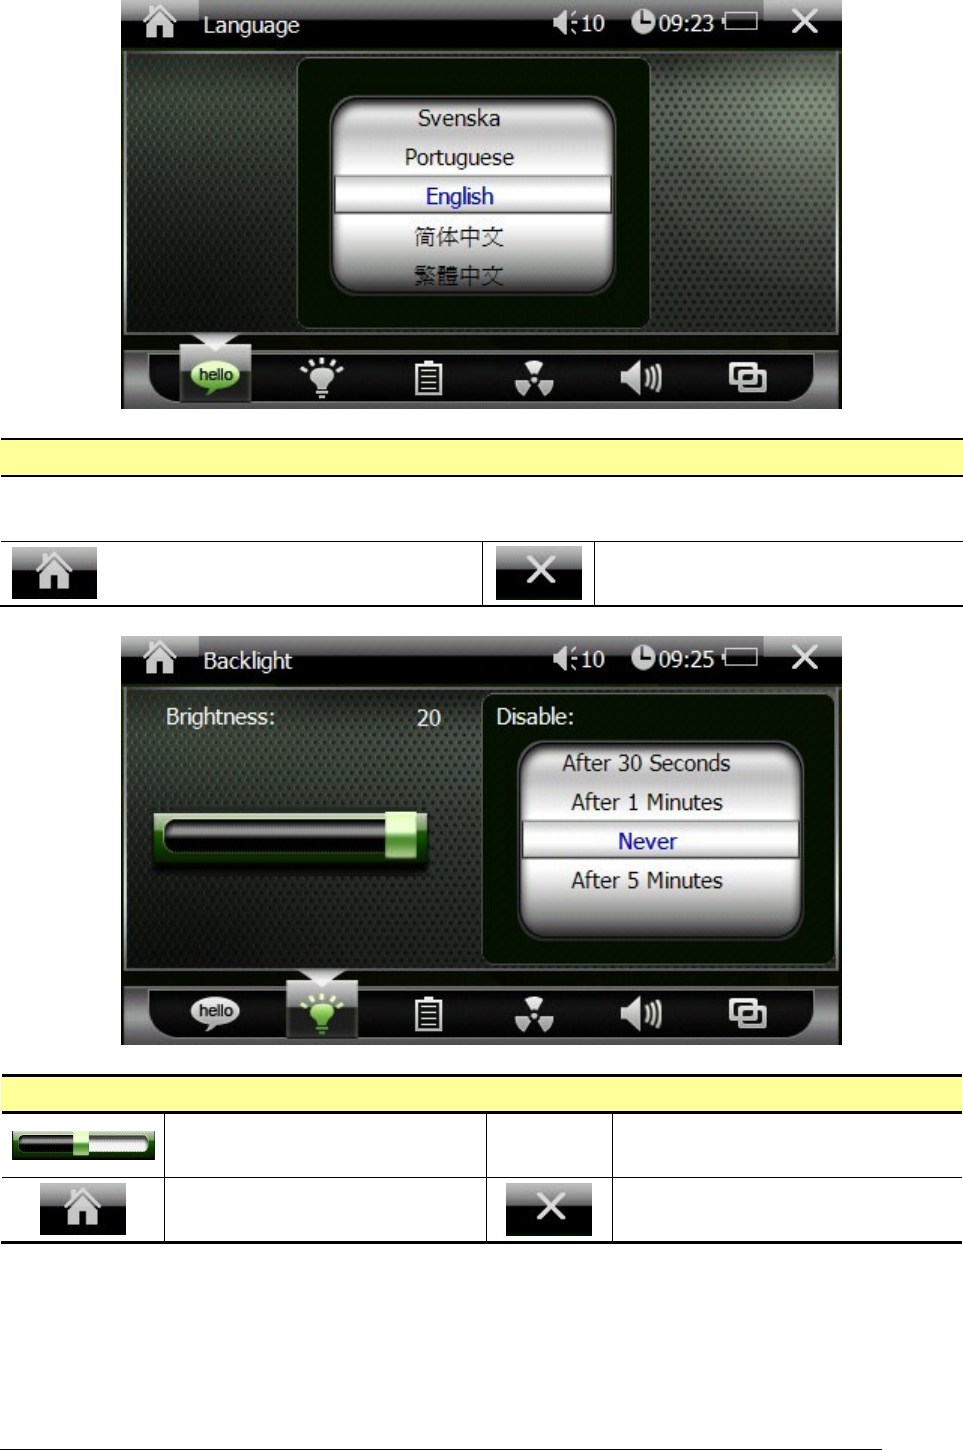
Backlight
Slide on the brightness bar to
adjust brightness.
Disable
Select the backlight turn-off
time.
Go back to the Console.
Go back to the Settings menu.
13
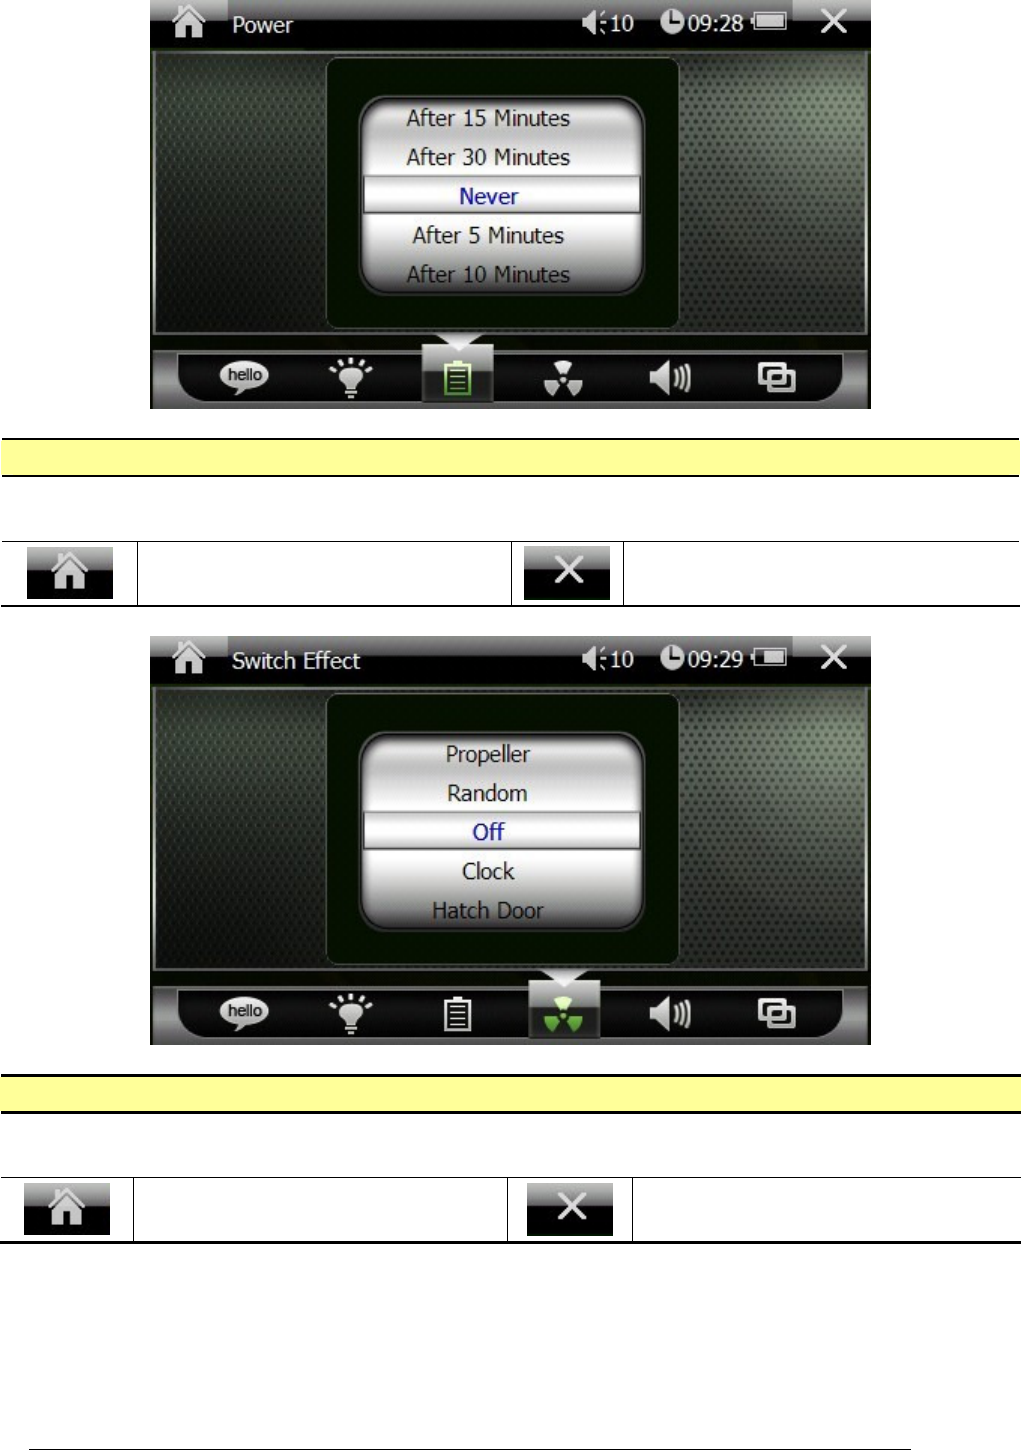
Power
Roll the menu to select power management mode.
Go back to the Console.
Go back to the Settings menu.
Switch Effect
Roll the menu to select the switch effect.
Go back to the Console.
Go back to the Settings menu.
14
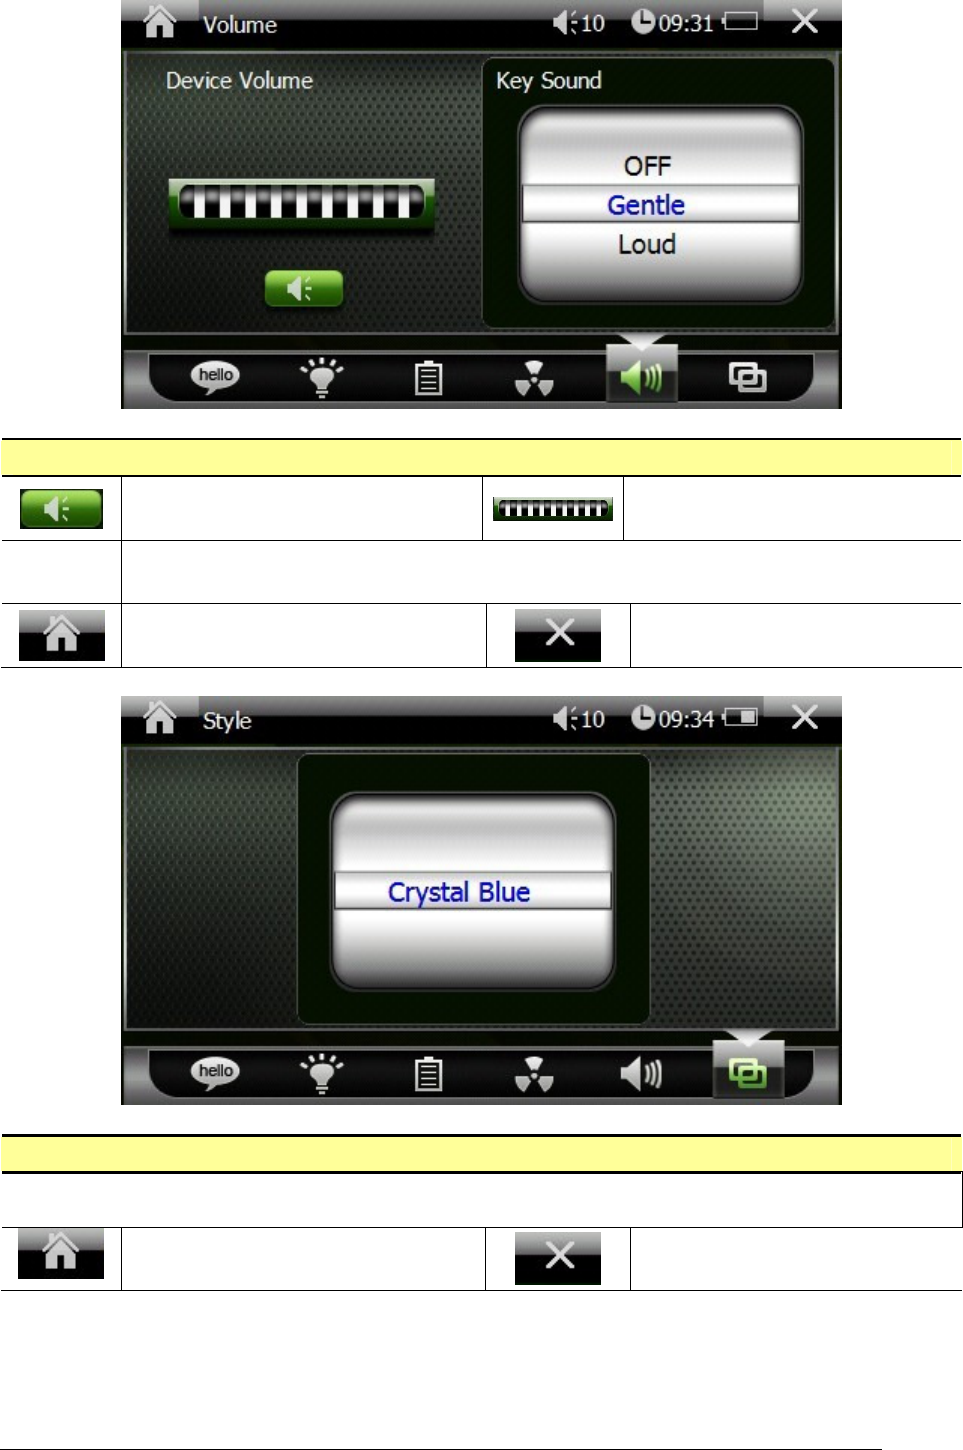
Volume
Tap this icon to mute or resume
the sound.
Slide on the volume bar to
adjust device volume.
Key
Sound Roll the menu to select key sound.
Go back to the Console.
Go back to the Settings menu.
Style
Roll the menu to select UI style.
Go back to the Console.
Go back to the Settings menu.
15
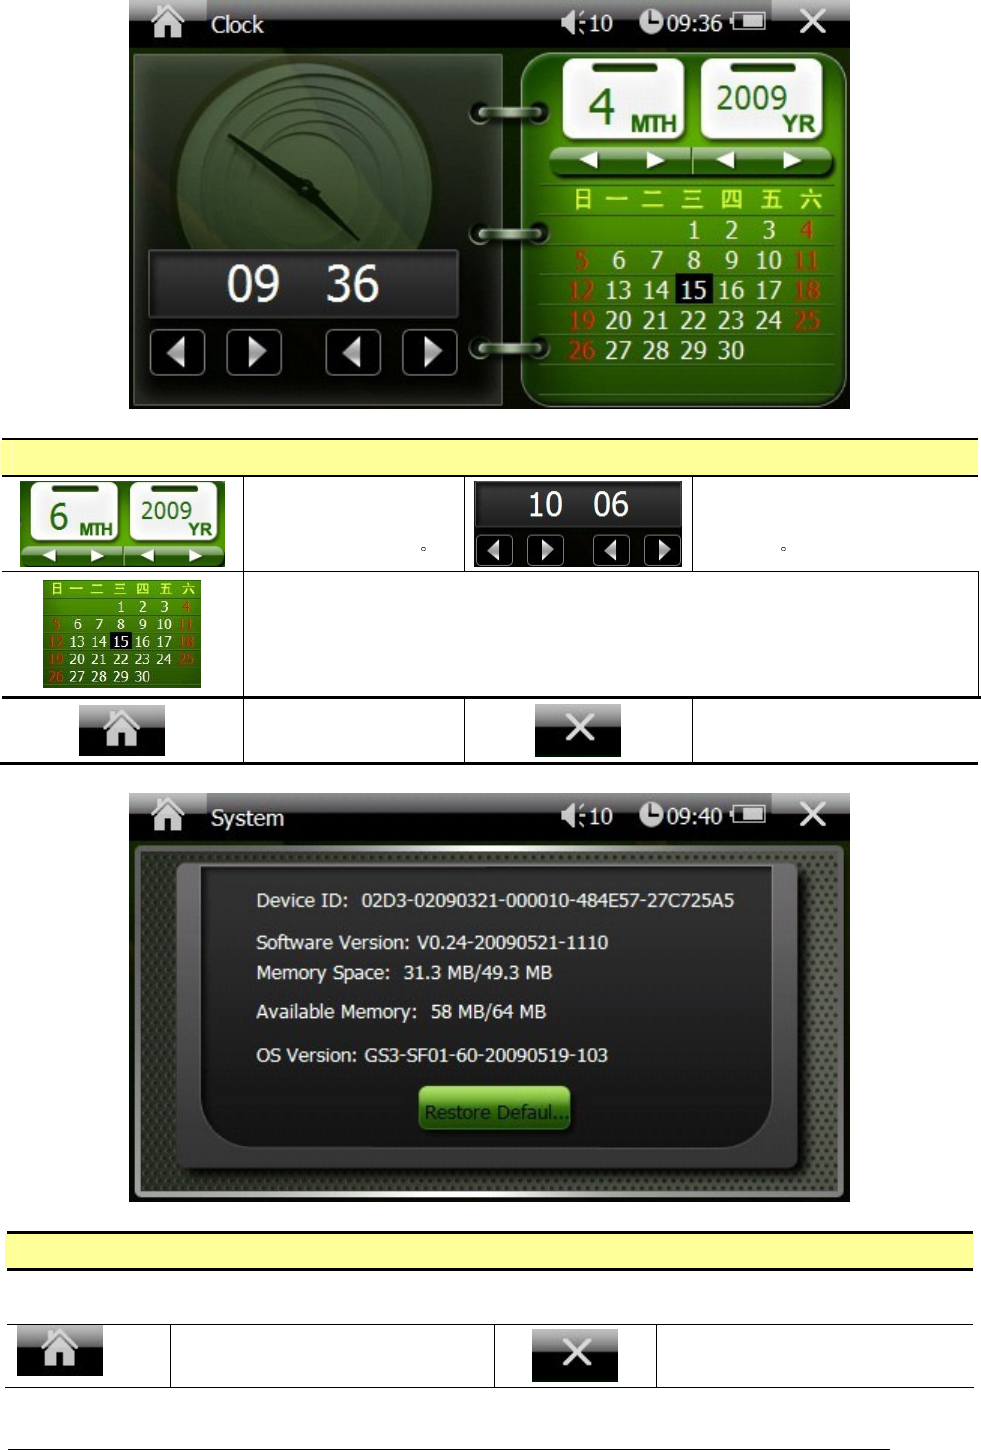
Clock
Tap the right or the
left arrow to set
month and year
Tap the right or the left
arrow to set hour and
minute
Tap a certain date on the calendar to set date.
Go back to the
Console.
Go back to the Settings
menu.
System
Check the system information including Device ID, Software Version, RAM Memory, ROM
Memory, and OS Version.
Go back to the Console.
Go back to the Settings
menu.
16
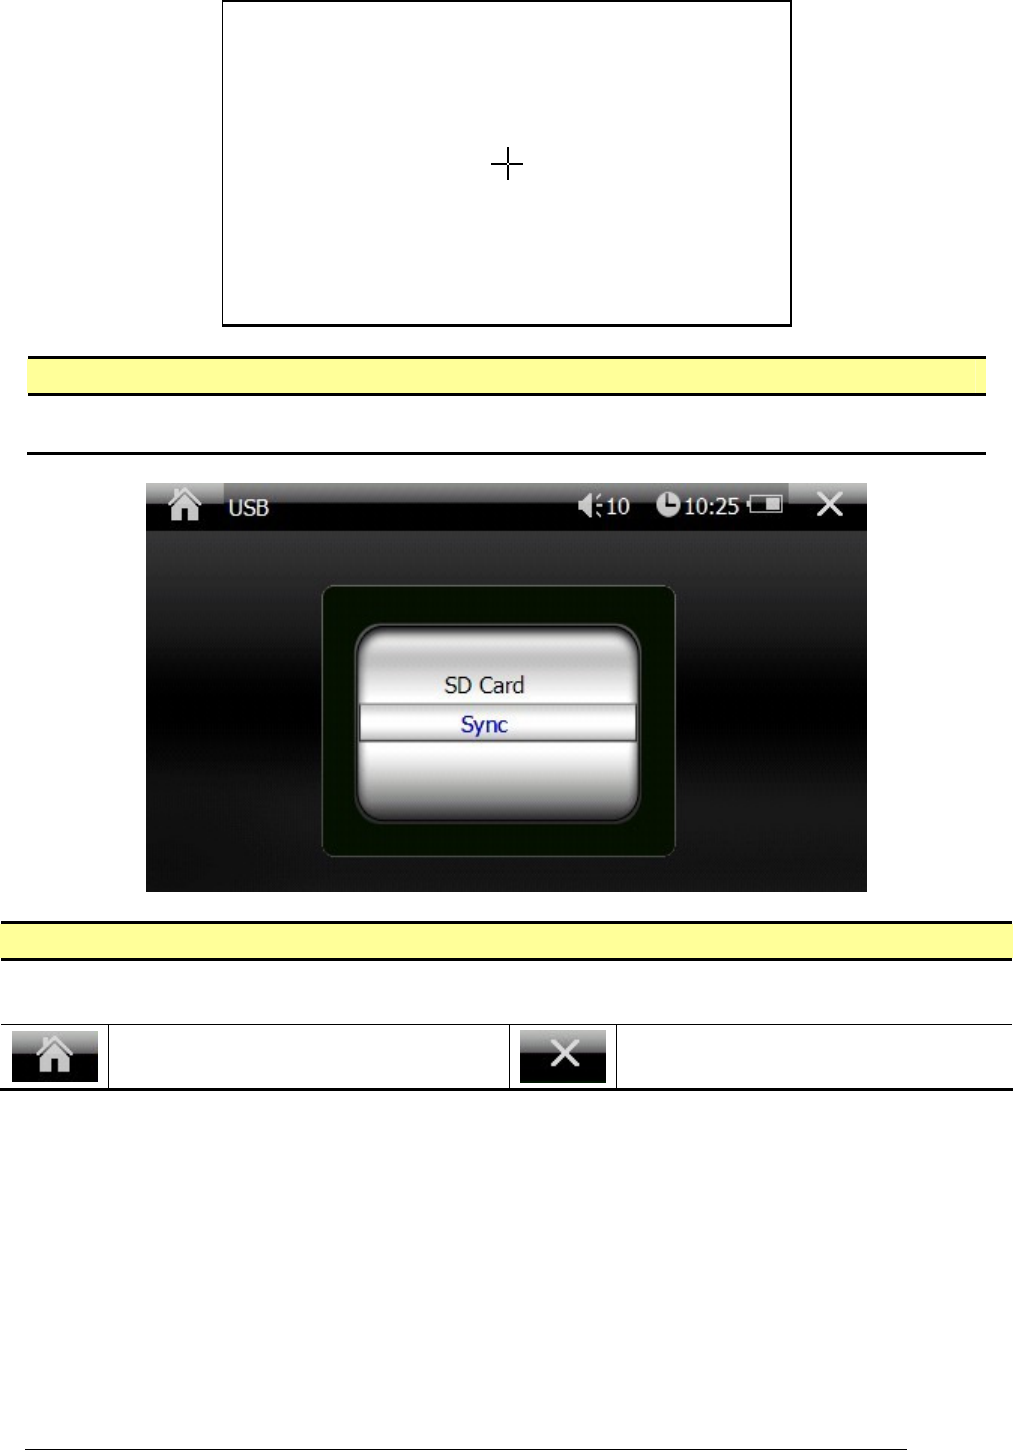
Touch Screen
Calibrate the touch screen by tapping the cross mark.
USB
Scroll the menu to select USB connection mode.
Go back to the Console.
Go back to the Settings menu.

17
Music Player
Tap this icon to start playing.
Tap this icon to pause playing.
。
Tap this icon to play next sound
track.
Tap this icon to play previous
sound track.
Play by following the order of
the playlist.
Play by random order of the
playlist.
Tap this icon to mute the sound.
Tap this icon to resume the
sound.
Edit playlists.
Delete sound tracks from the
playlist.
Go back to the Console.
Exit the Music Player program.
18
Edit Playlist
Select files to be added to the
playlist. Confirm playlist editing.
Go back to the Console.
Exit the playlist edit menu.
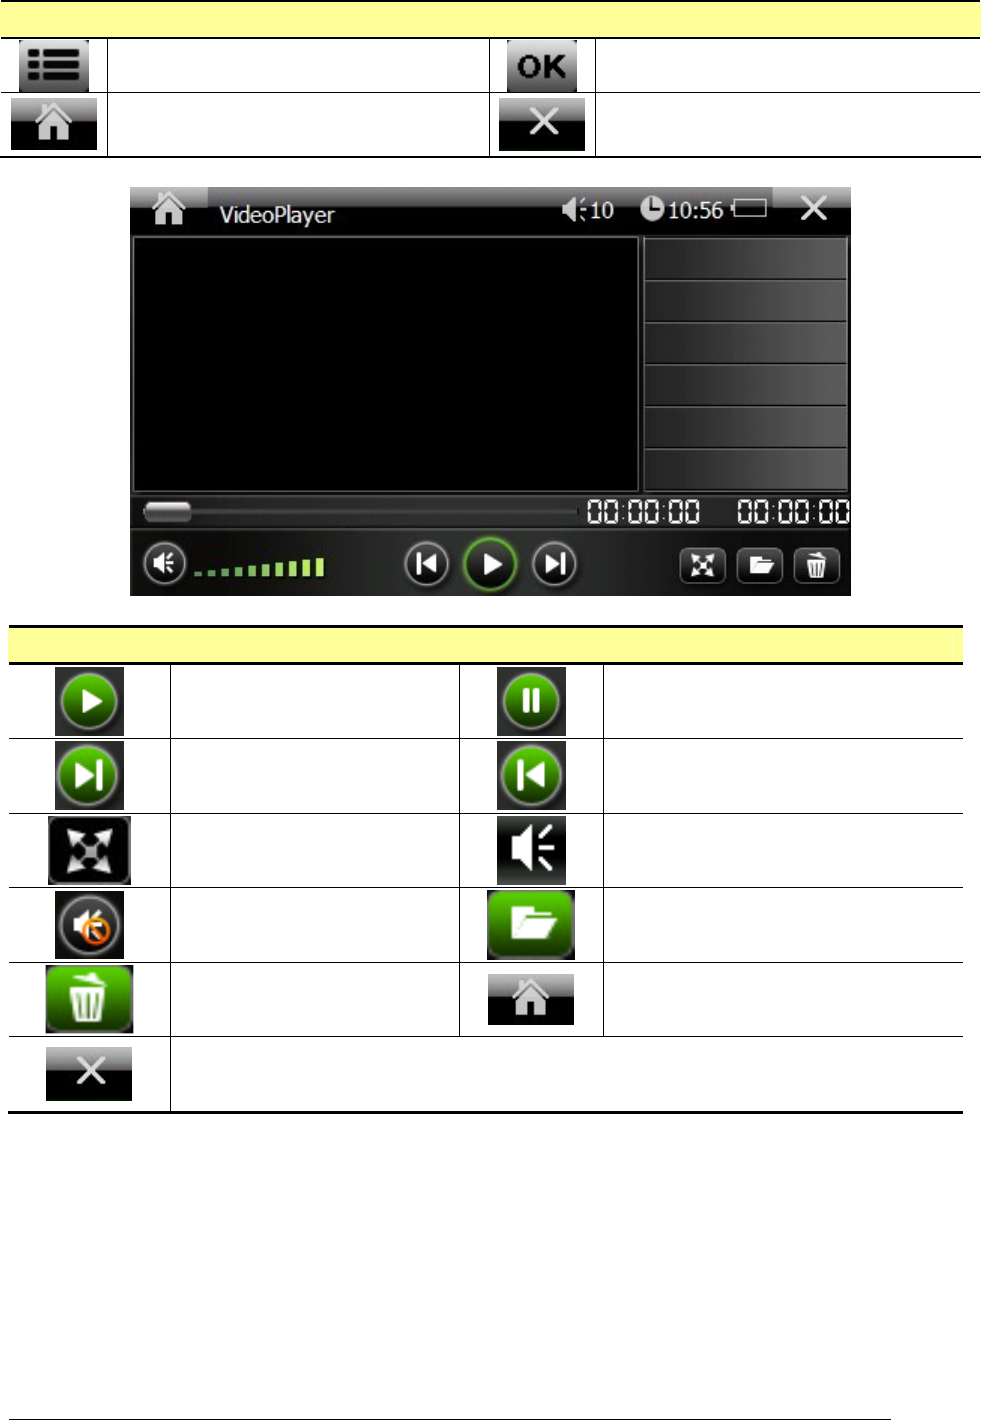
Video Player
Tap this icon to start
playing.
Tap this icon to pause playing.
Tap this icon to go to play
next video clip.
Tap this icon to go to play previous
video clip.
Tap this icon to enter full
screen mode.
Tap this icon to mute the sound.
Tap this icon to resume the
sound.
Edit playlist
Delete all files from the
playlist.
Go back to the Console.
Exit the Video Player application.
19
Edit Playlist
Select files to be added to the
playlist. Confirm playlist editing.
Go back to the Console.
Exit the playlist edit menu.
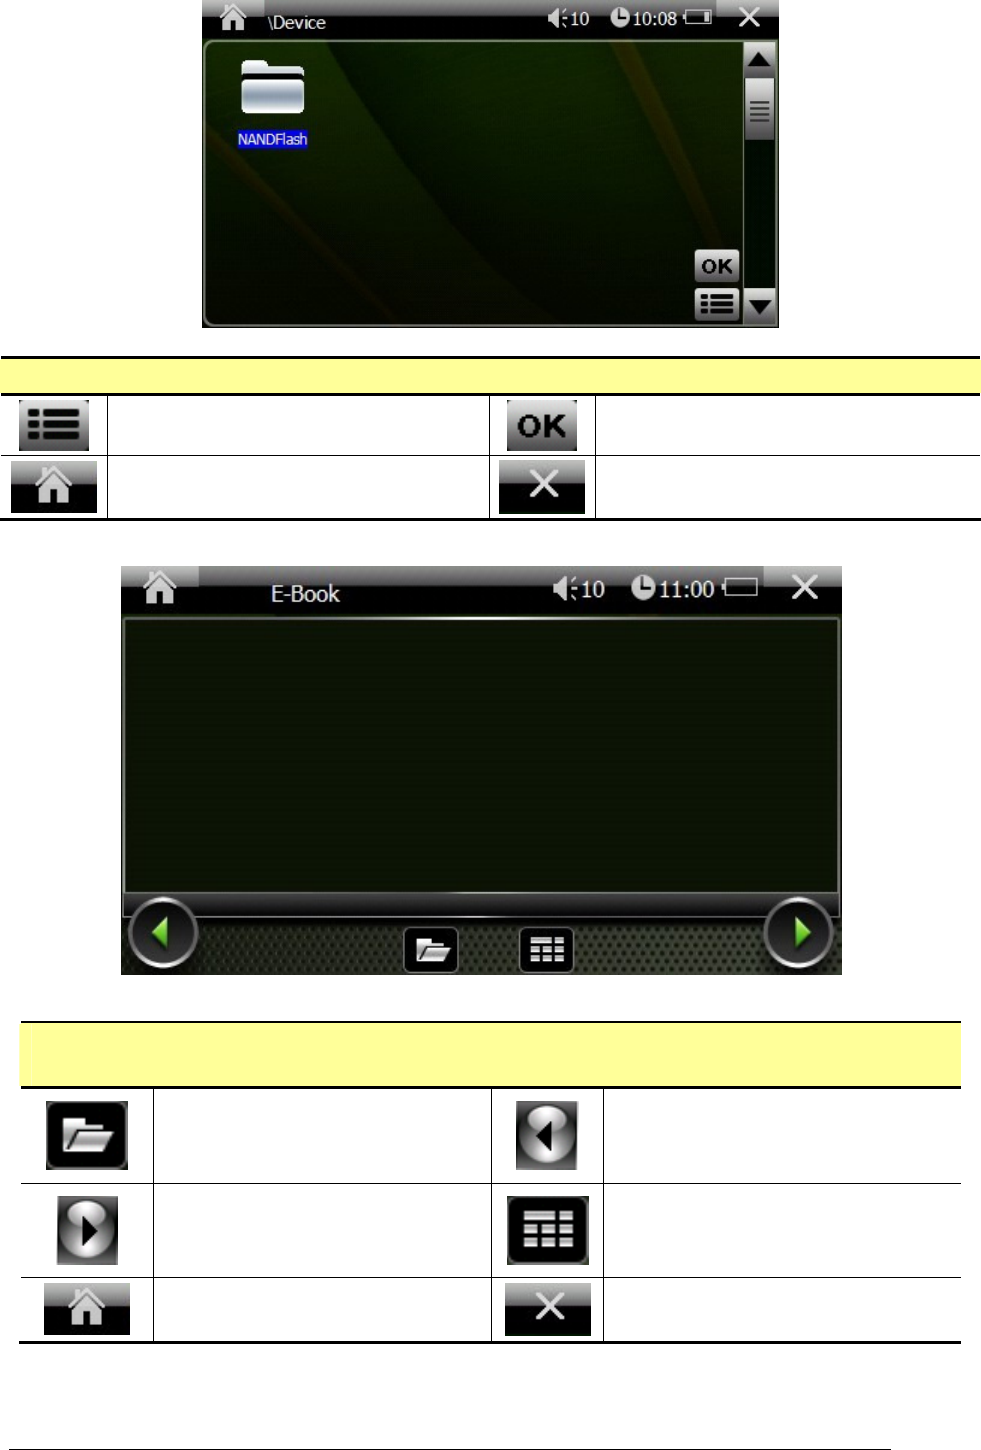
E-Book
Tap this icon to open files.
Go to previous page.
Go to next page.
Go to selected page.
Go back to the Console.
Exit the e-Book program.
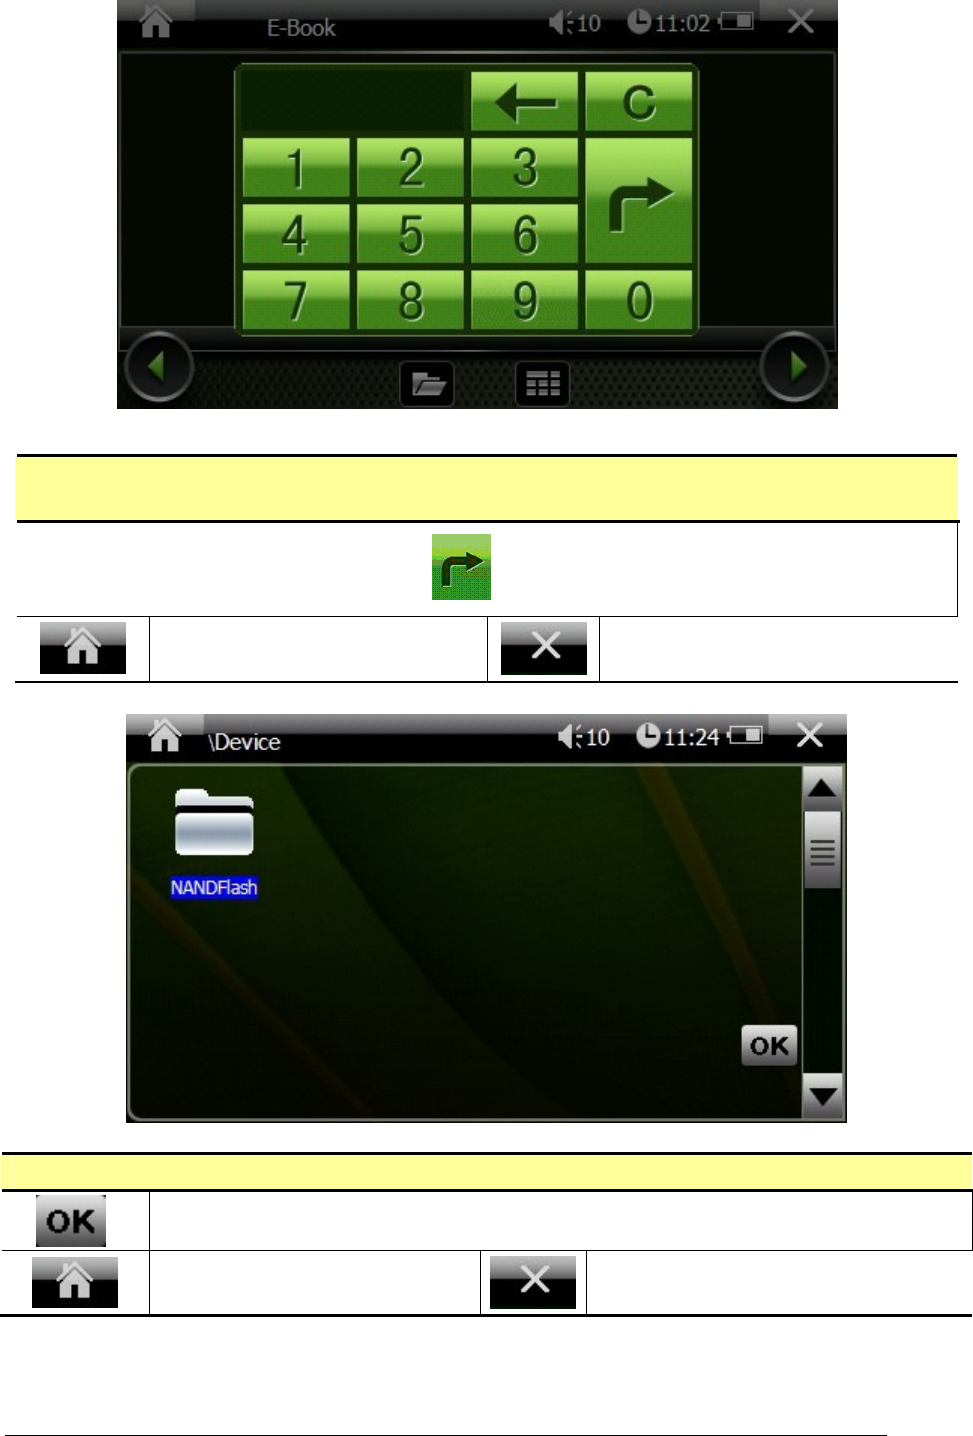
20
Page Select
Enter the page number and tap to read the selected page.
Go back to the Console.
Exit the Page Select.
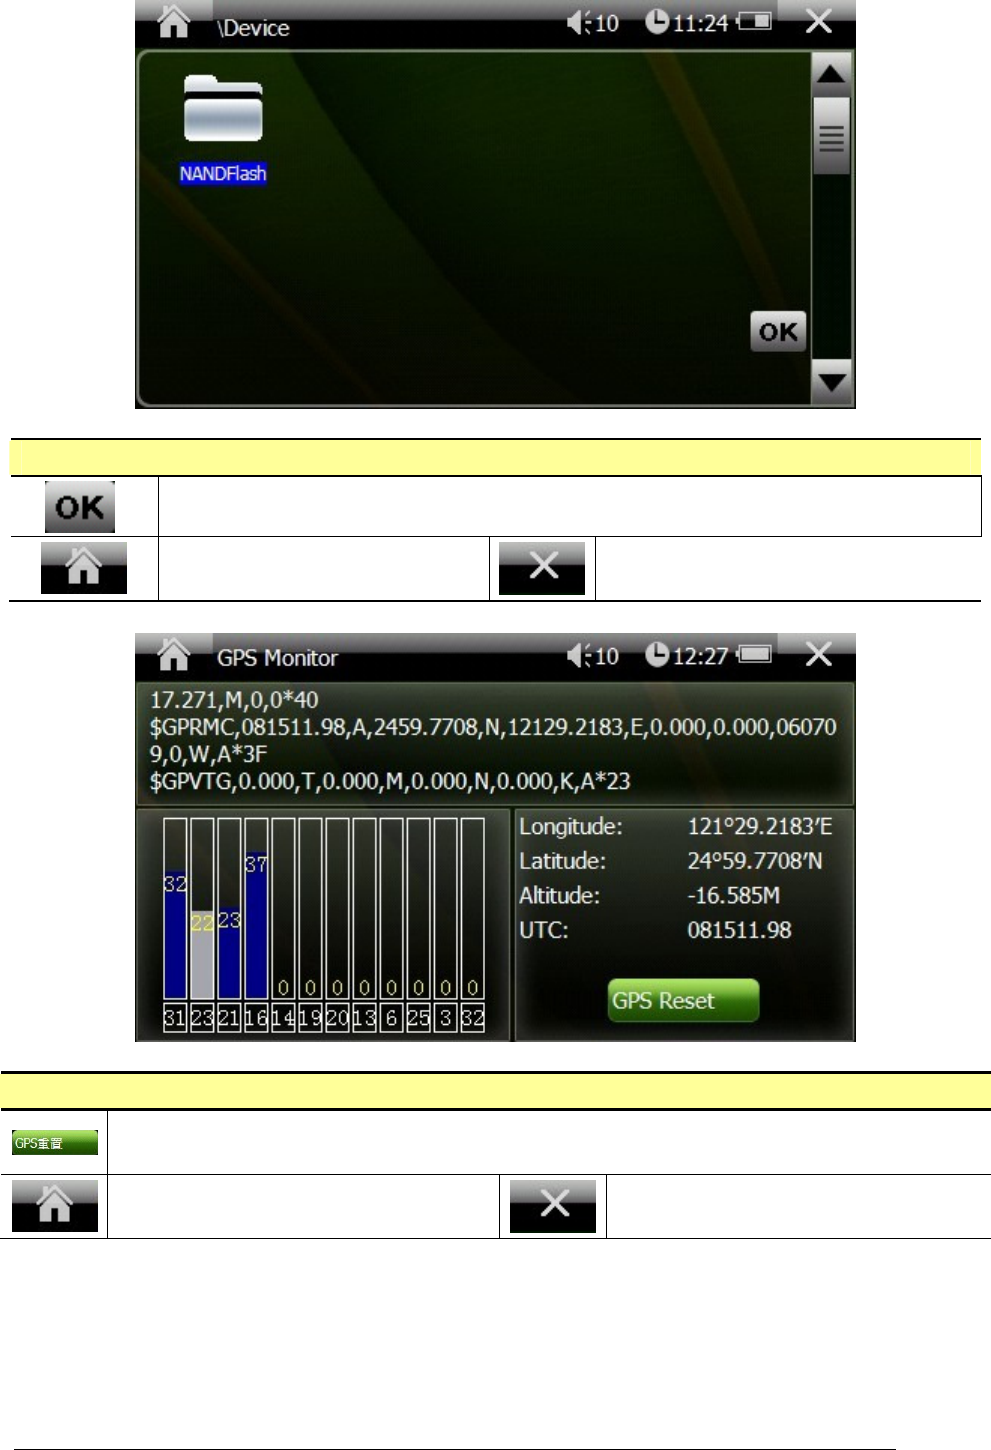
Open Files
Confirm the file selected.
Go back to the Console.
Exit the Open Files menu.

21
Image Viewer
Previous photo.
Tap this icon to enter full screen
mode.
Tap this icon to start the slide show
mode.
Tap this icon to rotate the photo
clockwise by 90 degree.
Zoom out.
Zoom in.
View previous photo.
View next photo.
Go back to the Console.
Go back to the Console.
22
Open Files
Confirm the file selected.
Go back to the Console.
Exit the Open Files menu.
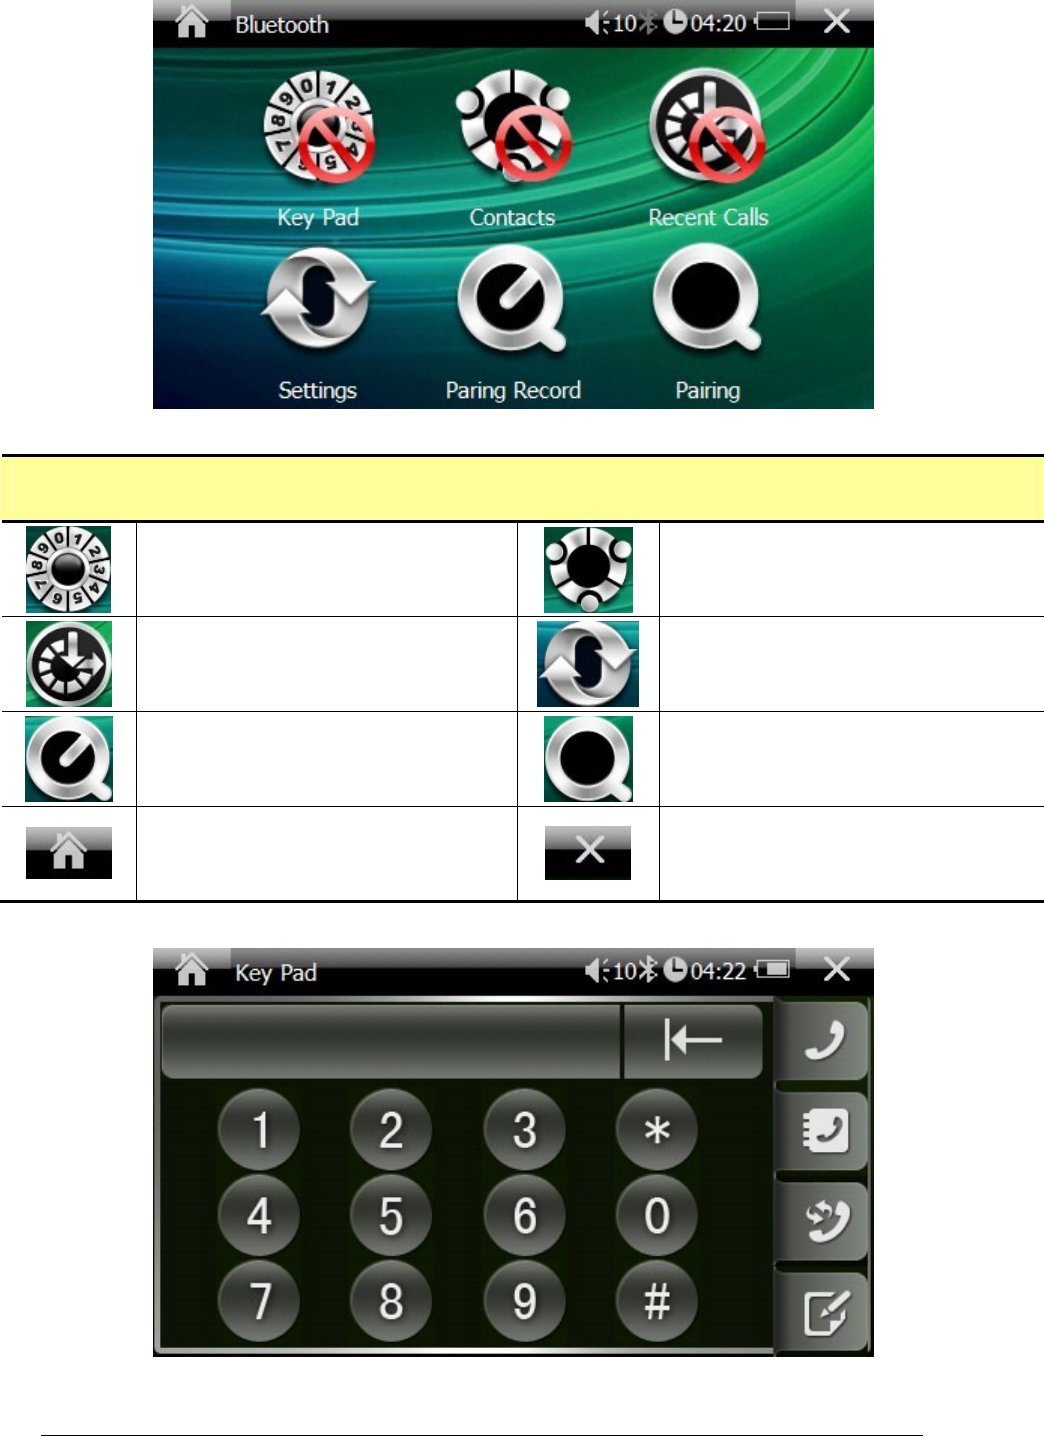
GPS Monitor
Tap this icon to reset the GPS receiver.
Go back to the Console.
Go back to the Console.
23
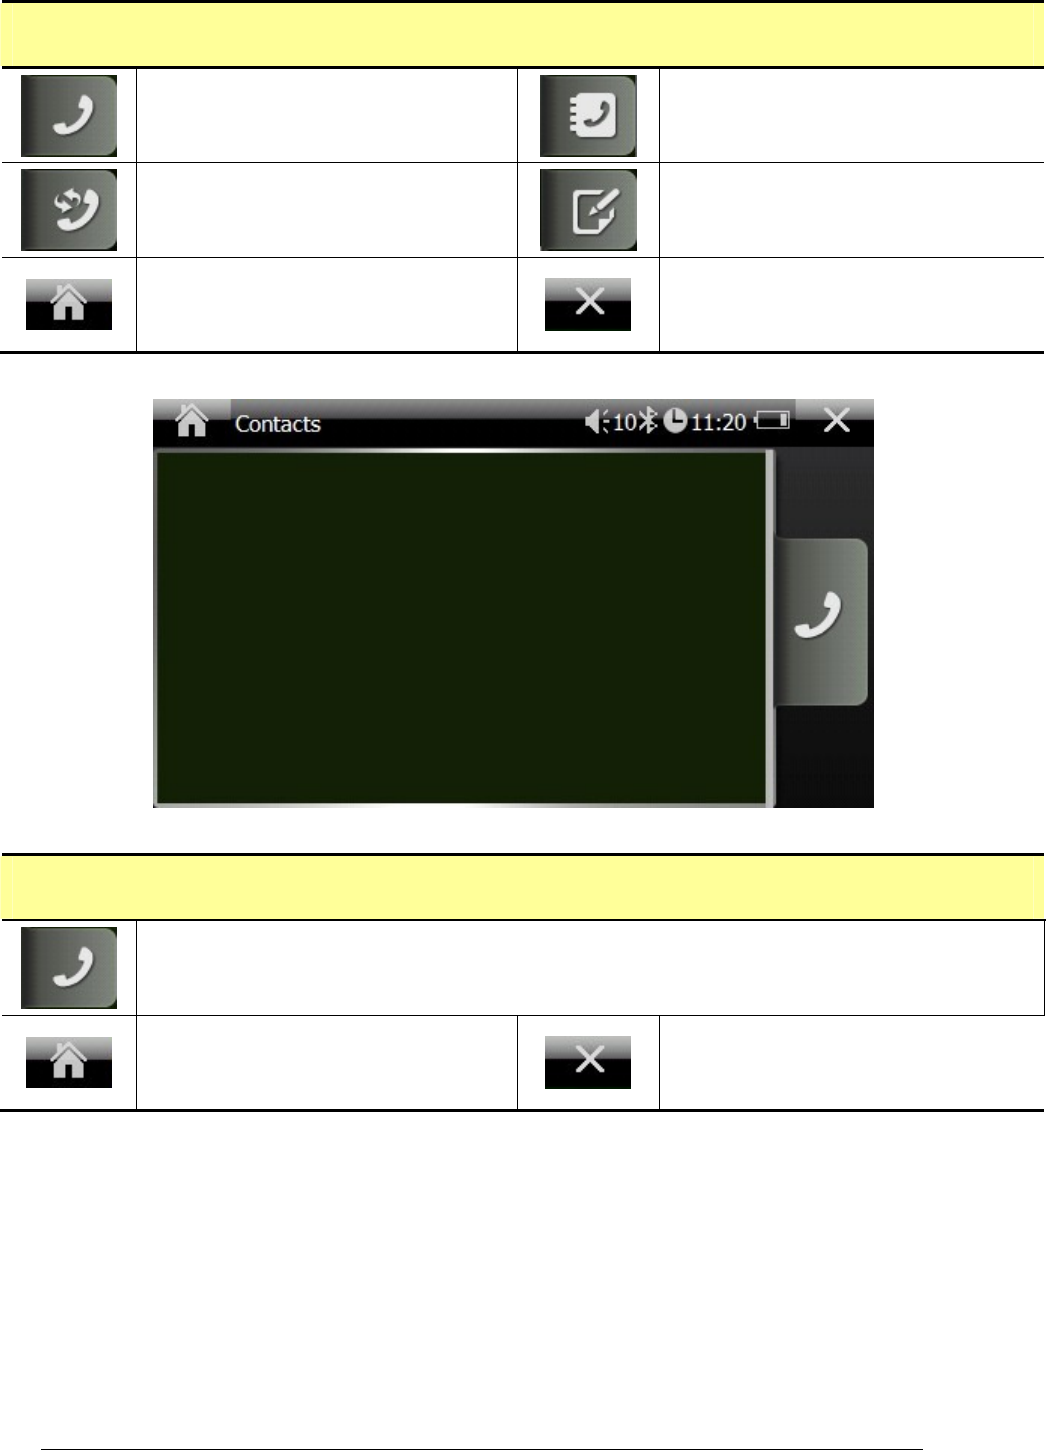
Bluetooth
Tap this icon to start the dialing key
pad.
Tap this icon to view contacts.
Tap this icon to view recent calls.
Tap this icon to enter the Bluetooth
setting menu.
Tap this icon to view pairing record.
Tap this icon to start pairing.
Go back to the Console. Go back to the Console.
24
Key Pad
Tap this icon to dial out.
Tap this icon to view contacts.
Tap this icon to redail the last call.
Tap this icon to view recent calls.
Go back to the Console. Go back to the Bluetooth menu.
Contacts
Tap this icon to dial out.
Go back to the Console. Go back to the Bluetooth menu.

25
Recent Calls
Tap this icon to dial out.
Tap on this button switch between
pages of missed calls, received calls,
and dialed calls.
Go back to the Console. Go back to the Bluetooth menu.
Setting
Tap this icon to enter PIN code.
Check the box to enable
Retain Bluetooth.
26
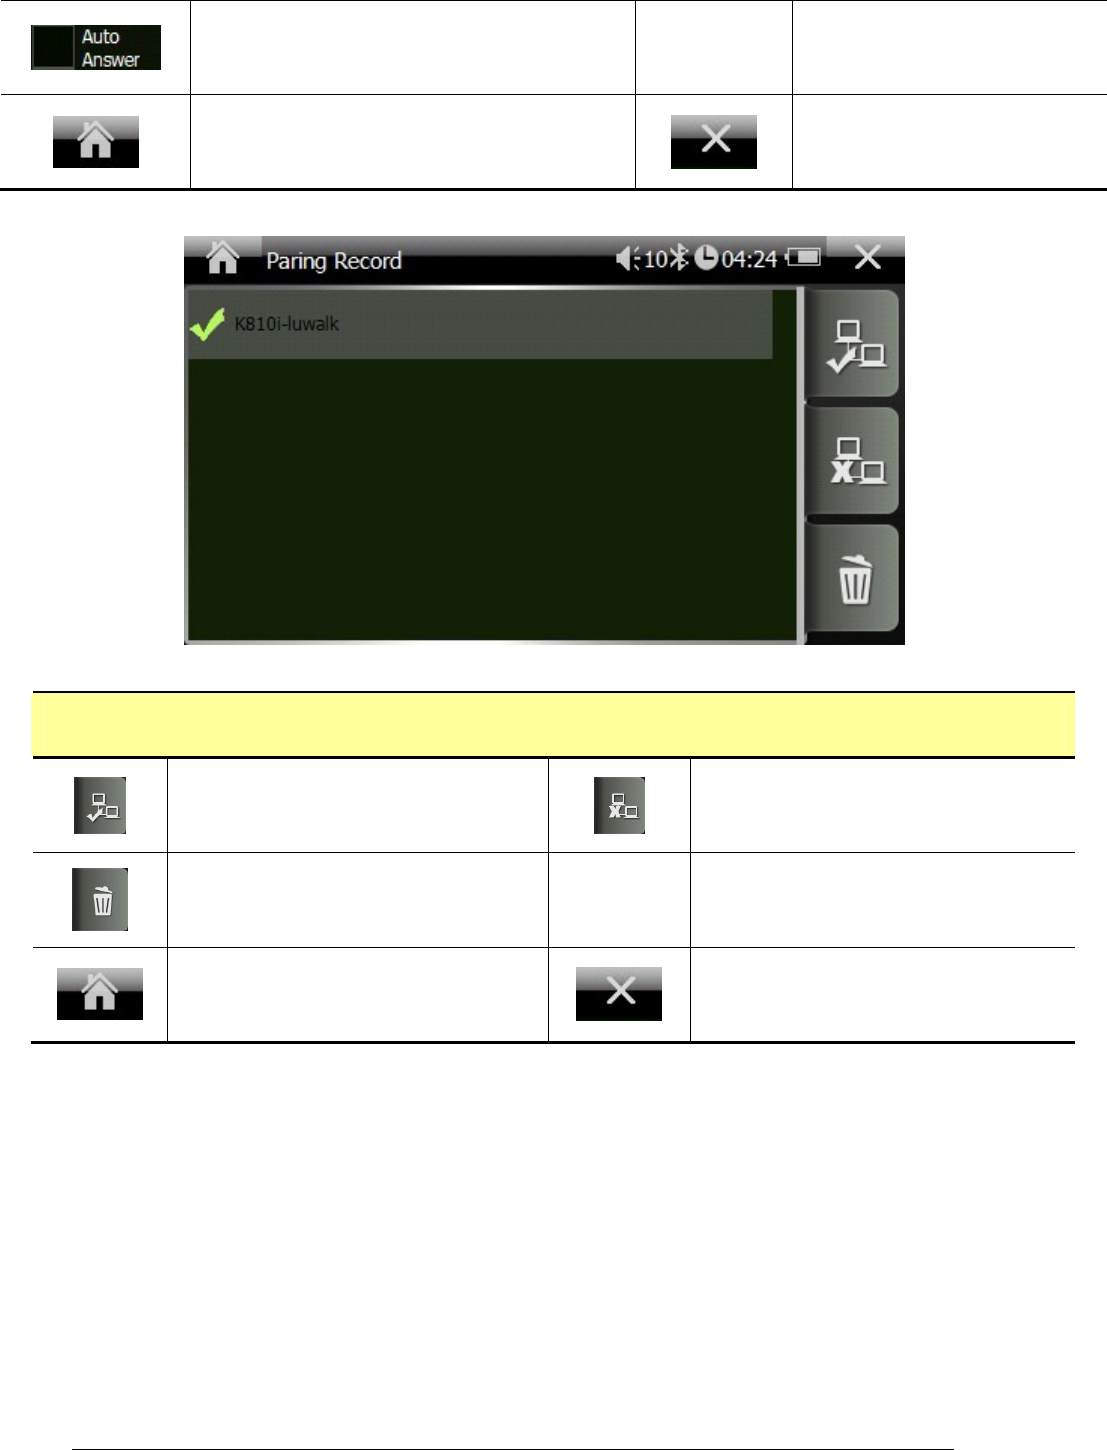
Check the box to enable Auto Answer.
Go back to the Console.
Go back to the Bluetooth
menu.
Pairing Record
Connect to the selected device.
Disconnect current connection.
Delete all pairing records.
Go back to the Console. Go back to the Bluetooth menu.
27
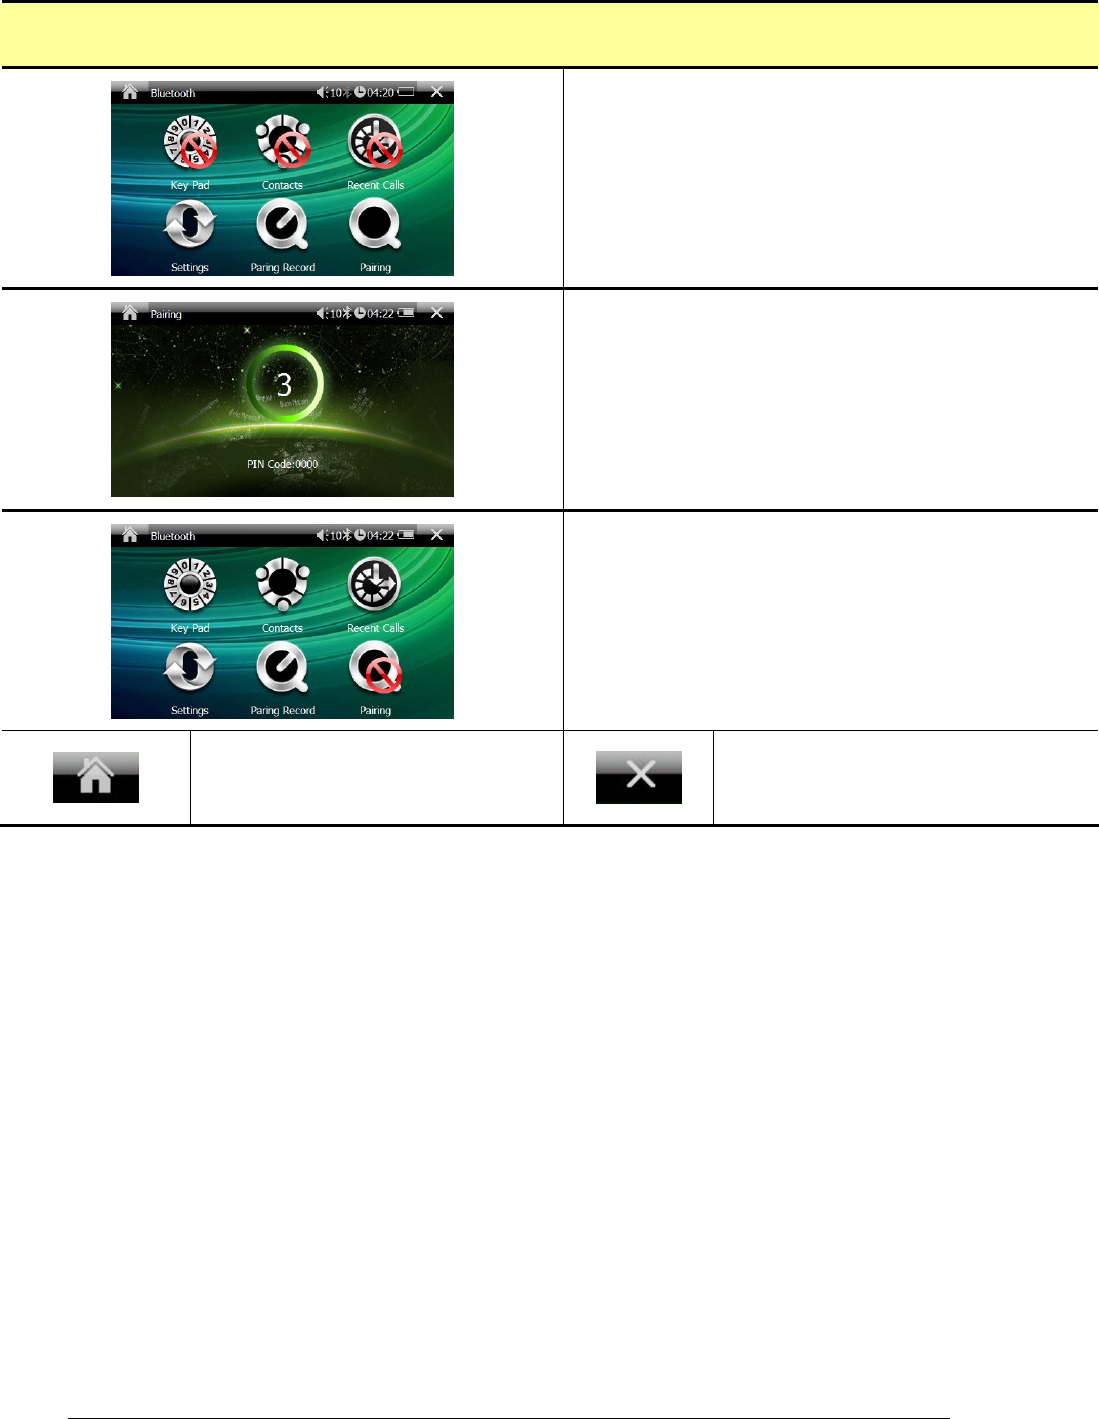
Pairing
Before the Bluetooth connection is established, Key
Pad, Contacts, and Recent Calls are disabled.
Tap Pairing to start pairing mode. Then use your cell
phone to connect to your GA-4640 to establish
Bluetooth pairing. If the pairing doesn’t established
within 60 seconds, the GA-4640 will leave pairing
mode automatically.
Once the connection is established, the Key Pad,
Contacts, and Call Records will be activated.
Go back to the Console. Go back to the Bluetooth menu.

28
8. Toubleshooting
Problem Solution
My GA-4640 cannot get GPS
signals.
Take the GA-4640 outdoors and away
from tall buildings and trees. Remain
stationary for several minutes to get the
necessary GPS information from
satellites.
The suction cup cannot stay on my
windshield.
Clean the suction cup and windshield
with a clean, dry cloth. Then mount the
suction cup as described in section 5-2.
I cannot turn on my GA-4640. Check if the battery is charged.
My phone cannot connect to my
GA-4640.
Make sure the Bluetooth on both your
phone and the GA-4640 is turned on.
Then follow the instructions in the user
manual.
The AVIN function is not working.
Make sure the cable is fully plugged in
the correct jack.
The system encounters fatal errors
and crashed.
Push the reset button to restart the
system.
The images or sound tracks or
video clips cannot be played on my
GA-4640.
Please check the software specifications
on the page 7 to see if the media formats
are supported by the GA-4640.
FCC Notices
This device complies with part 15 of the FCC rules. Operation is subject to the following two
conditions:
(1) This device may not cause harmful interference, and
(2) This device must accept any interference received, including interference that may cause
undesired operation.
FCC RF Exposure requirements:
This device and its antenna(s) must not be co-located or operation in conjunction with any other
antenna or transmitter.
NOTE: THE MANUFACTURER IS NOT RESPONSIBLE FOR ANY RADIO OR TV INTERFERENCE
CAUSED BY UNAUTHORIZED MODIFICATIONS TO THIS EQUIPMENT. SUCH MODIFICATIONS
COULD VOID THE USER’S AUTHORITY TO OPERATE THE EQUIPMENT.