Globalscale Technologies 003-XXXXXXX Display Plug User Manual YCJ003 XXXXXXX UserManualv
Globalscale Technologies INC Display Plug YCJ003 XXXXXXX UserManualv
users manual

Display Plug User Manual
v01
By Ellin@GTI-EE
2011-6-24
Table of Contens
1 Getting Start with the Display Plug (Ellin)
1.1 Console Access
1.2 Remote Access with Secure Shell(SSH)
1.3 Using Kerboard,Mouse and VGA/HDMI display
2 Software Upgrade
3 Use the GUI terminal
1. Getting Start with the Display Plug
1.1 Console Access
The Display Plug utilizes the Prolific PL2303HX(D) chip , a USB-to-serial
Bridge, to hook up the UART0 of Dove as a debug console, and this console is
available at a USB Micro-AB socket(J16).
Following steps assume a Host running Windows XP with PL2303HX(D) driver
loaded and a terminal program such as Hyper Terminal and Tera Term. Visit
www.prolific.com.tw for the latest PL2303HX(D) driver.
1. Plug one end of the USB Micro-AB cable to the console port(J16) of
Display Plug, the other end to the Host.
2. Wait for Windows Host to enumerate the PL-2303 device and load its driver
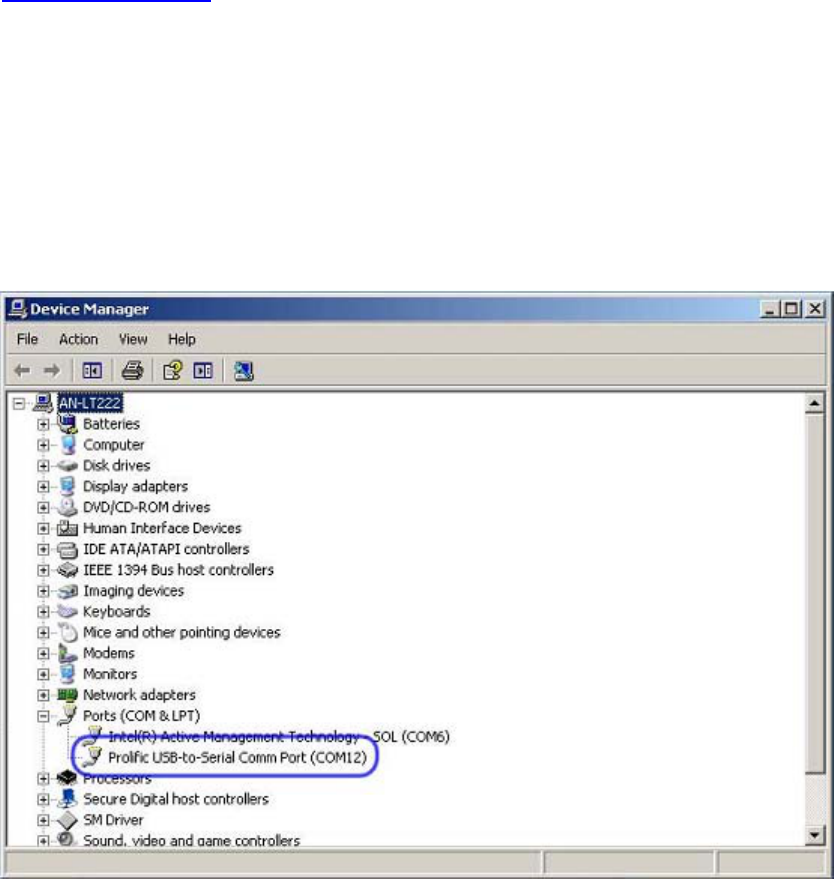
3. Go to the Device Manager(Start Menu->Settings->Control
Panel->System->Hardware->Device Manager). Expand the Ports(COM
and LPT) drop-down and note the COM port assigned to the PL-2303(see
below figure)
4. Launch Hyper Terminal or Tera Term in Host and Choose the COM port
that assigned the PL2303 device. Change the baud rate to 115200, date to 8
bit and parity to none. Click “OK” to apply the settings.
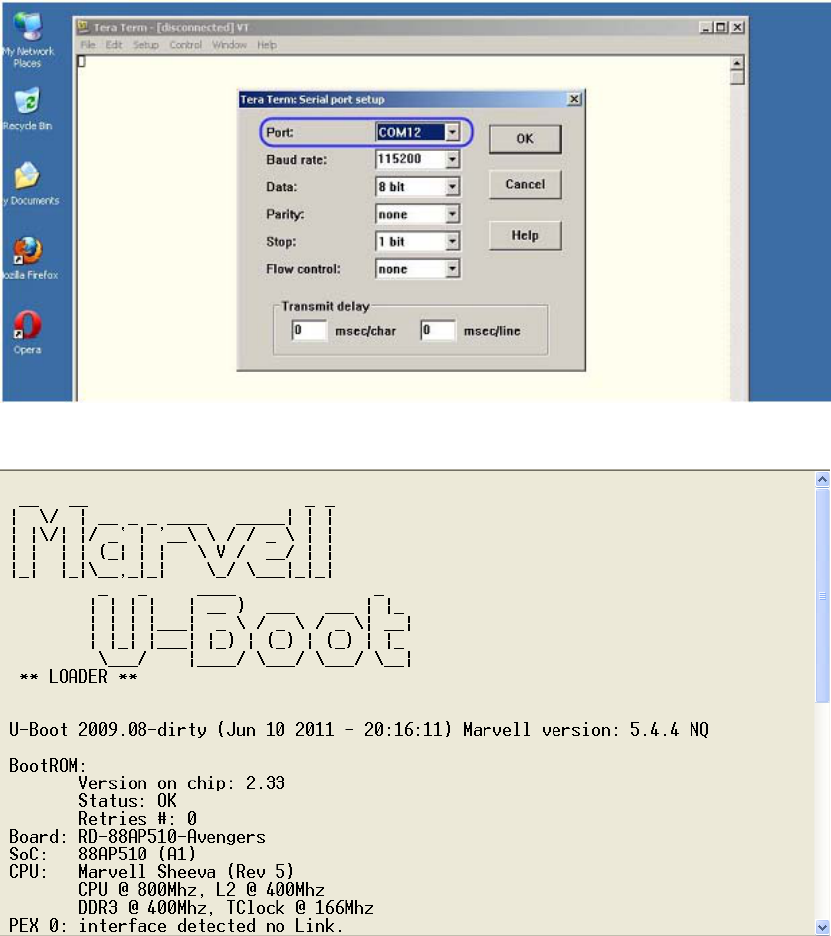
5. Power on the Display Plug, start-up messages scroll by as Linux boots until
the login prompt is reached
(Figure,Uboot Start-up)
6. Login the Display Plug as ubuntu/marvell
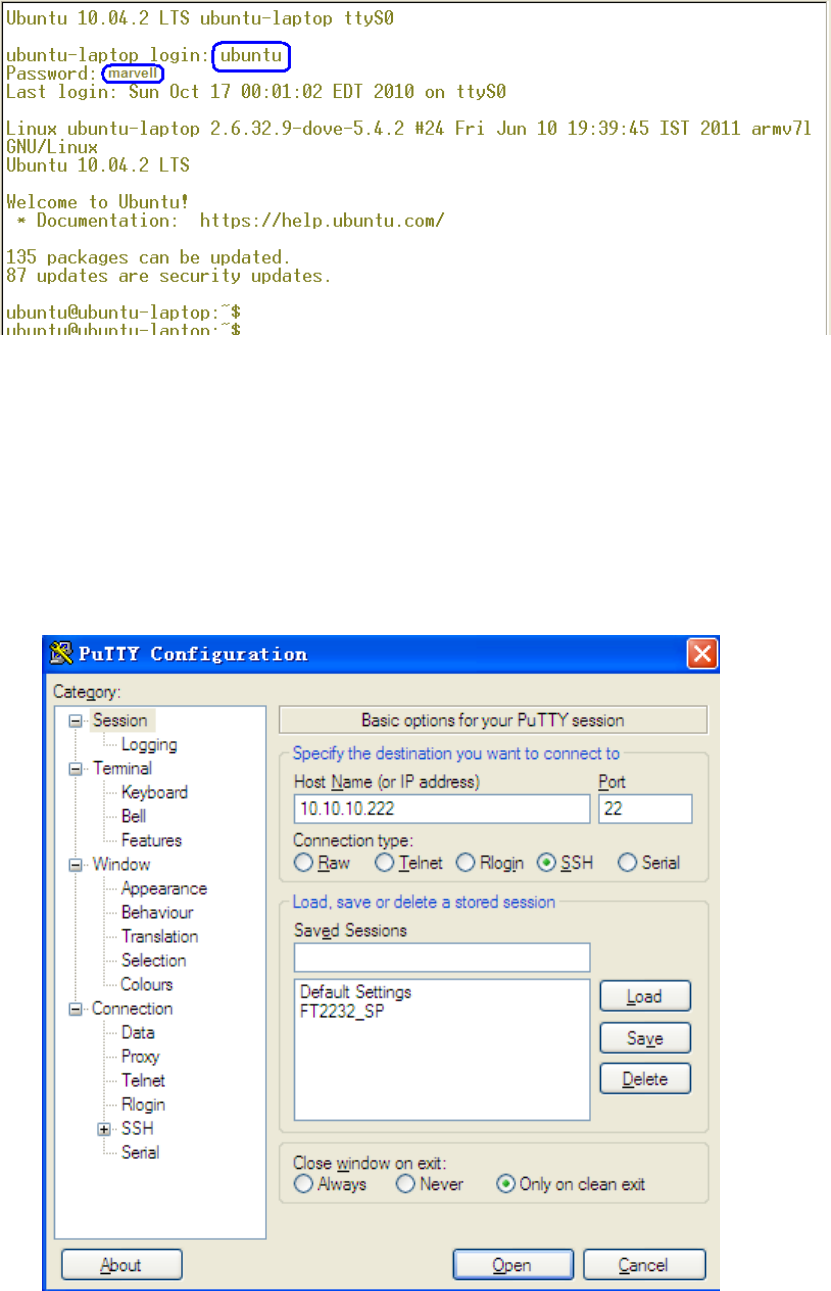
(Figure,Linux Login)
1.2 Remote Access with Secure Shell(SSH)
Secure Shell(SSH) can be used to access the Display Plug when it is
connected to a wired or wireless network. Following procedures assume either
that the Plug is reconfigured to a static IP address or that it is dynamically
assigned to a IP address from a DHCP server.
1. Launch a SSH software like Putty in the Windows Host, enter the Plug’s IP
address, and select SSH connection type.
If it is the first time to SSH to the Plug, there will be a security alert, press “y” to
forward.

2. Login the Plug as ubuntu/marvell as follow
1.3 Using Kerboard,Mouse and VGA/HDMI display
With a network connection(WiFi or Ethernet cable), keyboard, mouse and
flat panel display (HDMI or VGA), the Display Plug can be used as a
standalone Linux machine, Follow these steps to boot the Display Plug
and use the Linux destop.
1. Plug in a USB mouse, USB keyboard and a flat panel display(HDMI or
VGA monitor) to appropriate port. Connect a Ethernet CAT5/6 cable to
a wired network if required
2. Turn on the monitor and then power on the Display Plug.
3. Waiting about 50seconds, the destop will show up as below:
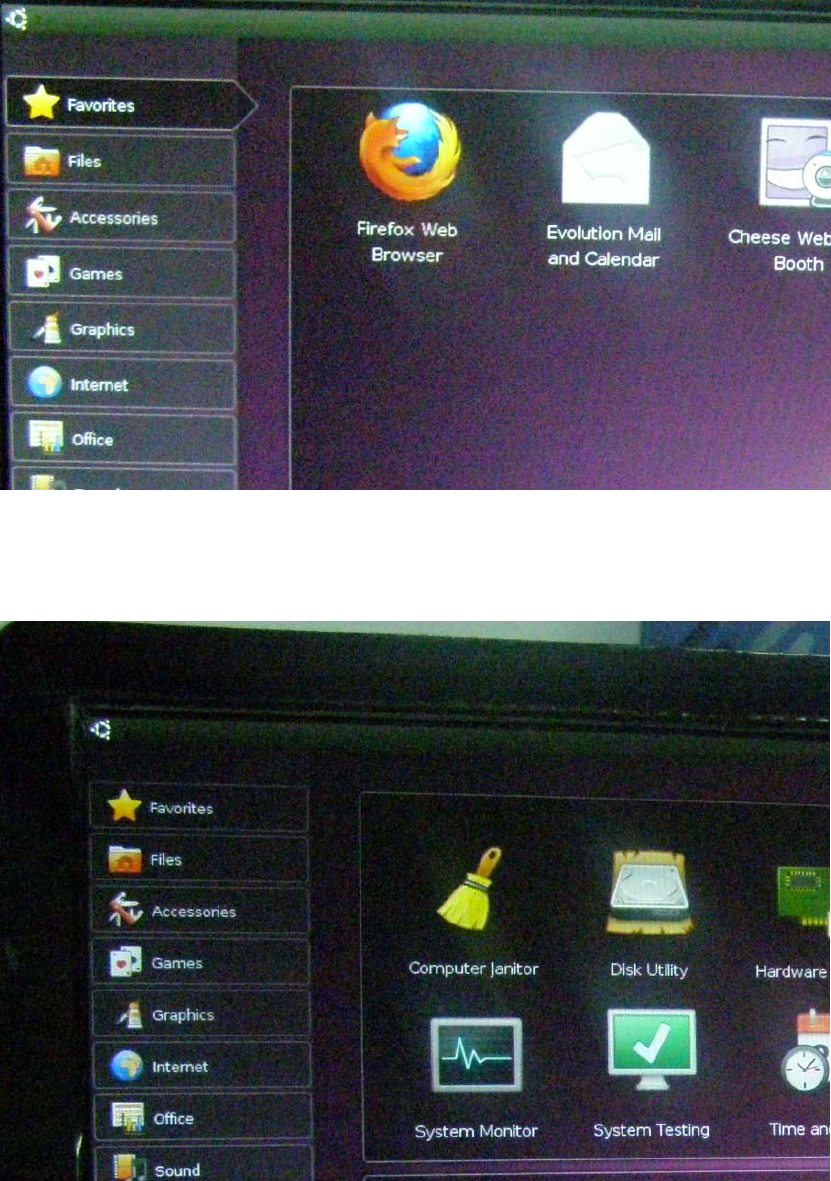
2. Use the mouse and keyboard to browse or change the
system settings:
3. Use the GUI terminal

================================================================
FCCNOTE:
Thisequipmenthasbeentestedandfoundtocomplywiththelimitsfora
ClassBdigitaldevice,pursuanttoPart15oftheFCCRules.Theselimits
aredesignedtoprovidereasonableprotectionagainstharmfulinterference
inaresidentialinstallation.Thisequipmentgenerates,usesandcanradiate
radiofrequencyenergyand,ifnotinstalledandusedinaccordancewith
theinstructions,maycauseharmfulinterferencetoradiocommunications.
However,thereisnoguaranteethatinterferencewillnotoccurina
particularinstallation.Ifthisequipmentdoescauseharmfulinterference
toradioortelevisionreception,whichcanbedeterminedbyturningthe
equipmentoffandon,theuserisencouragedtotrytocorrecttheinterference
byoneormoreofthefollowingmeasures:
‐‐Reorientorrelocatethereceivingantenna
‐‐Increasetheseparationbetweentheequipmentandreceiver.
‐‐Connecttheequipmentintoanoutletonacircuitdifferentfromthat
towhichthereceiverisconnected.
‐‐Consultthedealeroranexperiencedradio/TVtechnicianforhelp.
ThisdevicecomplieswithPart15oftheFCCRules.Operationissubject
tothefollowingtwoconditions:(1)thisdevicemaynotcauseharmful
interference,and(2)thisdevicemustacceptanyinterferencereceived,
includinginterferencethatmaycauseundesiredoperation.
ThemanufacturerisnotresponsibleforanyradioorTVinterferencecaused
byunauthorizedmodificationstothisequipment.Suchmodificationscould
voidtheuser'sauthoritytooperatetheequipment.
================================================================