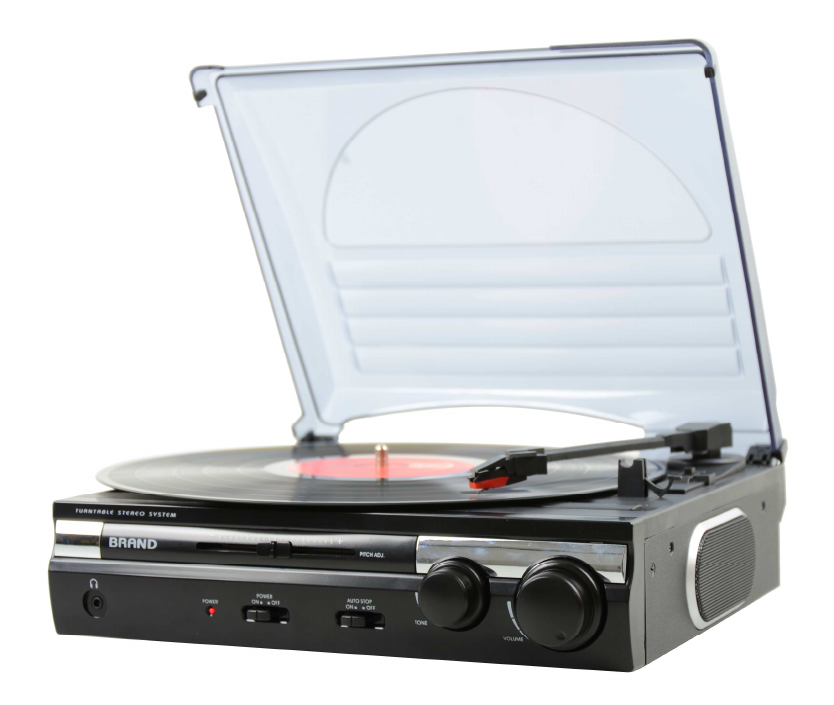
Goldsound Electronic TT182NPCBT Bluetooth 3-Speed Stereo Turntable with Built-in Speakers and Pitch Control User Manual TT 182NPC BT
Goldsound Electronic Limited Bluetooth 3-Speed Stereo Turntable with Built-in Speakers and Pitch Control TT 182NPC BT
User Manual
TURNTABLE WITH USB
ENCODING TO COMPUTER
TT-182NPC BT
Owner Manual
The Caution Marking is located at the bottom enclosure of the apparatus.
The Rating plate is located at the bottom enclosure of the apparatus.
IMPORTANT SAFETY INSTRUCTIONS:
1. Read the instructions. All uses guidelines must be read before start device.
2. Keep the instructions for future use.
3. Attention, use and security guidelines must be respected.
4. The device must not be used near water or be put in contact with moisture.
5. Make sure has no liquid is spilled on device and device openings.
6. Move device carefully, avoid shocks.
7. Do not block the breakdown of the device outputs.
8. Do not place the device near from a heat source (e.g. radiator). Do not expose it to the Sun.
9. Plug the device as indicate on this information form.
10. This device has a connection with overload protection (security device) decision-making. If the
replacement of decision-making is required, please you send has an experienced or the device
manufacturer technician.
11. For cleaning the device, please follow the recommendations of the notice.
12. The sector cord should be unplugged a long period of use.
13. Device shall be repaired by a qualified person when:
a. the taken or the power cord is damaged,
b. objects have fallen into the apparatus or a liquid has been spilled into device,
c. device was exposes to the rain,
d. device does not work correctly without notable exterior change,
e. device fell and the subwoofer is broken.
14. The user shall not try to maintain device beyond that which is described in this information
form. The guarantee would negate.
COMPLIANCE WITH FCC REGULATIONS
FCC ID : RQU-TT182NPCBT
This device complies with Part 15 of the FCC Rules. Operation is subject to the following two
conditions:
(1) this device may not cause harmful interference, and
(2)
this device must accept any interference received, including interference that may cause
undesired operation.
NOTE : This equipment has been tested and found to comply with the limits for a Class B digital
device, pursuant to Part 15 of the FCC Rules. These limits are designed to provide reasonable
protection against harmful interference in a residential installation. This equipment generates,
uses and can radiate radio frequency energy and, if not installed and used in accordance with
the instructions, may cause harmful interference to radio communications. However, there is no
guarantee that interference will not occur in a particular installation. If this equipment does cause
harmful interference to radio or television reception, which can be determined by turning the
equipment off and on, the user is encouraged to try to correct the interference by one or more of
the following measures:
- Reorient or relocate the receiving antenna.
- Increase the separation between the equipment and receiver.
- Connect the equipment into an outlet on a circuit different from that to which the receiver is
connected.
- Consult the dealer or an experienced radio/TV technician for help.
CAUTION: Changes or modifications not expressly approved by the party
responsible for compliance could void the user’s authority to operate
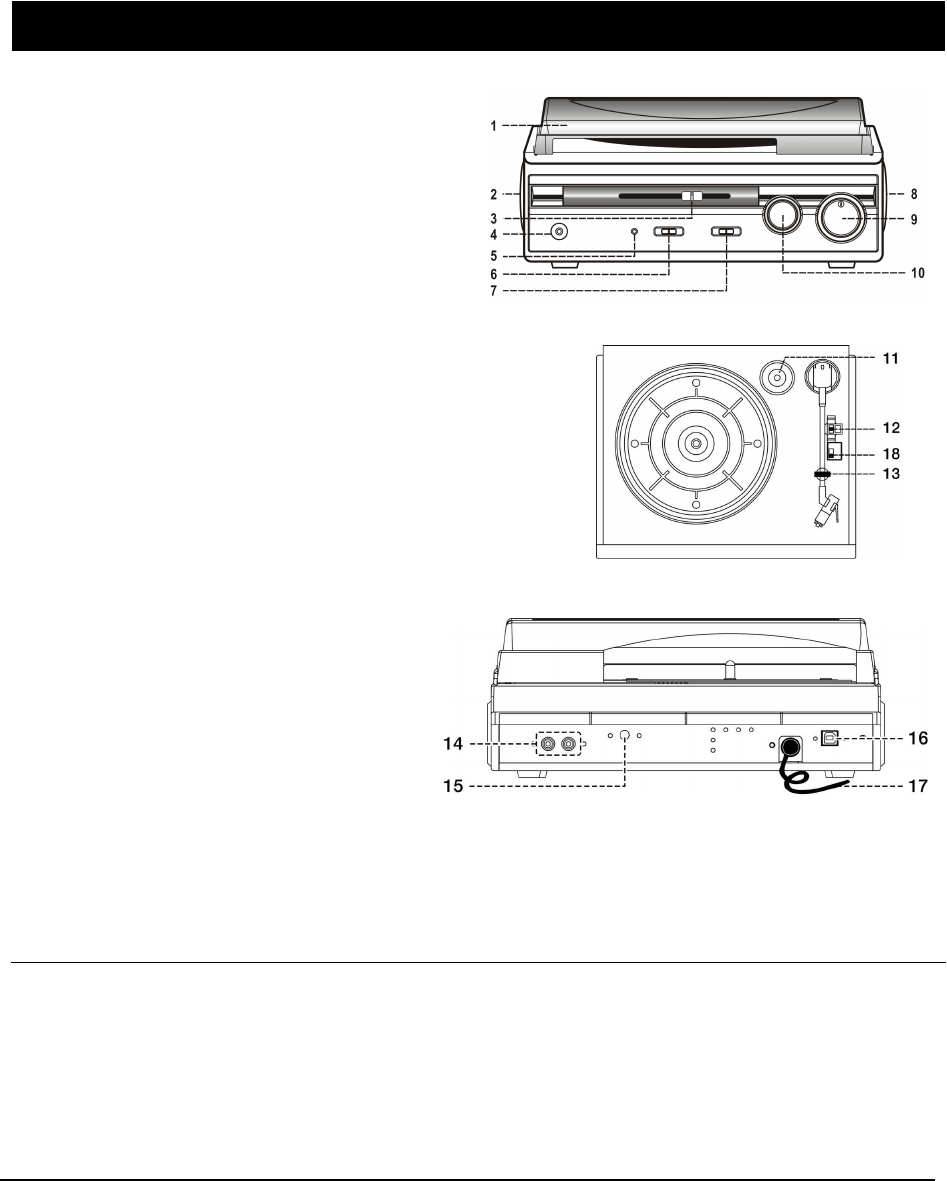
1) Dust Cover
2) Left Speaker
3) Pitch Adjust
4) 3.5mm Earphone jack
5) Power/Bluetooth LED Indicator
6) Power On/Off Switch
7) Bluetooth/phono Switch
8) Right Speaker
9) Volume Control Knob
10) Tone Control Knob
11) 45 RPM Record Adaptor
12) Turntable Speed Selector
13) Tone Arm Rest/Holder
14) Line Out Socket (L/R)
15) Aux In jack
16) USB Port For Computer Connection
17) AC Power Cord
18) Auto Stop Switch
CAUTION
:
Usage of controls or adjustments or performance of procedures other than those specified herein may
result in hazardous radiation exposure.
This unit should not be adjusted or repaired by anyone except qualified service personnel.
PRECAUTIONS FOR USE
INSTALLATION
• Unpack all parts and remove protective material.
• Do not connect the unit to the mains before checking the mains voltage and before all other
connections have been made.
• Do not cover any vents and make sure that there is a space of several centimeters around the unit for
ventilation.
CONNECTION
1. Connect the Power Cord (17) to an AC outlet.
2. To encode the Vinyl or Aux in signal to your computer, connect the USB Port (16) of the Turntable to a
suitable USB port on your computer via the USB cable provided.
3. Turn on the power by Power On/Off switch (6) and the power LED indicator (5) will light up, your
system is now ready to play your music. Please refer to the Operations section of this Manual for
details.
E-1
LOCATION OF CONTROLS
STEREO PHONOGRAPH OPERATION
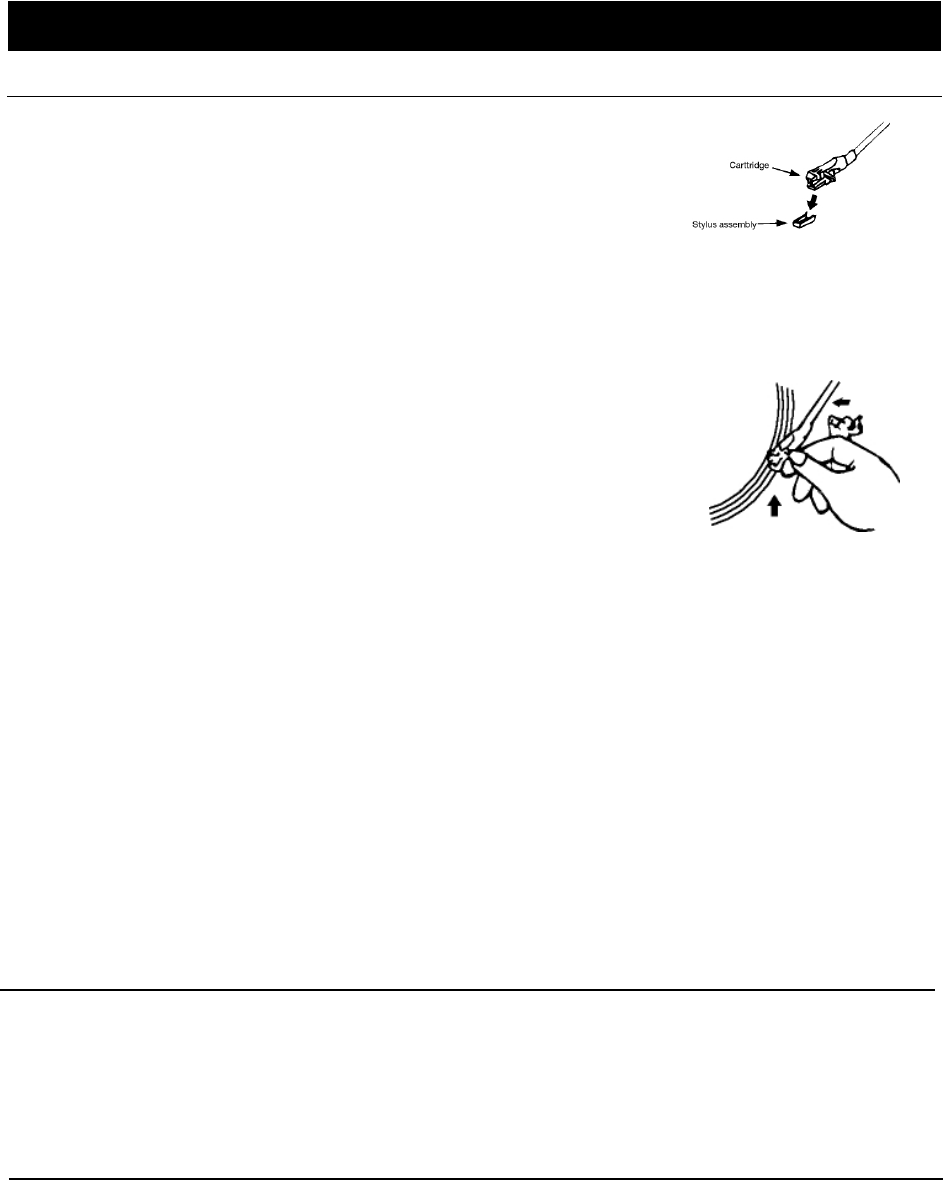
PLEASE NOTE - BEFORE USE
- Remove the stylus protector.
- Make sure that the tone arm is unlocked and free to move from the tone
arm rest prior to operating. Lock the tone arm again when not in use.
1. Slide the Power On/Off switch (6) to on position and set the
Bluetooth/Phono switch (7) at Phono position
2. Raise the turntable dust cover.
3. Place the record on the platter (use the 45 RPM record adaptor (11) if you are playing 45 RPM
records).
4. Set the speed selector (12) to the proper position for the record you are playing.
5. Lift the tone arm from the rest (13) and slowly move it over the record.
The platter will begin spinning.
6. Place the tone arm down onto the record in the location that you want to
play.
7. Adjust the volume (9) to the desired level.
8. At the end of record, the platter will automatically stop spinning. Lift the
tone arm from the record and return it to the rest.
9. To stop playing manually, lift the tone arm from the record and return it to
the rest.
NOTE:
Some types of records may have an auto-stop area outside the preset limit, so the turntable may
stop before the last track finishes. In this case, set the AUTO-STOP switch (18) to the “OFF” position. This
allows the record to play to the end, but please note that it will not stop automatically. You must manually
raise the tone arm and place it back in the rest and then turn off the power to stop the turntable from
spinning.
REMARK : Due to Aux and Phono were designed at the same channel of this system. When Aux in jack
(15) plugged by 3.5mm stereo plug. The channel will change to Aux automatically and turntable will stop to
rotate. Please ensure the Aux in jack (15) without plugged by anything before playing Phono.
ANOTHER ADJUSTMENT
You can adjust the tone sound by Tone control (10) or pitch by Pitch Adjust (3) for different music
enjoyment.
AUX-IN CONNECTION
Connect the unit to other device by connecting the Aux in jack (15) with a 3.5mm cable(not provided) and
other end connect to the external device such as Discman/MP3 player to perform the music playback or
encoding function etc.
1. Slide the Power On/Off switch (6) to On position
2. Volume Control Knob,(9) to desired volume level.
3. Start to play your external device.
PAIRING TO BLUETOOTH DEVICE
1. Slide the Power On/Off switch to the On position
2. Slide the Bluetooth / Phono function switch (6) to the “ ON ” position
3. The Power / Bluetooth LED (5) Indicator will flash blue. The unit will go into Pairing/Discoverable mode.
4. Turn on the Bluetooth function for the device you want to link to, and enable the search or scan function
to find the TT-182NPC BT.
5. Select "TT-182NPC BT" from the device list when it appears on your device screen. If required, enter
the pass code “0000” to pair (link) the unit with your device.
6. If you are pairing (linking) your computer to the speaker using Bluetooth, you may need to set the
TT-182NPC BT as your computer’s default sound device.
7. After successfully pairing the TT-182NPC with your Bluetooth device, a tone will be heard. The Power /
Bluetooth LED Indicator (5) will stop flashing and remain lit in blue color.
E-2
OPERATIONS

8. If you want to connect the TT-182NPC BT to another Bluetooth enabled device after you’ve already
successfully paired to another device, turn off the Bluetooth on the device that was previously paired
with the JTA-230BT. The JTA-230BT Bluetooth indicator will begin flashing, repeat step 1-6 above.
Note: The JTA-230BT may automatically reconnect to a previously linked device that is in range, so you
may need to turn off the Bluetooth on any paired device first before going through the above steps.
PLAY MUSIC FROM YOUR BLUETOOTH DEVICE WIRELESSLY TO THE TT-182NPC.
1. Select your favorite song, press the Play/Pause on your Bluetooth device to play or pause the song from
your Bluetooth device.
2. Press the skip forward/skip backward on your Bluetooth device to select the Next or Previous track.
3. Slowly adjust both the volume controls of your JTA-230BT and your Bluetooth device until you reach a
comfortable listening level.
CONNECTING TO A COMPUTER FOR RECORDING
Before getting start, please install the “ AUDACITY ” recording software to your computer. Below is an
example using a computer with Microsoft XP and the Audacity software installed. For more options, please
refer to Audacity software guide separately.
1) Turn on your computer and allow it to boot fully. Turn the unit power ON, connect the USB port (16)
from the unit to your computer via the USB cable provided. The unit connected to your PC will be
recognised as a USB device.
2) Open the “ AUDACITY ” program. Under the “ EDIT ” tab, select “ PREFERENCES ”.
3) Click the “DEVICE” tab and then choose the “USB Audio Controller” at Recording and Playback device
section
4) Select Channels “2 (STEREO)” and then click “OK” to close preference setting window.
5) Play the music such as Aux in/Phono to be recorded into the computer.
6) Click the red Record button on the software control panel. You will see a waveform moving and can
listen to the record playing through computer speakers.
7) When you have finished the recording, click the yellow Stop button on the software control panel.
8) Now click “FILE ” and choose to save your recording file.
9) Click the green Play button to playback your finished recording.
NOTE:
Free software (AUDACITY) licensed under the GNU general public license (GPL).
More information as well as open source code can be found on the provided CD or on
the website at: http://audacity.sourceforge.net/
IMPORTANT NOTES
LISTENING AND EXPORTING TO MP3
To listen to your digitized audio, you will need a third party application that can play wave files. You can
also use any standard audio CD burning software to burn your wave files to an audio CD.
If you would like to save your vinyl recordings as MP3 files after recording them using AUDACITY, you will
need to install the optional "LAME MP3 ENCODER" plug-in to the software provided on the CD. Once a
file is in MP3 format it can be played on any MP3 compatible mobile digital device.
The provided CD also included the LAME MP3 Encoder plug-in.
In AUDACITY, when you attempt to EXPORT AS MP3… for the first time after installing the lame
MP3 encoder plug-in, you will be asked for the location of the plug-in file. Browse to the LAME MP3
PLUGIN FOLDER you copied the plug-in file to and select the file. Subsequently, audacity will
remember the location of this file.
E-3

Software Name Operation System
Lame_Library_v3.98.2_for_Audacity_on_OSX Audacity 2.0 on Mac OSX
Lame_v3.99.3_for_Audacity_on_Windows Audacity 2.0 on Windows
(Me/2000/XP/Visa)
LINE OUT CONNECTION
You can connect this unit to your external Hi-Fi / AMPLIFIER system by connecting the LINE OUT socket
(14) to the auxiliary input socket of your Hi-Fi / AMPLIFIER system.
with a RCA cable (not included).
Note: The Volume control will not function when using the LINE OUT.
E-4