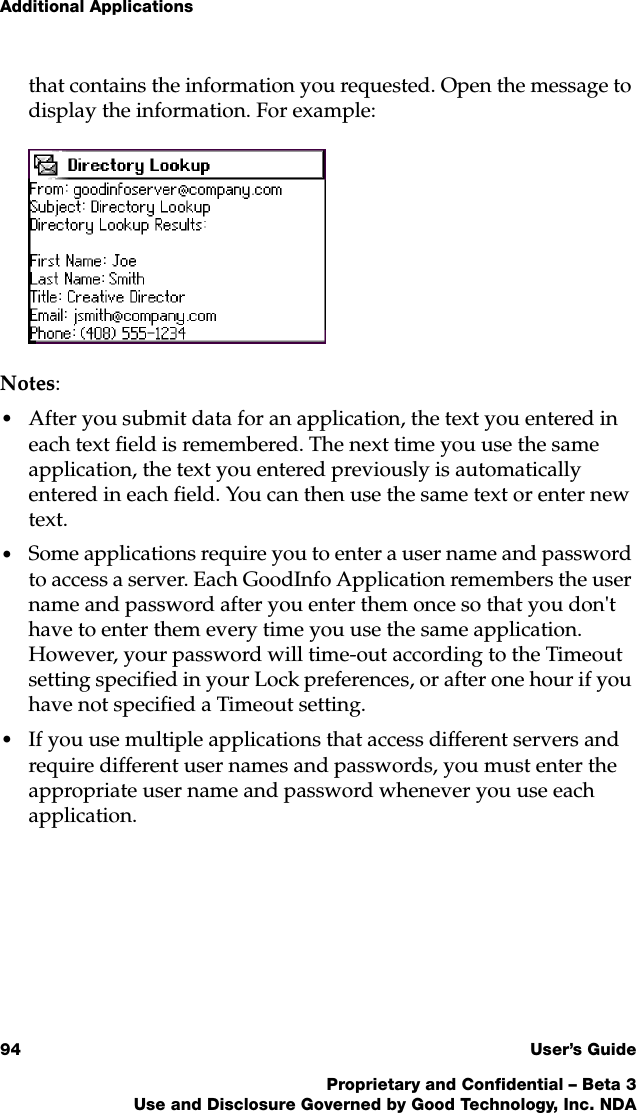
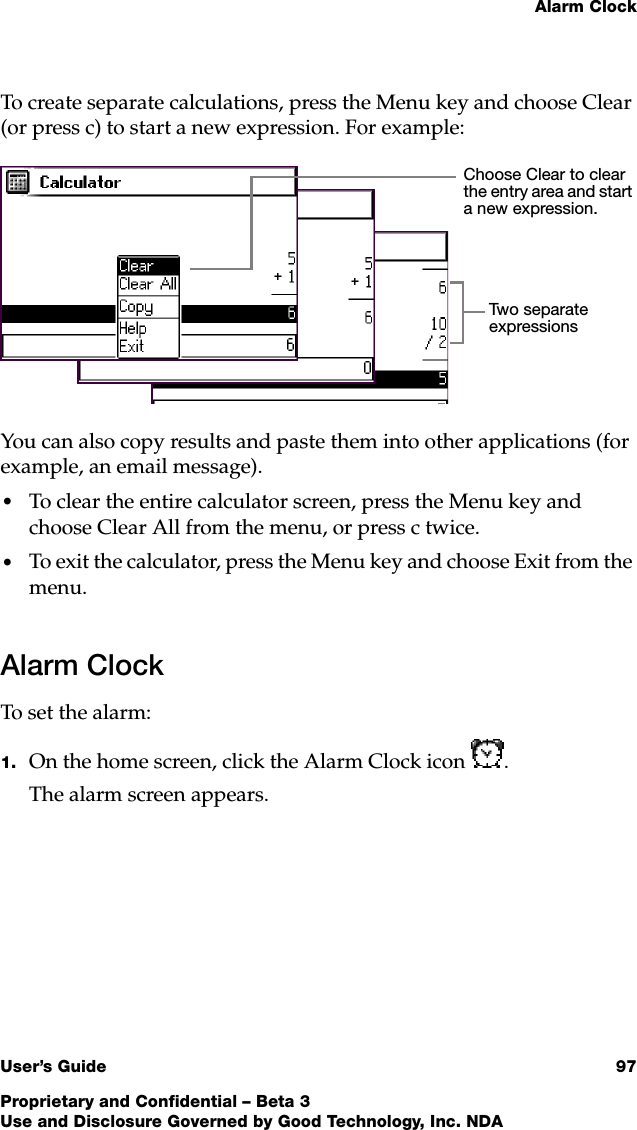
Good Technology G100 Wireless Email and Calendar Device, G100 User Manual Revised Users Manual
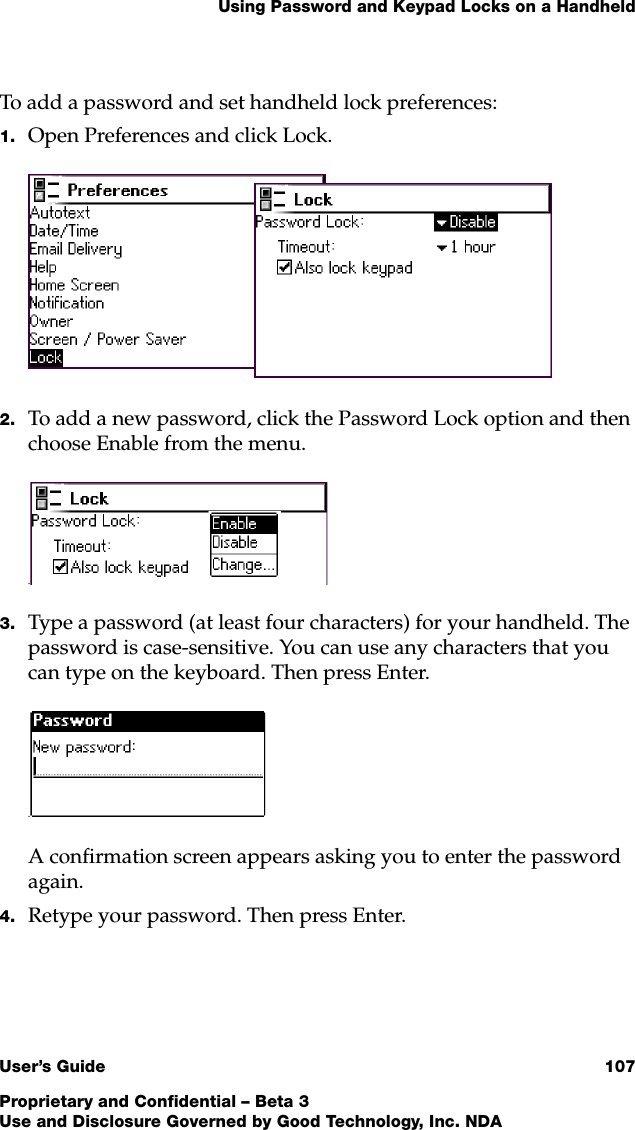
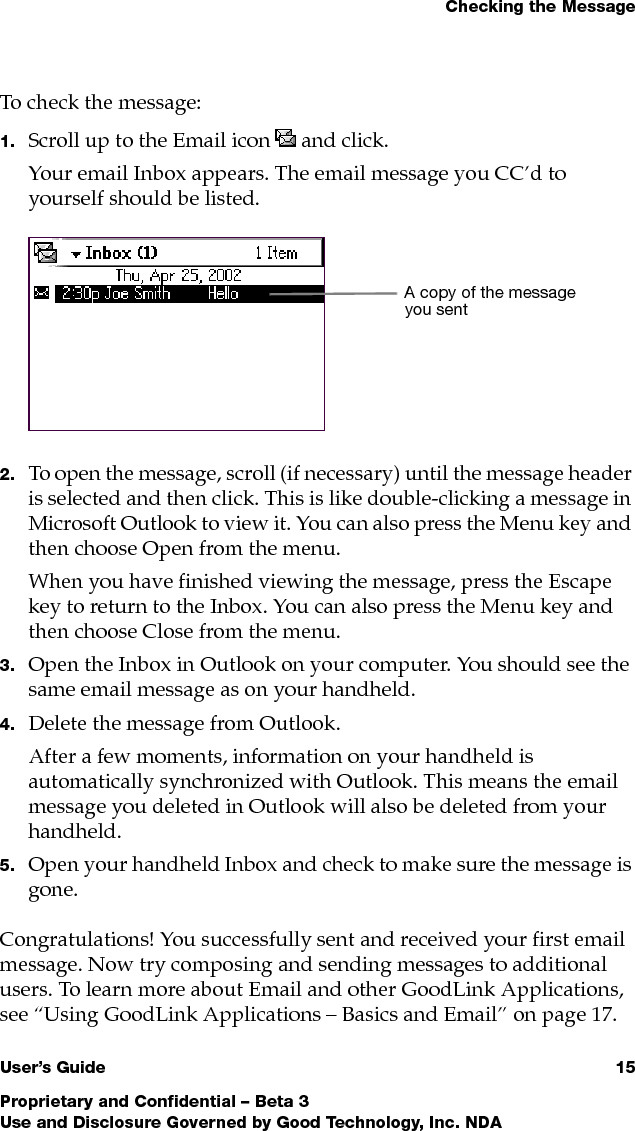
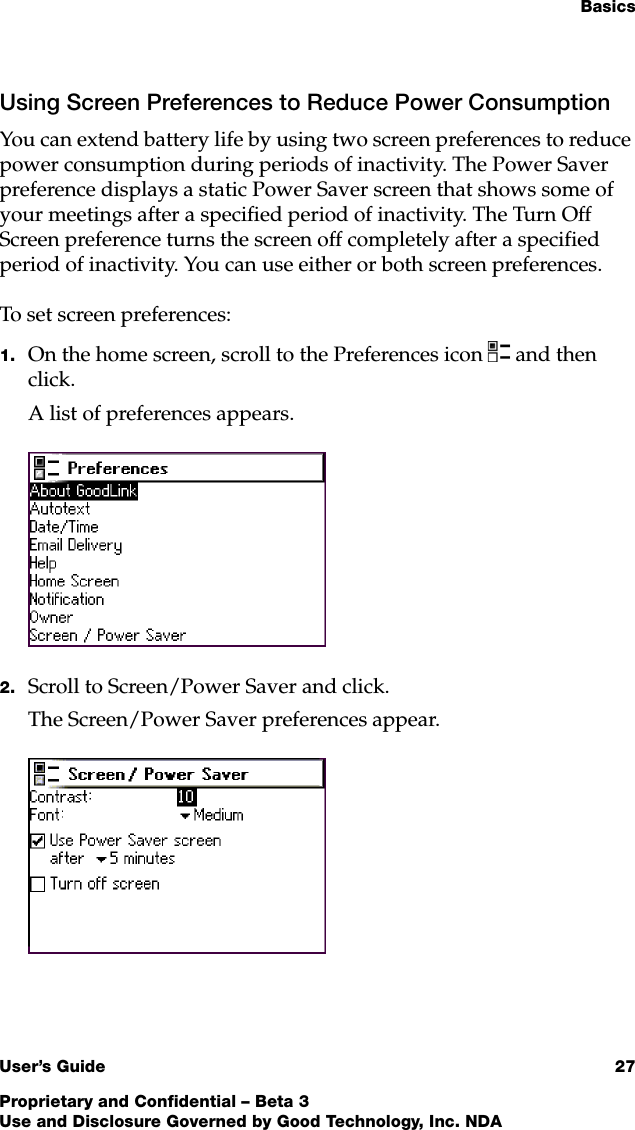
Good Technology, Inc. Wireless Email and Calendar Device, G100 Revised Users Manual
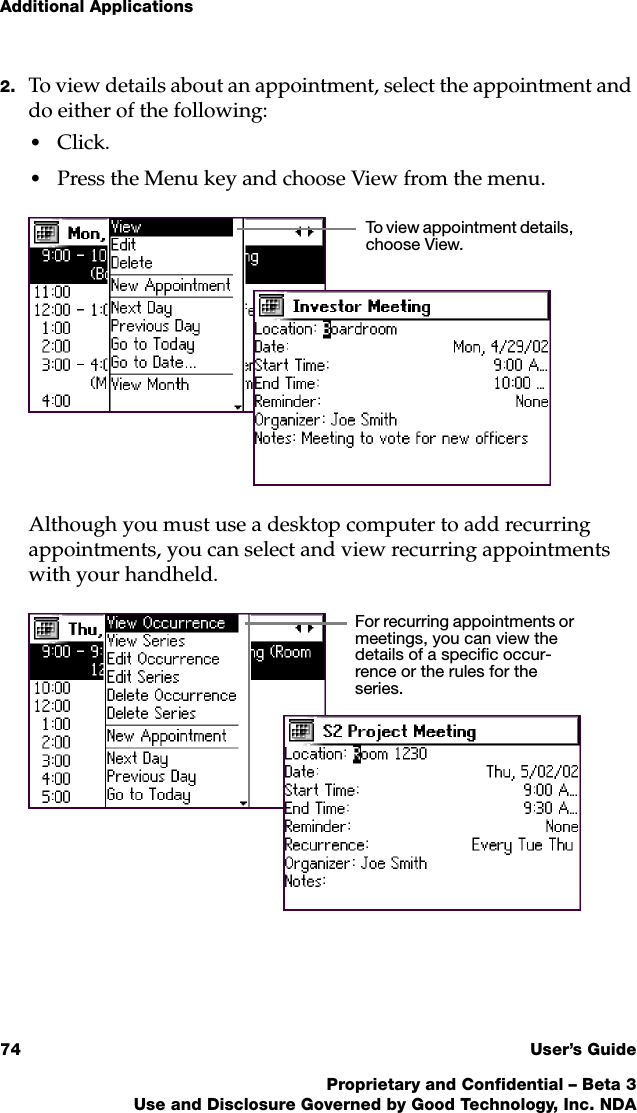
UserManual.wiki
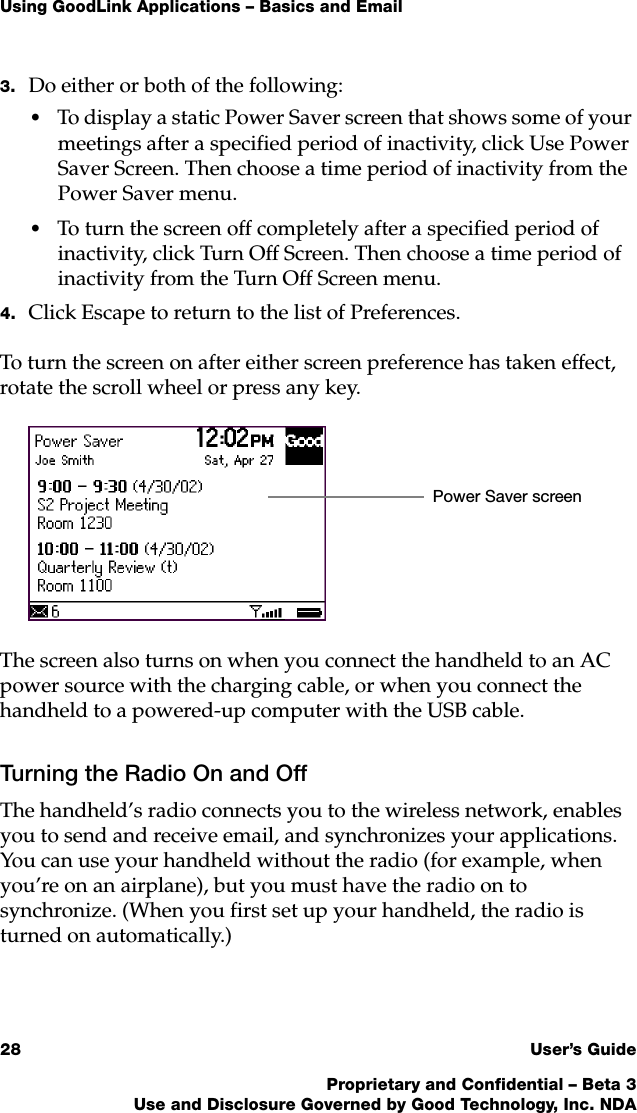
>
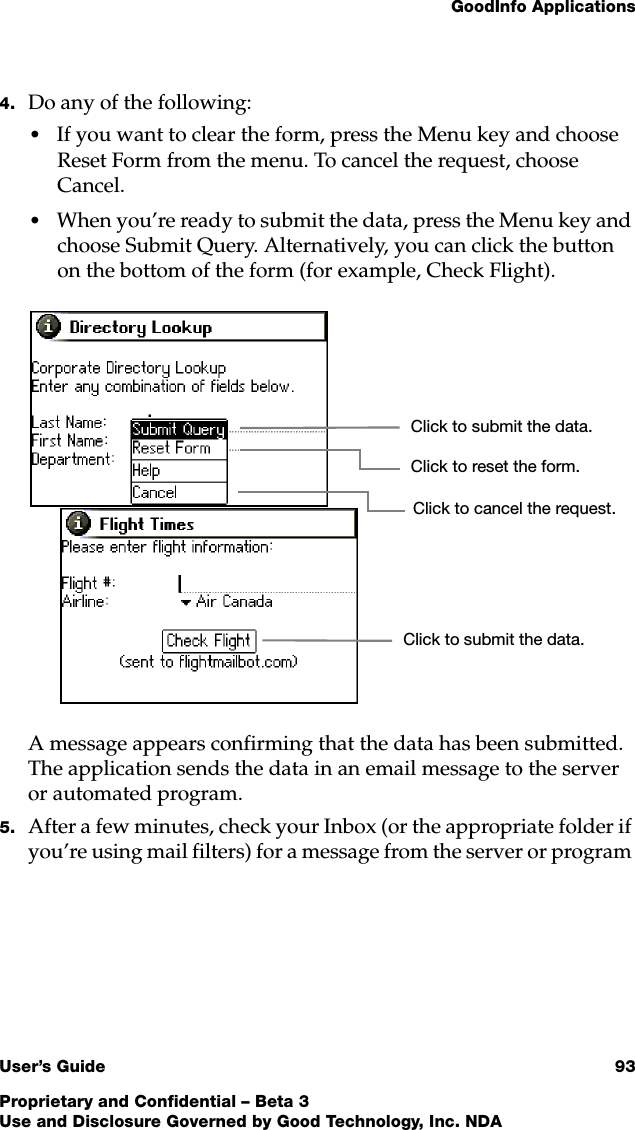
Good Technology
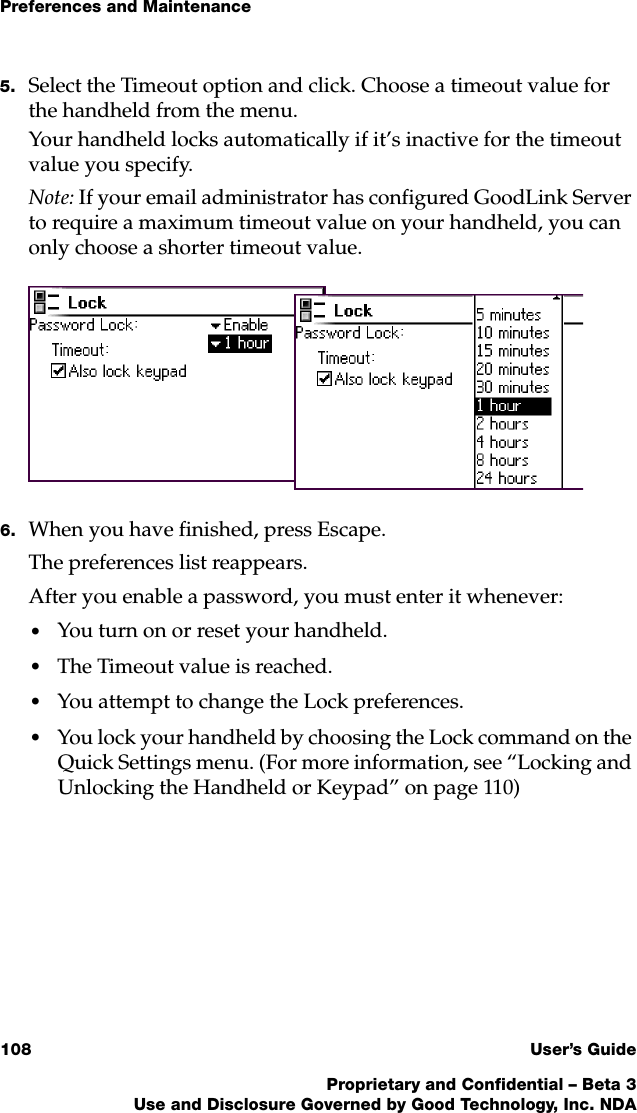
>
G100 User Manual
>
Revised Users Manual
Contents
1.
Users Manual
2.
Revised Users Manual
Revised Users Manual
Navigation menu
Upload a User Manual
Namespaces
Wiki Guide
HTML
PDF
Info
Views
User Manual
Discussion / Help
Navigation


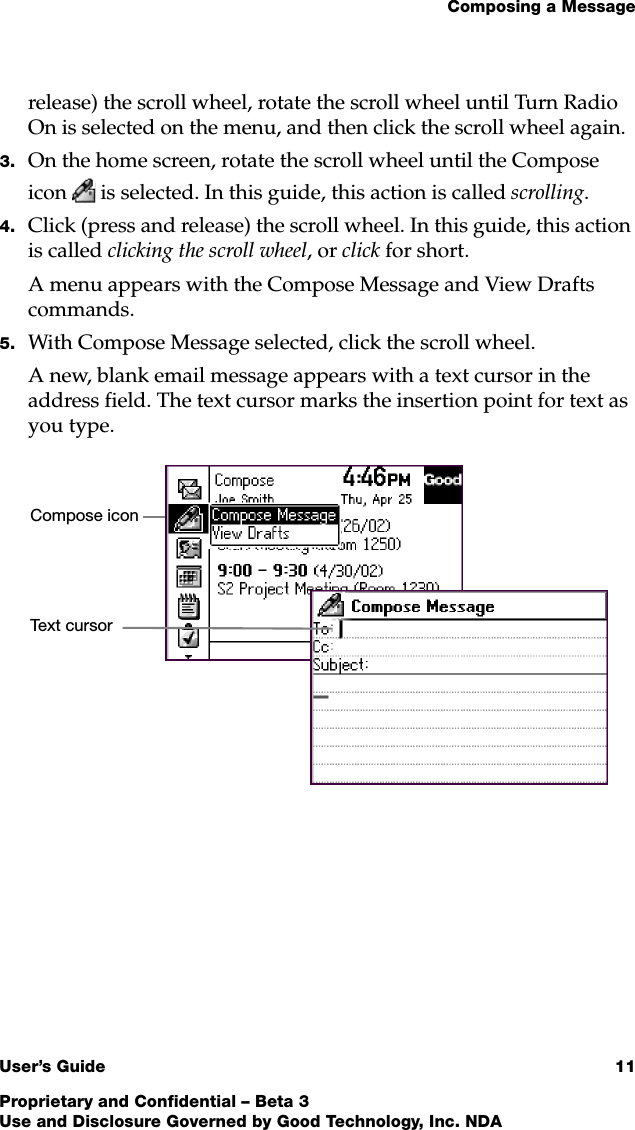


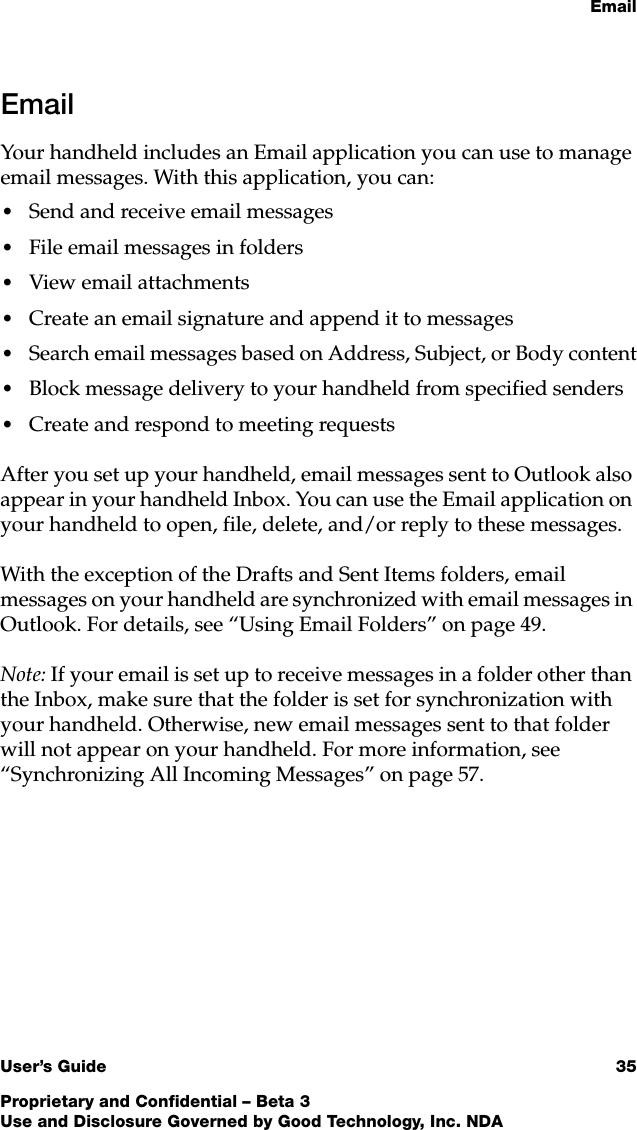
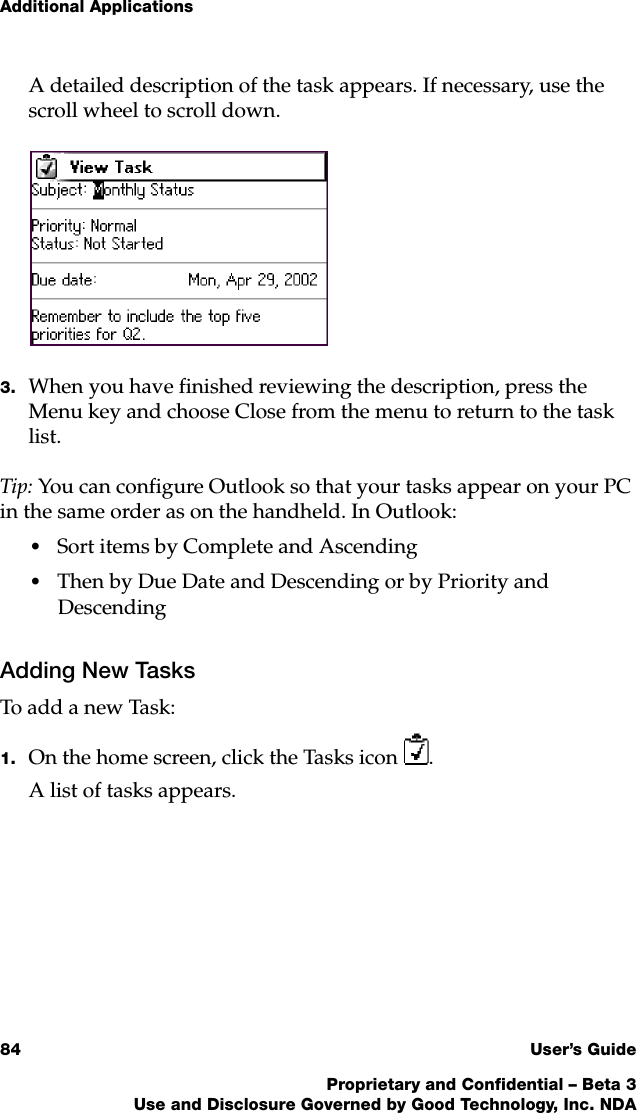
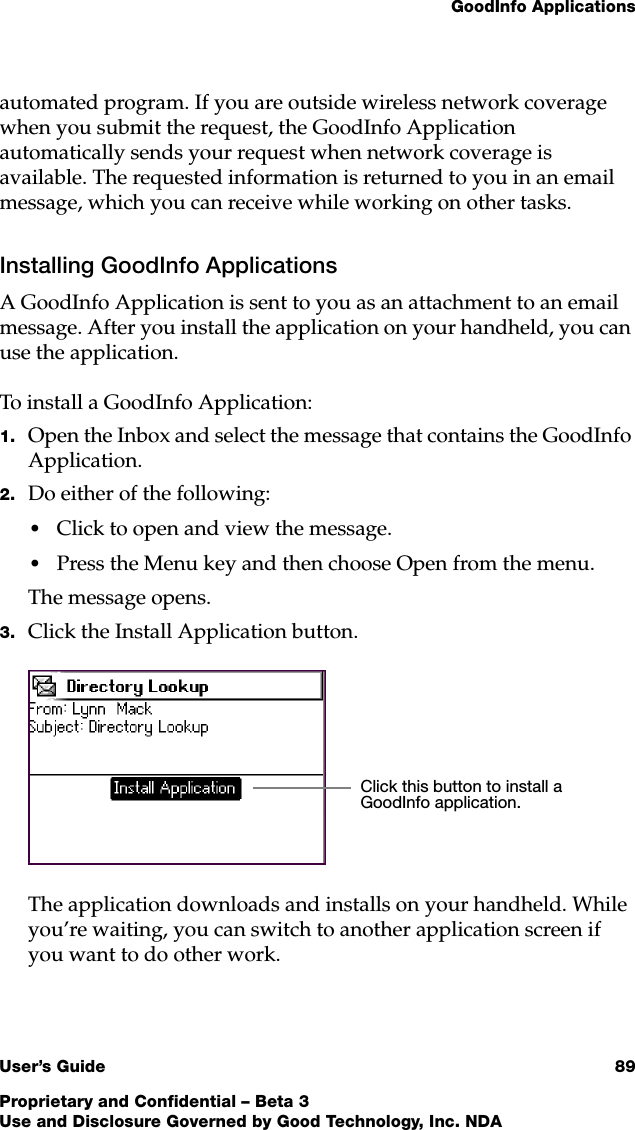
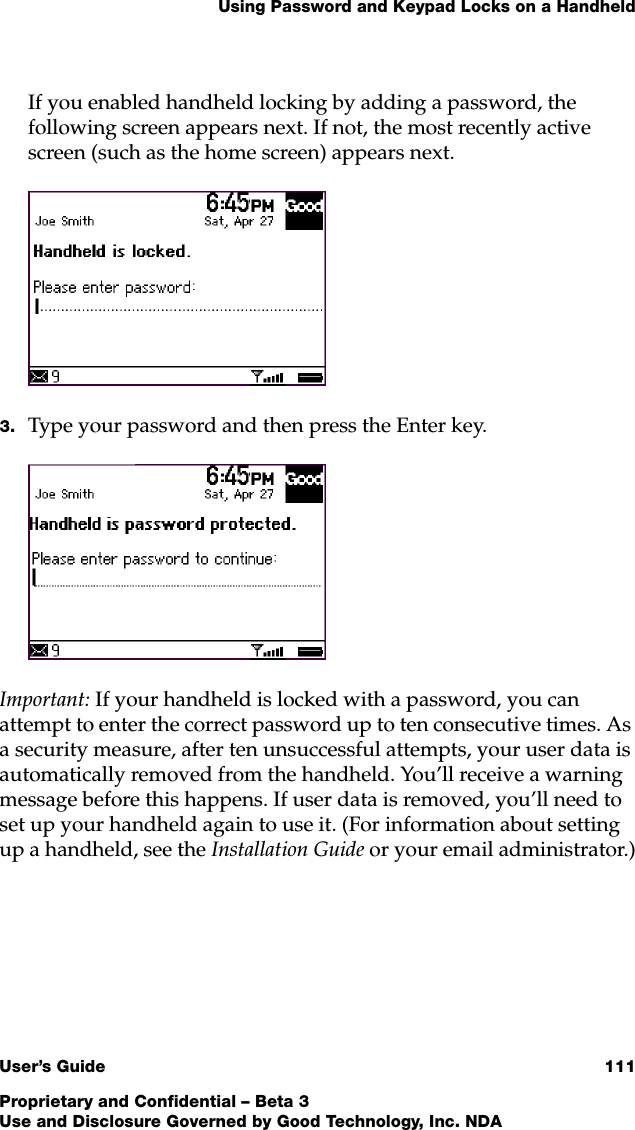
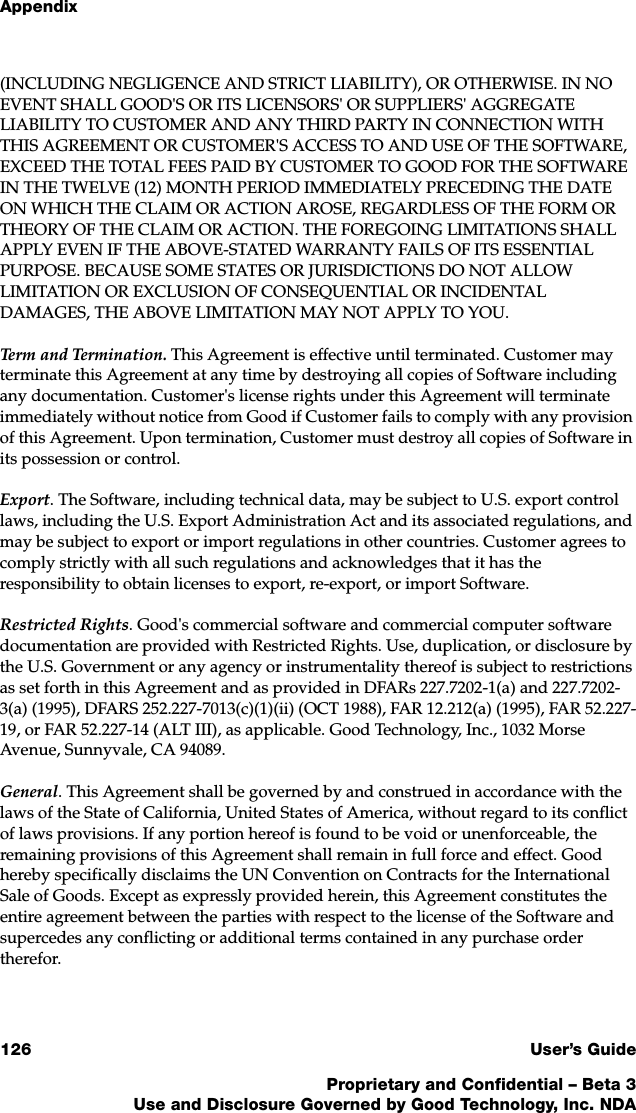
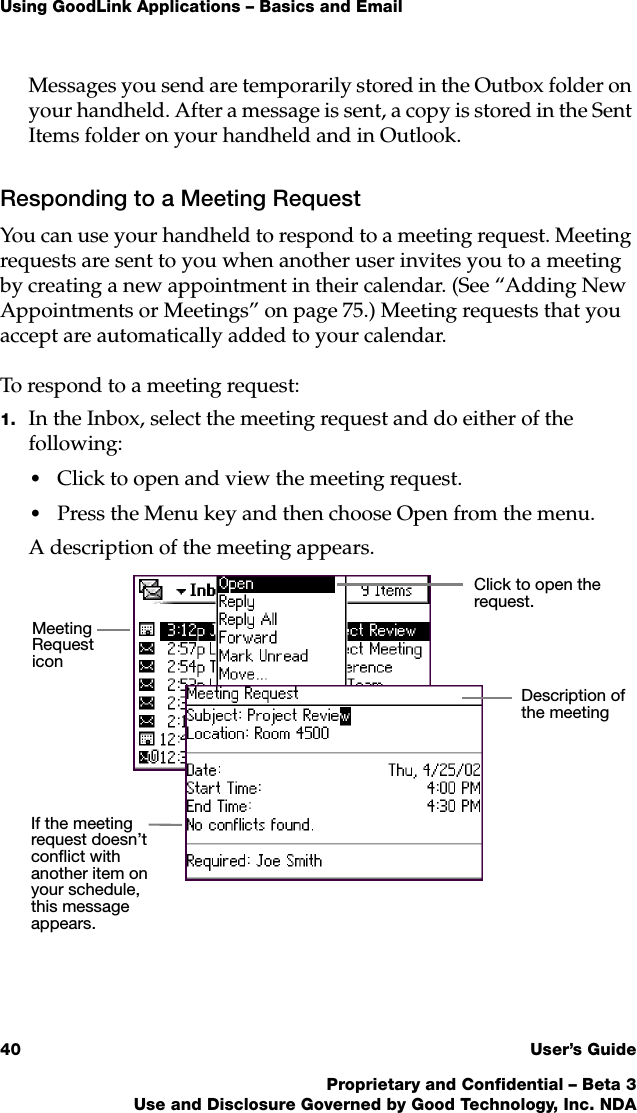
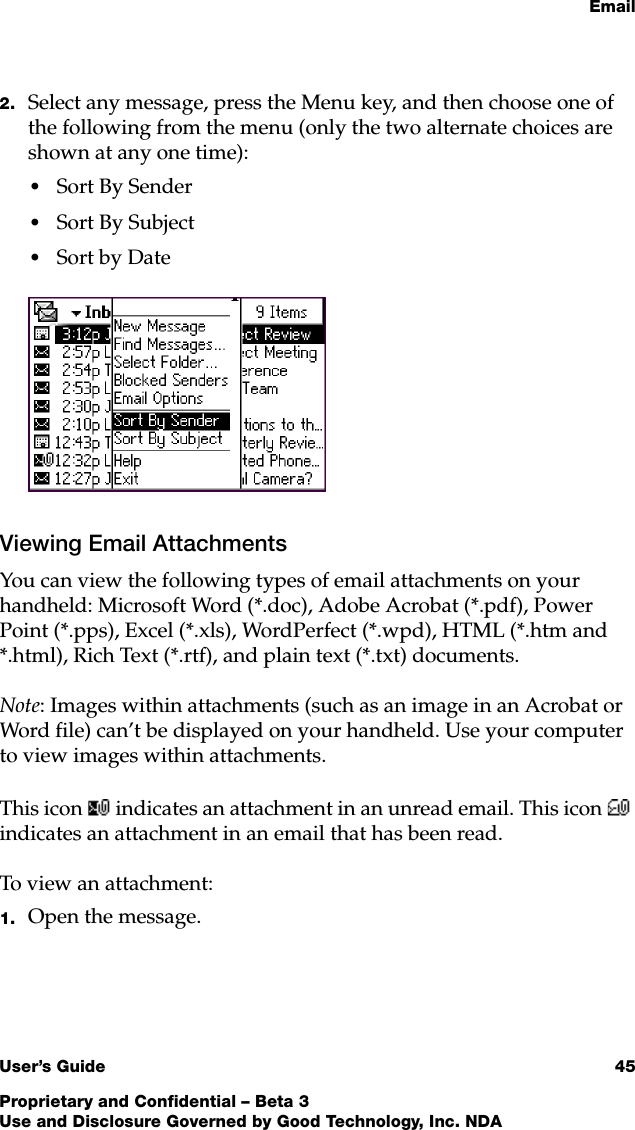
![EmailUser’s Guide 37Proprietary and Confidential – Beta 3Use and Disclosure Governed by Good Technology, Inc. NDA2. Select the message you want to view and click to open and view the message. Alternatively, you can press the Menu key and then choose Open from the menu. 3. When you have finished reviewing the message, do either of the following to close the message and return to the Inbox:•Press Escape. •Press the Menu key and then choose Close from the menu. Note: To save delivery time and extend battery life, email messages are delivered in sections. For long messages, you may see a [More] indicator at the bottom of the screen. To view the next section of the message, scroll to select [More], then click the scroll wheel. You can Choose Open to view the message.To see the complete heading, scroll up or press the “t” key to go all the way to the top.If a delegate sends a message on behalf of another person, the delegate’s name appears after “From,” and the name of the person who granted the delegate permis-sion to send messages appears after “On Behalf Of.”](https://usermanual.wiki/Good-Technology/G100.Revised-Users-Manual/User-Guide-247316-Page-43.png)
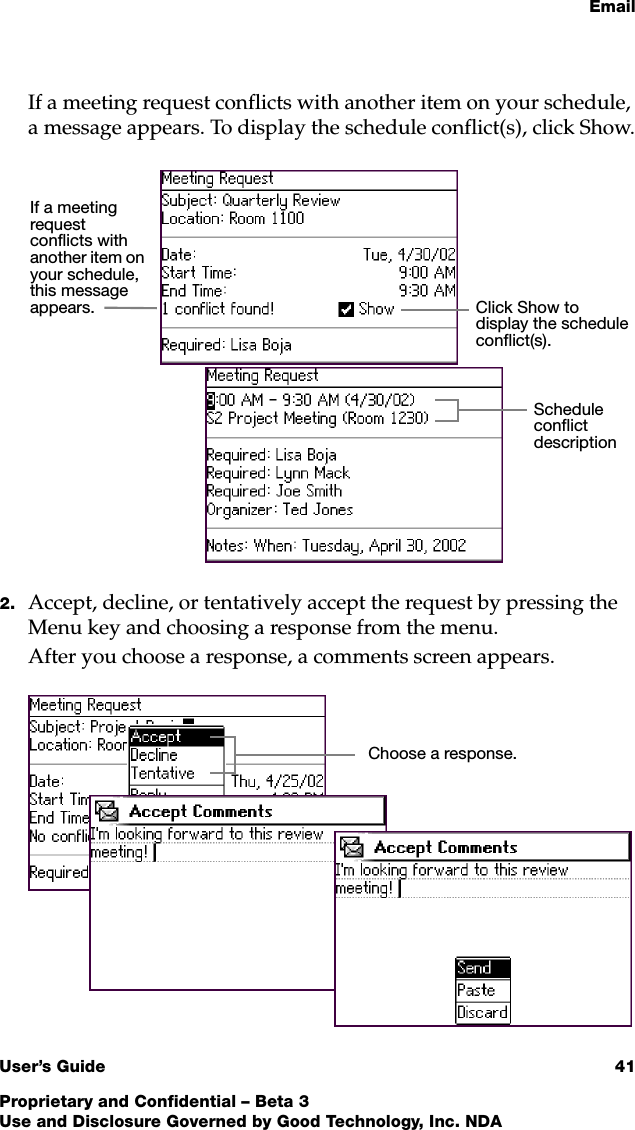

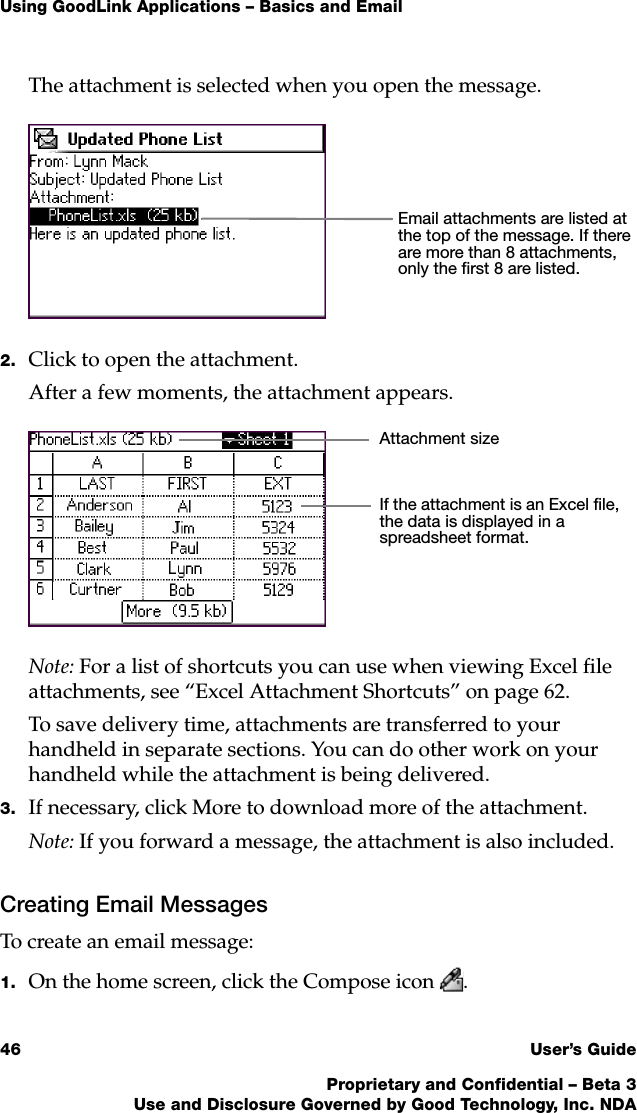


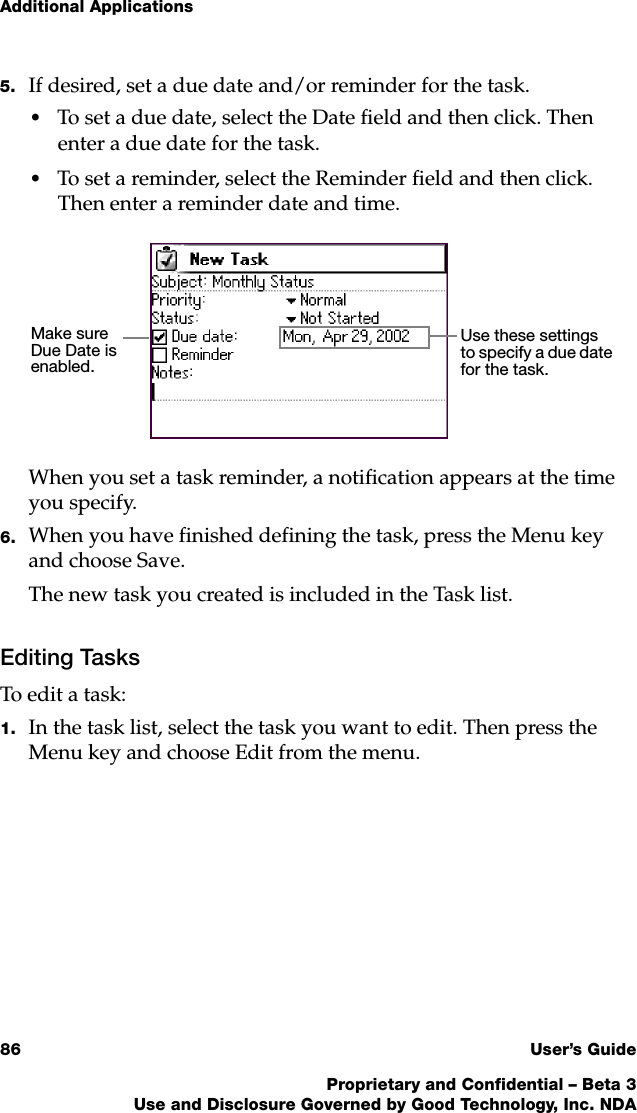
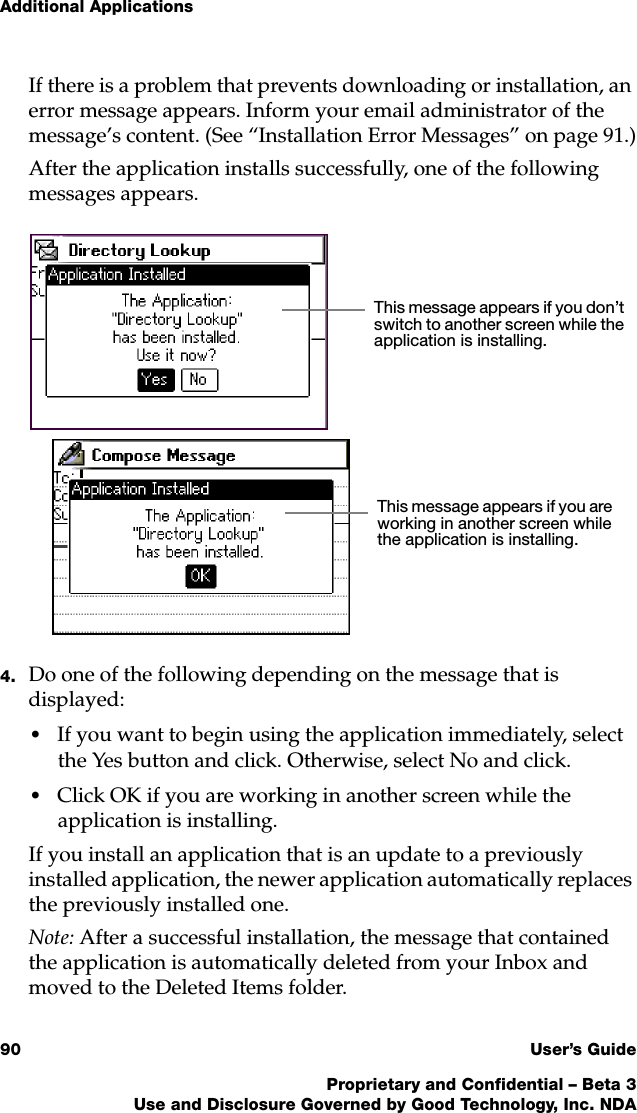
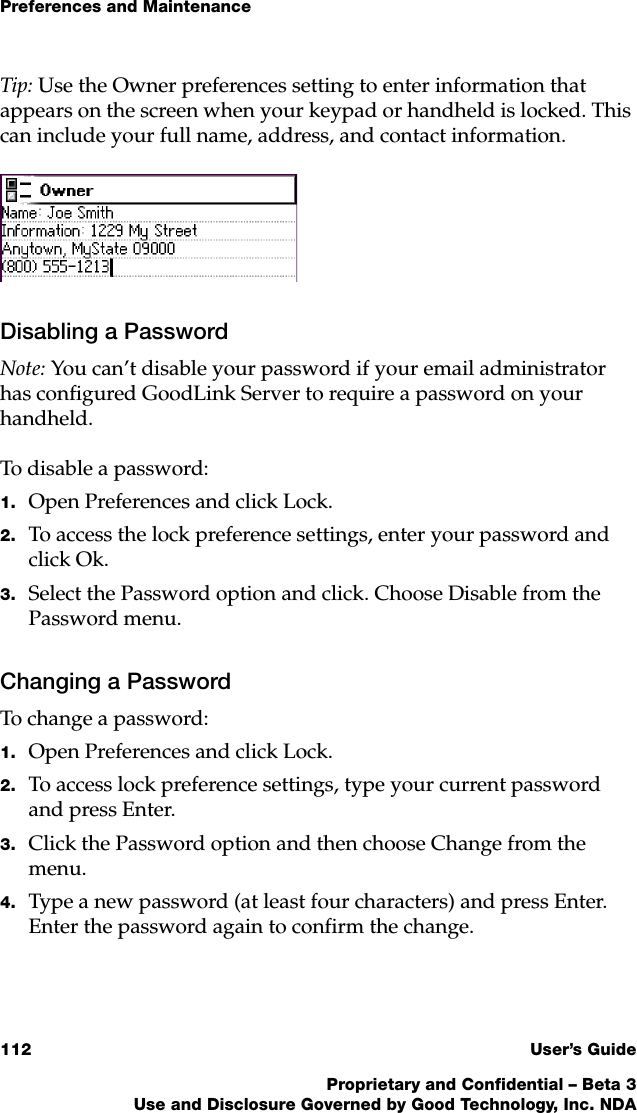
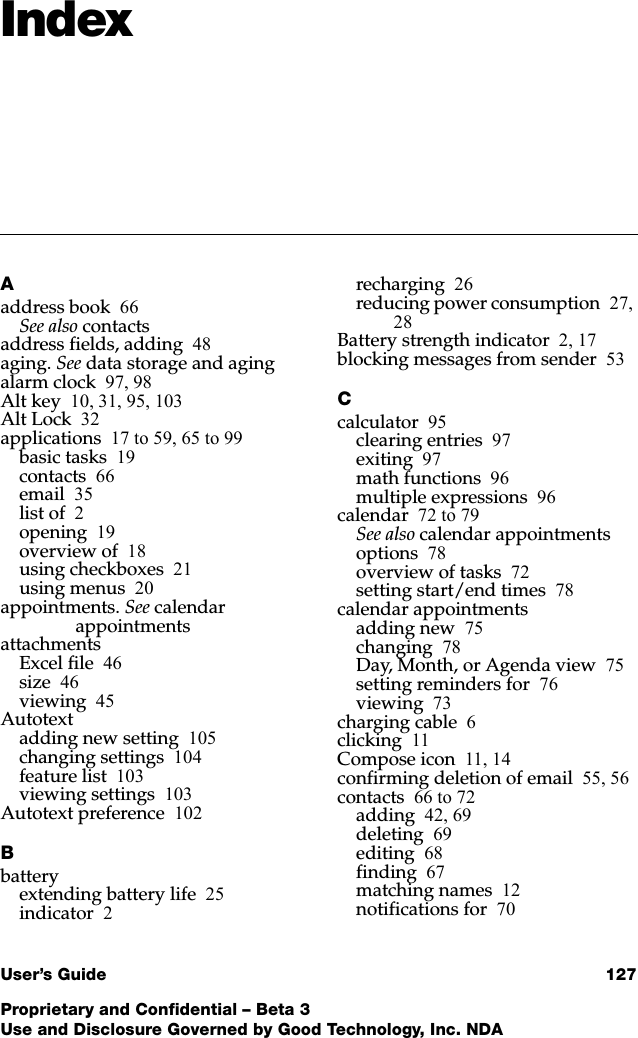
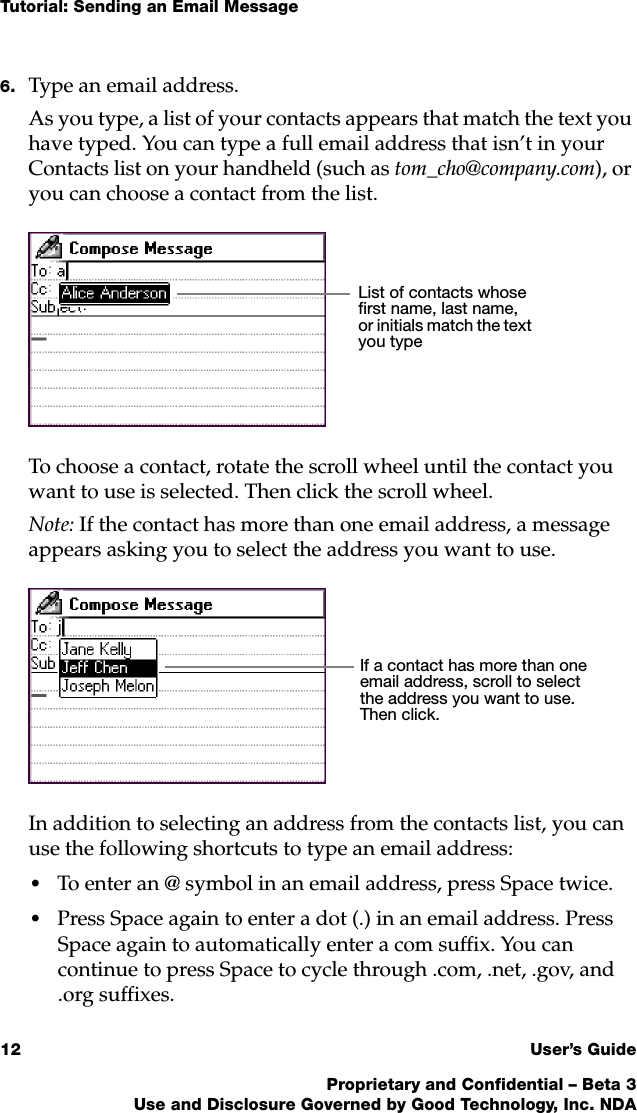
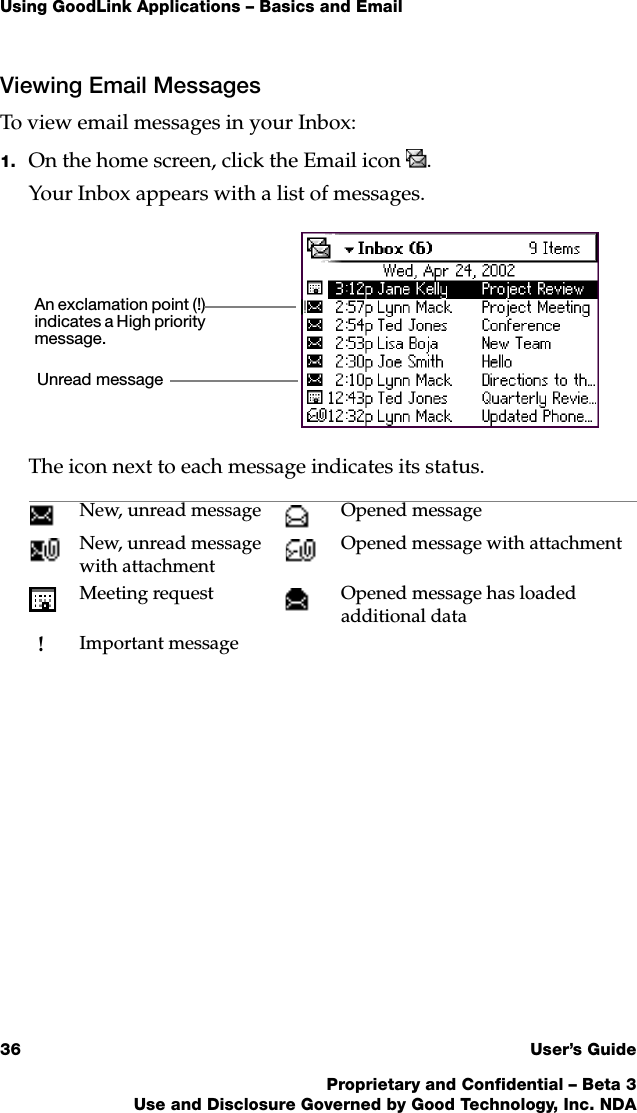
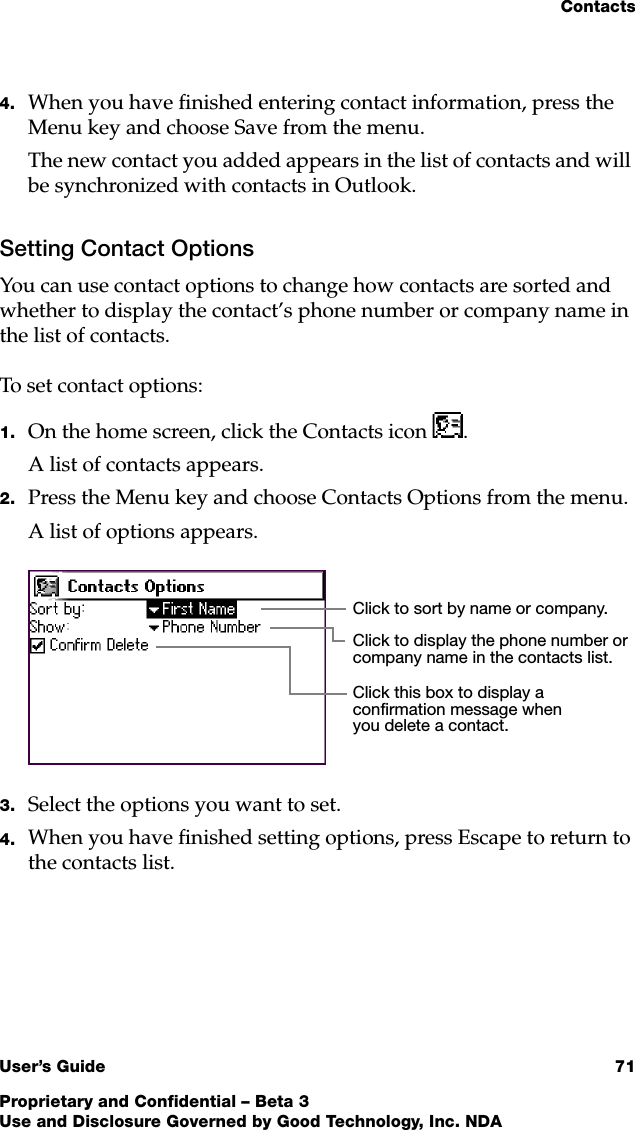
![Additional Applications68 User’s GuideProprietary and Confidential – Beta 3Use and Disclosure Governed by Good Technology, Inc. NDAOnly contacts that match the characters you type appear in the list. For example, if you type ma in the Find field, only contacts whose first or last names start with ma appear.2. Continue to type until you find the appropriate contact.Important: If the characters you type do not match any contacts, a [No Contacts] message appears. To redisplay contacts, press the Delete key to remove characters from the Find field.Editing ContactsTo edit a contact:1. On the home screen, click the Contacts icon .A list of contacts appears.2. Select the contact you want to edit and press the Menu key.3. Choose Edit.A list of fields appears. Type or change information in the fields. Press Enter to move the insertion point from field to field, or scroll with the scroll wheel.4. When you have finished making changes, press the Menu key and choose Save from the menu.Click to edit the contact.](https://usermanual.wiki/Good-Technology/G100.Revised-Users-Manual/User-Guide-247316-Page-74.png)


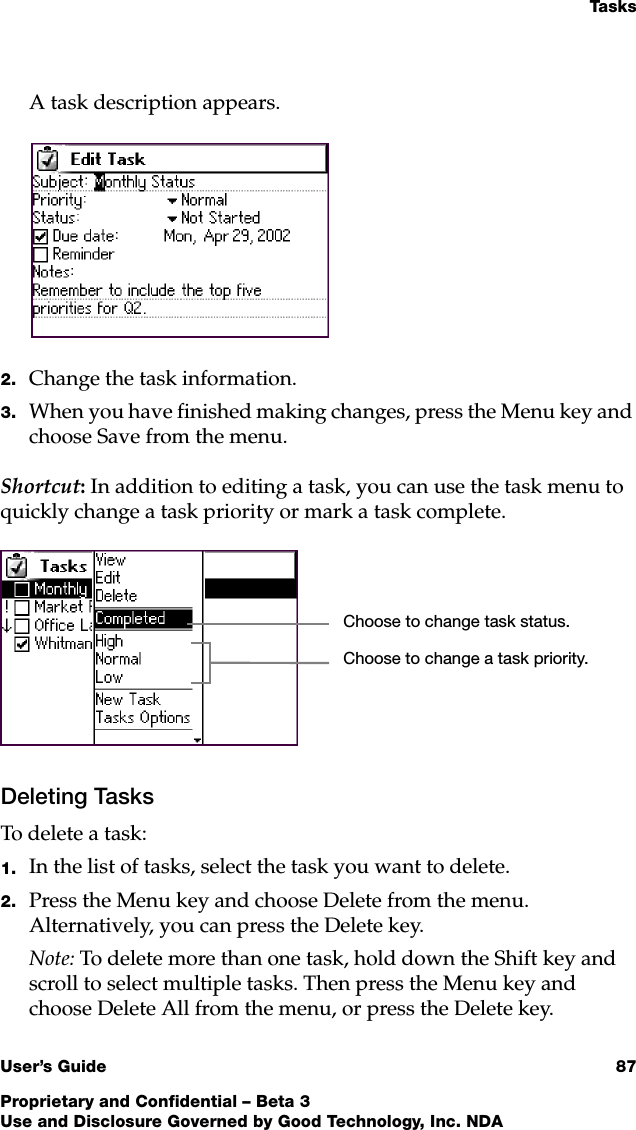
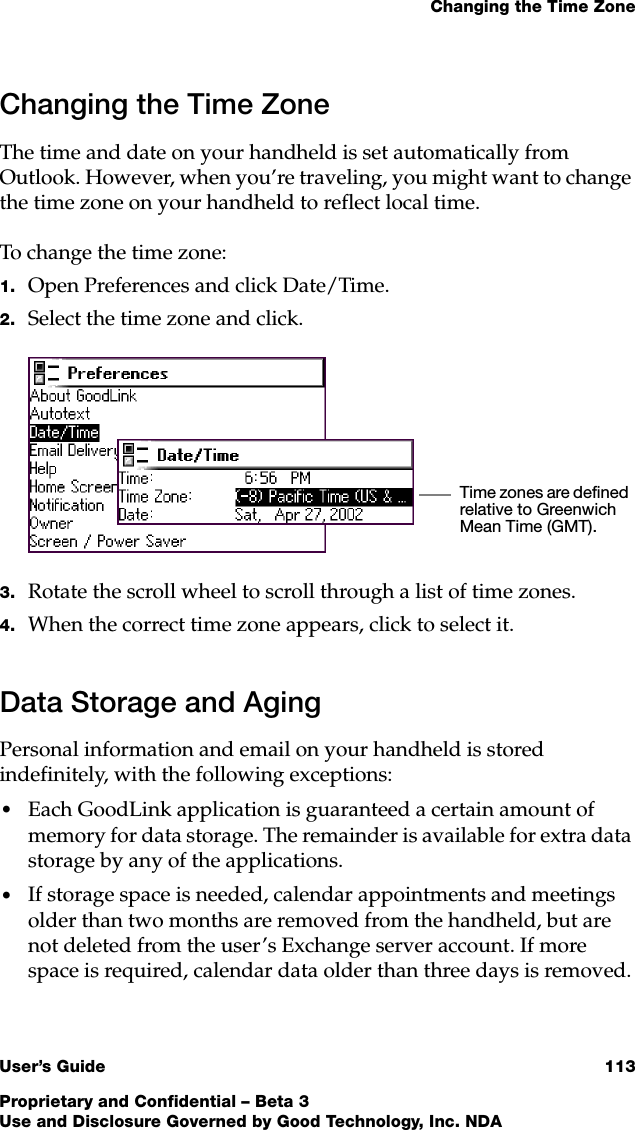
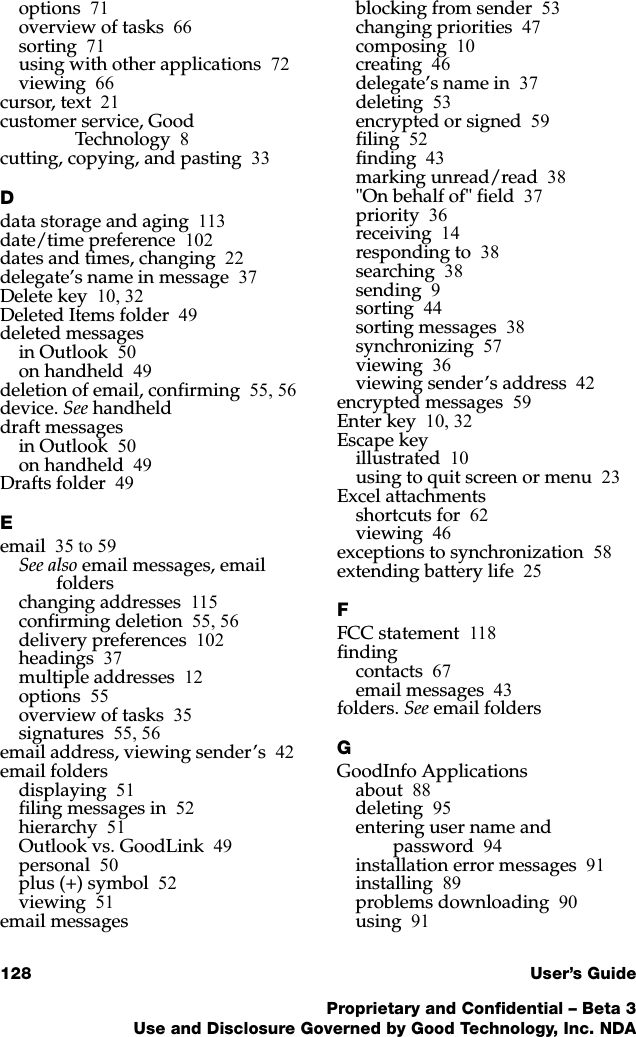
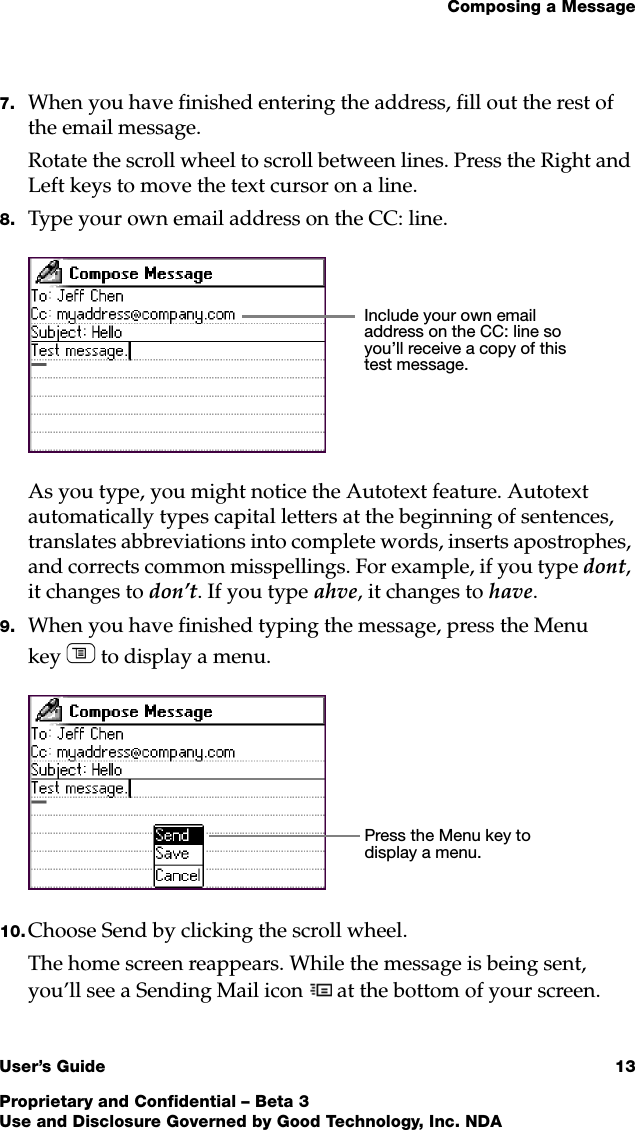
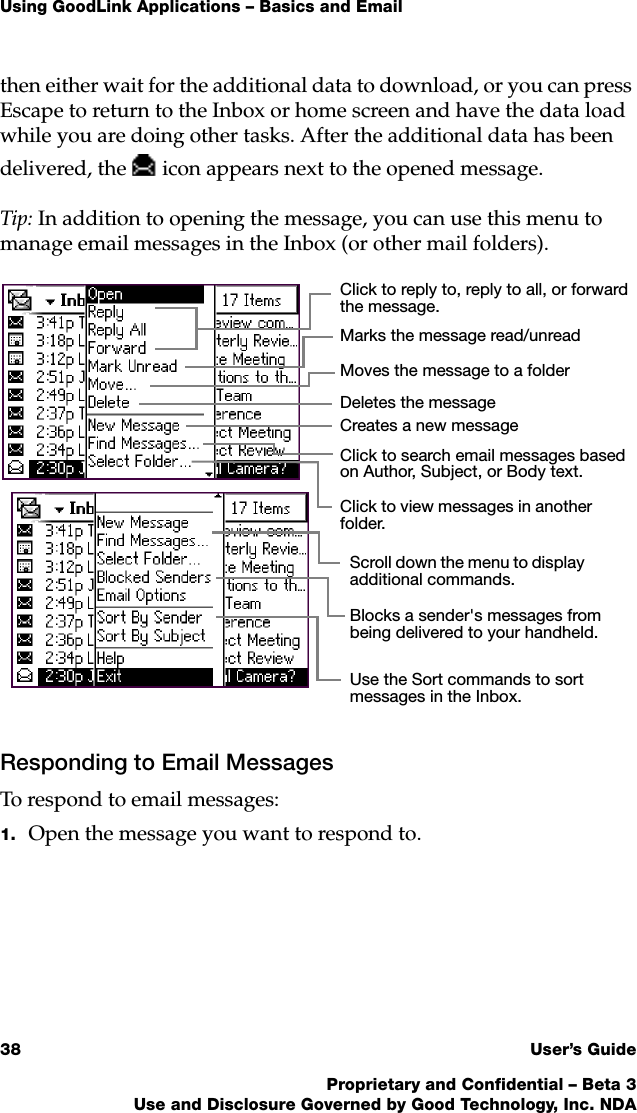
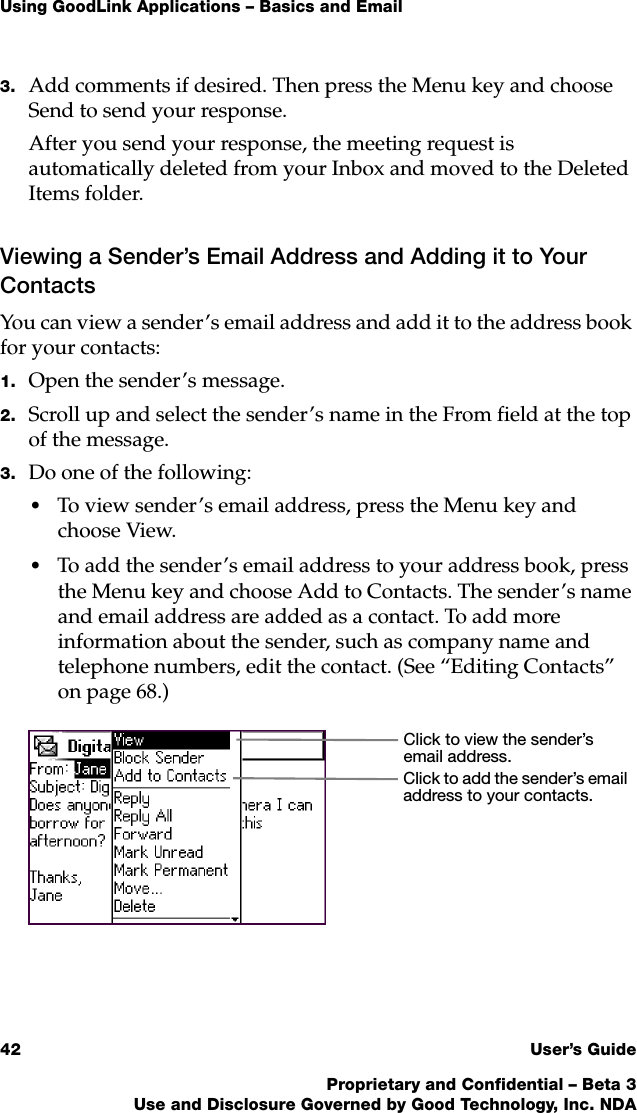
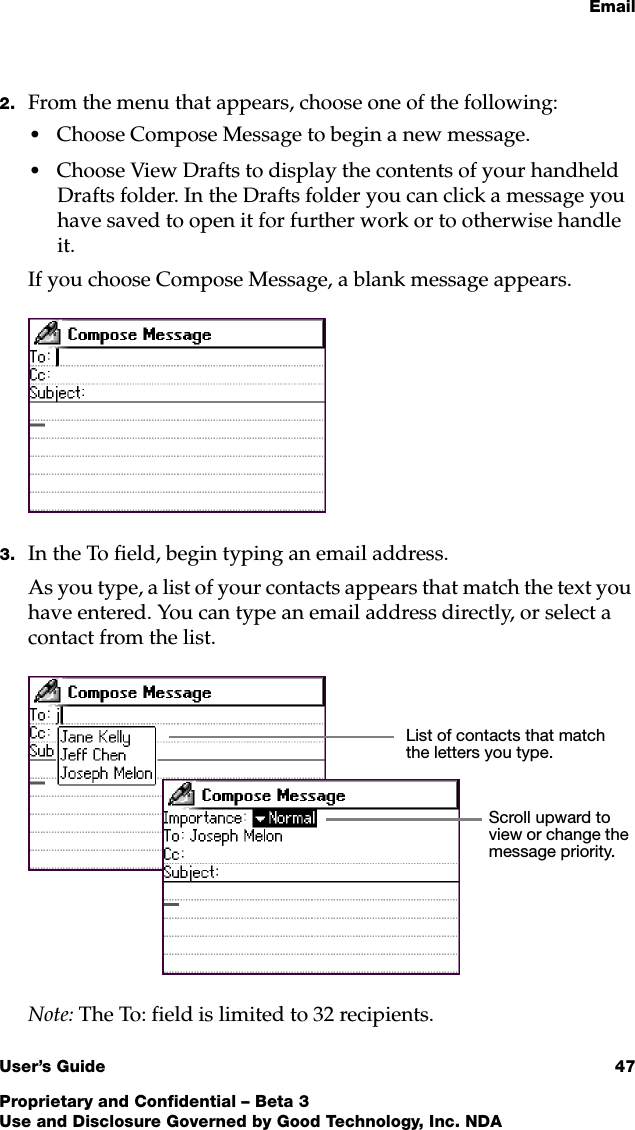
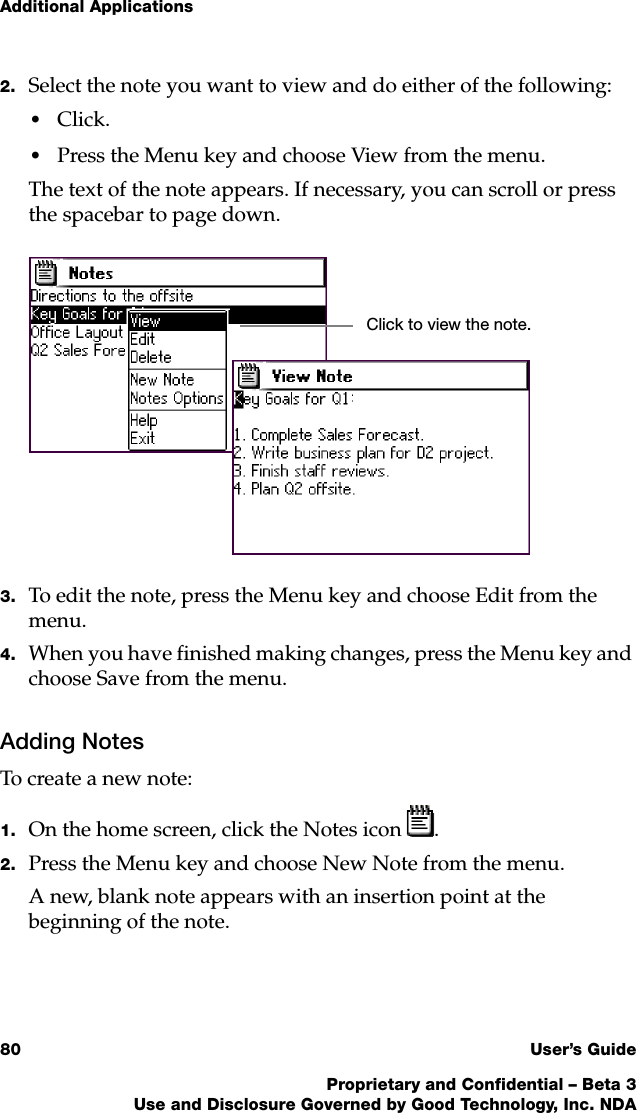
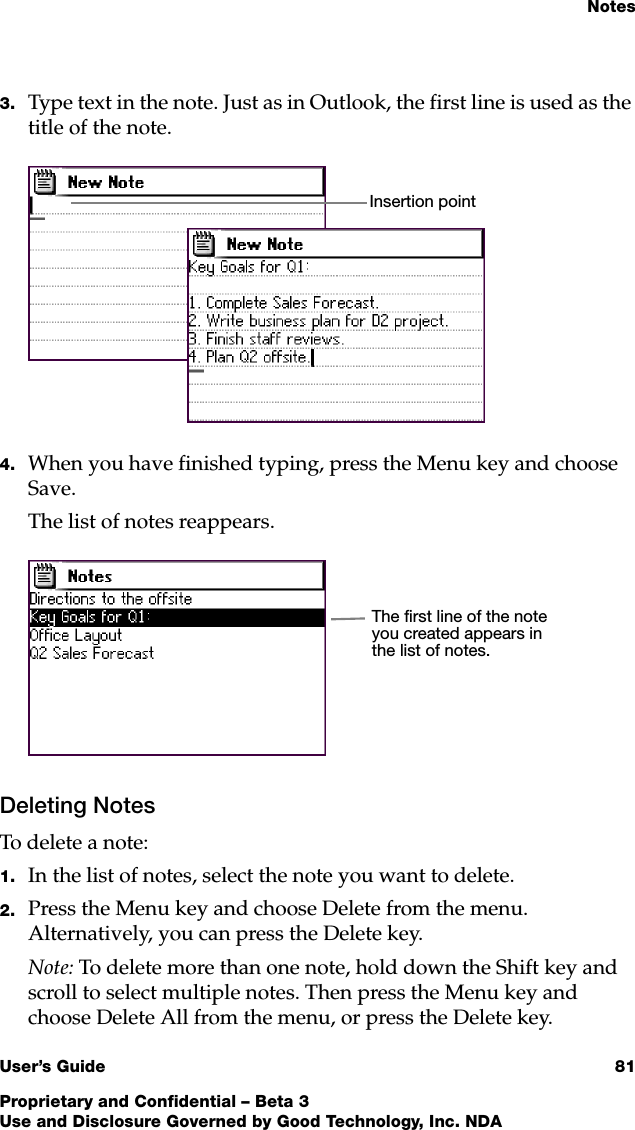
![NotesUser’s Guide 79Proprietary and Confidential – Beta 3Use and Disclosure Governed by Good Technology, Inc. NDA3. When you have finished setting calendar options, press Escape to return to the calendar.NotesYour handheld includes a Notes application you can use to jot down questions, ideas, directions, checklists, or any other bits of information you want to store on your handheld. Notes on your handheld are automatically synchronized with notes in Outlook.The Notes application enables you to:•View or edit existing notes•Create new notes•Copy note text to other applicationsViewing and Editing NotesTo view notes:1. On the home screen, click the Notes icon .A list of notes appears.If you don’t have any notes defined, a [No Notes] message appears.](https://usermanual.wiki/Good-Technology/G100.Revised-Users-Manual/User-Guide-247316-Page-85.png)
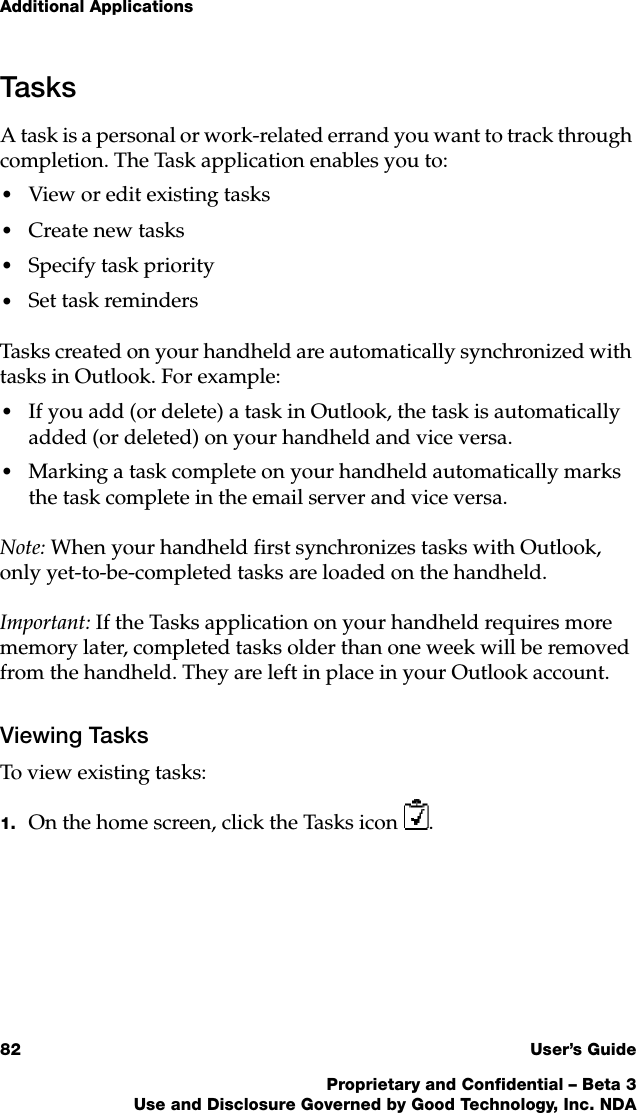
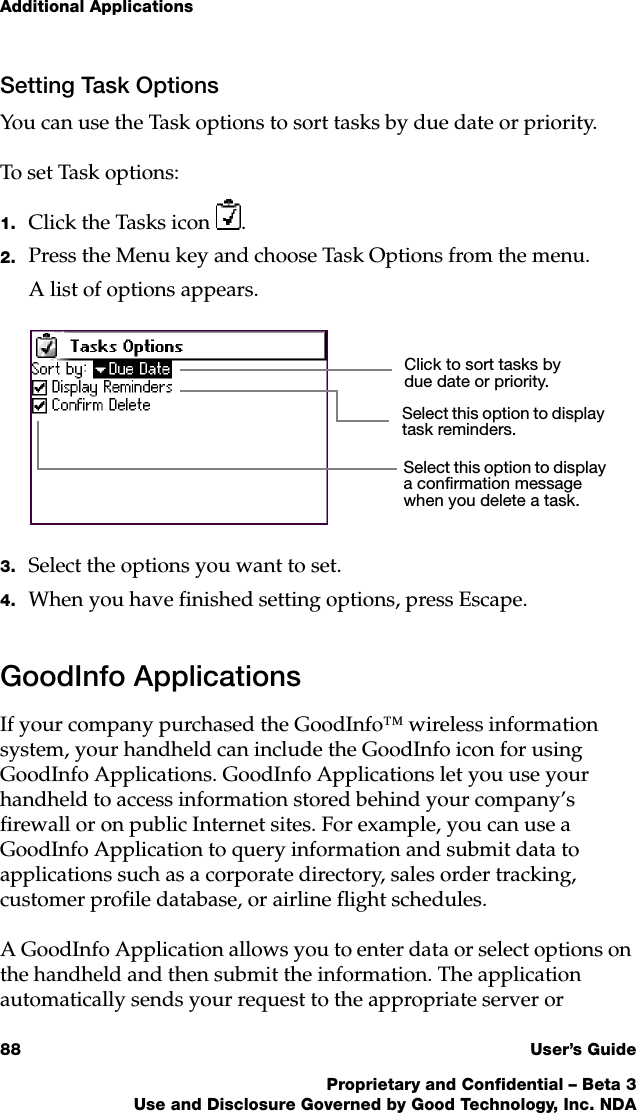
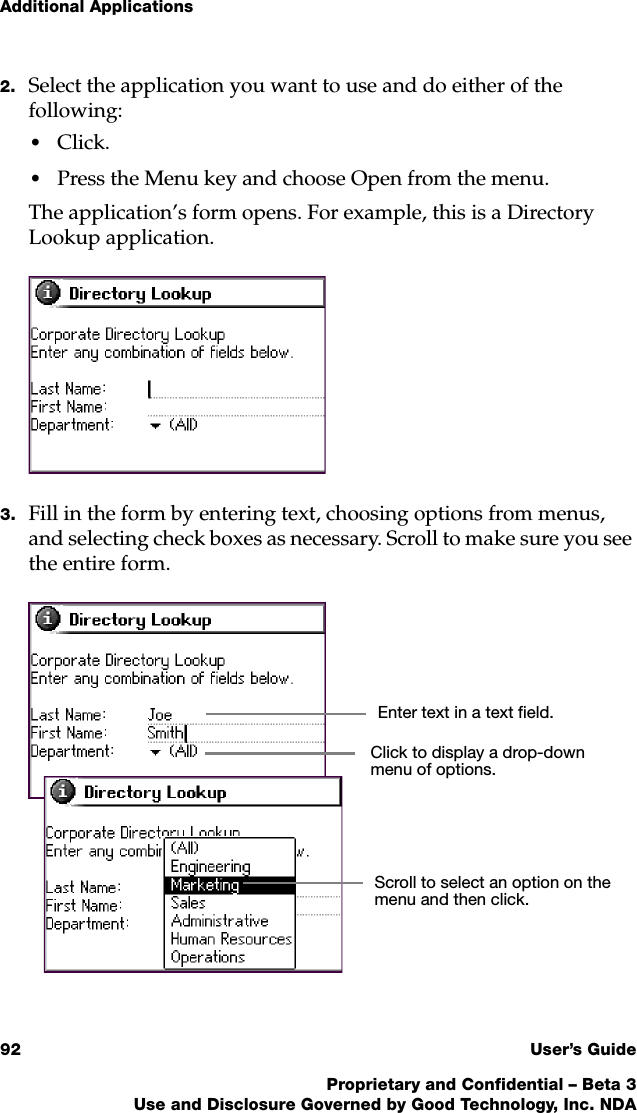
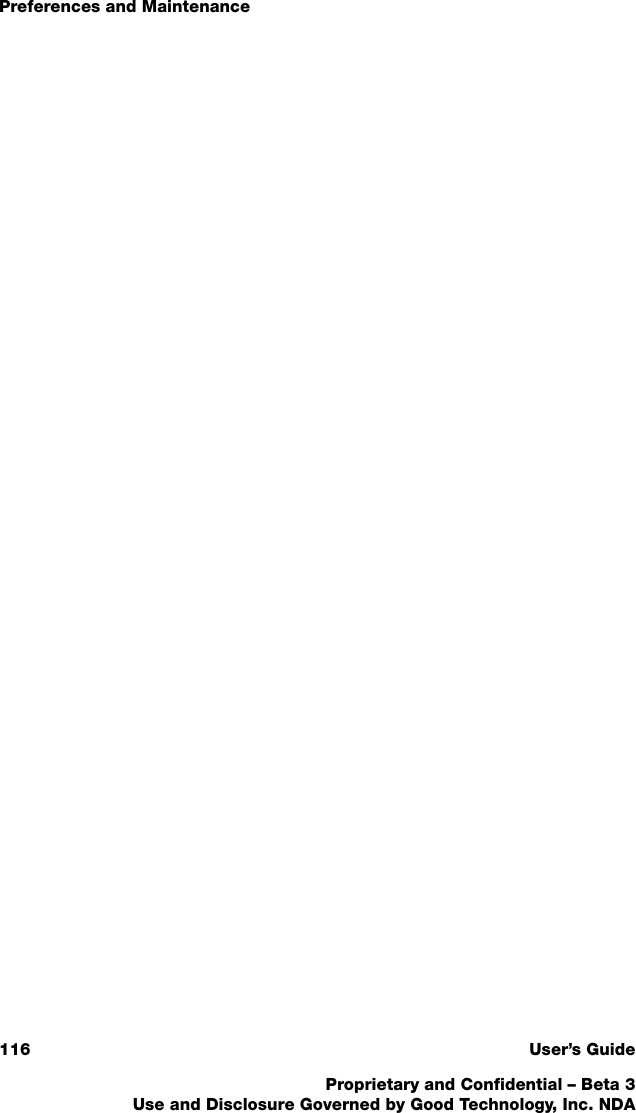
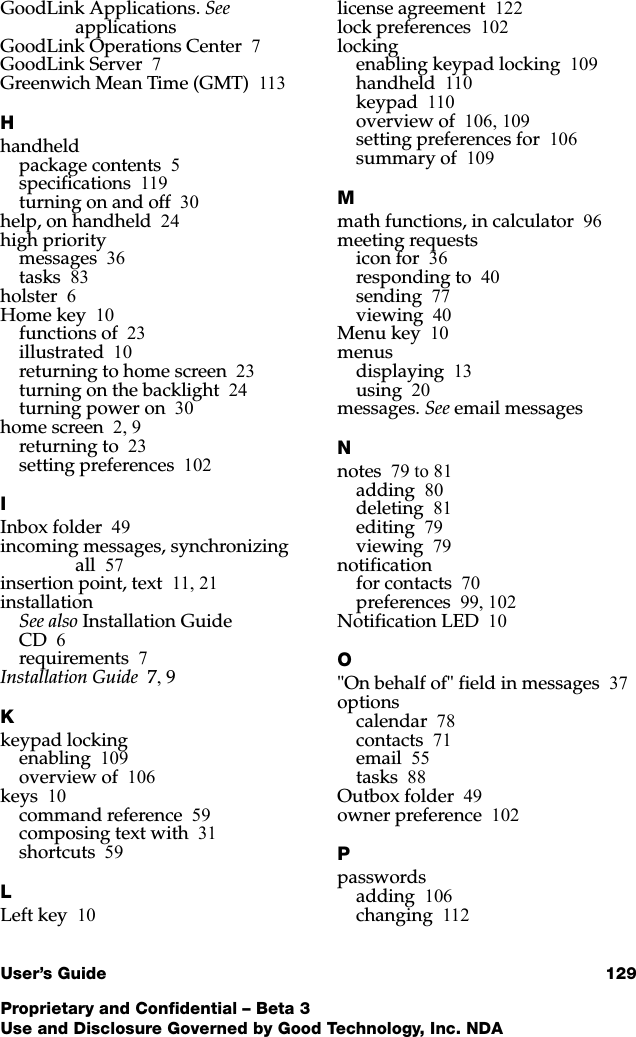
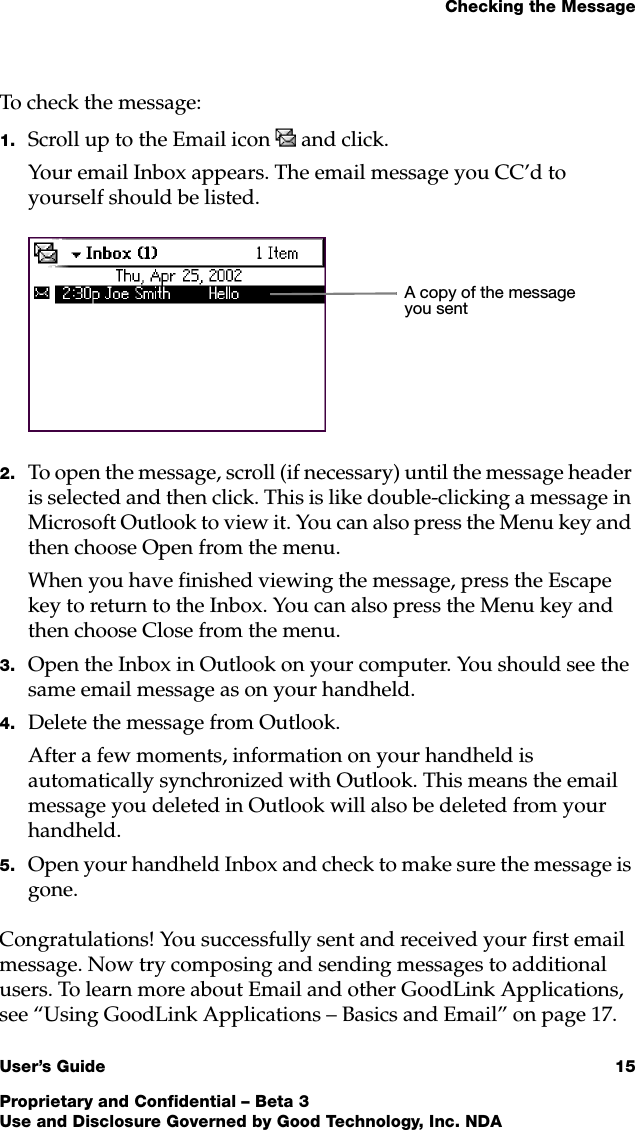
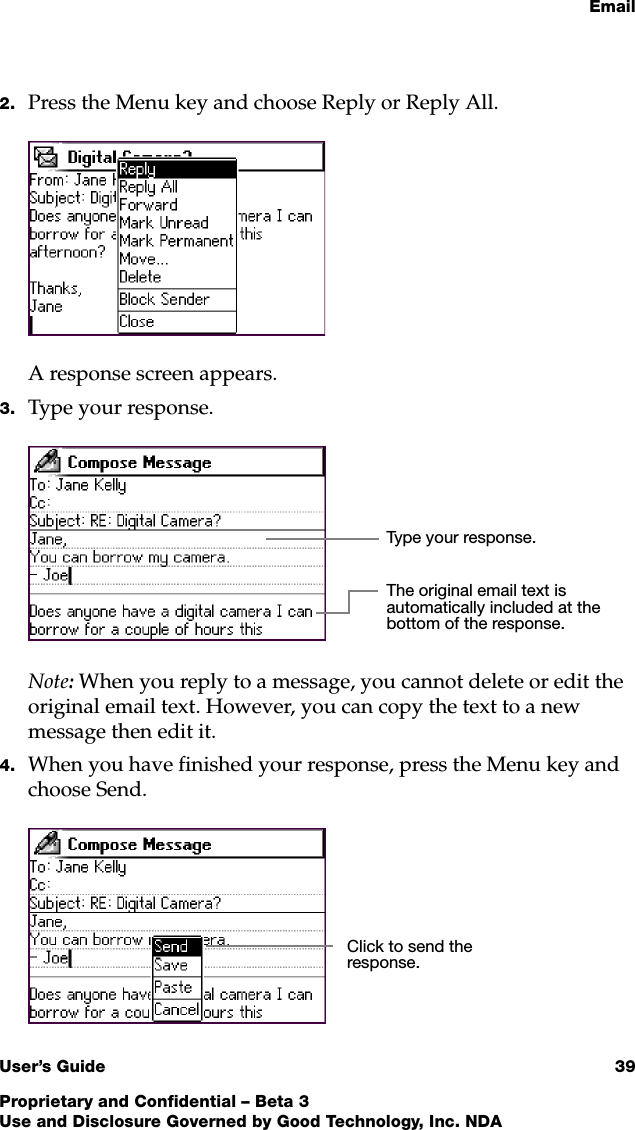
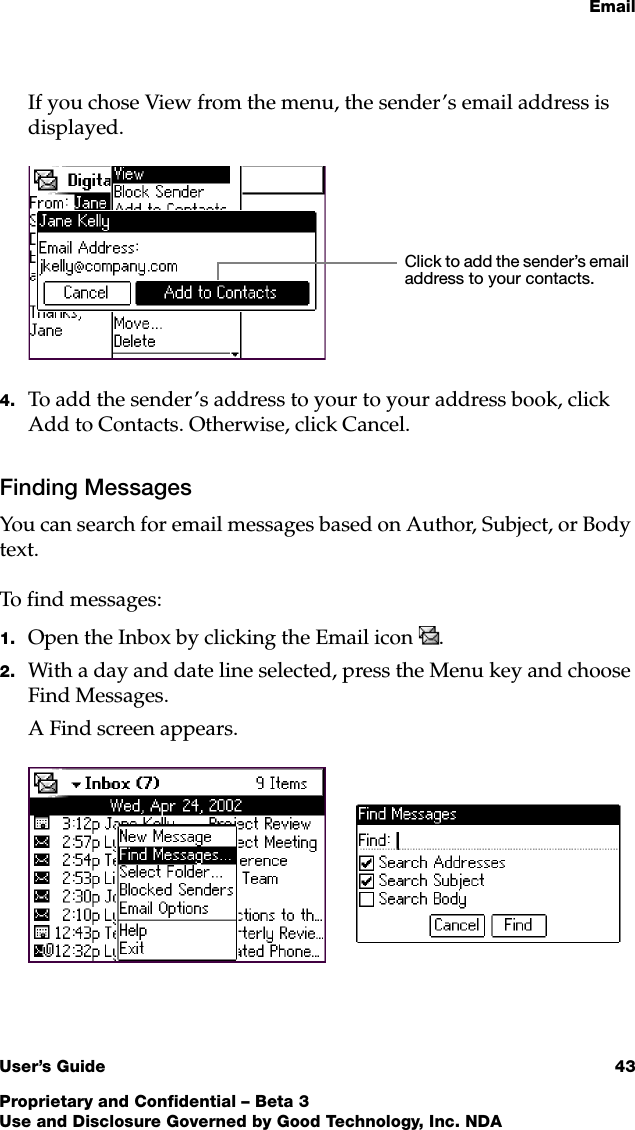
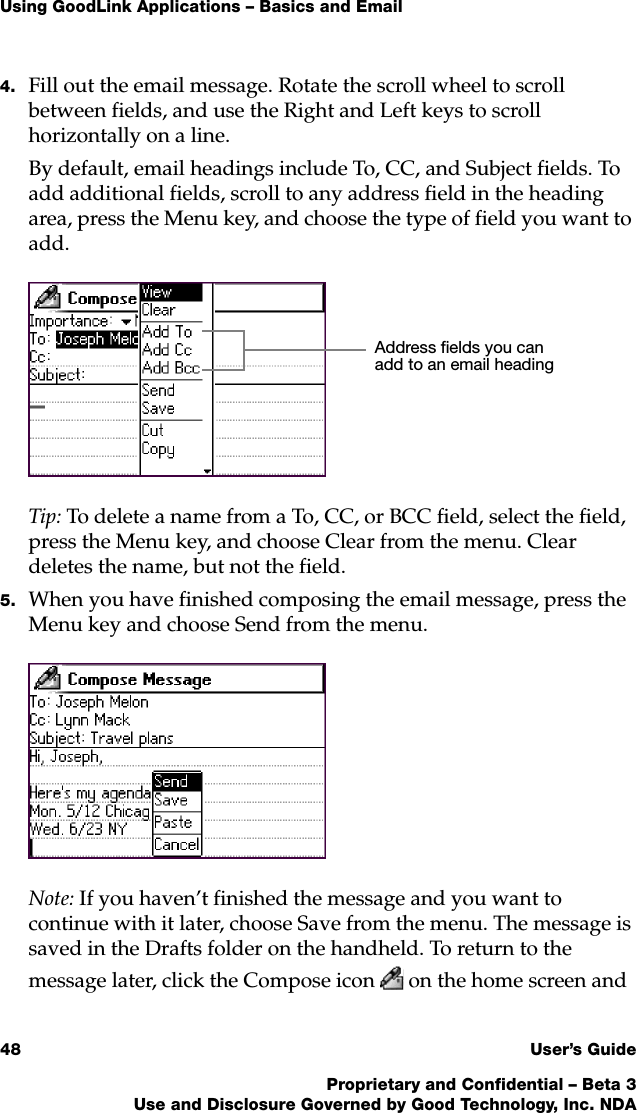
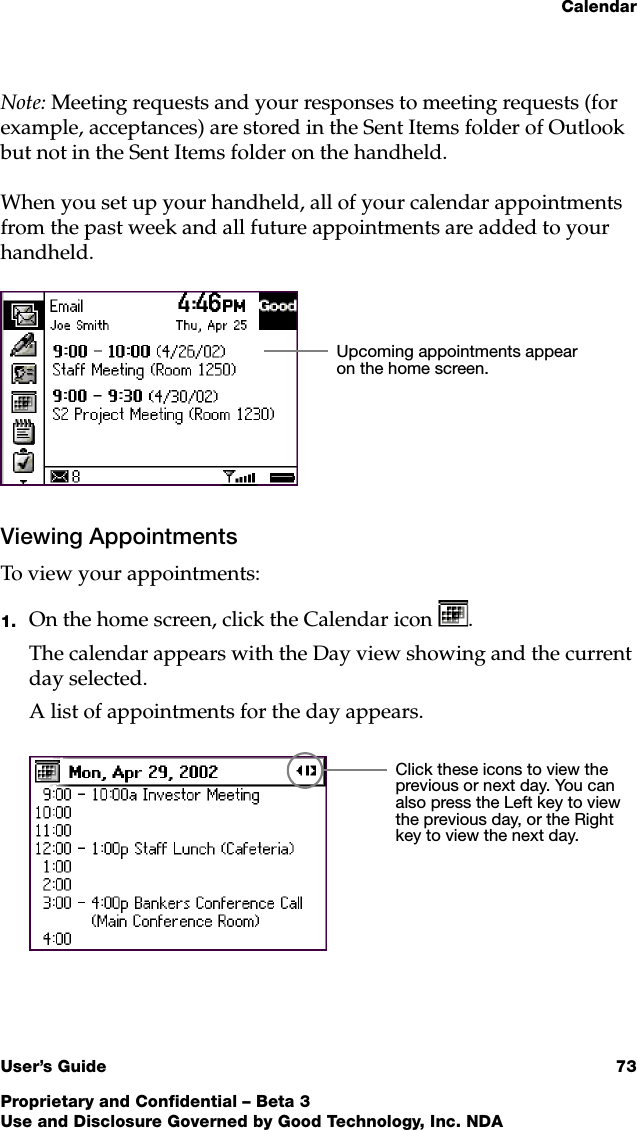
![Ta s k sUser’s Guide 83Proprietary and Confidential – Beta 3Use and Disclosure Governed by Good Technology, Inc. NDAA list of tasks appears. (If you don’t have any tasks defined, a [No Tasks] message appears.)Tasks in the task list are sorted in the following way:•Primary sort is Uncompleted/Completed, with Uncompleted at the top of the list.•Secondary sort is your selection: Due Date or Priority. If Due Date is selected, the tasks with no dates are placed at the top of the list. The rest of the tasks are ordered from later date to earlier date.If Priority is selected, High Priority tasks are placed on top, then Normal, then Low.•Tertiary sort is alphabetically by Subject.Configure secondary sorts using Task Options in the Tasks menu.2. Select a task and do either of the following:•Click. •Press the Menu key and choose View. An exclamation point (!) indicates a High priority.A check mark indicates a completed taskA down arrow indicates a Low priority](https://usermanual.wiki/Good-Technology/G100.Revised-Users-Manual/User-Guide-247316-Page-89.png)