user manual

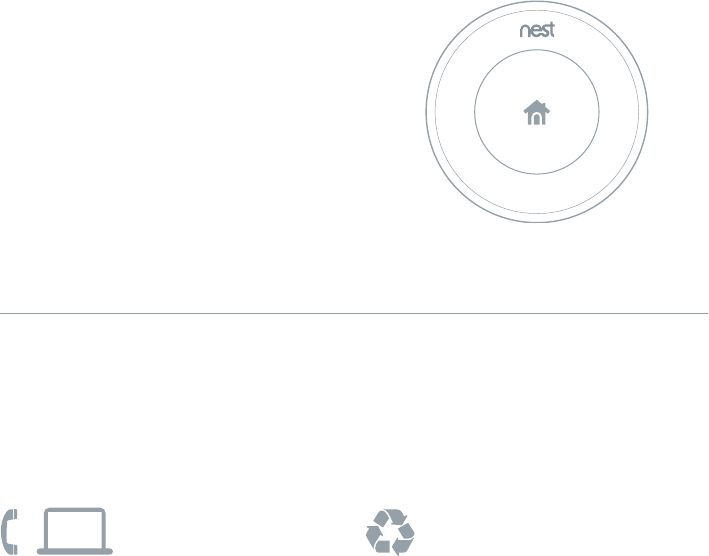
Learning Thermostat
Installation Guide
Compatibility
Go to nest.com/works to make sure Nest will work in your home
and find out if you’ll need Nest Concierge professional installation.
Watch the video
Before you install Nest, watch the installation video
at nest.com/support
Questions? Visit support or give us a call at 855-4MY-NEST.

Contents
Display
Screws for Steel Plate
Wall Screws
Base Nest Screwdriver
Optional Trim Plate Steel Plate
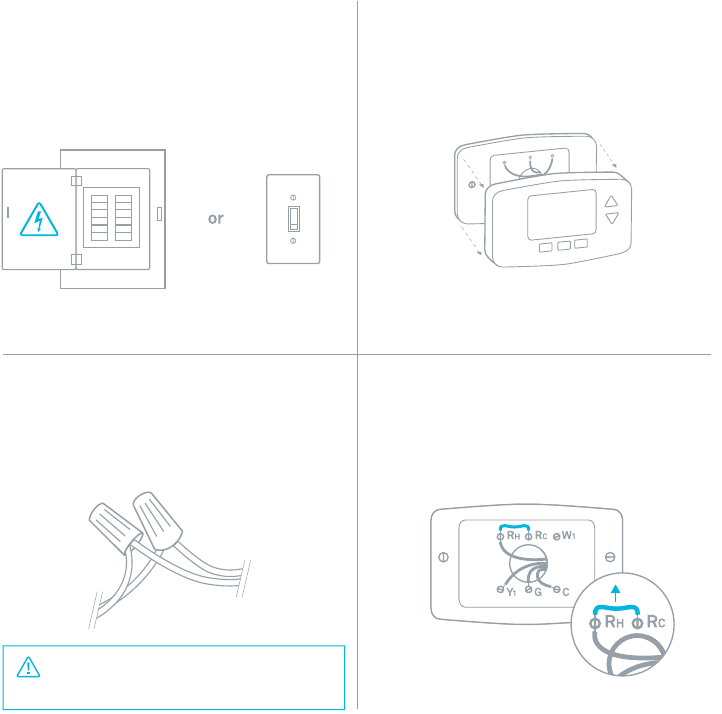
1. Switch off power
This protects you and avoids blowing a
fuse. Adjust the temperature on your old
thermostat to make sure your system is off.
2. Remove cover
Some covers pop off, while others need
to be unscrewed.
CAUTION: Do not connect Nest to
high voltage wires.
4. Remove any jumper wires
Jumper wires are short wires between
two connectors. Nest doesn’t need them.
An R wire can go into either Rc or Rh.
3. Check your system
If your old thermostat is labeled 110V or 220V
or has thick wires with wire nuts, your system
is high voltage. Not sure? Contact support.
Breaker Box Switch
5. Label wires
Peel off the blue labels and attach them to
your wires.
6. Disconnect wires and
remove base
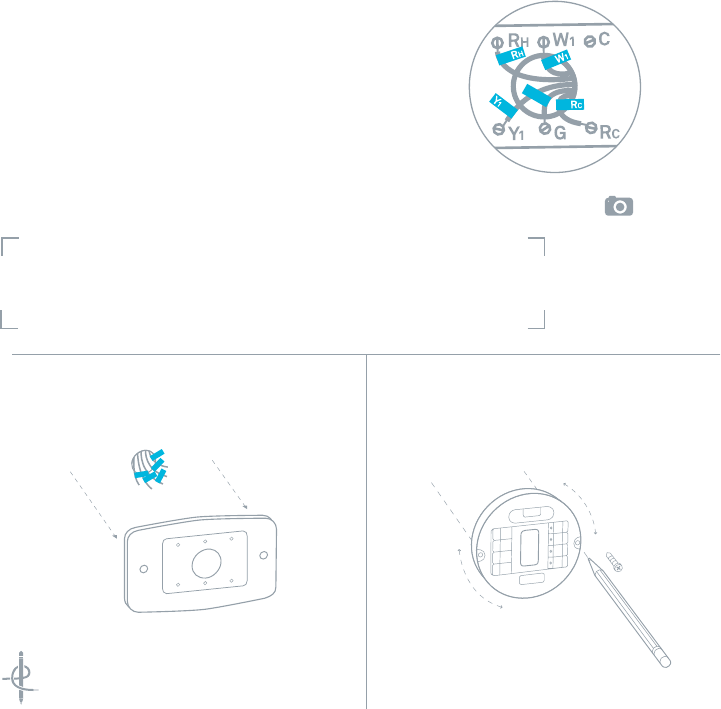
7. Mark where screws will go
Use the bubble level to make sure Nest
is level.
Tip: Take a
picture of the
wires on your
old thermostat
to help you
remember.
Tip: Wrap the wires around a pencil to
keep them from falling into the wall.
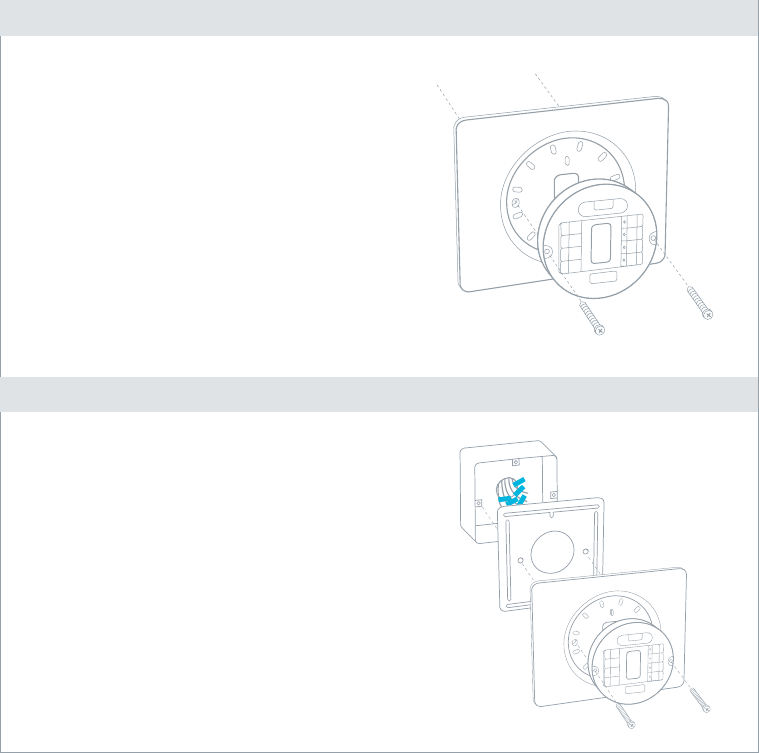
Use trim plate if needed
You can cover up holes or marks left by your
old thermostat with the optional trim plate.
Place the trim plate on the wall and put
the base on top so they snap together, then
screw them both to the wall.
The trim plate can be found in the bottom of
the Nest box.
Mounting Nest on an
electrical box
Electrical boxes aren’t common, but if you have
one, secure the steel plate to the electrical box
with two of the short steel plate screws. Insert
the steel plate screws into the long slots on the
steel plate.
Use the other two short steel screws to attach
the Nest base and trim plate to the steel plate.
Optional in most homes
Optional in most homes
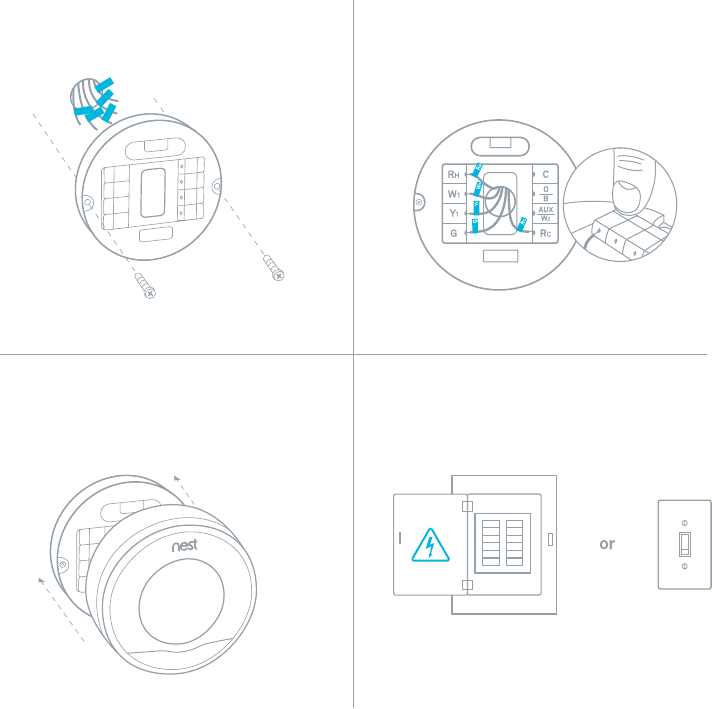
9. Connect wires
After all wires are connected, make sure
they’re flush with the wall.
10. Attach display
Press the display until it clicks into place.
8. Attach base
11. Switch power back on
Breaker Box Switch
Recycle your old thermostat:
see nest.com/responsibility
Please recycle Nest’s 100%
recyclable packaging
For more information visit nest.com
or call 855-4MY-NEST (855-469-6378)
12. Setup and Nest Account
Nest will turn on and start setup. Turn the
ring and press to select.
Connect Nest to Wi-Fi during setup, then visit
nest.com/home to create a Nest Account so
you can control Nest from anywhere.
Federal Communications
Commission (FCC)
Compliance Notice:
This equipment has been tested and found to comply with the limits
for a Class B digital device, pursuant to part 15 of the FCC Rules. These
limits are designed to provide reasonable protection against harmful
interference in a residential installation. This equipment generates,
uses and can radiate radio frequency energy and, if not installed
and used in accordance with the instructions, may cause harmful
interference to radio communications. However, there is no guarantee
that interference will not occur in a particular installation. If this
equipment does cause harmful interference to radio or television
reception, which can be determined by turning the equipment off and
on, the user is encouraged to try to correct the interference by one or
more of the following measures:
• Reorient or relocate the receiving antenna.
• Increase the separation between the equipment and receiver.
• Connect the equipment into an outlet on a circuit different from
that to which the receiver is connected.
• Consult the dealer or an experienced radio/TV technician for help.
This device complies with part 15 of FCC rules. Operation is subject to
the following two conditions:
1. This device may not cause harmful interference.
2. This device must accept any interference received, including
interference that may cause undesired operation.
Change or modications that are not expressly approved by the
manufacturer could void the user’s authority to operate the equipment.
RF Exposure Information
This equipment complies with FCC radiation exposure limits set forth
for an uncontrolled environment. In order to avoid the possibility of
exceeding the FCC radio frequency exposure limits, human proximity
to the antenna shall not be less than 20cm during normal operation.
This device complies with Industry Canada license-exempt RSS
standard(s). Operation is subject to the following two conditions:
(1) this device may not cause interference, and
(2) this device must accept any interference, including interference
that may cause undesired operation of the device.
Le présent appareil est conforme aux CNR d’Industrie Canada
applicables aux appareils radio exempts de licence. L’exploitation
est autorisée aux deux conditions suivantes:
(1) l’appareil ne doit pas produire de brouillage, et
(2) l’utilisateur de l’appareil doit accepter tout brouillage radioélectrique
subi, même si le brouillage est susceptible d’en compromettre le
fonctionnement.
This Class B digital apparatus complies with Canadian ICES-003.
Cet appareil numérique de la classe B est conforme à la norme NMB-
003 du Canada.
This equipment complies with IC RSS-102 radiation exposure limits
set forth for an uncontrolled environment. This equipment should be
installed and operated with minimum distance 20cm between the
radiator & your body.
Industry Canada (IC)
Compliance Notice:
IC Radiation Exposure
Statement: