Grand Electronics 00002 Tablet PC User Manual Attention
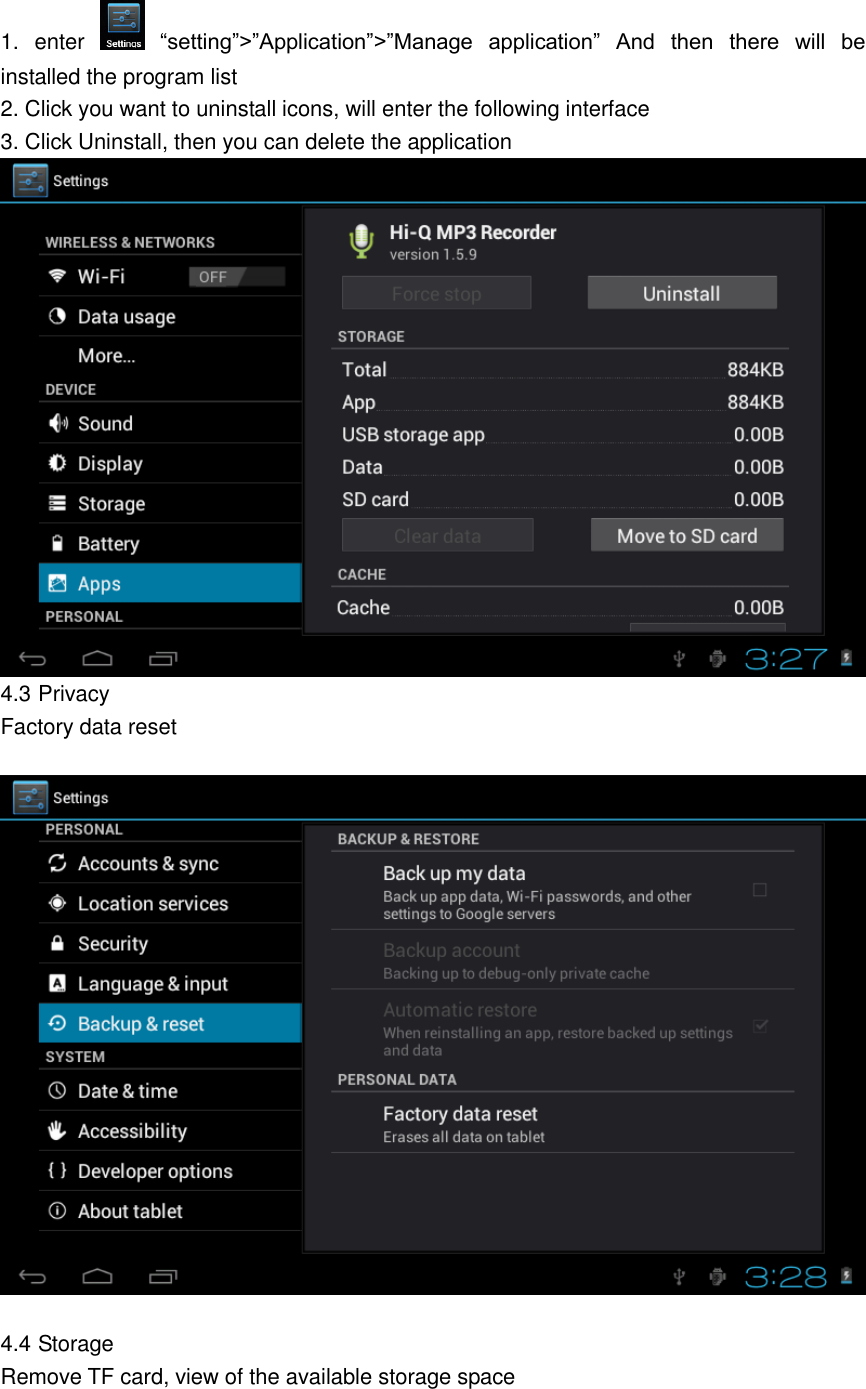
GRAND ELECTRONICS (SHENZHEN)CO.,LTD Tablet PC Attention
UserManual.wiki
>
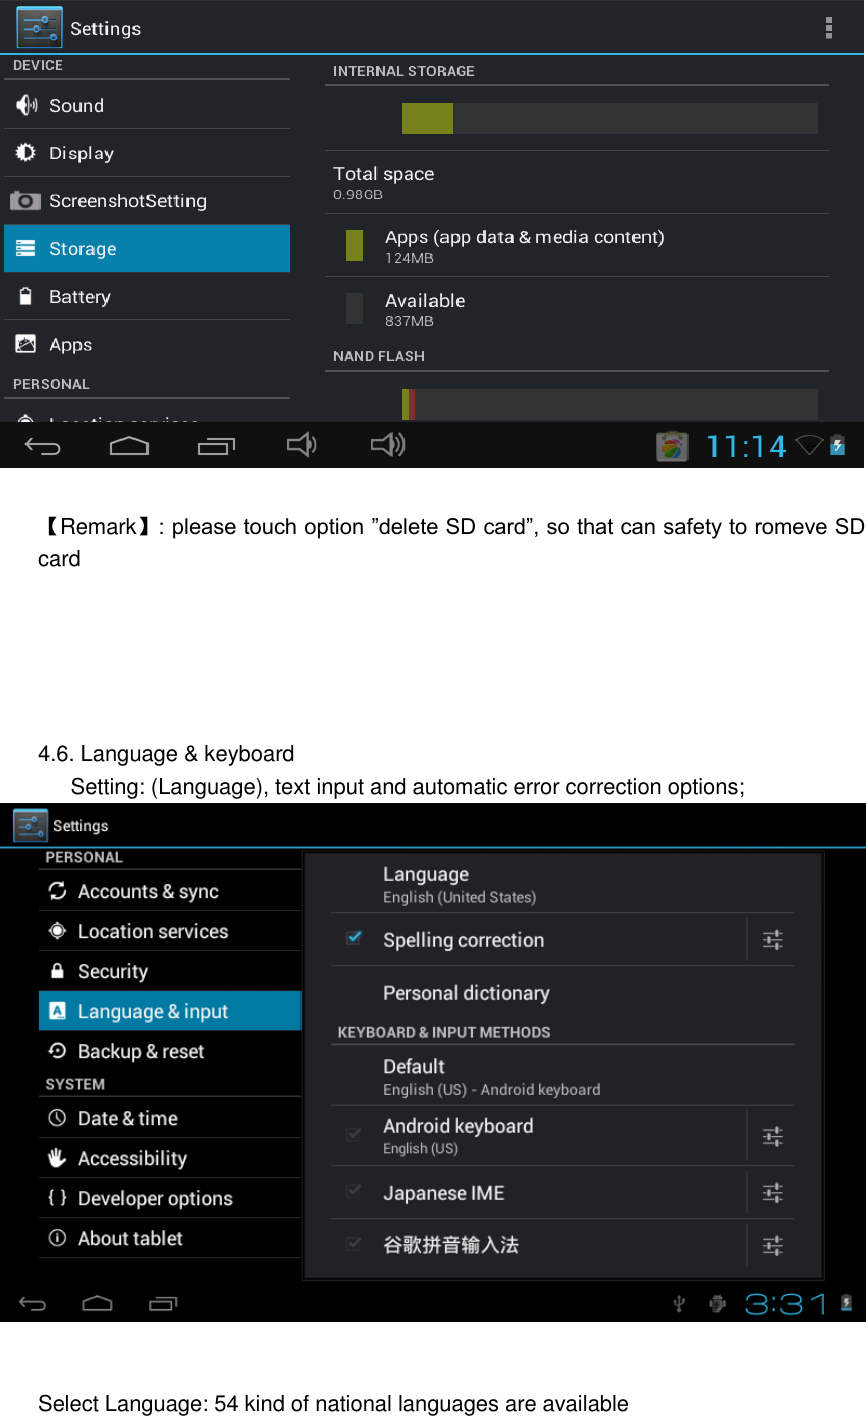
Grand Electronics
>
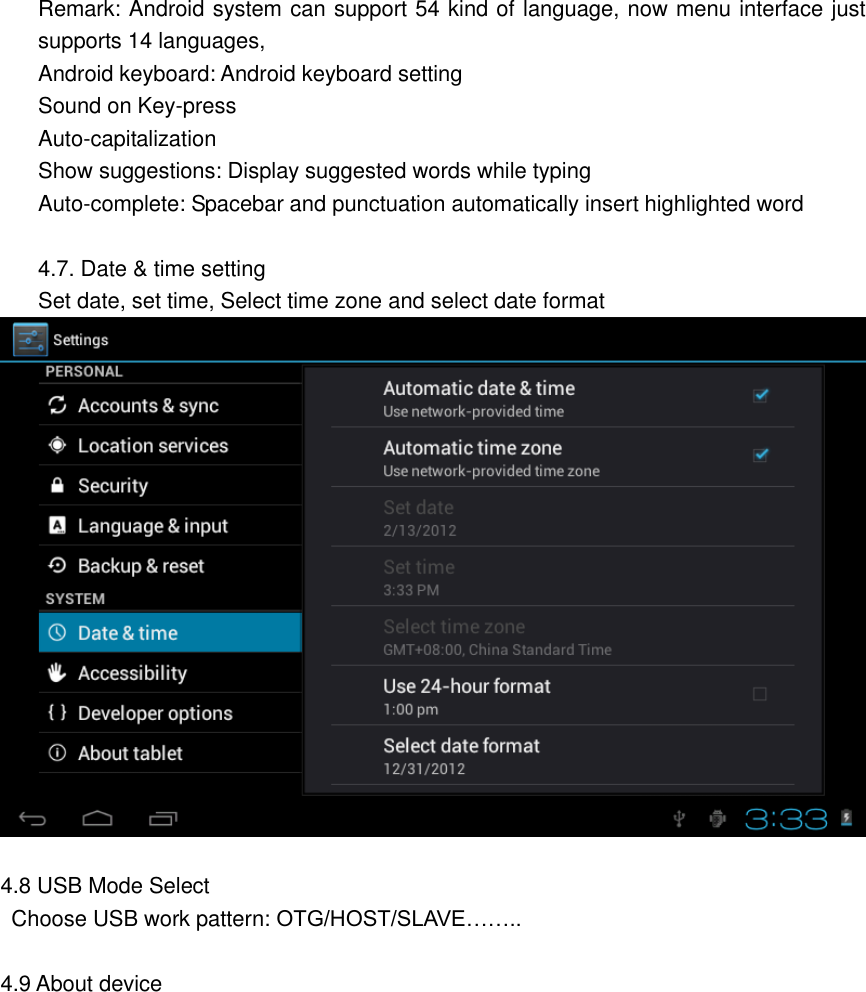
00002 User Manual
User Manual
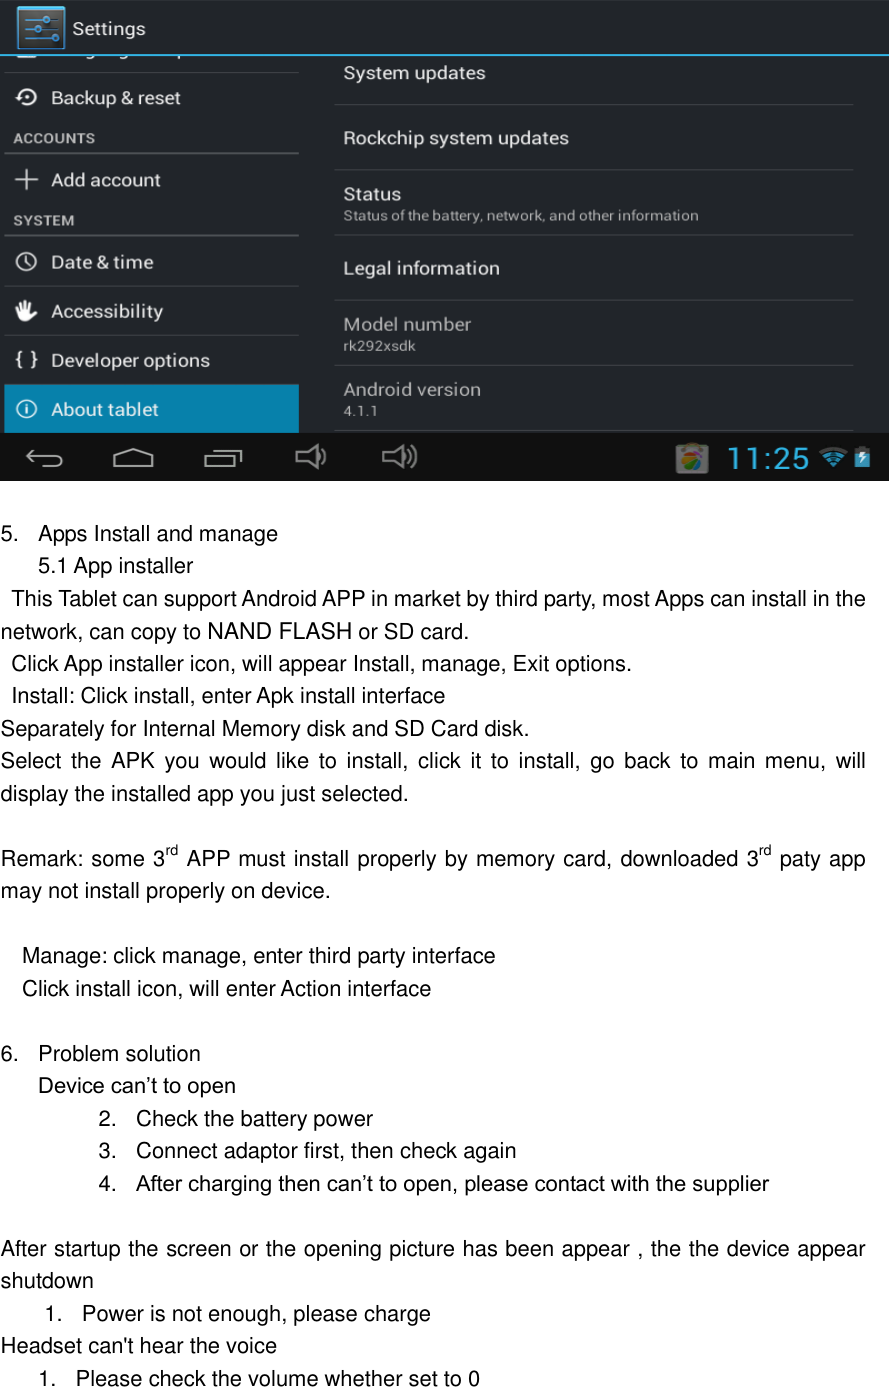
Navigation menu
Upload a User Manual
Namespaces
Wiki Guide
HTML
PDF
Info
Views
User Manual
Discussion / Help
Navigation