Grandex PS125-01 Digital Switch User Manual CA 210 V1 1 GRANDEX 070605
Grandex International Corporation Digital Switch CA 210 V1 1 GRANDEX 070605
Grandex >
User Manual

Installation Guide
Home Automation Digital Switch
PS125
The PS125 is a smart, controllable digital switch, which includes a Light
Sensor and Energy Meter, for your home’s 2-way circuit or 3-way circuit
switch. Together with Controller, PS App (mobile Smartphone /Tablet), and
all PS devices (switches, power plugs, dimmers, and sensors), the PS system
provides you with the capability to control your home’s electrical devices
remotely from anywhere in the world for home automation.
WARINGS AND CAUTIONS
PS125 is intended to be used as an indoor home switch; it should never
be used for medical and/or life support equipment
The operation and activation of PS125 can be controlled remotely in a
different place, or by automatic programmed control. As the control
may be intentional or unintentional due to programming, wrong button
pressed, the result of the operation could be undesirable, unexpected,
or even hazardous. Please exercise caution.
If you are unsure or uncomfortable about performing the installation,
please consult a qualified electrician.
Overview & Operation
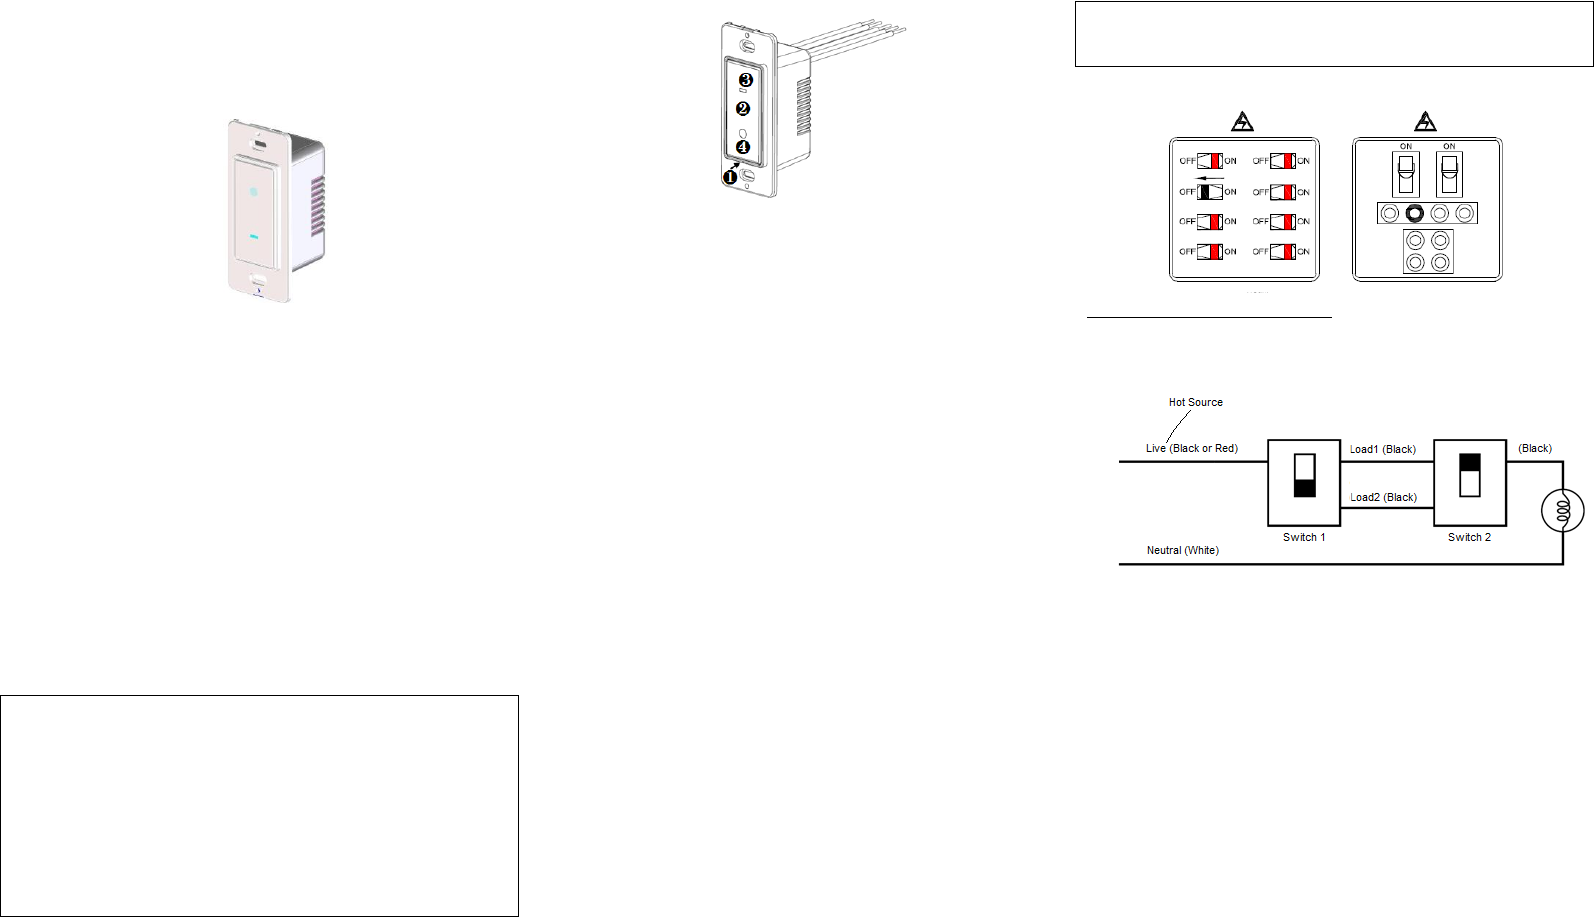
1. PS125 Reset Pin
Insert a small pin (e.g. paper clip) to power reset PS125 digital
switch
2. Toggle Switch
Press to toggle the switch on or off manually
Press and hold for 5 seconds to set the switch to scan mode
Press and hold for 10 seconds to reset the switch to factory
default setting
3. LED
Green and Orange – Flashing alternatively => In scan mode
Green and Orange – steady on => Power is off and it is without ID
Green – steady on => Power is off and it is connected to the
controller
Orange – steady on => Power is off and it lost connection to the
controller
Green and Orange – off => Power is on
4. Light sensor
Sense the brightness in the surrounding
Installation
WARNING
To avoid fire, shock, or death, turn off the power at the electrical service
panel before you install this device.
1. Turn off power to your switch at the electrical service panel
Perform either step 2 or step 3 below
2. Procedure to install PS125 to the 3-way circuit switch (2 switches) :
2.1 There are two switches for the 3-way circuit, please review a typical
wiring diagram below.
2.2 As there are two switches, we need to identify which switch to be
replaced by a PS125 Home Automation Switch. Please follow the
steps below to inspect both switches:
Remove the receptacle’s cover & the mounting screws.
Inspect and identify Ground, Neutral, Live, and Load wires in the
receptacle:
2 Load – always present and it is required (black wire)
1 Ground – not always present, but it is optional (green wire)
1 Live – always present and it is required (red or black wire)
1 Neutral – not always present but it is required (white wire). The
Neutral wire is usually present in a screw-on connector.
IMPORTANT :
If the Neutral wire is not present, stop and contact support.
Turn on power at the electrical service panel and use a “voltage
detector” to test each Live wire of both switches. The switch to be
replaced by PS125 should have the energized Live wire.
Once the switch to be replaced by PS125 is identified, turn off power
to your switch at the electrical service panel

2.3 Disconnect the wires and remove the receptacle from the identified
switch where its box has the Live wire.
2.4 Install the PS125 digital switch
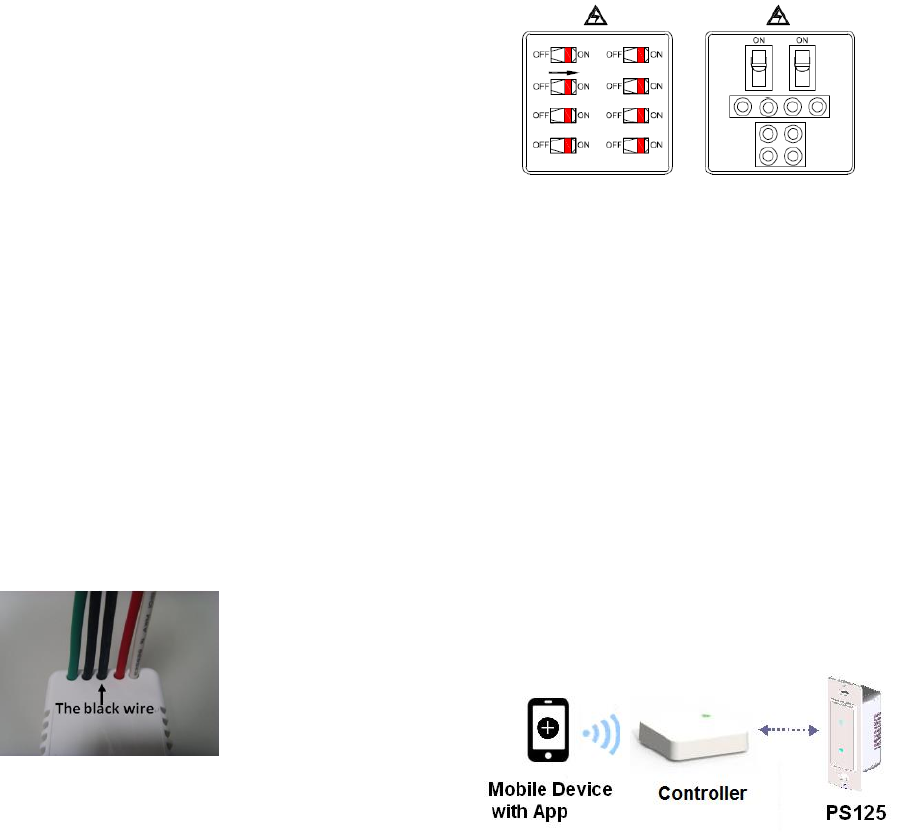
PS125 has five wires: 2 black, 1 red, 1 white, and 1 green.
Please connect the wires between PS125 to switch using the
screw-on connectors (see below)
2 Black wires to 2 Load wires
Green wire to Ground wire – if present
Red wire to Live wire
White wire to Neutral wire
Mount PS125 into the switch box carefully.
Screw on the screws
Attach the switch’s plate cover.
IMPORTANT :
The incorrect wires connection will result in switch not working.
3. Procedure to install PS125 to the 2-way circuit switch (1 switch) :
3.1 Follow the steps below to inspect the receptacle in the switch box
Remove the receptacle’s cover & the mounting screws.
Inspect and identify Ground, Neutral, Live, and Load wires in the
receptacle:
1 Load – always present and it is required (black wire)
1 Ground – not always present, but it is optional (green wire)
1 Live – always present and it is required (red or black wire)
1 Neutral – not always present but it is required (white wire). The
Neutral wire is usually present in a screw-on connector.
IMPORTANT :
If the Neutral wire is not present, then stop and contact support.
3.2 Disconnect the wires from the receptacle and remove it
3.3 Install the PS125 digital switch
PS125 has five wires: 2 black, 1 red, 1 white, and 1 green.
Please connect the wires between PS125 to switch using the
screw-on connectors (see below)
Black wire (as marked below) to Load wire
Green wire to Ground wire – if present
Red wire to Live wire
White wire to Neutral wire
Mount PS125 into the switch box carefully.
Screw on the screws
Attach the switch’s plate cover.
IMPORTANT :
The incorrect wires connection will result in switch not working.
4. Turn power on to your PS125 digital switch at the electrical service
panel.
5. Test the PS125 digital switch by pressing the toggle switch to turn the
switch On and Off
Note:
The orange and green status LED should be on when the switch is off,
and should be off when the switch is on. The installation is now
complete; you can add your PS125 digital switch to Controller, and
control it using PS App.
Link PS125 to the Controller
Download and install the latest PS App to your mobile device, and refer to
the walk through instructions from PS App’s to add your PS125 digital switch
to Controller. The main steps are:
Use the PS App, set the Controller into the scan mode.
Press and hold PS125 switch’s toggle switch for 5 seconds to set it to
scan mode.
The pairing process between the Controller and PS125 digital switch will
now take place.
The PS App will show the new device, PS125 is added.
Control PS125 using PS App via the Controller.
FCC Statement
This equipment has been tested and found to comply with the limits for a
Class B digital device, pursuant to Part 15 of the FCC Rules. These limits are
designed to provide reasonable protection against harmful interference in a
residential installation. This equipment generates uses and can radiate radio
frequency energy and, if not installed and used in accordance with the
instructions, may cause harmful interference to radio communications.
However, there is no guarantee that interference will not occur in a
particular installation. If this equipment does cause harmful interference to
radio or television reception, which can be determined by turning the
equipment off and on, the user is encouraged to try to correct the
interference by one or more of the following measures:
-- Reorient or relocate the receiving antenna.
-- Increase the separation between the equipment and receiver.
-- Connect the equipment into an outlet on a circuit different from that
to which the receiver is connected.
-- Consult the dealer or an experienced radio/TV technician for help.
This device complies with part 15 of the FCC Rules. Operation is subject to
the following two conditions:
(1) This device may not cause harmful interference, and (2) this device must
accept any interference received, including interference that may cause
undesired operation.
Changes or modifications not expressly approved by the party responsible
for compliance could void the user's authority to operate the equipment.