Grandex PS350-01 Combo Remote Control User Manual PS350 V1 0 0 20160420
Grandex International Corporation Combo Remote Control PS350 V1 0 0 20160420
Grandex >
User Manual
Installation Guide
Home Automation Combo Remote Control
PS350
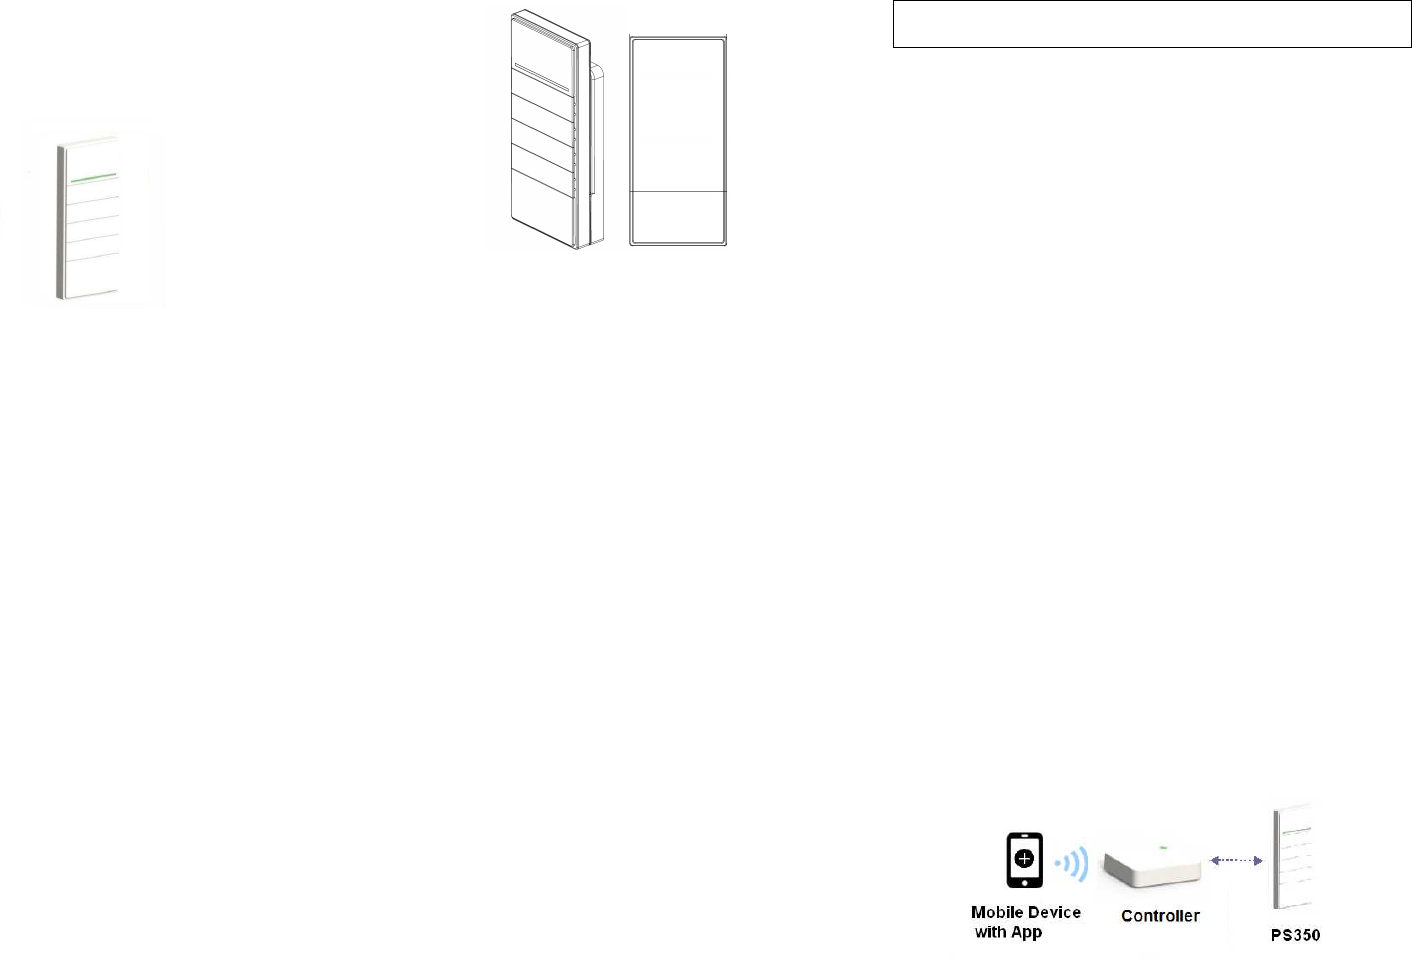
The PS350 is a smart combo remote control device for the PS
system. Together with Controller, PS App (mobile Smartphone /Tablet), and
all PS devices (switches, power plugs, dimmers, and sensors), the PS system
provides you with the capability to control your home’s electrical devices
remotely from anywhere in the world for home automation.
Overview & Operation
1. Control Buttons (1-4)
♦ Press and hold Button 1 for 10 seconds to set the PS350 to scan
mode
♦ Press and hold Button 4 for 10 seconds to clear network
connection and PS350 becomes standalone (not paired with
Controller)
♦ Press any Button’s the left side (for ON), or the right side (for OFF)
to take action on the configured control of a PS device, a group of
PS devices, or a Scene for PS devices
2. Battery Compartment (back of PS350)
♦ Install the battery (CR2450)
3. Wall Mount Holder
♦ Store PS350 onto the magnetic wall mount holder
4. LED
♦ Green and Orange – Flashing alternatively => In scan mode
♦ Green – steady on => A Button is pressed when battery is normal.
♦ Orange – steady on => A Button is pressed either when: a. in
standalone mode (not paired with Controller) or b. battery is low.
♦ Orange – Flashing => Control operation is unsuccessful when a
Button is released.
♦ Green and Orange – off => in standby mode or control operation
is successful when a Button is released.
Installation
IMPORTANT
If the Controller is not already installed, please install it first.
1. Mount the Wall Mount Holder (optional)
♦ Open the wall mount holder and secure the holder’s back side on
the wall with screws (not supplied), then reattach the holder’s front
side to the back side to close the wall mount holder.
♦ Alternatively, secure the wall mount holder using the supplied
adhesive tapes
♦ PS350 can now attach onto this magnetic holder for storage
2. Open the battery compartment, remove the battery’s insulator, and
then close the battery compartment
3. Test the PS350 by press any button, and then check if the Orange LED is
on.
Note:
The installation is now complete; you can now add your PS350 remote
control to Controller, and configure .
Link PS350 to the Controller
Download and install the latest PS App to your mobile device, and refer to
the walk through instructions from PS App’s to add your PS350 remote
control to Controller. The main steps are:
♦ Use the PS App, set the Controller into the scan mode.
♦ Press and hold PS350’s button 1 for 10 seconds to set it to scan mode.
♦ The pairing process between the Controller and PS350 remote control
will now take place.
♦ The PS App will show the new device, PS350 is added.
♦ Configure the PS350’s buttons on the PS App.
♦ Tab on a button on the PS App display screen or press the corresponding
button on the PS350 to take the action on the configured control of a PS
device, a group of PS devices, or a Scene for PS devices.
❶
❷
❸
❹
FCC Statement
This equipment has been tested and found to comply with the limits for a
Class B digital device, pursuant to Part 15 of the FCC Rules. These limits are
designed to provide reasonable protection against harmful interference in a
residential installation. This equipment generates uses and can radiate radio
frequency energy and, if not installed and used in accordance with the
instructions, may cause harmful interference to radio communications.
However, there is no guarantee that interference will not occur in a
particular installation. If this equipment does cause harmful interference to
radio or television reception, which can be determined by turning the
equipment off and on, the user is encouraged to try to correct the
interference by one or more of the following measures:
-- Reorient or relocate the receiving antenna.
-- Increase the separation between the equipment and receiver.
-- Connect the equipment into an outlet on a circuit different from that
to which the receiver is connected.
-- Consult the dealer or an experienced radio/TV technician for help.
This device complies with part 15 of the FCC Rules. Operation is subject to
the following two conditions:
(1) This device may not cause harmful interference, and (2) this device must
accept any interference received, including interference that may cause
undesired operation.
Changes or modifications not expressly approved by the party responsible
for compliance could void the user's authority to operate the equipment.