Grandstream Networks DP760 DECT Cordless VoIP Phone User Manual
Grandstream Networks, Inc. DECT Cordless VoIP Phone
UserManual.wiki
>
Grandstream Networks
>
DP760 User Manual
User Manual
Navigation menu
Upload a User Manual
Namespaces
Wiki Guide
HTML
PDF
Info
Views
User Manual
Discussion / Help
Navigation


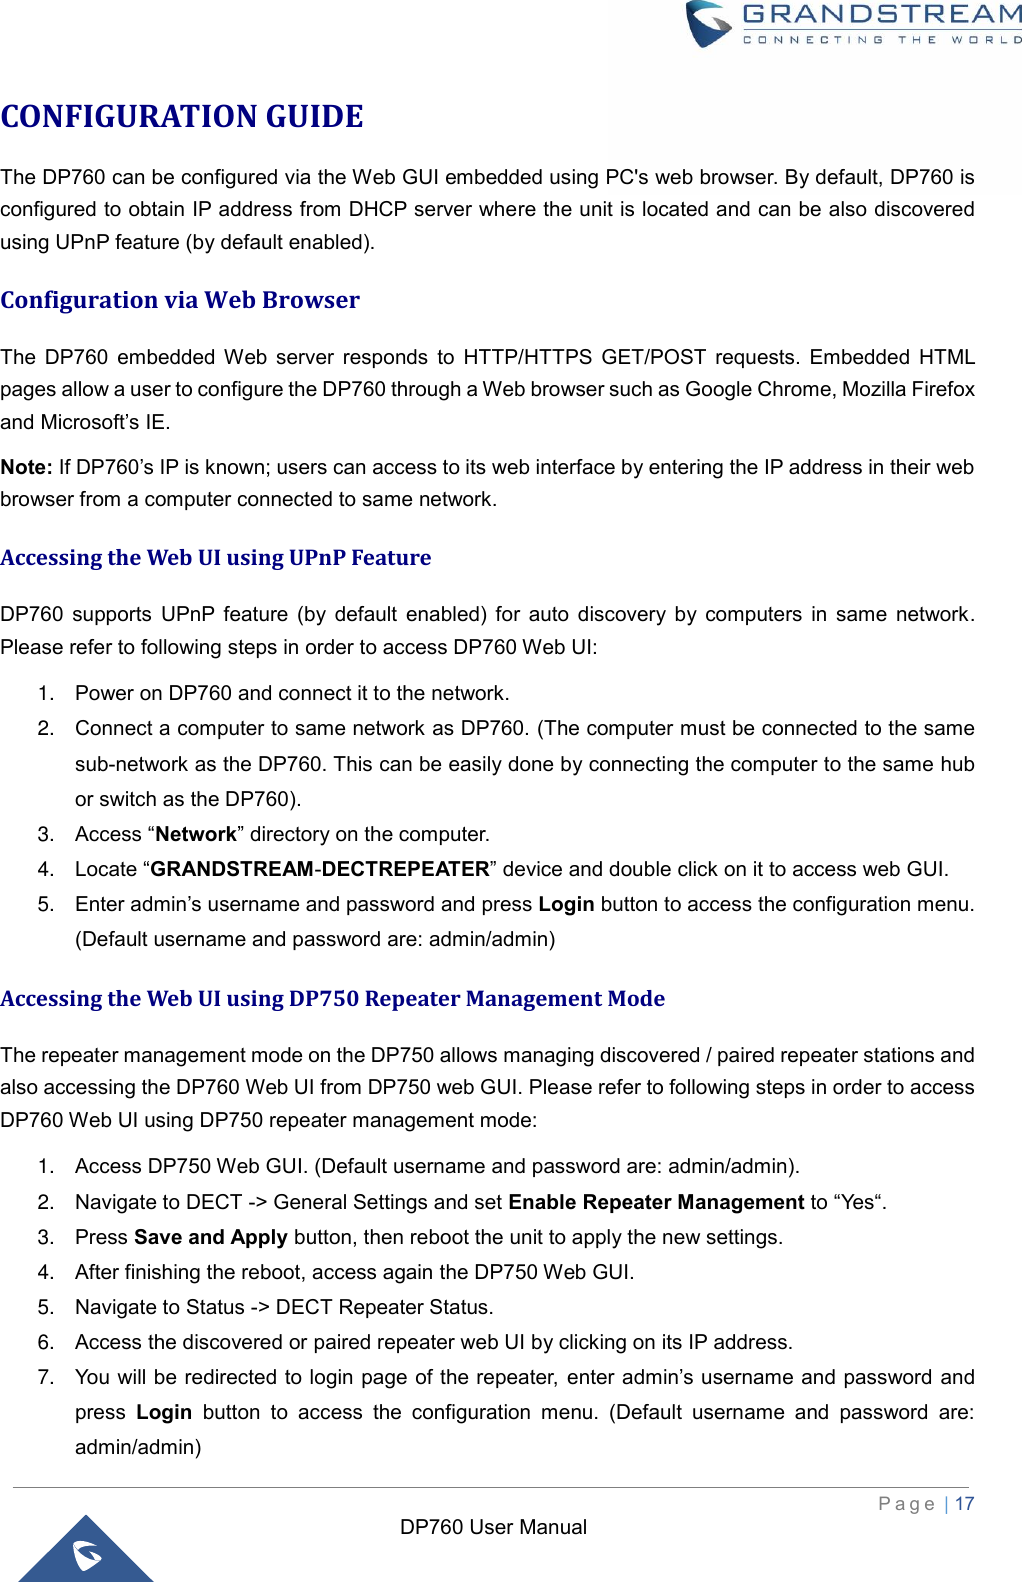
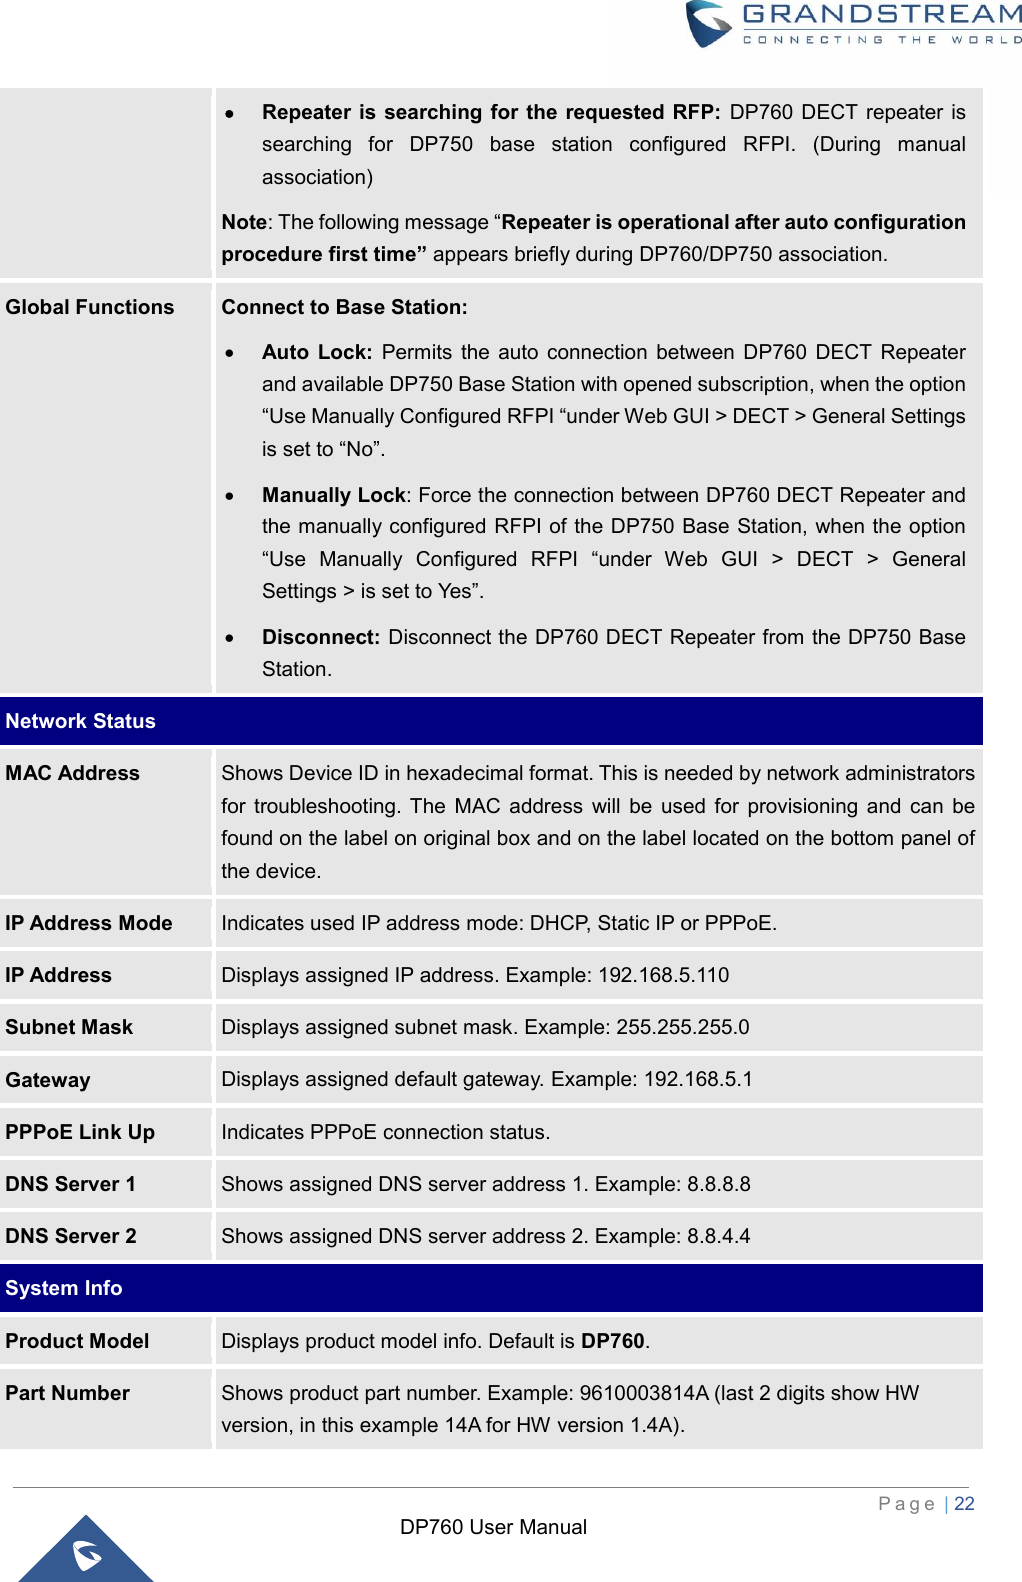
![P a g e | 21 DP760 User Manual Figure 9: Web Access Port Web Configuration Definitions This section describes DP760 options available in its Web UI. As mentioned, you can log in as an administrator or an end user. Status: Display the system info, network status, DECT status options. DECT: Configure DECT general settings, repeater name and RFPI manual configuration. Network Settings: Configure network basic and advanced settings. Maintenance: Configure upgrading and provisioning, web/SSH access, date and time, and syslog, packet capture and factory reset settings. Status Page Definitions Table 5: Status Pages Definitions DECT Status Repeater Name Displays name of DECT repeater. Default is DP760_[last 6 digit of MAC address]. Repeater FW Version Shows firmware version of repeater station. Repeater DECT RF Region Indicates region of repeater station. Example: EU, US, Auto… Repeater Status Describes the repeater status: Scanning for available RFPs: DP760 is scanning and searching for available RFPs (Radio Fixed Part Identity) address. Repeater is in normal operation: DP760 DECT repeater is correctly associated to DP750 base station and the link between them is operational.](https://usermanual.wiki/Grandstream-Networks/DP760/User-Guide-3234169-Page-21.png)
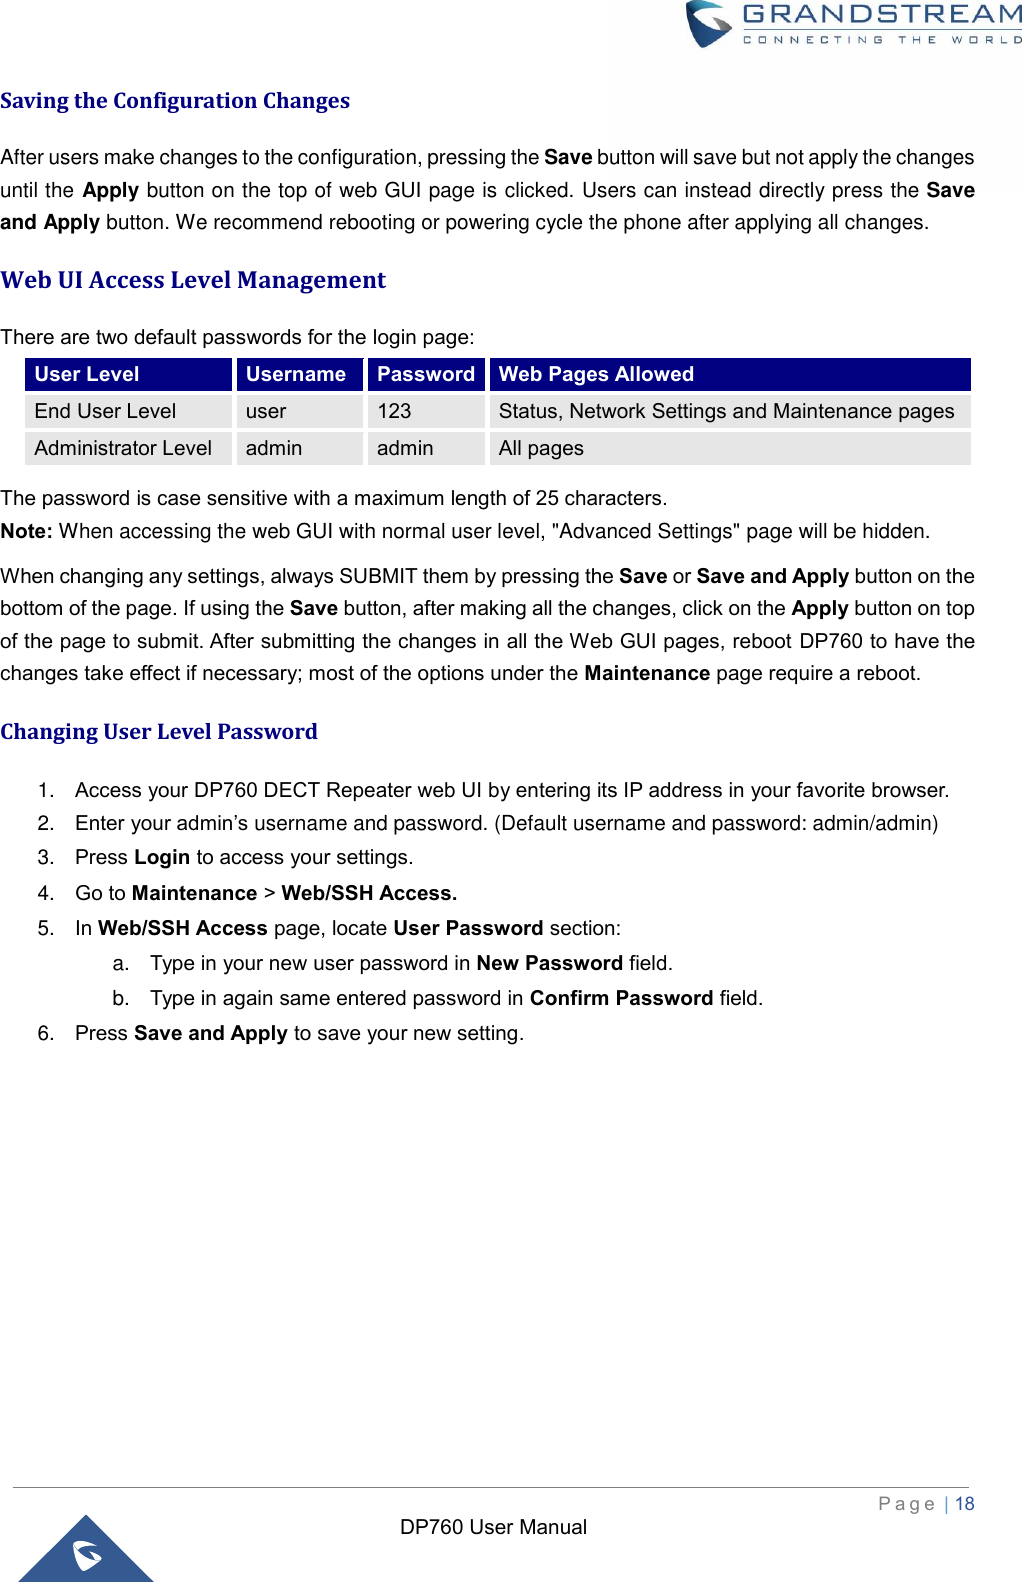
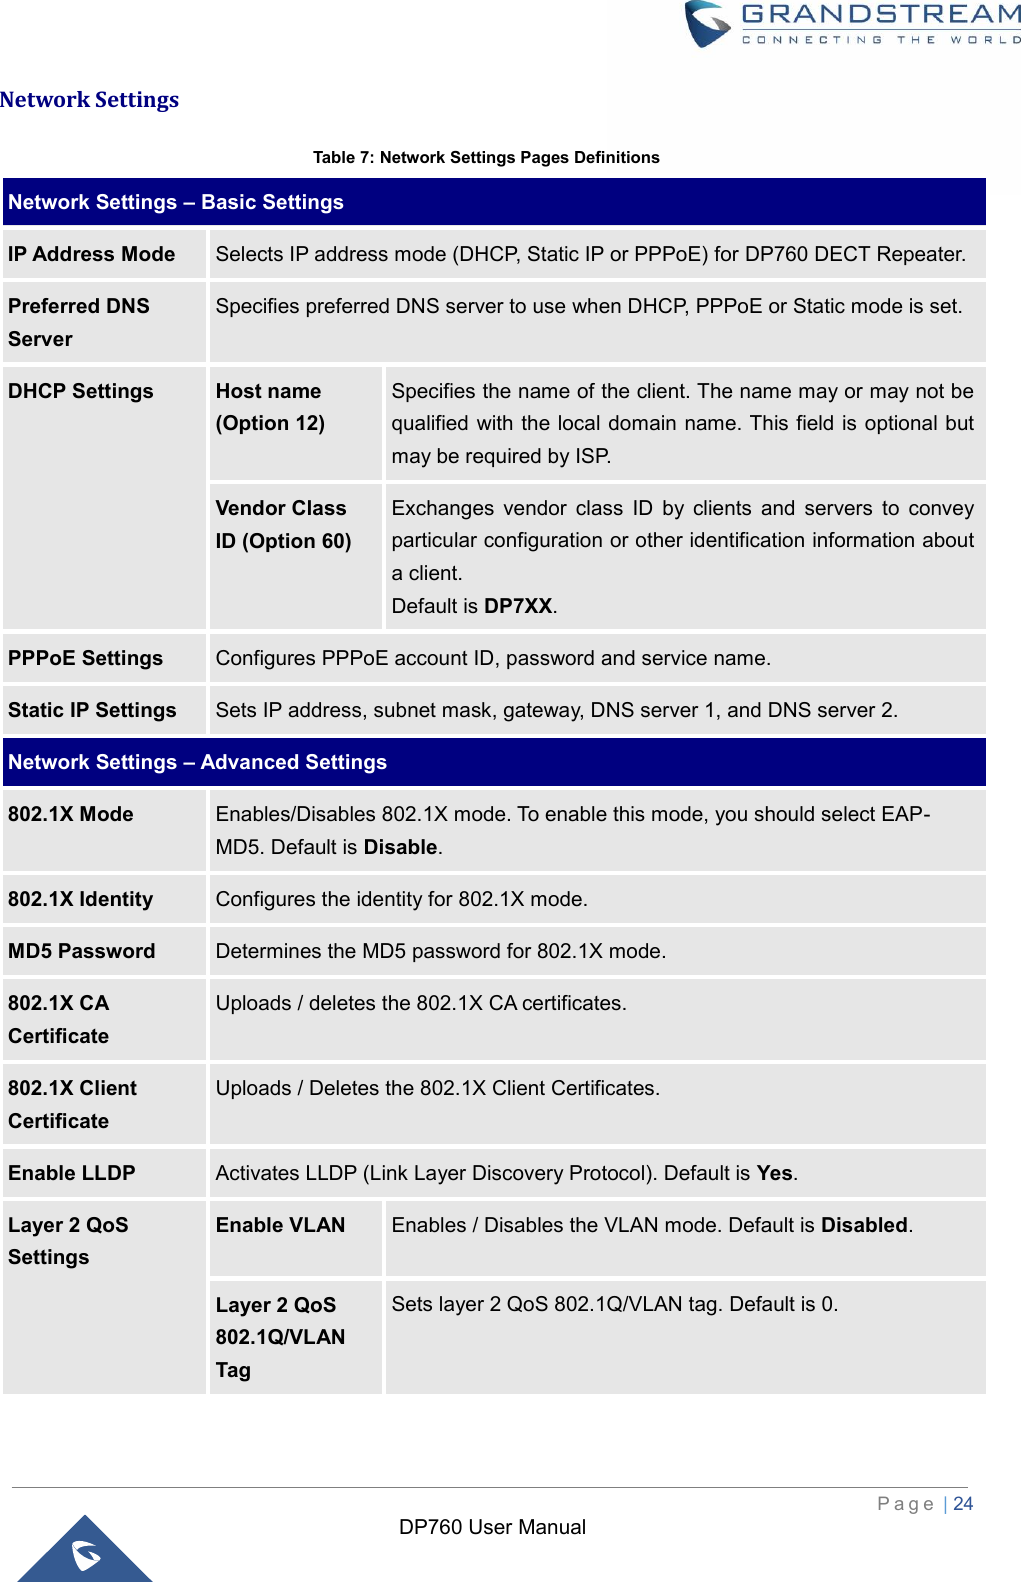
![P a g e | 23 DP760 User Manual Software Version Firmware Status: Displays the status of the firmware loaded. Check for new firmware: Check configured server for most recent firmware version and compare to current version. After pressing button, you must reload this page to display status (navigate to a different page and then back to this page) and check firmware availability. Boot: Specifies Boot version. Current is 1.0.3.7 Core: Specifies Core version. Current is 1.0.3.7 Base: Specifies Base version. Current is 1.0.3.7 Prog: Specifies Prog version. Current is 1.0.3.7. This is the main firmware release number, which is always used for identifying the software system of the DP760. Locale: Specifies Locale version. Current is 1.0.3.7 Recovery: Specifies Recovery version. Current is 1.0.3.7 System Up Time Indicates system uptime since last reboot. System Time Shows actual time and date according to your configuration. Service Status Reveals status of VoIP applications. Core Dump Provides generated core dump file if unit malfunctions. Normal will be displayed if no issues. DECT Page Definitions Table 6: DECT Page Definitions General Settings Repeater Name Configures the name of the repeater station. Default is DP760_[last 6 digit of MAC address]. Manually Configured Base RFPI Configures manually RFPI of DP750 base station to connect to. If empty, the repeater station DP760 will search for DP750 base stations and connect automatically to the first one found. Use Manually Configured RFPI Permits to use manually configured RFPI (if non-empty) when set to “Yes”. If set to “No”, the DP760 will search for a DP750 to connect to, regardless of manual configuration.](https://usermanual.wiki/Grandstream-Networks/DP760/User-Guide-3234169-Page-23.png)
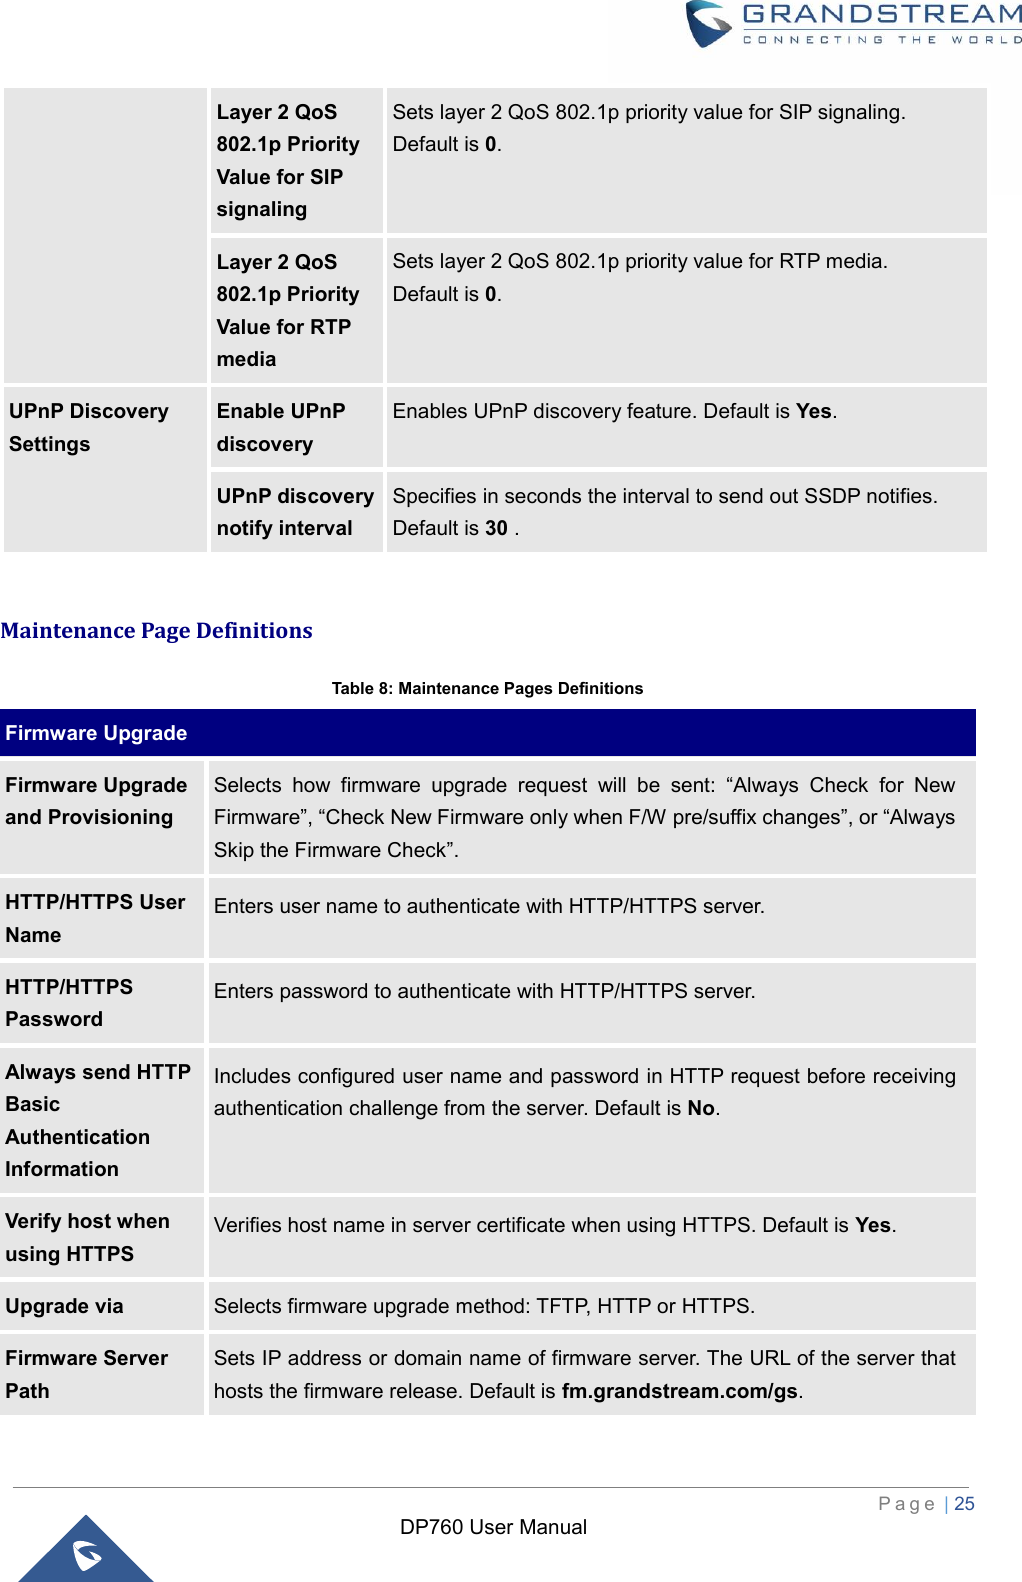

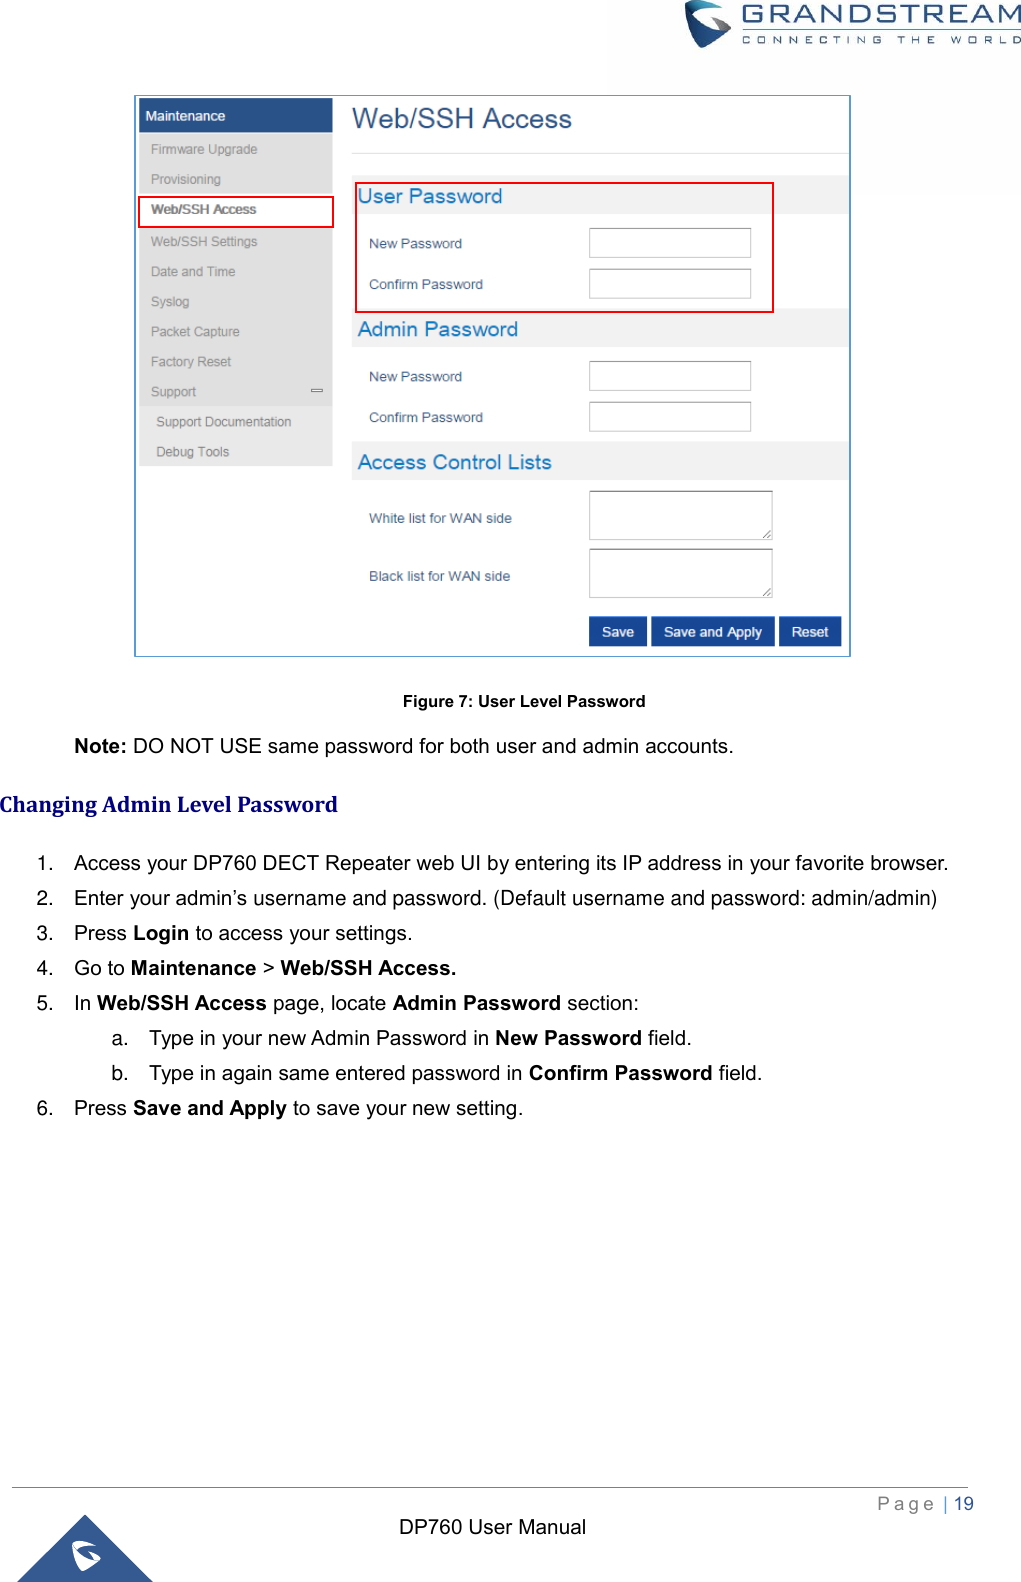
![P a g e | 29 DP760 User Manual Allow DHCP Option 2 to override time zone Obtains time zone setting (offset) from a DHCP server using DHCP Option 2; it will override selected time zone. If set to “No”, the repeater station will use selected time zone even if provided by DHCP server. Default is Yes. Syslog Syslog Server Sets IP address or URL of system log server. The server collects system log information from the repeater station. Syslog Level Selects log level; the level is one of DEBUG, INFO, WARNING, ERROR (default is NONE). Syslog messages are sent based on the following events: 1. product model/version on boot up (INFO level) 2. NAT related info (INFO level) 3. sent or received SIP message (DEBUG level) 4. SIP message summary (INFO level) 5. inbound and outbound calls (INFO level) 6. registration status change (INFO level) 7. negotiated codec (INFO level) 8. Ethernet link up (INFO level) 9. SLIC chip exception (WARNING and ERROR levels) 10. memory exception (ERROR level) Syslog uses USER facility. In addition to standard Syslog payload, it contains the following components: GS_LOG: [device MAC address] [error code] error message. Example: May 19 02:40:38 192.168.1.14 GS_LOG:[00:0b:82:00:a1:be][000] Ethernet link is up Packet Capture Status Displays packet capture status. When user starts to capture trace file, it will show “RUNNING” status, otherwise, it will show “STOPPED”. Factory Reset Factory Reset Press Reset to restore the factory default settings on the DP760. Support Support Documentation Online Support Redirects the users to tools page and DP7xx product pages available on Grandstream official website. Offline Support Allows users to download administration / user guides and drilling templates.](https://usermanual.wiki/Grandstream-Networks/DP760/User-Guide-3234169-Page-29.png)