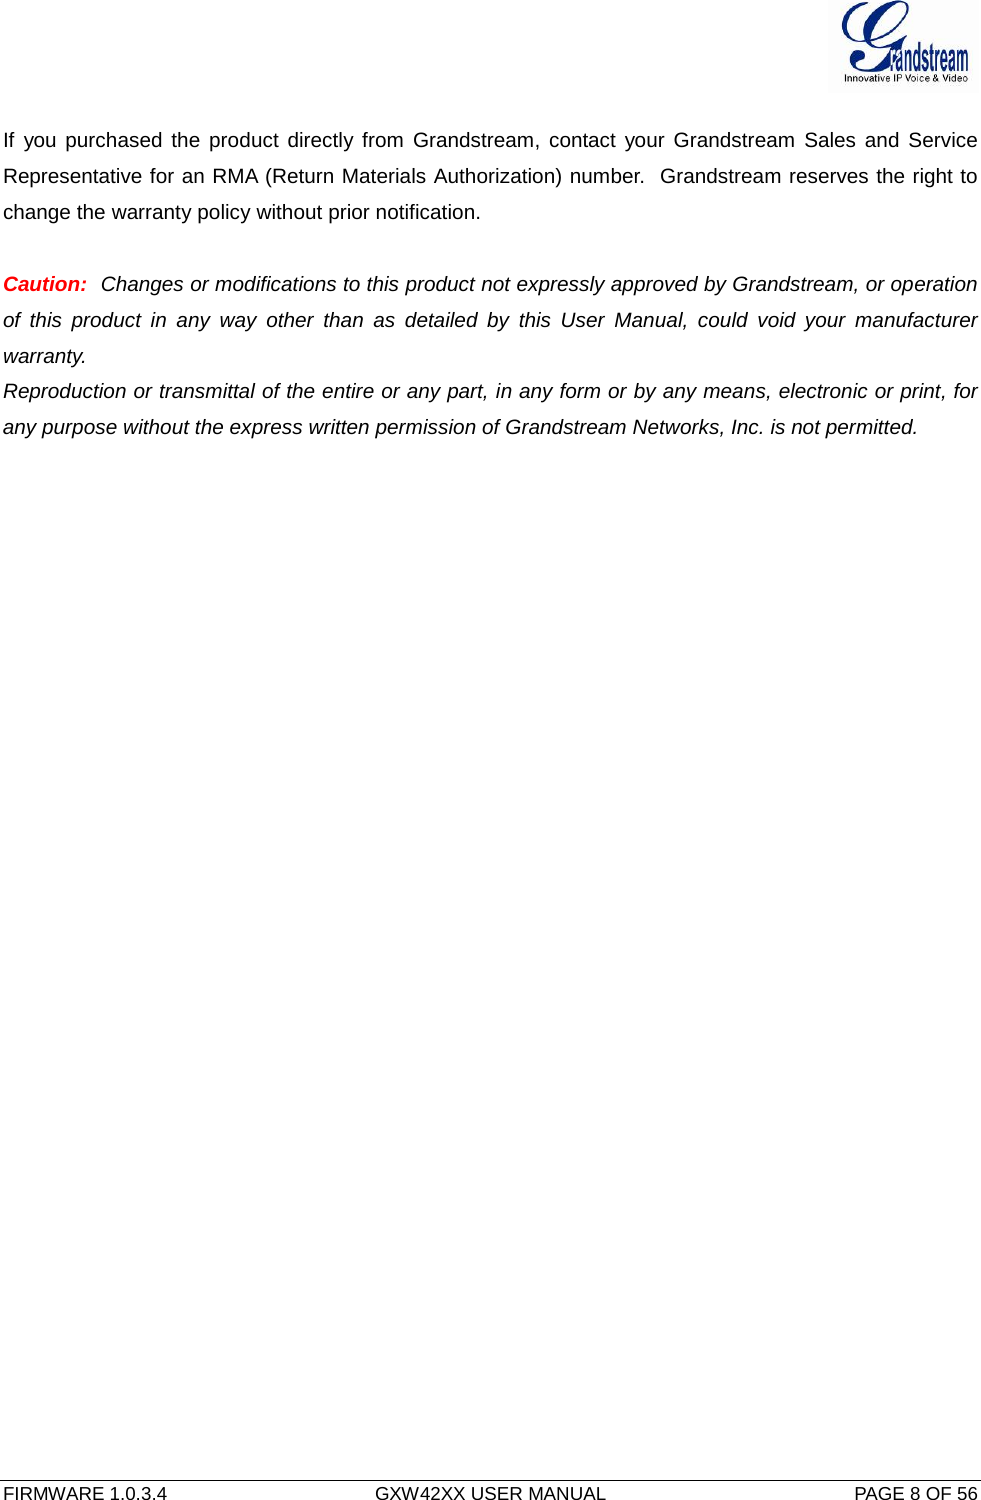
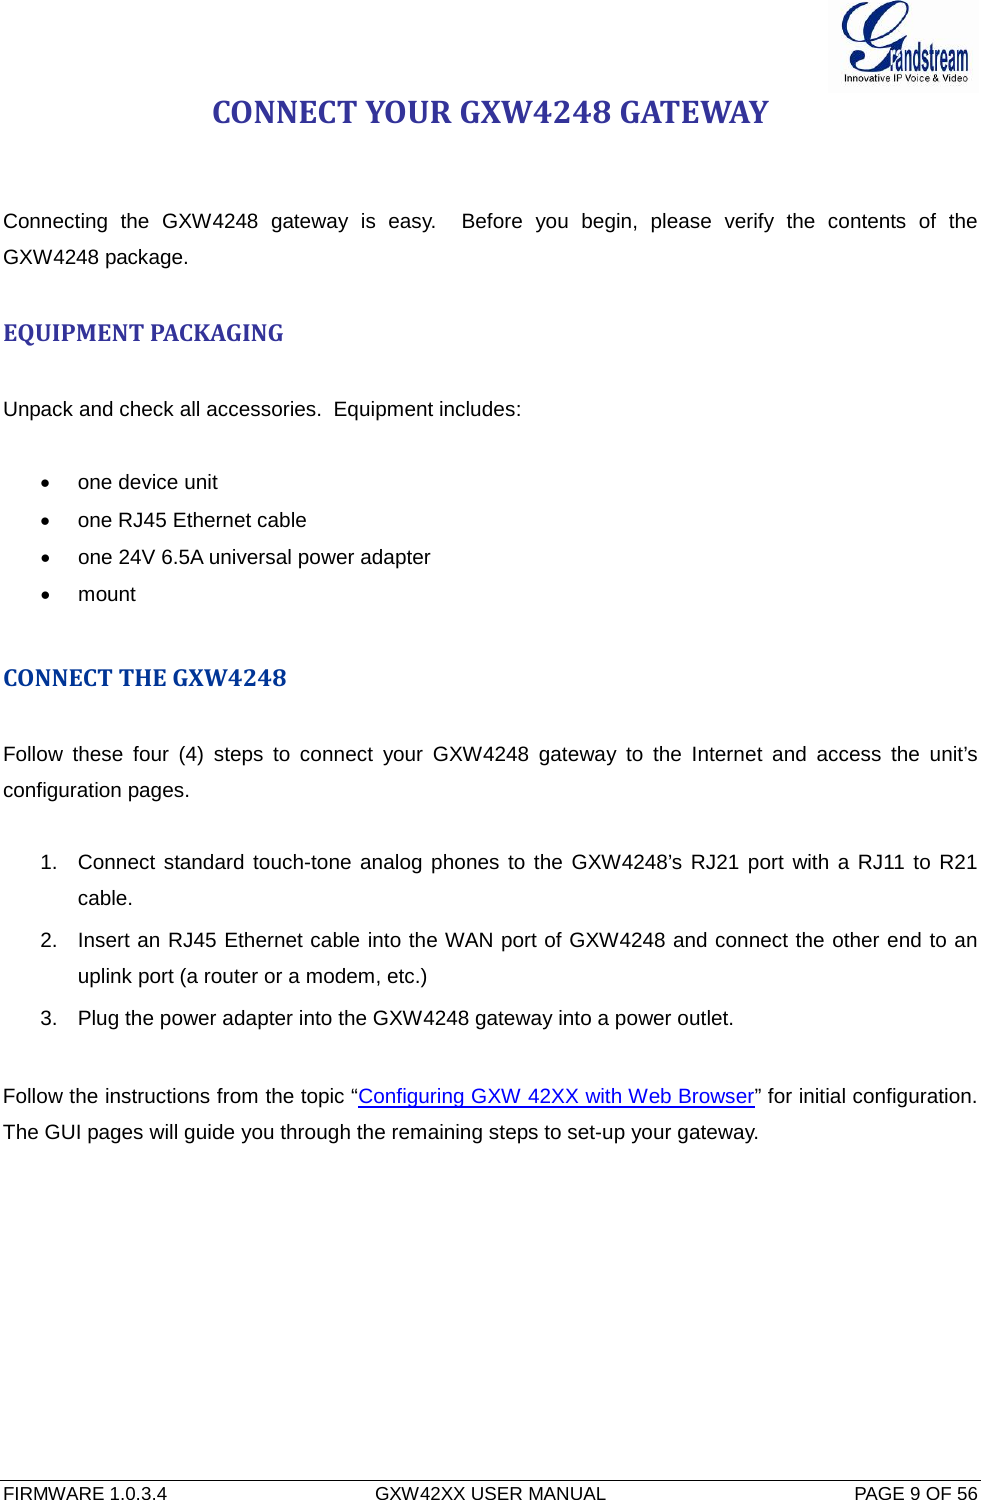
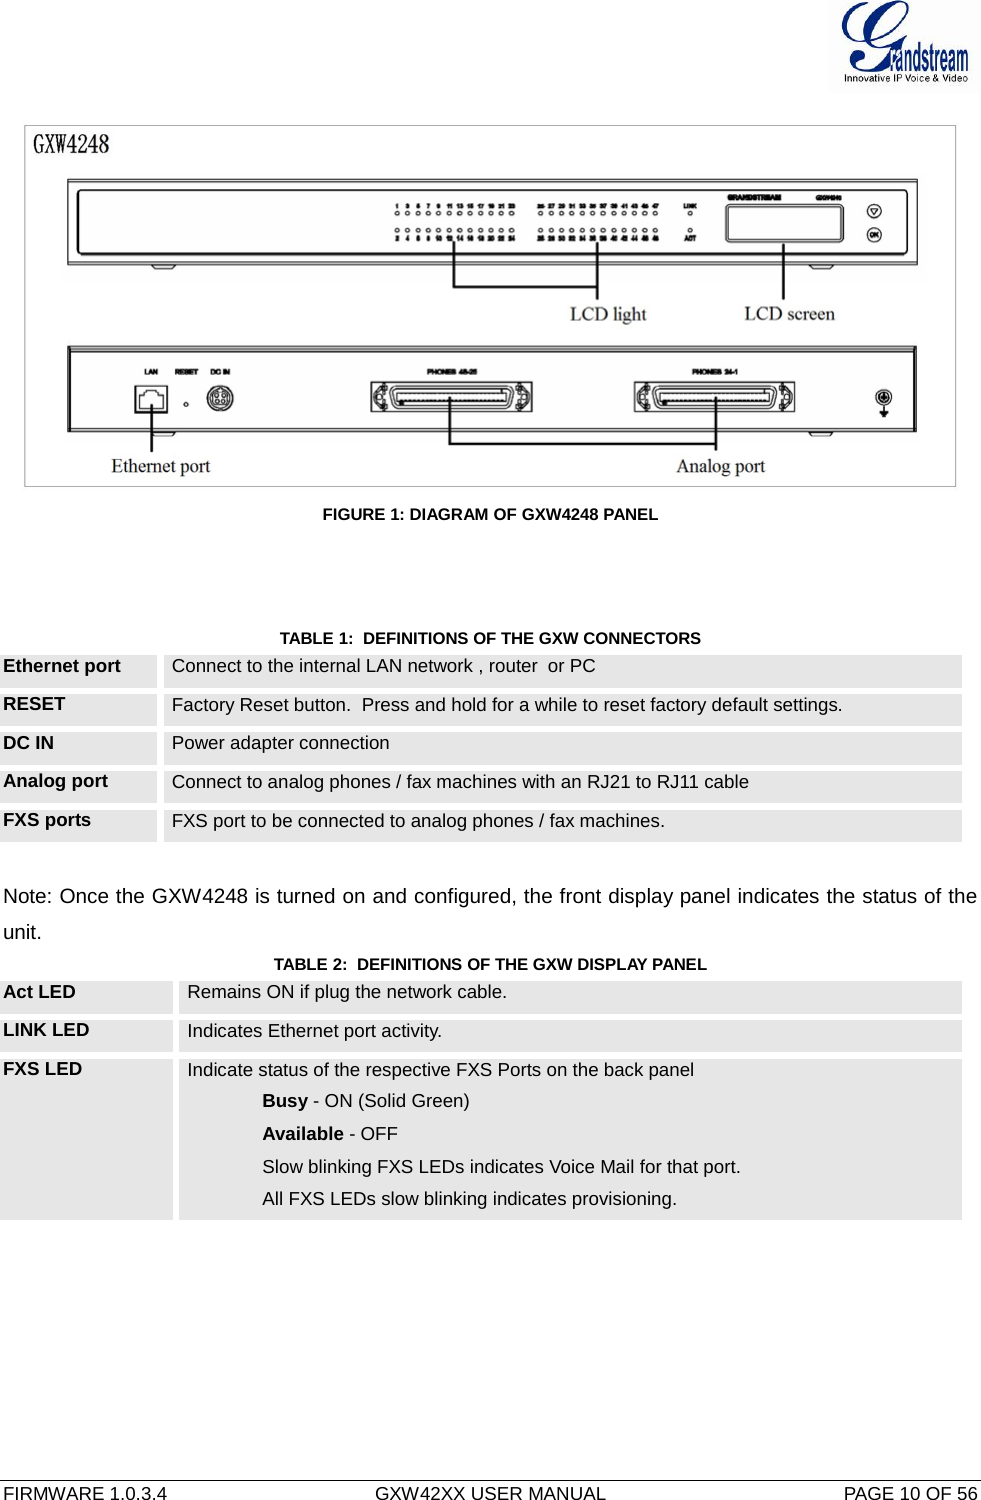
Grandstream Networks GXW4248 VOIP GATEWAY User Manual Grandstream Multi Port FXS Gateway GXW400x
Grandstream Networks, Inc. VOIP GATEWAY Grandstream Multi Port FXS Gateway GXW400x
UserManual.wiki
>
Grandstream Networks
>
GXW4248 User Manual
User Manual
Navigation menu
Upload a User Manual
Namespaces
Wiki Guide
HTML
PDF
Info
Views
User Manual
Discussion / Help
Navigation

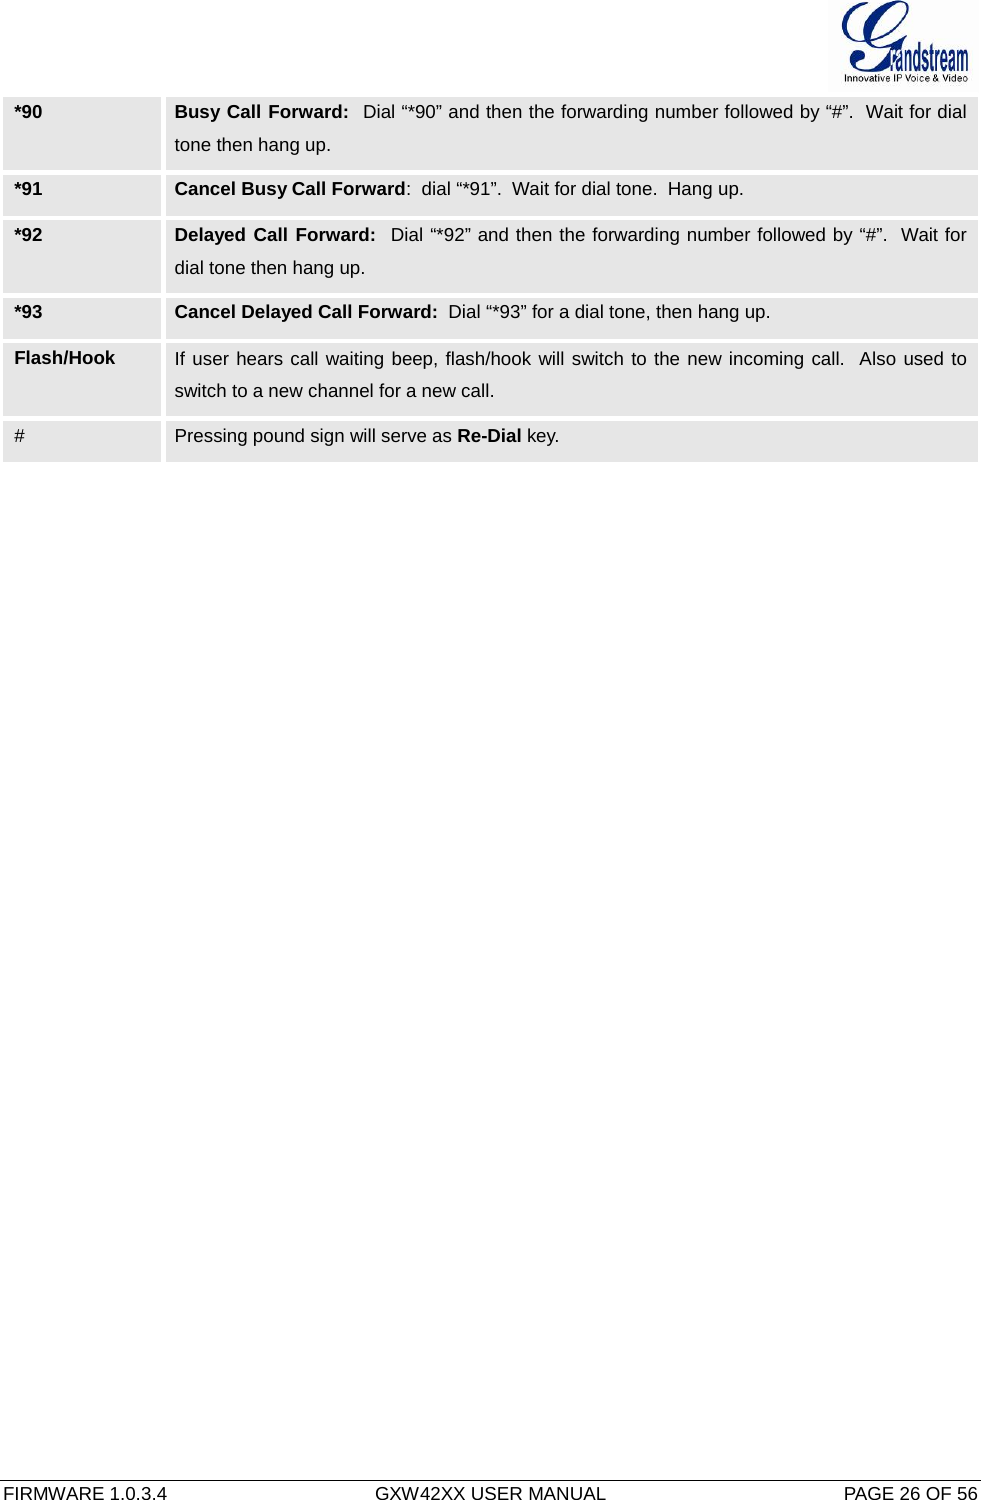

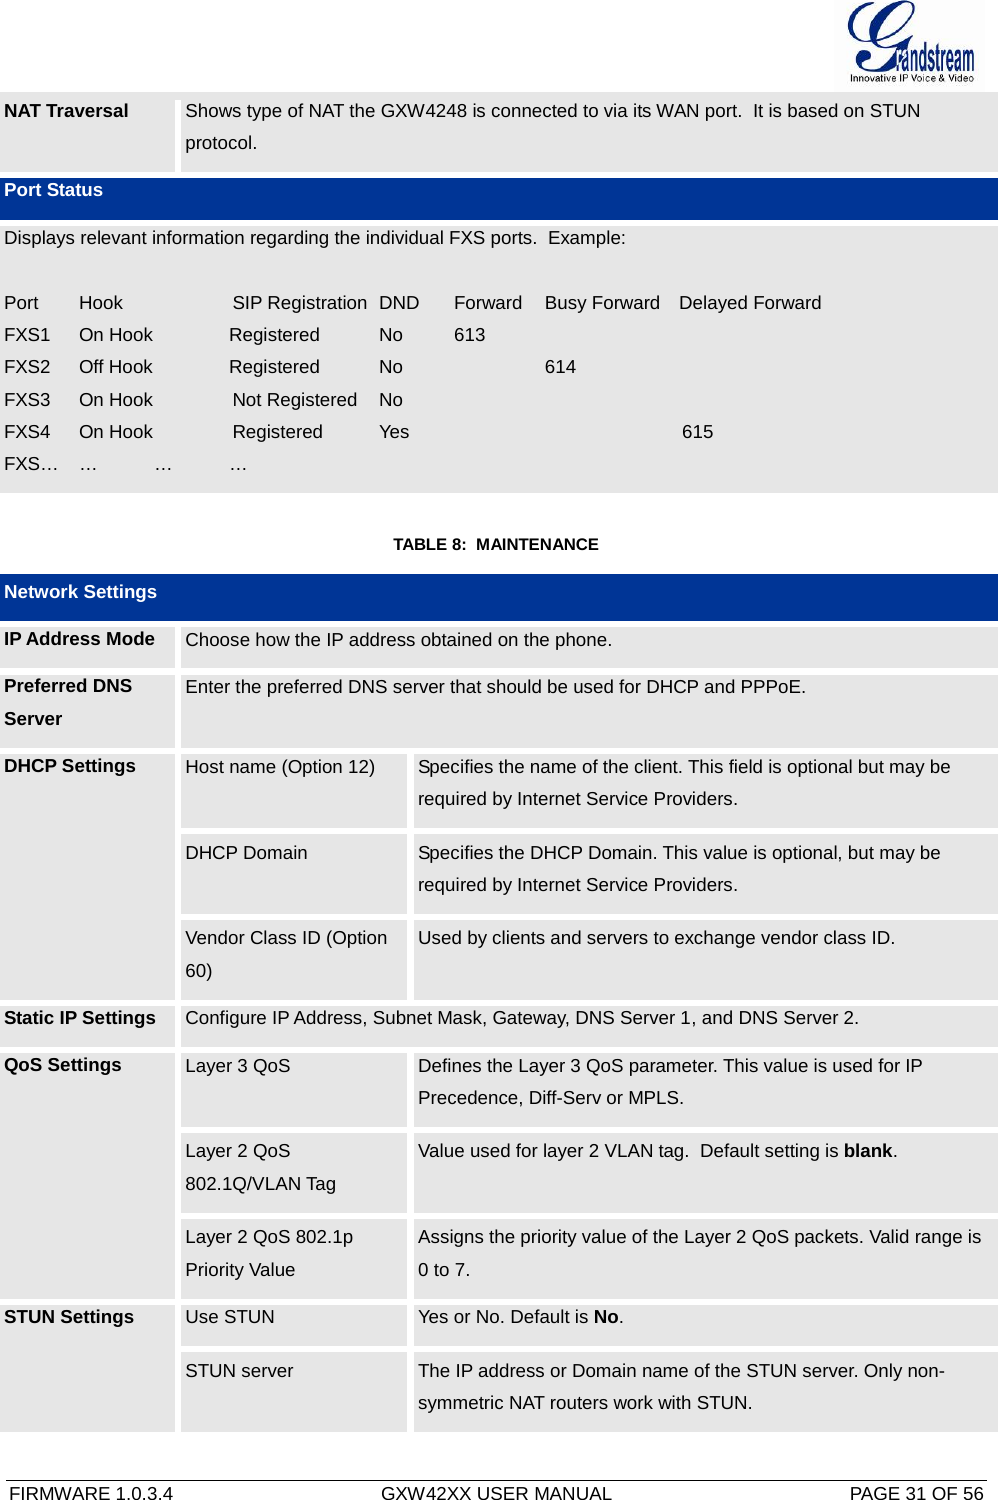
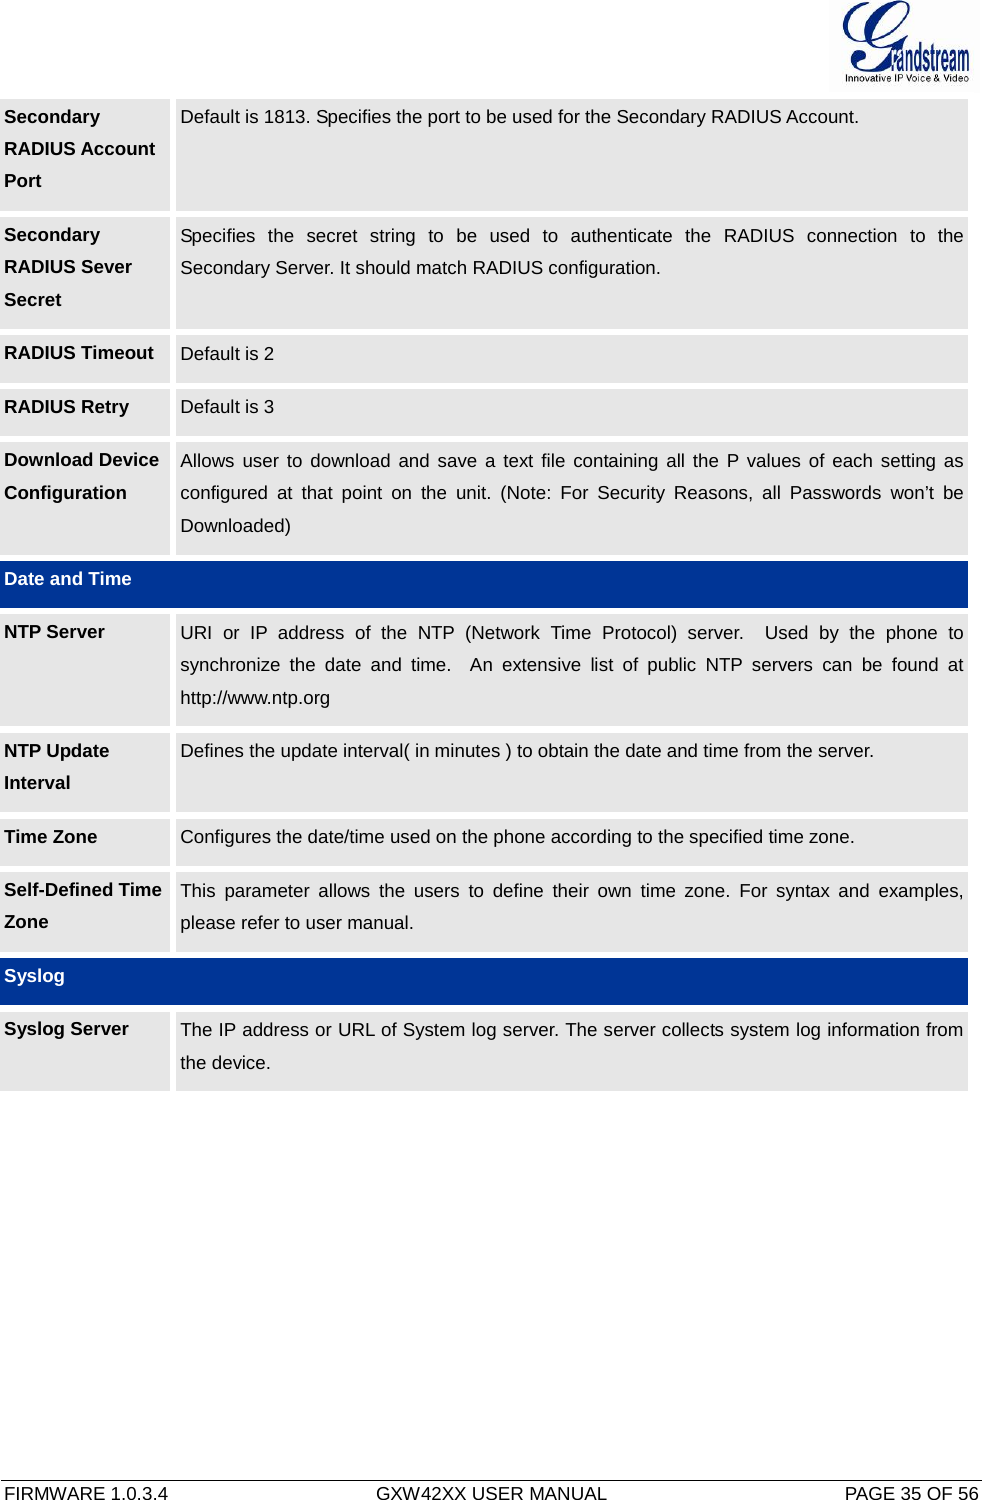
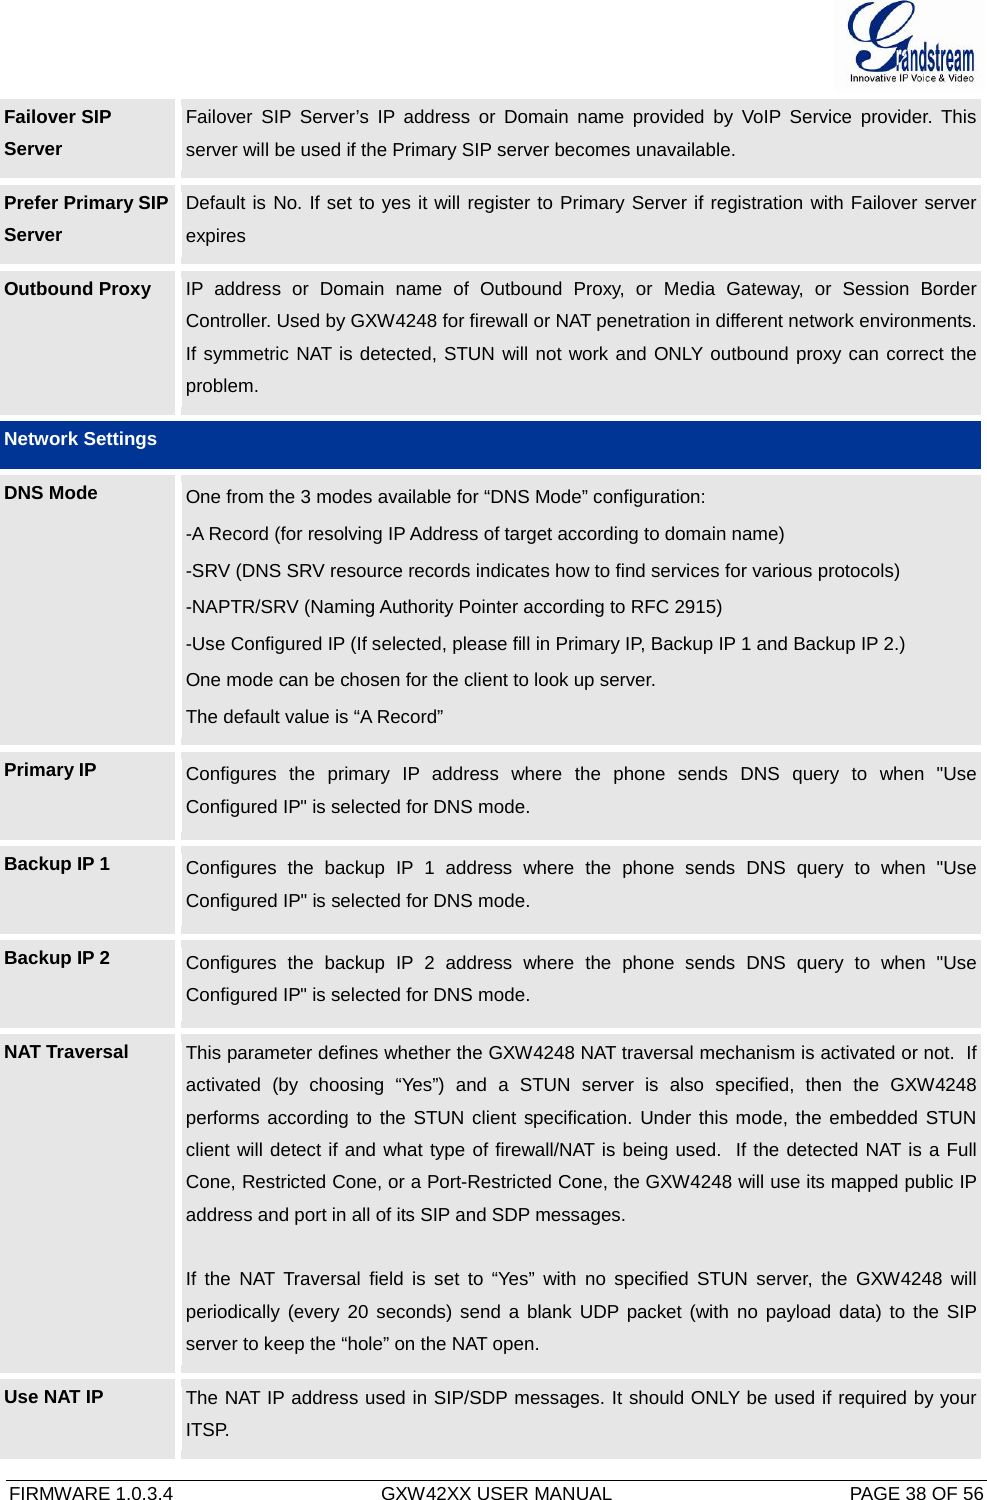
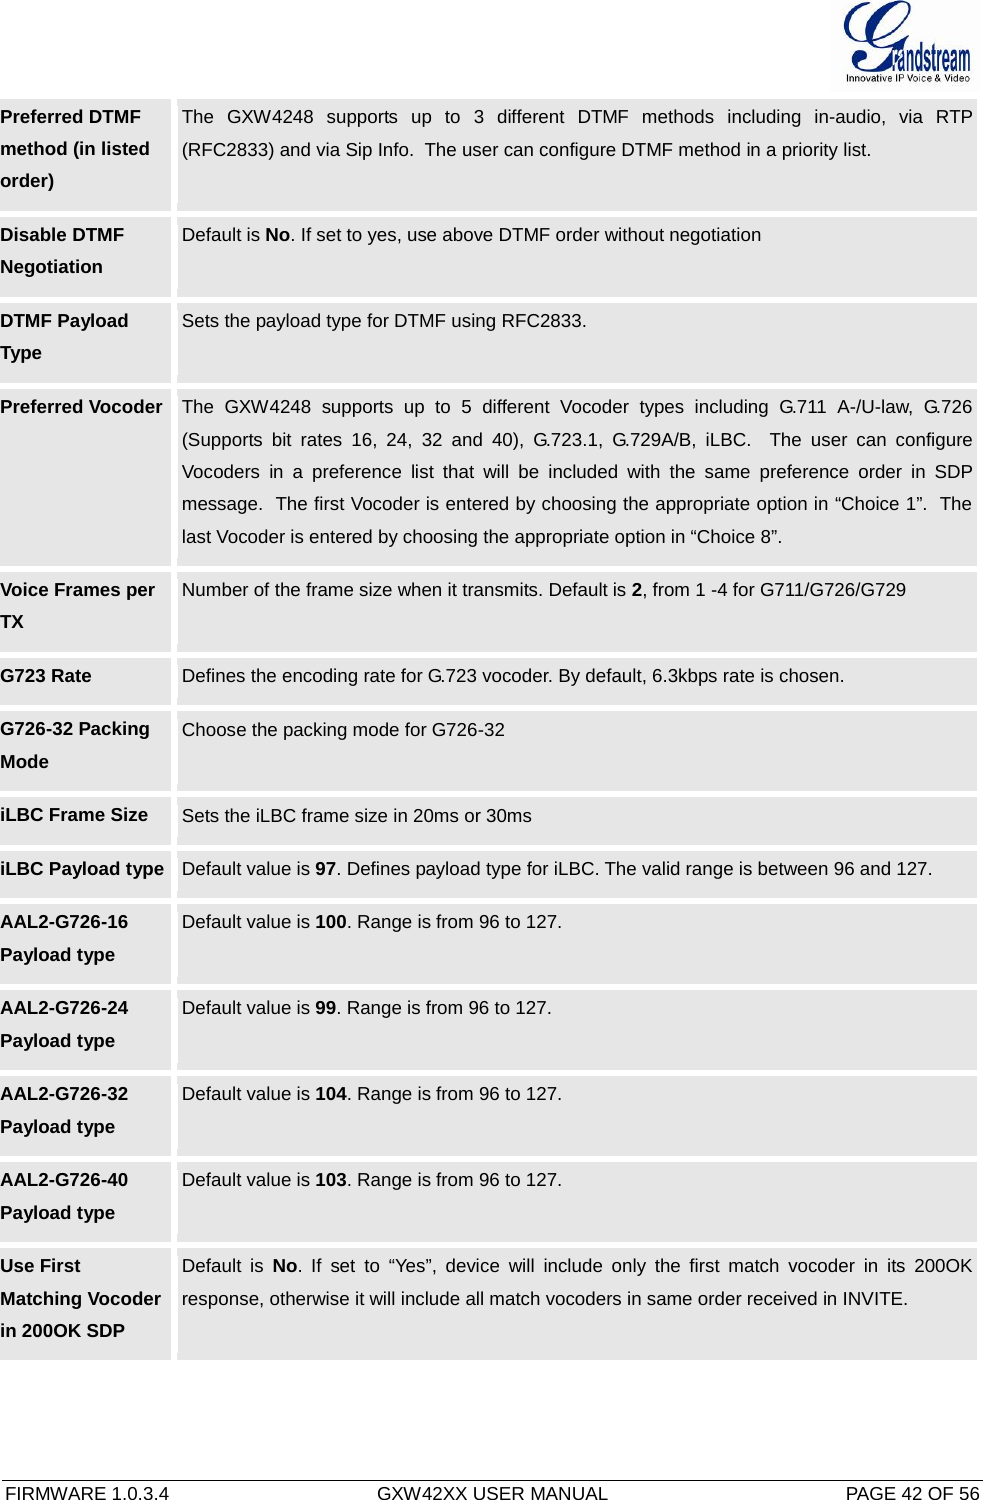
![FIRMWARE 1.0.3.4 GXW42XX USER MANUAL PAGE 36 OF 56 Syslog Level Select the GXW4248 to report the log level. Default is NONE. The level is one of DEBUG, INFO, WARNING or ERROR. Syslog messages are sent based on the following events: 1. product model/version on boot up (INFO level) 2. NAT related info (INFO level) 3. sent or received SIP message (DEBUG level) 4. SIP message summary (INFO level) 5. inbound and outbound calls (INFO level) 6. registration status change (INFO level) 7. negotiated codec (INFO level) 8. Ethernet link up (INFO level) 9. SLIC chip exception (WARNING and ERROR levels) 10. memory exception (ERROR level) The Syslog uses USER facility. In addition to standard Syslog payload, it contains the following components: GS_LOG: [device MAC address][error code] error message Example: May 19 02:40:38 192.168.1.14 GS_LOG: [00:0b:82:00:a1:be][000] Ethernet link is up Print SIP in Syslog Enable or disable printing of full SIP messages in Syslog. TABLE 9: ADVANCED SETTINGS Ring Tones System Ring Cadence Configuration option for all FXS ports ring cadence for all incoming calls. (Syntax: c=on1/off1-on2/off2-on3/off3; [...]) Default is set to c=2000/4000; (US standards)](https://usermanual.wiki/Grandstream-Networks/GXW4248/User-Guide-1930189-Page-36.png)
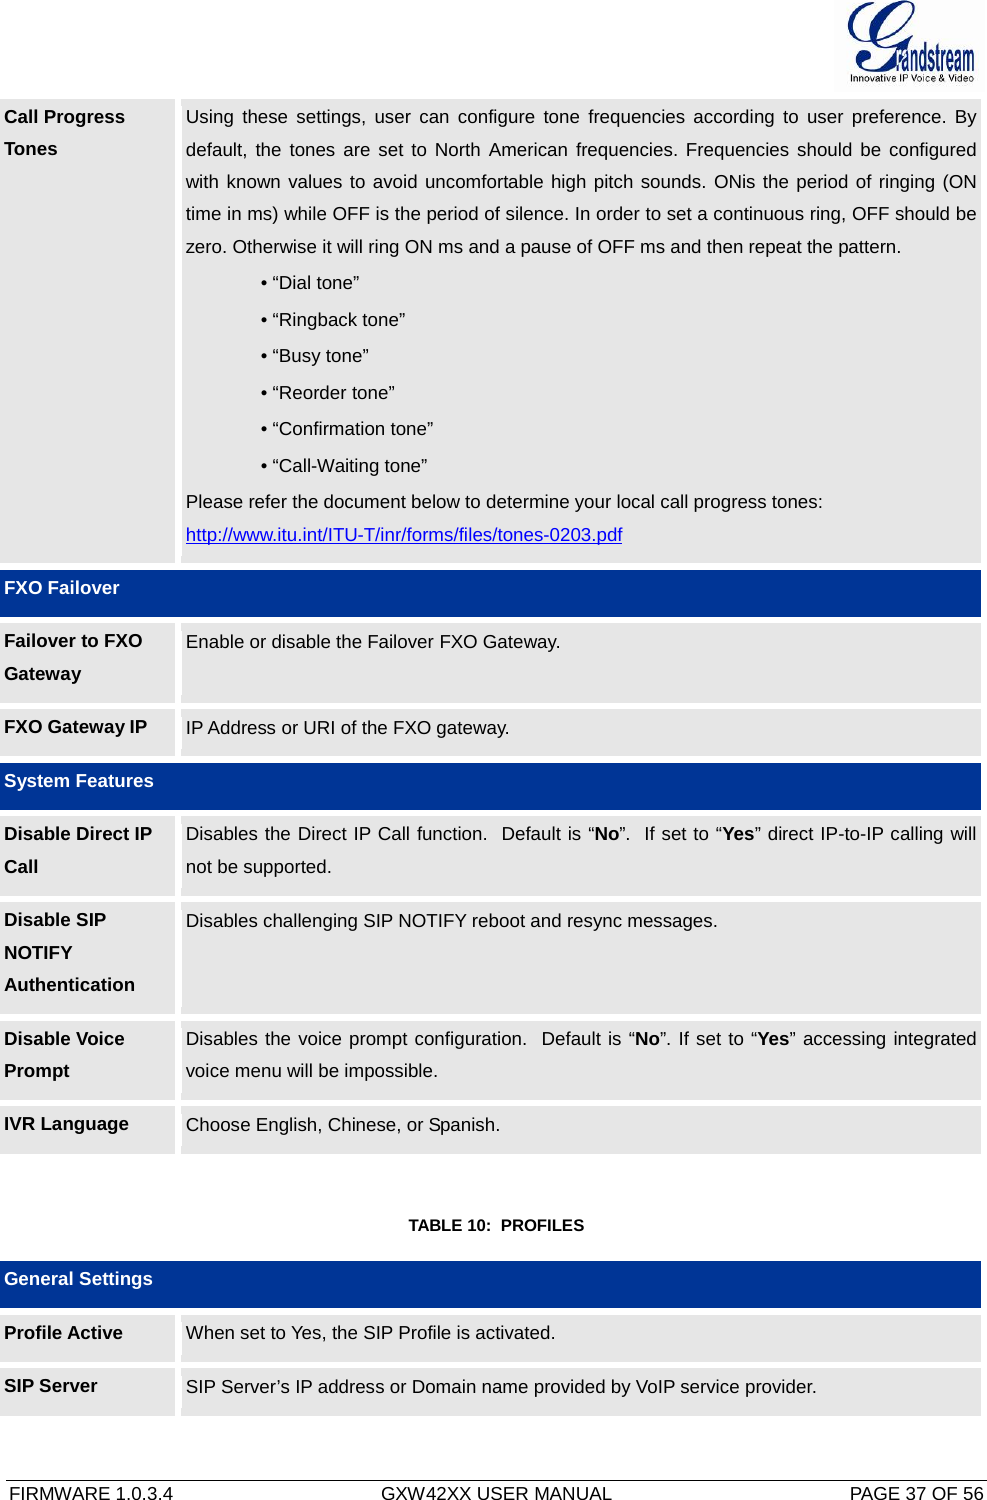
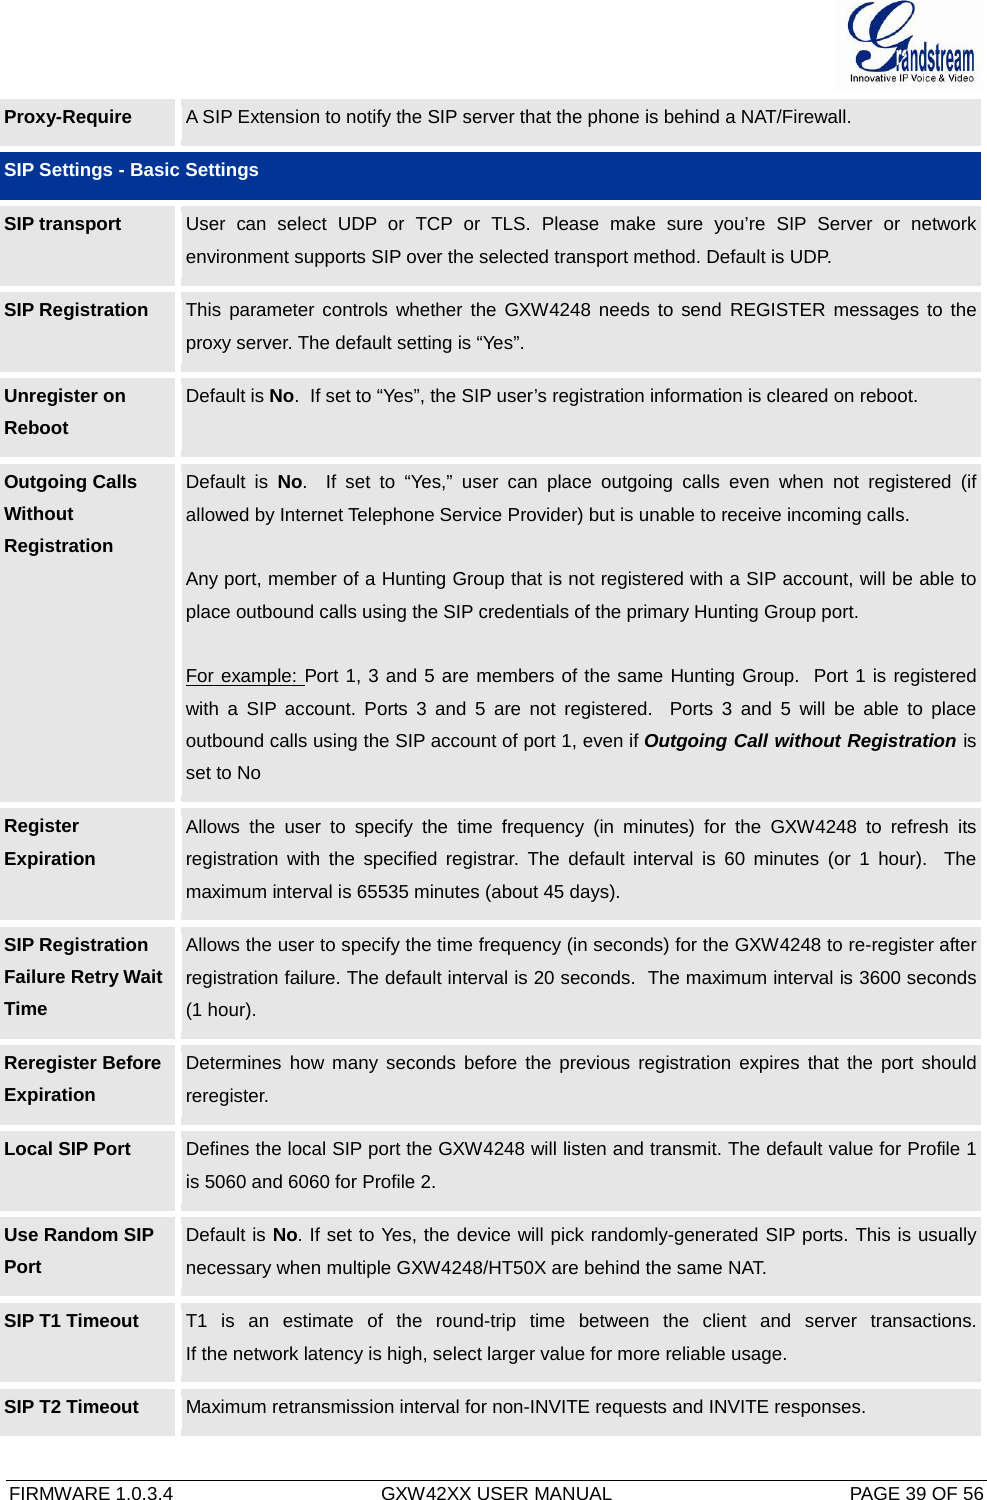
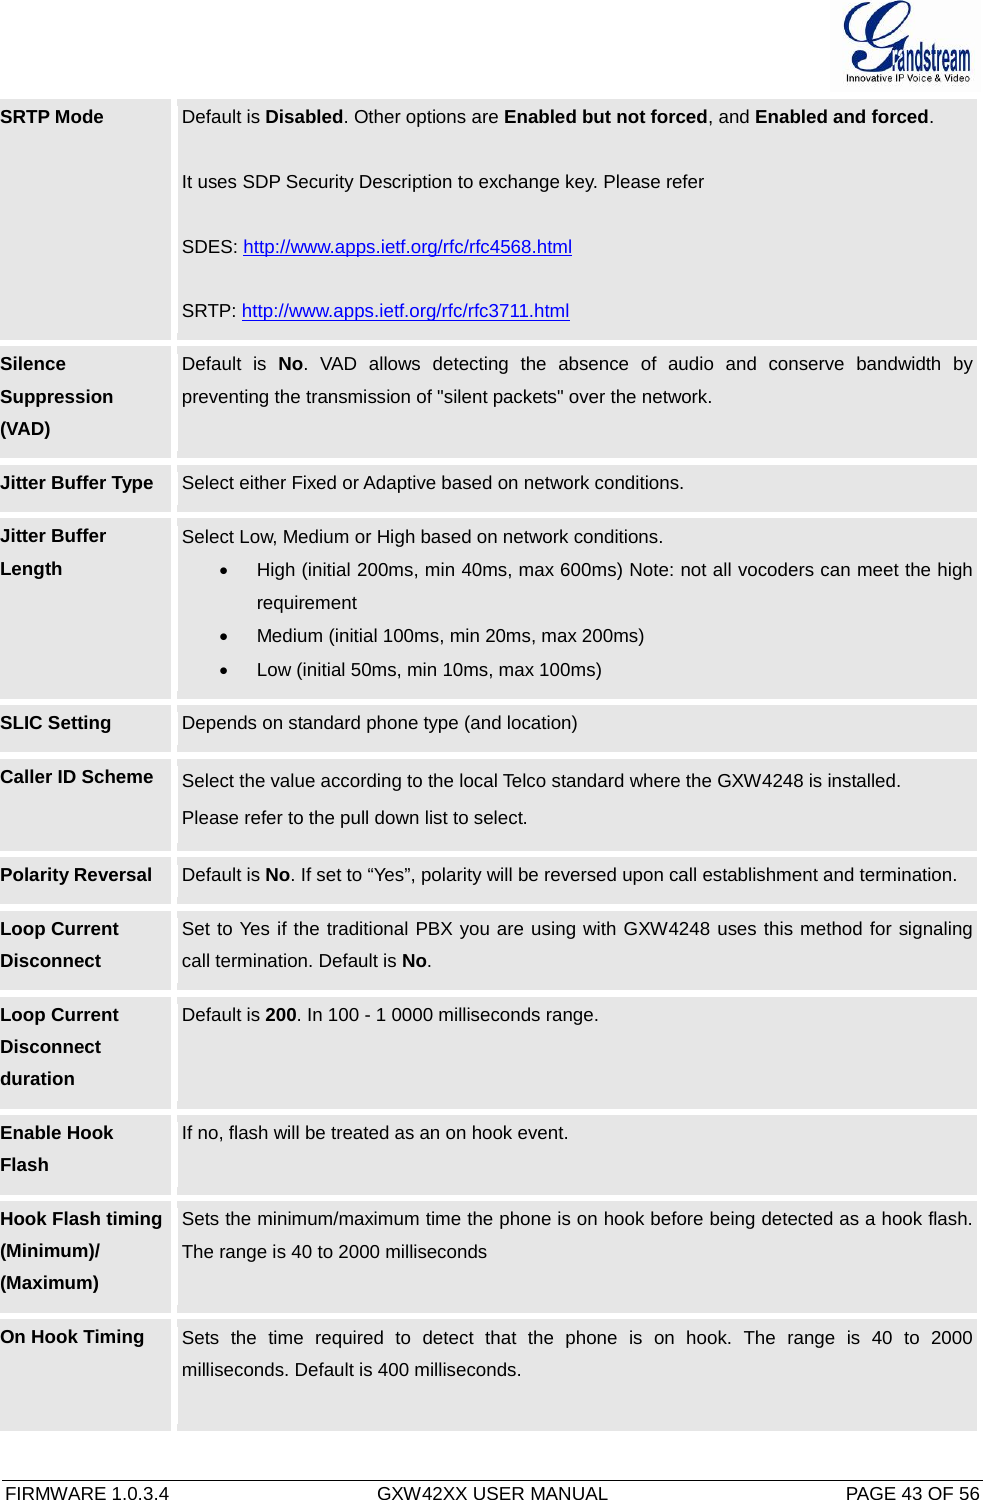
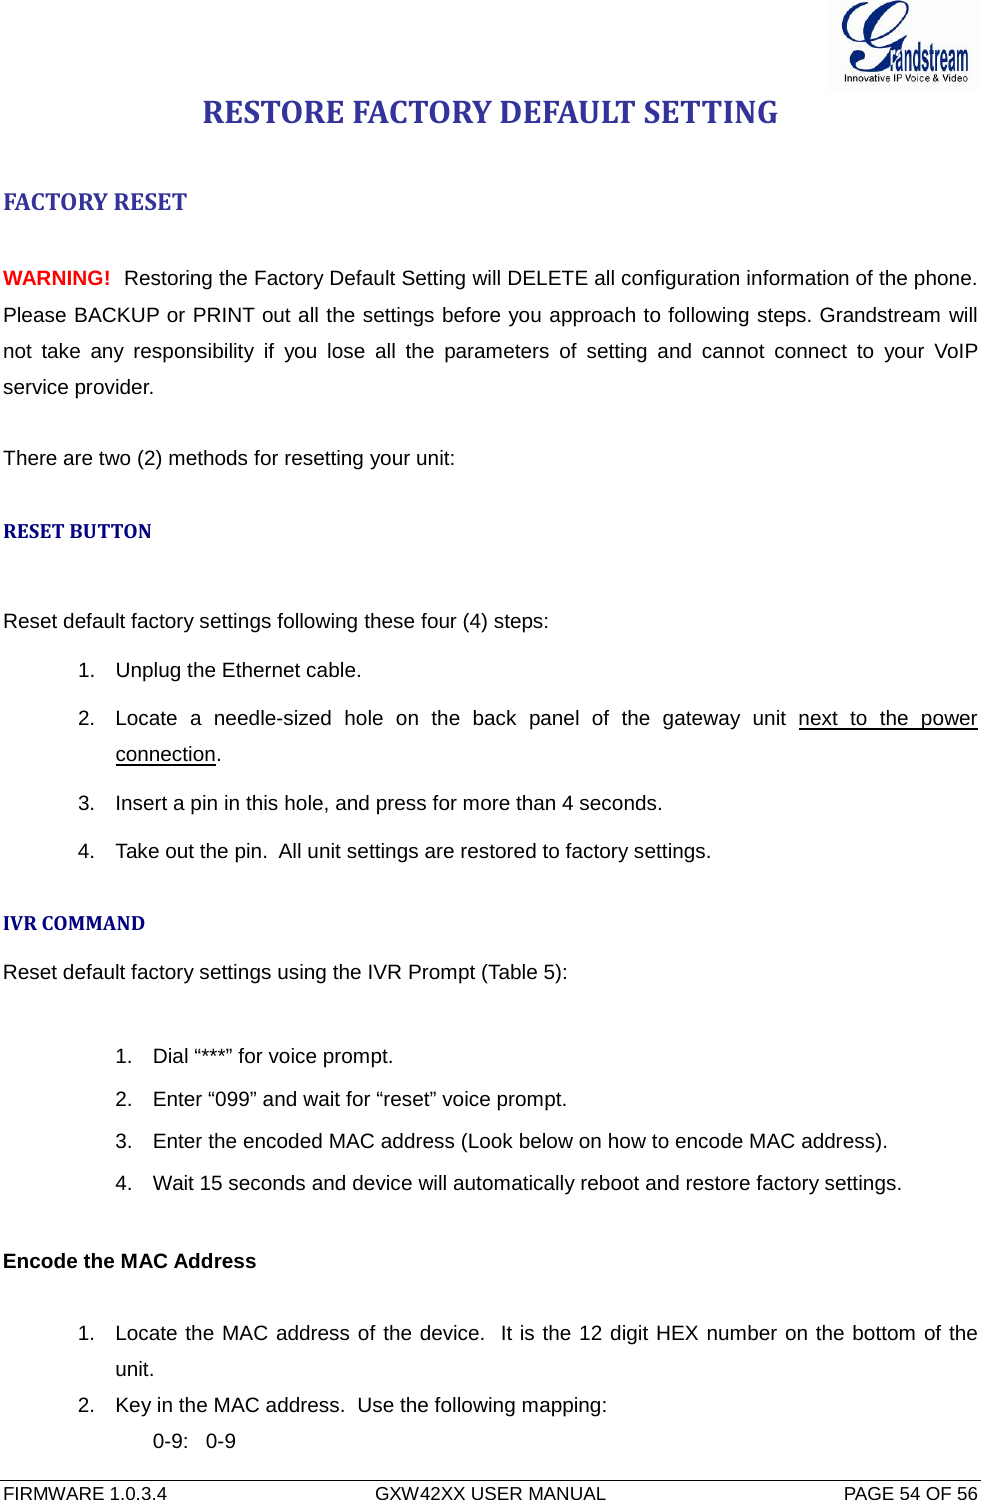
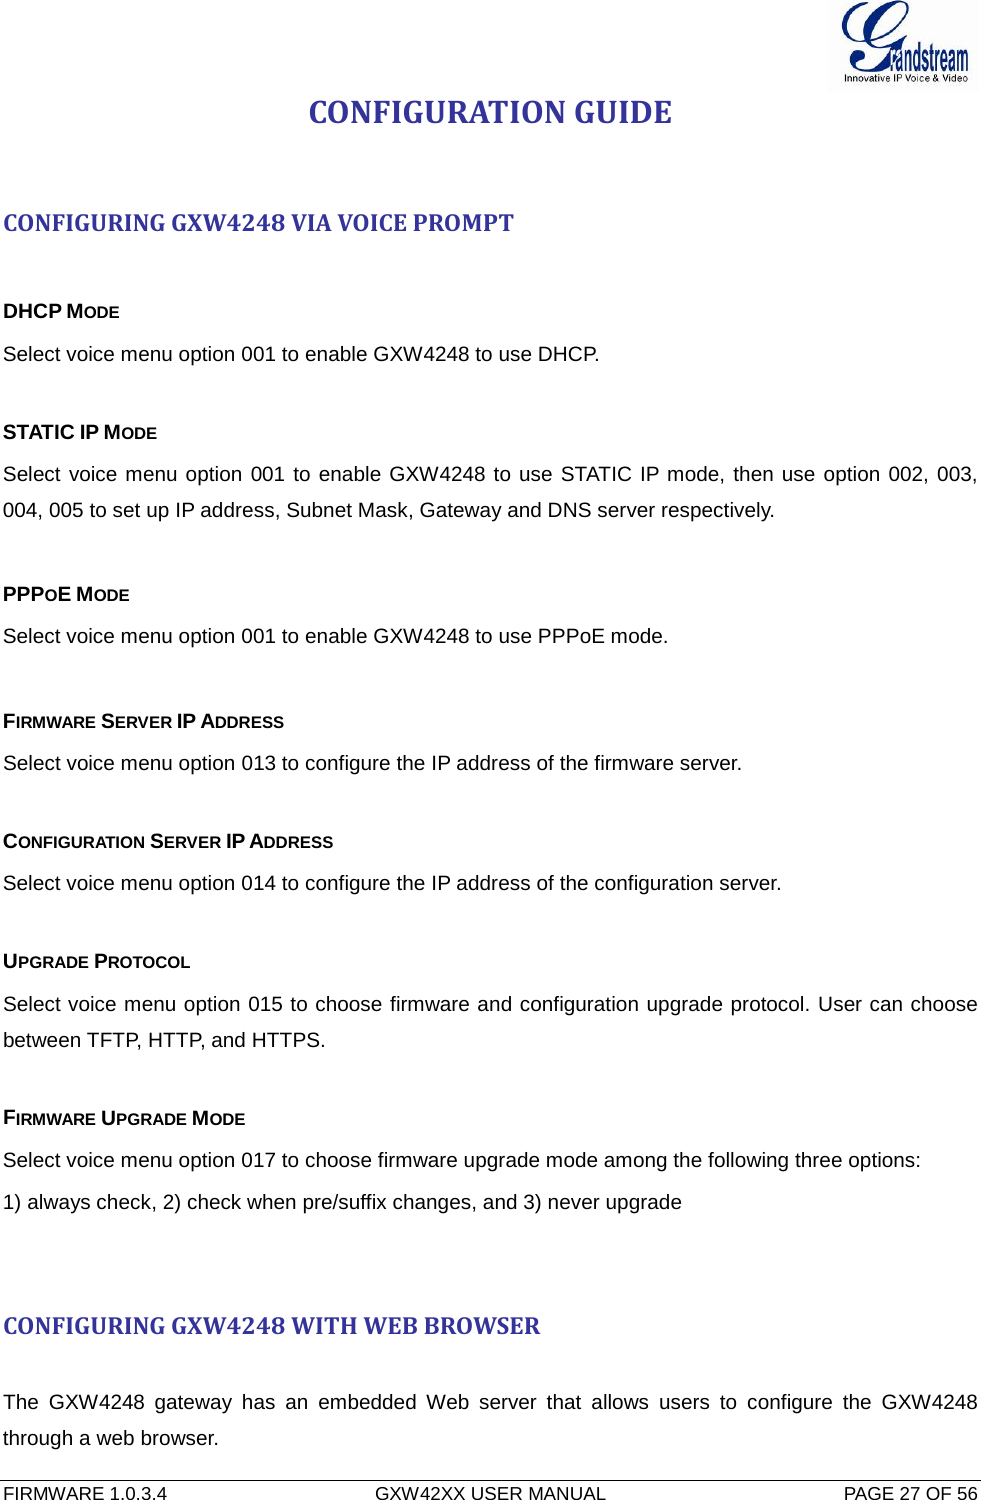
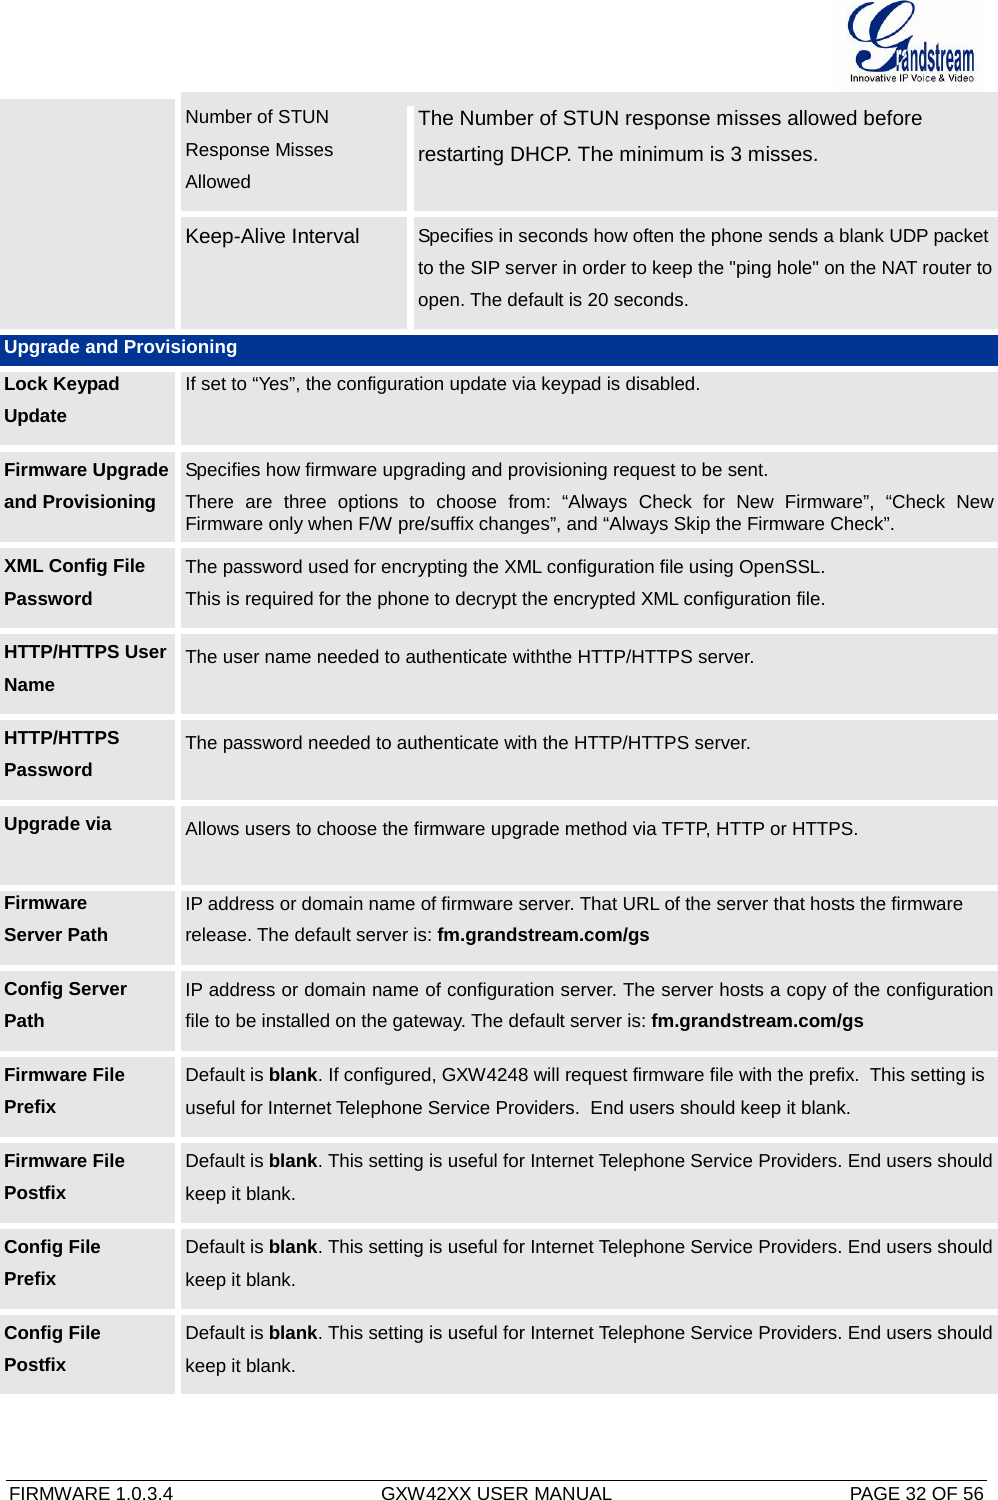
![FIRMWARE 1.0.3.4 GXW42XX USER MANUAL PAGE 45 OF 56 Dial Plan Dial Plan Rules: 1. Accept Digits: 1,2,3,4,5,6,7,8,9,0 , *, #, A,a,B,b,C,c,D,d 2. Grammar: x - any digit from 0-9; a. xx+ - at least 2 digits number; b. xx. – at least 2 digits number; c. ^ - exclude; d. [3-5] - any digit of 3, 4, or 5; e. [147] - any digit 1, 4, or 7; f. <2=011> - replace digit 2 with 011 when dialing g. < =1> - add a leading 1 to all numbers dialed, vice versa will remove a 1 from the number dialed h. | - or • Example 1: {[369]11 | 1617xxxxxxx} – Allow 311, 611, 911, and any 10 digit numbers of leading digits 1617 • Example 2: {^1900x+ | <=1617>xxxxxxx} – Block any number of leading digits 1900 and add prefix 1617 for any dialed 7 digit numbers • Example 3: {1xxx[2-9]xxxxxx | <2=011>x+} – Allow any length of number with leading digit 2 and 10 digit-numbers of leading digit 1 and leading exchange number between 2 and 9; If leading digit is 2, replace leading digit 2 with 011 before dialing. 3. Default: Outgoing - {x+} Example of a simple dial plan used in a Home/Office in the US: { ^1900x. | <=1617>[2-9]xxxxxx | 1[2-9]xx[2-9]xxxxxx | 011[2-9]x. | [3469]11 } Explanation of example rule (reading from left to right): • ^1900x. - prevents dialing any number started with 1900 • <=1617>[2-9]xxxxxx - allows dialing to local area code (617) numbers by dialing 7 numbers and 1617 area code will be added automatically • 1[2-9]xx[2-9]xxxxxx |- allows dialing to any US/Canada Number with 11 digits length • 011[2-9]x. - allows international calls starting with 011 [3469]11 - allow dialing special and emergency numbers 311, 411, 611 and 911 Note: In some cases user wishes to dial strings such as *123 to activate voice mail or other application provided by service provider. In this case * should be predefined inside dial plan feature and the Dial Plan will be: { [x*]+ }.](https://usermanual.wiki/Grandstream-Networks/GXW4248/User-Guide-1930189-Page-45.png)