Green Packet Berhad DT235-GP TDD-LTE BAND 41 INDOOR CPE User Manual USERS MANUAL
Green Packet Berhad, Taiwan TDD-LTE BAND 41 INDOOR CPE USERS MANUAL
Contents
- 1. User Manual
- 2. USERS MANUAL
USERS MANUAL
DT-235 & DT-350 Quick User Guide
1
Device Package
One device body
One AC/DC adapter
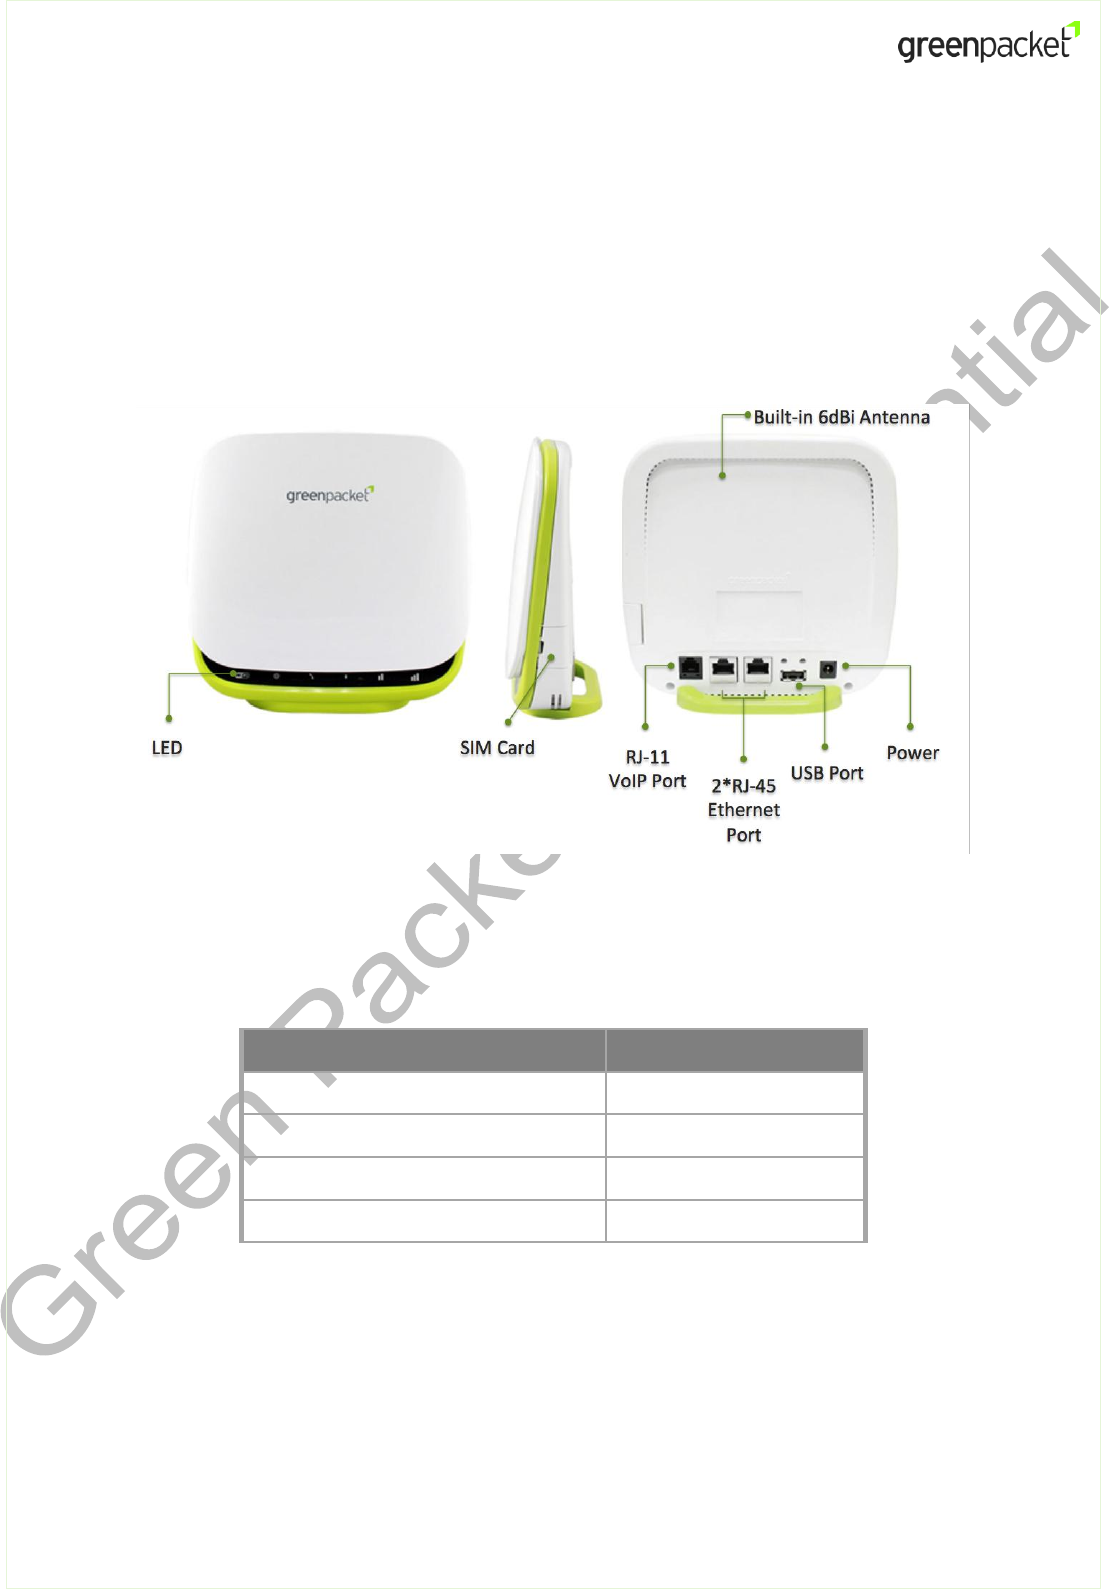
Device External Interface
Note: USB Port is not functional.
Environmental Specification
Feature
Specs.
Operating temperature
0 ~ 40 oC
Storage temperature
-20~60 oC
Operating humidity
0 ~ 95%
Storage humidity
0 ~ 95%
DT-235 & DT-350 Quick User Guide
2
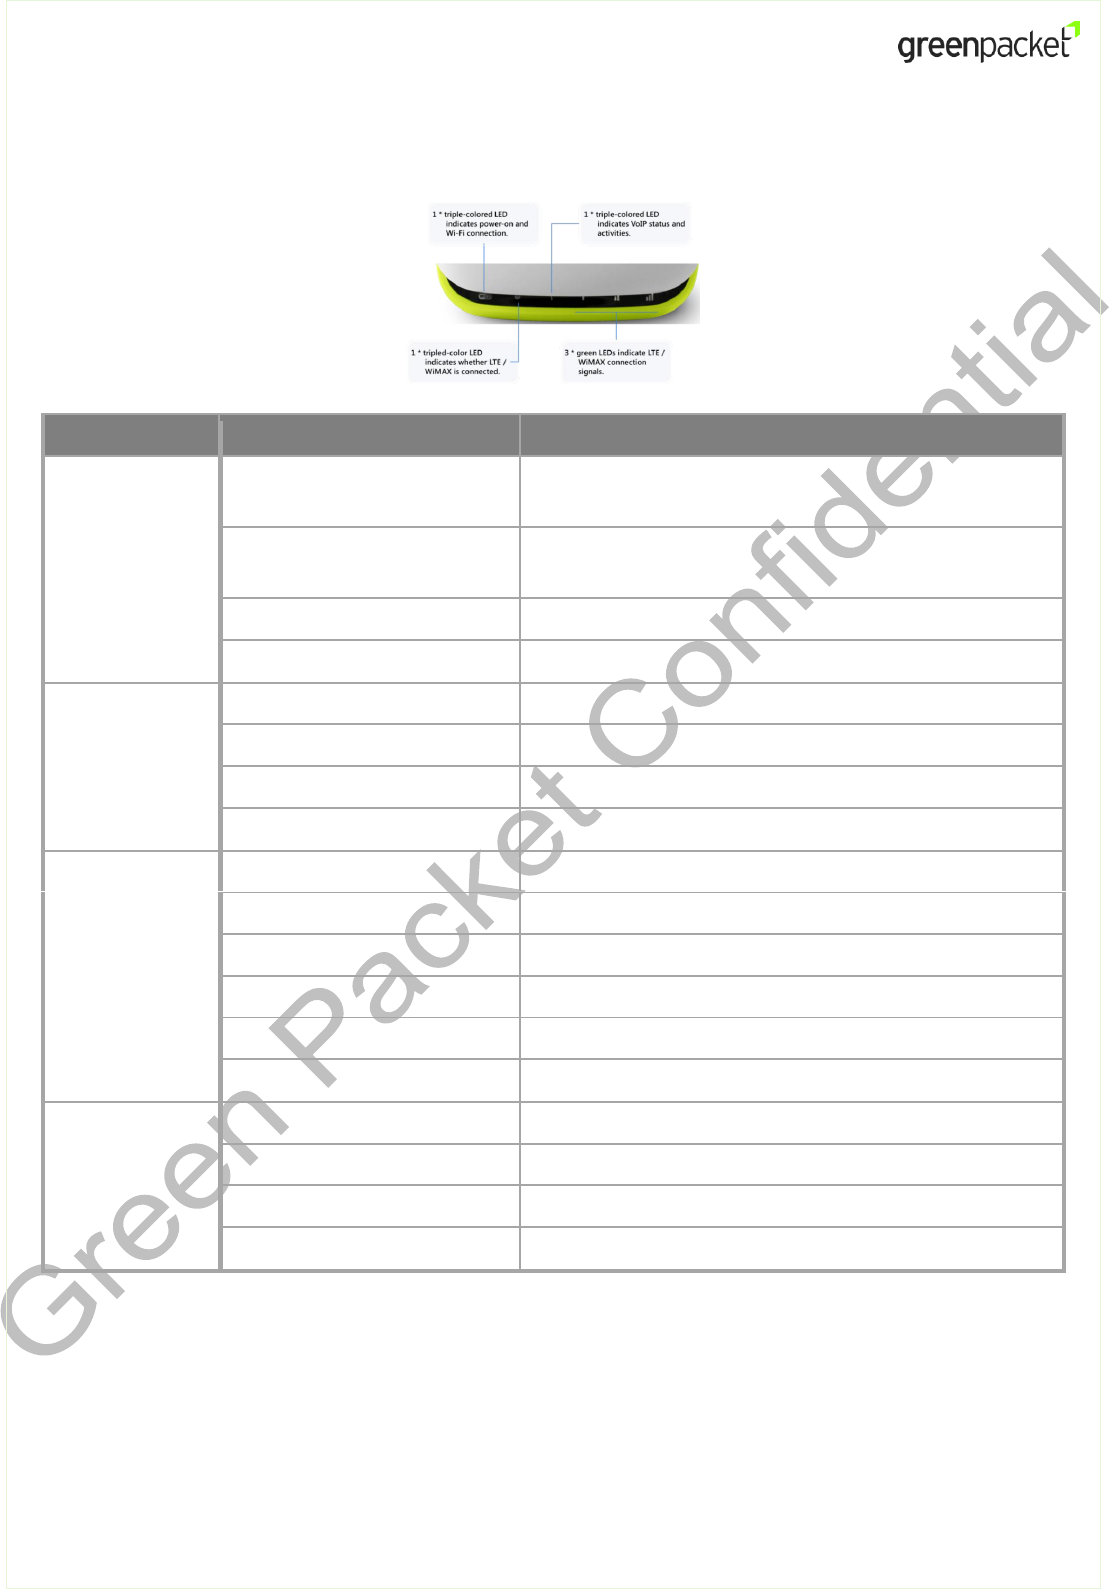
LED Indication
LED Indicators
Behavior
Description
Power & Wi-Fi
Status
Solid blue
While power is supplied to the device.
System is booting, or Wi-Fi disabled.
Solid purple
Wi-Fi is enabled (while the BLUE power LED is always
ON; mixing blue & orange red)
Blinking purple (and blue)
When data is being transmitted via Wi-Fi
All 6 LEDs off
No power is supplied to the device
Mode
Indication
Blinking blue
Scanning, connecting, finalizing LTE connection
Solid blue
LTE mode (camped on the LTE network).
Blinking orange red
Searching, connecting, finalizing WiMAX connection
Solid orange red
WiMAX mode (camped on the WiMAX network).
VoIP Activity
Solid blue
Phone service registered and ready
Blinking blue
Incoming call / Ringing
Solid orange red
Off-hook / Busy
Blinking orange red
New incoming call during conversation
Blinking purple
Incoming voicemail waiting
Off
Phone service not registered / disabled
LTE / WiMAX
Signal Strength
Off
No signal
Solid green LED 1
Signal is weak
Solid green LED 1+2
Signal is good
Solid green LED 1+2+3
Signal is excellent
Getting your Device Ready for Connection
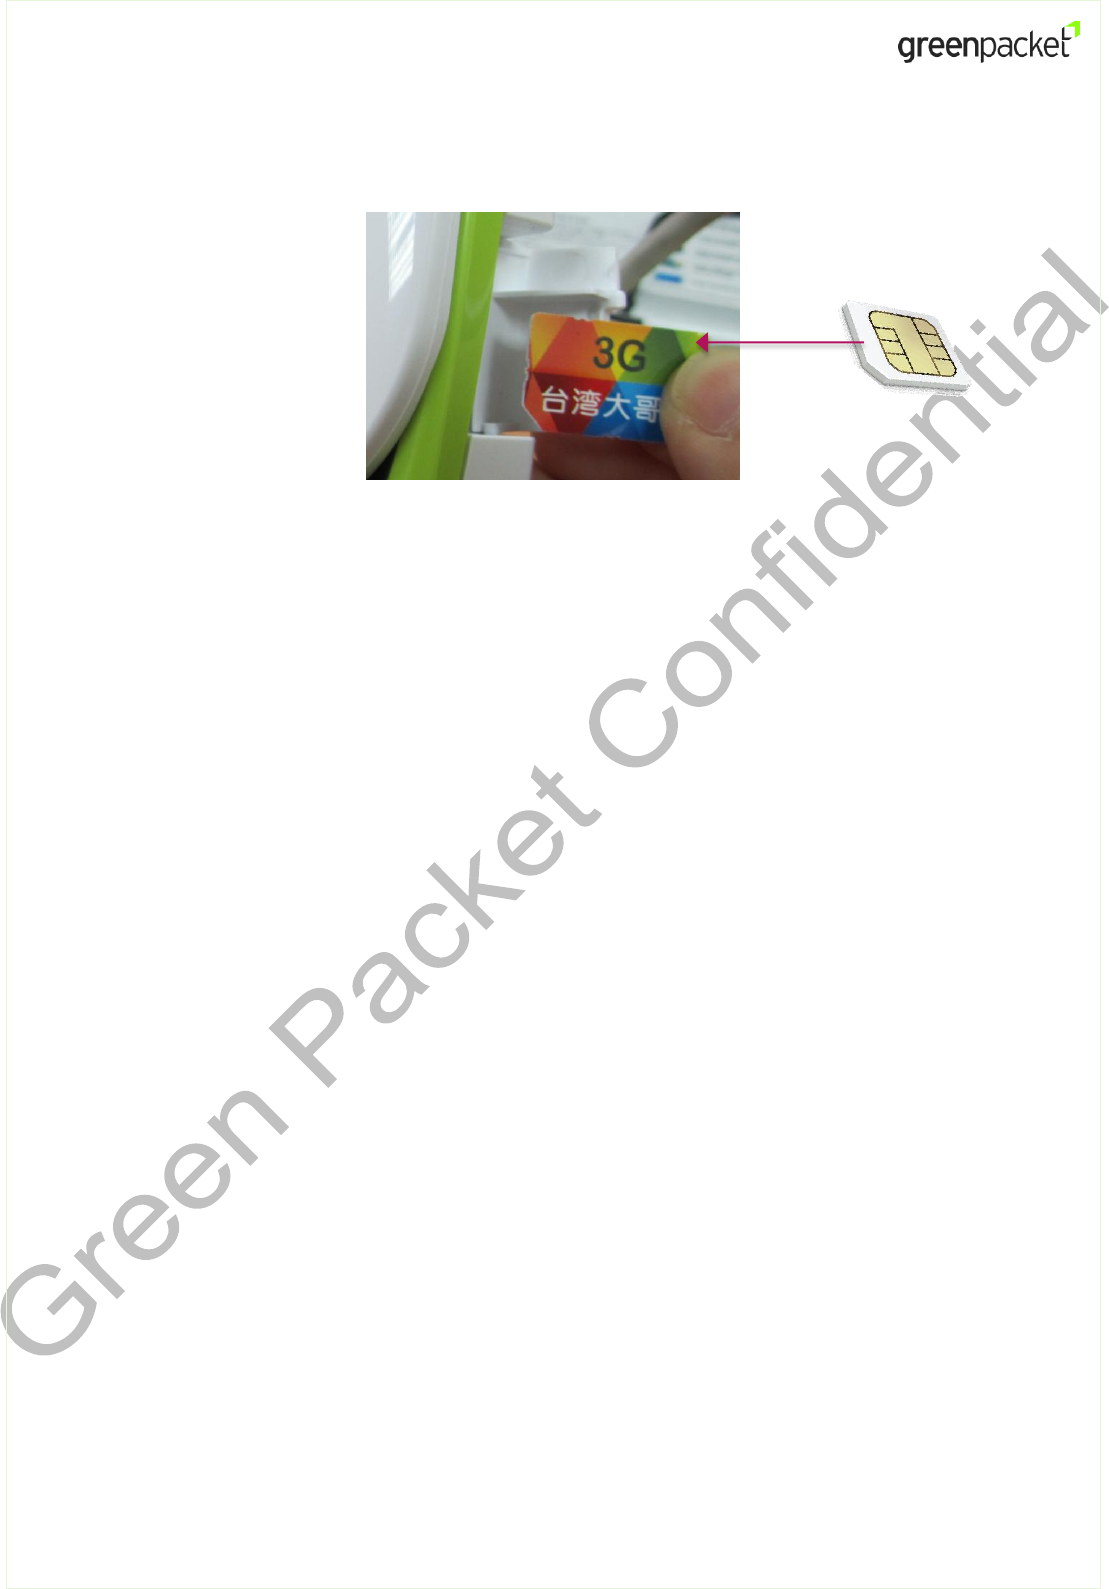
Step 1: Insert SIM Card (LTE Mode Only)
DT-235 & DT-350 Quick User Guide
3
Before powering on the CPE, please make sure to insert the LTE SIM card provided by your service
provider.
Note: To insert SIM card, please make sure to follow the direction as below. The medal part
of SIM card is facing bottom.
Step 2: Power On
Connect your CPE to power with the power cord and plug. Then, the LEDs will blink for a few
seconds and go off.
Step 3: Establish LTE Connection
Once powered on, the CPE will automatically connect to your subscribed LTE services. The
operation to set up connections takes place.
Note: Adjust the location of the LTE CPE for optimized signal reception. You can try several
spots in the house for an optimal location. Usually, it is recommended to place the indoor
modem near the window, facing toward the base station.
DT-235 & DT-350 Quick User Guide
4
Using Web User Interface to Access Device
Follow these steps to log in to the web management page:
1. Connect to the device via the LAN cable or WLAN.
To connect WLAN, please refer to the SSID and WPA key on the device label, located on the
device back.
Note: In DT series product package, only one AC/DC power adapter is provided. RJ-45 or RJ-
11 is not included.
2. Configure the computer's IP address so that the IP addresses of the computer and the
device are in the same network segment.
Note: The device's default IP address is 192.168.15.1, the subnet mask is 255.255.255.0, and
the login password is admin. If the device operates in routing mode, it is recommended you
automatically obtain the IP address and DNS server address.
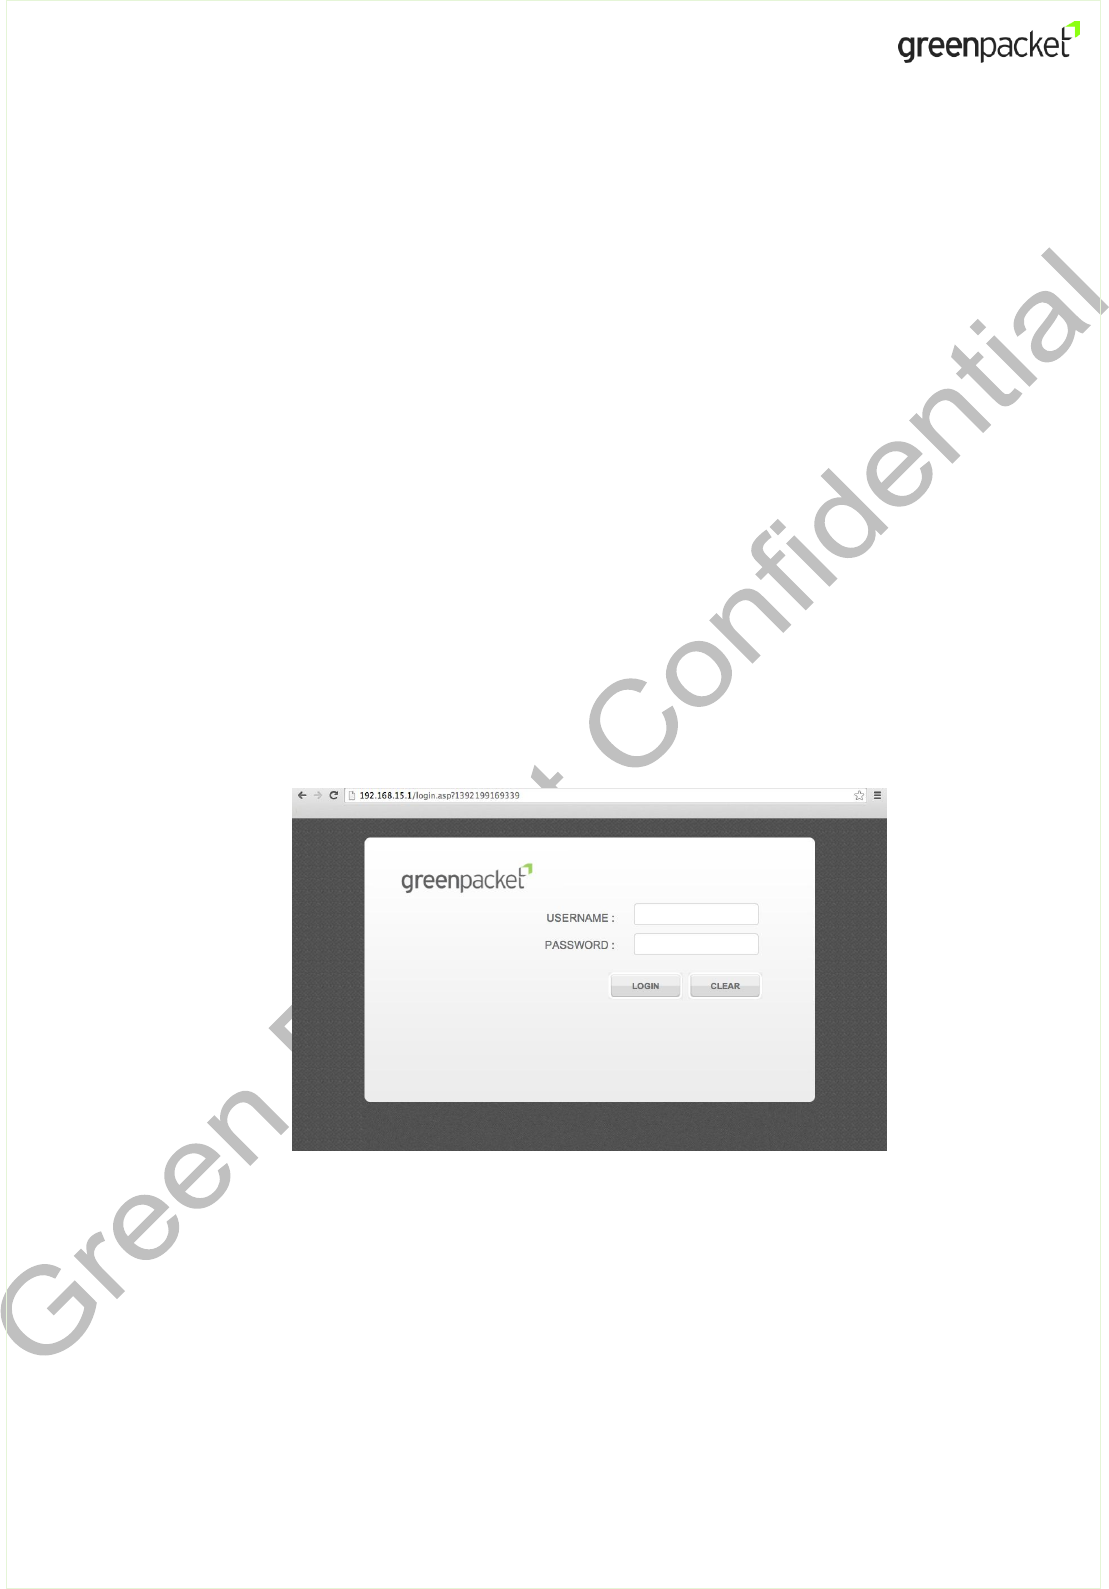
Open the browser, and enter http://192.168.15.1 in the address box.
3. Enter administrator / administrator as the Username and Password to log in to the web
management page. After the login information is verified, the web management page is
loaded.
Note: The Username and Password to the device may vary depending on your LTE/WiMAX
service providers.
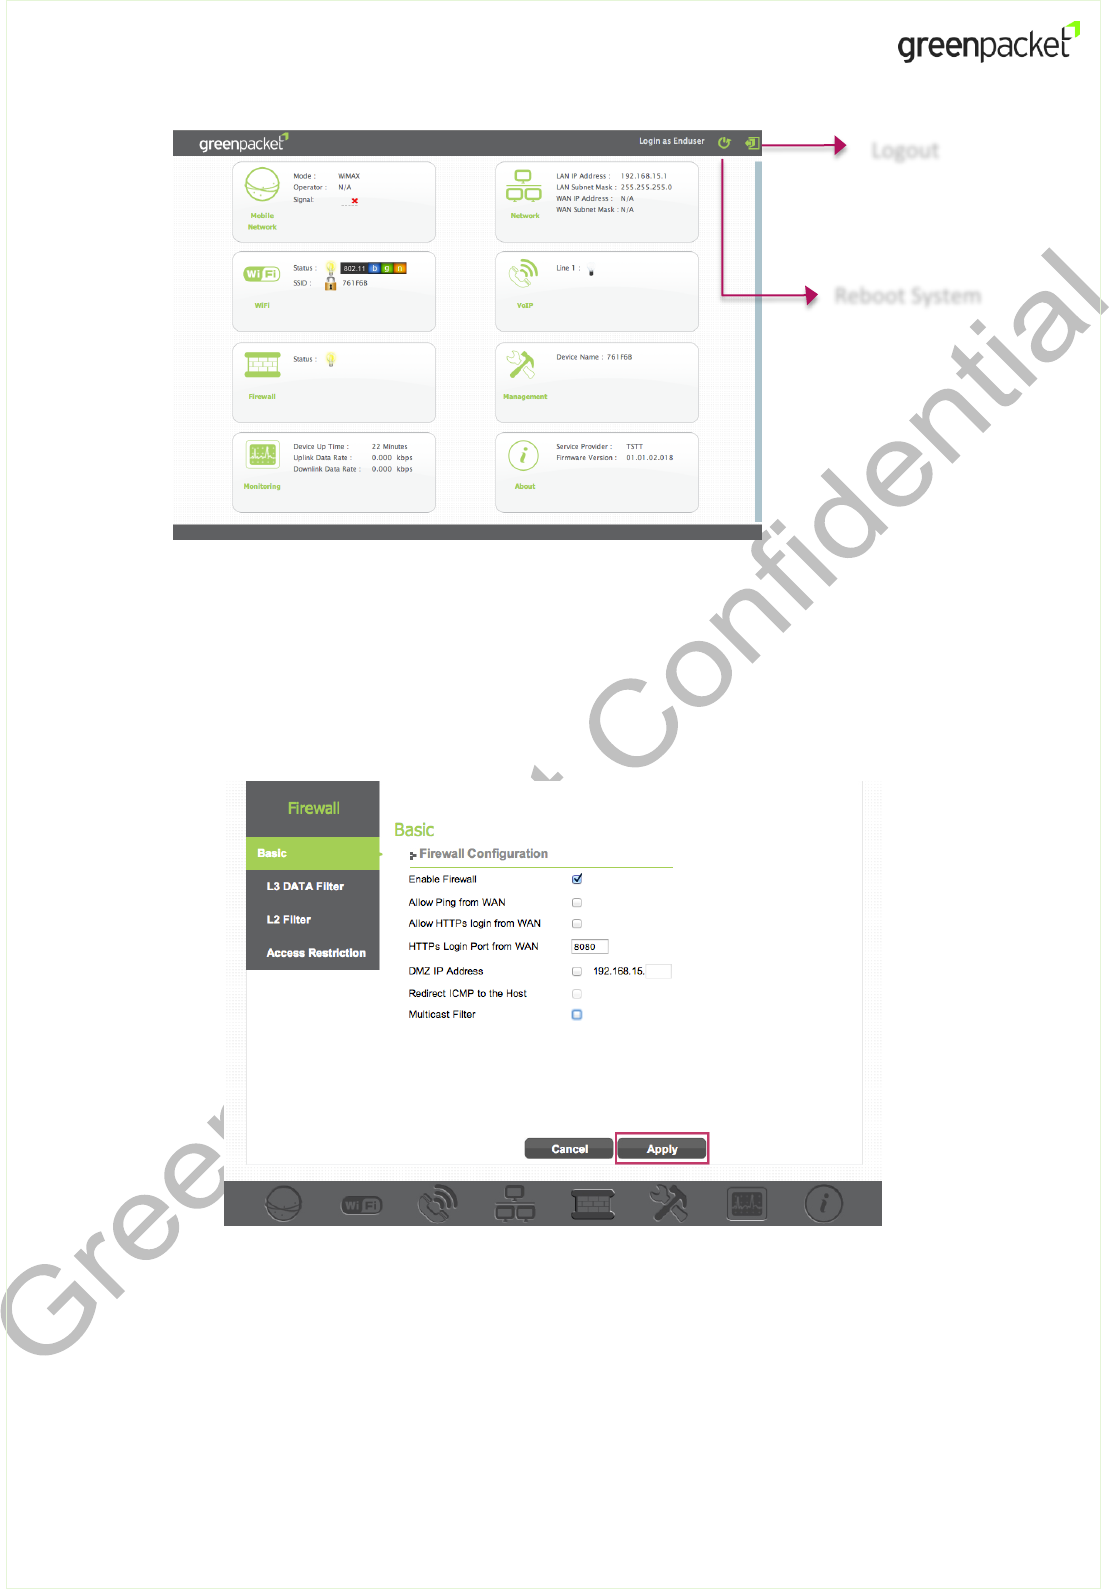
4. Once login, the Dashboard will be displayed, and you can have a status overview on device
activity.
DT-235 & DT-350 Quick User Guide
5
5. On the Dashboard, you can click on each section (Mobile Networks, Network, Wi-Fi, VoIP,
Firewall, Management, Monitoring, and About) to see the information or detailed
configurations.
Below is an example on Firewall section.
Note: If you make any change to the settings, make sure to click the Apply button to have
the configuration take effect.
Reboot System
Logout

DT-235 & DT-350 Quick User Guide
6
Claim of FCC Regulatory Compliance
FCC Regulatory
This device complies with part 15 of the FCC Rules. Operation is subject to the following two
conditions: (1) This device may not cause harmful interference, and (2) this device must accept
any interference received, including interference that may cause undesired operation.
Changes or modifications not expressly approved by the party responsible for compliance could
void the user‘s authority to operate the equipment.
This equipment has been tested and found to comply with the limits for a Class B digital device,
pursuant to part 15 of the FCC Rules. These limits are designed to provide reasonable
protection against harmful interference in a residential installation. This equipment generates,
uses and can radiate radio frequency energy and, if not installed and used in accordance with
the instructions, may cause harmful interference to radio communications. However, there is
no guarantee that interference will not occur in a particular installation. If this equipment does
cause harmful interference to radio or television reception, which can be determined by
turning the equipment off and on, the user is encouraged to try to correct the interference by
one or more of the following measures:
Reorient or relocate the receiving antenna.
Increase the separation between the equipment and receiver.
Connect the equipment into an outlet on a circuit different from that to which the
receiver is connected.
Consult the dealer or an experienced radio/TV technician for help.
FCC Radio Frequency Exposure Compliance
This equipment complies with radio frequency (RF) exposure limits adopted by the Federal
Communications Commission for an uncontrolled environment. This equipment should be installed
and operated with minimum distance 20 cm between the radiator & your body.