Guideline Geo 100MHZ GPR User Manual Proof read X3M Manual v2
Mala GeoScience AB (publ) GPR Proof read X3M Manual v2
Users manual
MAL
Å
GeoScience
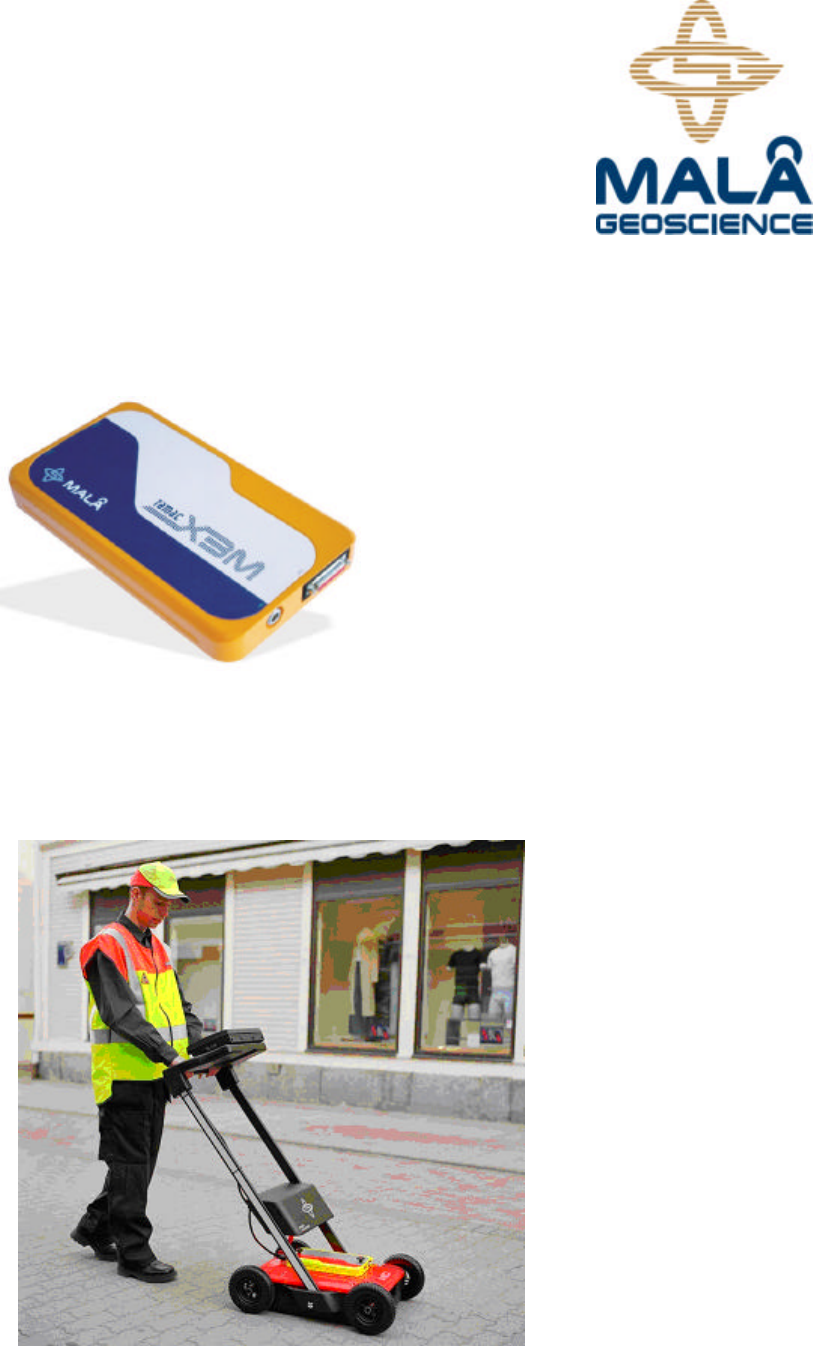
RAMAC X3M
and
EasyLocator
Hardware Manual
2
Table of Contents
____________________________________________________________
1. Introduction 3
1.1 Unpacking and Inspection 3
1.2 Repacking and Shipping 3
2. Start up and hardware description 4
2.1 Layout of the X3M 4
2.2 Mounting on the shielded antenna 5
2.3 Power cable 5
2.4 Distance measuring devices 5
2.5 Connection to computer 6
2.6 Kill switch 6
2.7 Start up and power button 7
3. Batteries and charging 8
3.1 Batteries 8
3.2 Charging 8
4. Software 8
5. Using the RAMAC X3M 9
6. RAMAC X3M specifications 10

3
1 Introduction
___________________________________________________________
Thank you for purchasing the RAMAC X3M/EasyLocator. We at Mala
GeoScience welcome comments from you concerning the use and
experience of this equipment, as well as the contents and usefulness of this
manual. Please take the time to read through the assembling instructions
carefully and address any questions or suggestions to the following:
MALÅ GeoScience postal address is:
Main Office: Subsidiary:
Malå GeoScience Malå GeoScience USA, Inc. E-Mail: sales@malags.se
Skolgatan 11 P.O. Box 80430 sales.usa@malags.se
S-930 70 Malå Charleston, SC 29416 rental@malags.se
Sweden USA support@malags.se
Phone: +46 953 345 50 Phone: +1-843 852 5021
Fax: +46 953 345 67 Fax: +1-843 769 7397
Information about MALÅ Geoscience’s products is also available on
Internet: www.malags.com
(Be sure to include instrument type and serial numbers)
1.1 Unpacking and Inspection
Great care should be taken when unpacking the equipment. Be sure to
verify the contents shown on the packing list and inspect the equipment for
any loose parts or other damage. All packing material should be preserved
in the event that any damage occurred during shipping. Any claims for
shipping damage should be filed to the carrier. Any claims for missing
equipment or parts should be filed with Mala GeoScience.
1.2 Repacking and Shipping
If original packing materials are unavailable, the equipment should be
packed with at least 80 mm of absorbing material. Do not use shredded
fibers, paper wood, or wool, as these materials tend to get compacted
during shipment and permit the instruments to move around inside the
package.
4
2 Start up and Hardware
Description
___________________________________________________________
The RAMAC X3M/EasyLocator is an integrated radar control unit, mounted
directly on the shielded antennas and powered externally. X3M is
compatible with the RAMAC/GPR shielded antennas 100, 250, 500 and
800MHz. EasyLocator has it own family of shielded antennas; DEEP, MID
and SHALLOW. The built-in electronic design makes it a low weight and
compact size system, easier to assemble and operate. No fiber optic cables
are required since the unit communicates directly with the laptop. Based on
the flexibility and the modularity of the RAMAC/GPR, the RAMAC X3M is
fully compatible with the Windows based acquisition software Ground
Vision, while the EsayLocator has it own acquisition software: EasyVision.
The built-in default autostacking function secures the best data quality at
maximum survey speed, in both units.
This section will give a short overview of how the GPR (Ground Penetrating
Radar) systems work.
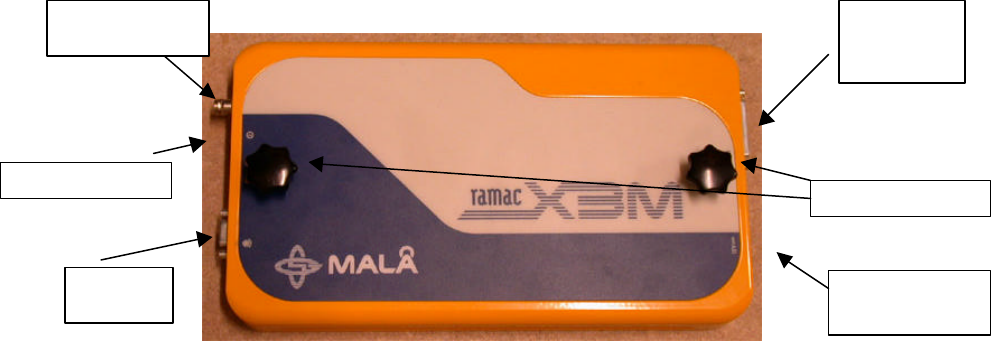
2.1 Layout of the RAMAC X3M /EasyLocator
Figure 2.1a. Layout of the X3M
The different number in Figure 2.1 corresponds to the following:
1: Connector for kill switch
2: Power button
3: Connector for encoder, 9 pin d-sub (wheel or hip chain)
4: Connector for parallel cable to a PC, 25 pin d-sub
5: Securing screws for mounting on antennas
6: Power cable connection
Figure 2.1. Layout of RAMAC X3M
5. Securing screws
1. Kill switch
connection
3. Encoder
connection
6. Power cable
connection
4. Parallel
cable port
connection
2. Power button
5
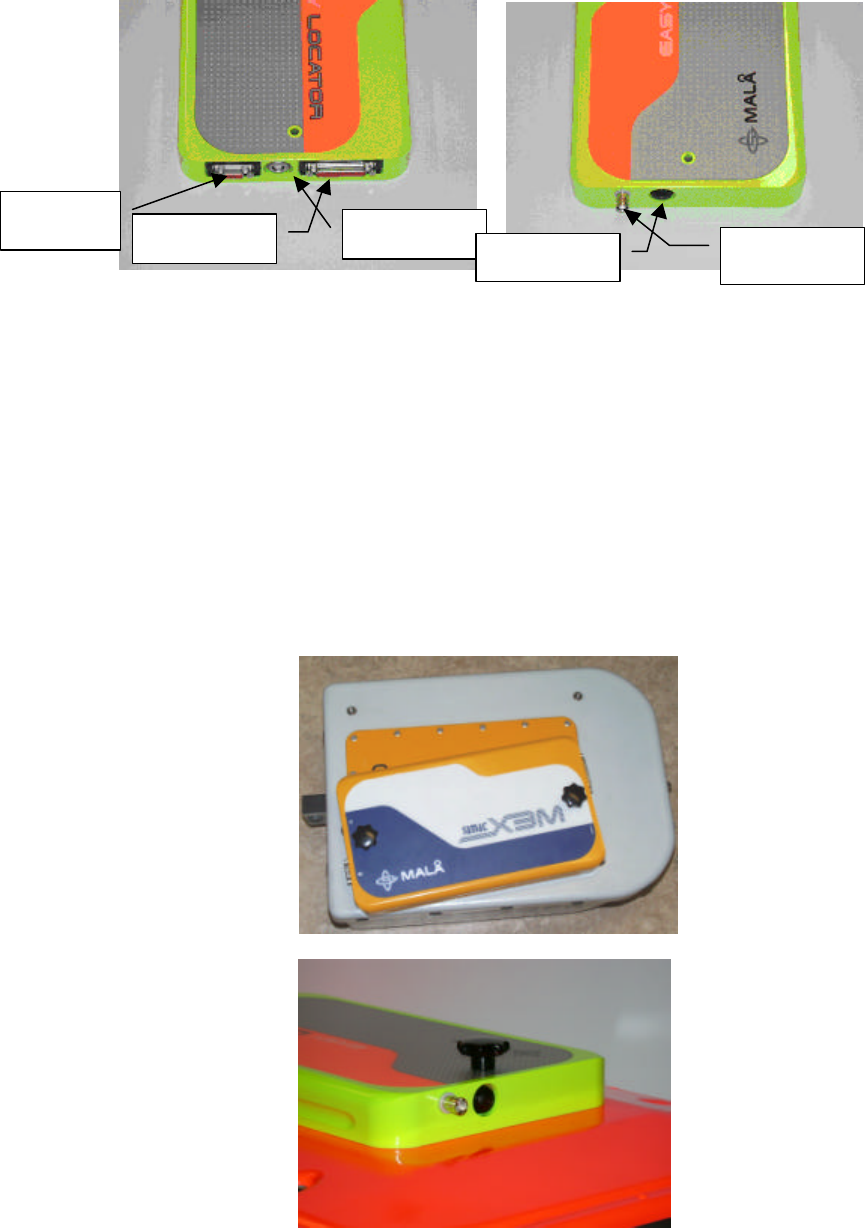
Figure 2.1 b. The same connectors as in figure 2.1a showed on an
EasyLocator.
2.2 Mounting on the shielded antennas
Start by placing the X3M/EasyLocator on the antenna that you are going to
use for your measurement. The Parallel port and the Power connection
should point forward according to the picture (Figure 2.2).
Fasten the unit on the antenna by tighten the securing screws.
Figure 2.2 Mounting on the antenna
3. Encoder
6. DC power
4. PC comm. 1. Kill switch
2. ON/OFF
6
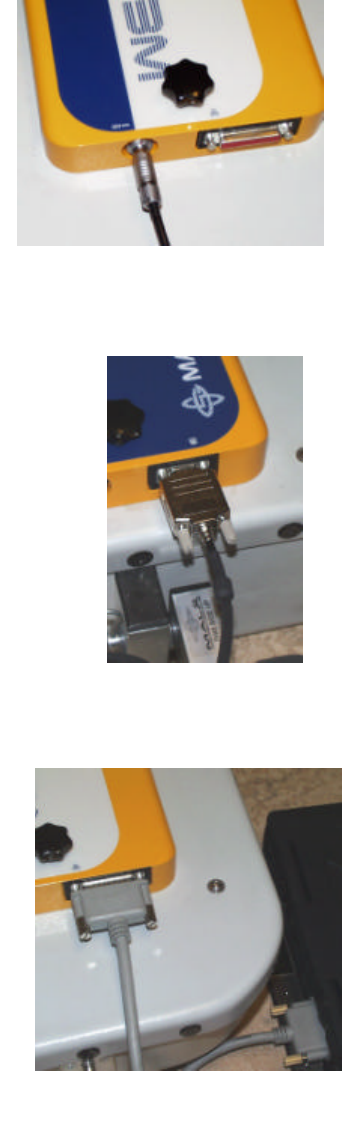
2.3 Power cable
When the X3M/EasyLocator is mounted on the antenna connect the Power
cable from your battery.
Look for the countersink and place it
towards the mark on the connection.
Push lightly. If you have it in the correct
position it should connect smoothly.
To disconnect: Pull out, holding the milled
part of the connection.
2.4 Distance measuring devices
The X3M/EasyLocator can be used together with
the standard MALÅ GeoScience distance
measuring devices (hip-chain and measuring
wheels). The encoder cable is connected as shown
below (Figure 2.4)
2.5 Connection to computer
Add the computer to the system by
connecting the parallel port cable between
the computer and the X3M/EasyLocator
(Figure 2.5).
Use an IEEE 1284 compatible parallel cable
that is less than or equal to three meters
long.
Figure 2.4. Encoder
Figure 2.3. Power cable
Figure 2.5. Parallel port

7
2.6 Kill switch
The kill switch is attached to a
handle that can either be
handheld or snapped onto a
RAMAC/GPR Cart (Figure 2.6
top).
The X3M/EasyLocator will not
be operational without the kill
switch. The button has to be
pushed down at all times
during measurements. If the
button is released the
transmitter will stop
transmitting.
Connect the kill switch to the
bayonet holder on the X3M/EasyLocator
by pushing lightly and turning the bayonet
socket clockwise (Figure 2.6 bottom).
To disconnect: Turn the bayonet socket
counterclockwise and pull out.
2.7 Start up and power button
To start the X3M/EasyLocator press and hold the start button for
approximately two seconds. The light in the center of the button will start to
flash (Figure 2.7).
Next start the acquisition software,
GroundVision or EasyVision, in your
computer. During the measurement the
button will have a steady light.
The X3M/EasyLocator has autostacking as
a default setting. More information about
autostacking and how to operate the
software will be found in their respective
manuals
Figure 2.7. Power
Figure 2.6. Kill switch
Kill switch
8
If you need to reset the X3M/EasyLocator press the power button for at
least three seconds. When the light starts to flash again the X3M is ready
for new measurements.
To turn the X3M/EasyLocator off, push the button and release quickly. The
red light will then stop flashing; the unit is now off.
If the power cable is accidentally pulled out, the X3M/EasyLocator will start
automatically when the cable is inserted again.
9
3 Batteries and charging
___________________________________________________________
3.1 Batteries
The battery belt is the standard power supply for the RAMAC
X3M/EasyLocator.
Capacity of the battery is 12V/9 Ah. This gives an operation time of 6-8
hours. When the battery voltage has dropped down to 10V the
X3M/EasyLocator will automatically turn itself off. The battery should always
be stored fully charged to maximize the lifetime of the battery. The
X3M/EasyLocator can also be supplied by any other external 12V DC power
source.
The EasyLocator can also be purchased with a specially designed trolley
system. This trolley has a special battery box, designed for Li-Ion batteries.
These are more lightweight while giving the same operation time.
3.2 Charging
The battery charger is an automatic quick charger designed for lead acid
batteries. The recharge up to about 80% of the full capacity goes very
quickly. However, it is recommended to keep the battery charging until it is
fully charged. The battery charger can be left on after the battery has been
fully charged. It then automatically turns into maintenance charging.
The indicator lamp on the charger gives you the following information:
Red = Charged < 80%
Yellow = Charged 80-100%
Green = Maintenance charging
Output 2.7 A, equals charging time between 3-5 hours (80%-100%)
4 Software
___________________________________________________________
The RAMAC X3M is designed to operate best with the data acquisition
software, GroundVision. The software is compatible with Windows 9x/ Me/
NT/ W2000 and XP. GroundVision is designed for a quick setup and storage
of default settings in the X3M. All data is stored in its original format (raw
data) on the hard drive of the computer for further post processing, if
10
required. Please refer to the GroundVision software manual for further
information on the acquisition software.
The EasyLocator is operated with the software EasyVision, designed for
optimal user friendliness. Please refer to the EasyVision software manual
for further information.

11
5 Using the RAMAC X3M/EasyLocator
___________________________________________________________
There are many applications where you can use the RAMAC
X3M/EasyLocator. A variety of different accessories that will make the
measurement easier are available for the X3M/EasyLocator.
The X3M/EasyLocator can
be used together with the
RAMAC/GPR Cart. The Cart
is designed for surveys on a
flat surface (Figure 5.1)
If the RAMAC/GPR Cart is
not suitable the system can
also be towed by using the
pulling handle and the X3M
PC holder. (Figure 5.2)
Note: All measurements should be performed with the antenna close to
ground, for best results.
Figure 5.1 RAMAC X3M with 500MHz antenna
Figure 5.2. RAMAC/GPR Cart wi
th X3M and 250MHz
antenna.
12
6 RAMAC X3M Specifications
___________________________________________________________
Pulse repetition frequency 100 kHz
Data bits 16
Nr of samples/trace 128-8192 (1024 with autostacking)
Nr of stacks Autostacking in the range 1-
32768 for
optimized speed performance
Signal stability < 100ps
Communication interface IEEE 1284 (ECP)
Communication speed >700 kb/s
Data transfer rate 40-400 kb/s at 4 Mbit/s
Acquisition mode1 Distance/time/manual
Power supply2 External 12V DC battery (Pb)
Operating time 6-8 hours with standard battery belt
Charger Quick charger, automatic charge cycle 100
40VAC input
Charge time 3-5h (80-100%)
Measuring wheel Standard RAMAC/GPR trigger device
Software3 Compatible with GroundVision
Antennas4 Shielded antennas 100, 250, 500 and 800 MHz.
Dimensions 310 x 180 x 30 mm (12.2 x 7 x 1.2 in)
Weight 1.7 kg (3.7 lb)
Operating temperature -20oC to +50oC (-4oF to +122oF)
Environmental IP 67
Notes:
1 EasyLocator does not have manual mode.
2 EasyLocator also has an Li-ion option.
3 EasyLocator only operates with the EasyVision software
4 EasyLocator is compatible with the DEEP, MID AND SHALLOW antennas.