Editing Viewpoint Settings 021709
2016-06-08
: Guides 021709 Editingviewpointsettings 021709_EditingViewpointSettings tips pdf asi
Open the PDF directly: View PDF ![]() .
.
Page Count: 2
www.advsolinc.com
ASI Client Center
1-877-438-2741
Autodesk Products Tip & Tricks
Copyright 2008 – Advanced Solutions, Inc.
9
Figure 2
Figure 1
Product: NavisWorks Manage 2009
Topic: Editing Viewpoint Settings
Written by: Nick Bower, Assoc. AIA BSD Techncial Engineer
Date: February 17, 200
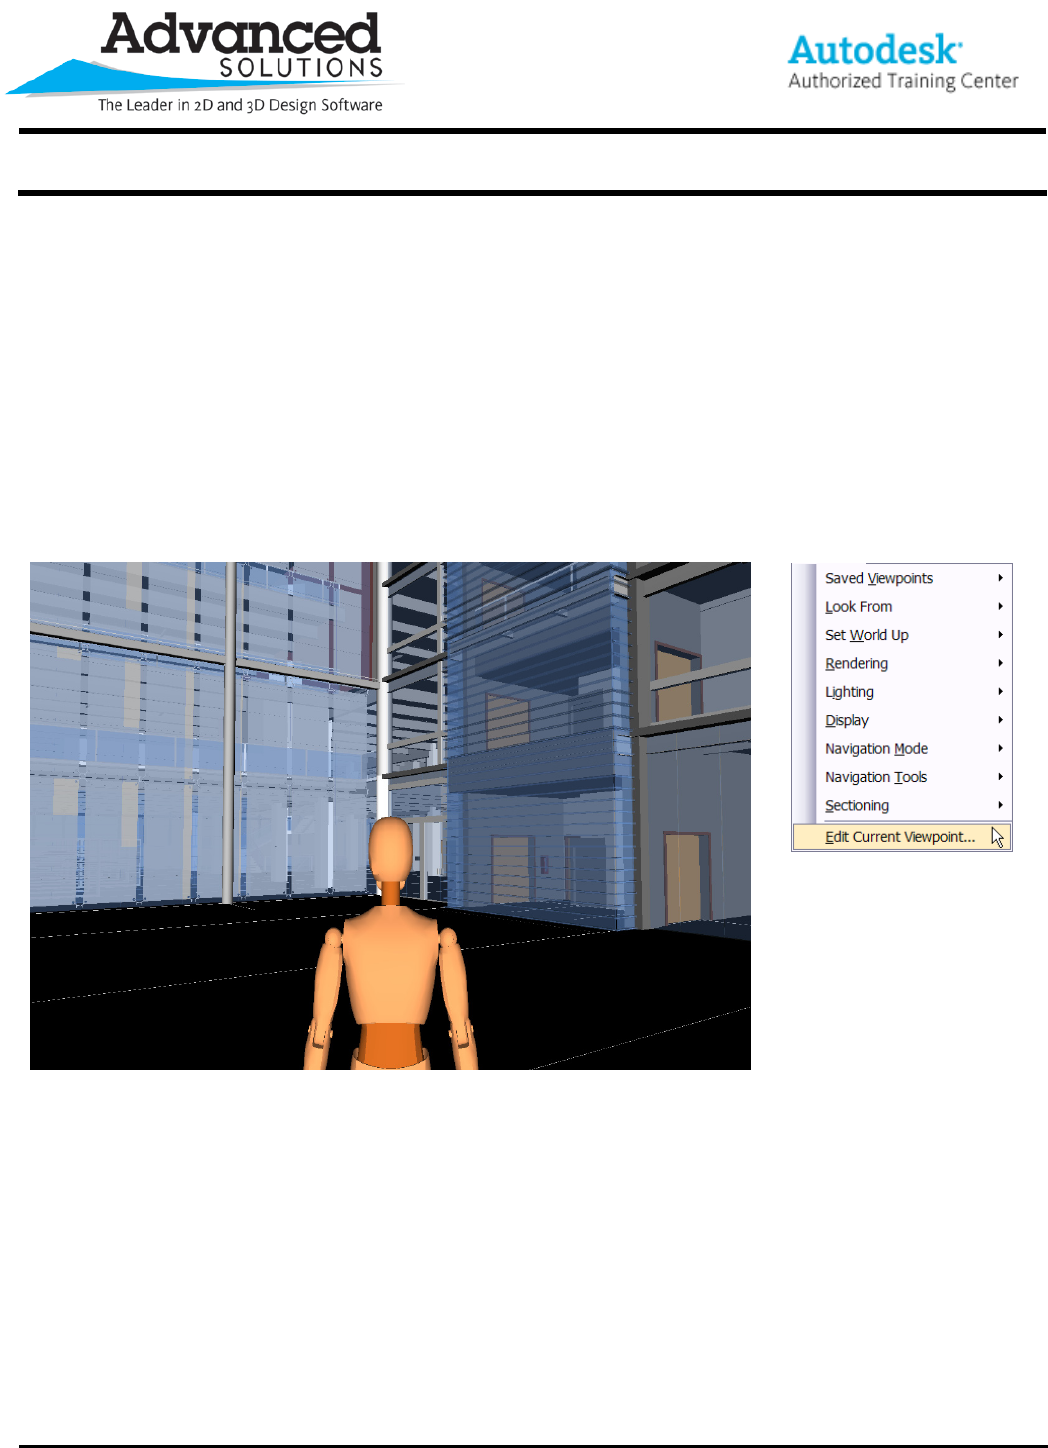
When working in NavisWorks Manage 2009, the need may arise to change the default Avatar or walking speed
when using the navigation tools. You can easily change any of these settings by modifying the Edit Current
Viewpoint Settings.
Unless changed otherwise, NavisWorks Manage will start with a default avatar to be used when working with the
walk tool. In the instance below (Figure 1), the avatar is the “Dummy” avatar. This default avatar may not be the
one that you would like to use for the purposes of recording an animation. It can be changed by going to
Viewpoint > Edit Current Viewpoint… (Figure 2).
www.advsolinc.com
ASI Client Center
1-877-438-2741
Autodesk Products Tip & Tricks
Copyright 2008 – Advanced Solutions, Inc.
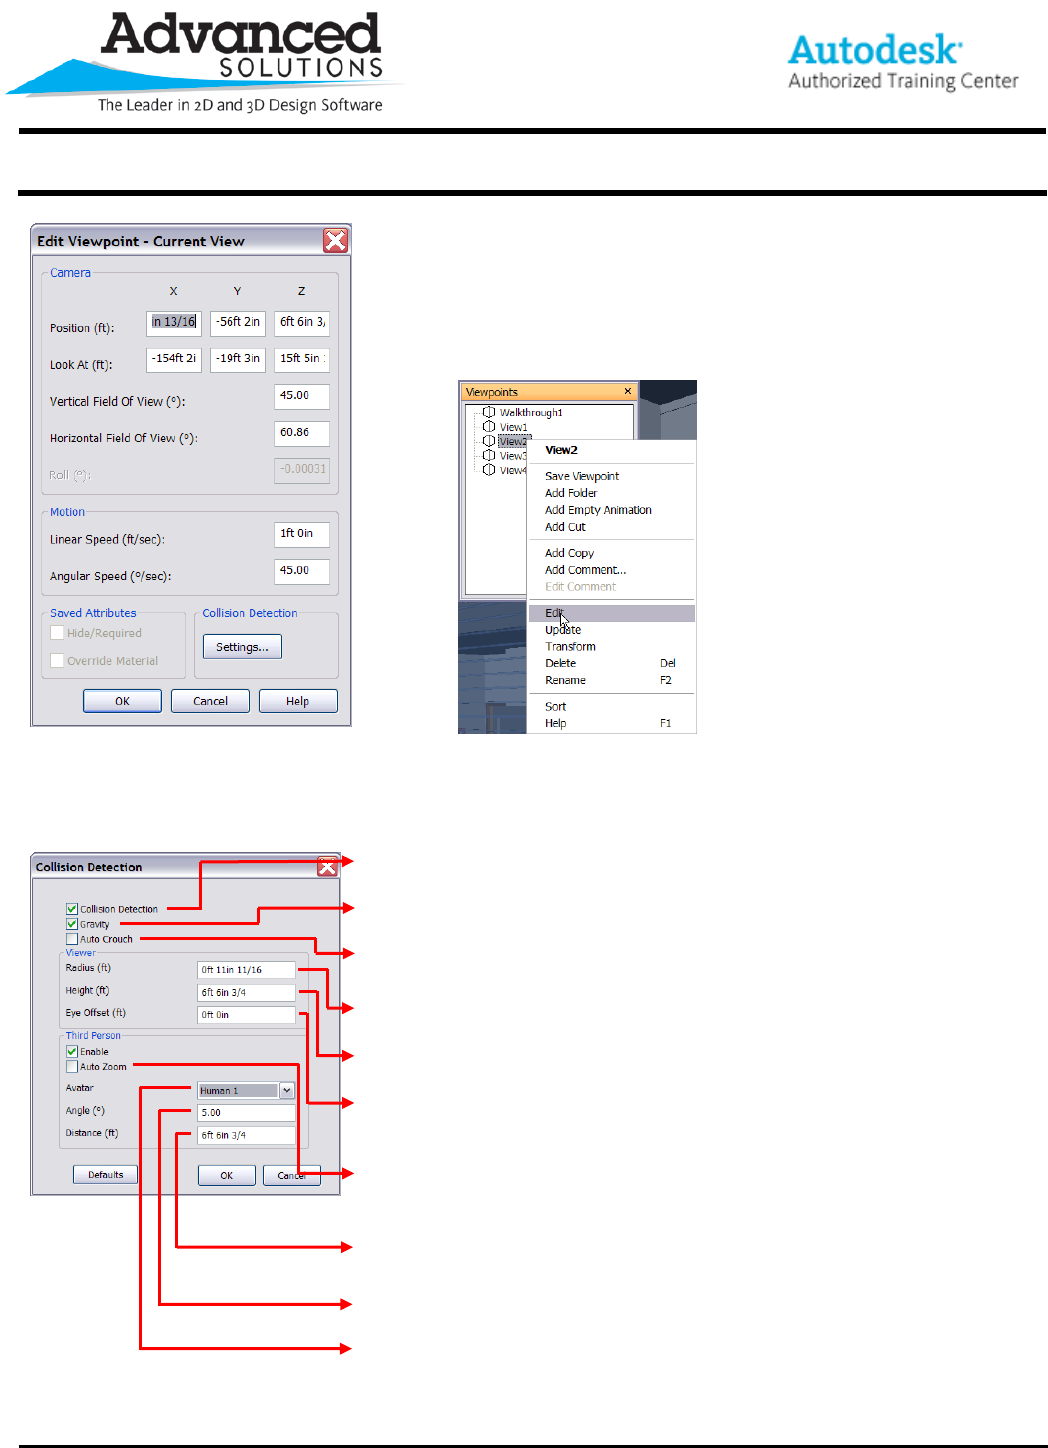
Once the Edit Viewpoint – Current View has been opened, click on
Settings… to edit the Collision Detection Settings (Figure 3). The Collision
Detection dialog will allow you to change the Third Person Avatar settings
for this particular viewpoint. It is worth noting that if you have multiple
viewpoints saved you can right click them in the viewpoints menu and edit
their settings (Figure 4).
Figure 3 Figure 4
The Collision Detection dialog will provide you the ability to change the way that the Third Person avatar looks
and behaves. The following descriptions explain the various options:
Controls whether the avatar can walk through objects such as walls. Also controls whether the
avatar can walk up and down stairs when Gravity is turned on
Pulls the avatar to the ground. This setting must be turned on to walk up or down stairs.
Will automatically make the avatar crouch down if there is something at head height such as a
pipe or soffit
Controls the roundness of the avatar. Making this number smaller will make the avatar appear
thinner.
Controls the height of the avatar. Typically set between 5’-8” – 6’-0”
Controls the distance above the height that will be seen as eye level when using the Auto Zoom
feature. This value is typically set to 0’-0”.
Will automatically zoom closer to the avatar if in a small space or when an object obstructs the
Third Person camera view. If required NavisWorks will switch back to First Person mode until
the avatar leaves the restricted space. This is useful for doing walkthroughs/redlines in plenum
spaces.
Controls the distance the camera is behind the avatar. A good rule of thumb is to start out with
the same value as the Height.
Allows you to control the camera angle behind the avatar. If this value is set to 0, you will be
looking directly at the avatar. If the value is set to 90 you will be looking down on the avatar.
Control the avatar’s appearance
