Importing AutoCAD Line Weights 032709 Auto CADLine
2016-06-08
: Guides 032709 Importingautocadlineweights 032709_ImportingAutoCADLineWeights tips pdf asi
Open the PDF directly: View PDF ![]() .
.
Page Count: 4
www.advsolinc.com
ASI Client Center
1-877-438-2741
Autodesk Products Tip & Tricks
Copyright 2008 – Advanced Solutions, Inc.
Product: Revit 2009
Topic: Importing AutoCAD Line Weights
Written by: Jonathan Weinhold, Technical Engineer
Date: March 27, 2009
Revit Line Weights
To make it easier to importing existing CAD details into your Revit projects, you can edit the line weights and how
they are imported.
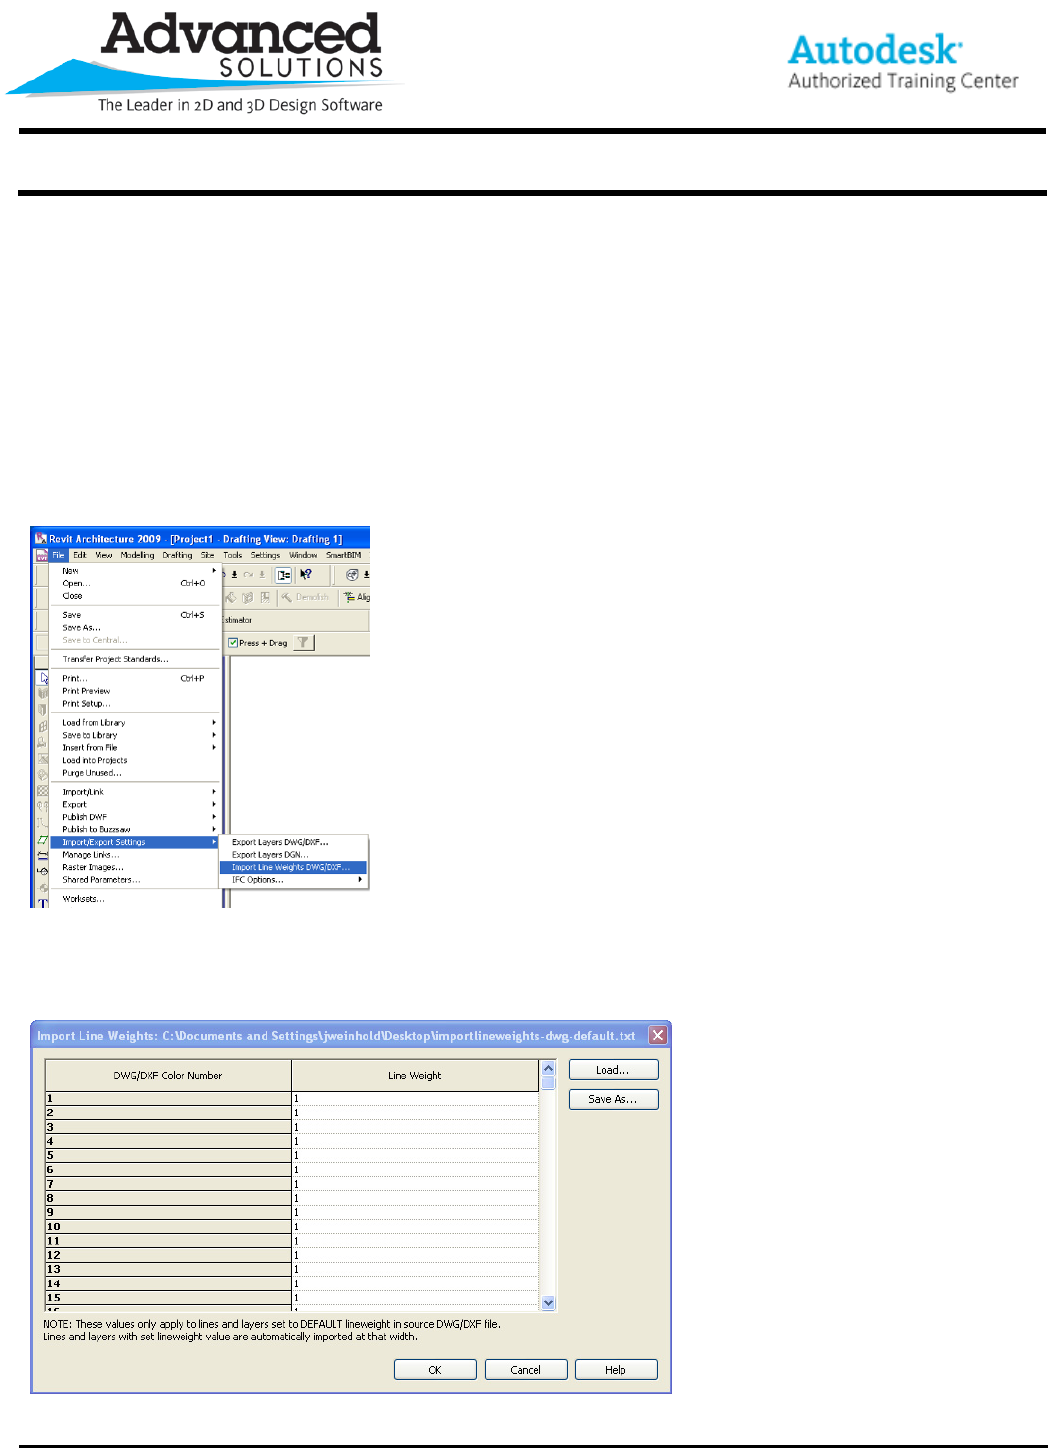
Select from the File Menu > Import/Export Settings > Import Line Weights DWG/DWF (Fig 1).
Figure 1
This should take you to the Import Line Weight Dialogue Box (Fig 2).
Figure 2
www.advsolinc.com
ASI Client Center
1-877-438-2741
Autodesk Products Tip & Tricks
Copyright 2008 – Advanced Solutions, Inc.
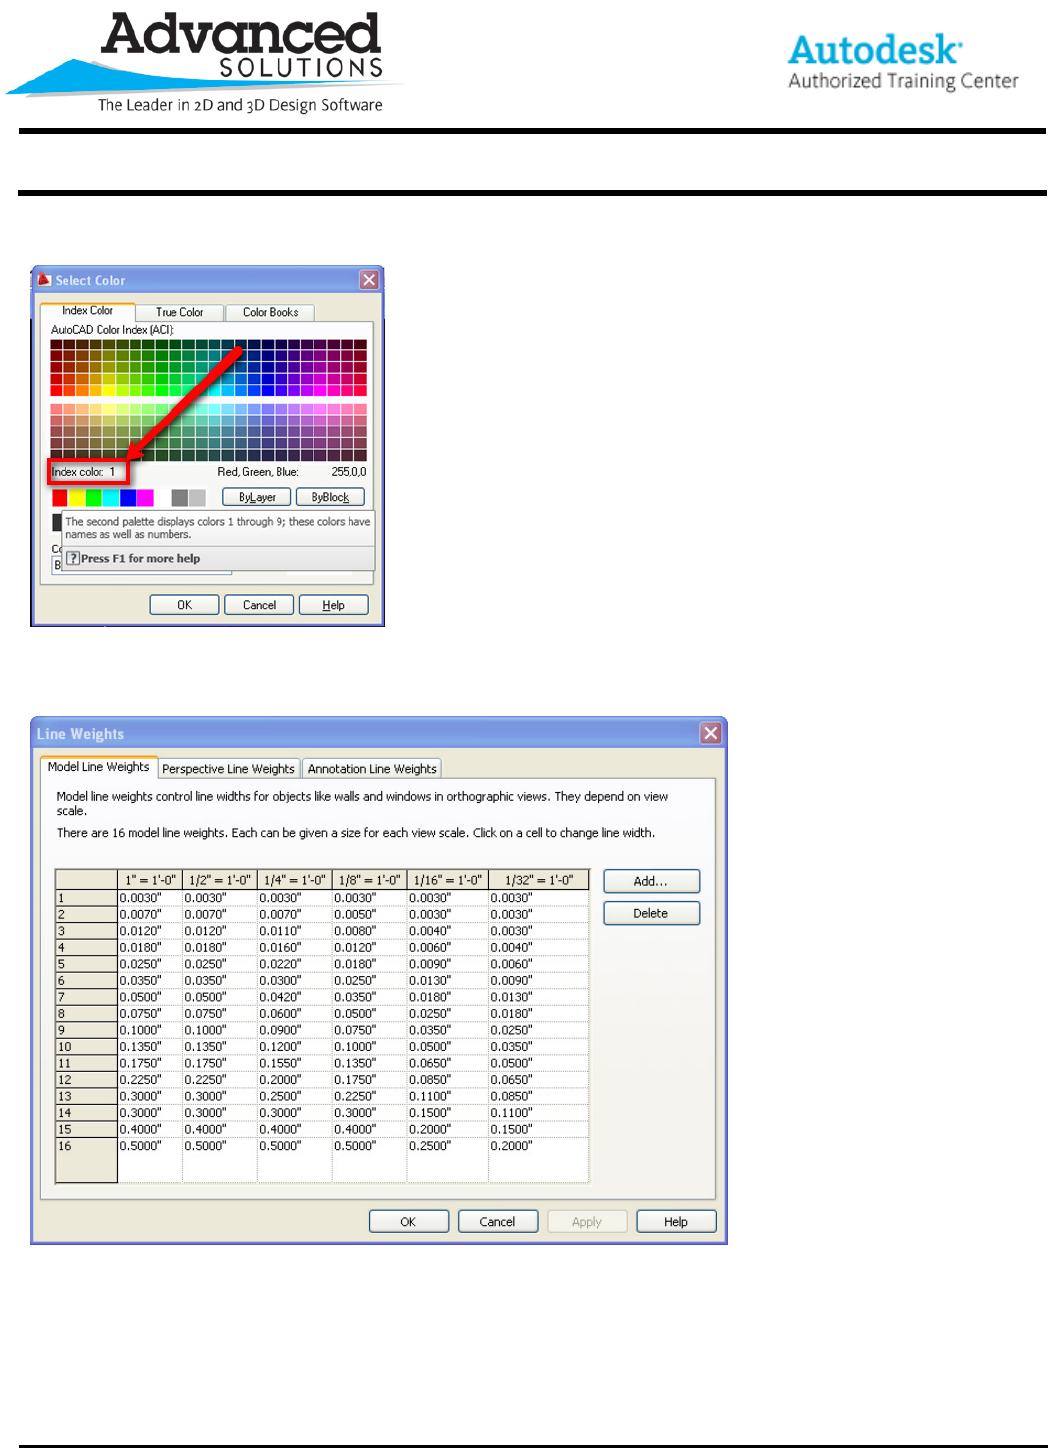
The Color Number on the left side refers to the AutoCAD Color Number (Fig 3).
Figure 3
The numbers on the left side refer to the Revit Line Weight (Fig 4).
Figure 4
You can go through and based on the AutoCAD line weight determine the thickness of the imported line weight.
In this example there are three line weights in AutoCAD that will be imported into Revit.

www.advsolinc.com
ASI Client Center
1-877-438-2741
Autodesk Products Tip & Tricks
Copyright 2008 – Advanced Solutions, Inc.
The line weight numbers in AutoCAD are 1, 2, and 5. These numbers correspond to color in AutoCAD. In this
case the colors are 1:Red, 2:Yellow, 5:Blue (Fig 5).
Figure 5
From the steps in Figure 1 change the line weights for the corresponding numbers 1, 2, and 5 (Fig 6). It does not
matter what you change them to as long as they are larger than 1.
Figure 6
Select View New > Drafting View to open a drafting space for you to add the detail (Fig 7). Give the drafting view
a name and scale then press OK.
Figure 7
www.advsolinc.com
ASI Client Center
1-877-438-2741
Autodesk Products Tip & Tricks
Copyright 2008 – Advanced Solutions, Inc.
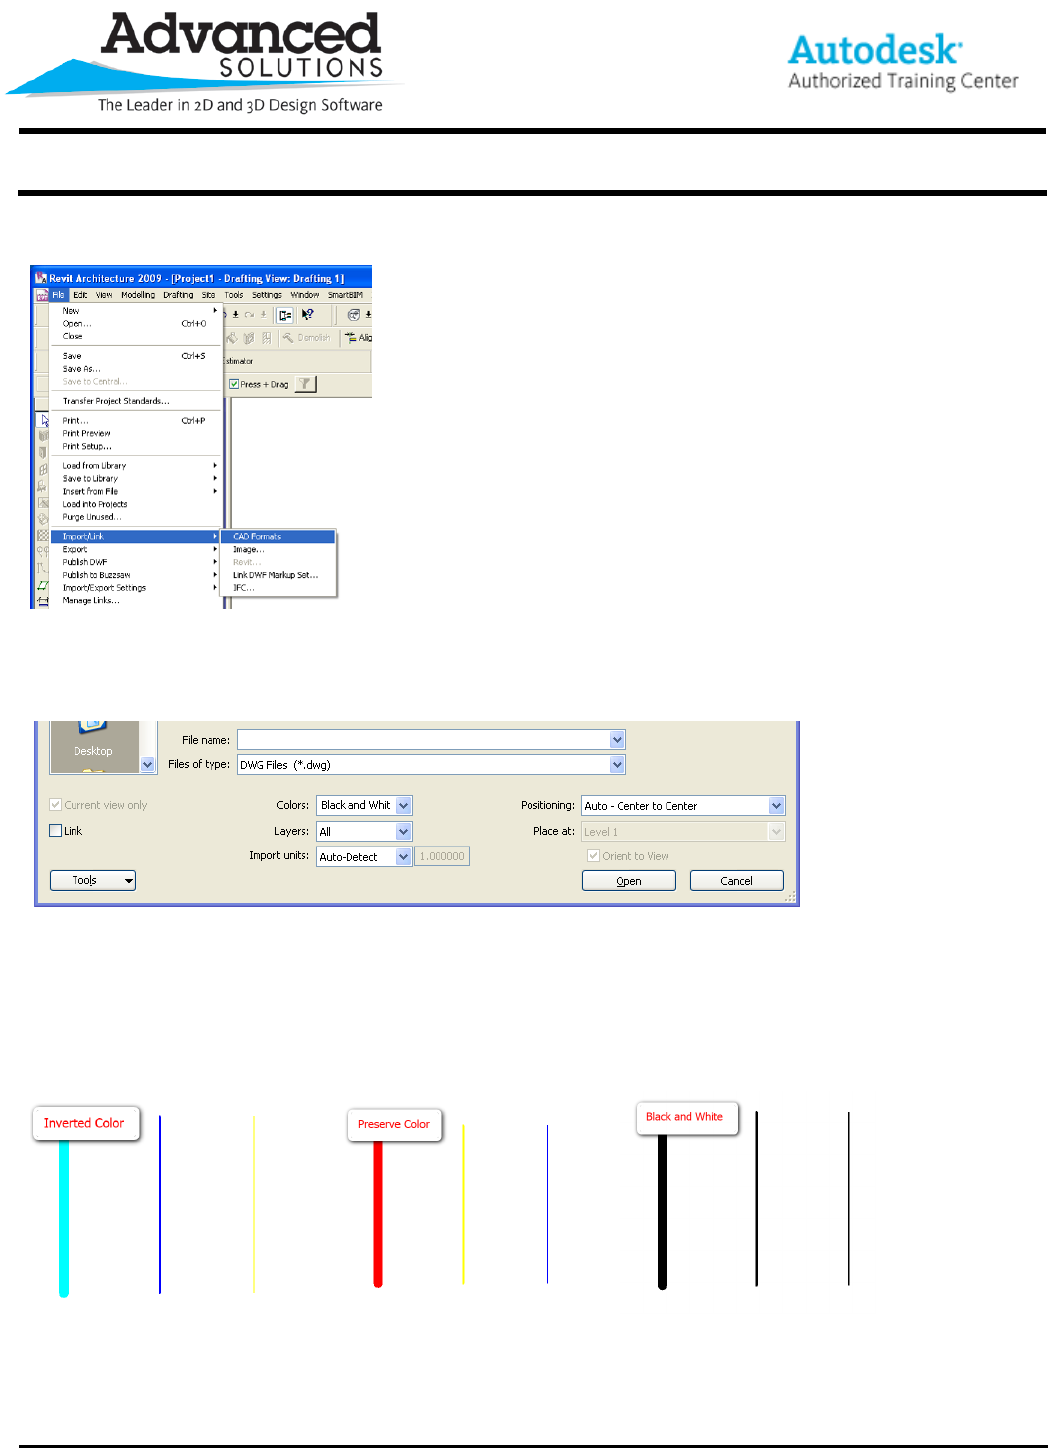
Next import the detail by selecting File > Import > CAD Formats (Fig 8).
Figure 8
Select the file you want to import and this will bring up the import dialogue box (Fig 9).
Figure 9
From the dialogue, you can specify color (Invert, Preserve, Black and White), layers (All, Visible, or Specify),
Units, Linking and positioning.
Below are examples of the different options imported in Revit (Fig 10) on the colors based on the CAD file
imported as seen in Figure 5.
Figure 10
