Dimension Isometric Views 062909
2016-06-08
: Guides 062909 Dimensionisometricviews 062909_DimensionIsometricViews tips pdf asi
Open the PDF directly: View PDF ![]() .
.
Page Count: 2

www.advsolinc.com
ASI Client Center
1-877-438-2741
Autodesk Products Tip & Tricks
Copyright 2008 – Advanced Solutions, Inc.
Product: Autodesk Inventor 2009
Topic: Dimension Isometric Views
Written by: Nate Antalis, Technical Engineer
Date: June 29, 2009
Use the General Dimension tool to add dimensions to isometric
drawing views. By selecting the General Dimension tool then
selecting points and edges on an isometric model view, Inventor
will automatically infer an annotative plane and place a dimension
on the plane.
Some geometry selections will have multiple annotative plane
options. Press the spacebar to toggle between the inferred
annotative planes before clicking to place the dimension.
Tip: Selecting endpoints rather than model edges will leave more
plane options available.
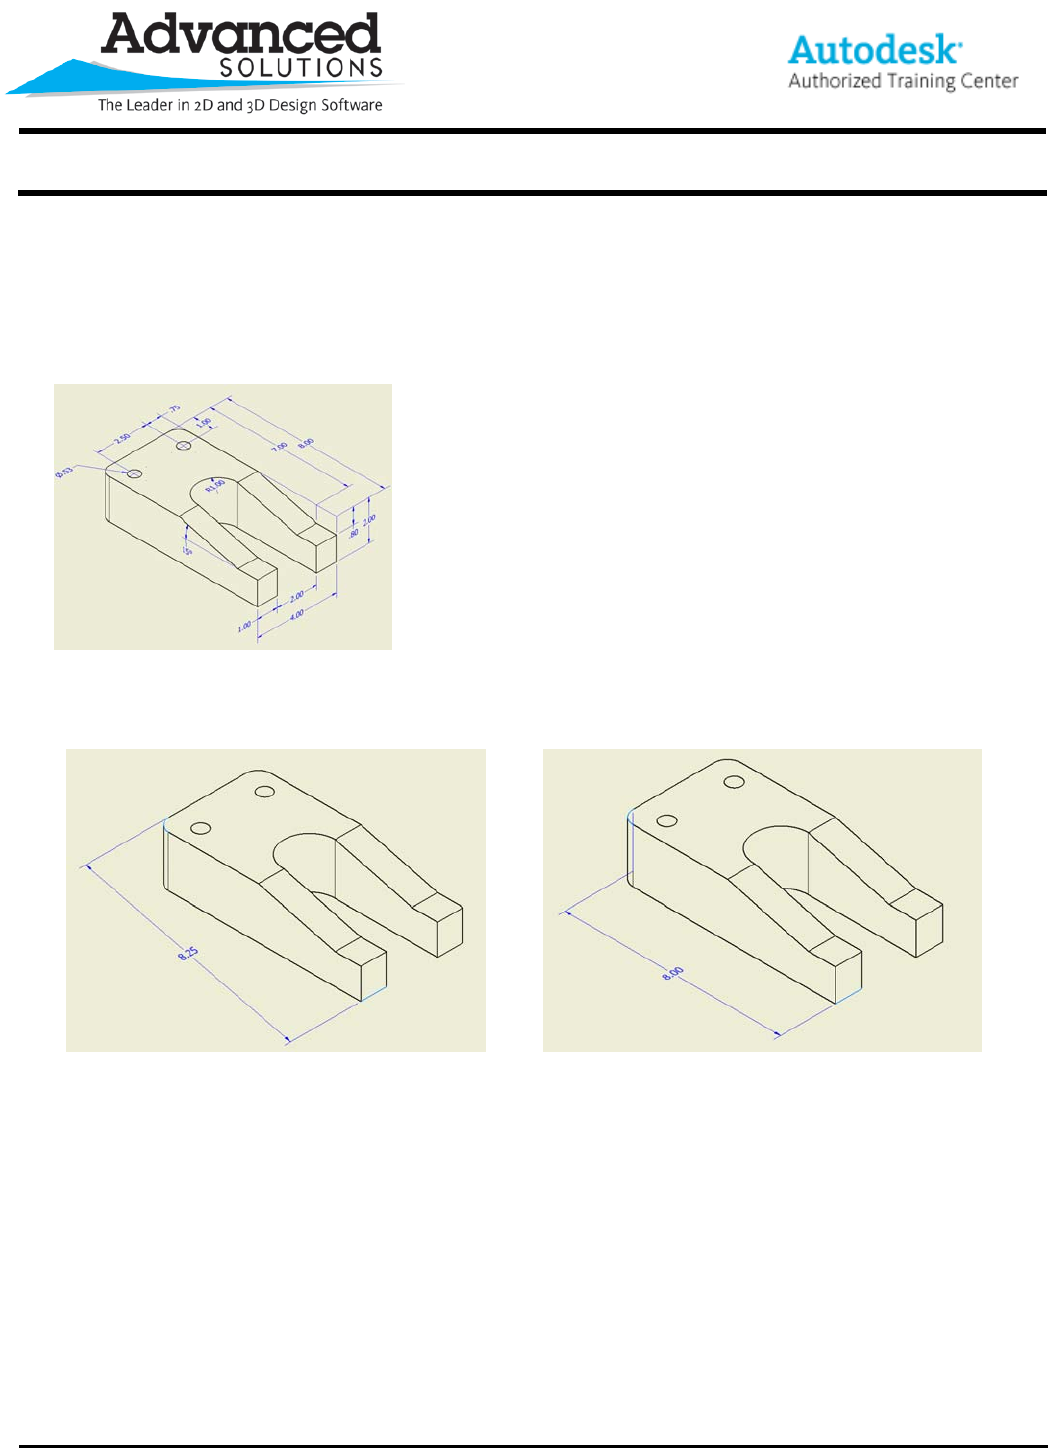
In the figures below the dimension was placed by selecting the horizontal line (1) and arc end point (2) in
Figure 1. By pressing the Space Bar, the inferred plane was changed, shown in Figure 2 below.
Figure 1 Figure 2
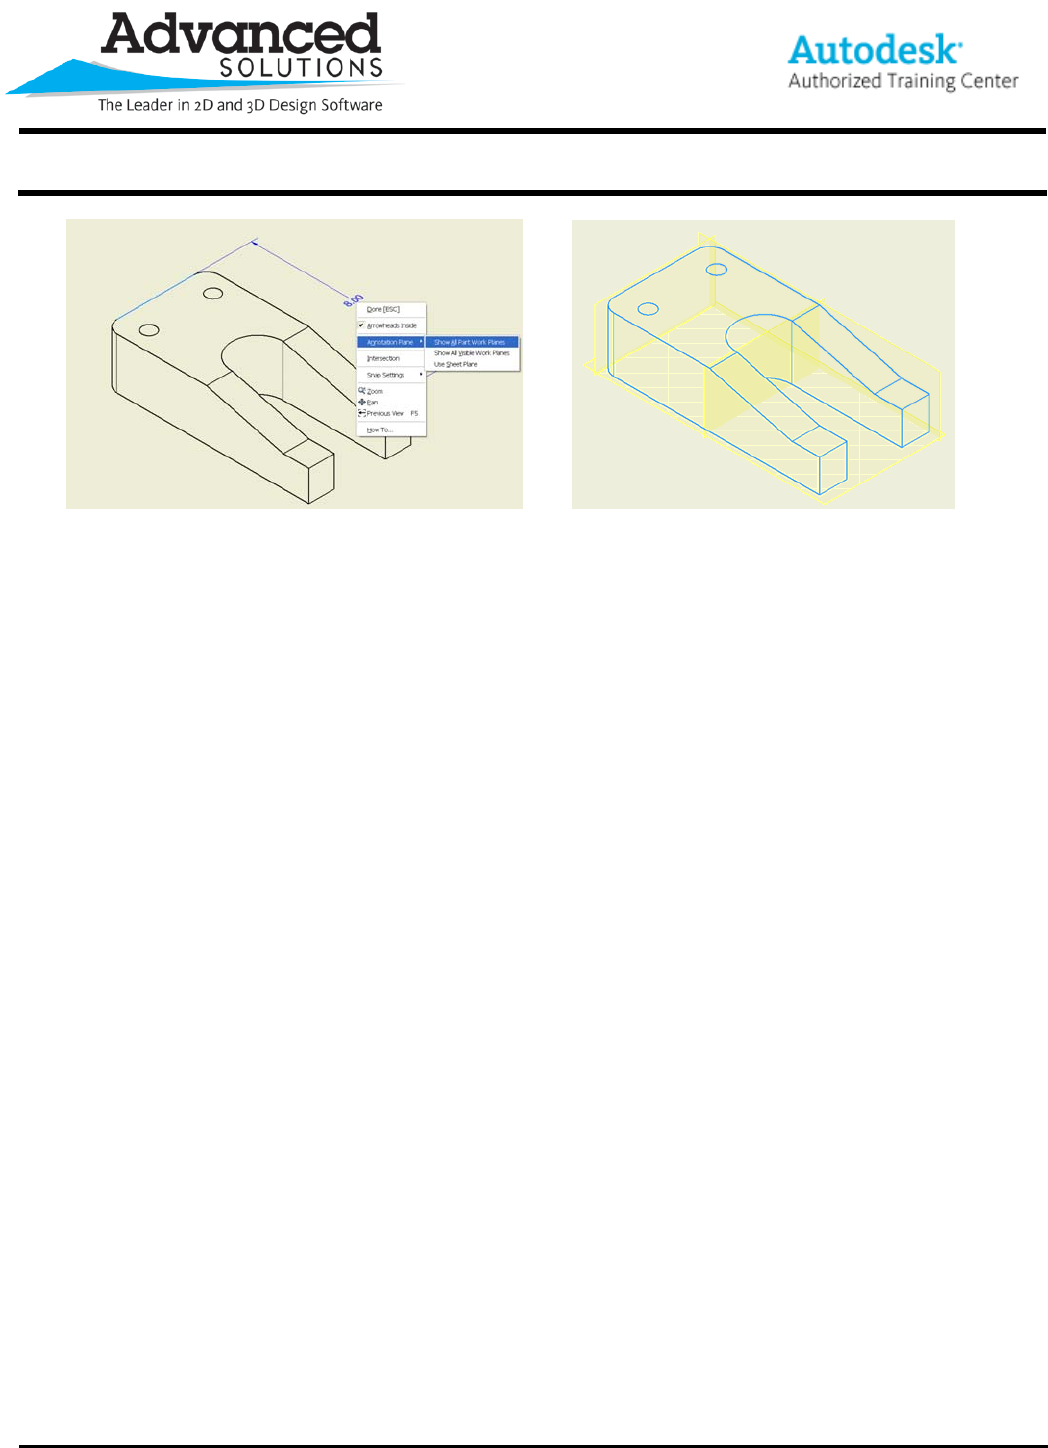
Alternately, right clicking while placing the dimension will bring up the context menu with the option to select
the annotative plane from the models default work or visible work planes. See Figures 3 & 4 below.

www.advsolinc.com
ASI Client Center
1-877-438-2741
Autodesk Products Tip & Tricks
Copyright 2008 – Advanced Solutions, Inc.
Figure 3 Figure 4