Manipulating A Roof's Cut Plan Profile 112508 Roof
2016-06-08
: Guides 112508 Manipulatingroofcutplanprofile 112508_ManipulatingRoofCutPlanProfile tips pdf asi
Open the PDF directly: View PDF ![]() .
.
Page Count: 3
www.advsolinc.com
ASI Client Center
1-877-438-2741
Autodesk Products Tip & Tricks
Copyright 2008 – Advanced Solutions, Inc.
Product:
Revit Architecture 2009
Topic:
Manipulating a Roof's Cut Plan Profile
Written by:
Nick Bower, Assoc. AIA BSD Technical Engineer
Date:
November 25, 2008
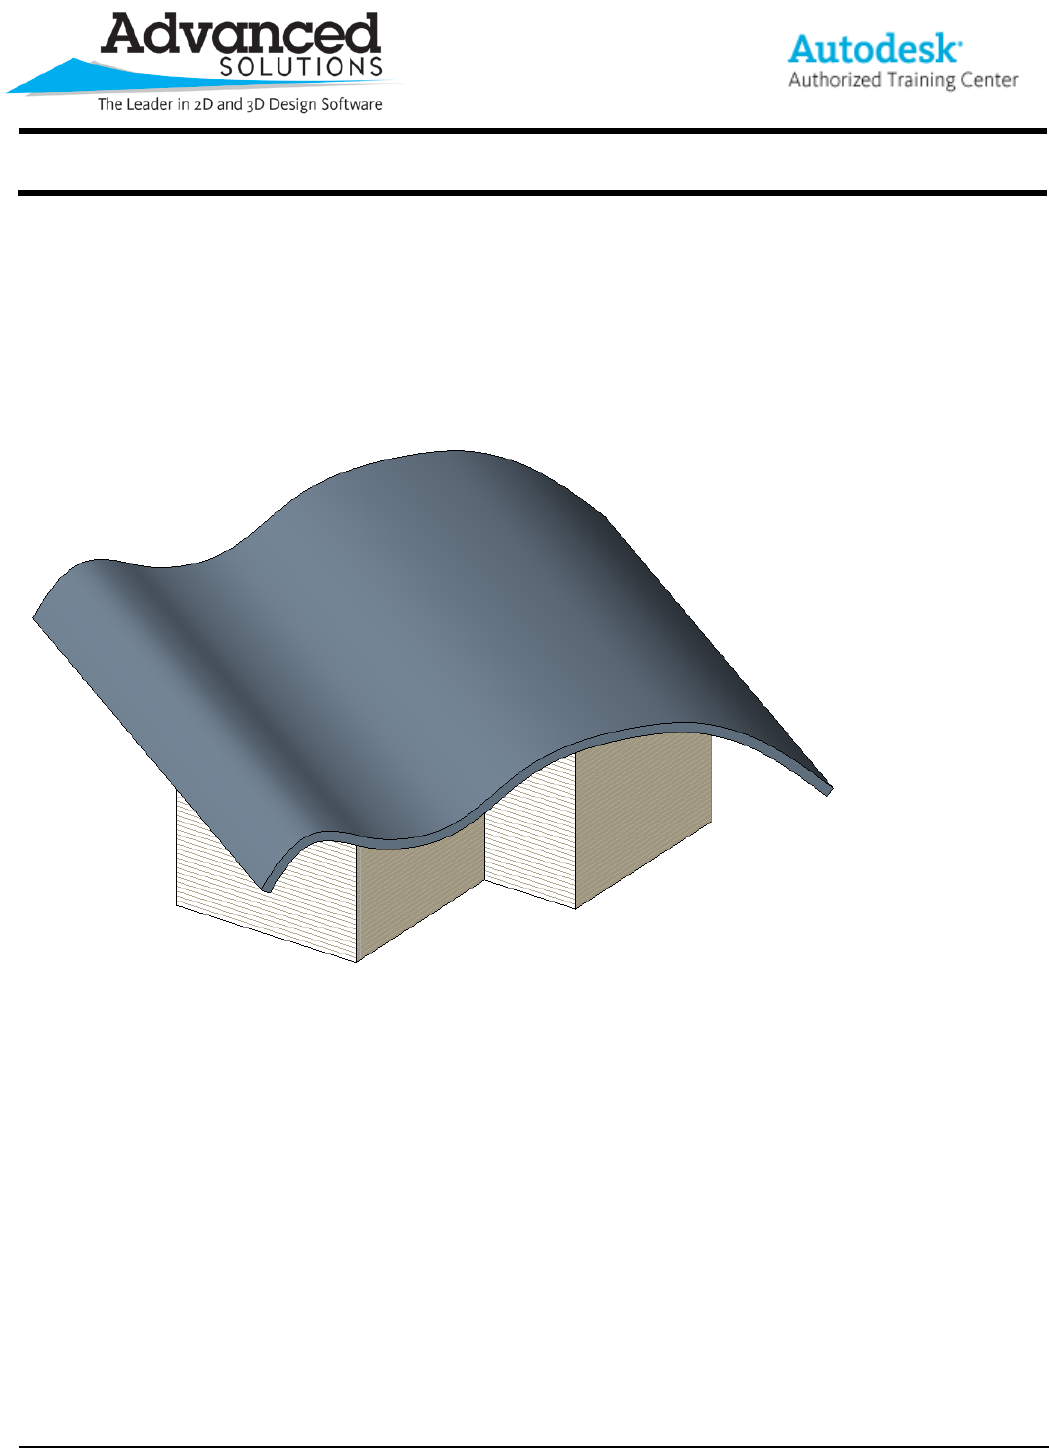
A Tool that is often overlooked when designing roofs in Revit Architecture 2009 is the Cut Plan Profile. This tool
will allow you to control the footprint of a complex roof from a mass or by extrusion.
www.advsolinc.com
ASI Client Center
1-877-438-2741
Autodesk Products Tip & Tricks
Copyright 2008 – Advanced Solutions, Inc.
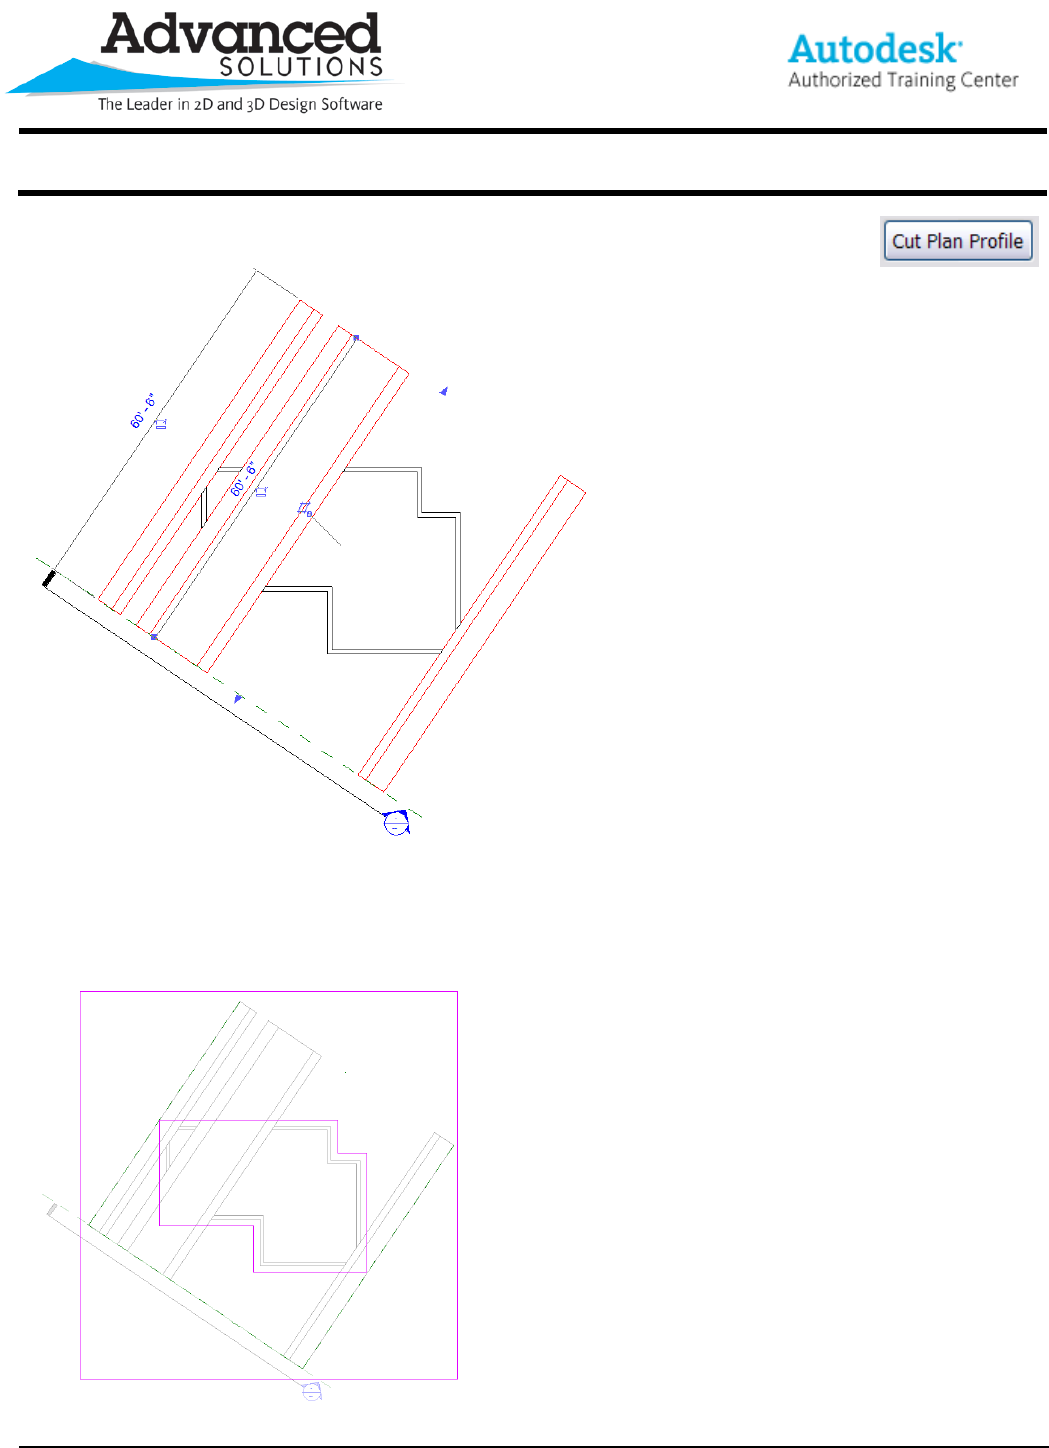
You can start to manipulate the roof by selecting it in a floor plan view and clicking on the Cut
Plan Profile icon on the Options Bar (Figure 1).
Figure 1
After clicking on the Cut Plan Profile icon, you will be taken out to sketch mode. From here, you will need to draw
in two continuous closed loops. One loop represents the overall cutting edge of the plan profile. This loop should
extend past the furthest extents of the roof shape. The second loop should be used to control the overhang of the
roof. In Figure 2, the overhang was set to be 1’-6”.
Figure 2
www.advsolinc.com
ASI Client Center
1-877-438-2741
Autodesk Products Tip & Tricks
Copyright 2008 – Advanced Solutions, Inc.
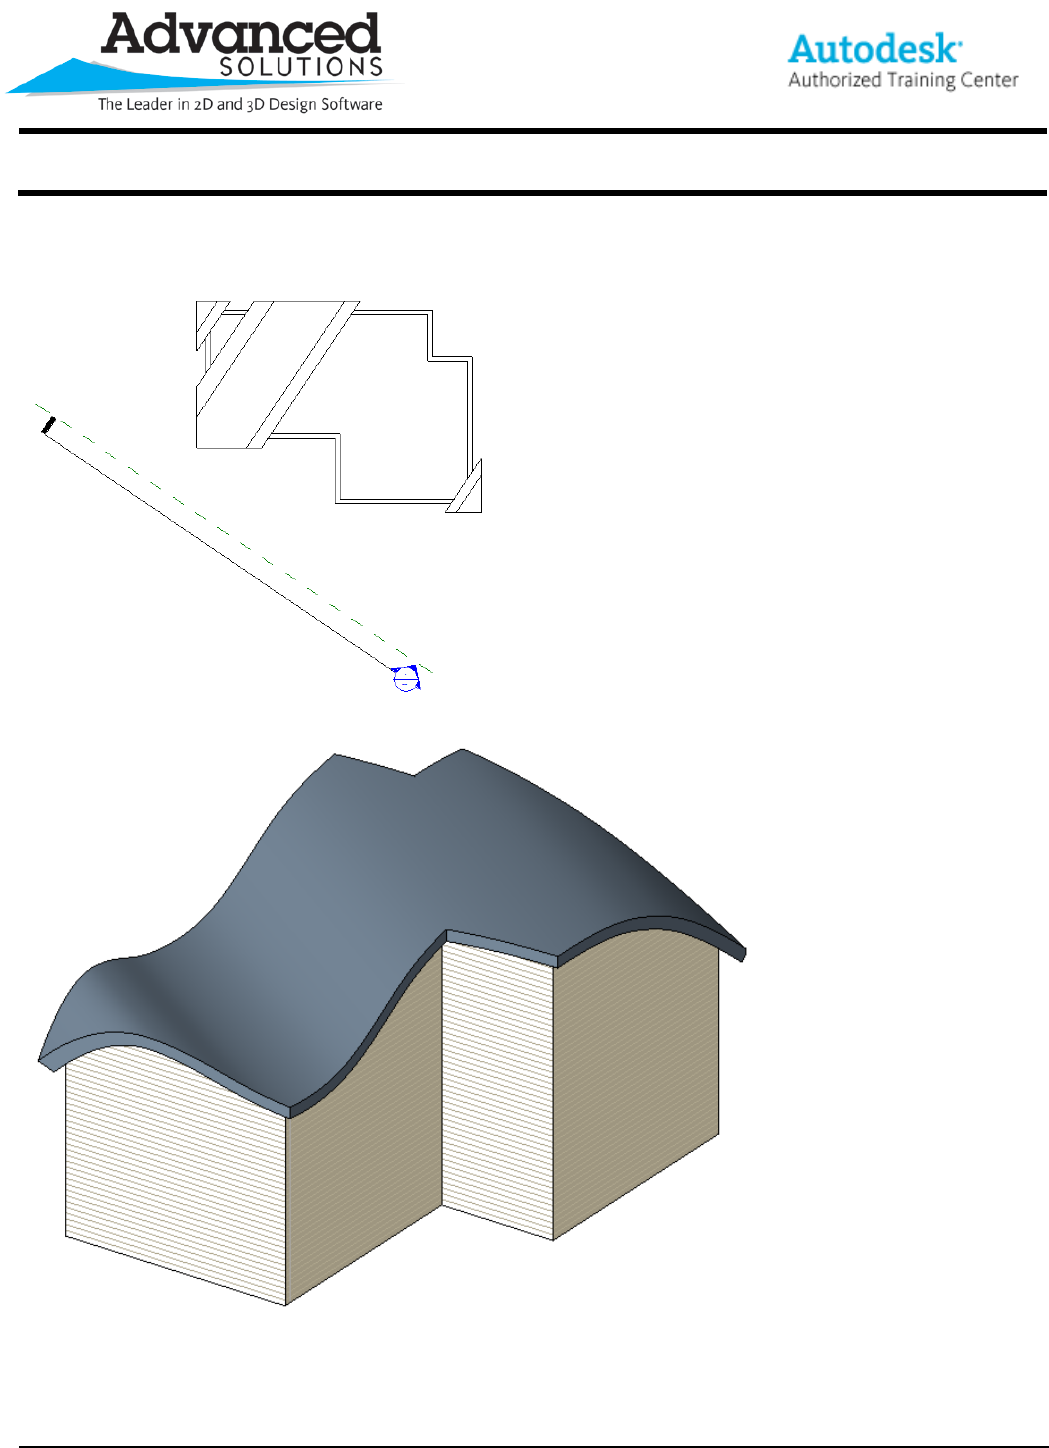
After finishing the sketch you will see the footprint of the roof has been changed to correspond with the boundaries
that were just drawn (Figure 3). This is also the case if you switch to a 3D view (Figure 4).
Figure 3
Figure 4
