Creating A Custom Material In NavisWorks 121108 Navis Works
2016-06-08
: Guides 121108 Creatingcustommaterialnavisworks 121108_CreatingCustomMaterialNavisWorks tips pdf asi
Open the PDF directly: View PDF ![]() .
.
Page Count: 4

www.advsolinc.com
ASI Client Center
1-877-438-2741
Autodesk Products Tip & Tricks
Copyright 2008 – Advanced Solutions, Inc.
Product: NavisWorks Manage 2009
Topic: Creating a Custom Material in NavisWorks
Written by: Nick Bower, Assoc. AIA BSD Technical Engineer
Date: December 11, 2008
Using Presenter in NavisWorks Manage 2009 is an easy way to create renderings for presentation. The
NavisWorks material library has a large amount of preset materials for use. However, the need may arise to
create a custom material from an imported image. The following steps describe this process.
project.
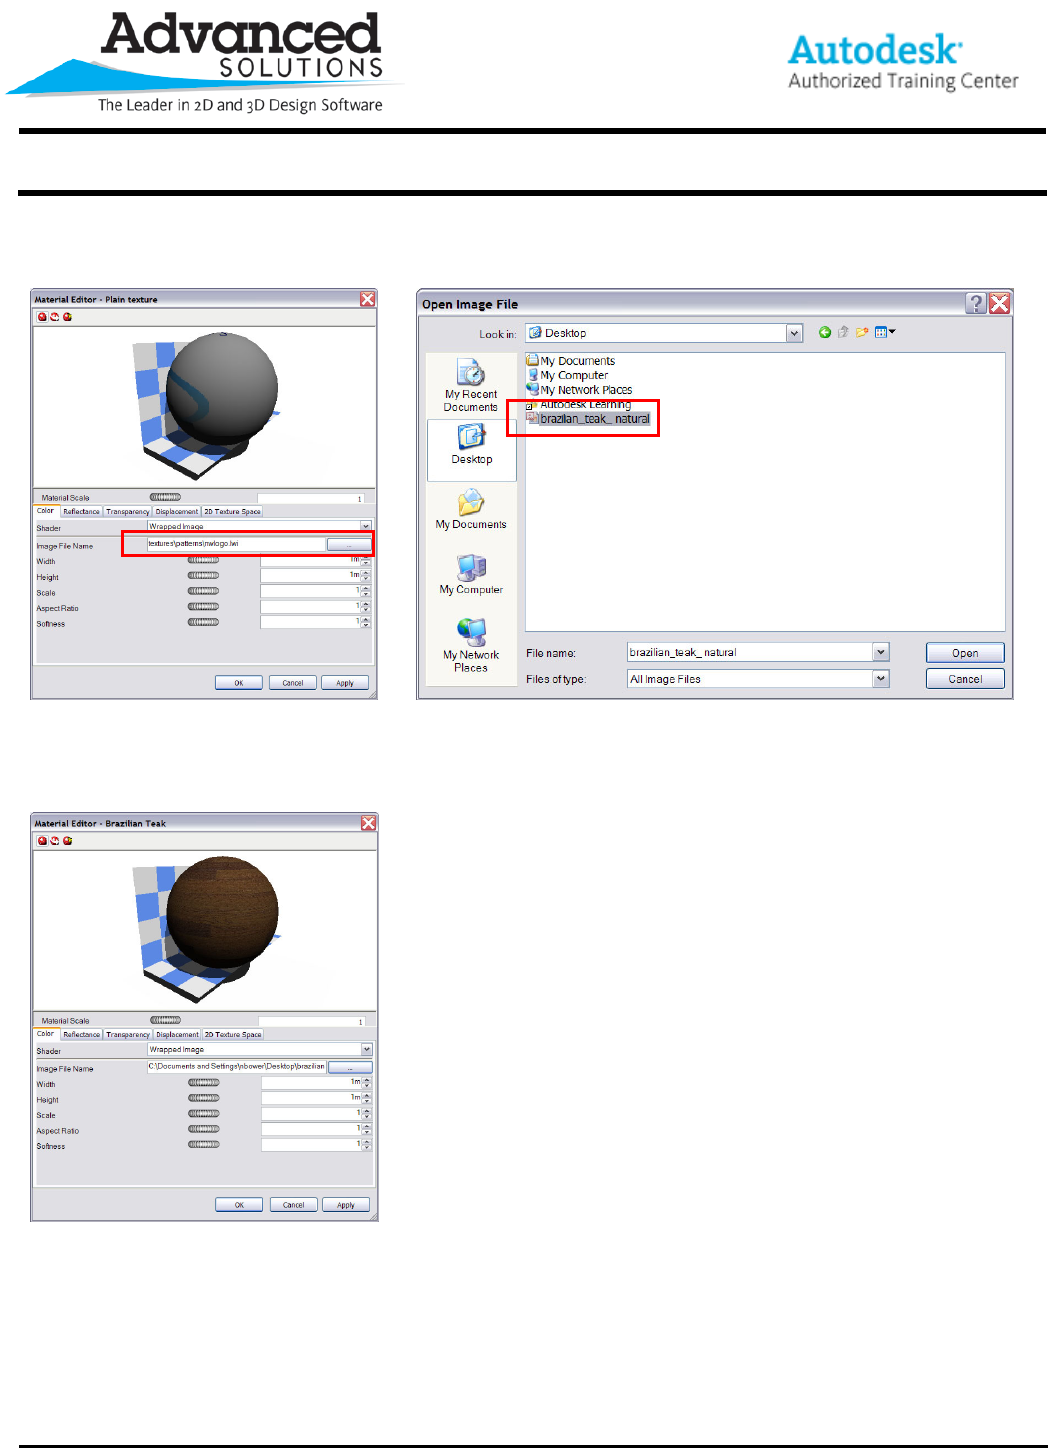
1. You can start by finding an image file of the material you
would like to use for rendering purposes. The most common
file types to use would be a .jpg or .tif. Figure 1 was taken
from the Revit Architecture Rendering Library and then
converted from a .png to a .jpg. It is recommended that you
save the image file to a common location for the
The name of this image file is brazilian_teak_natural
Figure 1
2. In the NavisWorks Presenter dialog, drag the “Plain texture” material from the left to right pane (Figure 2).
Figure 2
www.advsolinc.com
ASI Client Center
1-877-438-2741
Autodesk Products Tip & Tricks
Copyright 2008 – Advanced Solutions, Inc.
3. Double click the “Plain texture” material to view its material properties (Figure 3). In the Image File Name
dialog browse and find the brazilian_teak_natural image file saved earlier (Figure 4).
Figure 3 Figure 4
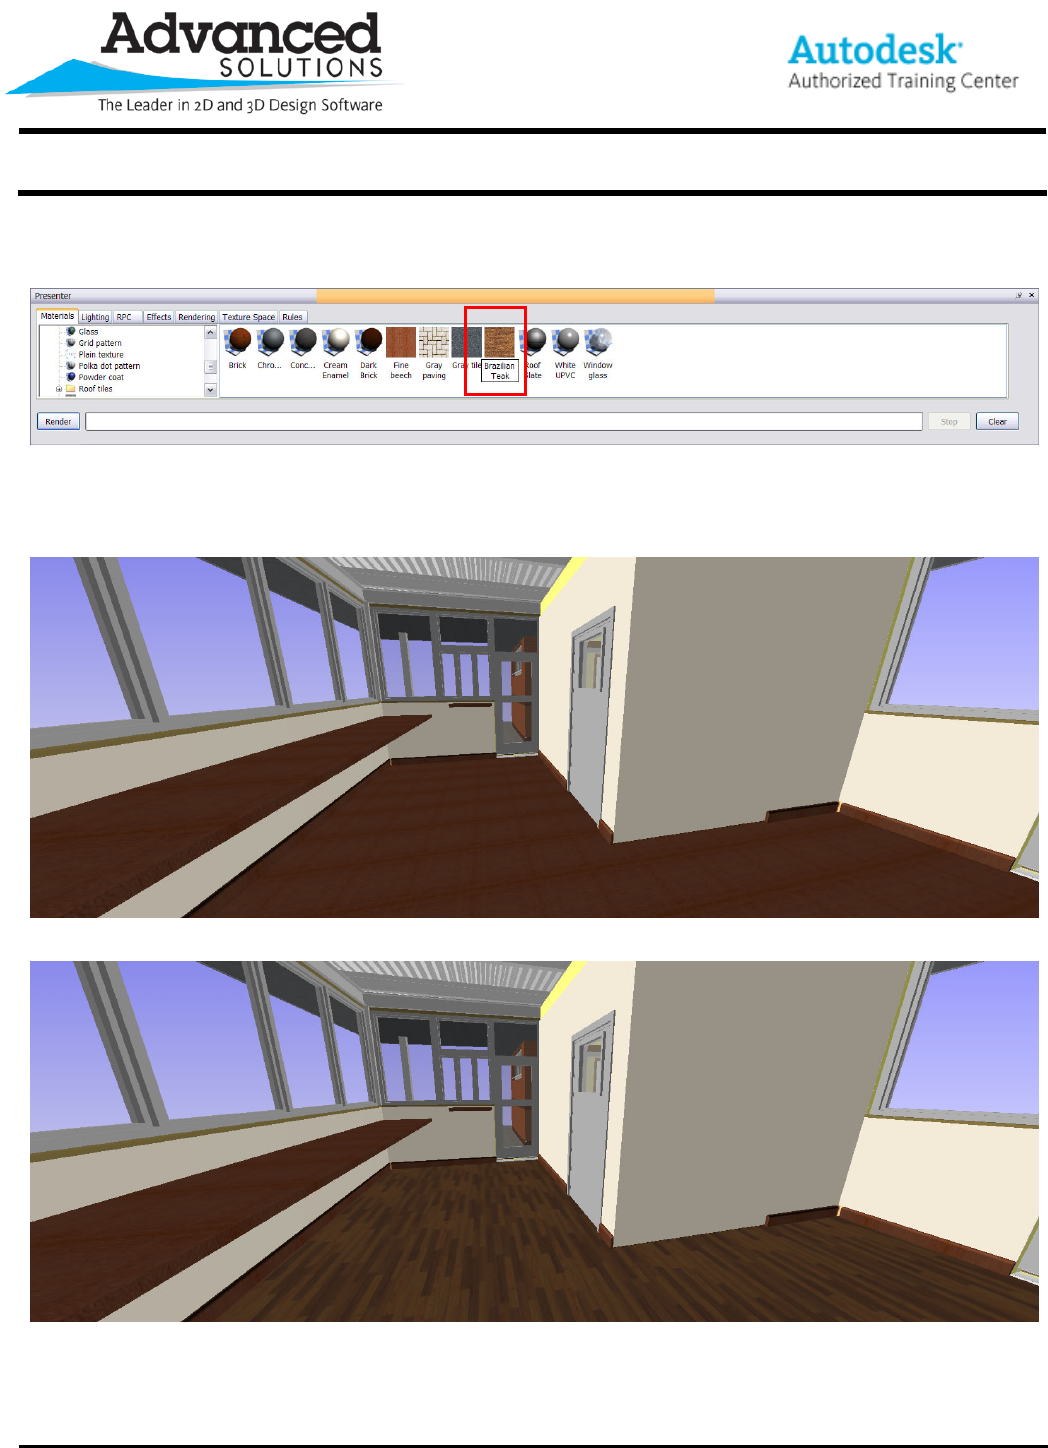
4. The image file is now wrapped around the sphere and can be applied to objects in the scene to be rendered.
You will also have the ability to manipulate the scale, and overall size of the image pattern in this dialog (Figure
5).
Figure 5
www.advsolinc.com
ASI Client Center
1-877-438-2741
Autodesk Products Tip & Tricks
Copyright 2008 – Advanced Solutions, Inc.
5. The material display should now represent the wood pattern that was just imported. It is highly recommended
that you rename the material and move it into the “My Materials” folder (Figure 6).
Figure 6
Figure 7 represents the model before applying the Brazilian Teak material. By using NavisWorks’ apply material
function, the material can be applied to the floor as a hardwood pattern (Figure 8).
Figure 7
Figure 8
www.advsolinc.com
ASI Client Center
1-877-438-2741
Autodesk Products Tip & Tricks
Copyright 2008 – Advanced Solutions, Inc.
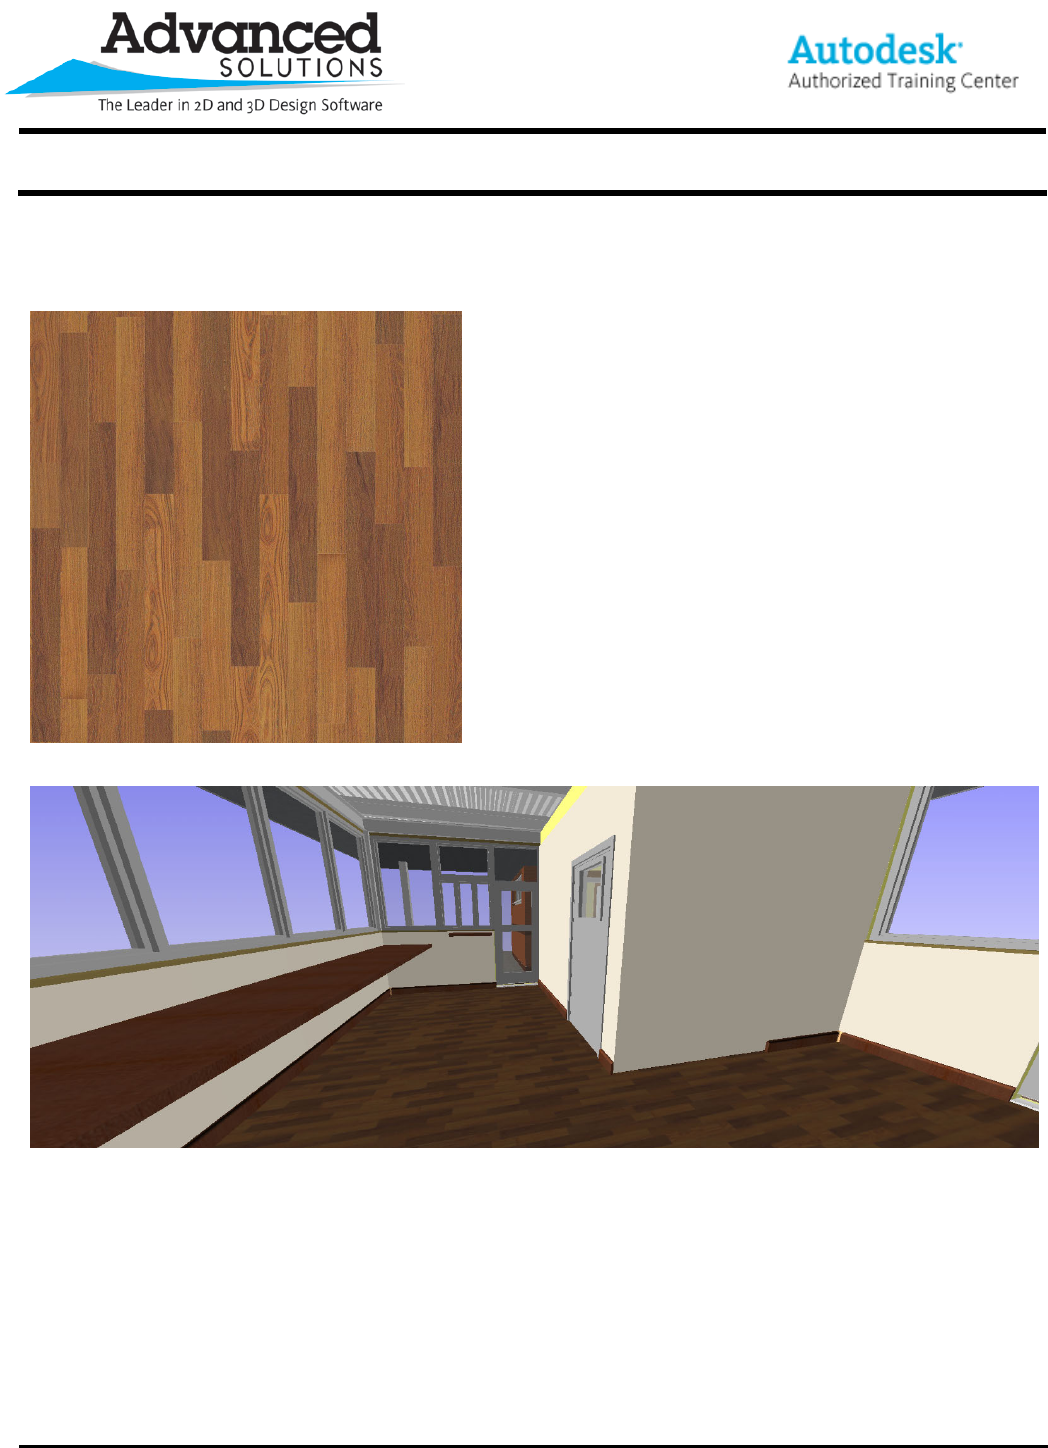
The need may also arise to rotate a material pattern (Figure 9). This can easily be done by rotating the actual
image file and re-saving it as a different name. From this point all that needs to be done is update the Brazilian
Teak material by selecting the rotated image file. The material will rotate in the scene automatically (Figure 10).
Figure 9
Figure 10
