Embedded Schedules 121908
2016-06-08
: Guides 121908 Embeddedschedules 121908_EmbeddedSchedules tips pdf asi
Open the PDF directly: View PDF ![]() .
.
Page Count: 1
www.advsolinc.com
ASI Client Center
1-877-438-2741
Autodesk Products Tip & Tricks
Copyright 2008 – Advanced Solutions, Inc.
Product: Revit MEP
Topic: Embedded Schedules
Written by: Paul C. Sills III, Sr App. Eng.
Date: December 19, 2008
An embedded schedule in Revit MEP allows you to create for an example a space schedule and embed the air
terminal parameters in your space schedule. With embedded schedules, we can have space, rooms, electrical,
air, piping, plumbing, or fire protection systems and associate other type of
object parameters together. For our example, we will use a space schedule
and embed an air terminal schedule.
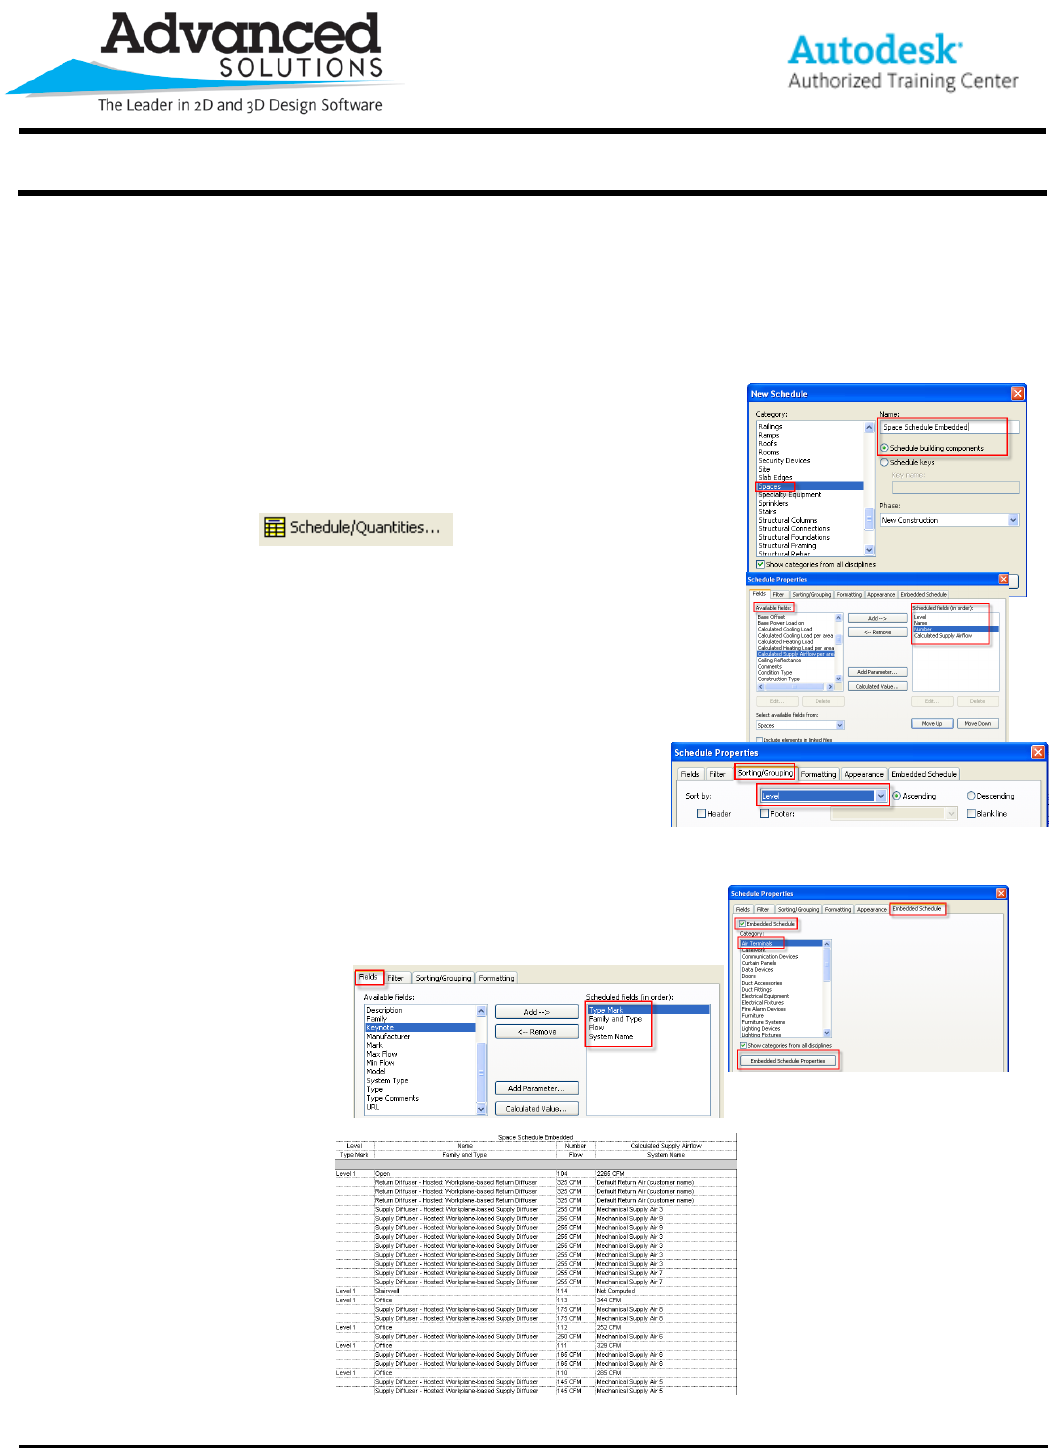
I. Creating a Schedule
a. Select the Schedule/Quantity icon on the design bar or select
view – new - Schedule/Quantity to create a
schedule.
b. Select Spaces under Category and name your schedule, I will
use Space Schedule Embedded for my example.
c. Select OK
d. From Available fields select; Name, Number, Level, and
Calculated Supply Airflow. I will place them as follows: Level,
Number, Name and Calculated Supply Airflow.
e. Select the Sorting tab and select Sort by; Level. This will list
the level in order.
We are finished with our main schedule, now we will
create the embedded schedule.
II. Adding an Embedded Schedule
a. Select the Embedded Schedule tab
b. Select Air Terminals under Category and select the Embedded Schedule Properties.
c. Under the Available Fields, areas select; Type Mark, Family and Type, Flow and System Name. I
will places these categories in this order.
d. Select the Sorting tab and for Sort By select Type Mark
e. Select OK to exit all dialogs.
You can see our schedule below.
