Inventor Tools 122409
2016-06-08
: Guides 122409 Inventortools 122409_InventorTools tips pdf asi
Open the PDF directly: View PDF ![]() .
.
Page Count: 8
www.advsolinc.com
ASI Client Center
1-877-438-2741
Autodesk Products Tip & Tricks
Copyright 2008 – Advanced Solutions, Inc.
Product: Inventor 2009
Topic: Inventor Tools
Written by: Brad Botner, Support Specialist
Date: December 24, 2008
Have you ever wondered what all these Inventor Tools do? Well, you may be missing out on a valuable tool that
could save you countless hours on a task that these Inventor Tools could accomplish in just a few seconds. You
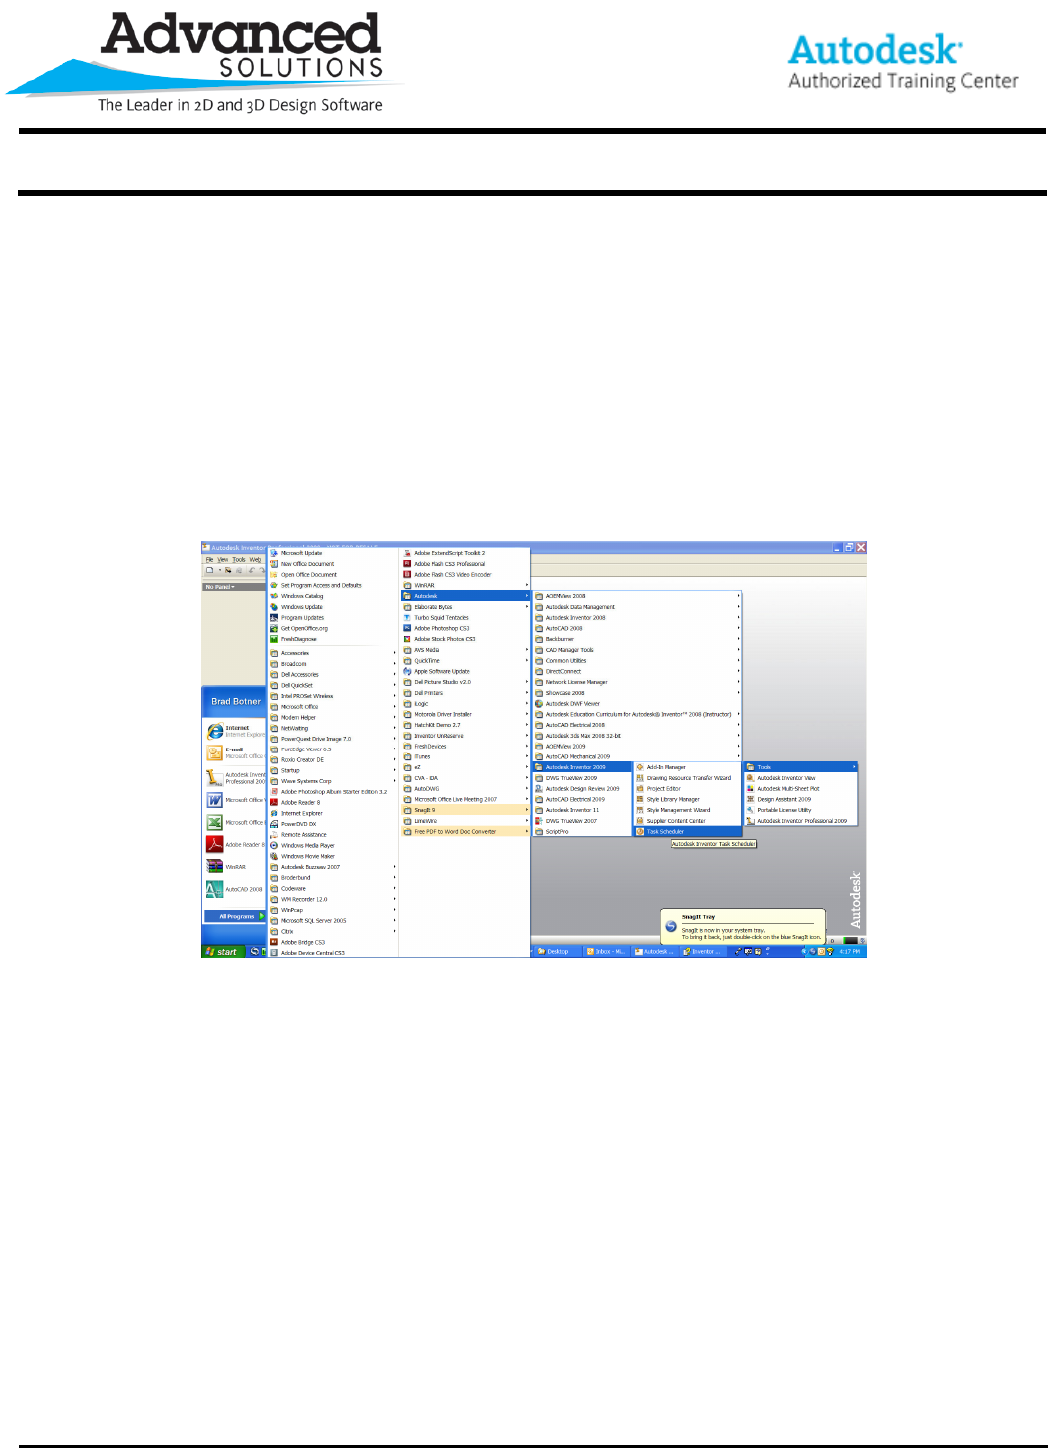
can access these tools via Start>Inventor 2009>Tools
The tools available to you are:
1. Add In Manager
2. Drawing Resource Transfer Wizard
3. Project Editor
4. Style Library Manager
5. Style Management Wizard
6. Task Scheduler
www.advsolinc.com
ASI Client Center
1-877-438-2741
Autodesk Products Tip & Tricks
Copyright 2008 – Advanced Solutions, Inc.
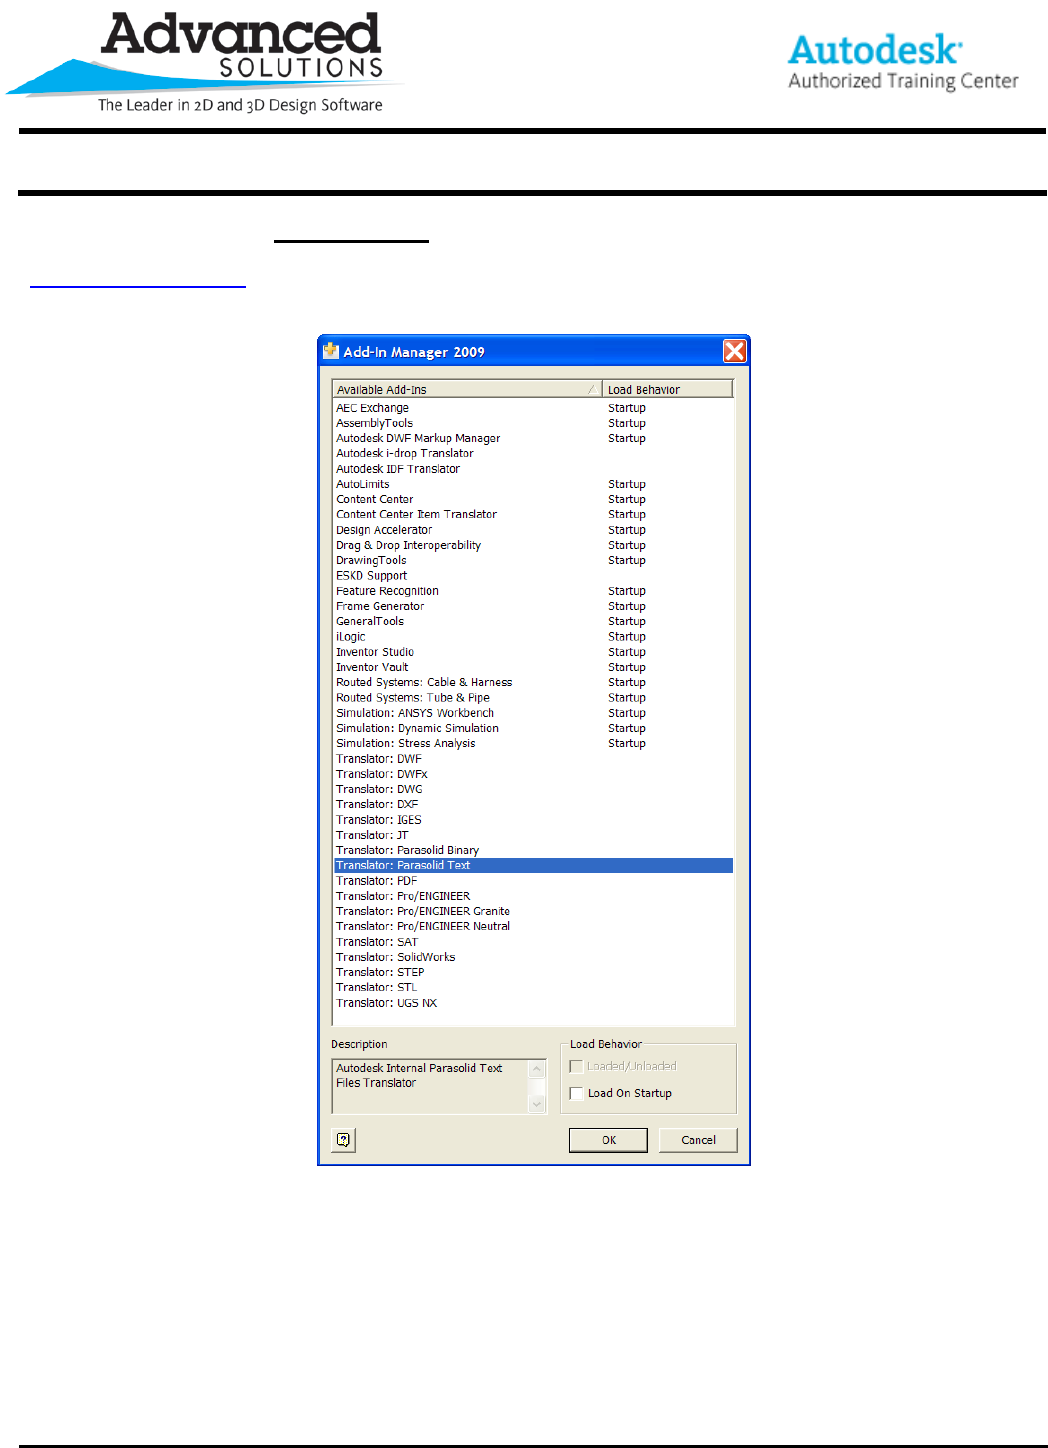
Let’s first take a look at the Add In Manager, a tool that allows you easily control the load up behavior of the
available add ins. This may also be accessed inside Inventor as well. Don’t forget to visit
www.labs.autodesk.com for the free Catia V5 translator add-in for your Inventor 2009.
www.advsolinc.com
ASI Client Center
1-877-438-2741
Autodesk Products Tip & Tricks
Copyright 2008 – Advanced Solutions, Inc.
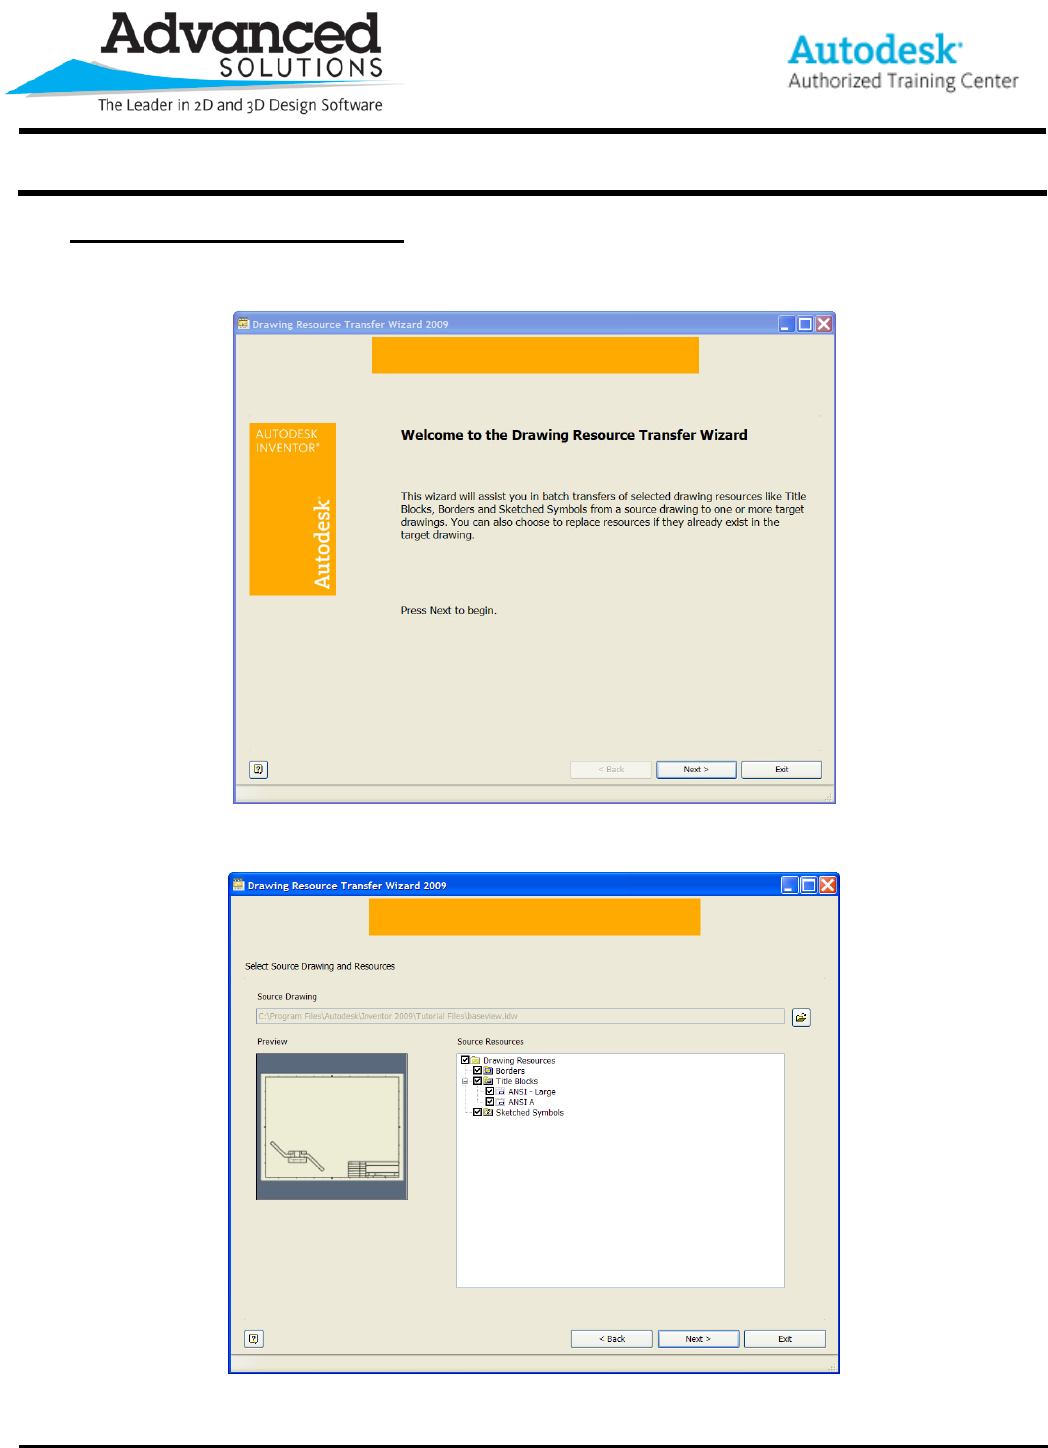
The Drawing Resource Transfer Wizard allows you to quickly transfer your .idw or .dwg drawing resources from
one drawing to another. For example, if you had sketched symbols or a title block that you need brought over into
another drawing, you can use this wizard to quickly transfer these objects.
From here, you select your source drawing.
Select the items that you want to transfer. You do not have to transfer all the drawing resource items.
www.advsolinc.com
ASI Client Center
1-877-438-2741
Autodesk Products Tip & Tricks
Copyright 2008 – Advanced Solutions, Inc.
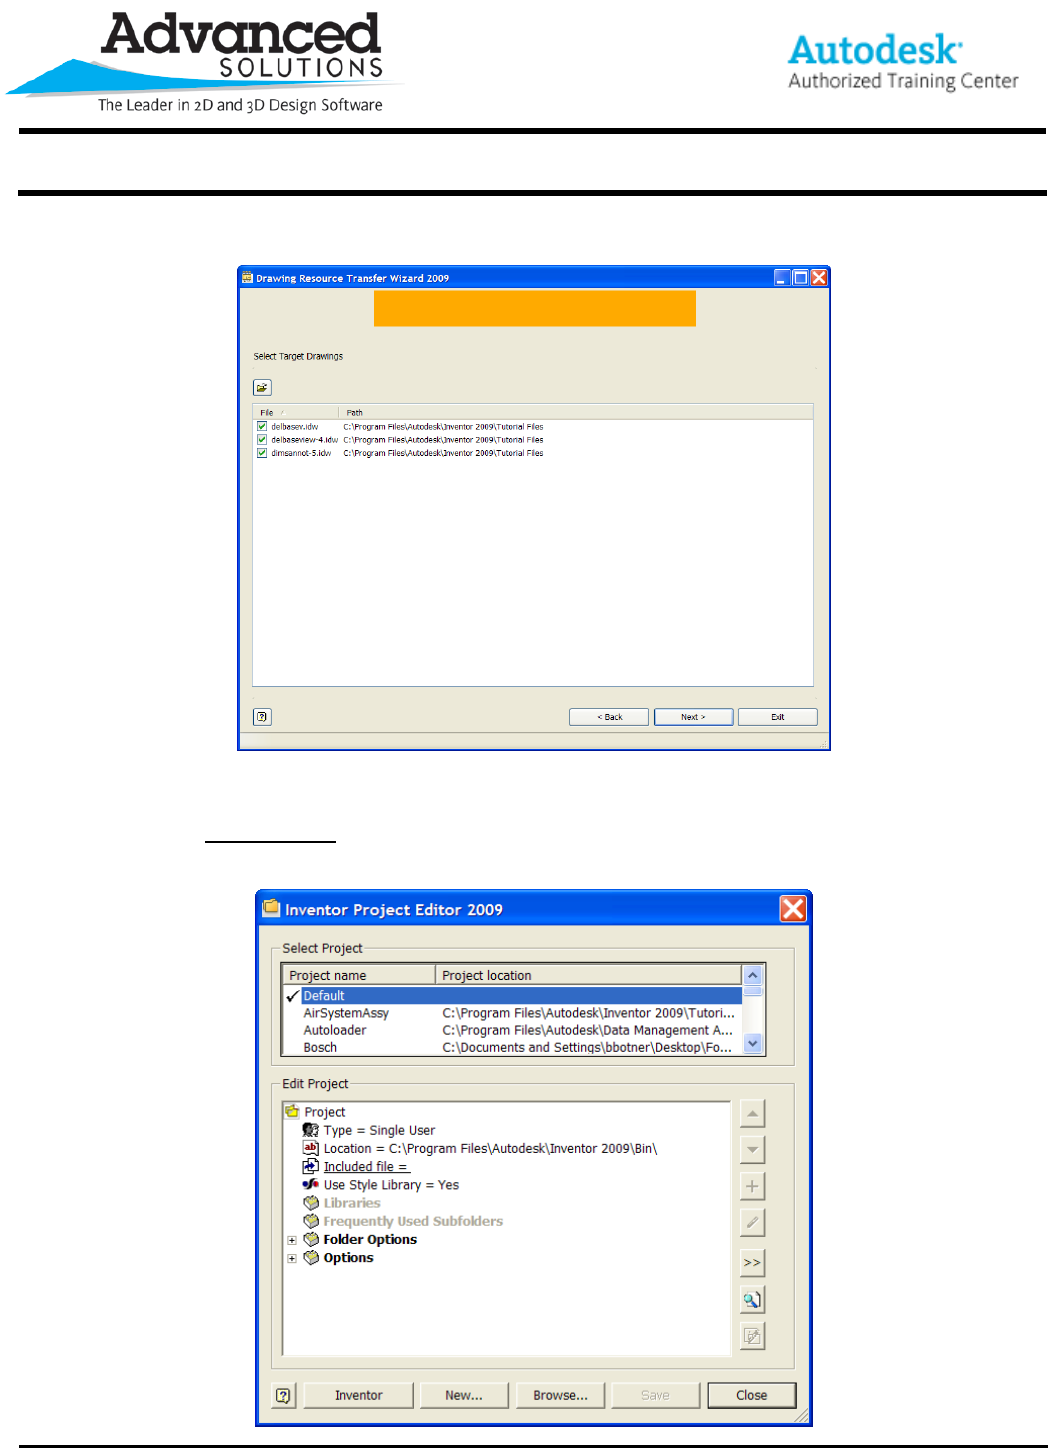
Then select the target drawings. You have successfully transferred the drawing Resource components.
The next tool is the Project Editor. The Project Editor is a quick way to manage your project files outside of
Inventor. A nice tool for any CAD Manager.
www.advsolinc.com
ASI Client Center
1-877-438-2741
Autodesk Products Tip & Tricks
Copyright 2008 – Advanced Solutions, Inc.
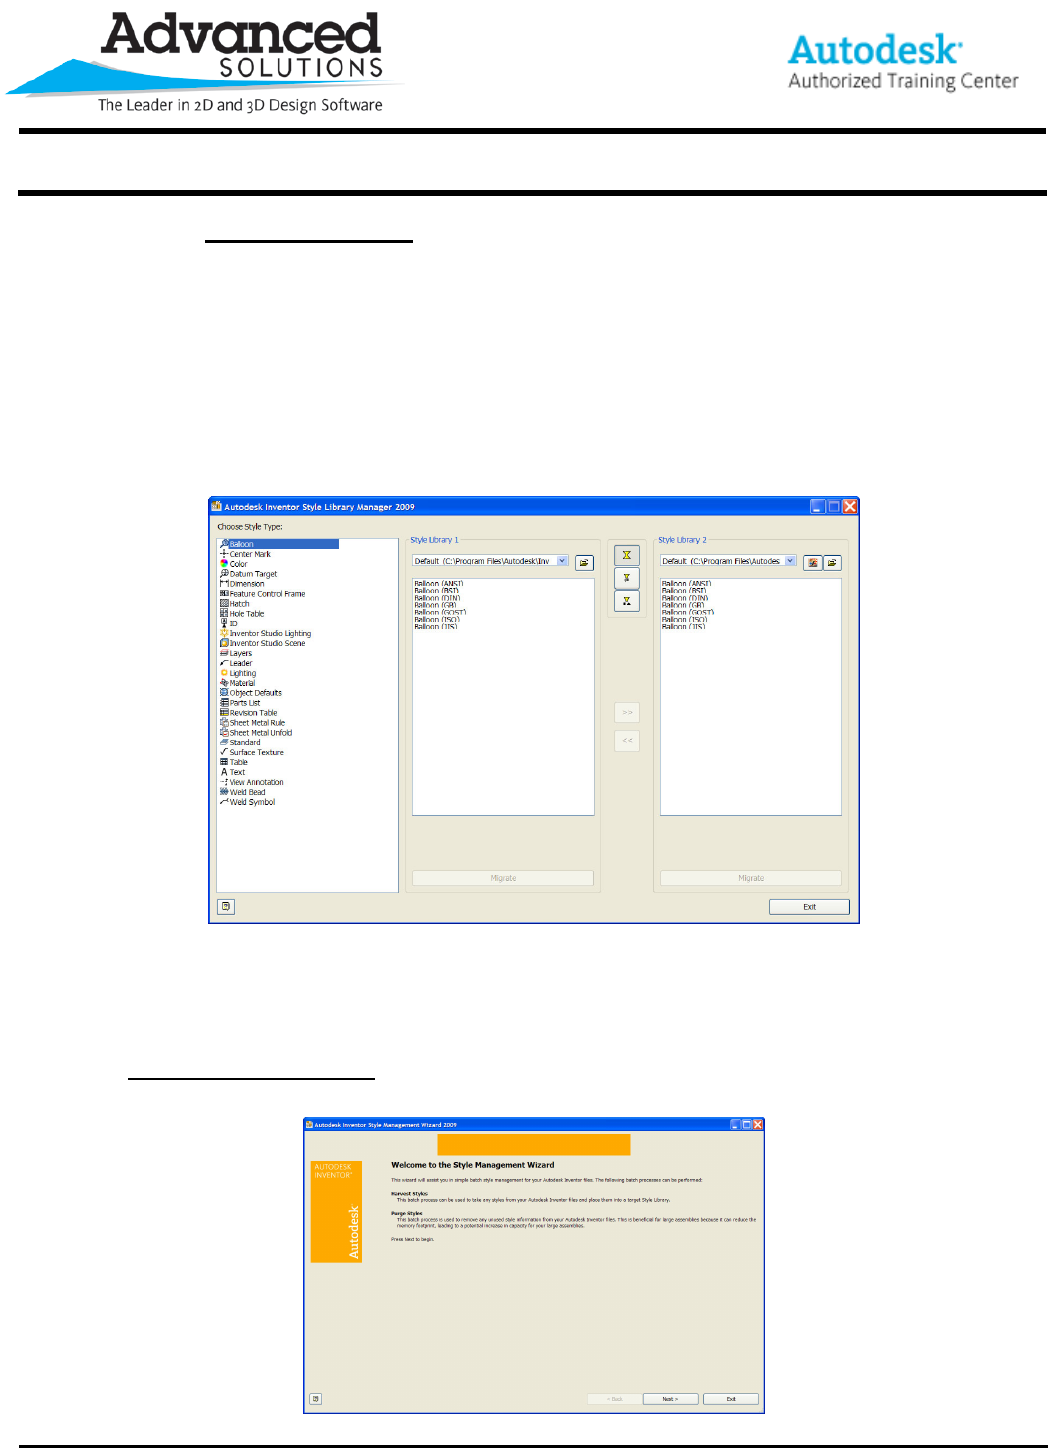
The next tool is the Style Library Manager. This tool will allow you to easily delete material styles or migrate
styles from one Library to another and will allow you to compare mismatches between style standards. Any items
shown in blue are unique behavior setups; any items listed in red are items that are different for the two style
libraries. The Style Library Manager user interface has three sections. The pane at left lists the Inventor objects.
The center pane lists one of the style libraries and its setups based on the Inventor object selected in the left
pane. The pane on the right lists the other style library directory that you’re comparing to. Selecting any Inventor
object lists the behaviors and allows you to add that behavior to the other style library via the >> button in the
middle of the dialogue box. The three buttons vertically placed in the center of the dialogue box allow you to filter
the displayed styles from All Styles to Mismatched Styles to Unique Styles. Once you’re done moving object
behaviors around, you simply exit the Style Library Manger and get on with your day.
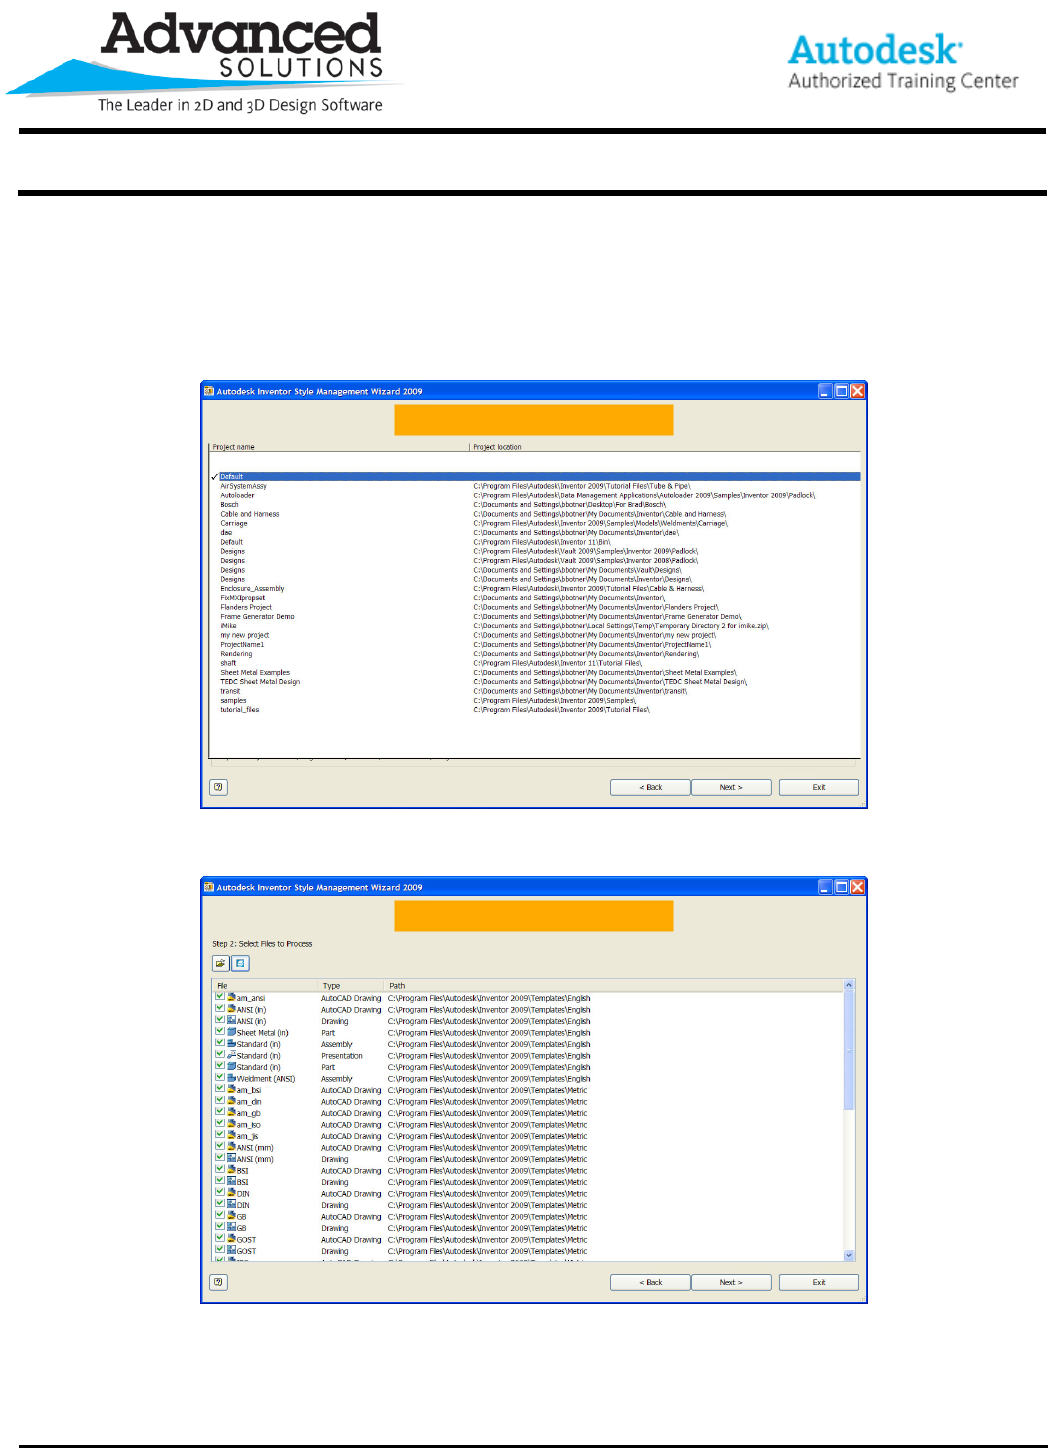
The Style Management Wizard is a tool that allows you to Harvest Styles or Purge Styles from a standard.
www.advsolinc.com
ASI Client Center
1-877-438-2741
Autodesk Products Tip & Tricks
Copyright 2008 – Advanced Solutions, Inc.
Starting out, you need to specify a project file to work on. After selecting a project file, you then select a file or
multiple files that contain styles within them which you need to make available to other files. You are also given
the capability of adding all the files associated with this particular project file.
www.advsolinc.com
ASI Client Center
1-877-438-2741
Autodesk Products Tip & Tricks
Copyright 2008 – Advanced Solutions, Inc.
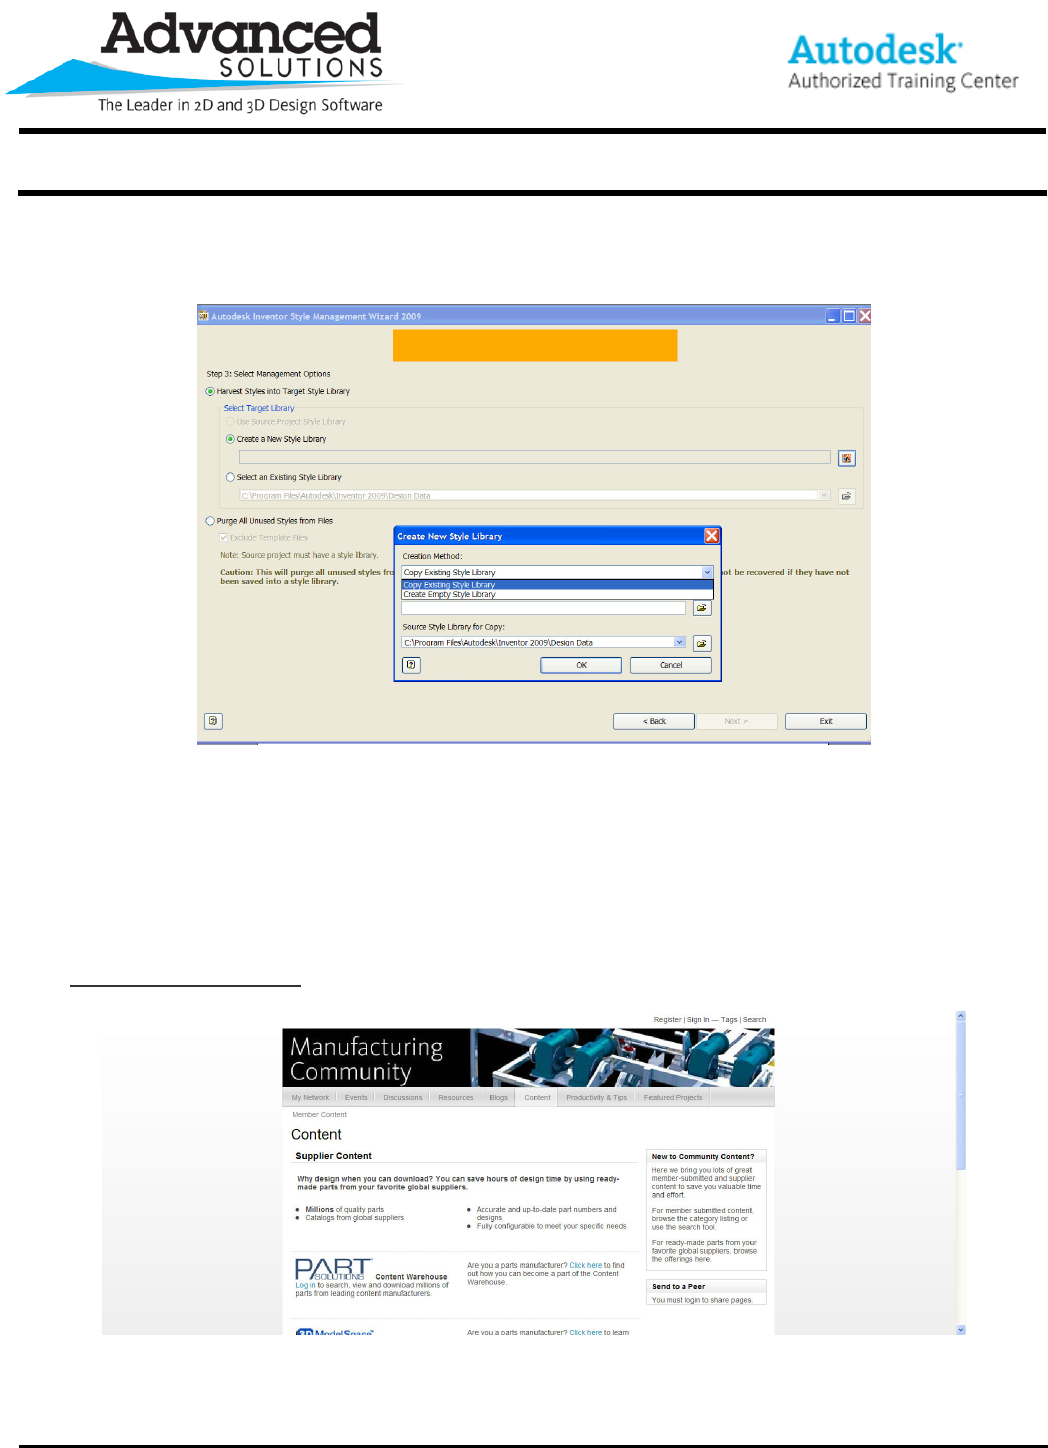
The next screen allows you to specify if you want these harvested styles to be placed in a new style library that
you designate, or place them into a pre-existing style library.
Once you hit Start, the process begins and gives a status screen after the operation is complete.
Now, what about purging? What does the Purge option do exactly? The Purge option looks at the same file or
files that you selected and removes all unused styles from your files. This is most beneficial on large assemblies
as removing the unused styles can reduce the memory footprint of that large assembly.
The Supplier Content Center takes you to the Mfg Community where you have the ability to download content.
www.advsolinc.com
ASI Client Center
1-877-438-2741
Autodesk Products Tip & Tricks
Copyright 2008 – Advanced Solutions, Inc.
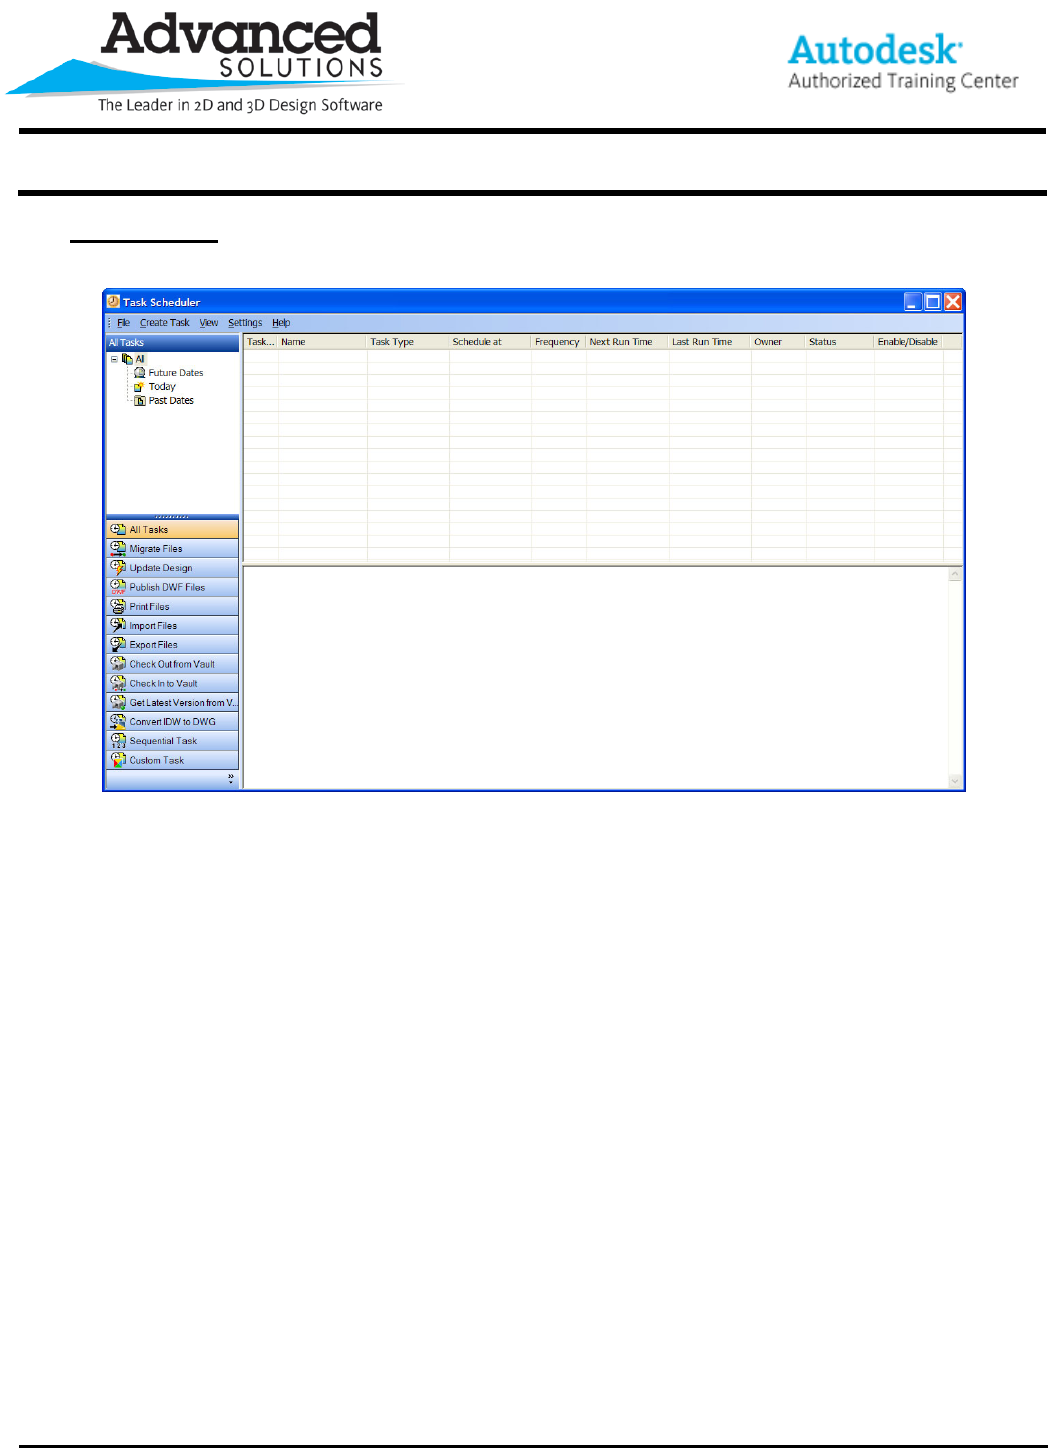
The Task Scheduler has many tools to help you automate many routine tasks.
You can use the Task Scheduler to migrate files, update designs, publish .DWF files, print, import and export
files, check in and out of vault and batch convert .IDW to DWG. You can also create your own custom task as
well. Take some time to see how this valuable tool can save you some time.
