Creating A Cut Fill Surface Label Style 122908
2016-06-08
: Guides 122908 Creatingcutfillsurfacelabelstyle 122908_CreatingCutFillSurfaceLabelStyle tips pdf asi
Open the PDF directly: View PDF ![]() .
.
Page Count: 3
www.advsolinc.com
ASI Client Center
1-877-438-2741
Autodesk Products Tip & Tricks
Copyright 2008 – Advanced Solutions, Inc.
Product: Civil 3D 2009
Topic: Creating a cut-fill surface label style
Written by: Rob Wiederman, Civil Engineer
Date: December 29, 2008
Cut and Fill surface labels:
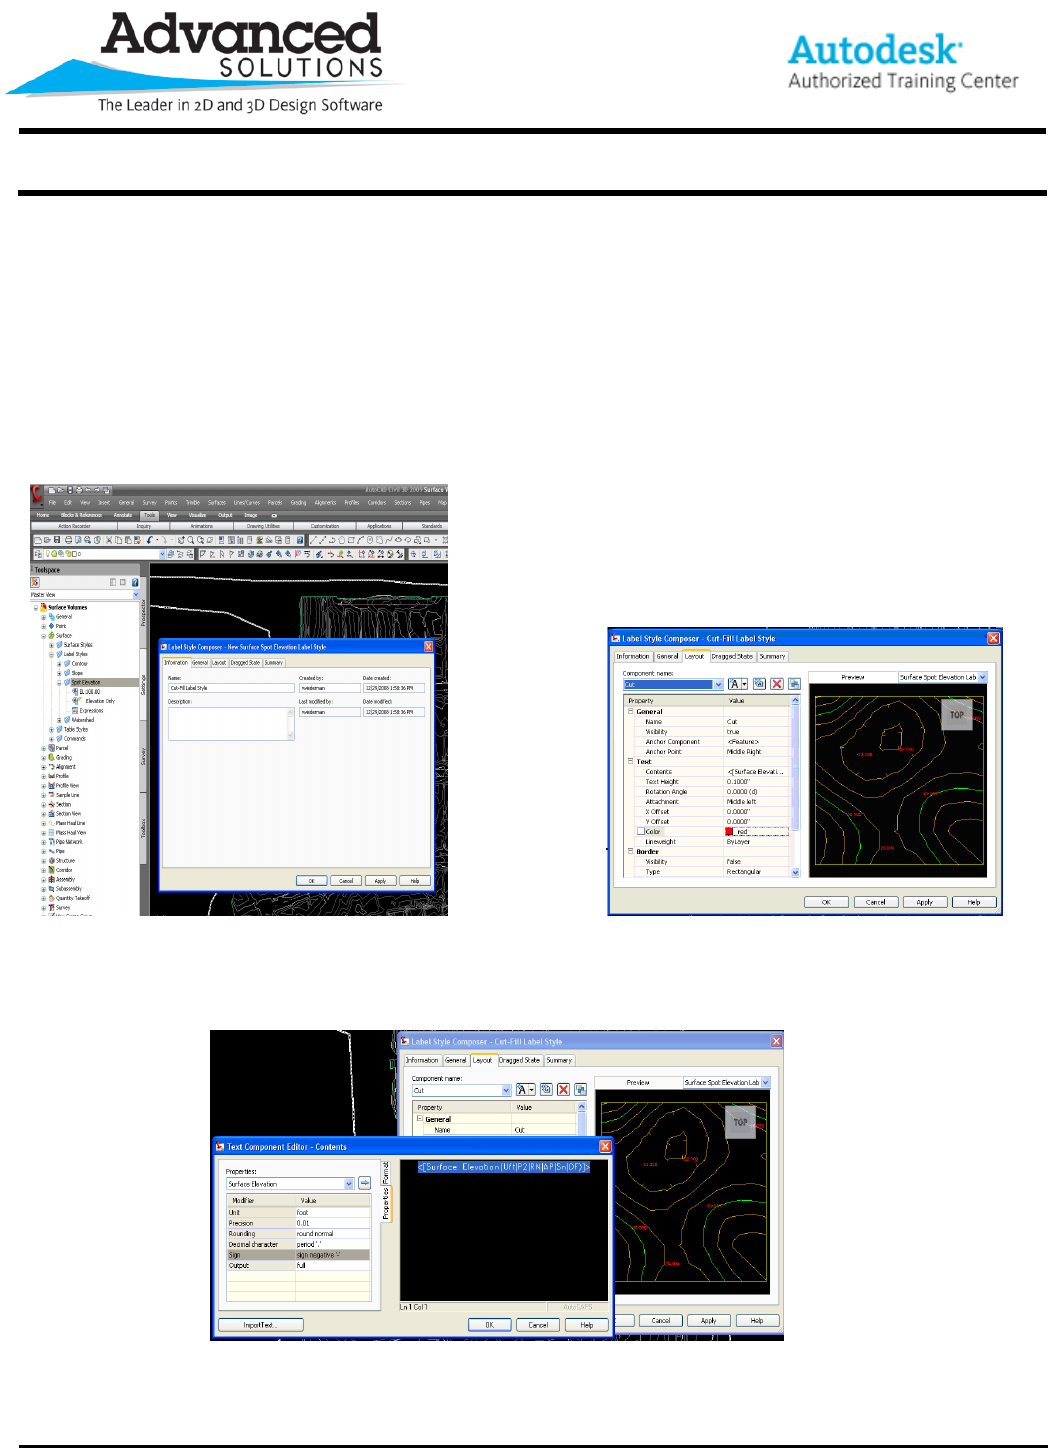
Once a cut and fill surface has been created, you can create a single label style to view both the cut and fill
labels.
Once, the settings tab, is selected you must expand surfaces> Select the layout tab, and change the name to
label Styles>Spot Elevation. Right click on spot elevation cut, and change the color to red.
and create a new style called Cut-Fill labels.
Under contents, select to open the text component editor. Make
sure that the sign is set to “sign negative”.
www.advsolinc.com
ASI Client Center
1-877-438-2741
Autodesk Products Tip & Tricks
Copyright 2008 – Advanced Solutions, Inc.
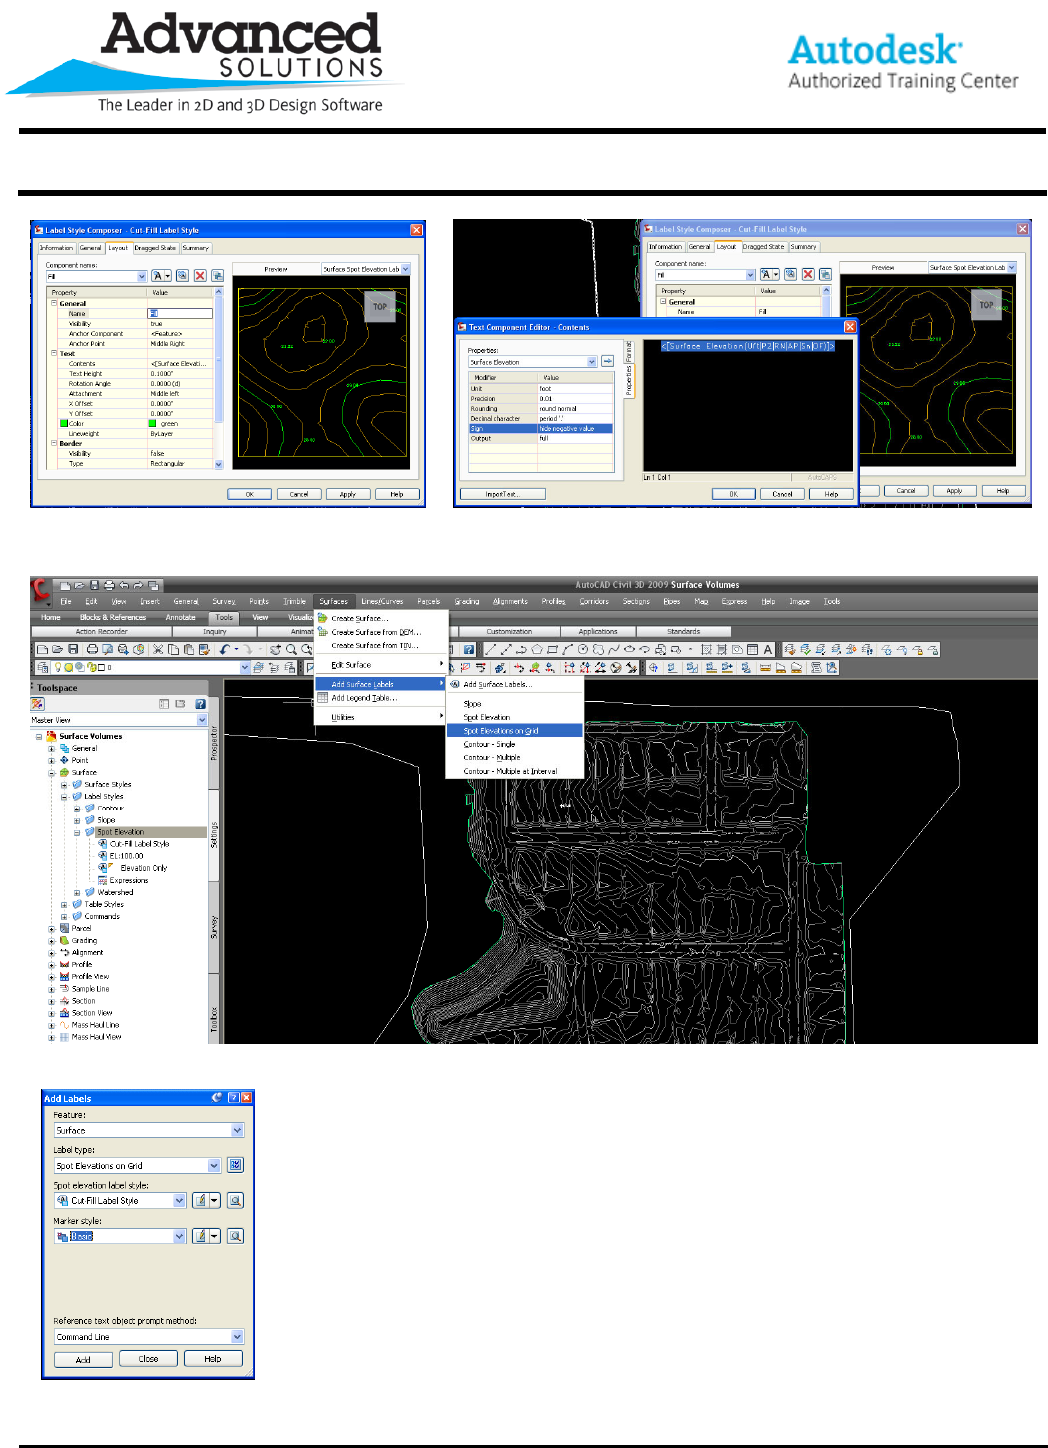
Copy the cut component, rename it to fill, Again, under contents, open the text component editor, and
and change the color to green. ensure the sign is set to “hide negative value”.
A new cut and fill surface label style has been created. To apply this style to a volume
surface, select the surface menu, add surface labels, add surface labels.
In the add labels dialogue, the feature will be set to surface, the label type should be
spot elevation on grid, and set the label style to the cut-fill style previously created with the marker optional.

www.advsolinc.com
ASI Client Center
1-877-438-2741
Autodesk Products Tip & Tricks
Copyright 2008 – Advanced Solutions, Inc.
Finally, after picking the add button, select the appropriate surface, set the suitable grid spacing, and your labels
appear. The cut labels are shown in red with a negative symbol, and the fill labels are shown in green and have
no symbol.
