HAOLIYUAN WU110K 150M Mini Wireless USB Adapter User Manual
HAOLIYUAN (SHENZHEN) ELECTRONIC CO., LTD 150M Mini Wireless USB Adapter Users Manual
Users Manual
1 / 13
Wireless 802.11b/g/n USB Adapter
Quick Installation Guide
2 / 13
I. Driver Installation
Please follow the following instructions to install your new wireless
USB Adapter:
1. Insert the USB wireless network card into an empty USB 2.0 port of
your computer when computer is switched on. Never use force to
insert the card, if you feel it’s stuck, flip the card over and try
again.
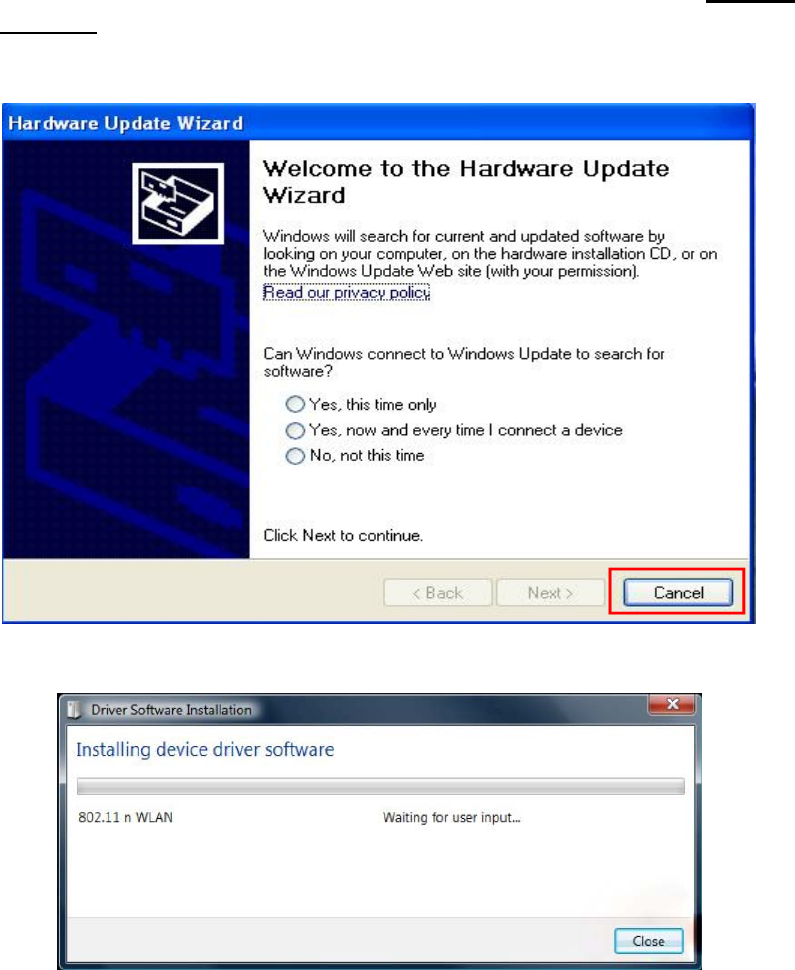
2. The following message will appear on your computer, click ‘Cancel
/ Close’.
Under Windows XP
Under Windows Vista and Windows 7
3 / 13
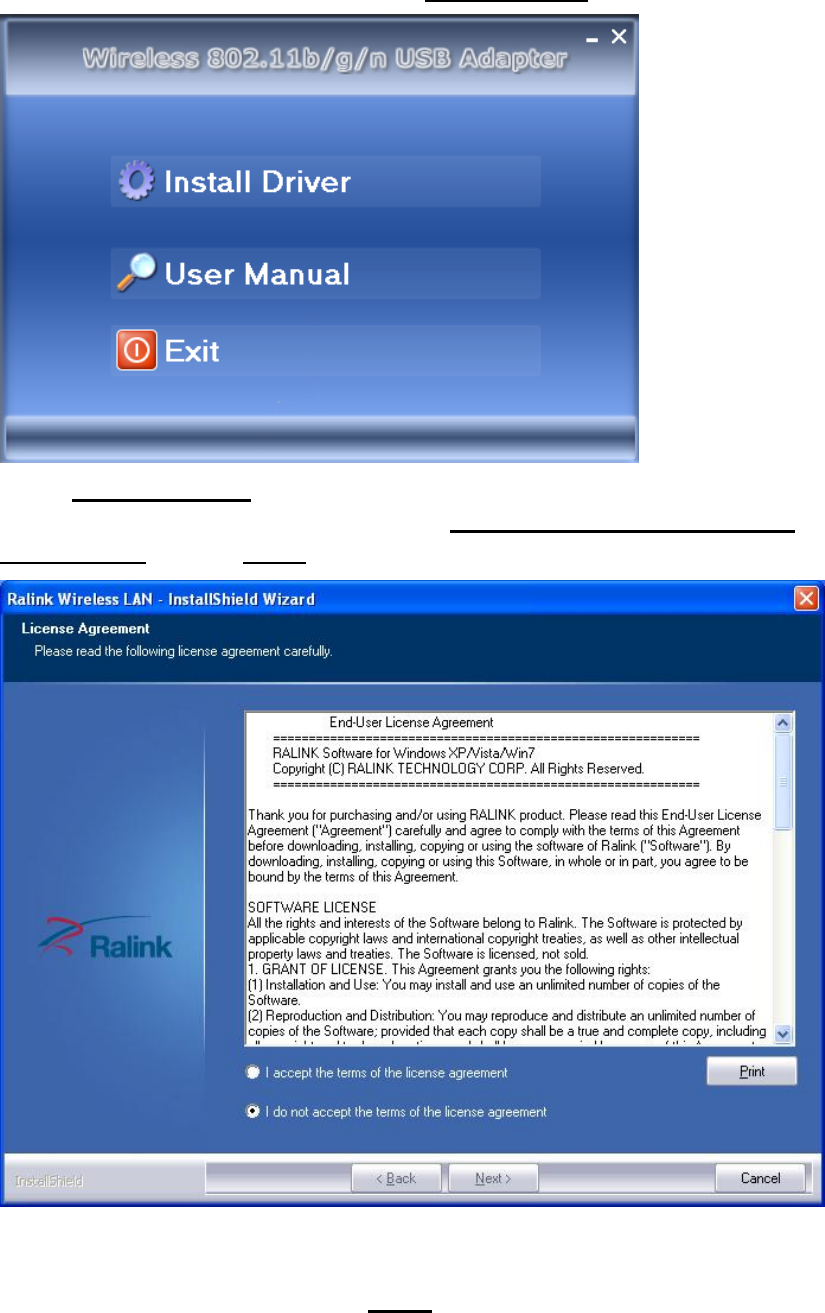
3. Insert the driver CD into your CD-ROM. You can see autorun screen
below. if not, you can double click ‘autorun.exe’ on CD.
Click ‘Install Driver’ to start the installation procedure.
4. Installation descriptions shown. Click I accept the of the license
agreement , Click ‘Next’ to continue.
5. Show following window, Click ‘Next’ to continue.

4 / 13
6. Show following window, Click ‘Next’ to continue.
7. Show following window, Click ‘Install’ to continue.

5 / 13
8. Show following window, click ‘Finish’ to finish the installation.
II. Connecting to a Wireless Network
6 / 13
The Utility lets you connect to a wireless network, hotspot, access
point (AP), or wireless router, and even lets you connect to the
Internet. Follow the steps below to connect to a wireless network
using the Utility.
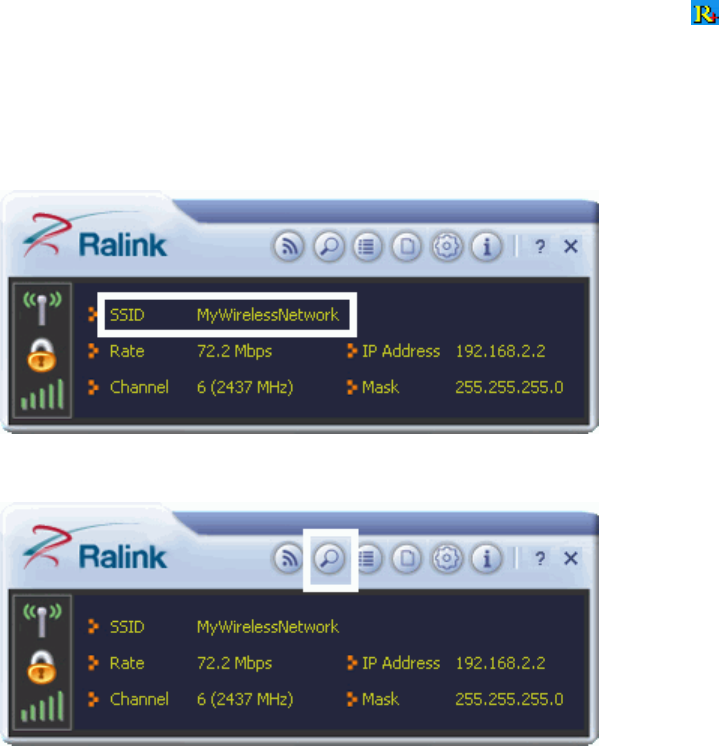
1. Open the Utility by double-clicking on the Utility icon in the
taskbar in the bottom right corner of your screen.
2. The Utility appears, by default connected to an available open
wireless network. Check the name of the network to which you are
connected. If this is the correct network, no further steps are
required.
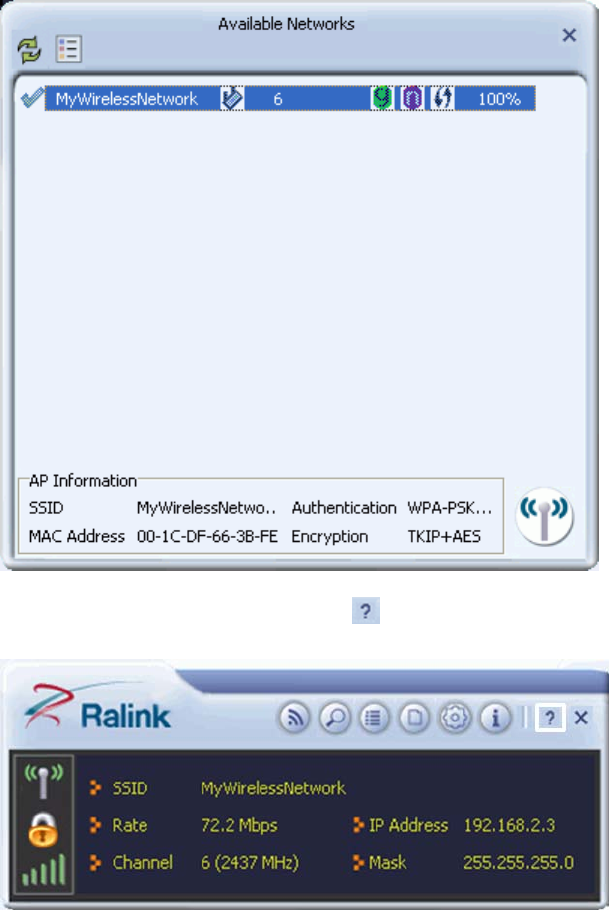
3. To connect to an alternative network, click the Available Networks
button.
4. In the Available Networks window that appears, select the name of
the network to which you are connecting. Then click the connect
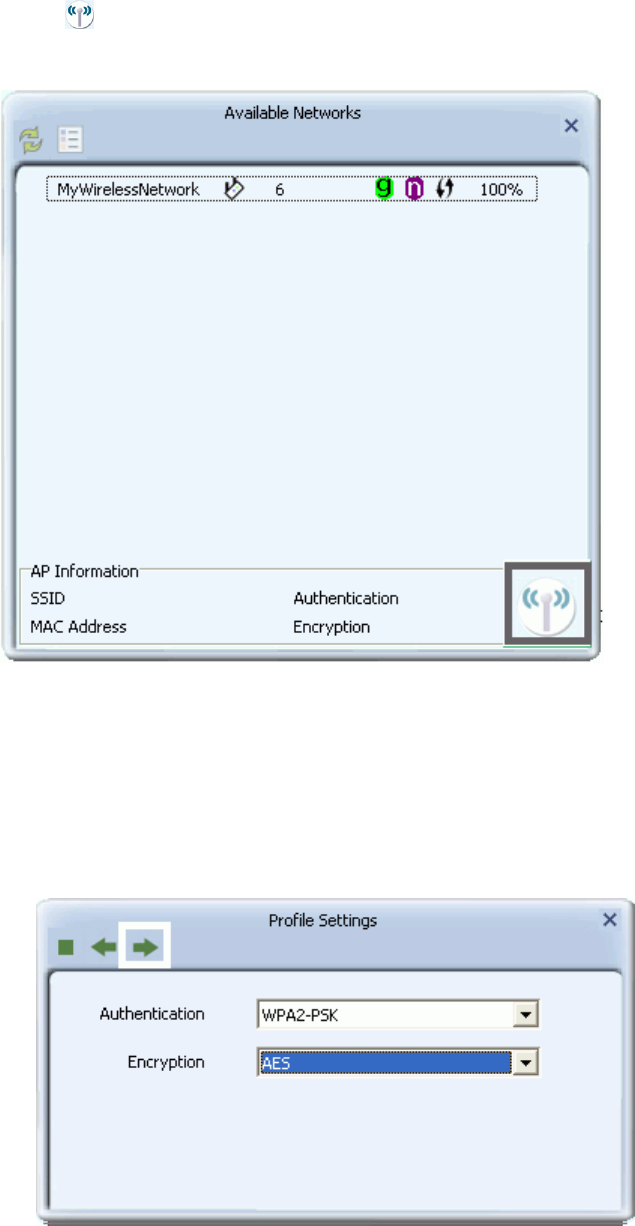
7 / 13
icon and wait several seconds while the Utility sets up a
connection.
5. The Utility automatically detects and displays the security settings
of the network to which you are connecting in the Profile Settings
screens.
WPA-PSK or WPA2-PSK
A. If the Utility shows that WPA-PSK or WPA2-PSK security is detected, click the
right arrow to save your settings.
B. In the screen that displays, in the 'WPA Preshared Key' field,
type a security key, the same as that used by the AP or wireless
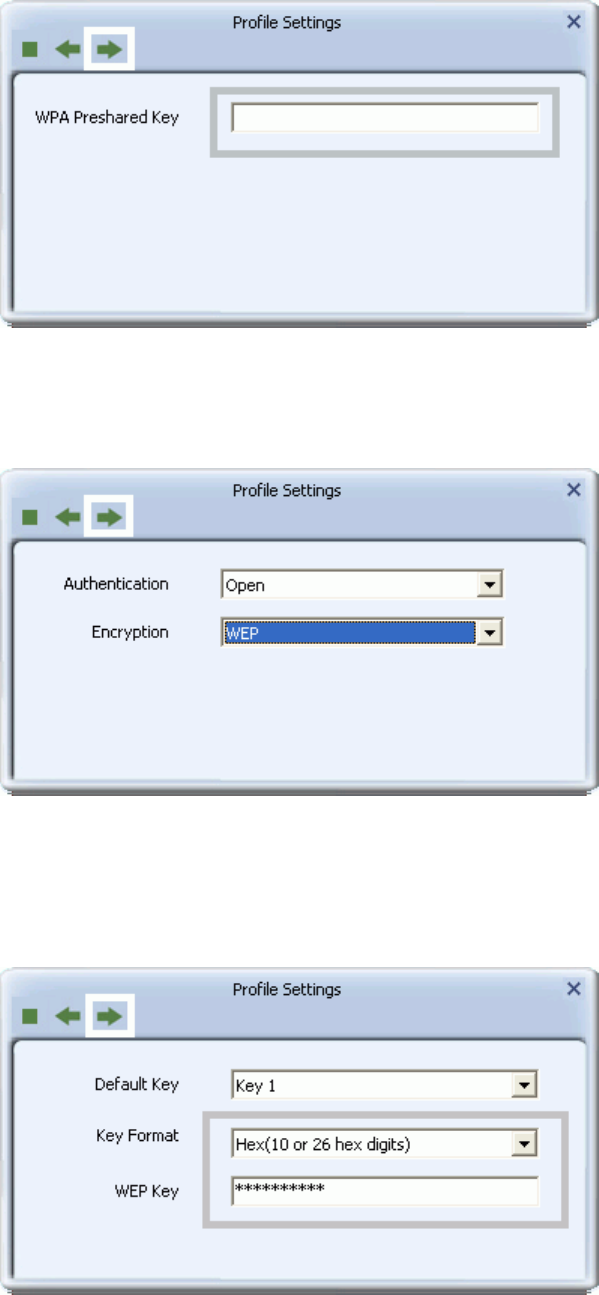
8 / 13
router to which you are connecting. Click the right arrow to save
your settings and connect to the network.
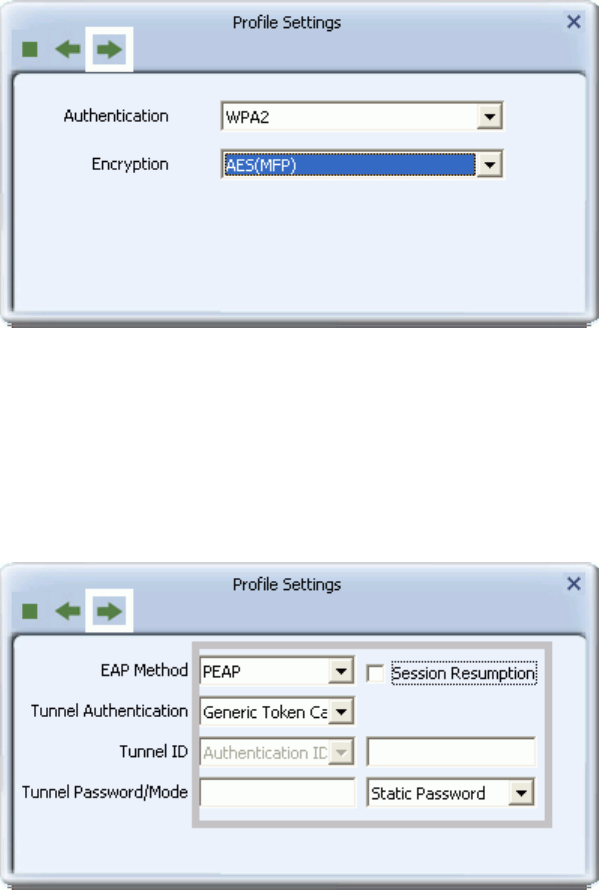
WEP
A. If the Utility shows that WEP security is detected, click the right
arrow to save your settings.
B. In the 'WEP Key' field, type the same WEP key as that
configured on the AP or wireless router to which you are
connecting, and ensure that 'Default Tx Key' and 'Key Format'
settings are also the same. Click the right arrow to save your
settings and connect to the network.
9 / 13
802.1X, WPA, or WPA2
A. If the Utility shows that 802.1x, WPA, or WPA2 security is
detected, click the right arrow to save your settings.
B. Select the EAP Method (Extensible Authentication Protocol) and
Tunnel Authentication method, and if required, the Tunnel ID
method and Tunnel Mode, and enter the user name and
password, using the settings provided by your organization's
network administrator. Click the right arrow to save your
settings.
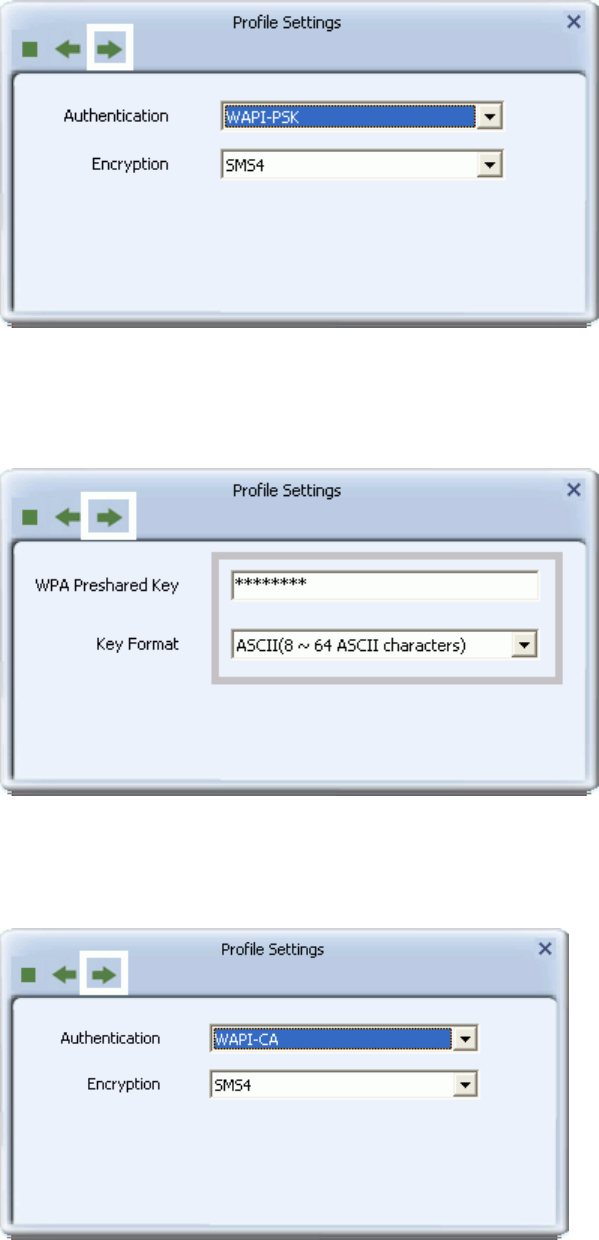
WAPI-PSK
A. If the Utility shows that WAPI-PSK security is detected, click the
right arrow to save your settings.
10 / 13
B. In the 'WPA Preshared Key' field, type a security key, and select
a Key Format setting, the same as that used by the AP or
wireless router to which you are connecting. Click the right
arrow to save your settings and connect to the network.
WAPI-CA
A. If the Utility shows that WAPI-CA security is detected, click the
right arrow to save your settings.
B. If you have a WAPI certificate already installed, in the Select
Mode field, select Auto and click the right arrow to save your
settings and connect to the network. Otherwise, if there is no
WAPI certificate in your system, go to Setting Up Enterprise
11 / 13
Wireless Security.
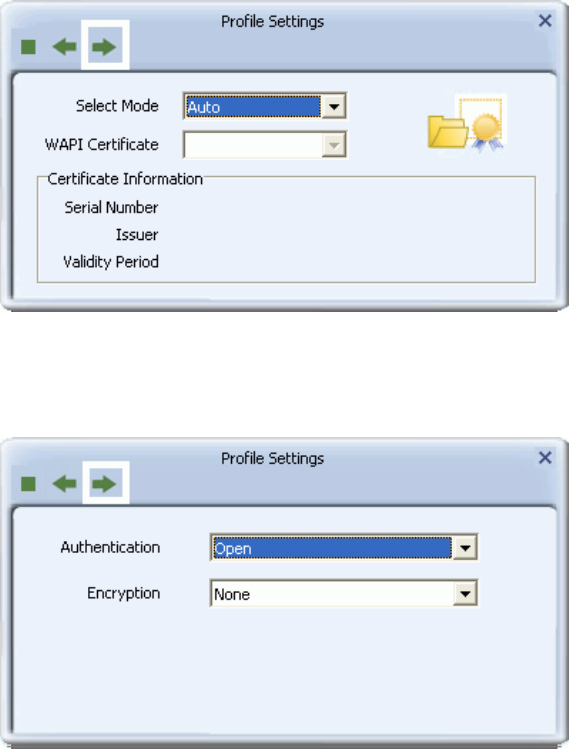
No Security
If your network has no security (not recommended), no further
settings are required. Click the right arrow to save your settings
and connect to the network
6. Once you are connected the Available Networks screen shows the
status of your connection.
12 / 13
7. For more settings help, click view.
13 / 13
FCC STATEMENT
1. This device complies with Part 15 of the FCC Rules. Operation is
subject to the following two conditions:
(1) This device may not cause harmful interference.
(2) This device must accept any interference received, including
interference that may cause undesired operation.
2. Changes or modifications not expressly approved by the party
responsible for compliance could void the user's authority to operate
the equipment.
Radiation Exposure Statement:
This equipment complies with FCC radiation exposure requirement.
The device can be used in portable exposure condition without RF
striction